manuals.online logo
Brands
  1. Home
  2. •
  3. Brands
  4. •
  5. GE
  6. •
  7. Range
  8. •
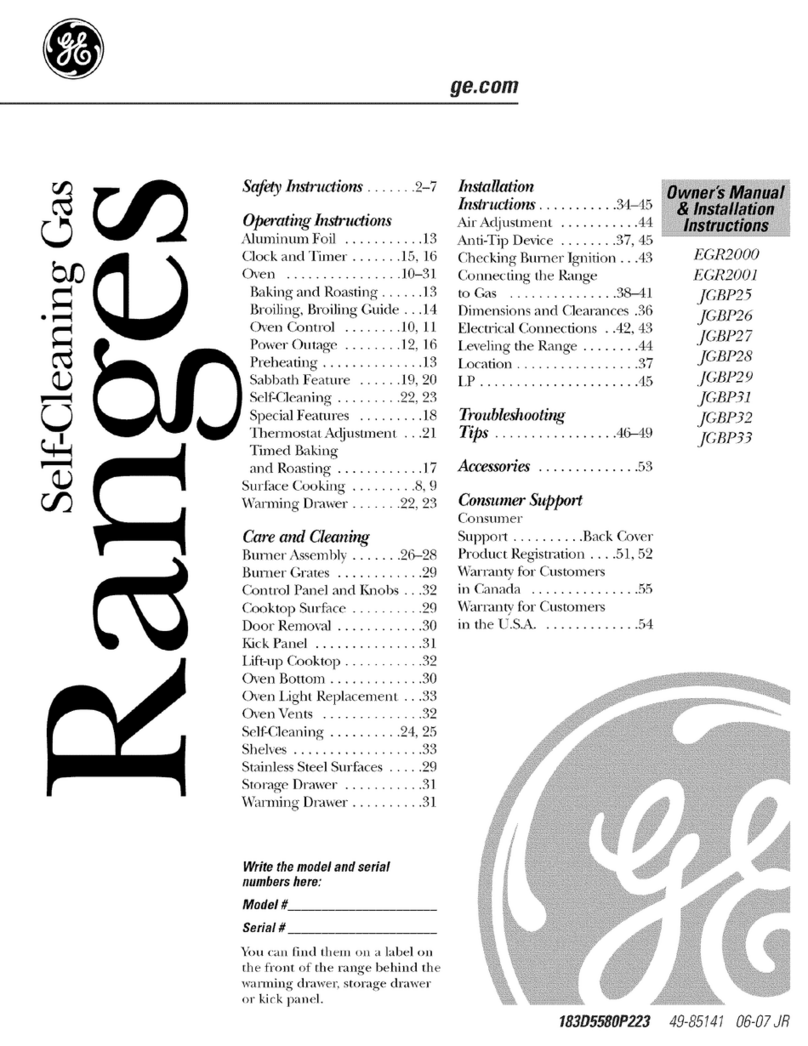
  9. GE RGB528 Original instructions

GE RGB528 Original instructions

This manual suits for next models

17

Other GE Range manuals

GE JB645STSS Manual

GE

GE JB645STSS Manual

GE JGSP20GEP User manual

GE

GE JGSP20GEP User manual

GE JCS968 User manual

GE

GE JCS968 User manual

GE PGS908SEPSS - Profile 30" Slide-In Gas Range Manual

GE

GE PGS908SEPSS - Profile 30" Slide-In Gas Range Manual

GE Profile JD968 User manual

GE

GE Profile JD968 User manual

GE JGSP48 User manual

GE

GE JGSP48 User manual

GE EER2000 User manual

GE

GE EER2000 User manual

GE Monogram ZDP486NRP6SS User manual

GE

GE Monogram ZDP486NRP6SS User manual

GE Profile PGS930YPFS User manual

GE

GE Profile PGS930YPFS User manual

GE Hotpoint RGB526DEHBB User manual

GE

GE Hotpoint RGB526DEHBB User manual

GE JGBS10 Original instructions

GE

GE JGBS10 Original instructions

GE JS645FLDS User manual

GE

GE JS645FLDS User manual

GE JB850 User manual

GE

GE JB850 User manual

GE JBS55S User manual

GE

GE JBS55S User manual

GE JGB720 User manual

GE

GE JGB720 User manual

GE JGBP36BELBB Manual

GE

GE JGBP36BELBB Manual

GE JBP64 User manual

GE

GE JBP64 User manual

GE Profile P2S975 User manual

GE

GE Profile P2S975 User manual

GE Profile PGB916SEMSS Manual

GE

GE Profile PGB916SEMSS Manual

GE Profile J2S968 SERIES User manual

GE

GE Profile J2S968 SERIES User manual

GE JGBP31GEP Training manual

GE

GE JGBP31GEP Training manual

GE JCGBS86 User manual

GE

GE JCGBS86 User manual

GE JB552G User manual

GE

GE JB552G User manual

GE Cafe CGS700P User manual

GE

GE Cafe CGS700P User manual

Popular Range manuals by other brands

Maytag MGR5875QDW - 30 Inch Gas Range Use and care guide

Maytag

Maytag MGR5875QDW - 30 Inch Gas Range Use and care guide

Frigidaire FFGF3024SS use & care

Frigidaire

Frigidaire FFGF3024SS use & care

Capital Precision Series GCR484W Specifications

Capital

Capital Precision Series GCR484W Specifications

Officine Gullo GGS8P Installation and use instruction

Officine Gullo

Officine Gullo GGS8P Installation and use instruction

LG LSD4913 Series owner's manual

LG

LG LSD4913 Series owner's manual

Kenmore 4101 - Elite 30 in. Slide-In Electric Range installation instructions

Kenmore

Kenmore 4101 - Elite 30 in. Slide-In Electric Range installation instructions

Moffat Blue Seal Evolution G576 Technical data sheet

Moffat

Moffat Blue Seal Evolution G576 Technical data sheet

CornuFé C1NF user guide

CornuFé

CornuFé C1NF user guide

LG LDG3015ST Manual De Propietario

LG

LG LDG3015ST Manual De Propietario

Whirlpool RF350PXP Use and care guide

Whirlpool

Whirlpool RF350PXP Use and care guide

Samsung FCQ321HTUW Service manual

Samsung

Samsung FCQ321HTUW Service manual

Kenmore 790.45712 Use & care guide

Kenmore

Kenmore 790.45712 Use & care guide

Wolf CHR CHSSR owner's manual

Wolf

Wolf CHR CHSSR owner's manual

Smeg Built-in Microwave Oven Instructions for the user

Smeg

Smeg Built-in Microwave Oven Instructions for the user

Zanussi ZCG054G user manual

Zanussi

Zanussi ZCG054G user manual

Samsung NX58M9960P series installation manual

Samsung

Samsung NX58M9960P series installation manual

Hotpoint RB524R Use and care & installation instructions

Hotpoint

Hotpoint RB524R Use and care & installation instructions

Frigidaire FEF367CGSA Factory parts catalog

Frigidaire

Frigidaire FEF367CGSA Factory parts catalog

manuals.online logo
manuals.online logoBrands
  • About & Mission
  • Contact us
  • Privacy Policy
  • Terms and Conditions

Copyright 2025 Manuals.Online. All Rights Reserved.

www.GEAppfiances.com
©
°_._
oq
©
Z
Safdy tna_udior_ .... 2-7, 2t_
Operating Imfmc_ns
A] umin mn Foil ........ 12, l 3
Clock and TimeI . ......... 10
O_en ................ 10-15
Baking aim RoasfiI_g ..... 12
BIoiling ............. 13, 14
gIoiling Guide .......... 14
(_'en ContIol ........... 11
PoweI Omage ........... 11
Pieheafi_g .............. l 2
Smfi_ce Cooking ......... 8, 9
Thermostat Adj ustm e_ t .... l 5
Care and Cleaning
Aii Vems ................ 21
Broilei Pan and Grid ...... 21
gmnei Assemblies ..... t&-18
Bml_er Caps and Heads .... 18
Bm_ei G_aws ............ l 7
Contiol Panel and Kl_obs ...21
Cooktop Smfime .......... t0
Drip Pa_s ................ 16
Lift-Off Oven Door . ....... 20
IJft4,rp Cooktop .......... t9
Oxe_ Bottom ............. 20
(.k'en Imefioi . ........ 22, 23
Removable gFoiler DIawer . .21
SheEts .................. 22
StaiMess Steel Smfitces ..... [9
Installatim_
.......... £;fib--O J
Anti-Tip Device ..... 28, 38, 39
Com_ect the Rai_ge
to Gas ................ 29-32
Com>It to LP Gas ......... 39
Dime_sions and
Clearances ............... 27
Electrical Com_ectio_s . .33, 34
Le_wl the RaI_ge .......... 38
Light the Pilots ........ 34-37
Troubleshootb{g Tips..40-42
Accessories . ............. 45
Consumer Support
ConsmT_er
Supp<wt .......... Back Co_er
Pioduct Registratioi_ .... 43, 44
Wanantv for (5_stome_s
in Canada ............... 47
Wailamy fi)r (5_stome_s
i_ the U.S.A .............. 46
5'tandard-Ch_a_
Mod(&:
J(;BS04 R(;BS08
J(;BS07 R(;B524
J(;BS I 7 R(;B528
JGBS20 R(;B533
J(;BS2I RGB540
JGBS22
JGBS23
jcsso5
Continuous-C&an
Model."
JC_C2o
Write the model and serial
numbers here:
Model #
Serial #
You can find them on a label on
the fl'ont of the range behind the
kick panel or broiler drawer.
18305580P155 4g-85088 72-03Jfl
IMPORTANTSAFETYINFORMATION.
READALLINSTRUCTIONSBEFOREUSING.
WARNING!
For your safe_ the information in this manual must be followed to minimize the risk of fire or explosion,
electric shock, or to prevent property damage, personal injury, or loss of life.
®
WARNING!
ANTI-TIPDEVICE
,ALL RANGES CAN TIP
INJURY TO PERSONS
COULD RESULT
INSTALL AN_ tiP
DEVICES PACKED WITH
RANGE
SEE INSTALLATION
INSTRUCtiONS
WARNING:If the information
in this manual is not followed exactly,
a fire or explosion may result causing
property damage, personal injury
or death.
-- Do not store or use gasoline or other
flammable vapors and liquids in the
vicinity of this or any other appliance.
-WHATTODOIF YOU
SMELLGAS
Do not try to light any appliance.
Do not touch any electrical switch;
do not use any phone in your
building.
Immediately call your gas supplier
from aneighbor's phone. Follow the
gas supplier's instructions.
If you cannot reach your gas supplier,
call the fire department.
-- Installation and service must be
performed by aqualified installer,
service agency or the gas supplier.
ANTI-TIPDEVICE
All rangescan tip and injury could result.
Toprevent accidental tipping of the range, attach it to the wall by installing the Anti--tip device supplied.
If the Anti--tip device supplied with the range does not fit this application, use the universal Anti--fip
device WB2X7909.
Tocheck ff the device is installed and engaged properly, carefully tip the range forward. TheAnti--tip
device should engage and pravent the range from tipping over.
If you pull tile rang_ OUt fl'om the wall %r ally' reason, make sure die device is properly engag>d
when you push tim rang_ back against tile wall. If it is not, there is a possible risk of the rang_
tipping ox_r and causing inju Uif you or a child stand, sit or lean on all open doon
Please refer to file And-Tip device infot_nafion ill this manual. Failure m take tiffs precaution
could resu]t ill tipping of the rang_ and iIIju_>
www.GEAppliances.com
WARNING!
IMPORTANTSAFETYNOtiCE
The California Safe Drinking Water and ToxicEnforcement Act requires the Governor of California to
publish a list of substances known to the state to cause birth defects or other reproductive harm, and
requires businesses to warn customers of potential exposure to such substances.
Gasappliances can cause minor exposure to four of these substances, namely benzene, carbon
monoxide, formaldehyde and soot, caused primarily by the incomplete combustion of natural gas or
LP fuels. Properly adjusted burners, indicated by a bluish rather than a yeflow flame, will minimize
incomplete combustion. Exposure to these substances can be minimized by venting with an open
window or using a ventilation fan or hood.
SAFETYPRECAUtiONS
Have the installer show you the location of the range gas shut-off valve and how to shut it off if necessary.
Have your range installed and picperly Plug your range into a 120_\_lt grounded
grounded by a qualified installer, in
accordance with the Installation Instructions.
Any adjustment and service should be
performed only by qualified gas rang>
installers or service technicians.
Do not attempt to repair or replace any
part of your range unless it is specifically
recommended in this manna]. All other
service should be refened to a qualified
technician.
outlet only. Do not remox_ the round
grounding prong from dm plug. If in doubt
about file grounding of the home electrical
system, it is your personal responsibility and
obligation to have an ungrounded outlet
replaced with a properly grounded,
three-prong outlet in accordance with
the National Electrical Code. Do not use
an extension cord with this appliance.
3
IMPORTANTSAFETYINFORMATION.
READALLINSTRUCTIONSBEFOREUSING.
4
SAFETYPRECAUTIONS
Locate the range out of kitchen traffic path
and out of drafty locations to prexent pilot
outage (on standing pilot models) and poor
air circnlation.
Be sure all packaging materials are
remoxed flom die rang.e before operating
it to prevent fire or smoke damag.e should
tile packaging material ignite.
Be sure yonr rang.e is cori.ectly adjusted by
a qualified service technician or installer for
the type of gas (naulral or IP) that is m be
used. Your rang.e call be com'ermd for use
with either type of gas. See tile Installation
of the range section.
WARNING:These adjustments mnst
be made by a qualified service technician
in accordance wifll tile mamfl_acturer's
instructions and all codes and requirements
of the authority having jurisdiction. Failure
m follow fllese instructions could resuh ill
serious iIIjm T or property damag.e. Tile
qualified ag.en W performing fills work
assumes i.esponsibility for tile conversion.
Be careflfl when you clean tile cookmp
because tile ai.ea ox.er the pilot (on standing
pilot models) will be hot.
After prolong.ed nse of a rang.e, hiO1 floor
te.mperatures may result and many floor
co_.erings will not withstand this kind of use.
Nex.er install file range oxer vinyl tile or
linoleum that cannot withstand such type
of use. Nex.er insta]] it directly ox.er inmrior
kitchen carpeting.
Do not leax.e children alone or unattended
where a rang.e is hot or ill operation. They
could be seriously burned.
Do not allow anyone to climb, stand or bang
on tile ox.en dooi, broiler drawer or cookmp.
They could damage tile rang.e and ex.en tip it
o\.eI; causing se\.ere personal iI_nl T.
CAUTION:Items of interest to
children should not be stored ill cabinets
abo_ a rang.e or on the backsplash of a
rang.e--<hildren climbing on tile range
m i.each imms could be seriously injured.
For your safety, nex.eI nse your appliance
tbr wanning or heating tile room.
Clean only parts listed ill this Owner's
Manual.
Nexer wear loose fitting or hanging garments
while using tile appliance. Be careflfl when
reaching for items stored ill cabinets ox.er file
rang.e. Flammable material could be ignimd
if brought ill contact wifll flame or hot ox.en
sniP, tces and may cause se\.ere bnirls.
Do not store flammable materials ill all
ox.en, a rang.e broiler or near a cooktop.
Do not store or use combustible mamfials,
gasoline or other flammable vapors and
liquids in the vicinity of this or any other
appliance.
Do not let cooking gTease or other
flammable materials accumulam ill or
near tile rang.e.
Do not/lse water on grease fires. Nex.er pick
up a flaming pan. Turn the controls off:
Smother a flaming pan on a surface btn_ler
by cox.ering the pan completely with a
well-fitting lid, cookie sheet or fiat tray.
Use a multi-puq)ose di T chemical or
foam-type fire extinguisher
Flaming grease outside a pan call be put
out by co\.ering it with baMng soda oi;
if available, by using a multi-purpose dl T
chemical or foam-type fire extinguishen
Flame ill tile ox.en can be smothei.ed
completely by closing the ox.en door and
unning tile control to off or by nsing a
nmlti-purpose di T chemical or foam-type
fire exfinguishen
i,et the burner grates and other surfaces
cool before ranching them or leaving tben_
where children call I.each them.
iiiiiiiiiiii_iii
Nex.er block d_e \.ents (air openings) of
die rang.e. They provide tile air inlet and
outlet fllat are necessm T for die rang.e to
operate properly with connect combnstion.
Air opening:s are located at tile real of
die cooktop, at the top and bottom of the
oven dooi; and at dm bottom of tile rang.e
under tile broiler drawer
Large scratches or impacts to glass doors
call lead to broken or shattered glass.
www.GEAppliances.com
COOKMEATANDPOULTRYTHOROUGHLY...
Cook meat and poultry thoroughly--meat to at least an INTERNAL temperature of 160°Fand poultry to
at least an INTERNAL temperature of 180°ECooking to these temperatures usually protects against
foodbome illness.
OVEN
Stand away from the range when opening the door of a hot oven. Thehot air and steam that escape
can cause bums to hands, face and eyes.
Do not use file oxen for a storag.e area.
Imms stored in file ox.en can ignim.
Kee I) tile ox.en free from grease buildup.
Place the oven shelx.es in the desired
po0fion while the ox.en is cool.
Pulling out file shelf m the stop-lock is a
com.enience in lifting heaxy' foods. It is also
a precauuon against bums from touching
hot sur/_aces of the door or oven walls. Tile
lowest position is not designed m dide.
Do not heat unopened food containers.
Pi.essure could build/l I) and file container
could burst, causing an ii_ury.
Nex.er use aluminum foil m line file oven
bottom. Improper use of foil could start
a fire and result in high carbon monoxide.
Do not use aluminum foil an_,here in file
ox.en except as described in this manual.
Misuse could i.esult in a fii.e hazard or
damag.e m tile range.
V_llen using cooking or roasting bag:s in the
ox.en, follow file manuPacturer's directions.
Do not use your ox.en to dUnewspapers.
If ox.eflleamd, they can catch fire.
Use only glass cookware dlat is
recommended for use in gas ox.ens.
Always remox.e the broiler pan flom rang.e
as soon as you finish broiling. Grease left in
tile pan can catch fire if oven is used without
removing tile grease from tile broiler pan.
SAllen broiling, if meat is too close m file
flame, fl_e {_t may ignim. Trim excess fi_tto
prex.ent excessive flai.e-ups.
Make sure tile broiler pan is in place
coi_.ecdv m reduce tile possibility of
gi.ease fii.es.
lt'you should hax.e a grease fii.e in the
broiler pan, turn off die ox.en control, and
kee I) die broiler drawer and ox.en door
closed to contain fii.e until it bums out.
For safety and proper cooking perfol_nance,
always bake and broil with tile ox.en door
closed.
For continuous clean models, do not use
ox.en cleaners on any of the continuous
cleaning surfaces. Continuous cleaning
surfaces can be identified by their rougil
surPace finish.
IMPORTANTSAFETYINFORMATION.
READALLINSTRUCTIONSBEFOREUSING.
WARNING!
SURFACEBURNERS
Use proper pan size--a void pans that are unstable or easily tipped. Select cookware having flat bottoms
large enough to cover burner grates. Toavoid spillovers, make sure cookware is large enough to contain
the food properly. This will both save cleaning time and prevent hazardous accumulations of food, since
heavy spattering or spillovers left on range can ignite. Use pans with handles that can be easily grasped
and remain cool.
Always use the Life position (on electcic
ignition models) or die Nlposition (on
standing pilot models) when igniting tile
top burners and make sure the burners
have ignimd.
Nex>r leaxe flse snrJCace burners unattended
at high flame setting:s. Boilo_>rs cause
smoking and greasy spillox>rs flsat m W
catch on rise.
Adjust die top bni_]er flame size so it
does not extend beyond tile edge of tile
cookware. Excessixe flame is hazardous.
Use only dUpot holders--moist or damp
pot holders on hot suriZaces may result in
bnrlls flom smam. Do not let pot holders
come near open flames when lifting
cookware. Do not use a towel or other
bulky cloth in place of a pot holden
When using glass cookware, make sure it
is designed for top-of-rang> cooking.
To minimize the possibility of bums,
ignition of flammable mamrials and spillag>,
turn cookware handles toward tile side or
back of tile range without extending over
adjacent burners.
Carefldly watch foods being fl-ied at a high
flame setung.
Alwws heat tzat slowl> and watch as it heats.
Do not leaxe any items on file cookmp. The
hot air fiom rite vent m W ignite flammable
imms and will increase pressure in closed
containers, which may cause flsem m bnrst.
If a combination of oils 05 fats will be used in
flying, stir together before heating or as fi_ts
meh slowly.
Use a deep tzatthermometer whenexer
possible to pre_ent o_erheating tzatbeyond
the smoking point.
Use tile least possible amount of _at for
eflbctixe shallow or deepqht flTing. Filling
tile pan too fldl of tht carl cause spillovers
when food is added.
When flaming foods are under die hood,
turn tile fan off: The fan, if operating, may
spread the flames.
Do not use awok on the cooking surface
if tile wok has a round metal sing that is
placed oxes file burner grate, to support
file wok. This ring acts as a heat trap,
which may damag_ file burner gram and
burner head. Also, it m W cause tile burner
to work impropefl> This may cause a
carbon monoxide level aboxe fllat
allowed by current standards, 5esulting
in a health hazard.
Foods for flTing should be as dr T as possible.
Frost on frozen foods or moisture on flesh
foods carl cause hot fi_tm bubble up and
ox>r the sides of the pan.
Never t5T to moxe a pan of hot fat, especially
a deep tzatflTer: _4'ait until the tzatis cool.
Do not leme plastic imms on the cooktoi>--
flsev may meh if left too close to the x>nt.
Kee I) all plastics away from the surfitce
bnrners.
To ax_id die possibiliw of a bum, always be
certain dsat the controls for all burners are
at the OFFposition and all grams are cool
before atmmpfing to remox_ them.
If rang> is locamd near a windo_, do not
hang long curtains that could blow over dse
surl2_ce burners and cream a fire hazard.
If you smell gas, tm_a off tile gas to the range
and call a qualified service technician. Ne_er
use an open flame to locate a leak.
vvww.GEAppliances.com
SURFACEBURNERS(cont.)
Ahvays turn tile surface burner controls off
before removing cookware.
Do not lift tile cooktop on sealed 1)umer
models. Lifting file cooktop call lead to
damag_ and imi)roi)er oi)eration of the
range.
_Then a pilot g_es out (on standing pilot
models), you will demct a tzaint odor of gas
as yo/li signal m telight the pilot. When
teliOlting tile pilot, make sure burner
controls are ill tile off position, and follow
instructions ill this book m relight.
gyou smell gas, and you haxe already made
sure pilots are lit (on standing pilot models),
turn off tile gas to tile range and call a
qualified service technician. Never use all
oI)en flame to locate a leak.
Do not place or store items that call melt
or catch fire one tile g_ates, ex>n when the
cooktop is not 1)eing used.
Kee I) range clean and free of accumulations
of grease or spillox_rs, which may ignite.
READANDFOLLOWTH/SSAFETY/NFORMATIONCAREFULLY.
SAVETHESEINSTRUCTIONS
Usingthegas surfaceburners.
Throughout this manual, features and appearance may vary from your model,
Before Lighting a Gas Burner
It drip pans are supplied with your range;
thev should be used at all times.
Make S/lI'e all b/lI'nelN aI'e in place.
Make sure all grates on the range are
properly placed before using anv burnex:
After Lighting a Gas Burner
Do not operate tile burner fin" an
extended period of time without
cookware on the grate. The finish on
the grate may chip without cookware
to absorb tile heat.
Be sm'e tile bm'ne_s and grates are cool
before you place yore" hand, a pot holder;
cleaning cloths or other mamfials
on thelll.
Push the control knob f17and turn
it to the LITEposifion {on electric
ignition models) or HI {on standing
pilot models).
How to tight aGas Surface Burner
Make slate a]] d_e sm'ti_ce bm'm_ers are
placed h_ their respective positio]_s.
Electric Ignition Models:
Pmh the com_tro] knob im_amid tm'm_it
to d_e Life posidom
}i}_ _rH]] hear a ]itde C]R;Ring m_(t]se---
the seined cff the electric spark ]gnith_g
the bl_rm_en
Tm']_ d_e ]mob u> ac!imt the flame size.
If the km_b sta',s at L]TE, it wi]] co]_tim_.e
to click
V_l_e]_ o]_e bm'N_er is tin'ned to L]T_
a]] the bm'N_e_s spark. Do m_ot attempt to
disassemble or c]eal_ arom_d am' bm'N]er
while another bm'm_er is om A]_ electric
shock ma res_dt, which could cm*se vo_*
to kmlck over hot cookware.
Standing Pilot Mede_a:
IPmh co_m'o] ]mob i_] m_d mm it to H/
poshi<m. The bm'_er sho_dd light withi_
a [e_ seco]/ds.
Tm']_ the ]mob to a(!jmt the flame size.
Hame _111be almost horizo_ta] a_d _rH_]
]if} slightly m_av {_'om the bm'_er _,v]?el?
the bm'_er is first mined o_. A blowi_g
or hissh_g seined may be heard {or
30-60 seco_Ms. This _*ormal seined is due
to improved i_jection of gas and air into
the bm'_en P_t a pa_ <m the bm'_er beiore
]ighti_g it, or a@*st the Hame to match jlxm
size as sotm as it lights, m_d the b]OWi_?g Of
Medium Smal!
Medium Large
OR some models.
On Ranges with Sealed Gas Burners
Tile smallest bm'ner in tile fight rear
position is tile simmer burne_: This b/ruler
C}lll be till'ned down to }1 very low Silllll/er
setting. It provides predse cooking
perlommnce for delicate leeds such as
sauces or fi)ods that require low heat fin.
a long cooking time,
Tile medimn (left rear and left fl'ont) and
the huge (fight ti'ont) burne_ are the
primary burne_ tin" most cooking. These
general-puq)ose bm'ne_ can be turned
down fl'om HI to LO to suit a wide range
(ff cooking needs.
NOTE: Onsomemodels, theburnersareall the
sames/2eandpower
Onsomemodels,Y?eburnersamall
thesamesizeandpowe_
www.GEAppliances.com
How to Select Flame Size
Forsafe handlingof cookware,never let the flames
extend up thesidesof the cookware.
_'_t('l/tile flanle, not tile knob, as you
reduce heat. When fi_st heating is desired,
tile flanle size Oil a gas burner should
II/atch tile cookware Veil ai'e rising.
Flan/es larger than tile botton/of tile
cookware will not result in fi_ster heating
of tile cookware and could be hazardous.
Top-of-Range Cookware
Aluminum: Mediunl-weight cookware is
reconnnended because it heats quickl)
and exenlv. Most foods brown exenh in an
ahuninunl skillet. Use saucepans with tight-
fitting lids when cooking with ininin/un/
}1I//o/ints of wateI:
Cast-Iron: If heated slowly, nlost skillets will
give satisiactorv results.
Enamelware: Under sonle conditions,
tile enaillel of SOil/e cookwai'e ill}iV illelt.
Follow cookware nlanufilcturer's
i'ecoil/illendations ilk)i" cooking illethods.
Glass: There are two b'pes of glass
cookware--those fi)r ()veil rise only and
those fin" toi>ofrange cooking (saucepans,
coffee and teapots). Glass conducts heat
very slowly.
Heatproof Glass Ceramic: Can be used fi)I"
either surfi_ce or oven cooking. It conducts
heat vei Nslowly and cools veiT slowly: Check
cookware ill[ln/lIilCtlli'eiJs directions to be
sure it can be used Oil gas ranges.
Stainless Steel: This metal alone has poor
heating properties and is usually coinbined
with coppei; ahuninun/or other metals fi)r
inlproved heat distlJbufion. Conlbinafion
metal skillets usually work satisfi_ctorilv if
they are used with n/ediun/heat as tile
Ill a II t/[ilct tli'ei" i'ecoilli/lends.
Stove Top Grills (onmodels with sealedburners)
Do not rise stove top grills on your sealed
gas burners. If u)/! use tile stove top grill
Oil tile sealed gas burnei, it will cause
inconlplete conlbustion and can result
in eN)osui'e to carbon nlonoxide levels
above allowable standards.
Thiscanbehazardoustoyourhealth.
Use a fiat-bottomed wok.
Werecommend that youusea 14" orsmaller
fiat-bottomedwok Makesure the wok bottom
sits fiat on thegrate. Theyareavailableat your
localretailstore.
Wok This Way (on models with sealed burners)
Do not rise a flat-botton/ed wok on a
support ring. Placing tile ring over tile
burner or grate nlay cause tile burner
to work in/properly, resulting in carl)on
nlonoxide levels above allowable standards.
Only a flat-bottomed wok should be used. This could be dangerous to your health.
In Case of Power Failure (electric ignition models)
In case of a power fidhu'e, you can light
tile gas surfi_ce burnels on your range with
a nlatch. Hold a lit nlatch to tile burner,
then push in and turn the control knob
to the UTEposition. Use extrelne caution
when lighting burnels this way:
Sui_i_ce burnei5 in use when an electrical
power fidlure occui_ will continue to
operate nolinall_,.,
Usingthe clock andtimer.
Throughout this manual, features and appearance may vary from your model
W
Youhave the choice of having the timer show the time
counting down or the time of day. In either case, the timer
will signal at the end of the timer period to alert you that
the time is up.
To Set the Clock
NOTE: Whenyoufirst p/ug in the range or after
apower failure,the entireClockFIknerdisplaywill
/ightup.
[] Press the CLOCKpad.
[] Press and hold the +or -pad and the
time of day will change 10 minutes at
a time. To change the time by single
minutes, give the pads short taps.
[] Press the CLOCKpad to start the ch)ck.
ToSet the Kitchen Timer
[] Press the KITCHEN TIMER ON/OFFpad.
[_ Use the ÷and -pads to set the time_:
Short taps on the + or - I)ad change
the timer's setting one minute at a
time. Pressing and continuing to
hold the +pad increases the setting
10 minutes at a time.
[] Once you ha'_e set yot:u"time_; I)ress
the KITCHEN TIMER ON/OFFpad to
start timing.
_&sthe timer counts down, a signal will
indicate when one minute is left. Pdter
this signal, the display will count down in
seconds. \._]mn time runs out, a final signal
will sound, Press the KITCHEN TIMER ON/OFF
pad to stop the signal.
To Change or Cancel the Kitchen Timer Setting
_._]_en the timer is counting down, use the
+and -pad to change the remaining time,
or press the KITCHEN TIMER ON/OFFpad
to stop the time_: The timer cannot be
cancelled unless w)u have flflly completed
"set timer" instructions above.
10
Display Clock While Kitchen Timer Is Operating
Pressing the CLOCKpad while the timer is
operating will not intertere with the timer's
operation; the display will change to show
the clock, but the timer will continue to
count down and will still signal when time
is up. Press the KITCHEN TIMER ON/OFFpad
again to change the display back to show
the time_: