GE Double-Door User manual

Owner’s
Manual
Double-Door, Bottom-Drawer,
Free-Standing Refrigerators
monogram.com
08-14 GE
239D4535P001
49-60717
Español
For a Spanish version of this manual, visit
our Website at monogram.com.
Para consultar una version en español de este
manual de instrucciones, visite nuestro sitio
de internet monogram.com.
Français
For a French version of this manual, visit
our Website at monogram.com.
Pour la version française de ce manuel, visitez
notre site Web sur monogram.com

2
Consumer Information
Stainless Steel Refrigerator
Introduction
Your new Monogram refrigerator makes an eloquent statement of style, convenience and kitchen
planning flexibility. Whether you chose it for its purity of design, practical storage arrangements or
DVVLGXRXVDWWHQWLRQWRGHWDLO³RUIRUDOORIWKHVHUHDVRQV³\RX·OOILQGWKDW\RXU0RQRJUDPUHIULJHUDWRU·V
superior blend of form and function will delight you for years to come.
The information on the following pages will help you operate and maintain your refrigerator properly.
If you have any other questions, visit our Website at: monogram.com
Contents
Consumer Services
Important Phone Numbers ..................25
Model and Serial Numbers....................3
Performance Data Sheet ....................23
ProblemSolver.......................... 21–22
Product Registration..........................3
Safety Instructions ........................ 4–7
Warranty ...........................Back Cover
Water Filter Warranty .......................24
Care and Cleaning
&OHDQLQJ³2XWVLGHDQG,QVLGH ................19
Light Bulb Replacement .....................20
Moving .....................................19
Vacation....................................19
Operating Instructions
Automatic Icemaker.........................18
AdditionalFeatures..........................15
Crispers.....................................16
InternalWaterDispenser....................11
2WKHU&RQWUROV ..............................10
Shelves and Bins .........................14-15
TemperatureControls.......................10
WaterFilter..............................12-13
Before
using
your
refrigerator
Read this manual carefully. It is intended to help
you operate and maintain your new refrigerator
properly.
Keep it handy for answers to your questions.
,I\RXGRQ·WXQGHUVWDQGVRPHWKLQJRUQHHGPRUH
help, there is a list of toll-free consumer service
numbers included in the back section of this
manual.
OR
Visit our Website at: monogram.com

3
Write
down
the model
& serial
numbers
<RX·OOVHHWKHPRQDODEHOLQVLGHWKHIUHVKIRRG
compartment at the top on the right side.
Please write these numbers on the Consumer
3URGXFW2ZQHUVKLS5HJLVWUDWLRQ&DUGLQFOXGHG
with the packing material.
Before sending in this card, please also write
these numbers here:
Model Number
Serial Number
Use these numbers in any correspondence
or service calls concerning your refrigerator.
If you
received a
damaged
refrigerator
Immediately contact the dealer (or builder) that
sold you the refrigerator.
Save time
& money
Before you request service, check the Problem
Solver in the back of this manual.
It lists causes of minor operating problems that
you can correct yourself.
If you
need
service
To obtain service, see the Consumer Services
page in the back of this manual.
:H·UHSURXGRIRXUVHUYLFHDQGZDQW\RXWREH
pleased. If for some reason you are not happy
with the service you receive, here are steps to
follow for further help.
For customers in the USA:
FIRST, contact the people who serviced your
appliance. Explain why you are not pleased. In
most cases, this will solve the problem.
NEXT, if you are still not pleased, write all the
GHWDLOV³LQFOXGLQJ\RXUSKRQHQXPEHU³WR
Manager, Customer Relations
GE Appliances
Appliance Park
Louisville, KY 40225
For customers in Canada:
FIRST, contact the people who serviced your
appliance. Explain why you are not pleased.
In most cases, this will solve the problem.
NEXT, if you are still not pleased, write all the
GHWDLOV³LQFOXGLQJ\RXUSKRQHQXPEHUWR
Manager, Consumer Relations
Mabe Canada Inc.
1 Factory Lane, Suite 310
Moncton, N.B. E1C 9M3
Consumer Information
Stainless Steel Refrigerator

READ AND SAVE THESE INSTRUCTIONS
WARNING When using this appliance, always exercise
basic safety precautions, including the following:
• Use this appliance only for its intended purpose as described
LQWKLV2ZQHU·V0DQXDO
• This refrigerator must be properly installed in accordance
with the Installation Instructions before it is used.
• Do not allow children to climb, stand or hang on the shelves
in the refrigerator. They could damage the refrigerator and
seriously injure themselves.
• Do not store or use gasoline or other flammable vapors and
liquids in the vicinity of this or any other appliance.
• Unplug your refrigerator before cleaning and making repairs.
NOTE: We strongly recommend that any servicing be performed
by a qualified individual.
NOTE: Power to the refrigerator cannot be disconnected by any
setting on the control panel.
• Because of potential safety hazards under certain conditions,
we strongly recommend against the use of an extension cord.
However, if you must use an extension cord, it is absolutely
necessary that it be a UL-listed (in the United States) or a CSA
certified (in Canada), 3-wire grounding type appliance extension
cord having a grounding type plug and outlet and that the
electrical rating of the cord be 15 amperes (minimum) and 120
volts.
• Replace all parts and panels before operating.
CAUTION
• Do not touch the cold surfaces in the freezer compartment
when hands are damp or wet. Skin may adhere to these
extremely cold surfaces.
• In refrigerators with automatic icemakers,
avoid contact with moving parts of the ejector mechanism,
or with the heating element located on the bottom of the
icemaker. Do not place fingers or hands on the automatic
icemaking mechanism while the refrigerator is plugged in.
• Keep fingers out of the “pinch point” areas: clearances
between the doors and between the doors and cabinet are
necessarily small. Be careful closing doors when children are in
the area.
• Do not refreeze frozen foods which have thawed completely.
• Do not clean glass shelves or covers with warm water when
they are cold. Glass shelves and covers may break if exposed
to sudden temperature changes or impact, such as bumping
or dropping. Tempered glass is designed to shatter into many
small pieces if it breaks.
,03257$176$)(7<,16758&7,216
DANGER RISK OF CHILD ENTRAPMENT
Child entrapment and suffocation are not problems
of the past. Junked or abandoned refrigerators are
still dangerous…even if they will sit for “just a few
days.” If you are getting rid of your old refrigerator,
please follow the instructions below to help prevent
accidents.
Before you throw away your old refrigerator
or freezer:
•Take off the doors.
•Leave the shelves in place so that children
may not easily climb inside.
REFRIGERANTS
All refrigeration products contain refrigerants, which
under federal law must be removed prior to product
disposal.
If you are getting rid of an old refrigeration product,
check with the company handling the disposal
about what to do.
4
This is the safety alert symbol. This symbol alerts you to potential hazards that can kill or hurt you and others. All safety
PHVVDJHVZLOOIROORZWKHVDIHW\DOHUWV\PERODQGWKHZRUG´'$1*(5µ´:$51,1*µRU´&$87,21µ7KHVHZRUGVDUHGHILQHGDV
Indicates a hazardous situation which, if not avoided, will result in death or serious injury.
Indicates a hazardous situation which, if not avoided, could result in death or serious injury.
Indicates a hazardous situation which, if not avoided, could result in minor or moderate injury.
WARNING
DANGER
CAUTION

5
0(685(6'(6e&85,7e,03257$17(6
LIRE ET CONSERVER CES INSTRUCTIONS
AVERTISSEMENT Lorsque vous utilisez le réfrigérateur, observez
toujours certaines précautions de base, notamment :
• N’utilisez le réfrigérateur que pour son usage prévu, comme
décrit dans le présent manuel.
• Installez le réfrigérateur conformément aux directives
d’installation avant de l’utiliser.
• Ne laissez pas les enfants grimper, s’asseoir, se tenir debout
ni se pendre aux clayettes du réfrigérateur. Ils pourraient
endommager le réfrigérateur et se blesser gravement.
• N’entreposez et n’utilisez pas d’essence ou autres vapeurs et
liquides inflammables à proximité de cet appareil ou de tout
autre appareil électroménager.
• Débranchez votre réfrigérateur avant de le nettoyer et de le
réparer.
REMARQUE : Nous vous recommandons vivement de confier
toute réparation à un technicien qualifié.
REMARQUE : /·DOLPHQWDWLRQpOHFWULTXHGXUpIULJpUDWHXUQHSHXW
SDVrWUHFRXSpHSDUO·LQWHUPpGLDLUHGXSDQQHDXGHFRPPDQGH
•
1RXVGpFRQVHLOORQVIRUWHPHQWO·XWLOLVDWLRQG·XQHUDOORQJHjFDXVH
des risques potentiels dans certaines conditions. Cependant, si
O·XWLOLVDWLRQG·XQFRUGRQSURORQJDWHXUHVWQpFHVVDLUHFHGHUQLHUGRLW
obligatoirement être homologué UL (aux USA) ou CSA (au Canada),
à trois brins avec mise à la terre pour appareil électroménager et
GRLWrWUHpTXLSpG·XQHILFKHHWG·XQHSULVHIHPHOOHDYHFWHUUH/HV
caractéristiques électriques du cordon prolongateur doivent être
de 15 ampères (minimum) et de 120 volts.
• 5HPHWWH]WRXWHVOHVSLqFHVHWSDQQHDX[HQSODFHDYDQWG·XWLOLVHU
O·DSSDUHLO
ATTENTION
• Une fois le réfrigérateur en marche, ne touchez pas les
surfaces froides du congélateur, surtout si vous avez les
mains humides ou mouillées :
ODSHDXULVTXHG·DGKpUHUjFHVVXUIDFHVWUqVIURLGHV
• Pour les réfrigérateurs dotés d’une machine à glaçons
automatique, évitez le contact avec les pièces mobiles du
PpFDQLVPHpMHFWHXURXDYHFO·pOpPHQWFKDXIIDQWVLWXpjOD
partie inférieure de la machine à glaçons. Ne posez pas les
doigts ou les mains sur le mécanisme de la machine à glaçons
pendant que le réfrigérateur est branché.
• Éloignez les doigts des parties du réfrigérateur où l’on peut
facilement se pincer : les espaces entre les portes et entre
les portes et les placards sont toujours étroits. Soyez prudent
ORUVTXHYRXVIHUPH]OHVSRUWHVGHO·DSSDUHLOHQSUpVHQFHGHV
enfants.
• Ne faites pas recongeler des aliments surgelés qui ont
complètement dégelé.
• Ne nettoyez pas les clayettes ou les couvercles en verre
avec de l’eau tiède quand ceux-ci sont froids. Les clayettes et
FRXYHUFOHVHQYHUUHSHXYHQWVHFDVVHUV·LOVVRQWH[SRVpVjGHV
changements soudains de température ou si vous les cognez
ou les faites tomber. Le verre trempé est conçu pour se briser en
petits morceaux en cas de casse.
/HVHQIDQWVSULVDXSLqJHRXPRUWVG·DVSK\[LHVRQW
WRXMRXUVG·DFWXDOLWp/HVDSSDUHLOVGHUpIULJpUDWLRQ
abandonés sont toujours aussi dangereux, même
VLRQQ·DWWHQGTXH´TXHOTXHMRXUVµSRXUV·HQ
débarasser. Si vous ne gardez pas votre ancien
appareil, veuillez suivre les directives ci-dessous
afin de prévenir les accidents.
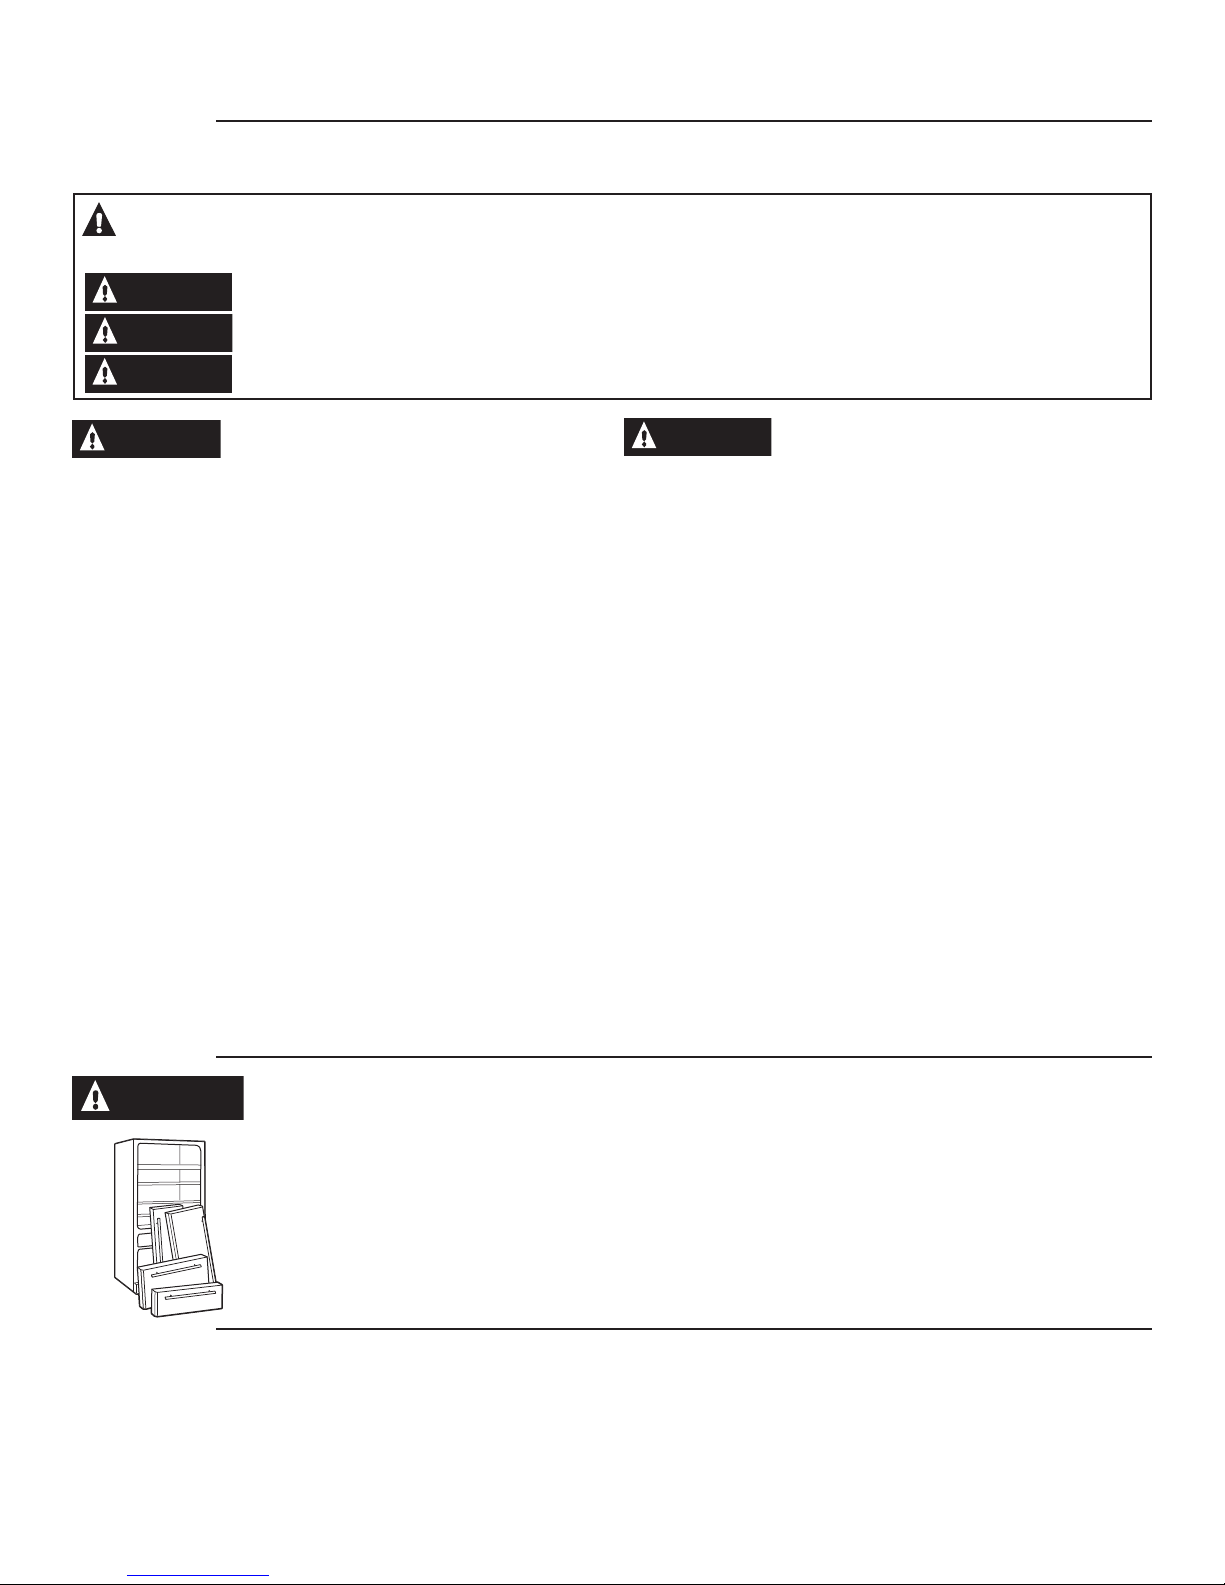
Avant de vous débarasser de votre vieux
appareil de réfrigération :
•Démontez les portes.
• /DLVVH]OHVFOD\HWWHVHQSODFHDILQG·HPSrFKHU
OHVHQIDQWVGHJULPSHUjO·LQWpULHXU
RÉFRIGÉRANTS
Tous les appareils de réfrigération contiennent
des refrigerants qui, conformément aux lois
fédérales, doivent être enlevés avant toute
pOLPLQDWLRQGHO·DSSDUHLO
Si vous vous débarrassez de vieux appareils de
réfrigération, vérifiez, auprès de la société qui
V·RFFXSHGHOHXUpOLPLQDWLRQFHTXHYRXV
devez faire.
DANGER RISQUES POUR LES ENFANTS
Ce symbole représente une alerte de sécurité. Ce symbole vous avise de dangers possibles pouvant causer la mort, des
EOHVVXUHVRXDXWUHV7RXVOHVPHVVDJHVGHVpFXULWpVHURQWSUpFpGpVGXV\PEROHG·DOHUWHGHVpFXULWpDLQVLTXHGHVPRWV©
'$1*(5ª©$9(57,66(0(17ªRX©0,6((1*$5'(ª&HVPHVVDJHVVRQWOHVVXLYDQWV
6LJQDOHXQHVLWXDWLRQTXLSUpVHQWHXQGDQJHULPPLQHQWHWTXLVLHOOHQ·HVWSDVpYLWpHHQWUDvQHUDGHVEOHV
sures graves, voire la mort.
6LJQDOHXQHVLWXDWLRQTXLSUpVHQWHXQGDQJHULPPLQHQWHWTXLVLHOOHQ·HVWSDVpYLWpHSHXWHQWUDvQHUGHV
blessures graves, voire la mort. .
6LJQDOHXQHVLWXDWLRQTXLSUpVHQWHXQGDQJHULPPLQHQWHWTXLVLHOOHQ·HVWSDVpYLWpHSHXWHQWUDvQHUGHV
blessures mineures ou graves.
AVERTISSEMENT
DANGER
ATTENTION

LEA Y GUARDE ESTAS INSTRUCCIONES
ADVERTENCIA
Al usar este electrodoméstico, siempre siga las
precauciones básicas de seguridad, incluyendo lo siguiente:
• Use este electrodoméstico sólo para su propósito original,
como se describe en el Manual del Propietario.
• Este refrigerador se debe instalar de forma apropiada de
acuerdo con las Instrucciones de Instalación antes de ser
usado.
• No permita que los niños se trepen, paren o cuelguen de los
estantes del refrigerador. Podrían dañar el refrigerador y sufrir
lesiones graves.
• No guarde ni use gasolina u otros vapores inflamables y
líquidos cerca de éste ni de otros electrodomésticos.
• Desenchufe el refrigerador antes de realizar su limpieza y de
hacer reparaciones.
NOTA: Recomendamos enfáticamente que cualquier
reparación sea realizada por un individuo calificado.
NOTA: La corriente al refrigerador no puede ser desconectada
por ninguna configuración del panel de control.
• Debido a los posibles riesgos sobre la seguridad bajo
ciertas condiciones, recomendamos enfáticamente no usar
prolongadores. Sin embargo, si se debe usar un prolongador,
es absolutamente necesario que sea un prolongador para
electrodoméstico de la lista UL (en Estados Unidos) o uno
certificado por CSA (en Canadá), de 3 cables con conexión a
tierra, que cuente con un enchufe con conexión a tierra y un
tomacorriente con una graduación eléctrica del cable de 15
amperes (mínimo) y 120 voltios.
•
Reemplace todas las piezas y paneles antes de utilizar.
PRECAUCIÓN
• No toque las superficies frías del compartimiento del freezer
cuando las manos estén húmedas o mojadas. La piel se
puede adherir a estas superficies extremadamente frías.
• En refrigeradores con máquina automática de hielo, evite
el contacto con las partes en movimiento del mecanismo
expulsor o con el elemento de calefacción ubicado en la parte
inferior de la máquina de hielos. No coloque los dedos ni las
manos en el mecanismo de la máquina de hielos automática
mientras el refrigerador esté enchufado.
• Mantenga los dedos alejados de las areas de “riesgo de
lastimaduras”: los espacios entre las puertas y entre las
puertas y el gabinete son necesariamente pequeños. Tenga el
cuidado de cerrar las puertas cuando los niños se encuentren
en el área.
• No vuelva a congelar comidas que hayan estado totalmente
congeladas en forma previa.
• No limpie estantes de vidrio ni tapas con agua caliente
cuando estén fríos. Los estantes de vidrio y las tapas se
pueden romper si son expuestos a cambios de temperatura
repentinos o impactos, tales como sacudones o caídas. El vidrio
templado está diseñado para destruirse en pequeñas piezas en
caso de rotura.
,16758&&,21(6,03257$17(6'(6(*85,'$'
PELIGRO RIESGO DE QUE UN NIÑO QUEDE ATRAPADO
Que un niño quede atrapado o que sufra una asfixia
no son problemas del pasado. Los refrigeradores
antiguos o abandonados aún son peligrosos…
incluso aunque se conserven por “sólo unos pocos
días”. Si se deshará de su antiguo refrigerador,
siga las siguientes instrucciones a fin de evitar
accidentes.
Antes de descartar su antiguo refrigerador o
freezer:
•Retire las puertas.
•Deje las repisas en su lugar de modo que los niños
no puedan trepar dentro con facilidad.
REFRIGERANTE
Todos los productos de refrigeración cuentan con
refrigerantes, que de acuerdo con la ley federal
deberán ser eliminados antes de descartar el
producto.
Si se deshará de un producto de refrigeración
antiguo, consulte a la compañía a cargo sobre cómo
deshacerse del mismo.
6
Éste es el símbolo de alerta de seguridad. El mismo alerta sobre potenciales riesgos de muerte o lesiones tanto para usted con
para otras personas. Todos los mensajes de seguridad estarán a continuación del símbolo de alerta de seguridad y con la palabra
´3(/,*52µ´$'9(57(1&,$µR´35(&$8&,Ï1µ(VWDVSDODEUDVVHGHILQHQFRPR
PELIGRO
6LJQDOHXQHVLWXDWLRQTXLSUpVHQWHXQGDQJHULPPLQHQWHWTXLVLHOOHQ·HVWSDVpYLWpHHQWUDvQHUDGHVEOHVVXUHV
graves, voire la mort.
ADVERTENCIA
6LJQDOHXQHVLWXDWLRQTXLSUpVHQWHXQGDQJHULPPLQHQWHWTXLVLHOOHQ·HVWSDVpYLWpHSHXWHQWUDvQHUGHV
blessures graves, voire la mort. .
PRECAUCIÓN
6LJQDOHXQHVLWXDWLRQTXLSUpVHQWHXQGDQJHULPPLQHQWHWTXLVLHOOHQ·HVWSDVpYLWpHSHXWHQWUDvQHUGHV
blessures mineures ou graves.

,03257$176$)(7<,16758&7,216
HOW TO CONNECT ELECTRICITY
Do not, under any circumstances, cut or remove
the third (ground) prong from the power cord.
For personal safety, this appliance must be
properly grounded.
The power cord of this appliance is equipped with
a 3-prong (grounding) plug which mates with a
standard 3-prong (grounding) wall outlet to minimize
the possibility of electric shock hazard from this
appliance.
Have the wall outlet and circuit checked by a
qualified electrician to make sure the outlet is
properly grounded.
Where a standard 2-prong wall outlet is
encountered, it is your personal responsibility
and obligation to have it replaced with a properly
grounded 3-prong wall outlet.
The refrigerator should always be plugged into its
own individual electrical outlet which has a voltage
rating that matches the rating plate.
A 115 Volt AC, 60 Hz, 15- or 20-amp fused, grounded
electrical supply is required. This provides the best
performance and also prevents overloading house
wiring circuits which could cause a fire hazard from
overheated wires.
Never unplug your refrigerator by pulling on the
power cord. Always grip plug firmly and pull straight
out from the outlet.
Repair or replace immediately all power cords that
have become frayed or otherwise damaged. Do not
use a cord that shows cracks or abrasion damage
along its length or at either end.
When moving the refrigerator away from the wall,
be careful not to roll over or damage the power cord.
USE OF EXTENSION CORDS
Because of potential safety hazards under certain
conditions, we strongly recommend against the
use of an extension cord.
However, if you must use an extension cord,
it is absolutely necessary that it be a UL-listed,
3-wire grounding type appliance extension cord
having a grounding type plug and outlet and that
the electrical rating of the cord be 15 amperes
(minimum) and 120 volts.
7
WARNING Explosion Hazard.
Keep flammable materials and vapors, such as gasoline, away from refrigerator. Failure to do so can
result in fire, explosion, or death.
WARNING Tip Over Hazard.
Built-in style models (model PYE, CYE, GYE, PWE, CWE, and ZWE) are top heavy, especially with any doors
open. These models must be secured with the anti-tip floor bracket to prevent tipping forward, which
could result in death or serious injury. Read and follow the entire installation instructions for installing the
anti-tip floor bracket packed with your refrigerator.
WARNING Electrical Shock Hazard.
Plug into a grounded 3-prong outlet.
Do not remove the ground prong.
Do not use an adapter.
Failure to follow these instructions can result in
death, fire, or electrical shock.

8
0(685(6'(6e&85,7e,03257$17(6
RACCORDEMENT ÉLECTRIQUE
Ne coupez ni retirez en aucun cas la troisième
broche (mise à la terre) de la fiche du cordon
d’alimentation. Pour votre sécurité, cet appareil
doit être correctement mis à la terre.
/HFRUGRQG·DOLPHQWDWLRQGHFHWDSSDUHLOHVWPXQL
G·XQHILFKHjEURFKHVPLVHjODWHUUHTXLVH
branche dans une prise mural ordinaire à 3 alvéoles
(mise à la terre) pour réduire au minimum les risques
du chocs électriques.
Faites examiner la prise de courant et le circuit par
un électricien qualifié pour vous assurer que la prise
est correctement mise à la terre.
Si la prise murale est du type standard à 2 alvéoles,
il vous incombe de la faire remplacer par une prise
à 3 alvéoles correctement mise à la terre.
La machine à glaçons doit toujours être branché
dans sa propre prise de courant, dont la tension
nominale est identique à celle indiquée sur la plaque
signalétique.
Une alimentation électrique à 115 volts CA, 60
Hz, avec un fusible de 15 ou 20 ampères et une
mise à la terre est nécessaire. Cette précaution
est recommandée pour garantir un rendement
optimum et éviter une surcharge des circuits
électriques de la résidence, ce qui pourrait créer un
ULVTXHG·LQFHQGLHSDUVXUVFKDXIIHGHVILOV
1HGpEUDQFKH]MDPDLVO·DSSDUHLOHQWLUDQWOHFRUGRQ
G·DOLPHQWDWLRQ6DLVLVVH]IHUPHPHQWODILFKH
du cordon et tirez droit pour la retirer de la prise.
Réparez ou remplacez immédiatement tout cordon
HIILORFKpRXHQGRPPDJp1·XWLOLVH]SDVXQFRUGRQ
IHQGLOOpRXSUpVHQWDQWGHVVLJQHVG·XVXUH
/RUVTXHYRXVGpSODFH]O·DSSDUHLOGXPXUIDLWHV
attention de ne pas la faire rouler sur le cordon
G·DOLPHQWDWLRQDILQGHQHSDVO·HQGRPPDJHU
CORDONS PROLONGATEURS
Nous vous recommandons fortement de ne pas
utíliser de cordons prolongateurs à cause des
risques potentiels qu’ils présentent dans certaines
conditions.
7RXWHIRLVVLYRXVGpFLGH]G·XWLOLVHUWRXWGHPrPHXQ
cordon prolongateur, il est absolument nécessaire
TX·LOV·DJLVVHG·XQFRUGRQjILOVDYHFPLVHjODWHUUH
pour appareils électroménagers homologué ULaux
États-Unis) ou homologué CSA (au Canada), pourvu
G·XQHILFKHHWG·XQHSULVHPLVHVjODWHUUHGH
ampères (minimum) et de 120 volts.
AVERTISSEMENT Risque d’explosion.
&RQVHUYH]OHVPDWpULDX[HWYDSHXUVLQIODPPDEOHVWHOVTXHO·HVVHQFHjO·pFDUWGHYRWUHUpIULJpUDWHXU
Une explosion, un incendie voire la mort pourrait en résulter.
AVERTISSEMENT Risque de basculement
Les modèles encastrés (modèles PYE, CYE et PWE) sont plus lourds au niveau de leur partie supérieure, surtout
DYHFOHVSRUWHVRXYHUWHV&HVPRGqOHVGRLYHQWrWUHIL[pVjO·DLGHGXV\VWqPHDQWLEDVFXOHPHQWSDUIL[DWLRQ
DXVROSRXUpYLWHUTXHO·DSSDUHLOQHEDVFXOHYHUVO·DYDQWFHTXLSRXUUDLWHQWUDvQHUGHVEOHVVXUHVJUDYHV
YRLUHPRUWHOOHV/LVH]HWVXLYH]OHVLQVWUXFWLRQVG·LQVWDOODWLRQFRPSOqWHVSRXUO·LQVWDOODWLRQGXV\VWqPHDQWL
basculement par fixation au sol livré avec votre réfrigérateur.
AVERTISSEMENT Risque de choc électrique.
%UDQFKH]O·DSSDUHLOGDQVXQHSULVHWULSOHDYHFWHUUH
Ne retirez pas la broche de terre.
1·XWLOLVH]SDVG·DGDSWDWHXU
/HQRQUHVSHFWGHFHVLQVWUXFWLRQVSHXWHQWUDvQHUGHV
ULVTXHVG·LQFHQGLHVGHVFKRFVpOHFWULTXHVRXODPRUW

,16758&&,21(6,03257$17(6'(6(*85,'$'
CÓMO CONECTAR LA ELECTRICIDAD
Nunca, bajo ninguna circunstancia, corte o elimine
el tercer cable (tierra) del cable de corriente. Por
seguridad personal, este electrodoméstico debe
estar adecuadamente conectado a tierra.
El cable de corriente de este electrodoméstico
cuenta con un enchufe de 3 cables (conexión
a tierra) que se conecta a un tomacorriente de
pared estándar de 3 cables (conexión a tierra) para
minimizar la posibilidad de riesgos de descargas
eléctricas por parte del mismo.
Contrate a un electricista calificado para que
controle el tomacorriente y el circuito eléctrico, a
fin de asegurar que el enchufe esté correctamente
conectado a tierra.
En caso de contar con un tomacorriente de pared
de 2 cables, es su responsabilidad y obligación
reemplazarlo por un tomacorriente de pared de 3
cables correctamente conectado a tierra.
El refrigerador debería estar siempre conectado
a un enchufe específico con un índice de voltaje
equivalente al que figura en su etiqueta de
características técnicas.
Se requiere un suministro eléctrico con fusible y
conexión a tierra de 115 voltios de CA, 60 Hz, y 15 o
20 amperes. Esto garantiza el mejor funcionamiento
y además previene la sobrecarga de los circuitos del
hogar, lo cual podría ocasionar riesgos de incendio
debido al recalentamiento de cables.
Nunca desenchufe el refrigerador tirando del cable
de corriente. Siempre tome su enchufe firmemente y
empuje el mismo hacia afuera para retirarlo.
Repare o reemplace de inmediato todos los cables
de corriente pelados o con cualquier tipo de daño.
No use un cable con cortaduras o abrasión sobre su
extensión o extremos.
Al alejar el refrigerador de la pared, se deberá tener
cuidado de que no ruede sobre ni dañe el cable de
corriente.
USO DE PROLONGADORES
Debido a los posibles riesgos sobre la seguridad
bajo ciertas condiciones, recomendamos
enfáticamente no usar prolongadores.
Sin embargo, si aún es necesario usar un
prolongador, es absolutamente necesario que
sea un prolongador para electrodomésticos de
la lista UL, de 3 cables con conexión a tierra, que
cuente con un enchufe con conexión a tierra y un
tomacorriente, y que la graduación eléctrica del
cable sea de 15 amperes (mínimo) y 120 volts.
9
ADVERTENCIA
Riesgo de Explosión
Mantenga cualquier material y vapores inflamables, tales como gasolina, alejados del refrigerador. Si no
se cumple con esto se podrá producir una explosión, incendio o la muerte.
ADVERTENCIA
Riesgo de Caídas
Los modelos con estilo incorporado (modelo PYE, CYE, GYE, PWE, CWE, y ZWE) son inestables, especialmente
con las puertas abiertas. Estos modelos deben ser asegurados con el soporte antivolcaduras, a fin de evitar
caídas hacia adelante, que podrían resultar en la muerte o lesiones graves. Lea y siga las instrucciones de
instalación en su totalidad, a fin de instalar el soporte de piso antivolcaduras embalado con su refrigerador.
ADVERTENCIA
Riesgo de Descarga Eléctrica
Enchufe en un tomacorriente con conexión a tierra
de 3 cables.
No elimine el cable de conexión a tierra.
No use un adaptador.
Si no se siguen estas instrucciones se podrá
producir la muerte, incendios o descargas
eléctricas.

10
Temperature
controls
2SHUDWLQJ,QVWUXFWLRQV
Stainless Steel Refrigerator
Refrigerator
Hold 3 Sec for °F/°C
Hold 3 Seconds
Hold 3 Seconds
Recommended: 37 °F
Actual Set
Energy Smart
Energy Smart Override
Hold 3 Seconds
Freezer
Door Alarm
Ice Maker
Lock Controls
Reset Filter
Recommended: 0°F
F
Changing Temperature Controls
Temperature Display is located on inside
of left-hand refrigerator door. To change
the temperature, press and release the
REFRIGERATOR or FREEZER pad. The ACTUAL
TEMP light will come on and the display will
show the actual temperature. To change the
temperature, tap either the
REFRIGERATOR or FREEZER pad until the desired
temperature is displayed.
To turn OFF cooling system, press and hold
the REFRIGERATOR and FREEZER pads
simultaneously for 3 seconds. When the cooling
system is OFF the display should read OFF.
To turn ON cooling system, press either
REFRIGERATOR or FREEZER pad. The display
will show the preset temperature settings of
37°F for refrigerator and 0°F for freezer. Turning
the cooling system off stops the cooling to
refrigerator, but it does not shut off the electrical
power.
Door alarm
Ice maker
Lock
controls
Reset filter
The door alarm will sound if either door is open
for more than 2 minutes. The beeping sound will
stop when you close the door.
Press to turn the ice maker on or off.
Press and hold for 3 seconds to lock or unlock the
refrigerator and freezer controls.
Press and hold for 3 seconds after replacing the
filter to reset the timer.

Internal water
dispenser
The water dispenser is located on the left wall
inside the refrigerator compartment.
To dispense water:
1Hold the glass against the recess.
2Push the water dispenser button.
3Hold the glass underneath the dispenserfor 2–3
seconds after releasing the dispenser button.
Water may continue to dispense after the
button is released.
If no water is dispensed when the refrigerator is
first installed, there may be air in the water line
system. Press the dispenser button and run 11ø2
gallons to remove trapped air from the water line
and to fill the water system. During this process,
the dispenser noise may be loud as the air is
purged from the water line system. To flush out
impurities in the water line, throw away the first
6 glassfuls of water.
NOTE: To avoid water deposits, the dispenser
should be cleaned periodically by wiping with
a clean cloth or sponge.
11
Dispensers
Stainless Steel Refrigerator

Water
filter
Water Filter
Stainless Steel Refrigerator
Water Filter Cartridge
The water filter cartridge is located in the fresh food
interior on the left side wall, near the top.
Select models use radio frequency identification
(RFID) to detect leaks and monitor filter status. The
RFID technology is certified by the FCC.
When to replace the filter cartridge
The filter cartridge should be replaced every six
months or earlier if 170 gallons of water has been
dispensed or the flow of water to the dispenser or
icemaker decreases.
Touch Screen Models: A filter status message will
appear on the screen when the water filter needs
to be replaced. The filter status will automatically
update when the filter is replaced.
Non-touch Screen Models: A filter indicator light will
illuminate on the screen when the water filter needs
to be replaced.
Removing the filter cartridge
To replace the filter, first remove the old cartridge by
opening the filter door and pulling on the bottom of
the cartridge to allow it to swing outward. When the
cartridge can no longer swing, gently pull to unseat it
IURPWKHFDUWULGJHKROGHU'21277:,67&$575,'*(
A small amount of water may drip out.
Installing the Filter Cartridge
1. Align top of filter with cartridge holder and push
until cartridge is fully seated. The arrow on the
label should point up if cartridge is oriented
correctly.
2. While continuing to ensure cartridge is fully seated
in the holder, gently swing the filter inward until it
is in position. If filter will not swing easily, check to
ensure filter is properly aligned and fully seated
within the cartridge holder.
3. Run two gallons of water through the cold water
dispenser (about 5 minutes) to remove air from
the system. A newly installed filter cartridge will
cause water to spurt from the dispenser. Use a
large pitcher or sports bottle to catch the water
spray.
4. Reset Filter Status message (non-touch screen
models).
Note: It is normal for water to appear discolored
during the initial system flush. Water color will return
to normal after first few minutes of dispensing.
Filter Bypass Plug
To reduce the risk of property damage due to water
leakage, you MUST use the filter bypass plug when
a replacement filter cartridge is not available. The
dispenser and icemaker will not operate without
either the filter or bypass plug installed. The bypass
plug is installed in the same way as a filter cartridge.
WARNING
To reduce the risk associated with choking, do not allow children under 3 years of age to have access to
small parts during the installation of this product. The disposable filter cartridge should be replaced every 6
months at the rated capacity, or sooner if a noticeable reduction in flow rate occurs.
For the maximum benefit of your filtration system, GE recommends the use of GE-branded filters only. Using
GE-branded filters in GE and Hotpoint®refrigerators provides optimal performance and reliability. GE filters
meet rigorous industry NSF standards for safety and quality that are important for products that are filtering
your water. GE has not qualified non-GE-branded filters for use in GE and Hotpoint refrigerators and there is no
DVVXUDQFHWKDWQRQ*(EUDQGHGILOWHUVPHHW*(·VVWDQGDUGVIRUTXDOLW\SHUIRUPDQFHDQGUHOLDELOLW\
If you have questions, or to order additional filter cartridges, visit our website at www.geapplianceparts.
com or call GE Parts and Accessories, 8003626.2002.
Customers in Canada should consult the yellow pages for the nearest Camco Service Center.
12
Swing
Push \ Pull
1
2
FCCID: ZKJ-EBX1532P001 ICID:
10229A-EBX1532P001
“This device complies with part 15 of the FCC Rules.
Operation is subject to the following two conditions: (1)
This device may not cause harmful interference, and
(2) this device must accept any interference received,
including interference that may cause undesired
operation.”
“This device complies with Industry Canada licence-
exempt RSS standard(s). Operation is subject to the
following two conditions: (1) this device may not cause
interference, and (2) this device must accept any
interference, including interference that may cause
undesired operation of the device.”

Water Filter
Stainless Steel Refrigerator
ADVERTENCIA
A fin de reducir el riesgo asociado con asfixia, no permita que los niños menores de 3 años tengan acceso
a las partes pequeñas durante la instalación de este producto. El cartucho del filtro descartable deberá ser
reemplazado cada 6 meses luego de agotar su capacidad, o antes si se produce una reducción notoria en el
caudal.
Para obtener el máximo beneficio de su sistema de filtrado, GE recomienda el uso de los filtros de la marca GE
únicamente. El uso de filtros de la marca GE en refrigeradores GE y Hotpoint®brinda un óptimo funcionamiento
y confiabilidad. Los filtros GE cumplen con rigurosos estándares NSF de la industria sobre seguridad y calidad,
que son importantes para los productos que están filtrando su agua. GE no posee filtros de la marca GE que
no estén calificados para su uso en refrigeradores GE y Hotpoint, y no existe seguridad de que los filtros que no
son de la marca GE cumplan con los estándares de GE en relación a calidad, funcionamiento y confiabilidad.
Ante cualquier consulta, o para ordenar cartuchos de filtros adicionales, visite nuestro sitio web en www.
geapplianceparts.com, o llame a GE Parts and Accessories (Piezas y Accesorios de GE), 8003626.2002.
Los clientes de Canadá deberán buscar el Centro de Servicio Técnico Camco en las páginas amarillas
AVERTISSEMENT
Pour réduire le risque d’étouffement pendant l’installation de ce produit, ne pas laisser les petites pièces
à la portée des enfants âgés de moins de 3 ans. La cartouche de filtre jetable doit être remplacée tous les 6
mois, si sa capacité nominale est atteinte ou si une réduction notable du débit est observée
3RXUOHVPHLOOHXUVUpVXOWDWVGHYRWUHV\VWqPHGHILOWUDWLRQ*(UHFRPPDQGHO·XWLOLVDWLRQGHILOWUHVGHPDUTXH*(
VHXOHPHQW/·XWLOLVDWLRQGHILOWUHVGHPDUTXH*(GDQVOHVUpIULJpUDWHXUV*(HW+RWSRLQWSURFXUHOHVPHLOOHXUV
UHQGHPHQWHWILDELOLWp/HVILOWUHV*(VDWLVIRQWDX[ULJRXUHXVHVQRUPHV16)GHO·LQGXVWULHUHODWLYHVjODVUHWpHW
ODTXDOLWpIDFWHXULPSRUWDQWSRXUOHVSURGXLWVTXLILOWUHQWYRWUHHDX*(Q·DSDVpYDOXpOHUHQGHPHQWGHVILOWUHV
G·DXWUHVPDUTXHVGDQVOHVUpIULJpUDWHXUV*(HW+RWSRLQWHWLOQ·H[LVWHDXFXQHDVVXUDQFHTX·LOVVDWLVIHURQWOHV
normes de qualité et de fiabilité GE.
Pour toute question ou pour commander des cartouches filtrantes de rechange, visitez notre site Web au
www.geapplianceparts.com ou composez le 800.626.2002 pour joindre le service des Pièces et accessoires GE.
/HVFRQVRPPDWHXUVGX&DQDGDGRLYHQWFRQVXOWHUOHVSDJHVMDXQHVSRXUFRQQDvWUHOHFHQWUHGHVHUYLFH&DPFR
le plus proche.
13

Rearranging
the shelves
Shelves in the refrigerator compartment
are adjustable.
Refrigerator Compartment
To remove:
1.Remove all items from the shelf.
2.Tilt the shelf up at the front.
3.Lift the shelf up at the back and bring
the shelf out.
To replace:
1. While tilting the shelf up, insert the top hook
at the back of the shelf in a slot on the track.
2.Lower the front of the shelf until the bottom
of the shelf locks into place.
1
Shelves and Bins
Stainless Steel Refrigerator
Spillproof
shelves
This shelf splits in half and slides under itself for
storage of tall items on the shelf below.
This shelf can be removed and replaced or relocated
(just like spillproof shelves).
NOTE: The back half of the Quick Space Shelf is not
adjustable.
QuickSpace™
shelf*
2
1
2
Spillproof shelves have special edges to help prevent
spills from dripping to lower shelves.
6HOHFW0RGHOV2QO\
14

15
Non-
adjustable
dairy bin
Adjustable
bins on doors
Shelves and Bins
Stainless Steel Refrigerator
To remove: Lift the dairy bin straight up,
then pull out.
To replace: Engage the bin in the molded door
supports and push down. The bin will lock in place.
Adjustable bins can easily be carried from
refrigerator to work area.
To remove: Lift bin straight up, then pull out.
To replace or relocate: Slide in the bin just above the
molded door supports, and push down. The bin will
lock in place.
Drop down tray *
(tray open)
1.2SHQULJKWIUHVKIRRGGRRU
2. Depress both buttons on lower sides of bin and
bin will drop down.
3. Reverse to reinstall.
Non-Dispense Models
(Left Hand Door)
Dispense Models
(Right Hand Door)
6HOHFW0RGHOV2QO\
Freezer basket
and drawer
1. Basket.
2. Drawer
3. Ice Bucket*
6HOHFW0RGHOV2QO\

Shelves and Bins
Stainless Steel Refrigerator
Basket removal
(bottom drawer)
To remove:push in plastic tab on either left or right
side
To replace: slide bin into location until it locks into
place.
To remove:pull the drawer out to the stop position.
Lift the front of the drawer up and out.
To replace: pull left and right slides untill fully
extended. Place drawer back in first and rotate
drawer front down to seat on slides. Push the drawer
in to closed position.
To remove:pull the drawer out to the stop position.
Slide pan divider to right to release it from the pan.
To replace: place pan divider into the groove on the
right and slide it to the left as needed.
Non-
Adjustable
bins on
the freezer
door
Adjustable
deli/produce
drawer
Drawer
divider*
1. 2SHQIUHVKIRRGGRRUV
2. 2SHQIUHH]HUGRRUWRWKHVWRSSRVLWLRQ
3. Remove freezer basket by lifting up the rear of
the basket and rotate it upward.
4. Lift it out to remove.
To replace:
Reverse step 1 thru 4 to replace.
6HOHFW0RGHOV2QO\
16

17
ClimateZone
Temperature
controlled
drawer
Climate Zone and Temperature Controlled Drawer
Stainless Steel Refrigerator
Keep fruits and vegetables organized in separate
compartments for easy access.
Excess water that may accumulate in the bottom of
the drawers or under the drawers should be wiped
dry.
The Temperature Controlled Drawer is a full-width
drawer with adjustable temperature control. This
drawer can be used for large miscellaneous items.
To change setting, press select button.
Note: Temperatures indicate the appropriate
temperatures for the food and actual tempera-
tures may vary based on normal operation and
other factors such as door openings and fresh
food set point.
32° 34° 38°
CAUTION Laceration Hazard.
Do not store glass bottles at this setting. If
they are frozen, they can break and result in
personal injury.
ATTENTION Risque de lacération.
Ne conservez pas les bouteilles de verre
à ce réglage. Si elles gèlent, elles peuvent
éclater et provoquer des blessures.
PRECAUCIÓN Riesgo de Laceración.
No guarde botellas de vidrio en esta
ubicación. Si están congeladas, se podrán
romper y producir lesiones personales.
Meat Beverage Deli Select

Automatic Icemaker
Stainless Steel Refrigerator
Automatic
icemaker*
NOTE: A newly installed refrigerator may take 12 to 24 hours to begin making ice.
The ice maker will produce seven cubes per cycle
approximately 100–130 cubes in a 24-hour period,
depending on freezer compartment temperature,
room temperature, number of door openings and
other use conditions.
The ice maker will fill with water when it cools to 15°F
(–10°C). A newly installed refrigerator may take 12 to
24 hours to begin making ice cubes.
If the refrigerator is operated before the water line
connection is made to the unit or if the water supply
to an operating refrigerator is turned off, make sure
WKDWWKHLFHPDNHULVWXUQHGRII2QFHWKHZDWHUKDV
been connected to the refrigerator, the ice maker
may be turned on. See the table below for details.
You may hear a buzzing sound each time the ice
maker fills with water.
Throw away the first few batches of ice to allow the
water line to clear.
Be sure nothing interferes with the sweep of the
feeler arm.
When the bin fills to the level of the feeler arm, the ice
maker will stop producing ice. It is normal for several
cubes to be joined together.
If ice is not used frequently, old ice cubes will become
cloudy, taste stale and shrink.
NOTE: In homes with lower-than-average water
pressure, you may hear the icemaker cycle
multiple times when making one batch of ice.
CAUTION To minimize the risk of
personal injury, avoid contact with the
moving parts of the ejector mechanism, or
with the heating element that releases the
cubes. Do not place fingers or hands on the
automatic ice making mechanism while the
refrigerator is plugged in.
ATTENTION Pour réduire le risque
de blessure, évitez tout contact avec les
SLqFHVPRELOHVGXPpFDQLVPHG·pMHFWLRQ
RXDYHFO·pOpPHQWFKDXIIDQWTXLOLEqUHOHV
cubes. Ne placez pas les doigts ou les mains
sur le mécanisme de production de glace
automatique lorsque le réfrigérateur est
branché à la prise électrique.
PRECAUCIÓN Para minimizar el riesgo de
lesiones personales, evite el contacto con
las partes móviles del mecanismo eyector
o con el elemento de calefacción que libera
los cubos. No coloque los dedos ni las manos
en el mecanismo de la máquina de hielos
automática mientras el refrigerador esté
enchufado.
To turn off the ice maker, use the “ICE MAKER” button
on the controls.
Accessing ice
Feeler Arm
Ice maker
Freezer Ice Bucket*
The ice storage is in the freezer compartment
drawer.
2SHQWKHIUHH]HUGUDZHU
• The ice bucket is located on the left side of the
upper basket.
• Pull the upper basket forward to remove the ice
bucket.
6HOHFW0RGHOV2QO\
Freezer
Ice
Bucket
18

19
Care and Cleaning
Stainless Steel Refrigerator
The stainless steel panels and handles can be
cleaned with a commercially available stainless
steel cleaner such as Stainless Steel Magic™.
Stainless Steel Magic is available at Ace, True
Value, Servistar, HWI and other leading stores.
It is also available through GE Parts and
$FFHVVRULHV2UGHUSDUWQXPEHU
WX10X15.
Do not use appliance wax or polish on the
stainless steel.
Silver-accented plastic parts
should be washed
with soap or other mild detergents. Wipe clean with
a sponge, damp cloth or paper towel.
Do not use scouring pads, powdered cleaners,
bleach or cleaners containing bleach because
these products can scratch and weaken the paint
finish.
Cleaning
the outside
To help prevent odors, leave an open box
of baking soda in the fresh food and freezer
compartments.
Unplug the refrigerator before cleaning. If this
is not practical, wring excess moisture out of
sponge or cloth when cleaning around switches,
lights or controls.
8VHZDUPZDWHUDQGEDNLQJVRGDVROXWLRQ³
about a tablespoon (15 ml) of baking soda to
a quart (1 liter) of water. This both cleans and
neutralizes odors. Rinse and wipe dry.
Use of any cleaning solution other than that
which is recommended, especially those that
contain petroleum distillates, can crack or
damage the interior of the refrigerator.
Do not wash any plastic refrigerator parts in
the dishwasher.
CAUTION Do not clean glass shelves or
covers with warm water when they are cold. Glass
shelves and covers may break if exposed to sudden
temperature changes or impact, such as bumping or
dropping. Tempered glass is designed to shatter into
many small pieces if it breaks.
ATTENTION Ne nettoyez pas les clayettes ou
OHVFRXYHUFOHVHQYHUUHDYHFGHO·HDXWLqGHTXDQG
ceux-ci sont froids. Les clayettes et couvercles en
YHUUHSHXYHQWVHFDVVHUV·LOVVRQWH[SRVpVjGHV
changements soudains de température ou si vous
les cognez ou les faites tomber. Le verre trempé est
conçu pour se briser en petits morceaux en cas de
casse.
PRECAUCIÓN No limpie estantes de vidrio ni
tapas con agua caliente cuando estén fríos. Los
estantes de vidrio y las tapas se pueden romper
si son expuestos a cambios de temperatura
repentinos o impactos, tales como sacudones
o caídas. El vidrio templado está diseñado para
destruirse en pequeñas piezas en caso de rotura.
Cleaning
the inside
Be careful when moving the refrigerator away
from the wall. All types of floor coverings can be
damaged, particularly cushioned coverings and
those with embossed surfaces.
Raise the leveling legs located at the bottom front of
the refrigerator.
Pull the refrigerator straight out and return it
to position by pushing it straight in. Moving the
refrigerator in a side direction may result in
damage to the floor covering or refrigerator.
Lower the leveling legs until they touch the floor.
When pushing the refrigerator back, make sure
you don’t roll over the power cord or icemaker
supply line.
Behind the
refrigerator
For long vacations or absences, remove food and
unplug the refrigerator. Clean the interior with a
baking soda solution of one tablespoon (15 ml) of
baking soda to one quart (1 liter) of water. Leave the
doors open.
If the temperature can drop below freezing, have a
qualified service technician drain the water supply
system to prevent serious property damage due to
flooding.
1) Turn refrigerator off (pg. 7) or unplug the
refrigerator.
2) Empty ice bucket
3) Turn water supply off
If you cut the water supply off, turn off the ice
maker (pg. 18).
Upon returning from vacation:
1) Replace the water filter.
2) Run 2 gallons of water through the cold water
dispenser (about 5 minutes) to flush the system.
Preparing
for vacation
Secure all loose items such as shelves and
drawers by taping them securely in place
to prevent damage.
When using a hand truck to move the
refrigerator, do not rest the front or back of the
refrigerator against the hand truck. This could
damage the refrigerator. Handle only from the
sides of the refrigerator.
Be sure the refrigerator stays in an upright
position during moving.
Preparing
to move

Replacing the Light Bulbs
Stainless Steel Refrigerator
There is LED lighting in fresh food compartment and
on the bottom of the fresh food doors to light the
freezer compartment.
An authorized technician will need to replace the
LED light.
If this assembly needs to be replaced, call GE
Service at 1.800.432.2737 in the United States or
1.800.561.3344 in Canada.
Fresh food
FRPSDUWPHQW³
upper light
LED Lights
20
This manual suits for next models
1
Table of contents
Other GE Refrigerator manuals

GE
GE Monogram ZIC360NX User manual

GE
GE CustomStyle GSC23LGQ User manual

GE
GE GTR12GBEWW Assembly instructions

GE
GE PSS25MGMBBB and Safety guide

GE
GE GBC12IAX Operating instructions

GE
GE TFX24P User manual

GE
GE GE Profile Arctica CustomStyle PSC23SGN User instructions

GE
GE Monogram ZIC360N RH Guide

GE
GE GTJ18XCTSA Manual

GE
GE Profile PSF26PGWBB How to use