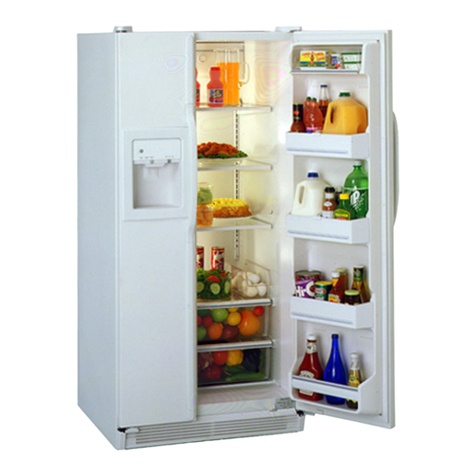
GE GMR03BLH Original instructions

GEAppliances.ca
Refrigerators
GMR03BLH
GMR05BLH
Owner’s Manual
& Installation
Instructions
Safety Information.............2, 3
Operating Instructions
Control Settings ....................4
Refrigerator Features...............4
Care and Cleaning ...............5-6
Replacing the Light Bulb............5
Installation Instructions.......7-9
Troubleshooting Tips .............10
Consumer Support
Product Registration ..............11
Warranty .........................13
Consumer Support .......Back Cover
ATTENTION:
Defrosting—Do not use sharp, pointed
objects to remove frost or ice from surfaces
of the freezer compartment. Doing so could
puncture the cooling coil, causing the unit to
lose its ability to maintain cold temperatures
and voiding the warranty. See the Care and
Cleaning section for instructions on defrosting
the freezer compartment.
Write the model and serial
numbers here:
Model # _______________________
Serial # ________________________
Find these numbers on a label inside
the refrigerator compartment at the
top on the right side. 350A4502P757 49-60709 03-14 ATS

2
IMPORTANT SAFETY INFORMATION.
READ ALL INSTRUCTIONS BEFORE USING.
IMPORTANT SAFETY INFORMATION READ ALL INSTRUCTIONS BEFORE USING
GE Appliances website
For more information on your refrigerator’s operation, visit
www.GEAppliances.ca
This refrigerator must be properly installed and located in
accordance with the Installation Instructions before it is used.
Unplug the refrigerator before cleaning and making repairs.
NOTE: Repairs must be performed by a qualified Service
Professional.
Replace all parts and panels before operating.
Because of potential safety hazards under certain conditions,
we strongly recommend against the use of an extension cord.
However, if you must use an extension cord, it is absolutely
necessary that it be a UL-listed (in the United States) or a CSA
certified (in Canada), 3-wire grounding type appliance extension
cord having a grounding type plug and outlet and that the
electrical rating of the cord be 15 amperes (minimum) and
120 volts.
To prevent suffocation and entrapment hazards to children,
Remove the fresh food and freezer doors from any refrigerator
before disposing of it or discontinuing its use.
Do not store or use gasoline or other flammable vapors and liquids
in the vicinity of this or any other appliance.
Power to the refrigerator cannot be disconnected by any
setting on the control panel, refrigerator must be unplugged to
remove power.
Do not allow children to climb, stand or hang on the door handles
or the shelves in the refrigerator. They could seriously injure
themselves.
Keep fingers out of the “pinch point” areas; clearances between the
doors and between the doors and cabinet are necessarily small. Be
careful closing doors when children are in the area.
Do not touch the cold surfaces in the freezer compartment when
hands are damp or wet, skin may stick to these extremely cold
surfaces.
Do not refreeze frozen foods which have thawed completely.
This is the safety alert symbol. This symbol alerts you to potential hazards that can kill or hurt you and others. All
safety messages will follow the safety alert symbol and the word “DANGER”, “WARNING”, or “CAUTION”. These words are
defined as:
DANGER Indicates a hazardous situation which, if not avoided, will result in death or serious injury.
WARNING Indicates a hazardous situation which, if not avoided, could result in death or serious injury.
CAUTION Indicates a hazardous situation which, if not avoided, could result in minor or moderate injury.
IMPORTANT SAFETY INSTRUCTIONS
To reduce the risk of fire, explosion, electric shock, or injury when using your
refrigerator follow these basic safety precautions:
REFRIGERATOR SAFETY INFORMATION
SAFETY
WARNING

READ AND FOLLOW THIS SAFETY INFORMATION CAREFULLY.
SAVE THESE INSTRUCTIONS
GEAppliances.ca
3
WARNING Explosion Hazard.
Keep flammable materials and vapors, such as gasoline, away from refrigerator. Failure to do so can
result in fire, explosion, or death.
INSTALLATION
Do not, under any circumstances, cut or remove the third (ground) prong from the power cord.
For personal safety, this appliance must be properly grounded.
The power cord of this appliance is equipped with a 3-prong
(grounding) plug which mates with a standard 3-prong
(grounding) wall outlet to minimize the possibility of electric
shock hazard from this appliance.
Have the wall outlet and circuit checked by a qualified
electrician to make sure the outlet is properly grounded.
Where a standard 2-prong wall outlet is encountered, it is
your personal responsibility and obligation to have it replaced
with a properly grounded 3-prong wall outlet. Do not use an
adapter.
The refrigerator should always be plugged into its own
individual electrical outlet which has a voltage rating that
matches the rating plate.
A 115 Volt AC, 60 Hz, 15- or 20-amp fused, grounded
electrical supply is required. This provides the best
performance and also prevents overloading house wiring
circuits which could cause a fire hazard from overheated
wires.
Never unplug your refrigerator by pulling on the power cord.
Always grip plug firmly and pull straight out from the outlet.
Repair or replace immediately all power cords that have
become frayed or otherwise damaged. Do not use a cord
that shows cracks or abrasion damage along its length or at
either end.
When moving the refrigerator away from the wall, be careful
not to roll over or damage the power cord.
CONNECTING ELECTRICITY
WARNING Electrical Shock Hazard.
Plug into a grounded 3-prong outlet
Do not remove the ground prong
Do not use an adapter
Failure to follow these instructions can result in death, fire, or electrical shock.
SAFETY (CONT.)
WARNING Suffocation and child entrapment hazard.
Remove fresh-food and freezer doors from the refrigerator, prior to disposal. Failure to do so can
result in child entrapment which can lead to death or brain damage.
Child entrapment and suffocation are not problems of the past.
Junked or abandoned refrigerators are still dangerous even if
they will sit for “just a few days.” If you are getting rid of your old
refrigerator, please follow the instructions below to help prevent
accidents.
Before You Throw Away Your Old Refrigerator or
Freezer:
Take off the fresh food and freezer doors.
Leave the shelves in place so that children may not easily
climb inside.
Refrigerants
All refrigeration products contain refrigerants, which under
federal law must be removed prior to product disposal. If you
are getting rid of an old refrigeration product, check with the
company handling the disposal about what to do.
PROPER DISPOSAL OF YOUR OLD REFRIGERATOR
IMPORTANT:
4
About the refrigerator controls and features.
Control Settings
Features
The temperature control maintains the temperature in
the refrigerator. Setting the control to MIN is the warmest
setting. Setting the control to MAX is the coldest setting.
Set the control to MED.
Allow 24 hours for the refrigerator to reach the
MED temperature. If you want a colder or warmer
temperature, move the dial one setting at a time. Moving
the control to OFF stops cooling but does not turn off the
power to the refrigerator. Setting the control too high may
cause freezing in the refrigerator depending on the room
temperature.
How To Test Temperatures
Use the milk test. Place a container of milk on a shelf and
check it a day later. If the milk is too warm or too cold,
adjust the temperature control.
After changing the control, allow 24 hours for the
refrigerator to reach the temperature you have set.
The control will look like one of the above.
Shelves
To remove a shelf, lift up the back slightly and pull forward. Some models have multi-position shelves that can be moved to
different levels.
Ice Tray Compartment
This compartment is designed for production of ice cubes and short-term storage (a few days at most) of some commercially-frozen
foods when in contact with the evaporator (cold surface in compartment.)
Door Shelves
Shelves on the door provide convenient storage for frequently used items. Some models have doors that are deep enough to store
large bottles.
OF
F
MI
N
ME
D
MA
X

5
Cleaning the Outside
Keep the outside clean. Wipe with a clean cloth
lightly dampened with kitchen appliance wax or
mild liquid dish detergent. Dry and polish with a
clean, soft cloth.
Do not wipe the refrigerator with a soiled dish
cloth or wet towel. These may leave a residue
that can erode the paint. Do not use scouring
pads, powdered cleaners, bleach or cleaners
containing bleach because these products can
scratch and weaken the paint finish.
Protect the paint finish. The finish on the outside
of the refrigerator is a high quality, baked-on
paint finish. With proper care, it will stay new-
looking and rust-free for years. Apply a coat of
kitchen/ appliance wax when the refrigerator is
new, and then at least twice a year.
Cleaning the Inside
To help prevent odors, leave an open box of
baking soda in the refrigerator.
Unplug the refrigerator before cleaning. If this
is not practical, wring excess moisture out of
sponge or cloth when cleaning around the
control.
Use warm water and baking soda solution–
about a tablespoon (15 ml) of baking soda to
a quart (1 liter) of water. This both cleans and
neutralizes odors. Rinse and wipe dry.
Other parts of the refrigerator–including door
gaskets, fruit and vegetable drawers, and all
plastic parts–can be cleaned the same way.
Do not wash any plastic refrigerator parts in the
dishwasher.
Care and cleaning of the refrigerator. GEAppliances.ca
Replacing the Light Bulb (on some models)
Unplug the refrigerator before replacing a
burned-out bulb. Setting the controls to OFF
does not remove power to the light circuit.
The light bulb is located behind the temperature
control housing and is visible through the light
shield.
Remove the light shield by snapping it from the
bottom of the housing. Gently unscrew the light
bulb. Replace with a bulb of the same or lower
wattage.
Bulb
Light Shield

Care and cleaning of the refrigerator.
Preparing for Vacation
For long vacations or absences, remove food and
unplug the refrigerator. Move the control to the OFF
position, and clean the interior with a baking soda
solution of one tablespoon (15 ml) of baking soda to
one quart (1 liter) of water. Leave the door open.
Defrosting
(on manual defrost models only)
Defrost whenever frost on the wall of the ice
tray compartment becomes 1/4” (0.6 cm) thick.
Never use a sharp or metallic instrument to
remove frost as it may damage the cooling
coils. (A punctured cooling coil will cause
serious problems and void the warranty.) We
recommend using a plastic scraper. Do not
use any electrical device in defrosting your
refrigerator.
To defrost:
Remove foods and ice trays from the ice tray
compartment.
Set the temperature control dial at OFF
position.
On models without a drip tray, place a pan
beneath the ice tray compartment to collect
water.
Defrosting usually takes a few hours. To defrost
faster, keep the door open. Also, pouring warm
(not hot) water on the frosted part may speed
defrosting. Do not use boiling water—it may
damage plastic parts.
After defrosting:
Empty water from the drip tray or from
the pan placed beneath the ice tray
compartment. Wash the tray or pan with
warm water.
Wipe the ice tray compartment with a damp
cloth.
Turn the temperature control to the desired
setting and return food and ice trays to the
refrigerator.
NOTE: If ice buildup is very thick, it may keep
the ice tray compartment door from opening
or closing completely. Don’t try to force it open;
after defrosting, the door will open and close
easily.
Preparing to Move
Secure all loose items such as shelves and
ice trays by taping them securely in place to
prevent damage.
Be sure the refrigerator stays in an upright
position during moving.
6

7
Turn counterclockwise to
raise, clockwise to lower.
LEVELING LEGS
Adjustable legs at the front corners of the refrigerator
should be set so the refrigerator is firmly positioned
on the floor, and the front is raised just enough that
the door closes easily when opened about halfway.
To adjust the leveling legs, turn the legs counterclockwise to
raise the refrigerator, clockwise to lower it.
If you have questions, call 1.800.561.3344 or visit our Website at: GEAppliances.ca
Installation
Refrigerator
Instructions
BEFORE YOU BEGIN
Read these instructions completely and carefully.
• IMPORTANT – Save these instructions for local
inspector’s use.
•IMPORTANT – Observe all governing codes
and ordinances.
• Note to Installer – Be sure to leave these instructions
with the Consumer.
• Note to Consumer – Keep these instructions
for future reference.
LOCATION REQUIREMENTS
• Do not install the refrigerator where the temperature will go
below 50°F (10°C) because it will not run often enough to
maintain proper temperatures.
•
Install it on a floor strong enough to support it fully loaded.
• Do not install it in a recessed area.
• Do not build in the refrigerator.
CLEARANCES
Allow the following clearances for ease of installation and
proper air circulation.
3 and 4 Cubic Foot
(84 and 113 l) Models
Sides 1/2” (13 mm)
Top 2” (51 mm)
Back 2” (51 mm)**
**From the rear cabinet surface to the wall
UNPACKING YOUR REFRIGERATOR
• Remove tape and any labels (except for the rating label)
from your refrigerator. Tape or glue residue can also be
removed by rubbing a small amount of liquid dish soap
over the adhesive with your fingers. Wipe with warm
water and dry.
• Do not use sharp instruments, rubbing alcohol,
flammable fluids, or abrasive cleaners to remove tape
or glue. These products can damage the surface of your
refrigerator.
• When moving the refrigerator, do not tilt the refrigerator
beyond 45° from upright position.
3 Cubic Foot (84 l) Models
4 Cubic Foot (113 l) Models

Leveling legs
Bottom
hinge
Plug
button
Spacer
Hinge
cover
Plug buttons
or screws Hinge
Door Reversal
(on some models)
1. Remove the small plug button on the left
side of the door top cap.
2. Remove the 2 plug buttons or screws on
the left side on top of the cabinet.
3. Remove the plastic hinge cover by lifting
it up by the front edge.
4. Remove the 2 screws from the top hinge.
5. Lift the door up and off the bottom hinge
(right side).
6. Tilt the refrigerator cabinet back to
remove the left leveling leg.
7. Remove the screws on the bottom hinge
(right side) and remove the leveling leg.
Move the bottom hinge to the left side
and secure it with screws. Re-install the
leveling legs.
IMPORTANT: The left leg has a spacer or
spacer feature that must be moved to the
right side leveling leg when the door swing
is reversed.
8. Screw the right leveling leg, with the
spacer, back in place on the right side.
9. Position the door on the left bottom
hinge. With the magnetic gasket holding
the door in place, secure the top hinge
with screws.
10. Make sure the door is aligned with the
refrigerator cabinet before continuing.
11. Replace the hinge cover on top of the
hinge.
12. Put the plug button in the hole on the
right side of the door cap.
13. Put the 2 plug buttons on the right side
on top of the cabinet
8
Installation Instructions
POWER CORD
• Plug the refrigerator power cord into its own properly grounded wall outlet with a voltage rating matching that on the
refrigerator rating plate.
• Do not use an extension cord.
• Read all safety precautions on pages 2 and 3.
WARNING Explosion Hazard.
Keep flammable materials and vapors, such as gasoline, away from refrigerator. Failure to do so can
result in fire, explosion, or death.
CONNECTING ELECTRICITY
WARNING Electrical Shock Hazard.
Plug into a grounded 3-prong outlet
Do not remove the ground prong
Do not use an adapter
Failure to follow these instructions can result in death, fire, or electrical shock.

9
Plug
button
Hinge cover
Plug buttons
or screws Hinge
2-Door Reversal
(on some models)
1. Remove the small plug button on the left
side of the door top cap.
2. Remove the 2 plug buttons or screws on
the left side on top of the cabinet.
3. Remove the plastic hinge cover by lifting
it up by the front edge.
4. Remove the 2 screws from the top hinge.
5. Lift the freezer door up and off the middle
hinge (right side). Set the door on a non-
scratching surface with the outside up.
6. Remove the center hinge by removing
the 2 screws. Lift the hinge to remove.
7. Lift the fresh food door off of the bottom
hinge. Set the door on a non-scratching
surface with the outside up.
8. Tilt the refrigerator cabinet back to
remove the left leveling leg.
9. Remove the screws on the bottom hinge
(right side) and remove the leveling leg.
Move the bottom hinge to the left side
and secure it with screws. Re-install the
leveling legs.
IMPORTANT: The left leg has a spacer or
spacer feature that must be moved to the
right side leveling leg when the door swing
is reversed.
10. Screw the right leveling leg, with the
spacer, back in place on the right side.
11. Remove the two plug buttons on the left
side at the center and install them on the
right.
12. Position the door on the left bottom
hinge. With the magnetic gasket holding
the door in place, make sure the door is
aligned with the refrigerator, and secure
the center hinge on the left with screws.
13.
Place the freezer door on the center hinge
over the pin. Assure the door is aligned
horizontally and vertically, and that the
gasket seals on all sides.
14.
Replace the top hinge on the left side with
screws.
15. Replace the hinge cover on top of the
hinge.
16. Put the plug button in the hole on the
right side of the door cap.
17. Put the 2 plug buttons on the right side
on top of the cabinet
Plug
buttons
Leveling legs
Bottom
hinge
Spacer
Center
hinge Screws
Installation Instructions

10
Troubleshooting Tips
Save time and money! Review the chart below first and you
may not need to call for service.
Before you call for service…
Problem Possible Causes What To Do
Refrigerator does not operate Control in OFF position. Move the control to a temperature
setting.
Refrigerator is unplugged. Push the plug completely into the
outlet.
The fuse is blown/circuit breaker is
tripped. Replace fuse or reset the breaker.
Vibration or rattling (slight vibration is
normal) Front leveling legs need adjusting. See Leveling Legs.
Refrigerator is on an uneven surface. Use shims to level the refrigerator.
Motor operates for long periods or cycles Normal when refrigerator is first
plugged in. Wait 24 hours for the refrigerator to
completely cool down.
Often occurs when large
amounts of
food are placed in refrigerator.
This is normal.
Door left open. Check to see if package is holding
door open.
Hot weather or frequent door
openings. This is normal.
Temperature control set at the
coldest setting. See About the control.
Not enough clearance from the wall. See Clearances in Preparing to install
the refrigerator.
Refrigerator too warm Temperature control not set cold
enough. See About the control.
Warm weather or frequent door
openings. Set the temperature control one step
colder. See About the control.
Door left open. Check to see if package is holding
door open.
Cabinet sides are warm This is normal for a hot wall type
condenser.
Refrigerator has odor Foods transmitting odor to
refrigerator. Foods with strong odors should be
tightly wrapped.
Keep an open box of baking soda in
the refrigerator; replace every three
months.
Moisture forms on outside of refrigerator Not unusual during periods of high
humidity. Wipe surface dry.
Moisture collects inside (in humid weather,
air carries moisture into refrigerator when
door is opened)
Too frequent or too long door
openings.
Refrigerator too cold Temperature control set too cold. See About the control.

11
OWNERSHIP REGISTRATION
P.O. BOX 1780
MISSISSAUGA, ONTARIO
L4Y 4G1
(FOR CANADIAN CONSUMERS ONLY -
POUR RÉSIDENTS CANADIENS SEULEMENT)
Please place in envelope and mail to:
Veuillez mettre dans une enveloppe et envoyez à :

12
CUT ALONG THIS LINE AND RETURN CARD – THANKS
DÉCOUPEZ ICI ET ENVOYEZ LA FICHE – MERCI
For Canadian
Customers
Pour les
consommateurs
canadiens
OWNERSHIP REGISTRATION CERTIFICATE – FICHE D’INSCRIPTION DU PROPRIÉTAIRE
Please register your product to enable us to contact you in
the remote event a safety notice is issued for this product
and to allow for efficient communication under the terms of
our warranty, should the need arise.
REGISTER ON-LINE:
www.geappliances.ca
ENREGISTREMENT SUR INTERNET À :
www.electromenagersge.ca
MAIL TO:P.O. BOX 1780, MISSISSAUGA
POSTEZ À : ONTARIO, L4Y 4G1
MR. / M. MRS. / MME
MISS/MLLE MS.
FIRST NAME / PRÉNOM
LAST NAME / NOM
STREET NO / N
O
RUE STREET NAME / RUE
APT.NO/APP./RR#
CITY / VILLE
PROVINCE
AREA CODE/
IND. RÉG.
TELEPHONE/TÉLÉPHONE E-MAIL/COURRIEL
DID YOU PURCHASE A SERVICE CONTRACT FOR THIS APPLIANCE?
AVEZ-VOUS ACHETÉ UN CONTRAT DE SERVICE POUR CET APPAREIL ?
YES/OUI
NO/NON
IF YES/SI OUI : EXPIRATION
Y/A MD/J
NAME OF SELLING DEALER / NOM DU MARCHAND
INSTALLATION DATE / DATE D’INSTALLATION
Y/A M D/J
CORRESPONDENCE
ENGLISH
CORRESPONDANCE
FRANÇAIS
I do not wish to receive any promotional offers regarding this product.
Je ne désire pas recevoir d’offres promotionnelles concernant ce produit
.
MODEL / MODÈLE
SERIAL / SÉRIE
Veuillez enregistrer votre produit afin de nous permettre de
communiquer avec vous si jamais un avis de sécurité concernant
ce produit était émis et de communiquer facilement avec vous en
vertu de votre garantie, si le besoin s’en fait sentir.
POSTAL CODE/CODE POSTAL

This warranty is extended to the original purchaser and any succeeding owner for products purchased for use in Canada.
If the product is located in an area where service by a Mabe Canada Authorized Servicer is not available, you may be
responsible for a trip charge or you may be required to bring the product to an Authorized Mabe Canada Service location.
Some provinces do not allow the exclusion or limitation of incendental or consequential damages, so the above limitation or
exclusion may not apply to you. This warranty gives you specific legal rights, and you may also have other rights which vary
from province to province. To know what your legal rights are in your province, consult your local or provincial consumer
affairs office.
Warrantor: Mabe Canada Inc., Burlington, ON L7R 5B6
For The Period Of: Mabe Will Replace:
One Year Any part of the refrigerator which fails due to a defect in materials or workmanship. During this
From the date of the limited one-year warranty, Mabe will also provide, free of charge, all labor and related service to
original purchase replace the defective part.
Service trips to your home to teach you how to use
the product.
Improper installation, delivery or maintenance.
Failure of the product if it is abused, misused, or
used for other than the intended purpose or used
commercially.
Loss of food due to spoilage.
Damage caused after delivery.
Replacement of house fuses or resetting of circuit
breakers.
Damage to the product caused by accident, fire, floods
or acts of God.
Incidental or consequential damage caused by possible
defects with this appliance.
Product not accessible to provide required service.
What Mabe Will Not Cover:
13
EXCLUSION OF IMPLIED WARRANTIES—Your sole and exclusive remedy is product repair as provided in this
Limited Warranty. Any implied warranties, including the implied warranties of merchantability or fitness for a
particular purpose, are limited to one year or the shortest period allowed by law.
Refrigerator Warranty.
All warranty service provided by our Factory Service Centers, or
an authorized Customer Care®technician. To schedule service,
contact us at 1.800.561.3344. Please have serial number and
model number available when calling for service.
Staple your receipt here.
Proof of the original purchase
date is needed to obtain
service under the warranty.

Consumer Support.
GE Appliances Website GEAppliances.ca
Have a question or need assistance with your appliance? Try the GE Appliances Website, any day of the year!
For greater convenience and faster service, you can now download Owner’s Manuals, order parts or even schedule
service on-line.
Schedule Service GEAppliances.ca
Expert repair service is only one step away from your door. Get on-line and schedule your service at your convenience any
day of the year! Or call 1.800.561.3344 during normal business hours.
Real Life Design Studio GEAppliances.ca
We support the Universal Design concept—products, services and environments that can be used by people of all ages,
sizes and capabilities. We recognize the need to design for a wide range of physical and mental abilities and impairments.
For details of our Universal Design applications, including kitchen design ideas for people with disabilities, check out our
Website today.
In Canada, contact: Manager, Consumer Relations, Mabe Canada Inc.
Suite 310, 1 Factory Lane
Moncton, N.B. E1C 9M3
Extended Warranties GEAppliances.ca
Purchase an extended warranty and learn about special discounts that are available while your warranty is still in effect.
You can purchase it on-line anytime, or call 1.888.261.2133 during normal business hours. Consumer Home Services will
still be there after your warranty expires.
Parts and Accessories GEAppliances.ca
Individuals qualified to service their own appliances can have parts or accessories sent directly to their homes
(VISA, MasterCard and Discover cards are accepted). Order on-line today, 24 hours every day or by phone during
normal business hours.
Instructions contained in this manual cover procedures to be performed by any user. Other servicing generally should
be referred to qualified service personnel. Caution must be exercised, since improper servicing may cause unsafe
operation.
Customers in Canada should consult the yellow pages for the nearest Mabe service center, or call 1.800.661.1616.
Contact Us GEAppliances.ca
If you are not satisfied with the service you receive, contact us on our Website with all the details including your phone
number, or write to: Director, Consumer Relations, Mabe Canada Inc.
Suite 310, 1 Factory Lane
Moncton, NB, E1C 9M3
Register Your Appliance GEAppliances.ca
Register your new appliance on-line—at your convenience! Timely product registration will allow for enhanced
communication and prompt service under the terms of your warranty, should the need arise. You may also mail
in the pre-printed registration card included in the packing material. In Canada: www.GEAppliances.ca.
Printed in China

www.electromenagersge.ca
Réfrigérateurs
GMR03BLH
GMR05BLH
Manuel de l'utilisateur
et instructions
d'installation
Sécurité ........................... 2, 3
Utilisation
Réglage des commandes...............4
Caractéristiques du réfrigérateur .......4
Entretien et nettoyage............... 5, 6
Remplacement de l'ampoule ...........5
Installation.......................7 à 9
Dépannage...........................10
Service à la clientèle
Enregistrement du produit.............11
Garantie ..............................13
Service à la clientèle
. . . . . . . . . . . . . . . . . . Dernière de couverture
ATTENTION :
Décongélation—N'utilisez pas d'objet tranchant
ou pointu pour enlever le givre ou la glace
des surfaces du compartiment congélateur.
Vous risqueriez de perforer le serpentin
de refroidissement, ce qui empêcherait
l'appareil de maintenir des températures de
refroidissement adéquates et annulerait votre
garantie. Reportez-vous à la section Entretien et
nettoyage pour obtenir des instructions sur la
décongélation du compartiment congélateur.
Inscrivez ici les numéros de modèle
et de série :
Nº de modèle ____________________
Nº de série ______________________
Vous trouverez ces numéros sur une
étiquette à l'intérieur du compartiment
réfrigérateur sur la partie supérieure du
côté droit. 350A4502P757 49-60709 03-14 ATS

2
CONSIGNES DE SÉCURITÉ IMPORTANTES.
LISEZ TOUTES LES INSTRUCTIONS AVANT D’UTILISER VOTRE APPAREIL.
CONSIGNES DE SÉCURITÉ IMPORTANTES LISEZ TOUTES LES INSTRUCTIONS AVANT D'UTILISER VOTRE APPAREIL
Site Web des électroménagers GE
Pour obtenir de plus amples renseignements sur le fonctionnement de votre réfrigérateur, visitez le
www.electromenagersge.car.
Ce réfrigérateur doit être installé conformément aux
instructions d'installation avant d'être utilisé.
Débranchez l'appareil avant de le nettoyer et de le réparer.
REMARQUE : Les réparations doivent être effectuée par un
professionnel qualifié.
Replacez toutes les pièces et tous les panneaux avant
l'utilisation.
En raison de risques à la sécurité dans certaines situations,
nous vous déconseillons fortement l'utilisation d'un cordon
prolongateur. Toutefois, si vous devez utiliser un cordon
prolongateur, celui-ci doit absolument être homologué UL (aux
États-Unis) ou CSA (au Canada), il doit être de type trifilaire
avec mise à la terre, il doit être muni d'une fiche et d'une prise
de mises à la terre, et il doit être conçu pour une alimentation
nominale de 15 A (minimum) et de 120 V.
Pour éviter que des enfants ne s'asphyxient et ne s'enferment,
démontez les portes du congélateur et du compartiment
de réfrigération avant de mettre l'appareil au rebut ou
d’interrompre son utilisation.
Ne rangez pas et n'utilisez pas d'essence ou d'autres vapeurs
et liquides inflammables à proximité de cet appareil ou de tout
autre appareil électroménager.
Aucun réglage du panneau de commande du réfrigérateur
ne peut couper son alimentation électrique. Le réfrigérateur
doit être débranché de la prise électrique pour couper son
alimentation.
Ne laissez pas les enfants grimper, s'asseoir, se tenir debout ni
se pendre aux poignées de porte ou clayettes du réfrigérateur.
Ils pourraient se blesser gravement.
Éloignez vos doigts des zones où vous pouvez facilement vous
faire pincer : les espaces entre les portes, et entre les portes et
les armoires, sont toujours étroits. Soyez prudent lorsque vous
fermez les portes du réfrigérateur en présence d'enfants.
Ne touchez pas aux surfaces froides dans le compartiment
congélateur lorsque vos mains sont mouillées ou humides, la
peau pourrait coller aux surfaces extrêmement froides.
Ne recongelez pas d'aliments qui ont complètement décongelé.
Il s'agit du symbole d'avertissement de sécurité. Il vous avertit des dangers potentiels qui pourraient provoquer la mort ou des
blessures, à vous ou à autrui. Tous les messages de sécurité suivent ce symbole d'avertissement de sécurité et les mots « DANGER »,
« AVERTISSEMENT » ou « ATTENTION ». Voici la définition de ces mots :
Indique une situation dangereuse qui, si elle n'est pas évitée, entraînera la mort ou des blessures sérieuses.
Indique une situation dangereuse qui, si elle n'est pas évitée, pourrait entraîner la mort ou des blessures sérieuses.
Indique une situation dangereuse qui, si elle n'est pas évitée, pourrait entraîner des blessures mineures ou plus
sérieuses.
CONSIGNES DE SÉCURITÉ IMPORTANTES
Pour réduire les risques d'incendie, d'explosion, de choc électrique ou de blessures
lorsque vous utilisez le réfrigérateur, suivez les mesures de sécurité de base suivantes :
CONSIGNES DE SÉCURITÉ RELATIVES AU RÉFRIGÉRATEUR
SÉCURITÉ
AVERTISSEMENT
DANGER
AVERTISSEMENT
ATTENTION

LISEZ ATTENTIVEMENT ET RESPECTEZ CES CONSIGNES DE SÉCURITÉ.
CONSERVEZ CES INSTRUCTIONS
www.electromenagersge.ca
3
AVERTISSEMENT
Risque d'explosion.
Tenez les matières et les vapeurs inflammables, comme l'essence, à l'écart du réfrigérateur. Le non-respect
de cette consigne peut entraîner un incendie, une explosion ou la mort.
INSTALLATION
Ne coupez ou ne retirez en aucun cas la troisième broche (mise à la terre) de la fiche du cordon
d’alimentation.
Pour des raisons de sécurité, cet appareil doit être correctement mis à la terre.
Pour diminuer les risques de choc électrique, le cordon
d’alimentation de cet appareil est muni d’une fiche à
3 broches (mise à la terre) qui correspond à une prise
murale à 3 alvéoles (prise mise à la terre).
Faites vérifier la prise murale et le circuit par un
électricien qualifié pour vous assurer que la prise est
correctement mise à la terre.
Si la prise murale comporte 2 alvéoles, il vous incombe de
la faire remplacer par une prise à 3 alvéoles correctement
mise à la terre. N’utilisez pas de fiche d’adaptation.
Le réfrigérateur doit toujours être le seul appareil branché
sur une prise de courant dont la tension nominale
correspond à celle indiquée sur la plaque signalétique.
Une alimentation électrique mise à la terre de 115 volts
CA, 60 Hz, avec fusible de 15 ou 20 A est nécessaire.
Cela assure de meilleures performances et évite toute
surcharge, et donc surchauffe, des circuits du domicile
qui pourrait être à l'origine d'un incendie.
Ne débranchez jamais le réfrigérateur en tirant sur son
cordon d'alimentation. Saisissez fermement la fiche et
sortez-la de la prise en tirant bien droit.
Réparez ou remplacez immédiatement tous les cordons
électriques effilochés ou endommagés. N'utilisez pas de
cordon qui présente des signes d'usure ou de fissure.
Lorsque vous éloignez l'appareil du mur, faites attention à
ne pas le faire rouler sur le cordon d'alimentation et à ne
pas endommager ce dernier.
RACCORDEMENT ÉLECTRIQUE
AVERTISSEMENT
Risque de choc électrique.
Branchez l'appareil sur une prise à 3 alvéoles mise à la terre
Ne retirez pas la broche de mise à la terre de la fiche
N’utilisez pas de fiche d’adaptation
Le non-respect de ces instructions peut entraîner un choc électrique, un incendie ou même la mort.
SÉCURITÉ (SUITE)
AVERTISSEMENT
Risque d'asphyxie et d'enfermement des enfants.
Avant la mise au rebut du congélateur, retirez les portes des compartiments de réfrigération et de
congélation de l'appareil. Dans le cas contraire, un enfant pourrait rester enfermer et mourir ou souffrir de
dommages cérébraux.
Les enfants pris au piège ou morts d'asphyxie sont
un problème courant. Les réfrigérateurs abandonnés
ou mis au rebut sont toujours dangereux même si
ce n'est que pour « quelques jours ». Si vous vous
débarrassez de votre vieux réfrigérateur, veuillez suivre
les instructions ci-dessous pour éviter tout accident.
Avant de mettre au rebut votre ancien réfrigérateur
ou congélateur :
Retirez les portes du congélateur et du
compartiment de réfrigération.
Laissez les clayettes en place afin d'empêcher les
enfants de grimper à l'intérieur.
Fluides frigorigènes
Tout appareil de réfrigération contient des frigorigènes
qui doivent être retirés avant la mise au rebut de
l'appareil. Si vous vous débarrassez d'un ancien
appareil, adressez-vous à l'entreprise d'élimination des
déchets pour savoir comment procéder.
MISE AU REBUT ADÉQUATE DE VOTRE VIEUX RÉFRIGÉRATEUR
IMPORTANT :

4
À propos des commandes et fonctions du réfrigérateur
Réglage des commandes
Caractéristiques
Le bouton de commande de température maintient la
température dans le réfrigérateur. MIN (minimum) est le
réglage le moins froid. MAX (maximum) est le réglage le plus
froid. Placez le bouton de commande à MED.
Il faut 24 heures au réfrigérateur pour qu'il atteigne la
température MED. Si vous souhaitez une température plus
élevée ou moins élevée, tournez le bouton de commande
d'un réglage à la fois. Placer le bouton de commande en
position OFF (arrêt) arrête le refroidissement, mais ne coupe
pas l'alimentation du réfrigérateur. Utiliser un réglage
trop élevé peut entraîner la congélation des aliments du
réfrigérateur selon la température ambiante.
Comment vérifier les températures
Utilisez le test du lait. Placez un contenant de lait sur une
clayette et vérifiez sa température un jour plus tard. Si le
lait est trop chaud ou trop froid, ajustez la commande de
température.
Après avoir modifié le réglage de la température, attendez
24 heures pour que la température du réfrigérateur atteigne
la température désirée.
Le bouton de commande ressemble à un de ceux illustrés ci-dessus.
Clayettes
Pour retirer une clayette, soulevez légèrement l'arrière de celle-ci et tirez-la vers vous. Certains modèles disposent de
clayettes à positions multiples, qui peuvent être installées à des hauteurs différentes.
Compartiment à glaçons
Ce compartiment est conçu pour produire des glaçons et pour le stockage à court terme (au maximum quelques jours) de
certains aliments congelés commerciaux, lorsqu'il y a contact avec l'évaporateur (la surface froide du compartiment).
Balconnets
Les balconnets de la porte fournissent un espace de rangement pratique pour les articles fréquemment utilisés. Certains
modèles disposent de portes assez profondes pour contenir de grandes bouteilles.
OF
F
MI
N
ME
D
MA
X

5
Nettoyage de la surface extérieure
L'extérieur doit rester propre. Nettoyez avec un
chiffon propre légèrement imbibé de cire pour
électroménagers ou de liquide à vaisselle doux.
Séchez et polissez à l'aide d'un linge doux et propre.
N'essuyez pas le réfrigérateur avec un torchon
sale ou une serviette humide. Ceux-ci peuvent
laisser un résidu qui pourrait endommager la
peinture. N'utilisez pas de tampon à récurer, de
poudre nettoyante, d'agent de blanchiment (ou de
produit qui en contient) car ils peuvent rayer ou
fragiliser la peinture.
Protection de la peinture L'extérieur du
réfrigérateur est recouvert d'une peinture cuite
au four de haute qualité. S'il est bien entretenu,
le revêtement garde son aspect neuf et ne rouille
pas pendant de nombreuses années. Appliquez
une couche de cire pour électroménagers de
cuisine lorsque le réfrigérateur est encore neuf, puis
répétez l'application au moins deux fois par an.
Nettoyage de l'intérieur
Pour éviter les odeurs désagréables, laissez une
boîte de bicarbonate de soude ouverte dans le
réfrigérateur.
Débranchez le réfrigérateur avant de le nettoyer.
Si cela n'est pas pratique, essorez bien l'éponge ou
le chiffon utilisés lorsque vous nettoyez autour du
bouton de commande.
Utilisez une solution d'eau chaude et de
bicarbonate de soude – environ une cuillère à
soupe (15 mL) de bicarbonate de soude pour
1 litre d'eau. Cela sert à nettoyer et à neutraliser
les odeurs. Rincez et essuyez.
Les autres pièces du réfrigérateur – dont les joints
de porte, les bacs à fruits et légumes, et les pièces
en plastique – peuvent être nettoyées de la même
manière.
Ne nettoyez aucune des pièces en plastique du
réfrigérateur au lave-vaisselle.
Entretien et nettoyage du réfrigérateur www.electromenagersge.ca
Remplacement de l'ampoule (certains modèles)
Débranchez le réfrigérateur avant de remplacer
une ampoule grillée. Tourner le bouton de
commande à la position OFF (arrêt) ne coupe pas
l'alimentation du circuit d'éclairage.
L'ampoule est située derrière le boîtier de la
commande de température et est visible derrière
le couvre-ampoule.
Enlevez le couvre-ampoule de la base du boîtier.
Dévissez doucement l'ampoule. Remplacez-la par
une ampoule de puissance identique ou inférieure.
Ampoule
Couvre-ampoule

Entretien et nettoyage du réfrigérateur
Avant de partir en vacances
En cas de longues vacances ou d’une absence
prolongée, retirez les aliments du réfrigérateur et
débranchez-le. Tournez la bouton de commande
à la position OFF (arrêt) et nettoyez l'intérieur du
réfrigérateur à l'aide d'une solution composée d'une
cuillerée à soupe (15 mL) de bicarbonate de soude et
d'une pinte (1 L) d'eau. Laissez la porte ouverte.
Décongélation (uniquement sur les modèles à dégivrage manuel)
Procédez au dégivrage de l'appareil dès que le
givre sur les parois du compartiment à glaçons
atteint 1/4 po (0,6 cm) d'épaisseur. N'utilisez
jamais d'outil pointu ou métallique pour enlever
le givre, car cela pourrait endommager les
serpentins de refroidissement. (La perforation
d'un serpentin de refroidissement peut causer
un grave problème à l'appareil et annulera sa
garantie.) Nous vous recommandons d'utiliser un
grattoir en plastique. N'utilisez jamais d'appareil
électrique pour dégivrer votre réfrigérateur.
Pour dégivrer votre réfrigérateur :
Retirez la nourriture et les moules à glaçons du
réfrigérateur et du compartiment à glaçons.
Réglez le bouton de commande de température
à la position OFF (arrêt).
Pour les modèles dépourvus de plateau
d'égouttement, placez un récipient sous le
compartiment à glaçons afin de recueillir l'eau.
Le dégivrage prend généralement quelques
heures. Pour accélérer le dégivrage, laissez la
porte du réfrigérateur ouverte. Verser de l'eau
tiède (et non chaude) sur les pièces givrées
accélère également le dégivrage. N'utilisez jamais
d'eau bouillante, cela pourrait endommager les
pièces en plastique.
Après le dégivrage :
Videz l'eau du plateau d'égouttement ou du
récipient placé sous le compartiment à glaçons.
Nettoyez le plateau ou le récipient avec de l'eau
tiède.
Nettoyez le compartiment à glaçons avec un
chiffon humide.
Tournez le bouton de commande de
température au réglage désiré et replacez
les aliments et les moules à glaçons dans le
réfrigérateur.
REMARQUE : Si le givre atteint une épaisseur
importante, il pourrait empêcher la porte
du compartiment à glaçons de se fermer
complètement. Ne tentez pas d'ouvrir cette porte
en la forçant; après le dégivrage du réfrigérateur,
elle pourra s'ouvrir et se fermer facilement.
Avant un déménagement
Afin d'éviter d'endommager les pièces mobiles
comme les clayettes et les bacs à glaçons,
immobilisez-les au moyen de ruban adhésif.
Assurez-vous que le réfrigérateur reste en position
verticale durant le déménagement.
6
This manual suits for next models
1
Table of contents
Languages:
Other GE Refrigerator manuals

GE
GE GSE22 Operating instructions

GE
GE Profile PGCS1PJZSS Manual

GE
GE TBX18SABAA User instructions

GE
GE PTC22MFMALCC and Safety guide

GE
GE GSS25MSSSS Safety guide

GE
GE GSHL5KGXLS - CleanSteel 25.4 cu. Ft.... Assembly instructions

GE
GE TBF72 User manual

GE
GE Profile PFSF5NFZ Manual

GE
GE ENERGY STAR GSH25JFX Manual

GE
GE GFSL6KKY Manual
Popular Refrigerator manuals by other brands

Samsung
Samsung SRF671BFH2 user manual

Caldura
Caldura Mini Fridge operating instructions

Mitsubishi Electric
Mitsubishi Electric MR-L650EN series operating instructions

Sub-Zero
Sub-Zero 700TC-3 Service manual

True
True GDM-33C-PT-54 Specifications

Victory
Victory VUR-3-BT Installation, operation and troubleshooting instructions