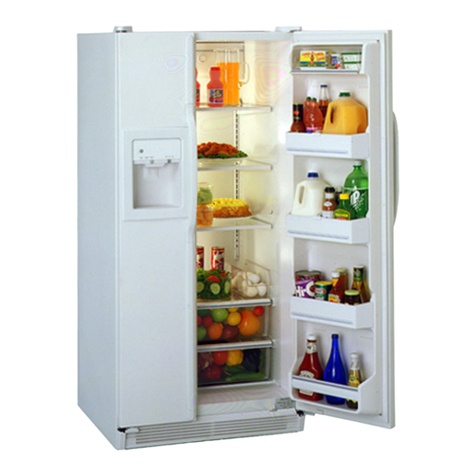
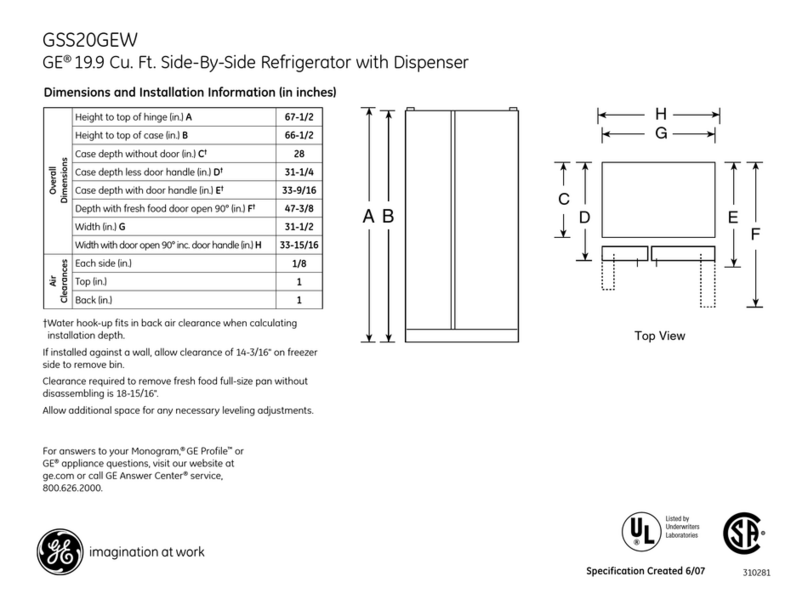
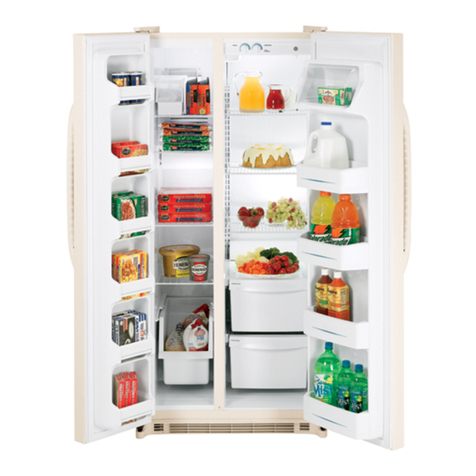
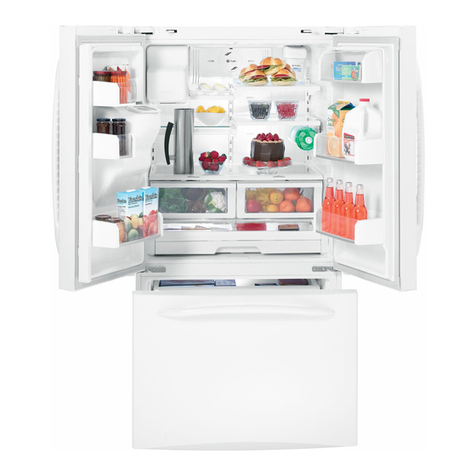
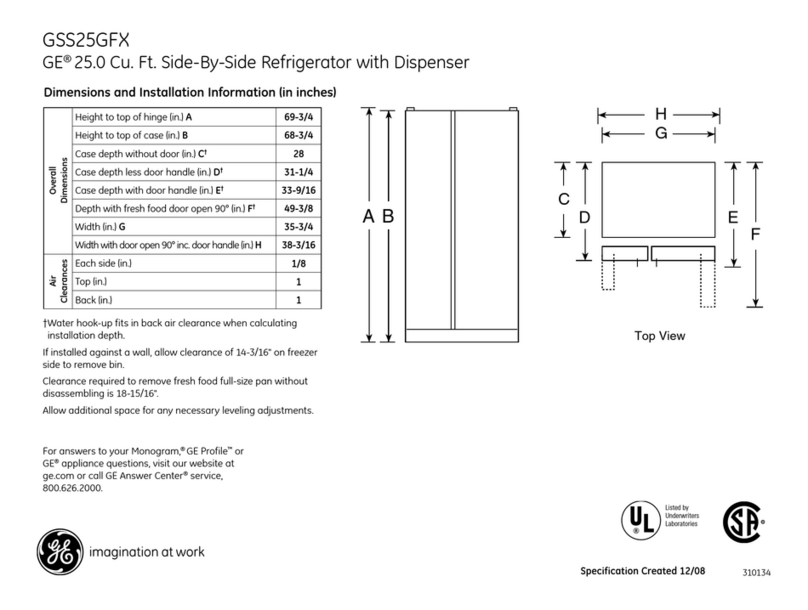
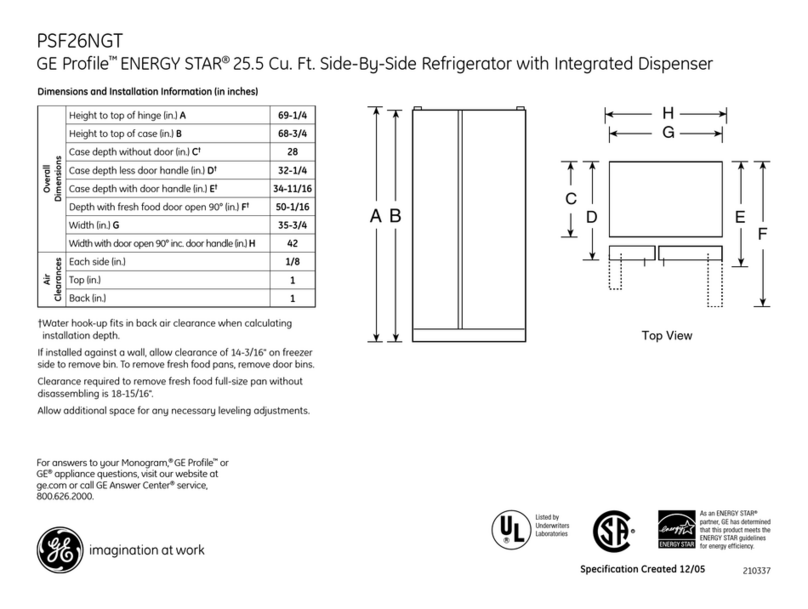
GE GSHF9NGYACBB and Safety guide

GEAppliances.com
Safety Instructions ........... 2-3
Operating Instructions
Automatic lcemoker .............. 11
Care and Cleaning ............ 13, 14
Crispers and Pans ............ 10
Ice and Water Dispenser ........ 12, 13
Refrigerator Doors ................. 9
Replacing the Light Bulbs ......... 1S
Shelves and Bins ................. 7, 8
Temperature Controls ............ 4
TurboCoof ..................... 4
Water Filter .................... 5, 6
Installation Instructions
Installing the Refrigerator ., 21-24
Moving the Refrigerator .......... 17-20
Preparing to Install
the Refrigerator ............. 16
Water Line Installation .......... 25-27
Troubleshooting Tips , , ,28-31
Normat Operating Sounds ........ 28
Consumer Support
Consumer Support .......... Back Cover
Performance Data Sheet , ,32, 33
State of California Water
Treatment Device Certificate 34, 35
Warrantg (Canadian} .......... 36
Warrantg (US ) .......... 37
Models 22, 23, 25, 25, 27 and 29
CSte hC6te
R frig rateurs
La section fran_aise commence 6 la page 38
Ladoa Lado
Refrigeradores
La secci6n en espafiol empieza en la p@ina 74
Write the model and serial numbers
here:
Model #
Serial #
Findthese numbers on a label inside
the refrigerator compartment at the
top on the right side 200D8074P037 49-50587 02-09 JR

_,_ _L:, ,__,
: • Li :•
_ii__,i :i:_i_::i
n
v A
÷
w ° .
vn trt
0
0
A ,
tt. i
o
u'l
E
IMPORTANT SAFETYINFORMATION.
READ ALL INSTRUCTIONS BEFOREUSING.
HIIIIIIIIIIIIII,IIiH, ii i.......................
AWARNING!
Use this appliance onfg for its intended purpose as described in this Owner's Manual,
SAFETYPRECAUTIONS
When using electrical appliances, basic safet_lprecautions should be followed, including the following:
ii:¸•
Thisrefligerator must be properlg installed
and located in accordancewith theInstallation
Instructionsbeforeit isused
Donot allow childrento climb,stand or hang
on the shelvesinthe refligerator.Theycould
damagethe refrigeratorand seriouslyinjure
themselves
Do not touch the cold surfaces in the freezer
compartment when hands are damp or wet
Skinmay stick to these extremely cold surfaces.
Do not store or use gasoline or other flammable
vapors and liquids in the vicinity of this or any
other appliance
In refrigerators with automatic icemakers,
avoid contact with the moving parts of the
ejector mechanism or with the heating element
located on the bottom of the icemaker. Do
not place fingers or hands on the automatic
icemaking mechanism while the refrigerator
is plugged in
Keepfingersout of the "pinchpoint" areas;
clearancesbetween the doorsand between
the doorsand cabinet are necessarilysmall
Becareful closingdoorswhen childrenare
in the area
:: Unplugthe refligerator beforecleaningand making
repairs
NOTE:Westronglyrecommendthat any servicing
beperformed b_la qualifiedindividual
::::::Donot refreezefrozenfoodswhich have
thawed completely
NOTE:Turning the refrigerator off vio the controls on
the touch panel does not shut off dectricat power to
the refrigerator.

................OAr G::ER:RISK OF CHILD GEAppliances,:,com
ENTRAPMENT
PROPERDISPOSALOFTHEREFRIGERATOR
Childentrapment andsuffocation arenot problems
ofthe past Junkedor abandoned refrigeratorsare
stilldangerous evenifthey willsit for '_iustafew
days" Ifyou aregetting ridof your old refrigerator_
pleasefollow the instructionsbelowto help prevent
accidents
Before You ThrowAway Your Old
Refrigerator or Freezer:
_:::Takeoff the doors
:::::Leavetheshelvesin placesothat childrenmay not
easilyclimb inside
Refrigerants
All refrigeration products contain refrigerants,which
under federal law must be removed prior to product
disposal If gou are getting rid of an old refrigeration
product, check with the company handling the
disposal about what to do
i!::!..........USEOF EXTENSIONCORDS
Because of potentia! safety hazards under certain conditions we strongtg recommend against the use
dan extension cord
However,if you must useonextensioncord.it isabsolutelynecessarythat it be o UL-listed(inthe UnitedStates}
or e CSA-listed(inCanada}.3-wiregrounding type applianceextensioncordhavinga grounding type plug and
outlet and that the electricalratingof thecord be 15amperes(minimum}and 120volts
\ll S
AWARNING!
HOW TOCONNECTELECTRICITY
Do not, under ang circumstances, cut or remove the third (ground) prong from the power cord
Forpersonal safety, this appliance must be properlg grounded
Thepower cordof thisapplianceisequipped
with o 3-prong (grounding)plug which mates
with o standard5-prong (grounding}wa!l outlet
to minimizethe possibilityofelectricshockhazard
from this appliance
Havethewall outlet and circuitcheckedby a qualified
electricianto make surethe outlet isproperly
grounded
ifthe outlet isa standard 2-prong outlet, itis
your personalresponsibilityand obligation to
hoveitreplacedwith a properlygrounded
3-prong walloutlet
Therefrigerator shouldalwagsbe plugged intoits
own individualelectricaloutlet which hasovoltage
rating that matchesthe rating plate.
Thisprovidesthe bestperformance end alsoprevents
overloadinghousewiring circuitswhich couldcausea
firehazardfrom overheatedwires
Never unplug your refrigerator by pulling on
the power cord Always grip plug firmly and pull
straight out from the outlet,
Repairor replaceimmediately allpower cordsthat
havebecomefrayed or otherwisedamaged Donot
usea cordthat showscracksor abrasiondamage
along its lengthor at eitherend
Whenmoving the refrigeratorawag from thewall,
be carefulnot to rolloveror damagethe powercord
READAND FOLLOWTHISSAFETYINFORtVlATIONCAREFULLY,
SAVETHESEINSTRUCTIONS
2
re
t_
0
v,* lJ,_
v A
En
0
0
tQ
re
"o
0

l,e
:_:_i¢_(:::i:_i_
i:i/:i_i::_•:ii_:/:!:
_ _:"L _ • :
v A
t.T m1"i,_
0
0
A
L_
tt.
0
ul
E
8
About the temperature controls.
larm_
Not of! features are on all models
o
Gu,boq
LCooLj
O_F is Recammended 37_F is.Recommer_ded
0. ® ®• •
Hold 3 Seconds to Reset Hold 35econds
Thetemperaturecontrolsarepresetin thefactoryat37°FfortherefrigeratorcompartmentandO°Fforthe
freezercompartmentAllow24hoursforthetemperaturetostabilizetotilepresetrecommendedsettings
ThetemperaturecontrolscbndisplayboththeSETtemperatureaswellastheactualtemperatureinthe
refrigeratorandfreezer,TireactualtemperaturemayvaryslightlyfromtheSETtemperaturebasedon
usageandoperatingenvironment
Onsamemodels,settingbothcontrolstothewarmestsettinguntilthedisplayflashes[off)willstop
coatinginboththefreezerandrefrigeratorcompartments
i::: Onothermodels,settingeithercontroltothewarmestsettinguntilthedisplayflashesloft)willstop
thecoolingtothefreezerandrefrigerator.
NOTE:Turningtherefrigeratoroffviathecontrolsonthetouchponddoesnotshutoffeleddcalpower
totherefrigerator
NOTE:Therefrigeratorisshippedwithprotectivefilmcoveringthetemperaturecontrolstfthisfilmwas
notremovedduringinstotfotionremoveit now
Performance Air Flow System
ThePerformanceAir-FlowSystemisdesignedto
maximizetemperaturecontrolintherefrigerator
andfreezercompartments.Thisuniquespecial
featureconsistsoftileAirToweralongtheback
walloftherefrigeratorandtheAirTunnelonthe
bottomportionofthefreezerrearwallPtacing
foodinfrontofthelouversonthesecomponents
About TurboCool:" (on some models}
will not affect performance Although the Air Tower
andthe AirTunnelcon beremoved, doingso will
affect temperature performance (Forremoval
k_structions,on-line contact usatgecam or
coil800GECARESInCanada,contact us at
geappliancesca or call 1800 56t 33/44}
O
Gurbo
k coo,_J
How it Works
TurboCoolrapidlycoolstherefrigerator
compartmentinordertomorequicklycoolfoods.
UseTurboCoolwhenaddinga largeamount
offoodtotherefrigeratorcomportment,putting
awayfoodsaftertheyhavebeensittingoutat
roomtemperatureorwhenputtingawaywarm
leftovers.Itcanalsobeusediftherefrigeratorhas
beenwithoutpowerforanextendedperiod
Onceactivatedthecompressorwillturnon
immediatelyandthefanswiltcycleonand
offathighspeedasneededforeighthours
Thecompressorwillcontinuetorununtilthe
refrigeratorcompartmentcoolstoapproximately
34°F(1°C1,thenitwillcycleonandofftomaintain
thissettingAfter8hour&or ifTurbaCoolis
pressedagain,therefrigeratorcompartment
wi! returntotheorgna settng
HowtoUse
PressTurboCoolTheTurboCooltemperature
displaywillshowTcendtheLEDwillbeactivated
AfterTurboCooliscomplete,theTurboCool
indicatortightwillgoout
NOTES:Therefrigeratortemperaturecannotbe
changedduringTurboCool
Thefreezertemperatureisnataffected
duringTurboCao/
Whenopeningtherefrigeratordoor
duringTurboCool.thefanswillcontinue
toruniftheyhavecycledon
About the water filter, tonsomemodels) GEAppliances.com
i,,111 ii ii I iiiiii
Water Filter Cartridge
Thewater filter cartridge islocatedin the backupper right
cornerof the refrigeratorcomportment
When to Replace the Filter on Models Without
aReplacement Indicator Light
Thefilter cartridge shouldbereplacedevergsixmonths or
earlierif theflow ofwater to the water dispenseror icemaker
decreases
Removing the Filter Cartridge
If gou are replacingthe cartridge,first removetheold one
bg slowlgturning it to theleft. Donot pulldown on the
cartridge A smallamount ofwater mag dripdown
Installing the Filter Cartridge
0 if gou are replacinga SmartWatercartridgewith
an adapter,it mustbe removedbeforeinstallingthe
cartridge Toremovetheadapter,turn it tothe left
about 1/4 turn
With Adapter Wilhou[ Adapter
fappe_rancemayvary)
On modelswithout a replacementindicator light,apptg
the month and gearstickerto the newcartridge to remind
you to replacethefilter in six months,
_) Fillthe replacementcartridge with water from the top to
allowfor betterflow from thedispenserimmediatelgafter
installation
O Lineup thearrow on the cartridge and thecartridge
holder.Placethetop of thenew cartridge up inside
theholder`Donat pushitup into the holder.
O Siowlgturn it to the rightuntilthe filter cartridge stops
DONOTOVERTIGHTEN,Asgouturn the cartridge,it will
automaticallg raiseitselfintoposition Thecartridge will
move about 1/2 turn
CanridgeHolder
Runwater from thedispenserfor 3 minutes(about
1-1/2galions)to clearthe sgstemand prevent sputtering
Pressand hold the WATERFILTERpad tonsome models)
on the dispenserfor 3 seconds
@
"teLJ
Hold 3 secondsto Reset
NOTE:A newlginstalledwater filter cartridge mag cause
water to spurt from thedispenser.
Filter Bypass Plug
Youmust usethe filter bgpassplug when a replacementfilter
cartridge isnot available Thedispenserand theicemakerwill
not operatewithout thefilter or filter bgpassplug
FiRer_
Bypass _)w,,_
Plug
Smarf#$gter
tf gou havequestions-visit ourWebsiteat GEAppliances,com
or call 1.800GECARES11800/4322737)
Replacementfilters:
Toorder additional filter cartridges in the United States,
visit our Websiteat GEAppliances.com,or call GEParts and
Accessories,800.5262002.
Filter Hodel MSWF
Customersin Canadashouldconsultthe gellowpages
for the nearestHabe ServiceCenter.
u_
0
:_,/i_:? _i _::
:A L_:I"_-_, _::
XL :L_?_:C: :
v,F irl
v
g,)
0
0
:::t"
0

About the water filter. (on some models) (cont.)
On some models
Water" Niter Cartridge
Thewater fiitercartridge islocated in the beckupper right
cornerof the refrigeratorcomportment
When to Replace the Niter on Models Without
a Replacement Indicator Light
Thefilter cartridgeshouldbe replacedeverysix months
or earlierifthe flow ofwater tothe water dispenseror
icemakerdecreases
O Slowlyturn it to the right until thefilter cartridge stops
DONOTOVERTIGHTEN.Asyou turnthe cartridge,itwill
automaticallyraiseitself intoposition Thecartridge will
moveabout 1/2 turn
Removing the Filter Cartridge
Ifyou are replacingthecartridge first removetheold
one by slowly turning itto the left Do not pulldown
on the cartridge Asmell amount of water may drip down
Installing the Filter Cartridge
If youare replacinga SmartWatercartridge with
an adopter,itmust be removedbeforeinstalling
the cartridge Toremove theadapter,turn it
tothe left about 1/4turn.
@
O
@
With Adapter Without Adapter
(appearance may vary)
On modelswithout a replacementindicatorlight,
applg the month and yearstickerto the new cartridge
to remind you to replacethe filter insix months.
Fillthe replacementcartridge with water from the tap to
allow for better flow from the dispenserimmediatelLjafter
installation
Lineup thearrow on the cartridgeand the cartridge
holder PIacethetop of the newcartridge up insidethe
holder_Donot pushit up into the holder
O Runwater from the dispenserfor 3 minutes (about1-t/2
gallons)to clear the system and preventsputtering
Pressand holdthe WATERFILTERpad (onsome models)
on thedispenserfor 3 seconds
®
"teLJ
Hold 3 secondsto Reset
NOTE:A newly installedwater filter cartridge may cause
water' to spurt from the dispenser.
Filter Bgpass Plug
Youmustusethe filterbypassplug when a replacementfilter
cartridge isnot available.Thedispenserand the icemakerwifl
not operatewithout the filteror filter bypassplug
Bypass _
Plug
u n i
Stoat:Water
If you have questions-visit our Website at GEApptiances cam,
or call :L800GE CARES(t 800.432 27371
Replacement filters:
To order additional filter cartridges in the United States,
visff our Webs!re at GEAppfiances.com, or call GEParts and
Accessories, 800.626°2002.
Filter Model HWF
Customers in Canada should consult the yellow pages
for the nearest Habe Service Center:
6

About the shelvesand bins.
Not all features are on all models,
GEAppliances,com
JJnt_J_ulunl_l_l n
Freezerbin
Refrigerator Door Bins and Freezer Door Tilt-Out Bins
Large Bins
Thelarger refrigerator door binsand freezer
tilt-out door binsare adjustable
Toremove: Lift the front of the bin straight
up. then lift up and out
To replace or relocate: Engage the back side
of the bin inthe molded supports of the door,
Then push down on the front of the bin Bin
wil!tack in place
SmallBins
Toremove: Liftthefront of thebin straightup
thenout
Toreplace: Positionthebin abovethe
rectangularmoldedsupportson the door.
Thenslidethe bin down ontothe support
to lockit in place
Thesnuggerhelpsprevent tipping spilling
or slidingofsmall itemsstoredonthe door
shelf Placea fingeron eithersideof the
snuggernearthe rear and move it beck
and forth tofit gour needs
A
CAUTION:
Onmodelswith an
ice chute inside the
top freezer door bin.
be careful when
placing items in the
bin Makesurethat
itemsdonot block
or fallinto theice
chute
Freezer till-out bin
Pless tab and pull shell forward Io
romove
Slide-Out Spillproof Shelf
Theslide-outspillproofshelfallows gou
to reachitemsstoredbehind others The
specialedgesoredesignedto helpprevent
spillsfrom dripping to lower shelves,
Toremove:
Slidethe shelfout until itreachesthe stop.
then pressdown on thetab and slidethe shelf
straight out
Toreplace or relocate:
Linethe shelf up with the supportsandslide
it intoplace Theshelfcan be repositioned
when the door isat 90°ormore Toreposition
the shelf,slidethe shelfpast the stopsand
angle downward Slideshelfdown to the
desiredposition,lineup with thesupports
and slideinto place
Hake sure gou push the shelves all the wag
back in before gou close the door
7

0About the shelves and bins. rcontJ
Not all features are on all models
quickSpace'* Shelf (onsome models)
Thisshelfsplitsin halfand sIidesunder itself
forstorage of tallitems on theshelf beIow
Thisshetfcan be removedand replaced
or-relocatedjust likeSlide-OutSpiltproof
Shelves.
Onsome models,this shelf cannot be used
in the lowestposition
Freezer Baskets
Toremove slideoutto thestopposition
lift thefront past thestop position and
slideout.
Make suregou push the basketsatt the
way back in beforeyou close the door:
Toremove,pushthebasketall theway to
the backofthe freezer.Liftup until theback
pinsaredisengaged Liftthe entirebasket
up and pullout,
Hake sureyou push the basketsall the
wag back in beforegou close the door
Slide-Out Freezer Shelves
Toremove,slideout tothe stopposition,
lift thefront pastthe stop position,andslide
outfrom rib
Make suregou push the shelvesall the wag
back in before gou close the door
8
Fixed Freezer Shelves
Toremove,lift the shelfup at the left sideand
then bring the shelfout NOTEFORDISPENSERMODELS:Inorder
totake fulladvantageofthe tilt-out icebin
[onsome models[ only storeitems on the
shelfbelowthe icebin that are no taller
than thelowestpoint on the bin
Door Wine/Beverage Rack (onsome models)
Thisrock holds up to 5 cans or one bottle
ofwine
Therack hangsfrom thesides
of thedairy bin
Toremove:
O Emptythewine/beverage rack
0 Holdingthe bottom of the dairy bin.
lift the fiontstraight up,then lift up
and out
O Todetach the rack from the dairy bin,
pull the rack'ssidewires out of theholes
on eachsideof thedairy bin
Toreplace:
Reattachthe rackto the sidesof thebin
Engagetheback sideofthe bin in
the moldedsupportson the door.
Thenpushdown on the front of
the bin Thebinwill lockinto place

About the refrigerator doors. GEAppliances.com
Refrigerator Doors
The refrigerator doors mag feel different
than the ones you ore used to. The special
door opening/closing feature makes sure
the doors close alI the wag and are
securelg sealed
When opening and closing the door, you
wil! notice a stop position if the door is
opened past this stop point, the door will
remain open to allow gou to goadand
unload food more easiig When the door
is onlg portialtg open. it ,will outomaticallg
close
Theresistancegou feetat thestop
positionwill be reducedasthe door
isloadedwith food
Whenthe dooris onlypartiallyopen.
il wil; automaticallyclose
Beyondthisslop lhe doorwill
stayopen
Door Alignment
Ifdoors ore uneven, adjust the refrigerator
door.
O Usinga 7/16" socketwrench,turn the
door adjustingscrewto the right to
raisethedoor;to the left,to lower it.
(Anylonplug.imbeddedin the threads
of thepin,preventsthe pin from
turning unlesso wrench isused}
O After one or two turns ofthewrench.
openand closethe refrigeratordoor
and checkthealignment at thetop
of the doors
O"
_J r_
u
0
0
0

About the crispers and pans.
Not all features are on a!! models
Fruit and Vegetable Crispers
Excesswater that mag accumulate in the
bottom of the drawersshouldbe wipeddry
Onsome models,the bottom drawer has
fullextensionslidesthat alfowfull access
tothe drawer
HI _ LO AdJustable Humidity Crispers
Slidethe control aflthewag to the HIsetting
to providehigh humiditg recommendedfor
mostvegetables
Slidethe controi oil thewag to the LO
setting toprovidelower humiditg levels
recommendedfor most fruits
I
Convertible Dell Pan fan some models]
Theconvertibledeli pan hasits owncold air
duct to allowa stream ofcoldair from the
fleezer compartment or refrigerator
compartment to flow to the pan
The variable temperature control regulates
the air flow from the Climate Keeper Air
Tower.
Setthe control to thecoldest settingto store
freshmeats
Set the contmi to cold to convert the pan
to normal refrigerator temperature and
provide extra vegetable storage space The
cold air duct is turned off Variable settings
between these extremes can be selected
Aboutcrispe r removal.
Not all features are on all models
Crisper Removal
Crisperscan eas{igbe removedbg puiiingthe
drawerstraight out and lifting the drawerup
andover the stop location
Ifthe door preventsgoufrom taking out
thedrawers,first trg to removethe door bins
ifthis doesnotoffer enough clearance the
refrigeratorwill needto be roiledforward
until thedoor opensenough to slidethe
drawers out Insome cases,when gou rolt
the refrigeratorout, gou will needto move
the refrigeratorto the left or rightasgou roll
it out
10

About the automatic icemaker. GEAppliances.com
iii iii [11 ii ii ii ii ii/,11111II II ii ii ij i,j/i, i/i _11
A newlg installed refrigerator may take 12 to 24 hours to begin making ice
Powsr
Switd_
Gi'88ri
PowerLight FeelerA.n
Icemaker
Automatic icemaker
The icemuker will produce seven cubes
per cgcle-appro×imotelg 100-130cubes
in a 24-hour period, depending on freezer
compartment temperature, room
temperature, number of door openings
and other use conditions
See below for how to access iceand reach
the power switch on dispenser models
If the refrigerator is operated before the
water connection ismade to the icemaker,
set the power switch in the 0 (off/position
When the refrigerator has been connected to
the water supplg, set timepower switch to the
Iton) position
Theicemokerwillfillwith water when itcools
to 15°F(-IO°C}Anewlginstalledrefrigerator
maLjtake 12to24hourstobeginmakingice
cubes
Youwill heara buzzingsoundeachtime
theicemakerfillswith water.
Throwowag the firstfew batchesoficeto
allow thewater lineto clear,
Besurenothing interfereswith thesweep
of thefeelerarm
When the bin fills to the level of the feeler
arm. the icemuker will stop producing ice
Itis normal for several cubes to be joined
together,
If iceisnot usedfrequentlg,old icecubes
willbecome cloudg,tastestale end shrink.
NOTE:Inhomeswith lower-than-average
water pressure,you may heartheicemaker
cyclemuttiptetimeswhen makingone batch
ofice
Models without a shelf
above the ice bin
To access ice end reach the
icemaker power switch:
oLift the bin. tl_enpull it
forward until the bin stops
OLewer the bin to accessice
or reach thepower switch
NOTE:In orderto take full
advantage of the tflt_out ice bin,
on0 store items on the shelf below
the ice bin that are no taller than
the lowest point on the bin
Accessing Ice and Reaching
the Power Switch on Dispenser
Models
Thereare two types of icestorage bins
on dispensermodels,Onehasa shelfabove
the bin,the otherdoesnot
Specialnote about dispenser models
without a shelf above the icebin:
Thesemodelshavee tilt-outice bin.
Thebincan be tiltedout asshown in
the illustrations,and it will hold itself
up while goutake iceout or turn the
icemokerpowerswitch on and off
Besureto put thebin beck in place
beforedosing thedoor.
To restore gour icelevelfrom an emptg
bucket stage,the following steps are
recommended:
O 12hoursafter thefirst botch of ice
hasfallen intothe bin,dispense
3to 4 cubes
After an additional 6 hours, dispense
3 to 4 cubes again
These steps will restore t.,Jourice Ievei
in the shortest amount of time
Hodels with a shelf
above the ice bin
To accessice.pull the bin forward
Toreach the power switch, pull the
shelfstraight out Always be sure to
replace the shelf
ul
_.
O"
_: :( Ji?L >:_
.:. ,-<. :,
://:/-14 _j::
;<7/_ ,::_m
z_ % t :: :>: q_
:x : :L:_:-A :-
i_/ L _ z_,_,/_
i .
v
v
0
0
Itl
8
0
ii

'O
O1
oq
;/ i:_::!:I::
i:,i!?:i?ii
:-: L_.: ¸ ::
:XI:: _:(::!i!::
!.- 11_
ol
0
0
4:
in
0
A
E
O1
About the ice and water dispenser. (onsome models)
,,,,,,,,,,,,,,,,,, ........................................... ,,,,, ,,, ,
SpillSherf
To Use the Dispenser
SetectCOBEO,CE cRus.ED,CE
or WATER_.
Pressthe glassgentlgagainst thetop of the
dispensercradle
Thespillshelf isnotself-draining Toreduce
water spotting,theshelf and its grilleshould
becleanedregularlg,
finD water is dispensed when the
refrigerator is first installed there may
be air in the water line sgstem Press the
dispenser arm far at least two minutes to
remove trapped air from the water fine
end to fill the water sgstem To flush out
impurities in the water line, throw uwag
the first six glassfuls of water
CAUTION: Never put fingers or ang other
objects into the ice crusher discharge
opening
Locking the Dispenser
ntro_ll
Hold 3 Seconds
PresstheLock Controls
pad for3 secondsto lock
the dispenserand canboI
panel Tounlock press
and hold the pod again
for 3 seconds
Dispenser Light
Thispad turnsthe night
igh and off Thelight also
comeson when the
dispenser-cradleis
pressed If thislight burns
out, it shouldbe replaced
with o 6 watt 12V
maximum bulb
Door Alarm tansomemodels)
®
L2U°r
Toset the alarm.
pressthis pad until the
indicator light comeson
Thisalarm wilt soundif
eitherdoor isopen for
more than 3 minutes
Thelight goesout and
the beepingstopswhen
gou closethe door,
Important Facts About Your Dispenser
Donot add icefrom trags or bagsto
the storagedrawer:It mag nat crush or
dispensewetl
Avoidoverfillingglasswith iceand use
ofnarrow glassesBacked-upicecanjam
thechute or causethedoor inthe chute to
freezeshut If iceisblockingthechute,poke
itthroughwith a woodenspoon
Beveragesand foods shouldnat be
quick-chilledin the icestoragedrawer,
Cans.bottlesor food packagesinthe
storagedrawer mag causethe icemaker
or auger tojam
Somecrushed icemag be dispensed
eventhough gau selectedCUBEDICE.This
happensoccasionallgwhen a few cubes
accidentallgget directedto the crusher,
:::After crushediceisdispensed,some water
mag drip from the chute
!.:Sometimesa smallmound af snow will
form onthe door inthe icechute This
condition isnormal and usuallgoccurs
when gou havedispensedcrushed ice
repeatedlg Thesnow will eventuallg
evaporate
i::::Tokeepdispensedicefrom missing
theglass,put theglass closeto, but not
touching,the dispenseropening,
12

Models without a shelf
above the ice bin
To remove
Lift the bin then _ull i_
forward until the bin stops
Lift andpull forward again
to remove the bin
GEAppliancesocom
Removing and Replacing the Ice
Storage Bin on Dispenser Models
Thereare two types of icestorage bins on
dispenser models,One hasashelf above
the bin,the otherdoesnot
Alwagssetthe icemakerpowerswitch to the
O(off) positionbeforeremovingthe icebin
When replacing either typeof icebin:
Alwagsbe sureto pressitfirmlg intoplace
If itdoesnot go all thewag back removeit
and rotate the drivemechanism 1/4turn
Thenpushthe bin backagain
Models with a shelf
above the ice bin
Toremove:
J
Pull _hebin straight ouL then lift
past thestop position
Careand cleaning of the refrigerator.
Cleaning the Outside
Dispenserdriparea
Thedispenser drip area ion some models),
beneaththegrille,shouldbewipeddrg Water
left in thisarea magleavedeposits Remove
thedepositsbg adding undilutedvinegarto
thewell Soakuntil thedepositsdisappear
or become looseenough to rinseowog
Thedispenser cradle(on somemodels)
Beforecleaning,lockthe dispenserbg
pressingand holding theLock Controlspad
for 3seconds Cleanwith worm water and
bakingsodasolution- about a tablespoon
(15ml}of bakingsoda toa quart (t liter)
of water`Rinsethoroughkj and wipe drg
Thedoor handlesand trim, Cleanwith
a cloth dampenedwith soapgwater,
Drgwith a softcloth
Keeptheoutside clean_Wipewith a
cleancloth lightly dampenedwith kitchen
appliancewax or mildliquiddishdetergent
Drgand polishwith a clean,softcloth
Do not wipe the refrigerator witi_ asailed
dish cloth or wet towel Thesema_/leave
a residue that con erode the point Do not
use scouring pads, powdered cleaners,
bleach or cleaners containing bleach
because these products can scratch
and weaken the paint finish
Cleaning the Inside
Tohelpprevent odors, leavean open box
ofbakingsodain the freshfoodand freezer
compartments
Unplug the refrigerator before cleaning,,
If this isnotpractical,wring excessmoisture
out of spongeorcloth when cleaningaround
switches,lights or controls
Usewarm water and bakingsodasolution-
about a tablespoon(15mi)of bakingsodato
a quart (1liter)of water.Thisboth cleansand
neutralizesodors Rinseand wipedrg
Useof ang cleaningsolution other than
that which is recommended,especially
thosethat contain petroleum distillates,
can crack or damage the interior of the
refrigerator..
Avoid cleaning cold glass shelveswith hot
water because thee_treme temperature
difference may cause them to break
Handle glass shelves carefully Bumping
tempered glass can cause it to shutter
Donot wash one plastic refrigerator
parts in the dishwasher 13
O"
,__i: _ ,,,, i _
::i- -<::Zi: _,
. J --
w
0
0
¢b
0
O_
to
w
0

=
ij
I/)
I=
:i:• •••':: :3"
!:I_LI:¸: ;ii Ji•
i_:;: _,/_: ,::
0
0
4::
Ill
43
A
it.
o
A
w
E
8
Care and cleaning of the refrigerator. CcontJ
Behind the Refrigerator
Becareful when movingthe refrigerator
awag from the wall Afltgpes of floor'
coveringscan be damaged,particuladg
cushionedcoveringsand thosewith
embossedsurfaces
Puilthe refrigerator straightout and
return itto position bg pushingitstraight
in Movingthe refrigeratorin a sidedirection
mag resultin damage to thefloor covering
or refrigerator.
When pushing the refrigerator back. make
sure gou don't roll over the power cord or
icemaker supplg line (on some modelsL
Preparing for Vacation
For long vacations or absences, remove
food and unplug the refrigerator. Clean the
interior with a baking soda solution of one
tablespoon (15 ml)of baking soda to one
quart (1liter) of water: Leave the doors open
Set the icemaker power switch to the
O(off) position and shut offthe water
supplg to the refrigerator:
If the temperature can drop below freezing.
have o qualified servicer drain the water
supply system (on some models} to prevent
serious property damage due to flooding
Preparing to love
Secure all loose items such as shelves end
drawers bg toping them securely in place
to prevent damage
When usinga hand truck to move the
refrigerator,do not restthe front or back
ofthe refrigerator againstthe hand truck,
Thiscoulddamage therefrigerator:Handle
onty from thesidesof therefrigerator,
Be sure the refrigerator stags in an upright
position during moving
14

Replacing the light bulbs. iiiiiiiiiiiiiiiii ii ...................... ii I 1..111 i .111 i.i1 ii I I I I
GEAppliances,,com
NOTE: Turning the refrigerator off via the controls on the touch panel does not shut off electrical power to
the refrigerator
Yourlight shield will look like one
o! the following:
OR
Refrigerator Compartment--Upper Light
0 Unplug the refrigerator, 0
0 Thebulbsare locatedat the top of
the compartment, insidethe light shield
Onsome models,a screwat the front of
the lightshieldwiIihaveto be removed
Onother models,the screwislocated
in thepocket locatedat the backof
the shieid
0Toremovethe lightshield,on some
models,pressin onthetabs on the sides
oftheshieldand slideforward and out
Onothermodels,just slidethe shield
forward and out
After replacingthe bulb with an appliance
bulbof thesame orlowerwattage.
replacethelight shieldand screw When
replacingthelight shield,make surethat
the tabs atthe back of the shieldfit into
the slotsat the backof the light shield
housing
Plugtherefrigerator back in
Refrigerator Compartment--Lower Light
Thislight islocated above the top drawer
Unplugthe refrigerator.
Lift thelight shieldup and pull itout
0 After replacingthebulb with an appliance
butbofthe sameor lower wattage.
replacetheshield
O Plug the refrigerator back in
Freezer Compartment
O Unplugthe refrigerator. O
Removetheshelfjust abovethe light
shield (TheshetfwilIbe easierto remove
ifit isemptiedfirst )Removethe screwat
the topof the lightshield
Toremovethe light shield,press inon the
sides,and lift upand out
Replace the bulb with an appliance
bulb of the same or lower wattage,
and reinstall the light shield When
reinstalling the light shield, make sure
the top tabs snap securely into place
Replacethe screw
Reinstallthe shelf and plug the
refrigerator back in
Dispenser
Unplugthe refrigerator
Thebulb islocatedon the dispenser
underthe control panel Removethe light
bulb bg turningit counterclockwise
0 Replacethe bulb with a bulb
of the same sizeand wattage
O Plug the refrigerator back in
tl f illgh!
Refrigerator Compartment ton some modetsl
Thereisan LEDlightingdisplay in the top
of the refrigeratorcompartment on some
models tfthis assembIgneedsto be
replaced,cattGEServiceat 1,8004322737
in the UnitedStatesor 1800 5613344
in Canada t5
,E
0
u_
:_L :L i _ :
• V,,xz _
:/ 7<, _
w A
w
;:::x"
0
o
w
r_
o
r_
o

Installation
Instructions Models
Refri erator
22, 23, 25, 26, 27 end 29
i,,/11,iul,/,/,/,/,/,/ui/ulJl,,i
Questions? Call 800.GE,CARES1800,432.2737} or Visit our Website at: GEAppliances.com
In Canada, call 1300.5613344 or Visit our Website at: www.GEAppliances_ca
BEFORE YOU BEGIN
Read these instructions completelg
and carefully,
•IMPORTANT - Save these instructions
for local inspector's use.
• IMPORTANT -Observe all governing
codes and ordinances
• Note to Installer -Be sure to leave these
instructions with the Consumer_
- Note to Consumer - Keep these instructions
for future reference
• Skill level -installation of this appliance requires
basic mechanical skiJls
• Completion time - Refrigerator Installation
30 minutes
Water Line Installation
30 minutes
Proper installation is the responsibilitg of
the installer
Product failure due to improper installation is not
covered under the Warrantg
If the refrigerator has alreadg been installed,
remove the base grille (see Step 2 in Moving
the Refrigerator), then skip to Step 5 in Installing
the Refrigerator.
,,,,,,,,,i, i1,,,,, ,, ,i i
PREPARATION
WATER SUPPLY TO THE ICEMAKER
If the refrigerator has an icemoker; it will have
to be connected to o cold water line. AGE water
supplg kit (containing tubing, shutoff valve,
fittings and instructions} is available at extra
cost from LJOUrdealer, bg visiting our Website
at GEAppliances,com (in Canada at
wwwoGEAppliances.ca} or from Ports and
Accessories, 800 626 2002 (in Canada
:[888.261 30551
TOOLS YOU WILL NEED
3/8" and 5/16" Socket
U
Plastic Putty Knife
1/2" and7/t6" Wrench
Phillips-HeadScrewdriver
16

Installation Instructions
MOVING THE REFRIGERATOR
[_ LOADING THE RERIGERATOR
ONTO A HAND TRUCK
Leave all tape and door pads on doors until
the refrigerator is in its final location
To move the refrigerator, use a padded hand
truck Center the refrigerator on the hand truck
and secure the strap around the refrigerator
DO NOT OVERTIGHTEN THE STRAR
[] REMOVE THE BASE GRILLE
Remove the grille bg removing the two Phillips
head screws
If the refrigerator must go through
ang entrance that is Jessthan 38" wide,
the doors must be removed Proceed to
Step 3
DO NOT remove the handles°
if all entrances are more than 38" wide,
skip to Installing the Refrigerator.
lU,I,,,I U U
[_] DISCONNECT THE WATER COUPLING
(on some models}
If the refrigerator has a water dispenser,
there is a water line from the cabinet into
the bottom hinge on the freezer door that
must be disconnected.
To disconnect, push in on the white collar
of the coupling and pull out the tubing
White collar
Bottom
freezer
hinge
1.7

Installation Instructions m,,um,,,,,,uuluIH,,IHli,,li,i,ll ml II II luLm
MOVING THE REFRIGERATOR(CONT.)
[] DISCONNECT THE POWER COUPLING
(on some models)
If the refrigerator has a water' dispenser,
there is a power line (harness) from the cabinet
into the bottom hinge on the freezer door that
must be disconnected
To disconnect, pull apart at the coupling.
[_ DISCONNECT THE ELECTRICAL
CONNECTORS (on some models)
tf the refrigerator' has a refreshment center,
there are electrical connectors (harnesses)
from the cabinet into the bottom hinge on the
refrigerator door that must be disconnected
To disconnect, pull apart each connector:
Bottom
refrigerator
hinge
H,,,,H,,lUUll IIm IIIIIIIIIIIJ IIIII I
[] CLOSE THE FREEZER AND
REFRIGERATOR DOORS
[]_] REMOVE THE FREEZER DOOR
[_] Remove the freezer door top hinge cover bg
either squeezing it and pulling it up or bg
prging it off with a plastic puttg knife
[] Remove the two 5/16" hex head screws, then
lift the hinge straight up to free the hinge pin,
5/t6" HexHead
[] Open the freezer door to 90 °
90°
18

Installation Instructions
IT) REMOVE THE FREEZER DOOR (cont.)
i_ As one person slowlg lifts the freezer door up
and off the bottom hinge, the second person
should carefullg guide the water line and power
line (harness) through the bottom hinge
[] Set the door on a non-scratching surface with
the inside up.
[] REMOVE THE REFRIGERATOR DOOR
[] Remove the refrigeretor door top hinge cover
bg either squeezing it and pulling it up or bg
prging it off with a plastic puttg knife
I_ REMOVE THE REFRIGERATOR DOOR
(canto)
t-_ Remove the two 5/16" he× head screws, then
lift the hinge straight up to free the hinge pin
5/16"HexHead
[_ Open the refrigerator door to 90°
98°
1,9

Installation Instructions
.. ,, ,,,, , , , ,
MOVING THE REFRIGERATOR(CONT.)
%
@
[]
REMOVE THE REFRIGERATOR DOOR
(cont.)
Lift the refrigerator door up and off the bottom
hinge
If the refrigerator has a refreshment center,
one person should slowlg lift the door up and
off the bottom hinge and the second person
should carefullg guide the electrical lines
(harnesses) through the bottom hinge
Re{reshment Center Models only
Set the door on a non-scratching surface with
the inside up.
i,iu,llllunu
[_Z]REPLACING THE DOORS
To replace the doors, simplg reverse steps 3
through 8
However, please note the following:
• When lowering the doors onto the bottom
hinges, make sure the second person
carefully guides the tube end harnesses
through the holes in the hinges
• When connecting the water line, make sure
you insert the tubing oil the wag to the mark,
Mark
- Do not pinch the tubing and harnesses when
placing the doors on the bottom hinges
° When connecting the power line and the
electrical lines (refreshment center models
only), be sure that the connectors ore seated
together fully
20
This manual suits for next models
2
Table of contents
Languages:
Other GE Refrigerator manuals

GE
GE GTH20JBBBB Manual

GE
GE TI-4 User manual

GE
GE Profile PSC25NSWSS Manual

GE
GE TBF22R Specification sheet

GE
GE Profile PSHF6YGZ User manual

GE
GE Profile CustomStyle PSC23MGT Manual

GE
GE Monogram ZIS36N User manual

GE
GE GMV070BAYR User manual

GE
GE GSHS5PGXSS Manual

GE
GE PDSS0MFXRSS - ProfileTM R 20.1 Cu. Ft. Bottom-Freezer Drawer... Manual