GE GTH18CCEHRWW Operating instructions

0GEApplia nces.c orn
L._
(b
N
(b
(b
LL..
I
0
F--
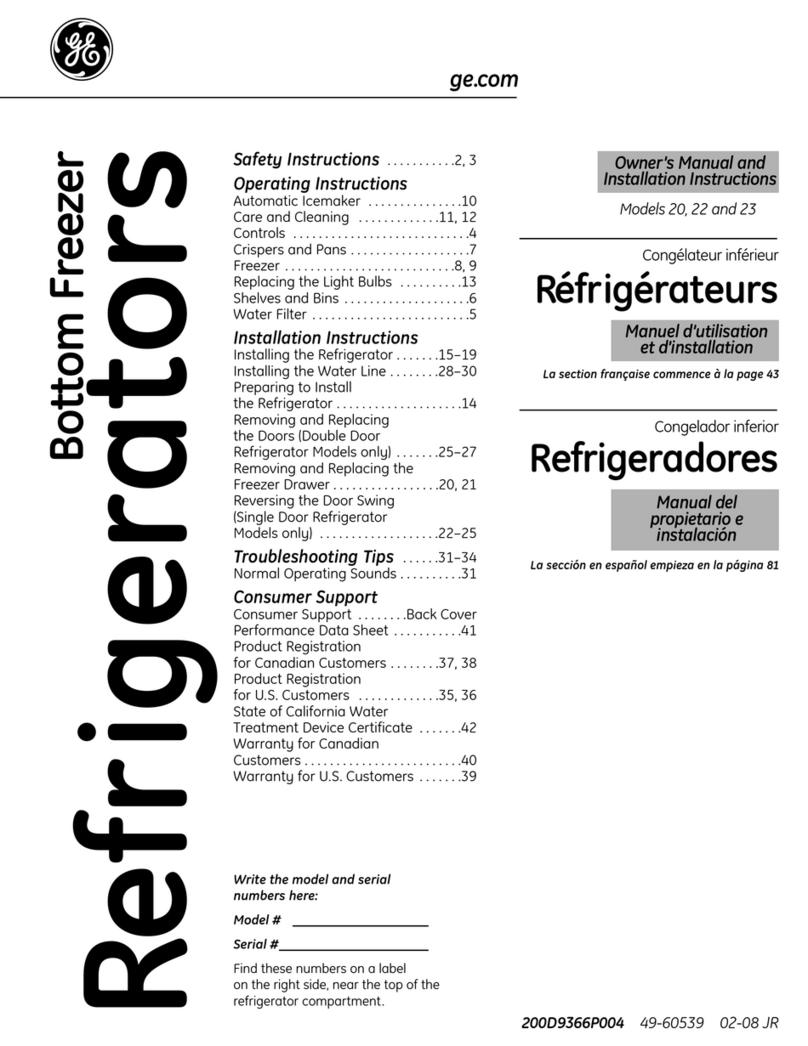
Safety Instructions .......... 2-4
Operating Instructions
Temperature Controls .............. S
Shelves ......................... 5, 6
Storage Drawers ................ 6, 7
Automatic Icemaker ................ 7
Care and Cleaning ................. 8
Installation Instructions
Preparing to Install
the Refrigerator .................... 9
Water Line Installation ........ 10-12
Reversing the Door Swing ..... 13-16
Troubleshooting Tips
Normal Operating Sounds ........ 17
Before You Call For Service ...... 18, 19
Consumer Support
Refrigerator Warranty .......... 23
Consumer Support ...... Back Cover
O_
Write the model and serial
numbers here:
Model #
Serial #
You can find them on a label on
the upper left side of the fresh food
compartment.
Hodels 16, 17, 18
197D8622P001 49-60655-4 06-14 GE

IMPORTANT SAFETY INFORMATION.
READ ALL INSTRUCTIONS BEFORE USING.
A DANGER! RISK OF CHILD ENTRAPMENT
PROPERDISPOSALOF THE REFRIGERATOR
Childentrapment and suffocation are not problems of
the past.Junked or abandoned refrigerators are still
dangerous...evenifthey will sit for "just a few days."If
you are getting rid ofyour old refrigerator, pleasefollow
the instructions below to help prevent accidents.
Before You Throw Away Your Old
Refrigerator or Freezer:
Takeoff the doors.
Leavethe shelvesin place sothat children may not
easily climb inside.
If the refrigerator has a lock make it unusable
Refrigerants
All refrigeration products contain refrigerants, which
under federal law must be removed prior to product
disposal. If you are getting rid of an old refrigeration
product, check with the company handling the
disposal about what to do.
USE OF EXTENSION CORDS
Because of potential safety hazards under certain conditions, we strongly recommend against the
use of an extension cord.
However, ifyou must usean extensioncord, it isabsolutely necessary that it be a UL-listed,3-wire grounding type
appliance extensioncord having a grounding type plug and outlet and that the electrical rating of the cord be !5
amperes (minimum)and !20 volts.
IMPORTANTE INFORMACION DE SEGURIDAD.
LEATODAS LASINSTRUCCIONESANTES DESU USO.
A iPELIGRO! RIESGO DE ENCIERRO DE
DESECHEEL REFRIGERADORCORRECTAMENTE NINOS
Elencierro o sofocaci6n de nihos no es un problema
del pasado. Los refrigeradores desechados o
abandonados son todavfa peligros, incluso si
s61ovan a permanecer "unos pocos d[as". Siva
a desechar su refrigerador, par favor siga las
siguientes instrucciones para ayudar a evitar
accidentes.
Antes de desechar su viejo refrigerador o
congelador:
Retire las puertas y des6chelas de forma
separada.
Deje los estantes en su lugar de manera que los
nihos no puedan subir f6cilmente.
Si el refrigerador tiene una Ilave, p6ngala en usa.
Refrigerontes
Todoslosaparatos de refrigeraci6n contienen
refrigerantes, loscuales se deben retirar antes de
la eliminaci6n del producto de acuerdo con la ley
federal. Siva a desechar alg0n aparato antigua de
refrigeraci6n, consulte con la compahia a cargo
de desechar el aparato para saber qu6 hacer.
usa DE CABLES DE EXTENSION
Debidoa peligrospotenciales de seguridad bajo ciertascondiciones, nos oponemos al usade cables de extensi6n.
Sin embargo, si debe usar un cable de extensi6n, esabsolutamente necesario que seaun tipo de cable de
extensi6n para aparatos con conexi6n a tierra de tres cables,que est_ en la lista de UL(enlos EstadosUnidos)o en
la lista CSA(enCanad@),que tenga un enchufe de tipo conexi6n a tierra y saliday que el grado el6ctrico del cable
sea de !5 amperios (minima)y !20 voltios.

IMPORTANT SAFETY INFORMATION.
READ ALL INSTRUCTIONS BEFORE USING. GEAppliances.com
A WARNING!
Use this appliance only for its intended purpose as described in this Owner's Manual.
pSAFETYPRECAUTIONS
When using electrical appliances, basic safety precautions should be followed, including the following:
Thisrefrigerator must be properly installed and located
in accordance with the Installation Instructions before
it is used.
Do not attempt to or allow children to climb, stand
or hang on the shelvesin the refrigerator.They
could damage the refrigerator and seriouslyinjure
themselves.
Do nottouch the coldsurfaces in the freezer
compartment when handsare damp or wet. Skinmay
stick to these extremely cold surfaces.
Do not store or usegasolineor other flammable
vapors and liquidsin the vicinity of this or anyother
appliance.
Keepfingers out ofthe "pinch point" areas;clearances
between the doorsand between the doors and
cabinet are necessarilysmall.Becareful closingdoors
when children are in the area.
Unplugthe refrigerator before cleaningand making
repairs. s
NOTE:Westrongly recommend that any servicingbe
performed by a qualified individual.
Inrefrigerators with automatic icemakers,avoid
contact with the moving parts of the ejector
mechanism,or with the heating element (locatedon
the bottom of the icemaker)that releasesthe cubes.
Do not placefingers or hands on the automatic
icemaking mechanism while the refrigerator is
plugged in.
Turningthe temperature control to the OFFposition
does not remove power to the light circuit.
Do not refreezefrozen foods which havethawed
completely.
Before replacing a burned-out light bulb, the
refrigerator should be unplugged in order to avoid
contact with a livewire filament. (Aburned-out light
may breakwhen being replaced.)
IMPORTANTE INFORMACION DE SEGURIDAD.
LEA TODAS LAS INSTRUCCIONES ANTES DE SU USO.
iADVERTENCIA!
Use este aparato s61ocon el fin para el cual fue diseflado como se describe en este Manual del propietario.
MESURESDESE CURITFt
AI usar aparatos el#ctricos, se deben seguir precauciones b6sicas de seguridad, incluyendo las siguientes:
No intente ni permita que losniflos se trepen, paren
o cuelguen de losestantes del refrigerador. Este
refrigerador debe instalarsey ubicarse correctamente
seg6n las Instrucciones de instalaci6n antes de su
USO.
No intente ni permita que losniflos se trepen, paren
o cuelguen de losestantes del refrigerador. Podr[an
dahar el refrigerador y sufrir graves dahos.
No toque lassuper_ciesfrfasen el compartimiento
del congelador con las manos h6medas o
mojadas. La piel sepuede pegar a estas super_cies
extremadamente frfas.
iiiiii_,
iiiiii_
Desconecteel refrigerador antes de limpiar y hacer
reparaciones.
NOTA:Recomendamos enf6ticamente que cualquier
serviciosea realizado por un individuo calificado.
Enlos refrigeradores con m@quinasde hielo
autom@icas,evite el contacto con laspartes en
movimiento del mecanismo eyector,o con el
elemento de calefacci6n (ubicado en la parte inferior
de la m(_quinade hielos)que expulsa loscubos. No
coloque los dedoso las manos en el mecanismo de
la m6quina de hielosmientras el refrigerador est#
conectado.
No almacene o use gasolina u otros vapores y
Ifquidosinflamables en las@reascercanas a este o a
cualquier otro aparato.
Mantenga losdedos alejadosde las@reasestrechas;
losespacios entre las puertas y entre laspuertas y
losgabinetes son necesariamente pequeflos. Tenga
cuidado al cerrar laspuertas cuando haya niflos en el
area.
Girar el control de temperatura a la posici6n apagado
no retira la corriente del circuito de luz.
No vuelva a congelar alimentos que se han
descongelado por completo.
Antes de reemplazar una 16mparade luz quemada,
se deber6 desenchufar el refrigerador a fin de evitar
el contacto con el filamento que a0n tiene corriente.
(Una16mparade luzquemada sepuede quebrar al
set reemplazada).

IMPORTANT SAFETY INFORMATION.
READ ALL INSTRUCTIONS BEFORE USING.
AWARNING!
HOW TO CONNECT ELECTRICITY
Do not, under any circumstances, cut or remove the third (ground) prong from the power cord.
For personal safety, this appliance must be properly grounded.
Thepowercordofthisapplianceis equippedwith a 3-prong
(grounding)plugwhich mateswith a standard:S-prong
(grounding)walloutletto minimizethepossibilityofelectric
shockhazardfrom this appliance.
Havethewall outletand circuitcheckedbya qualified
electricianto makesurethe outletisproperlygrounded.
Wherea ungrounded2-prongwall outletisencountered,
itisyour personalresponsibilityandobligationto haveit
replacedwith a properlygrounded3-prongwalloutlet.
Therefrigeratorshouldalwaysbepluggedintoitsown
individualelectricaloutletwhich hasa voltage,wattage and
frequencythat matchthe ratingplate.
Thisprovidesthe bestperformanceand alsoprevents
overloadinghousewiringcircuitswhichcouldcausea fire
hazardfrom overheatedwires.
Neverunplugyour refrigeratorby pullingon thepowercord.
Alwaysgripplugfirmly and pullstraightout from theoutlet.
Repairor replaceimmediatelyall powercordsthat have
becomefrayedor otherwisedamaged.Donotusea cord
that showscracksor abrasiondamagealong itslengthorat
eitherend.
When movingthe refrigeratoraway from thewall,be
carefulnotto rolloveror damagethe powercord.
READ AND FOLLOW THIS SAFETY INFORMATION CAREFULLY.
SAVE THESE INSTRUCTIONS
s
IMPORTANTE INFORMACION DE SEGURIDAD.
LEATODAS LASINSTRUCCIONESANTES DESU USO.
,AiADVERTENCIA!
COlViOCONECTARLA ELECTRICIDAD
Bajo ninguna circunstancia, no corte ni retire la tercera pata (conexi6na tierra)del cablede electricidad. Por
seguridad personal, este aparato debe estar correctamente conectado a tierra.
Elcable el_ctrico de este aparato est6 provisto de un
enchufe de tres patas (conexi6na tierra) que encaja
en un tomacorriente est6ndar de 3 orificios (conexi6n
a tierra) para minimizar la posibilidad de peligro de un
choque el6ctrico de este aparato.
Haga que el tomacorriente de la pared y el circuito
sean revisadospor un electricista calificado para
asegurar que el tomacorriente tiene la conexi6n a tierra
apropiada.
En caso de contar con un tomacorriente de pared
de 2 clavijas, es su responsabilidad y obligaci6n
reemplazarlo por un tomacorriente de pared de 3
clavijas correctamente conectado a tierra.
Elrefrigerador deber[aestar siempre conectado a un
enchufe espedfico con un [ndice de voltaje,vataje y
frecuencia equivalentes los que figuran en suetiqueta
de caracter[sticas t6cnicas.
Estoofrece el mejor desempeho y tambi6n evita
sobrecargar los circuitos el6ctricos de la casa que
podrfan causar un incendio a partir de loscables
recalentados.
Nunca desconecte su refrigerador halando del cable
el6ctrico. Siempretome el enchufe firmemente y h61elo
directamente del tomacorriente.
Repareo reemplace de inmediato todos loscables
el6ctricos que sehayan desgastado o dahado. No use
un cable que tenga grietas o dahos de abrasi6n en su
Iongitud o en cualquier extremo.
AIretirar el refrigerador de la pared,tenga cuidado de no
enrollar o dahar el cable el6ctrico.
LEAYSIGACUIDADOSAMENTEESTAINFORMACION DESEGURIDAD.
CONSERVE ESTASINSTRUCCIONES

About the temperature control dial.
Turning the dial to OFF stops cooling in both compartments-fresh food and freezer. It does not shut off power to
the refrigerator.
Temperature Control Dial (on some models)
The temperature control dial adjust refrigerator from warmest to coldest.
The recommended factory setting is shown in illustration to the left. For colder
temperature turn dial clockwise toward snowflake. Forwarmer temperature turn
dial counter clockwise away from snowflake, allow 24 hours for adjustment.
Recommened
factory setting Coldest setting Warmest setting
About the fresh food compartment shelves.
Shelf supports at various levels allow you to custom-space your shelves. Not all features are on all models.
ii_ili iIi_
r_Tilt up
Half-Width Shelves
One end of the shelf restson a molded side-wall
support; a bracket on the other end hooks into
a track on the rear cabinet wall.
Toremove, lift the shelf up at front, then off the
support and out of the track.
Toreplace, selectdesired shelf height. With
shelf front raised slightly,hook the bracket'stop
lug into the track, then lowerthe shelf onto the
support.
NOTE:Theshelf to the right of the track is
designedto hook into the right-hand slot;the
shelfto the left isdesigned
to hook into the left-hand
slot.
:a.forward
To remove the full-width shelves
Full-Width Shelves
Some models have a stationary tempered
glass shelf, a spillproof shelf, or two steel
wire stationary shelves. These shelves can
be moved to another place in the fresh food
compartment.
Lift rear_
When placed correctly on the shelf supports, pullforwardanddown
the shelf will stop before coming completely
out of the refrigerator and will not tilt when Toremovea full-widthshelfwhenthe
you place food on it or remove food from it. freshfoodcompartmentdoorcannot
beopenedfully

About the freezer compartment shelves.
Step Shelf (on some models)
To remove the step shelf:
_] Lift left sideof shelf slightly.
2-] ivlove shelf to the left to free its right ends
from holes in the cabinet wall.
B] Lower right side of shelf,move shelf to the
right and take it out.
To reploce the step shelf:
i] With shelftilted asshown, fit left endsof
shelf into holes in cabinet wall. 2] Lift left sideof shelf slightly, swing shelf up,
fit right endsof shelf into holesin cabinet
wall, and lower shelf into place.
Ice Trays (on some models)
Ice trays are designed to release ice cubes
easily. Hold tray upside-down over a
container and twist both ends to release
cubes.
For only one or two ice cubes, leave the tray
right-side up, twist both ends slightly and
remove desired number of cubes. Wash ice
trays and storage bin in lukewarm water
only. Do not put them in an automatic
dishwasher.
About the storage drawers.
Not all features ore on all models.
Fruit and Vegetable Drawers
Excess water that may accumulate in the
bottom of the drawers should be emptied
and the drawers wiped dry.
Snacks Drawer
The snacks drawer can be moved to the
most useful location for your family's needs.
Humidity Control
HIGH LOW
Adjustable Humidity Drawer (onsomemodels)
Slide the control all the way to the Slide the control all the way to the LOW
HIGH setting to provide high humidity setting to provide lower humidity levels
recommended for most vegetables, recommended for most fruits.

About storage drawer and cover removal.
Not all features are on all models.
GEAppliances.com
Drawer and Cover Removal
Drawers con be removed easily by grasping
the sides and lifting up slightly while pulling
drawers post the stop location.
To remove the cover, lift it off its supports,
pull it forward, tilt it and take it out.
Twin Drawer Shelf
To remove:
_] Removethe drawers.
E each in,push the front of gloss cover up,
and at the some time, pull it forward asfor
asit will come.
Tiltit andtake it out.Avoidcleaningthecold
glasscoverwith hotwater becausethe
extremetemperaturedifferencemay causeit
to break.
B-] Removethe drawer frame. (Alwaysremove
the glass cover before you take out the
drawer frame.)
Lifttheframe off the supportsateach side
and buck,pullit forward,tilt it andtake itout.
To replace:
[_] Lowerthe frame until it restson the
supports at each side and buck.
E Replacethe glasscover, pushing its rear
edge firmly into the rear frame channel
and gently lowering the front into place.
[3-] Replace the drawers.
About the automatic icemaker.
A newly-installed refrigerator may take 12 to 24 hours to begin making ice.
Thereare 2 types of icemakers:
Icemaker
IL
Fee!erArm
Power Switch
Powerswitchmodel
EeeterArm in (up) position
position
Automatic Icemaker (on some models)
Theicemakerwill produceapproximately
70-100cubes ina 24-hour period,depending
on thefreezercompartmenttemperature, room
temperature,numberofdoor openingsandother
useconditions.
If therefrigerator isoperatedbeforethewater
connectionismadeto the icemaker,setthe switch
to OFFor movethefeelerarmto the STOP(up)
position.
When the refrigerator has been connected
to the water supply,set the switch to the ON
position or move the feeler arm to the ON
(down)position.
Theicemakerwill fillwith water whenit coolsto
15°F.A newly-installedrefrigeratormay take 12to
24 hoursto beginmakingicecubes.
Oncethe icemaker starts to make ice,it may
take up to 48 hours to fill the bin,depending on
the temperature settings and number of door
openings.
Youwill hear a buzzingsound eachtime the
icemaker fills with water.
Throw away the first few batches of iceto allow
the water lineto clear.
Besurenothing interferes with the sweep of the
feeler arm.
When the bin fills to the levelof the feeler arm,
the icemaker will stop producing ice.
It isnormal for several cubes to bejoined
together.
Ifice isnot usedfrequently, old ice cubes will
become cloudy,taste stole,shrink or fuse
together.
Icemaker Accessory Kit
Ifyour refrigeratordid notalreadycome equipped
with an automatic icemaker,an icemaker
accessorykit isavailableat extra cost.
Checkthe backof the refrigerator for
the specific icemakerkit neededfor
your model.
Feelerarm model

Care and cleaning of the refrigerator.
Cleaning the Outside
The door handles and trim (on some models). Clean with a
cloth dampened with soapy water. Dry with a soft cloth.
Keep the outside clean. Wipe with a clean cloth lightly
dampened with kitchen appliance wax or mild liquid dish
detergent. Dry and polish with a clean, soft cloth.
The stainless steel panels and door handles (on some
models) can be cleaned with a commercially available
stainless steel cleaner. Cleaners with oxalic acid such as
Bar Keepers Friend®Soft Cleanser will remove rust, tarnish
and small blemishes. Use only a liquid cleanser free of grit
and rub in the directrion of the brush lines with a damp soft
sponge. Do not use appliance wax or polish on the stainless
steel.
Do not wipe the refrigerator with a soiled dish cloth or wet
towel. Thesemay leave a residue that can erode the paint.
Do not usescouring pads, powdered cleaners, bleach or
cleaners containing either bleach or ammonia because these
products can scratch and weaken the paint finish.
Cleaning the Inside
To help prevent odors, leave an open box of baking soda in
the fresh food and freezer compartments.
Unplug the refrigerator before cleaning.
If this is not practical, wring excess moisture out of sponge
or cloth when cleaning around switches, lights or controls.
Use warm water and baking soda solution-about a
tablespoon (!S ml)of baking soda to a quart (! liter)of water.
This both cleans and neutralizes odors. Rinseand wipe dry.
After cleaning the door gaskets, apply a thin layer of
petroleum jelly to the door gaskets at the hinge side. This
helps keep the gaskets from sticking and bending out of
shape.
Avoid cleaning cold glass shelves (on some models) with
hot water because the extreme temperature difference
may cause them to break. Handle glass shelves carefully.
Bumping tempered glass can cause it to shatter.
Do not wash any plastic refrigerator parts in the dishwasher.
Condenser
_ There is no need for routine
condenser cleaning in normal
home operating environments.
i _ :_ However, in environments that
may be particularly dusty or
C eaning t e condenser col s. greasy, the condenser should
be cleaned periodically for
efiqcient refrigerator operation.
To clean the condenser, turn the temperature control dial to
OFF.Sweep away or vacuum up dust.
For best results, use a brush specially designed for this
purpose. It isavailable at most appliance parts stores.
Moving the Refrigerator
Becareful when moving the refrigerator away from
the wall. All types of floor coverings can be damaged,
particularly cushioned coverings and those with embossed
surfaces.
Turnthe leveling legsat each front corner of the refrigerator
counterclockwise until the rollers support the refrigerator. Pull
the refrigerator straight out and return it to position by pushing
it straight in.Moving the refrigerator in a side direction may
result in damage to the floor covering or refrigerator.
When pushing the refrigerator back, make sureyou don't
roll over the power cord or icemaker supply line (on some
models).
After rolling the refrigerator back into place, turn the
legs clockwise until the legs again bear the weight of the
refrigerator.
Light Bulb Replacement
To replace a burned-out bulb, unplug the refrigerator from
its electrical outlet, unscrew the bulb when cool and replace
it with an appliance bulb of the same or lower wattage.
Turning the control to the OFFposition does not remove
power to the light circuit.
Preparing for Vacation
Forlong vacations or absences, remove food and unplug
the refrigerator. Move the temperature control dial to the
OFF position, and clean the interior with a baking soda
solution of one tablespoon (!S ml) of baking soda to one
quart (i liter) of water. Leave the doors open.
Move the feeler arm to the STOP(up) position, or move the
switch to the OFF position on the slide switch model and
shut off the water supply to the refrigerator.
If the temperature can drop below freezing, have a qualified
servicer drain the water supply system (on some models) to
prevent serious property damage due to flooding.
Preparing to Move
Secure all loose items such as grille, shelves and drawers by
taping them securely in place to prevent damage.
Be sure the refrigerator stays in an upright position during
moving.
Installation instructions Models 16, 17, 18
If you hove questions, coil 1.800.GE.CARES or visitour Websiteut:GEApplionces.com
BEFOREYOU BEGIN
Reed these instructions completely end cerefully.
.IMPORTANT -Soretheseinstructions
for Iocol inspector's use.
.IMPORTANT - Observeo,governing
codes ond ordinunces.
. Note to Installer - Be sure to leuve these
instructions with the Consumer.
. Note to Consumer - Keepthese instructions
for future reference.
, Skill level - Instollotion of this opplionce requires
busic mechunicul skills.
, Completion time - Refrigerotor Instollotion
15 minutes
Reversing the Door Swing
1 hour
, Proper instollution isthe responsibility of the instuller.
, Product fuilure due to improper instullution is not
covered under the Wurrunty.
WATER SUPPLY TO THE ICEMAKER Ion
some models)
If the refrigerotor hos on icemoker, it will hove to be
connected to u cold water line.A wuter supply kit
(contuining copper tubing, shutoff vulve, fittings ond
instructions) isuvuiluble ut extru cost from your dealer,
by visiting our Website ut GEAppliences.com or from
Ports und Accessories, 1.877.959.8688.
REFRIGERATOR LOCATION
, Do not instoll the refrigerotor where the temperuture
will go below 60% (16°C)becuuse it will not run often
enough to muintuin proper temperutures.
, Instull it on u floor strong enough to support it fully
Iouded.
CLEARANCES
Allow the following cleoronces for eose of instollotion,
proper uir circulution und plumbing und electricul
connections.
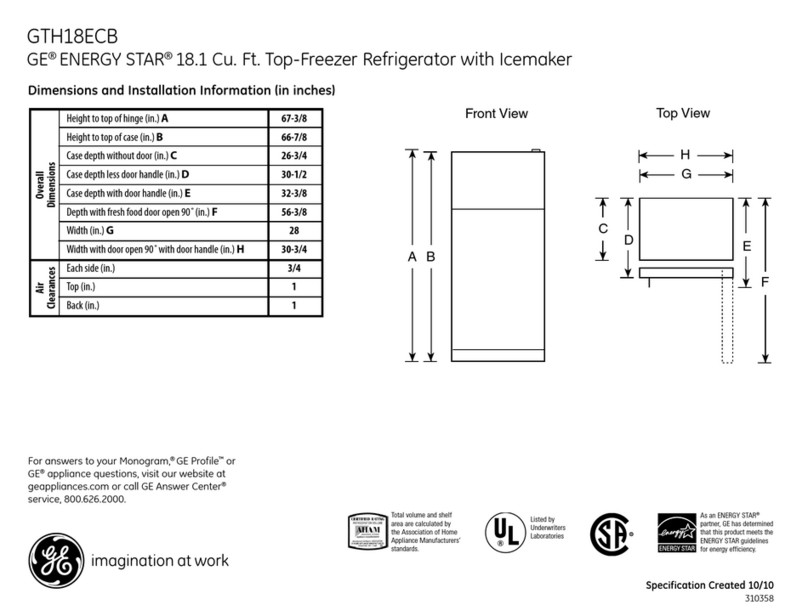
, Sides3/4" (19 mm)
, Top 1" (25 mm)
, Buck 2" (50 mm)
ROLLERS AND LEVELING LEGS
Leveling legs neor eoch front corner of the refrigerotor
ore odjustoble. They firmly position the refrigerotor
ond prevent it from moving when the doors ore
opened. Leveling legs should be set so the front of the
refrigerotor is roised just enough thot the doors close
eosily when opened obout holfwoy.
Turn the leveling legs clockwise to reise the refrigerotor,
counterclockwise to lower it,
Rollers next to the leveling legs ollow you to move the
refrigerotor owoy from the woll for cleoning.
Turn the legs counterclockwise until the weight of the
refrigerotor istronsferred from them to the rollers. After
rolling the refrigerotor bock into ploce, turn the legs
clockwise until the legs ogoin beor the weight of the
refrigerotor.

Installation Instructions
INSTALLING THE WATER LINE (ON SOME MODELS}
BEFORE YOU BEGIN
Recommended copper water supply kits are WX8X2,
WX8X3 or WX8X4, depending on the amount of tubing
you need. Approved plastic water supply lines are GE
SmartConnecf" Refrigerator Tubing (WXO8XIO006,
WXO8X10015and WXO8X10025).
When connecting your refrigerator to a GEReverse
Osmosis Water System, the only approved installation is
with a GERVKit.For other reverse osmosis water systems,
follow the manufacturer's recommendations.
This water line installation is not warranted by the
refrigerator or icemaker manufacturer. Follow these
instructions carefully to minimize the risk of expensive
water damage.
Water hammer (water banging in the pipes)in house
plumbing can cause damage to refrigerator parts and
lead to water leakage or flooding. Call a qualified plumber
to correct water hammer before installing the water
supply line to the refrigerator.
To prevent burns and product damage, do not hook up
the water line to the hot water line.
If you use your refrigerator before connecting the water
line, make sure the ice maker power switch is in the OFF
position (on power switch models) or the feeler arm in the
STOP(up) position (on feeler arm models).
Donot install the icemaker tubing in areas whe re
temperatures fall below freezing.
When using any electrical device (such as a power drill)
during installation, be sure the device is double insulated
or grounded in a manner to prevent the hazard of electric
shock, or is battery powered.
All installations must be in accordance with local
plumbing code requirements.
A WAR NING! Connecttopotable water
supply only.
A JADVERTENCIA! Conecteal
suministro de agua potable solamente.
WHAT YOU WILL NEED
, Copper or GE SmartConnect T"Refrigerator Tubing kit,
1/4" outer diameter to connect the refrigerator to the
water supply. If using copper, be sure both ends of the
tubing are cut square.
To determine how much tubing you need: measure
the distance from the water valve on the back of the
refrigerator to the water supply pipe. Then add 8' (2.4
m). Be sure there is sufficient extra tubing (about 8' [2.4
m] coiled into 3 turns of about 10" [25 cm] diameter) to
allow the refrigerator to move out from the wall after
installation.
WHAT YOU WILL NEED (Cont.)
GESmartConnecf" Refrigerator Tubing Kits are available
in the following lengths:
6' (!.8 m) - WX08X10006
15' (4.6m) - WXO8XIO015
25' (7.6m) - WXO8XlO025
Besure that the kit you select allows at least 8' (2.4m) as
described above.
NOTE:The only GEapproved plastic tubing is that
supplied in GE SmartConnect T"Refrigerator Tubing kits.
Do not use any other plastic water supply line because
the line is under pressure at all times. Certain types of
plastic will crack or rupture with age and cause water
damage to your home.
, Power drill.
,112" or adjustable wrench.
, Straight and Phillips
blade screwdriver.
, Two 1/4" outer diometer
compression nuts and
2 ferrules (sleeves}-to connect
the copper tubing to the shutoff
valve and the refrigerator water
valve.
OR
A GEwater supply kit (containing tubing, shutoff valve
and fittings listed below) isavailable at extra cost from
your dealer or from Parts and Accessories.
A cold water supply. The water pressure must be
between 20 and 120 p.s.i.(1.4-8.1 bar).
If you are using a GESmartConnect T"Refrigerator
Tubing kit, the necessary fittings are preassembled to
the tubing.
If your existing copper water line has a flared fitting
at the end, you will need an adapter (available at
plumbing supply stores) to connect the water line to the
refrigerator ORyou can cut off the flared fitting with a
tube cutter and then use a compression fitting. Do not
cut formed end from GESmartConnecf _Refrigerator
tubing.
, Shutoff valve to connect to the cold water line.The
shutoff valve should have a water inlet with a minimum
inside diameter of 5/32" at the point of connection to
the COLDWATER LINE. Saddle-type shutoff valves are
included in many water supply kits. Before purchasing,
make sure a saddle-type valve complies with your local
plumbing codes.
10

Installation Instructions
Install the shutoff valve on the nearest frequently used drinking water line.
rl] SHUT OFF THE MAIN WATER SUPPLY
AND UNPLUG REFRIGERATOR
Turn on the nearest faucet (counterclockwise)long
enough to clear the line of water.
[] DRILL THE HOLE FOR THE VALVE
Choose a location for the valve that is easily
accessible. It is best to connect into the side of a
vertical water pipe. When it is necessary to connect
into a horizontal water pipe, make the connection to
the top or side, rather than at the bottom, to avoid
drawing off any sediment from the water pipe.
Drill a 1/4" hole in the water pipe (even if using a self-
piercing valve), using a sharp bit. Remove any burrs
resulting from drilling the hole in the pipe. Take cure
not to allow water to drain into the drill. Failure to
drill a 1/4" hole may result in reduced ice production
or smaller cubes. F
13] FASTEN THE SHUTOFF VALVE
Fasten the shutoff valve to the cold water pipe with the
pipe clamp.
Tighten the clamp screws until the sealing washer
begins to swell.
NOTE:Do not overtighten or you may crush the tubing.
Washer
Clamp
Screw
Saddle-TyF
Shutoff Valve Vertical Cold
Water Pipe
NOTE:Commonwealth of Massachusetts Plumbing
Codes 2a8CIVlRshall be adhered to. Saddle valves
are illegal and use isnot permitted in Massachusetts.
Consult with your licensed plumber.
11
F4]ROUTE THE TUBING
Route the tubing between the cold water line and the
refrigerator.
Route the tubing through a hole drilled in the wall or
floor (behind the refrigerator or adjacent base cabinet)
as close to the wall as possible.
NOTE: Besure there is sufifcient extra tubing (about 8
feet [2z_acm] coiled into 3 turns of about 10" [25 cm]
diameter) to allow the refrigerator to move out from
the wall after installation.
%CONNECT THE TUBING TO THE VALVE
Place the compression nut and ferrule (sleeve)for
copper tubing onto the end of the tubing and connect
it to the shutoff valve.
Make sure the tubing is fully inserted into the valve.
Tighten the compression nut securely.
For plastic tubing from a GESmartConnect TM
Refrigerator Tubing kit, insert the molded end of the
tubing into the shutoff valve and tighten compression
nut until it is hand tight, then tighten one additional
turn with a wrench. Overtightening may cause leaks.
)ression
Nut
Saddle-T'
ShutoffValve SmartConnectTM
Tubing
Packing Nut--
Outlet Valve-- _ Ferrule (sleeve)
NOTE:Commonwealth of Massachusetts Plumbing
Codes 2z_8CMRshall be adhered to. Saddle valves
are illegal and use is not permitted in Massachusetts.
Consult with your licensed plumber.
[] FLUSH OUT THE TUBING
Turn the main water supply on (counterclockwise) and
flush out the tubing until the water isclear.
Shut the water off at the water valve after about
one quart (1 liter) of water has been flushed through
@

Installation Instructions
II
[-_ CONNECT THE TUBING TO THE
REFRIGERATOR
NOTES:
INSTALLING THE WATER LINE {CONT.}
. Before making the connection to the refrigerator, be
sure the refrigerator power cord is not plugged into
the wall outlet.
. We recommend installing a water filter ifyour water
supply hassand or particles that could clog the screen
of the refrigerator's water valve. Install it inthe water
line near the refrigerator. If using GESmartConnect_"
Refrigerator Tubing kit,you will need an additional tube
(WX08X10002)to connect the filter. Do not cut plastic
tube to install filter.
Remove the access cover. J_r_---_. I
©
Remove the plastic flexible
cap from the water valve
(refrigerator connection).
Placethe compression nut and ferrule (sleeve)onto
the end of the tubing as shown. On GESmartConnect T"
Refrigerator Tubing kit, the nuts are already assembled
to the tubing.
Insert the end of the tubing into the water valve
connection as far as possible. While holding the tubing,
tighten the fitting.
For plastic tubing from a GESmartConnect T"
Refrigerator Tubing kit, insert the molded end of the
tubing into the shutoff valve and tighten compression
nut until it is hand tight, then tighten one additional
turn with a wrench. Overtightening may cause leaks.
Fasten the tubing into the clamp provided to hold it in a
vertical position. You may need to pry open the clamp.
1/4" Tubing
Copper Clamp
Tubing
Refrigerator
1/4" Compression
Nut
Ferrule
(sleeve)
SmartConnect"_
Tubing
acces I
[_ TURN THE WATER
ON AT THE
SHUTOFF VALVE
Tighten any connections
that leak.
[_] INSTALLING THE REFRIGERATOR
Plug in the refrigerator.
Arrange the coil of tubing so
that it does not vibrate against
the back of the refrigerator
or against the wall. Pushthe
refrigerator back to the wall.
IT0]START THE ICEMAKER
On power switch models, set the icemaker power
switch to the ON position. On feeler arm models,
move the feeler arm to the ON (down) position. The
icemaker will not begin to operate until it reaches its
operating temperature of !5°F (-9°0 or below. It will
then begin operation automatically.
Power
switch
Powerswitch model
_K,FeelerArm in
the ON (down)position
Feeler arm model
NOTE:In lower water pressure conditions, the water
valve may turn on up to 3 times to deliver enough
water to the icemaker.
12

Installation Instructions
REVERSING THE DOOR SWING
IMPORTANT NOTES
When reversing the door swing:
. Readthe instructions all the way through before starting.
. Handle parts carefully to avoid scratching paint.
. Setscrews down by their related parts to avoid using
them in the wrong places.
. Provide a non-scratching work surface for the doors.
IMPORTANT:Once you begin, do not move the cabinet until
door-swing reversal is completed.
These instructions are for changing the hinges from the
right side to the left side-if you ever want to change the
hinges back to the right side, follow these same instructions
and reverse all references to left and right.
TOOLS REQUIRED
Maskingtape
Phillips screwdriver
5/16" hex-head
socket driver T20 or T25 Torxdriver
(neededforsome
models)
5/16" open-end
wrench
Putty knife or thin-
blade screwdriver
[i] BEFORE YOU START
i.i Unplug the refrigerator from its electrical outlet.
1.2 Empty all door shelves, including the dairy
compartment.
CAUTION: Do not let either door drop to the floor. To
do so could damage the door stop.
_] REMOVE THE FREEZER DOOR
2.1Tape the door shut with masking tape.
2.2With a 5/16" hex-head socket driver, remove the
screws that hold the top hinge to the cabinet.
2.3 Lift the hinge straight up to free the hinge pin
from the socket in the top of the door and set it
aside, along with its screws.
Top t
2.4 Remove the tape and tilt the door away from the
cabinet. Lift it off the center hinge pin.
2.5 Setthe door on a non-scratching surface with
the outside up.
2.6Transfer the 2 screws from the opposite side of
the cabinet to the screw holes vacated by the top
hinge removal.
13

Installation Instructions
REVERSING THE DOOR SWING (CONT.)
[] REMOVE THE FRESH FOOD DOOR
3.1Tape the door shut with masking tape.
REMOVE THE FRESH FOOD DOOR (CONT.}
3.5Transfer the two screws from the opposite sideof the
cabinet to the screw holesvacated by the center hinge
removal.
3.6 Transfer the washer (ifyour model has one)to the
opposite side.
3.2 Using a 5/16" hex-head socket screwdriver and a
5/!6" open-end wrench, remove the two screws
holding the center hinge to the cabinet. Lift the
center hinge to free its pin from the socket in the
top of the door, and set hinge and screws aside.
Becareful not to losethe center hinge spacer and
washer.
€
f
3.3 Removethe tape and tilt the door away from the
cabinet. Lift the door from the pin inthe bottom
hinge bracket. (Ifthe plasticwasher sticksto the door
bottom, put it back on the hinge.)
3.4Setthe door outside-up on a non-scratching surface.
3.7 Takeone of the screws removed in step 2 and start
itin the outermost screw hole on the opposite side.
Donot drive it all the way down-leave enough space
under the screw head for thickness of the bracket.
IJ
I-_ REVERSING THE HARDWARE
4.3.Movethe bottom hingebracketand plasticwasherfrom
the right sideto the left side. /I I Plastic
1t I _,,/Washer
Switchthe hinge pinto the ¢'-!!¢--. I _d
oppositesideof the bracket. _e."-l__
Hingej_ _
Bracket
14

Installation Instructions
[] REVERSING THE HARDWARE (CONT.1
4.2 Interchange hinge and screws at top right with
screws at top left of cabinet. Do not tighten screws
on hinge side at this time.
Installingthe hingeon
the left.
NOTES:
Installingthe hingeon
the right.
, Some hinges have four holes. Which holes you use
for installing the hinge depends on which side you
install the hinge.
. The outer edge of the hinge should be parallel to
the edge of the case for correct installation.
_] REVERSING THE DOOR HANDLES (CONT.}
5.1.3Removeplug button from the top hinge hole on the
left side of the door and insert it into the hole on the
opposite side that was vacated by removal of the top
hinge.
PlugBu_
5.1.4 Pull the plug button from the front of the door and
transfer it to the opposite side.
Plug
Toreattach the
handle on the
opposite side.
D REVERSING THE DOOR HANDLES
5.1 Transfer fresh food door hendle
5.1.1 Remove the handle plug using a tape-tipped
putty knife under the edge, and remove the
screw underneath. Remove the two screws
holding the handle to the top of the door.
Plug'_
. i
5.2 Transfer door stop
5.2.1 Move the plastic door stop and screws from
the right side to the left side.
DoorStop RightSide
5.3 Reinstall the fresh food door handle
5.3.1 Attach the handle to the right side of the
door with screws at the top
and under the handle plug.
5.3.2 Reinstall the handle plug.
15

Installation Instructions
REVERSINGTHE DOOR SWING (CONT.)
_1 REVERSING THE DOOR HANDLES (CONT.)
5.4 Transfer Freezer Door Handle
5.4.1
Remove the screw
holding the handle
to the top of the
door and the two
screws holding the
handle to the bottom
of the door.
5.4.2 Remove the handle.
5.4.3 Remove the screw from the
right top edge of the door
and insert it into the handle
screw hole on the left side.
5.4.4 Transfer the door stop as shown in preceding
section 5.2.
5.4.5 Attach the handle to the
right edge of the door with
screws at top and bottom,
using bottom holes vacated
by removal of the door stop
screws.
[] RE-HANGING THE DOORS
6.1 Re-hang the fresh food door
6.1.1 Lower the fresh food door onto the bottom
hinge pin. Be sure the washer is in place on
the pin.
Hinge--_
Bracket
Plastic
Washer
_-1RE-HANGING THE DOORS (CONT.)
6.1.2 Insert the pin on the center hinge into the socket in the
top of the door. Place the spacer, then the washer, on
the hinge pin.
NOTE:The center hinge must
be turned over as shown when
mounted on the left side.
Plastic
and Spacer
6.1.3 Tilt the door toward the cabinet. As the door is brought
into position, slide the hinge under the head of the screw
which earlier had been partly driven into the outermost
hole. Insert the remaining screw, then tighten both
screws securely.
ir __ 1.1 .............
6.2 Re-hang the freezer door
6.2.1 Lower the freezer door _ _!
onto the center hinge
pin. Besure the Center Hin_--"-_
washer and spacer
are in place on the pin.
and Spacer
6.2.2 Tilt the door toward the cabinet, lifting the top hinge so
the pin fits into the socket on the top of the door.
6.2.3. Make sure the door is slightly above the top of the
cabinet and the gap between the doors is even
across the front. Tighten the top hinge screws. Do not
overtighten these screws-tighten them until they are
just snug, then turn them another one-half turn.
16

Normal operating sounds. GEApp#ances.com
Newer refrigerGtors sound different from older refrigerators. Modern refrigerators have more features
ond use newer technology.
Do you hear what I hear? These sounds are normal.
[]The new highefficiency HUM M M...
compressormoy run
fosterond longerthon __WHOOSH...
youroldrefrigerotorond
you moy heoro high-pitchedhum orpulsotingsound
while it is operoting,
[] You moy heor o whooshing sound when the doors close.
This isdue to pressureequolizing within the refrigerotor.
CLICKS, POPS,
CRACKSand CHIRPS
[] Youmoy heor crockingor popping soundswhen the
refrigerotorisfirst pluggedin.Thishappensusthe refrigerotor
coolsto the correcttemperoture.
[] Thecompressormoy couseo clickingor chirping soundwhen
ottempting to restort (thiscouldtoke
upto 5 minutes).
[] Exponsionond controction ofcoolingcoilsduring ond offer
defrost concouse o crockingor popping sound.
[] On modelswith on icemoker,offer on icemokingcycle,you
moy heor the icecubes dropping intothe icebucket.
WHIB! You moy heor the funs spinning ot high
speeds.
This hoppens when the refrigerotor is
first plugged in,when the doors ore
opened frequently or when
o Iorge omount of food is odded to the refrigerotor or
freezer comportments. The funs ore helping to mointoin
the correct temperotures.
[]
[]
[]
[]
WATER SOUNDS
Theflow of refrigerontthrough the freezercoolingcoilsmoy
moke o gurgling noiselikeboilingwoter.
Water dropping on the defrostheotercon couseo sizzling,
popping or buzzingsoundduring the defrostcycle.
A woterdrippingnoisemoyoccurduringthe defrostcycleusice
meltsfromtheevoporotorondflowsintothedroinpun.
Closingthe door moy couseo gurglingsound dueto pressure
equulizution.
17

Before you call for service...
Troubleshooting Tips
Save time and money! Review the charts on the following
pages first and you may not need to cull for service.
liii i!iiiiiiliiii!iiliii!!iliiiii!i!!i!!i illiiiiiii!i!i!!!i! i!i!!iiliii
vibration or ratUing (slight
vibration is normalJ
Freshfood or freezer
Motor operates for
long periods or cycles
on and off frequently,
{Modem refdgerato[s
with more storage space
and a larger space and
a larger freezer require
more operating time.
They sto_ and Stop
often to maintain even
temperatures,}
Fm 0r c ,sta Son
Refrigerator in defrost cycle.
Temperature control dial in OFF
position.
Refrigerator is unplugged.
Thefuse isblown/drcuit breaker is
tripped.
Rollerscrews or levelinglegs need
adjusting.
Wait about 30 minutesfor defrostcycleto end.
Hove thetemperature control dialto a temperaturesetting.
Pushtheplug completelyintothe outlet.
Replacefuse or resetthe breaker.
Temperature control dial not set cold
SeeRollersandLevelingLegs.
SeeAbout thetemperaturecontroldial.
enough.
Worm weather or frequent door Setthetemperature controldial onestep colder.SeeAbout
openings, thetemperaturecontroldial.
Door left open.
Packageblocking air duct in freezer
comportment.
Normal when refrigerator isfirst
plugged in.
Often occurswhen large amounts of
food ore pieced in refrigerator.
Door left open.
Hot weather or frequent door
openings.
Temperature control dial set ot the
coldestsetting.
Grilleand condenser needcleaning.
frozen food (frostwithin
package isnormal}
Checkto seeifpackage isholdingdoor open.
Checkto seeifpackage isblockingairduct infreezer
compartment.
Wait 24 hoursfor the refrigeratorto completelycooldown.
Thisisnormal.
Checkto seeifpackage isholdingdoor open.
Thisisnormal.
SeeAbout thetemperaturecontroldial
SeeCareandcleaning.
Door left open. Checkto seeifpackage isholdingdoor open.
Toofrequent or too long door
openings.
Automatic iCemaker does Icemaker is not on. Hove the feeler arm to the ON (down) position, or move the
not Work (on some models} power switch to the ON position
Water supply turned off or not See Installing the water line.
connected.
Freezer comportment too warm. Wait 24 hours for the refrigerator to completely cool down.
Piled up cubes in the storage bin Level cubes by hand.
Frequent ,bu_ing,: SOund
supply to the refrigerator
hasnot beenconnected
Cubes too small
SIow ice Cube freezing
causethe icemaker to shut off.
Icemaker is on but the water
Water shutoffvalve connecting
refrigerator to water line may be
clogged.
Hove thefeelerarmto the STOP(up)position,or move
thepower switchto theOFFposition,Keepingit on will
damage thewater valve..
Calltheplumberto clearthevalve.
Door left open. Checkto seeifpackage isholdingdoor open.
Temperature control dial not set cold SeeAbout thetemperaturecontroldial.
enough.
18

TroubleshootingTips
GEAppliances.com
Icecubes haveodor/taste Icestorage bin needscleaning.
Foodtransmitting odor/taste to ice cubes.
Interior of refrigerator needscleaning
Moistureforms on cabinet Not unusual during periods of high
surface between the doors humidity.
Moisture collects inside(in Toofrequent or too long door openings.
humid weather, air carries
moisture into refrigerator
when doors reopened)
Refrigerator hasodor Foodstransmitting odor to refrigerator.
Interior needscleaning.
Emptyand wash bin.Discordold cubes.
Wrap foodswell.
SeeCoreand cleaning.
Wipesurfacedryand resettemperature control
dialone settingcolder.
Foodswith strong odorsshouldbe tightlywrapped.
Keepon open boxof bakingsodainthe
refrigerator;replaceeverythree months.
SeeCareand cleaning.
19

Notes.
20
This manual suits for next models
3
Table of contents
Other GE Refrigerator manuals

GE
GE TFX27F Installation instructions

GE
GE GE Spacemaker GMR02AAMBB User manual

GE
GE Profile PSS26PSWSS User manual

GE
GE PBV10 Original instructions

GE
GE 17 Operating instructions

GE
GE Profile 24 CustomStyle User manual

GE
GE GNS23GSH Manual

GE
GE TBF14 Installation instructions

GE
GE Profile GSH6LGZ Programming manual

GE
GE GVE Series Original instructions