GE Monogram ZICS360NMBRH User manual

OwneF's
Manual
Bottom-Freezer
Built-In Refrigerators
www.monogram.com
Monogram._

Consumer Infbrmafion
Bottom t@¢ezer /_(/)'ig'¢rator
lntrvduction Your new Monogran_ refl'igerator makes an eloquent statement of style, convenience and kitchen
planning flexibility. Whether you chose it for its purity of design, practical storage arrangements
or assiduous attention to detail--or tbr all of these reasons--you'll find that vom _Monogram
reti'igerator's superior blend of fln'm and flmction will delight you tin" years to come.
The Monogram refl'igerator was designed to provide the flexibility to blend in with yore" kitchen
cabinetry. Decorative door insert panels allow it to match vom" kitchen cabinets or blend with
w)ur kitchen decor.
Since the Monogram refl'igerator is a built-in product, custom panels are reqtfired on the
fl'ont of the Monogram refl'igeratm; Consult yore" kitchen designer or cabineunaker fin" wmr
customized look.
The information on the fl_llowing pages will hel I) you operate and maintain wmr refl'igerator
properly:
If you have any other questions, visit ore" _,Vebsite at: www, monogram.com
Contents Consumer Services
Importnnt Phone Nmnbe_ ................ 19
Model and Serial Nmnbers ................. 3
Pert0rmance Data Sheet .................. 17
Problem Solver . ...................... 15, 16
Product Registration ...................... 3
Satiety Insmmtions ...................... 4-7
State of (_alifln'nia
_.V_ter Treatment Device Certificate ......... 18
Wm'antv ........................ Back Cover
Care mad Clemahag
Cleaning--Outside and Inside ............. 13
Condenser . ............................. 13
I,ight Bulb Replacement .................. 14
¼_cation ................................ 14
Operating Instructions
Automatic Icemaker . ..................... 10
Master I,ight Switch ....................... 9
Sh elves ................................. 12
Storage Pans ............................ 11
Temperatm'e Controls ..................... 8
Water Filter Cartridge ..................... 9
using"
.yOUY
v@igevatov
Read this manual careflfllv. It is intended to
help you operate and maintain your new
refl'igera tot properly:
Keep it handy for answers to w)ur questions.
If wm don't tmderstand something or need
more help, there is a list of toll-free consulner
service nmnbers included in the back section
of this manual,
OR
Visit ore" Website at: www.monogrmn.com

Write
down the
model &
serial
nlA _7_lD_S
You'll see then_ on alabel inside the fl'esh fi)od
compartment under the storage drawers on the
right side.
These numbers are also on the Consmner
Product Ownership Registration Card included
with this manual.
Before sending in this card, please write these
numbers here:
Model Nmnber
Serial Nmnber
Use these nuinbers in any correspondence or
serxice calls concerning )ore" refl'igerator.
If you received
a damaged
refrigerator
hmnediatelv contact the dealer (or builder)
that sold xou the refrigerator.
Save time
& mon_
Before you request serxice, check the Problem
Solxer in the back of this manual. It lists causes of minor operating problems that
VO/I C_lIl correct VOtlrself.
l[you
need
service
To obtain service, see tile Consumer Services
page in the back of this manual.
We're proud of our service and want wm to be
pleased. If fl)r some reason wm are not hal_py
with the service you receive, here are steps to
tollow for flH'ther hell).
For customers in the USA:
FIRST, contact tile people who serviced yore"
appliance. Explain why you are not pleased.
In most cases, this will solve the problem.
NEXT, if you are still not pleased, write all the
details--including your phone nmnbe_to:
Manager, Customer Relations
GE Appliances
Appliance Park
I,ouisville, KV 40225
For customers in Canada:
FIRST, contact the people who serxiced xotn"
appliance. Explain why you are not pleased.
In most cases, this will solxe the problem.
NEXT, if you are still not pleased, write all the
details--including, your, I_h°ne number to:
Manager, Consmner Relations
Camco Inc.
1 Factor_ i,ane Suite 310
Moncton, N.B. E 1C 9M3

IMPORTANT SAFETY INSTRUCTIONS
READ AND SAVE THESE INSTRUC770NS
WARNING: _,_hen using this
appliance, always exercise basic safeW
precautions, including tile following:
• Use this appliance only for its intended
purpose as described in this Owner's
Man ual,
• This refrigerator must be properly installed
ha accordance with the Installation
Instructions before it is used.
Do not allow children to climb, strand or hmag
on the shelves in the refrigerator. They could
damage tile refl'igerator and seriously iI_jm'e
them selves,
Do not touch the cold surfaces in the freezer
compartment when hands axe damp or wet.
Skin mav adhere to these extremely cold
snI'_lces,
•Do not store or use gasoline or other
flammable vapors and liquids in the vicinity
of this or any other appliance.
In refrigerators with automatic icemakers,
avoid contact with moving parts of tile ejector
mechanism, or with tile heating element
located on tile bottom of tile icemaker. Do
not place fingers or hands on tile automatic
icemaking mechanism while the refrigerator
is phlgged in.
Keep fingers out of the "pinch point" areas:
clearances between tile doors and between
tile doors and cabinet are necessarily small.
Be careflfl closing doors when children are
in tile area.
Unplug your refrigerator before cleaning
and making repairs. NOTE: We strongly
recommend that any servicing be performed
bv a qualified individual.
Before replacing a burned-out light bulb,
set tile Master I,ight switch in tile OFF
position to turn off tile lights in order to
avoid contact with a live wire filament.
(A burned-out light bulb mav break when
being replaced,) NOTE: Setting the
refl'igerator temperature controls to OFF
does not remove power to tile light circuit.
• Do not refreeze frozen foods which have
thawed completely.
,ik DANGER." RISK OF CHILD ENTRAPMENT
Child entrapment and suffocation are not
problems of tile past.flmked or abandoned
refrigerators are still dangerous...even if they
will sit for 'iJust a tew days." If vou are getting
rid of wmr old refl'igerator, please tollow tile
instructions below to hel I) prevent accidents.
Before You Throw Away Your Old
Refrigerator or Freezer:
• Take off tile doors.
• I,eave tile shelves in place so that children
mav not easily climb inside.
CFC DISPOSAL
Your old refrigerator may have a cooling
svstem that used CFCs (chlorofluorocarbons).
CFCs are believed to harln stratospheric ozone.
If vou are throwing away your old refl'igerato_;
make sure tile CFC refl'igerant is removed fl)r
proper disposal bv a qualified servicer. If wm
intentionally release this CFC refrigerant you
can be subject to fines and imprisonment
trader provisions of environmental legislation,

LIP 2 ET CONSERVER CES INST"R UCTIONS
AVERTISSEMENT :i,orsque
vous utilisez le rg_ti'ig_rateui; observez toujours
certaines precautions de base, notalnlnent :
• N'utilisez le rOfrigOrateur que pour son usage
pr_vu, comme dOcrit dans le prg_sent manuel.
• InstaJlez le r_frig_rateur conform(?ment aux
directives d'installation avant de l'utiliser.
•Ne laissez pas les enfants grimper, s'asseoir,
se tenir debout ni se pendre aux clayettes du
r_frig_rateur, lls pourraient endonunager le
r_ti'ig_rateur et se blesser gravement.
•Une fois le r&frig6rateur en maacche, ne
touchez pas les surfaces froides du
congOlateur, surtout si vous avez les mains
humides ou mouill_es :la pea u risque
d'adh_rer ;'lces surtaces trOs froides.
•N'entreposez et n'utilisez pas d'essence ou
autres vapeurs et liquides inflammables h
proxilnit_ de cet appaJceil ou de tout autre
appareil _lectrom_nager.
•Pour les r_frig_rateurs dot_s d'une machine
hgla_ons automatique, &'itez le contact avec
les pi_ces Inobiles du nl_canislne &jecteur,
ou avec l'(_l(_inent chaultant situ(_ ;'l la partie
intiarieure de la machine fi gla_:ons. Ne posez
pas les doigts ou les mains sur le m_canisme
de la machine ;'l glaqons pendant que le
r_frig_rateur est branch,.
• _]loignez les doigts des parties du
rOfrigOrateur off l'on peut facilement se
pincer : les espaces entre les portes et entre
les portes et les placards sont tot!jouI_ (_troits.
Soyez prudent loi_que votts fbnnez les portes
de l'appareil ell presence des entimts.
• D&branchez votre r&frig&rateur avant
de le nettoyer et de le r&parer.
REMARQUE : Nous vous reconln/andons
viveillent de confier totlte rt_paration ;'1 tin
technicien qualifi&
• Avm_t de remplacer une ampoule grill(?e,
inettez le connn utateur de huni&re principale
ell position OFF (arr6t) pour _teindre la
hnni&re afin d'g_viter tout contact avec till
fil sous tension. (Une alnpoule grill_e
peut se briser pendant l'op&'ation).
REMARQUE : I,orsque w)us placez les
conunandes de telnp&'ature du r_fl'ig_rateur
sur OFF (arr&t), l'alilnentation _lectrique
de l'alnpoule n'est pas coup(_e.
• Ne faites PAS recongeler des aliments
surgel0s qui ont compl&tement d_gel&
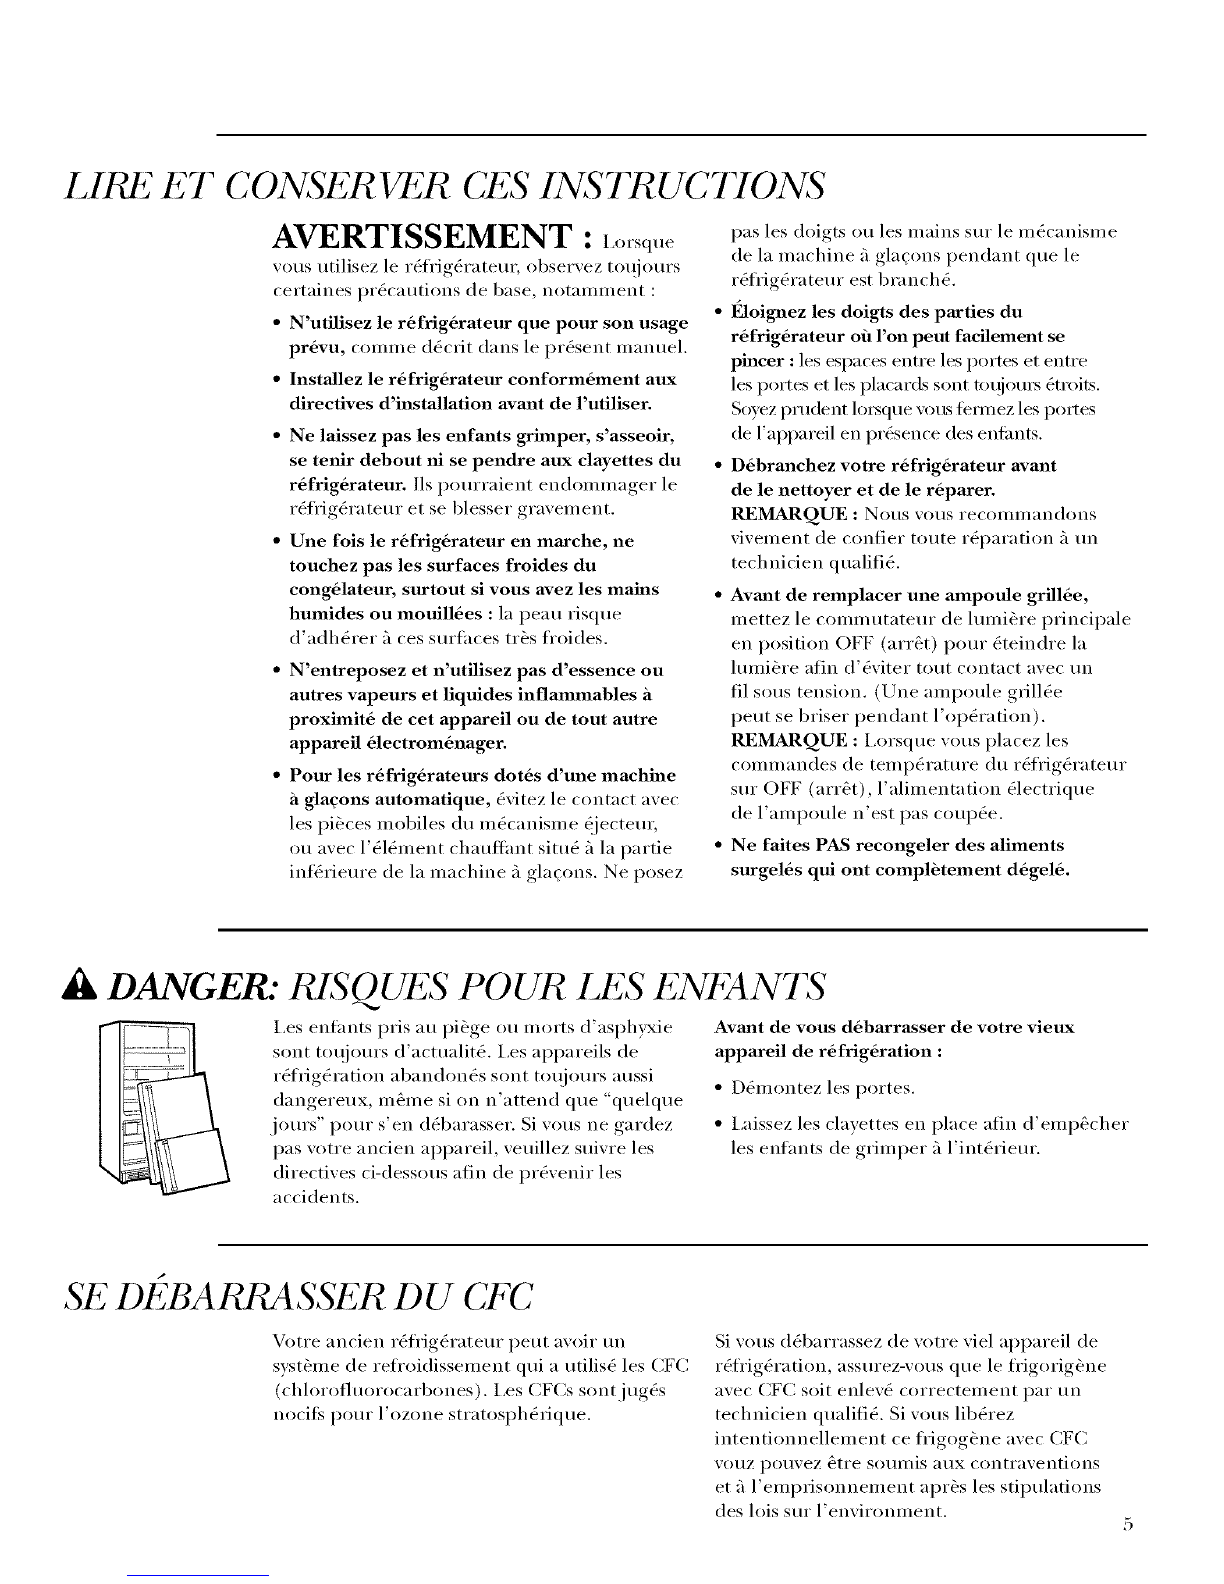
li DANGER.. " "POUR IJ'2S ENFANTS
mSQU ;S
I,es enthnts pris au pi&ge ou morts d'asphyxie
sont toujours d'actualitO. I,es appareils de
rg_fligOration abandong_s sont toujours aussi
dangereux, in_ine si (Ill n'attend que "quelque
jours" pour s'en d_barasser. Si vous ne gardez
pas votre ancien appareil, veuillez suivre les
directives ci-dessous afin de pr_venir les
accidents.
Avmat de vous dObarrasser de votre vieux
appareil de rOfrig_ration :
• Dg_tnontez les portes.
• I,aissez les clavettes en place afin d'etnp_cher
les entants de grilnper f_l'int&'ieur.
SE DEBARRASSER DU
Votre ancien i'_fi'ig_rateur peut avoir un
syst_me de refi'oidisselnent qui a utilis_ les CFC
(chlorofluorocarbones). I,es CFCs sontjug_s
nocits pour l'ozone stratosph&_ique.
Si vous d_barrassez de votre viel appareil de
r_fl'ig_ration, assurez-vous que le fl'igorig_ne
avec CFC soit enlev_ correctement par un
technicien qualifi_. Si vous lib_rez
intentionnelleinent ce fi'igog_ne avec CFC
VO/IZ potIVeZ 6tre so/ii//is aHx c()nti'aventi()ns
et fi l'elnprisonnenlent apr&s les stipulations
des lois sur Fenviromnent.

IMPORTANT SAFETY INSTRUCTIONS
HOW TO CONNECT EIJ ?,CTI CITY
Do not, under ally circumstances, cut or
remove the third (ground) prong from the
power cord. For personal safety, this appliance
must be properly grounded.
Tile power cord of this appliance is equipped
with a 3-prong (grounding) plug which mates
with a standard S-prong (gromlding) wall
outlet to minimize the possibility of electric
shock hazard from this appliance.
Have tile wall outlet and circ/dt checked bv a
qualified electrician to make sure tile outlet is
properly gromlded.
Where a standard 2-prong wall outlet is
encolmtered, it is yore" personal responsibility
and obligation to have it replaced with a
properly grounded 3-prong wall outlet.
Use of a GFI (Grolmd Fatflt Intermptor) is not
recommended for tile refrigerator outlet.
The refl'igerator should alwa):s be plugged into
its own individual electrical outlet which has a
w_ltage rating that matches the rating plate,
This provides tile best perfin'mance and also
prevents overloading house wiring circuits
which could cause a fire hazard from
overheated wires.
DO NOT USE AN ADAPTER PLUG TO
CONNECT THE REFRIGERATOR TO A
2-PRONG OUTLET.
DO NOT USE AN EXTENSION CORD
WITH THIS APPLIANCE.
Never mlplug yore" refl'igerator by pulling on
the power cord. Always grip plug firmly and
pull straight out fl'om the outlet,
Repair or replace immediately all power cords
that have become fl'aved or otherwise
damaged. Do not use a cord that shows cracks
or abrasion damage along its length or at
either end.
When II/oving the refl'igera tot away from the
wall, be careflfl not to roll over or damage tile
power cord.
Reier to the Installation lnstHictions fin"
particular electrical s)_stem specifications
fin" this refl'igerator.
SAVE THESE
INSTRUCTIONS

p
RA CCORDEMENT ELECTRIQUE
Ne coupez ni retirez en aucun cas la troisi_me
broche (raise hla terre) de la fiche du cordon
d'alimentation. Pour votre s_curit_, cet
appareil dolt _tre correctement mis a la terre.
I,e cordon d'alimenmtion de cet appareil est
muni d'une fiche _'l3 broches (raise _'lla terre)
qui se branche darts tree prise mural ordinaire
_'l3 alv0oles (raise fi la terre) pore" r&luire au
minimmn les risques du chocs (_lectriques.
Faites examiner la prise de com'ant et le circuit
par tm _lectricien qualifi_ pour vous assurer
que la prise est correctenlent raise _'lla terre.
Si la prise tam'ale est du type standard _'l2
alv_oles, il wins incombe de la efire remplacer
par tree prise _'l3 alvg_oles correctement raise
_'lla terre.
i,' utilisation d'un intermptem _de d6fi_ut ;'1la
terre (GFI--(;rotmd Fault Intenuptor) n'est
pas recommand_ pore" la prise de com'ant
du rg_frig_ratem:
I,e r_ti'ig_ratem" doit toujours _tre branch_
darts sa propre prise de courant, dont la tension
nominale est identique _'lcelle indiqu_e sin" la
plaque signalg_tique.
Cette prg_caution est recommand_e pour
garantir tm rendement optim mn et (Mter
tree sm'cha_ge des circuits (_lectriques de la
rg_sidence, ce qui pomTait crg_er un risque
d'incendie par surschaufl'e des ills.
N'UTIL1SEZ PAS UNE FICHE
D'ADAPTATION POUR RACCORDER
LE REFRIG]_:RATEUR DANS UNE PRISE
MURALE A2 ALV_:OLES.
N'UTILISEZ PAS DE CORDONS
PROLONGATEURS AVEC CET APPARE1L
Ne d_branchezjamais l'appareil en tirant le
cordon d'alimentation. Saisissez fermement
la fiche du cordon et tirez droit pore" la retirer
de la prise.
R_parez ou remplacez immg_diatement tout
cordon efliloch(_ ou endommag_. N'utilisez
pas tm cordon timdill_ ou prg_sentant des
signes d'usure.
I,orsque vous d_placez l'appareil du ram; faites
attention de ne pas la fifire fouler sur le cordon
d'alimentation afin de ne pas l'endommaget;
Vovez les Instructions d'lnstallation pour
les spg_cifications particuliers du sx:st_me
d'g_lg_ctrique de cet appareil.
CONSERVEZ CES
DIRECTIVES

Operating Instructions
Bollom Freezer I_/rig'eralor
7 mpoature
controls
Preset Settings
Allow 24 hours to reach these preset temperatures.
The temperature display shows the actual
temperature of the freezer and fresh food
compartments. The actual telni_eramre inay
vary slightly ti'oln the set temi_erature based
on thctors such as frequency of door opening,
_lulotlnt of tim(l, deii'ost cycling and room
temperature.
To turn off the cooling system in both the
freezer and ti'esh food compartments, press
either + pad tmtil both displays show OFF.
To turn the cooling system on, press either -
pad. The preset temperatures of 0°F and 37°F
will appear in the display.
To check the current temperature setting for
the fresh food or freezer compartment, press
the +or -pad once. After 5 seconds, the
display will return to the actual temperature.
To change the temperature settings, press the
+ or- pads. Allow 24 hours fi)r the refl'igerator
to reach the teml)erature you have set.
Temperature Ranges
Low High
34°F 45°F
1 °C 7 °C
Fresh Food
Freezer _6°F +6°F
_21°C _14°C
NOTE:Setting the controls to OFFstops
cooling, but does not sh tit off electrical power
to the refrigerator.
Changing
di Hay
temp atures
frvm °F to °C
To change the temi)erature display between
Fahrenheit and Celsius, press the Temp
Display °C/°F.
Door
alaflfl
To turn the Door Alarm feature on, press
the pad once. The ACHVElight will come on.
To mrn it off, press the pad again.
_:hen the DOOR ALARM
is active, the alarm will flash _'_
and beep if you keep the
door open for UlOi'e than
2 u/intltes. ((€i1=

Automatic Icenlaker (on some models)
Bollom Freezer I_ff)'ig'eralor
Wato filter
cartri({ge
The water filter cartridge is located behind the
grille panel at the top of the refl'igerato_: I,ili up
the panel to access the cartridge.
When to Replace the Filter: WATERflL_ER
The filter cartridge is designed _ _"_
to filter 300 gallons of water (lasting
approximately 12 months). It should
be replaced when the status light turns
red or if win notice the ice cubes getting
hollow or small.
Installing the Filter Cartridge:
1Raise the grille panel at the top of the
refl'igerato_:
2Remove the old cartridge by slowly turning
it to the letk A small amount of water may drip
down. Do not pull down on the cartridge.
3 Fill the new cartridge with water from the
tap to allow for better flow immediamlv atter
installation,
4 IJne up the arrow on the cartridge with the
center of the holder. Do not push it up into
the holder:
5 Slowly mrn it to the fight tmtil the cartridge
stops. It will rotate about 1/4 turn. DO NOT
OVERTIGHTF2q.
To Reset the Filter Status Light:
Press and hold the RESET pad fi)r 3 seconds.
Filter Bypass Plug:
_)u must use the filter bypass plug:
a) if you have a household rex'e_e osmosis water
system
b) if a replacement filter is not available.
The icemaker will not operate without the filter or
filter bypass plug installed.
O
Replacement Filters:
To order additional filters ha the United States,
call GE Parts mad Accessories, 800.626.2002.
(;WF
Suggested Retail .$34.9,<5
Custome_ in Canada should consult the vellow
pages tot the nearest Camco Se_Mce Center:
Holder
WaterFilter
Cartridge
Slowly turn it to the right.
Do not overtighten.
Using the
Master Light
switch
This feature turns off the lights in the fl'esh
food and fl'eezei" cou/pai'tulents.
The switch is located behind the grille panel
at the top of the reti'igerator. I,ilt up the panel
to access the switch.

Autonlatic Icenlaker (on some models)
Bottom Freezer H_f)'ig'eralor
Automatic
icemak
A newly-h_stalled refrigerator may take 12-24
hours to begin ma_khag ice.
Tile icemaker will produce seven cubes per
cycle--ai)i)roxinmtely 15 cycles in a 24-horn"
period,
If tile refrigerator is operated betore tile water
connection is made to the icemaket; set the
power switch to O (off),
_,_]/en the reflJgerator has been connected to the
water sui)ply, set tile power switch to I(on).
Throw away the fi_t fifll bucket of ice to allow the
water line to cleat:
Be sure nothing interferes with tile sweep of the
teeler arm.
_,_]/en tile bin fills to tile level ot tile teeler am_,
the icemaker will stop producing ice.
PowerSwitch
It is nomml fiw several cubes to be joined together:
If ice is not used fl'equentl> old ice cubes will
become cloudy, taste stale and shrink.
If ice cubes get stuck in the icemake_; set the
power switch to 0 (off) and remove tile cubes. Set
the power switch to I (on) to restart the icemake_:
_Mter tile icemaker has been tin'ned on again,
there will be a delay of about 45 minutes befi)re
tile icenlaker i'esuilles ol)erations.
NOTE: In homes with low water pressm'e, you
may hear tile icemaker water \:five cycle on several
filn es when nlaking one batch of ice.
10

F
St() age Pans
Bollom t'¥eezer H_qrigeralor
The sealed snack pans retain high hulniditv
ti)r the convenient storage of lunch meats and
cheese, hors d'oeuvres, spreads and snacks.
Make sure the pans are closed completely to
maintain the correct humidity level.
Adjustable
humidity
]) (l _l S
These drawers have individual, a(!justable
humiditv controls that let you control the
amount of cold air entering the drawers.
Make sure the drawers are closed completely to
maintain the correct humiditv level.
Slide the control all the way to the High setting
and the drawer provides higher humidity levels
recon_in ended tor in ost leaf)' vegetables.
Slide the control all the way to the Low setting
and the drawer provides lower humidity levels
reconlnlended ti)r nlost ti'uits.
Excess water that n/av accumulate in the
bottom of the drawers should be emptied
and the drawers wiped dr}.
To remove a pma, pull it ()tit and lilt the front
up and out of the wire holder. I,ilt the back
up and ()tit.
To replace a pml, place the back of the pan in
the wire holder, making sure the indentations at
the back of the pan fit into the back of the wire
holder. Then lower the fl'ont of the pan into the
wire holder. Press firmly on the top of the pan
until it snaps into place.
11
11

Shelves and Bins
Bollom Fr_,ezer I_/)'ig'_,*'ato*"
Adjustable
shelves in the
fresh jood
compartment
Tempered glass shelves in tile fresh fl)od
compartment enable you to make etticient shelf
arrangements to fit vom _tamilv's food storage
needs.
To remove shelves: Tilt shelf up at fl'ont, then
lilt it up and out of tracks on rear wall of
refl'igera tot.
To replace shelves: Select desired shelf height.
With shelf fl'ont raised slightly; engage top lugs
in tracks at rear of cabinet. Then lower fl'ont of
shelf until it locks into position.
Removable
wine rack Tile wine rack is designed to hold a bottle on its
side and will fit on any shelf.
To relocate the wine rack: Pull the wine rack
straight out, position its lip over tile right edge
of tile shelf vou want to suspend it fl'om and
push it all the wav in.
DOOT
bins Some door bins are a(!iustable and can be
inoved iiI) and down to ineet your storage needs.
Tile deeper door bins must be placed at tile
bottoi/l of tile door,
To remove: i,ifl tile bin up and slide it
toward you.
]_2yF_ez ei
drawer with
basket
Inside tile fl'eezer drawer is a wire slide-out
fl'eezer basket.
This basket can be i)ushed back so items on tile
bottom of tile fl'eezer drawer can be reached.
To remove the basket:
1 Open the fl'eezer drawer.
2 I.iti up the back of the basket, then slide the
basket back until it clears the front hooks.
12 Toremovebasket

re and (;leaning
Bottom Freezer I_(/}'ig'e*'alo*"
Cleaning
outside
The door hmadles mid trim. Clean with a cloth
&unpened with soapy water. D_v with a sott
cloth.
Keep the outside clean. Wipe with a clean
cloth lightly dampened with mild liquid dish
detergent. Dry with a clean, sott cloth.
Do not wipe the refl'igerator with a soiled dish
cloth or wet towel. These may leave a residue
that can erode the paint. Do not use scouring
pads, powdered cleaners, bleach or cleane_
containing bleach because these products can
scratch and weaken the paint finish.
The stainless steel panels and door hm_dles
(on some models) can be cleaned with a
commerciallv available stainless steel cleaner
such as Stainless Steel Mag'id _'
Stainless Steel Mag'ic is awlilable at Ace, Trtle
Value, Servista_; HWI and other leading stores.
It is also available through GE Parts and
Accessories, 800.626.2002. Order part number
X,_3X10X 15.
Do not use appliance wax or polish on the
stainless steel.
Ch?aning
inside To help prevent odors, leave an open box
of baking soda in the refl'igerator and fl'eezer
colnl)a i'tlnents.
Unplug the refrigerator before clemfing.
If this is not practical, wring excess moisture
Otlt of sponge or cloth when cleaning arotlnd
switches, lights or controls.
Use warm water and baking soda solution--
about a tablesi)oon (l 5 ml) of baking soda
to a quart (l liter) of water. This both cleans
and neutralizes odors. Thoroughly rinse
and wipe dry.
Other parts of the refrigerator-including
door gaskets, meat and vegetable drawers,
ice storage bin and all plastic parts-can be
cleaned the same way: Alier cleaning the door
gaskets, apply a thin laver of petroleum ,jelly to
the door gaskets at the hinge side. This helps
kee I) the gaskets flxma sticking and bending
()tit of shape.
Avoid cleaning cold glass shelves with hot water
because the extreme temperature difference
may cause them to break. Hmadle glass shelves
carefully. Bmnping tempered glass can cause it
to shatter.
Do not wash any plastic refrigerator parts in
the dishwasher.
CondeJ2seT There is no need tk)i" ro/ltine condenser
cleanings in normal home operating
environlilents. Howevei; iI1 envii'onli/ents that
may be particularly dusty or greasy; the
condenser should be cleaned annually
tot etiicient refl'igerator operation.
To clean the condenser:
1 Turn off the power at the circuit breaker
or fllse box. _'ait about 30 minutes for the
condensei" ai'ea to cool.
2 Raise the grille panel at the top of the
refrigerator.
3 Use a soft bristle brush to loosen dust and lint
on the condenser fins. Use a v_lctltlill hose to
rein ove soil.
4 I,ower the grille panel.
5Reconnect power at the fllse box or
circuit breaker.
CondenserCoils
Cleanthe condenserperiodicallywith a brush.
13

Ca_re and Cleaning
Bottom Freezer I?_(/rigerator
Preparing
jbr vacation
For long vacations or absences_ YeIllove tood
and shut off power to the refl'igerator at the
fllse box or circuit breaker. Clean the interior
with a baking soda solution of one tablespoon
(l 5 ml) of baking soda to one quaint (l liter)
of water. I,eave the dooi_ open.
For shorter vacations, relnove perishable fi)ods
and leave controls at regular settings. However,
if tile room temperature is expected to drop
below 60°F (16°C), tollow the sam e
inst_ uctions as fin" hmg \z_cations.
Set the icemaker power switch to the O (off)
position and shut off tile water supply to
tile refl'igerator.
Light bulb
replacement
in the
.fieshjood
compartment
Tur_fing the temperature control to OFF does not
remove power to the light circuit.
There are fimr light bulbs in tile top of tile
fl'esh food compartment.
To replace the bulbs:
1Set tile Master I,ight switch in the OFF
position to turn ott tile lights. See {Aint{"the
Ma,sh:r Lig'hl swilch.
2 Remove tile light shield by placing your
finge_ in the openings at the back of the
shield. Then, pull tile shield toward wm and
swing the back of the shield down,
3 Replace with tile same size bulb (40 watt max.).
4 Reinstall the shield and reset the Master i,ight
switch to the ON position.
Light bulb
replacement
in the freezer
compartment
To replace a bulb:
1 Set tile Master I,ight switch in tile OFF
position to turn off tile lights. See lAin t{"lhe
Ma,sler Lig'hl switch.
2Remove tile fl'eezer light shield by removing
the two screws with a Phillips screwdriver.
3Replace with the same size bulb (40 watt max.).
4 Reinstall the shield and reset the Master I,ight
switch to the ON position.
14

The Problenl Solver
Bollom Freezer R_(frig'eralor
Questions ?
Use this
problem
solver: t
PROBLEM POSSIBLE CAUSE
REFRIGERATOR
DOES NOT OPERATE
MOTOR OPERATES
FOR LONG PERIODS
OR CYCLES ON AND
OFF FREQUENTLY
(Modern refrigerators
with more storage
space and a larger
freezer require more
operating time. They
start mad stop often
to maintain even
temperatures.)
VIBRATION OR
RATTLING
(Slight vibration
is normal.)
OPERATING
SOUNDS
DOOR NOT CLOSING
PROPERLY
FRESH FOOD
OR FREEZER
COMPARTMENT
TOO WARM
• Ma) be in defrost cxcle when comi)ressor does not operate fi_r about
30 minutes.
• Temperature control in the OFF position.
• If interior light is not on, refrigerator may not be I_hu"°ed_ in at
wall outlet.
• The fllse is blown/circuit breaker is tripped. Replace fllse or reset
the breaker,
• Normal when refl'igerator is first i)lugged in. _4]fit 24 horn's for the
refl'igerator to completely cool down.
•Otten occm's when large am(rants offi_od are placed in refl_igerator.
This is normal.
• Door lett open or package holding door open.
• Hot weather or fl'equent door openings. This is normal.
• Temperatm'e controls set at the coldest setting. See Temperatm'e
Controls.
• I,exel the refrigerator. See Installation Instructions.
• Normal tan air flow--one tan blows cold air through the fi'esh fi_od
_lIld freezer COilll)_li'tillents--_lnothei" t_lil cools the condensei" _li'e_l
behind the grille panel.
• These NORMAl, sounds will also be heard from time to time:
• Defl'ost water dripping.
• Refl'igerant boiling or gm'gling.
• Cracking or poi)ping of cooling coils caused by expansion and
contraction during defrost and reti'igeration ti)llowing defrost.
• Ice cubes dropping into the bin and water running in pipes as
icemaker refills.
• The icemaker water xalxe will buzz when the icemaker fills
with water.
• Refl'igerator not level. See Installation Inst_ uctions.
• Package holding door open.
• Temperatm'e controls not set cold enough. See Temperatm'e
Controls.
• _'_rm weather or ti'equent door openings.
• Door leit open for long tim e.
• Package may be holding door open.
15

The Problem Solver
Bollom Freezer H_/rig'eralor
Questions ?
Use this
problem
solver: t
PROBLEM POSSIBLE CAUSE
FROST OR ICE
CRYSTALS ON
FROZEN FOOD
(Frost within package
is normal.)
SLOW ICE CUBE
FREEZING
ICE CUBES HAVE
ODOR/TASTE
AUTOMATIC
ICEMAKER
DOES NOT WORK
MOISTURE FORMS
ON OUTSIDE OF
REFRIGERATOR
MOISTURE
COLLECTS INSIDE
REFRIGERATOR
HAS ODOR
INTERIOR LIGHT
DOES NOT WORK
SMALL OR
HOLLOW CUBES
• Door left open or I)ackage, holding door open.
• Freqtlent or long, door ol)enings, .
• Door may have been left open.
• TeI/ll)erattlre of ti'eezei" COilll)artil/ent too W}li'ii/,
• Old cubes need to be discarded.
• Ice storage bin needs to be emptied and washed.
• Unsealed packages in fresh ti)od and/or freezer compartments may
be transmitting odor/taste to ice cubes.
• Interior of refrigerator needs cleaning, See Care and Cleaning,
• Poo>tasting incoming water, Replace water filter,
• Icemaker power switch is in the O (off) position,
• _'ater supply tin'ned off or not connected.
• Water filter clogged. Replace the filter or use the filter bypass plug.
• Freezer COIIll)_lI'tIIlen[ tOO W_II'III.
• Piled 11I) ctlbes in storage bin may Catlse icemaker to shut off too soon.
i,evel cubes in bin.
• Ice cubes stuck in icemaker. Tm'n off the icemaker, remove cubes
and ttlrn the icemaker back on.
• Not tlntlS/lal dm'ing periods of high hmnidity. Wipe s/irt_lce dry.
• Door lett open or package holding door open.
• In lmmid weather; air carries moisture into refl'igerator when dom_
aI'e opened.
• Foods with strong odors should be tightly covered.
• Check tot spoiled tood.
• Interior needs cleaning. See Care and Cleaning.
• Kee I) open box of baking soda in refl'igerator; replace every 3 months.
• No poweI" at outlet,
• I,ight bulb needs replacing, See Care and Cleaning,
• Master I,ight switch is in the OFF position,
• Water filter clogged, Replace the filter or use the filter bypass i)lug,
16

Performance Data Sheet
GESmartWater Filtration System
GWFCartridge
Health Claim Performance Certified by NSF/ANSI*
'100% safety factors built in for unmetered usage)
Standard No. 42: Aesthetic Effects
PaJ:mneter
Chhmue
T&O
Particulate**
Parameter
USEPA
MCL
USEPA
Tudfidiw
Cysts
I,ead at pH 6.5
I,ead at pH 8.5
Lindane
Mrazine
2,4-D
._sbestos
hlfluent
Challenge
1.9 ppm
200,000
Effluent
Average
0.02 ppm
3,978
StaaldaJ:d No. 53: Health Effects
hlfluent Effluent
Ma_xinluin
0.05ppm
7,800
%Reduction
Average Minimum
98.90% 97.37%
98.00% 96.10%
% Reduction
MCL
1 NTU***
99.95% Reduction
15 ppb
15 ppb
O.O002ppm
0.003 ppm
0.100 ppm
99%
Challenge
24.3 NTU
105,750
160 ppb
150 ppb
0.00062 ppm
0.0084 ppm
0.272 ppm
690 MFI,/ml
Average
0.07 NTU
26
1 ppb
1.8 ppb
0.0000:5 ppm
0.002 ppm
0.042 ppm
0.32 MFI,/ml
Testedusing aflow rate of0.5gpm; pressure of 120psig; pH of ZS+_O.&temp. of20+-2.5C
** Measurement in particles/ml
*** NTU=Nephelometric Units
Ma.,_num
0.1 NTU
55
1 ppb
4.3 i)pb
0.00005 ppm
0.003 ppm
0.090 ppm
1.2 MFI,/ml
Average
99.71%
99.97%
99.37%
98.80%
91.93%
76.19%
84.89%
99.95%
Minimum
99.59%
99.95%
99.37%
97.13%
91.93%
64.28%
67.63%
99.82%
Operating Specifications
Capacity: certified ti)r up to ,300 ,galh)ns; up to one year
P re sstlre re q tli re In eu t: 40-120 p si (2.8-8.2 b a r), n on-s h o c k
::: Temperature: 33-100 F (0.6-38 C)
?Flow rate: 0.5 gpm (1.9 lpm)
General Installation/Operation/Maintenance Requirements
Flush new cartridge at full flow for 3 minutes to pm'ge out trapped air.
Replace cartridge when flow becomes too slow.
Special Notices
Installation instructions; parts and service axailabilit}; and standard _armnt} are included _dth the product _hen shipped.
This drinking water s}stem must be maintained according to mantfl'acttu'er's instructions, including replacement of
filter cartridges.
Do not use with water that is microbiologicall,x tmsafe or of tmknown quality without adequate disinfection before or atter
the sxstem. Sxstems certified for c_st reduction max be used on disiutected water that may contain filterable cysts.
The contaminants or other substauces remoxed or reduced b} this water treatment s}stem are uot necessaril} in }our water
Check for compliance with the state and local laws and regulations.
System T(sted and Certified by NSF Internalional againsl ANSIiNSF
Standard 42 & 53 fk_r the reduction of"
Stmldard No. 42: Aesflmtic Effects
Chemical l Jnit
'Ihste and Odor Reduction
Chlorine Reduction, Class I
Mechanical Fihration Lnit
Particulate Reduction, Class I
Standard No. 53: Health Effects
Chemical Reduction [7nit
Lead and Atrazine Reduction
I_indane and 2,4-1) Reduction
Mechanical Fihration Lnit
'Ihrbiditv Reduction
Cyst and A_bestos Reduction
Manufi_ctm'ed fiw: (;eneral Electric Company I,ouisville KY40225
17

State of California
Department of Health Services
Water Treatment Device
Certificate Number
00-1434
Date Issued: May 30, 2000
Date Revised: February 9, 2(X)l
Trademark/Model Designation Replacement Elements
GE Smart Water Filtration Systems : GWFO 6 GWF06
GE Smart Water Filtration Systems - GWF GWF
Hotpolm Rehl_e _f_' o% l'a_,_ _ _y_Tems - HWF HWF
Manufacturer: GenervlElecmc Appliances
Cysts tprotozoan) Asbesro-
Turbidity Led
Organic Contaminants
Atrazine
Lindane
2,4-D
Rated Service Capacity: 300 gallons ,_ Rated Service Flow: 0.5 gpm
Do not use where water is mierobiologieally unsafe or with water of unknown quality, except that systems
claiming cyst reduction may be used on water containing cysts.
*500 gallons for models that include a replacement filler indicator light.
For Purchases Made In Iowa: This form must be signed and dated b} the buyer and seller prior to the consummation of
this sale. This form should be retained on file b_ the seller for a minim um of two years.
BUYER: SELLER:
Name NaIn e
Address Address
(;iV,' State Zip (SV,' State Zip
Signature Date Signature Date
18

Consumer Services
Bollon_ Freezer I_(/}'ig'eralor
With the purchase of your new Monogram appliance, receive the
assurance that if you ever need information or assistance from GE,
we'll be there. All you have to do is call-toll-free, t
GE Answer
Center ®
In the USA:
800.626.2000
Whatever your question about any Monogram major appliance, GE Answer Cente_ _'_
information service is available to hell). Your call--and your question--will be answered
promptly and courteously. And wm can call any time. GE Answer Centei _'_selMce is open
24 hours a da> 7 days a week.
OR
Visit our _,Vebsite at: www.monogram.com
In Canada, call 1.888.880..3030.
In-Home Repair
Service
In the USA:
800.444.1845
In Canada:
1.888.880.3030
AGE consumer se_wice protessional will provide expert repair se_wice, scheduled at a time
that's convenient for win. Many GE Consumer Service company-operated locations otter
wm service todav or tomorro_, or at wmr convenience (7:00 a.m. to 7:00 p.m. weekda):s,
9:00 a.m. to 2:00 p.m. Saturdays). Our thctory-trained technicians know your appliance
inside and out--so most repairs can be handled in just one visit.
For Customers
With Special
Needs...
In the USA:
800.626.2000
s_erloN
GE offet_ Braille controls for a variety of GE appliances, and
a brochure to assist in I)lannin°_ a barrie_free kitchen for persons
with limited mobility.
()msumers *sith impaired hearing or speech *d_o have access to
a TDD or a conxentional teletypewriter max call 800.TDD.GEA(:
(800.833.4322) to request information or serxice.
Service Contracts
In the USA:
800.626.2224
In Canada:
1.888.880.3030
You can have the secure teeling that GE Consumer Setwice will still be there after wmr
warranty expires. Purchase a GE contract while vour warranty is still in etti_ct and vou'll
receive a substantial discount. With a multiple-year contract, you're assured offllture
se_wice at today's prices.
Parts and
Accessories
In the USA:
800.626.2002
In Canada:
1.888.880.3030
Individuals qualified to service their own appfiances can have parts or accessories sent directly
to their home. The GE parts s)stem provides access to oxer 47,000 parts...and all GE (;enuine
Renewal Parts are fullx warranted. VISA, MasterCard and Discoxer cards are accepted.
User maintenance instructions contained in this mmmal cover procedures intended to be
performed by m_y user. Other servicing generally should be referred to qualified service
persomml. Caution must be exercised, since improper servicing may cause unsafe operation.
19

Warranty
Bollom Freezer Re/rigeralor
WHATIS
COVERED
P}_m the Date
of the Or_in, al
Purchase
YOUR MONOGRAM REFRIGERATOR WARRANTY
Staple sales slip or cancelled check here. Proof of original purchase
date is needed to obtain service under warranty.
FULL TWO-YF_R WARRANTY
For two years from (late of original purchase, we will provide, flee of charge, parts and set\ice labor ill
your home to repair or replace a*U part q!'the rq/r_W_r_torthat fifils because of a man ufilcturing defect.
FULL FIVE-YFAR WARRANTY
For five years li'om (late of original purchase, we will provide, li'ee of charge, parts and service labor
in your ilome to repair or replace an 3,part rfthe sealed r@'ig'_:mti_g',_3'stem(the compressol, condenseL
evaporator and all connecting tubing) that Iifils because of a manufacturing defect.
LIMITED ADDITIONAL SEVEN-YFAR WARRANTY ON THE SFALED SYSTEM
For the sixth through twelfth year from the (late of the original purchase, we will provide, flee of
charge, replacement parts lb(an), part r!/'the sealed _Y:/rig'_:_Ylti_g",_ystem(the compressol, condenseg
ex_lporator and all connecting tubing) that Iifils because of a manufacturing defect. You PW for
the service trip to your home and for service labor charges.
LIMITED LIFETIME WARRANTY ON FULL F2C_TENSION SLIDES
From the (late of the original purchase we will provide, l_'ee of charge, replacement parts for
a_ 3,part q/'the./}dl extemio*_ slide_ that fails because of a manufilcturing defect. You pay for the
service nip to your home and l'br service labor charges.
LIMITED THIRTY-DAY WARRANTY ON WATER FILTER CARTRIDGE
From the (late of the original purchase we will provide, l]'ee of charge, replacement parts for
a_), part o/'the _vaterfilter cartrMg'("that l'ifils because of a manufacturing defect. During this limited
thirtDday warrant B we will also provide, flee of charge, a replacement water filter cartridge.
• @@@@@@@@@@@@@@@@@@@@@@@@@@@@@@@@@@@@@@@@@@@@@@@@@@@@@@@@@@@@@@@@@@@@o
This warranty is extended to the original purchaser and any succeeding owner for products
purchased for ordinar_ home use in the 48 mainland states, Hawaii, Washington, D.C. or Canada.
In Alaska the warranty'is the same except that it is I,IMITED because you must pay to ship
the product m the service shop or fi)r the service technician's tra\el c(_sts to your home.
All warranty service will be provided by our Factory Service Centers or by our authorized Customer
Care.: servicers during normal working hours.
Should \_)ur appliance need service, during warranty period or beyond, in the USA call
800.444_1845. In Canada: 888.880.3030.
WHAT IS NOT
COVERED
• Service trips to your home to teach you how
to use the product.
• Replacement of house fuses or resetting of
circuit breakers.
• Damage to the product caused by accident,
fire, floods or acts of God.
•Failure of the product if it is used for other
than its intended purpose or used commercially.
• Damage caused after delivery.
•Improper installation, delivery or maintenance.
If you have an installation problem, contact
your dealer or installer. You are responsible
for providing adequate electrical, plumbing
and other connecting facilities.
•Replacement of the light bulbs or water filter
cartridge other than as noted above.
•Replacement of the water filter cartridge due
to water pressure that is outside the specified
operating range or due to excessive sediment
in the water supply.
•Loss of food due to spoilage (in the USA only).
• Incidental or consequential damage caused by
possible defects with this appliance.
Solne states/provinces do not allow the exclusion or limitation of incidental or consequential
damages, so the above limitation or exclusion ma> not apply to \_)u. This warranty gives you specific
legal rights, and you ma_ also have other rights which vary l_'Oln state to state/province to province.
To know what your legal rights are in your state/province, consult your local or state/provincial
consumer allitirs olfice or your state's Attorney General.
Warrantor in USA: General Electric Company, (_
Louisville, KY 40225
Warrantor in Canada: Cameo Inc. IVl _,HAO_O_f_m ®
162D9632PO04
49-60304
15423-01 11-03JR
Printed in the United States
GEConsumer Products
General Electric Company
Louisville, KY40225
@2003General Electric Company
This manual suits for next models
15
Table of contents
Other GE Refrigerator manuals

GE
GE Profile 24 CustomStyle Operating instructions

GE
GE Side-by-Side Stainless Steel Free-Standing... User manual

GE
GE Profile PFCF1NFX Manual

GE
GE PSS23KSESS Assembly instructions

GE
GE GSHF9NGY Manual

GE
GE 197D3351P020 Operating instructions

GE
GE PFSS6PKXBSS and Operating instructions

GE
GE 162D9639P004 Original instructions

GE
GE ZlS360N User manual

GE
GE Profile GSCF3PGXBB Manual