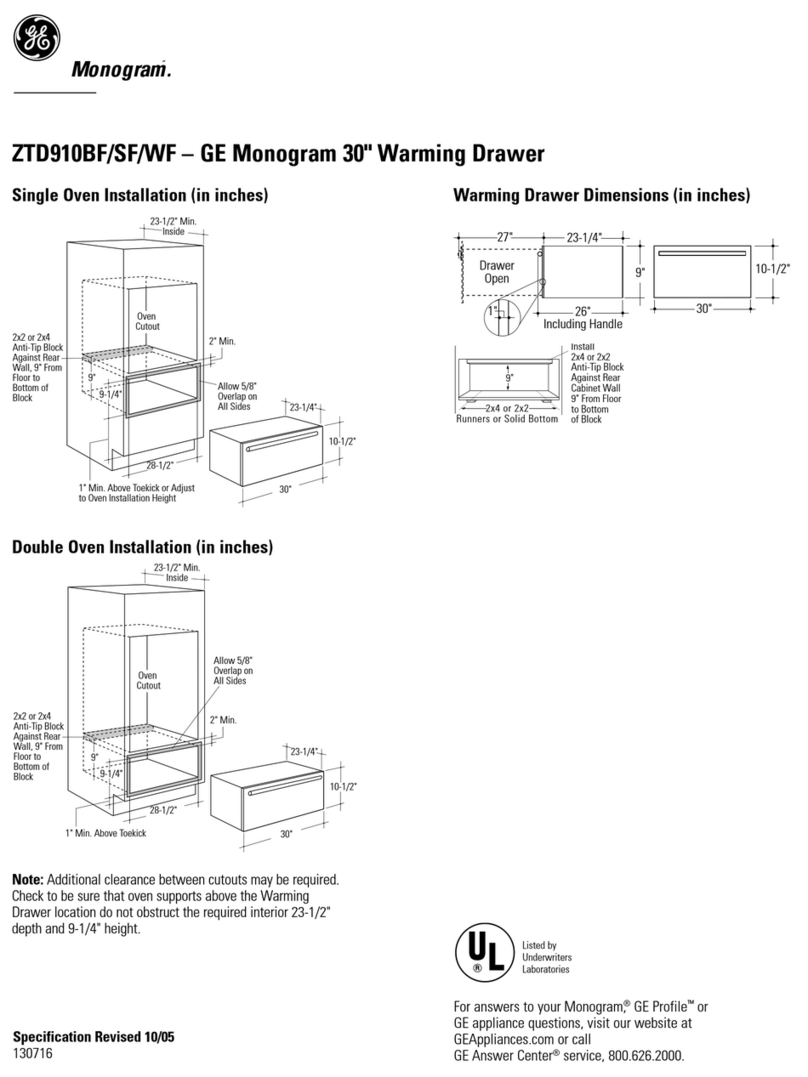
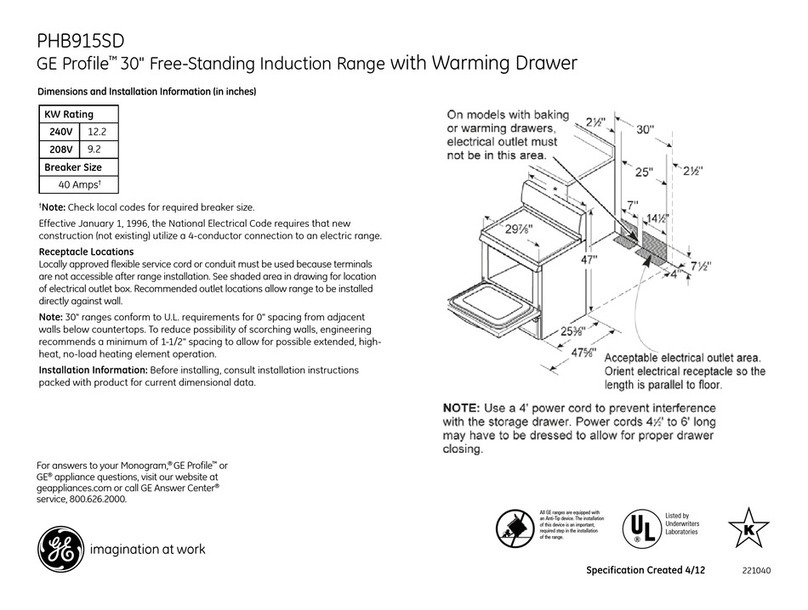
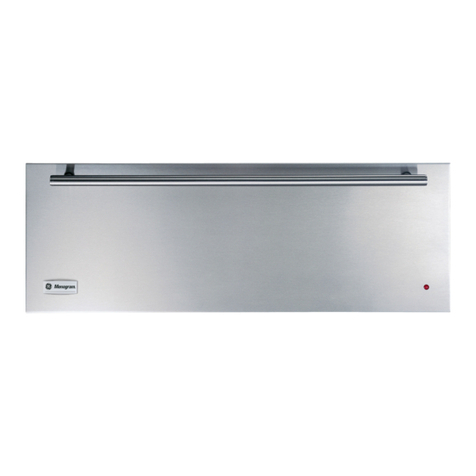
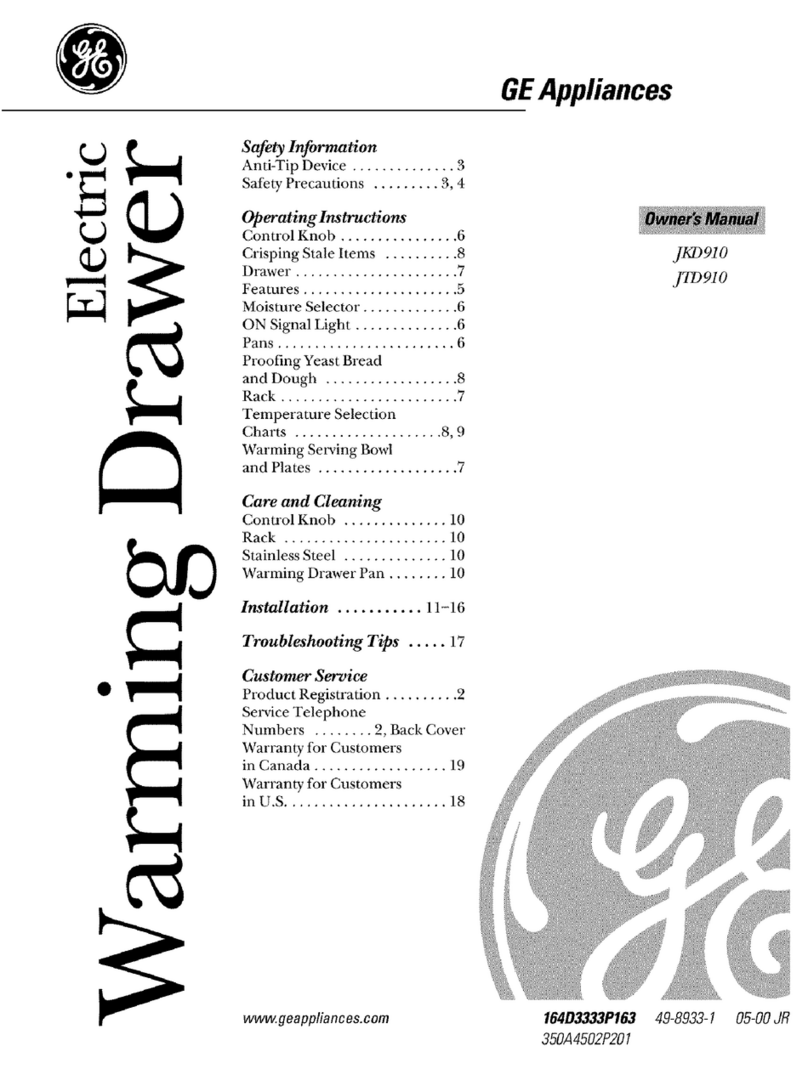
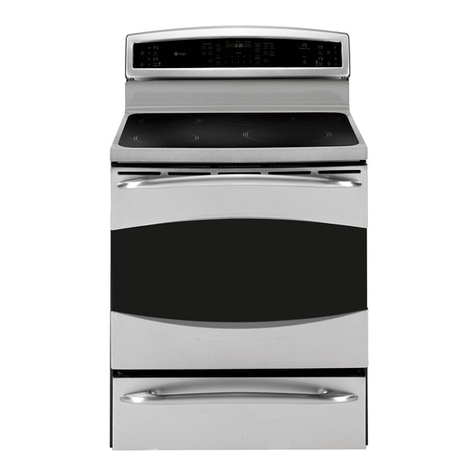
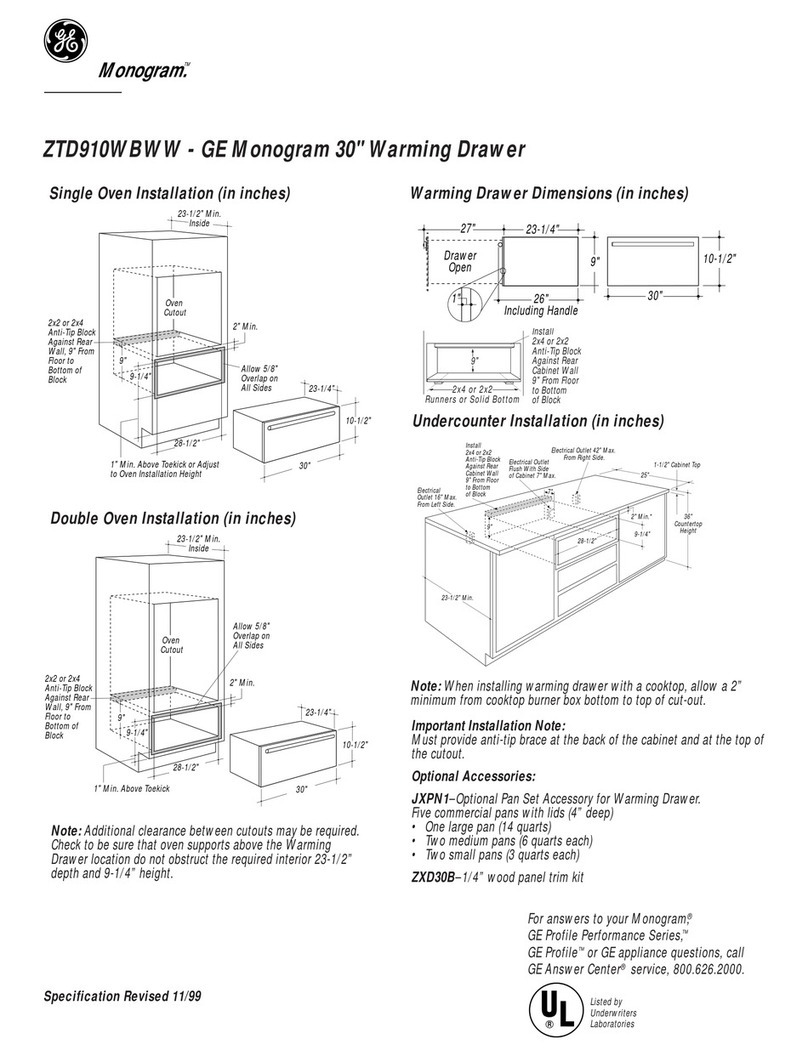
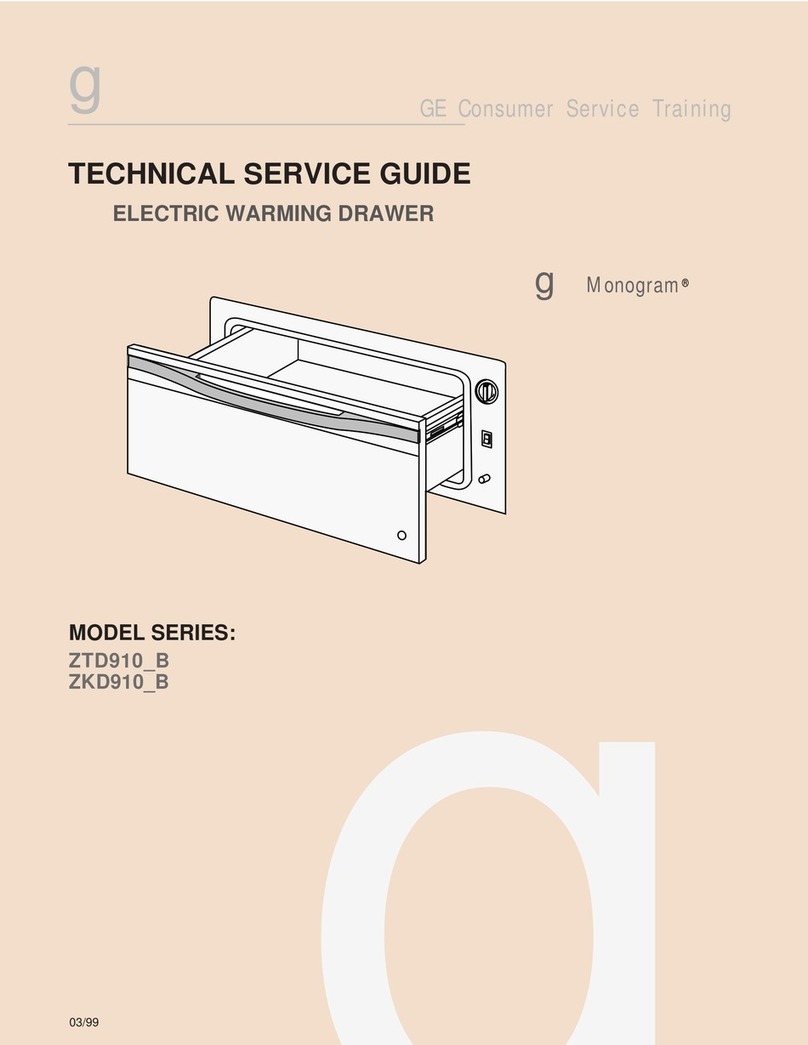
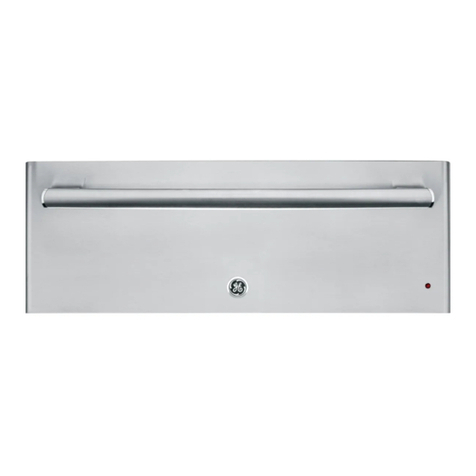
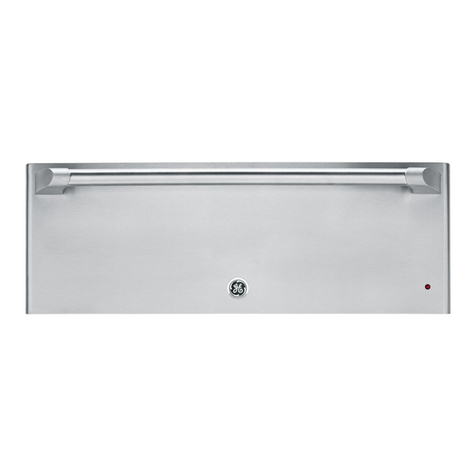
GE Profile PKD915 User manual

49-80507-5 12-14 GE
GEAppliances.com
Write the model and serial numbers here:
Model # ________________________
Serial #_________________________
You can find them on a label located on the
backside of the lower drawer front.
In Canada, contact us at:
www.GEAppliances.ca
Warming Drawer
Safety Information............2
Warranty.......................4
Assistance / Accessories.....6
Using The Warming Drawer
Features..............................7
OperatingTips........................8
Care and Cleaning
CleaningTheWarmingDrawer.......11
Installation Instructions.....12
Troubleshooting Tips ........20
Electric
Owner’s Manual &
Installation Instructions
PKD915
PTD915
CW9000
PJ7000
PW9000

249-80507-5
All warming drawers can tip and injury could result if not properly installed.
To prevent accidental tipping of the warming drawer, attach it to the wall with an anti-tip brace as described in
the Installation Instructions.
Ŷ 8VHWKLVDSSOLDQFHRQO\IRULWVLQWHQGHGSXUSRVH
as described in this Owner’s Manual.
Ŷ %HVXUH\RXUDSSOLDQFHLVSURSHUO\LQVWDOOHGDQG
JURXQGHGE\DTXDOLILHGLQVWDOOHULQDFFRUGDQFH
with the provided installation instructions.
Ŷ 'RQRWDWWHPSWWRUHSDLUUHSODFHRUFOHDQ
DQ\SDUWRI\RXUZDUPLQJGUDZHUXQOHVVLW
LVVSHFLILFDOO\UHFRPPHQGHGLQWKLVPDQXDO
All other servicing should be transferred to a
TXDOLILHGWHFKQLFLDQ
Ŷ %HIRUHSHUIRUPLQJDQ\VHUYLFHGLVFRQQHFWWKH
SRZHUVXSSO\DWWKHKRXVHKROGGLVWULEXWLRQSDQHO
E\UHPRYLQJWKHIXVHRUVZLWFKLQJRIIWKHFLUFXLW
breaker.
Ŷ 'RQRWOHDYHFKLOGUHQDORQH²FKLOGUHQVKRXOG
not be left alone or unattended in an area where
DQDSSOLDQFHLVLQXVH7KH\VKRXOGQHYHUEH
DOORZHGWRFOLPEVLWRUVWDQGRQDQ\SDUWRIWKH
appliance.
Ŷ CAUTION:'RQRWVWRUHLWHPVRI
interest to children in cabinets above a warming
drawer - children climbing on the warming drawer
WRUHDFKLWHPVFRXOGEHVHULRXVO\LQMXUHG
Ŷ 8VHRQO\GU\SRWKROGHUV²PRLVWRUGDPSSRW
KROGHUVRQKRWVXUIDFHVPD\UHVXOWLQEXUQVIURP
VWHDP'RQRWOHWSRWKROGHUVWRXFKKRWKHDWLQJ
HOHPHQWV'RQRWXVHDWRZHORURWKHUEXON\FORWK
in place of pot holders.
Ŷ 1HYHUXVH\RXUDSSOLDQFHIRUZDUPLQJRUKHDWLQJ
the room.
Ŷ 'RQRWWRXFKWKHKHDWLQJHOHPHQWVRUWKHLQWHULRU
surface of the warming drawer. These surfaces
PD\EHKRWHQRXJKWREXUQHYHQWKRXJKWKH\
DUHGDUNLQFRORU'XULQJDQGDIWHUXVHGRQRW
touch, or let clothing or other flammable materials
FRQWDFWDQ\LQWHULRUDUHDRIWKHZDUPLQJGUDZHU
allow sufficient time for cooling first. Other
VXUIDFHVRIWKHDSSOLDQFHPD\EHFRPHKRW
HQRXJKWRFDXVHEXUQV3RWHQWLDOO\KRWVXUIDFHV
include the warming drawer vent opening,
surfaces near the opening and crevices around
the warming drawer door.
Ŷ 'RQRWKHDWXQRSHQHGIRRGFRQWDLQHUV3UHVVXUH
could build up and the container could burst,
FDXVLQJDQLQMXU\
Ŷ 'RQRWXVHDOXPLQXPIRLOWROLQHWKHZDUPLQJ
drawer bottom. Foil can trap heat or melt,
resulting in damage to the product and a shock
or fire hazard.
Ŷ $YRLGVFUDWFKLQJRULPSDFWLQJJODVVGRRUVRU
FRQWUROSDQHOV'RLQJVRPD\OHDGWRJODVV
EUHDNDJH'RQRWFRRNRQDSURGXFWZLWKEURNHQ
JODVV6KRFNILUHRUFXWVPD\RFFXU
Ŷ 7KHSXUSRVHRIWKHZDUPLQJGUDZHULVWRKROG
hot cooked foods at serving temperature (greater
WKDQ)%DFWHULDZLOOJURZLQIRRGZKLOHLW
LVEHORZ)7KHUHIRUHDOZD\VVWDUWZLWKKRW
IRRGFROGIRRGFDQQRWEHKHDWHGRUFRRNHGLQ
the warming drawer.
IMPORTANT SAFETY NOTICE
GENERAL SAFETY INSTRUCTIONS
WARNING
WARNING
SAVE THESE INSTRUCTIONS
5HDGDOOVDIHW\LQVWUXFWLRQVEHIRUHXVLQJWKHSURGXFW)DLOXUHWRIROORZWKHVHLQVWUXFWLRQVPD\UHVXOWLQILUH
HOHFWULFDOVKRFNVHULRXVLQMXU\RUGHDWK
WARNING
IMPORTANT SAFETY INFORMATION.
READ ALL INSTRUCTIONS BEFORE USING.
SAFETY INFORMATION
49-80507-5 3
Failure to do so may result in fire or personal injury.
Ŷ 'RQRWVWRUHRUXVHIODPPDEOHPDWHULDOVLQRUQHDU
a warming drawer, including paper, plastic, pot
holders, linens, wall coverings, curtains, drapes and
JDVROLQHRURWKHUIODPPDEOHYDSRUVDQGOLTXLGV
Ŷ 1HYHUZHDUORRVHILWWLQJRUKDQJLQJJDUPHQWVZKLOH
XVLQJWKHDSSOLDQFH7KHVHJDUPHQWVPD\LJQLWHLI
WKH\FRQWDFWKRWVXUIDFHVFDXVLQJVHYHUHEXUQV
Ŷ 'RQRWOHWFRRNLQJJUHDVHRURWKHUIODPPDEOH
materials accumulate in or near the warming
drawer. Grease in the warming drawer or near
WKHZDUPLQJGUDZHUPD\LJQLWH
SAVE THESE INSTRUCTIONS
Ŷ 'RQRWXVHZDWHURQJUHDVHILUHV1HYHUSLFNXS
a flaming pan. Ŷ ,IWKHUHLVDILUHLQWKHZDUPLQJGUDZHUVPRWKHU
WKHILUHE\FORVLQJWKHZDUPLQJGUDZHUGRRU
DQGWXUQLQJWKHZDUPLQJGUDZHURIIRUE\XVLQJ
DPXOWLSXUSRVHGU\FKHPLFDORUIRDPW\SHILUH
extinguisher.
KEEP FLAMMABLE MATERIALS AWAY FROM
THE WARMING DRAWER
IN THE EVENT OF A FIRE, TAKE THE FOLLOWING
STEPS TO PREVENT INJURY AND FIRE SPREADING
WARNING
WARNING
SAFETY INFORMATION
Ŷ6WDQGDZD\IURPWKHZDUPLQJGUDZHUZKHQ
opening the warming drawer door. Hot air or
steam which escapes can cause burns to hands,
IDFHDQGRUH\HV
ŶKeep the warming drawer vent unobstructed.
ŶKeep the warming drawer free from grease
EXLOGXS*UHDVHLQWKHZDUPLQJGUDZHUPD\LJQLWH
ŶPlace warming drawer racks in desired location
while warming drawer is cool. If rack must be
moved while warming drawer is hot, do not
let pot holder contact hot heating element in
warming drawer.
Ŷ'RQRWOHDYHLWHPVVXFKDVSDSHUFRRNLQJ
utensils or food in the warming drawer when not in
use. Items stored in a warming drawer can ignite.
WARMING DRAWER SAFETY INSTRUCTIONS
WARNING

449-80507-5
GE Electric Warming Drawer Warranty
GEAppliances.com
$OOZDUUDQW\VHUYLFHLVSURYLGHGE\RXU)DFWRU\6HUYLFH&HQWHUVRUDQDXWKRUL]HG&XVWRPHU&DUH®technician.
7RVFKHGXOHVHUYLFHRQOLQHYLVLWXVDWZZZJHDSSOLDQFHVFRPVHUYLFHBDQGBVXSSRUWRUFDOO*(&$5(6
(800.432.2737). Please have serial number and model number available when calling for service.
6HUYLFLQJ\RXUDSSOLDQFHPD\UHTXLUHWKHXVHRIWKHRQERDUGGDWDSRUWIRUGLDJQRVWLFV7KLVJLYHVD*(IDFWRU\
VHUYLFHWHFKQLFLDQWKHDELOLW\WRTXLFNO\GLDJQRVHDQ\LVVXHVZLWK\RXUDSSOLDQFHDQGKHOSV*(LPSURYHLWVSURGXFWV
E\SURYLGLQJ*(ZLWKLQIRUPDWLRQRQ\RXUDSSOLDQFH,I\RXGRQRWZDQW\RXUDSSOLDQFHGDWDWREHVHQWWR*(SOHDVH
DGYLVH\RXUWHFKQLFLDQQRWWRVXEPLWWKHGDWDWR*(DWWKHWLPHRIVHUYLFH
)RUWKHSHULRGRIRQH\HDUIURPWKHGDWHRIWKHRULJLQDOSXUFKDVH*(ZLOOSURYLGHDQ\SDUWRIWKHFRRNWRSZKLFK
IDLOVGXHWRDGHIHFWLQPDWHULDOVRUZRUNPDQVKLS'XULQJWKLVOLPLWHGRQH\HDUZDUUDQW\*(ZLOODOVRSURYLGHIUHHRI
charge, all labor and in-home service to replace the defective part.
What GE will not cover:
Ŷ 6HUYLFHWULSVWR\RXUKRPHWRWHDFK\RXKRZWRXVH
the product.
Ŷ ,PSURSHULQVWDOODWLRQGHOLYHU\RUPDLQWHQDQFH
Ŷ Failure of the product if it is abused, misused,
modified or used for other than the intended purpose
RUXVHGFRPPHUFLDOO\
Ŷ Replacement of house fuses or resetting of circuit
breakers.
Ŷ 'DPDJHWRWKHSURGXFWFDXVHGE\DFFLGHQWILUH
floods or acts of God.
Ŷ 'DPDJHWRILQLVKVXFKDVVXUIDFHUXVWWDUQLVKRU
small blemishes not reported within 48 hours of
GHOLYHU\
Ŷ ,QFLGHQWDORUFRQVHTXHQWLDOGDPDJHFDXVHGE\
possible defects with this appliance.
Ŷ 'DPDJHFDXVHGDIWHUGHOLYHU\
Ŷ 3URGXFWQRWDFFHVVLEOHWRSURYLGHUHTXLUHGVHUYLFH
Ŷ Service to repair or replace light bulbs, except for
/('ODPSV
EXCLUSION OF IMPLIED WARRANTIES
<RXUVROHDQGH[FOXVLYHUHPHG\LVSURGXFWUHSDLUDVSURYLGHGLQWKLV/LPLWHG:DUUDQW\$Q\LPSOLHGZDUUDQWLHV
LQFOXGLQJWKHLPSOLHGZDUUDQWLHVRIPHUFKDQWDELOLW\RUILWQHVVIRUDSDUWLFXODUSXUSRVHDUHOLPLWHGWRRQH\HDURUWKH
VKRUWHVWSHULRGDOORZHGE\ODZ
7KLVZDUUDQW\LVH[WHQGHGWRWKHRULJLQDOSXUFKDVHUDQGDQ\VXFFHHGLQJRZQHUIRUSURGXFWVSXUFKDVHGIRUKRPHXVH
ZLWKLQWKH86$,IWKHSURGXFWLVORFDWHGLQDQDUHDZKHUHVHUYLFHE\D*($XWKRUL]HG6HUYLFHULVQRWDYDLODEOH\RX
PD\EHUHVSRQVLEOHIRUDWULSFKDUJHRU\RXPD\EHUHTXLUHGWREULQJWKHSURGXFWWRDQ$XWKRUL]HG*(6HUYLFHORFDWLRQ
IRUVHUYLFH,Q$ODVNDWKHZDUUDQW\H[FOXGHVWKHFRVWRIVKLSSLQJRUVHUYLFHFDOOVWR\RXUKRPH
6RPHVWDWHVGRQRWDOORZWKHH[FOXVLRQRUOLPLWDWLRQRILQFLGHQWDORUFRQVHTXHQWLDOGDPDJHV7KLVZDUUDQW\JLYHV\RX
VSHFLILFOHJDOULJKWVDQG\RXPD\DOVRKDYHRWKHUULJKWVZKLFKYDU\IURPVWDWHWRVWDWH7RNQRZZKDW\RXUOHJDOULJKWV
DUHFRQVXOW\RXUORFDORUVWDWHFRQVXPHUDIIDLUVRIILFHRU\RXUVWDWH¶V$WWRUQH\*HQHUDO
Warrantor: General Electric Company. Louisville, KY 40225
)RUFXVWRPHUVLQWKH8QLWHG6WDWHV
Register Your Appliance: 5HJLVWHU\RXUQHZDSSOLDQFHRQOLQHDW\RXUFRQYHQLHQFH
www.geappliances.com/service_and_support/register/
7LPHO\SURGXFWUHJLVWUDWLRQZLOODOORZIRUHQKDQFHGFRPPXQLFDWLRQDQGSURPSWVHUYLFHXQGHUWKHWHUPVRI\RXUZDUUDQW\
VKRXOGWKHQHHGDULVH<RXPD\DOVRPDLOLQWKHSUHSULQWHGUHJLVWUDWLRQFDUGLQFOXGHGLQWKHSDFNLQJPDWHULDO
6WDSOH\RXUUHFHLSWKHUH3URRIRIWKHRULJLQDOSXUFKDVH
GDWHLVQHHGHGWRREWDLQVHUYLFHXQGHUWKHZDUUDQW\ WARRANTY
Thank You! ... for your purchase of a GE Brand appliance.

49-80507-5 5
Mabe Electric Warming Drawer Warranty
)RURQH\HDUIURPWKHGDWHRIWKHRULJLQDOSXUFKDVH
$Q\SDUWRIWKHZDUPLQJGUDZHUZKLFKIDLOVGXHWRDGHIHFWLQPDWHULDOVRUZRUNPDQVKLS'XULQJWKLVOLPLWHGRQH\HDU
ZDUUDQW\0DEHZLOODOVRSURYLGHIUHHRIFKDUJHDOOODERUDQGLQKRPHVHUYLFHWRUHSODFHWKHGHIHFWLYHSDUW
What GE will not cover:
Ŷ 6HUYLFHWULSVWR\RXUKRPHWRWHDFK\RXKRZWRXVH
the product.
Ŷ ,PSURSHULQVWDOODWLRQGHOLYHU\RUPDLQWHQDQFH
Ŷ Failure of the product if it is abused, misused,
modified or used for other than the intended purpose
RUXVHGFRPPHUFLDOO\
Ŷ Replacement of house fuses or resetting of circuit
breakers.
Ŷ 'DPDJHWRWKHSURGXFWFDXVHGE\DFFLGHQWILUH
floods or acts of God.
Ŷ 'DPDJHWRILQLVKVXFKDVVXUIDFHUXVWWDUQLVKRU
small blemishes not reported within 48 hours of
GHOLYHU\
Ŷ ,QFLGHQWDORUFRQVHTXHQWLDOGDPDJHFDXVHGE\
possible defects with this appliance.
Ŷ 'DPDJHFDXVHGDIWHUGHOLYHU\
Ŷ 3URGXFWQRWDFFHVVLEOHWRSURYLGHUHTXLUHGVHUYLFH
Ŷ Service to repair or replace light bulbs, except for
/('ODPSV
EXCLUSION OF IMPLIED WARRANTIES
<RXUVROHDQGH[FOXVLYHUHPHG\LVSURGXFWUHSDLUDVSURYLGHGLQWKLV/LPLWHG:DUUDQW\$Q\LPSOLHGZDUUDQWLHV
LQFOXGLQJWKHLPSOLHGZDUUDQWLHVRIPHUFKDQWDELOLW\RUILWQHVVIRUDSDUWLFXODUSXUSRVHDUHOLPLWHGWRRQH\HDURUWKH
VKRUWHVWSHULRGDOORZHGE\ODZ
Warrantor Is Not Responsible For Consequential Damages.
Warrantor: Mabe Canada Inc.
)RUFXVWRPHUVLQ&DQDGD
$OOZDUUDQW\VHUYLFHSURYLGHGE\RXU)DFWRU\6HUYLFH&HQWUHVRUDQDXWKRUL]HG&XVWRPHU&DUH®technician. For service,
call 1.800.361.3400. Please have serial number and model number available when calling for service.
6WDSOH\RXUUHFHLSWKHUH3URRIRIWKHRULJLQDOSXUFKDVH
GDWHLVQHHGHGWRREWDLQVHUYLFHXQGHUWKHZDUUDQW\
WARRANTY
Thank You! ... for your purchase of a GE Brand appliance.Thank You! ... for your purchase of a GE Brand appliance.

649-80507-5
Schedule Service: ([SHUW*(UHSDLUVHUYLFHLVRQO\RQH
VWHSDZD\IURP\RXUGRRU*HWRQOLQHDQGVFKHGXOH\RXU
service at www.geappliances.com/service_and_support/
2UFDOO*(&$5(6GXULQJQRUPDO
business hours.
Parts and Accessories: ,QGLYLGXDOVTXDOLILHGWRVHUYLFH
their own appliances can have parts or accessories sent
GLUHFWO\WRWKHLUKRPHV9,6$0DVWHU&DUGDQG'LVFRYHU
FDUGVDUHDFFHSWHG2UGHURQOLQHWRGD\KRXUV
HYHU\GD\RUE\SKRQHDWGXULQJQRUPDO
business hours.
Instructions contained in this manual cover procedures
WREHSHUIRUPHGE\DQ\XVHU2WKHUVHUYLFLQJJHQHUDOO\
VKRXOGEHUHIHUUHGWRTXDOLILHGVHUYLFHSHUVRQQHO&DXWLRQ
PXVWEHH[HUFLVHGVLQFHLPSURSHUVHUYLFLQJPD\FDXVH
unsafe operation.
Real Life Design Studio: *(VXSSRUWVWKH8QLYHUVDO
'HVLJQFRQFHSWRISURGXFWVVHUYLFHVDQGHQYLURQPHQWV
WKDWFDQEHXVHGE\SHRSOHRIDOODJHVVL]HVDQG
FDSDELOLWLHV:HUHFRJQL]HWKHQHHGWRGHVLJQIRUDZLGH
UDQJHRISK\VLFDODQGPHQWDODELOLWLHVDQGLPSDLUPHQWV
)RUGHWDLOVRI*(¶V8QLYHUVDO'HVLJQDSSOLFDWLRQV
including kitchen design ideas for people with disabilities,
FKHFNRXWRXU:HEVLWHWRGD\)RUWKHKHDULQJLPSDLUHG
SOHDVHFDOO7''*($&
Contact Us: ,I\RXDUHQRWVDWLVILHGZLWKWKHVHUYLFH\RX
UHFHLYHIURP*(FRQWDFWXVRQRXU:HEVLWHZLWKDOOWKH
GHWDLOVLQFOXGLQJ\RXUSKRQHQXPEHURUZULWHWR
General Manager, Customer Relations
GE Appliances, Appliance Park Louisville, KY 40225
7U\WKH*($SSOLDQFHV:HEVLWHwww.geappliances.com/service_and_support/KRXUVDGD\DQ\GD\RIWKH
\HDU)RUJUHDWHUFRQYHQLHQFHDQGIDVWHUVHUYLFH\RXFDQQRZGRZQORDG2ZQHU¶V0DQXDOVRUGHUSDUWVRUHYHQ
schedule service on-line.
Accessories
Looking For Something More?
GE offers a variety of accessories to improve your cooking and maintenance experiences!
7RSODFHDQRUGHUYLVLWXVRQOLQHDW
www.GEApplianceParts.com86RUwww.GEAppliances.ca&DQDGD
or call 800.626.200286800.661.1616&DQDGD
7KHIROORZLQJSURGXFWVDQGPRUHDUHDYDLODEOH
How to Remove Protective Shipping Film and Packaging Tape
&DUHIXOO\JUDVSDFRUQHURIWKHSURWHFWLYHVKLSSLQJILOP
ZLWK\RXUILQJHUVDQGVORZO\SHHOLWIURPWKHDSSOLDQFH
VXUIDFH'RQRWXVHDQ\VKDUSLWHPVWRUHPRYHWKHILOP
Remove all of the film before using the appliance for the
first time.
To assure no damage is done to the finish of the
SURGXFWWKHVDIHVWZD\WRUHPRYHWKHDGKHVLYHIURP
packaging tape on new appliances is an application of
DKRXVHKROGOLTXLGGLVKZDVKLQJGHWHUJHQW$SSO\ZLWKD
soft cloth and allow to soak.
NOTE: The adhesive must be removed from all parts. It
cannot be removed if it is baked on.
Accessories
´:LGH&XVWRP3DQHO.LW =;'%
´0RQRJUDP3UR3DQHO.LW =;'3
Parts
:LUH5DFN :%;
Cleaning Supplies
&LWUX6KLQH6WDLQOHVV6WHHO:LSHV :;;
&(5$0$%5<7(®6WDLQOHVV6WHHO$SSOLDQFH&OHDQHU 30;
Have a question or need assistance with your appliance?
ASSISTANCE / ACCESSORIES

49-80507-5 7
1RWDOOIHDWXUHVDUHRQDOOPRGHOV$SSHDUDQFHPD\YDU\
Features
USING THE WARMING DRAWER:Features
Warming Drawer
Moisture Selector
(on back of panel)
Control Knob
ON/OFF Switch
ON Signal Light
Rating Plate
ON Signal Light
Viewer Lens
ON Signal Light
7KH21VLJQDOOLJKWLVORFDWHGEHORZWKH212))
VZLWFKDQGJORZVZKHQWKH212))VZLWFKLVLQWKH
21SRVLWLRQ,WVWD\VRQXQWLOWKH212))VZLWFKLV
moved to the OFF position.
7KH21VLJQDOOLJKWLVYLVLEOHWKURXJKWKHOLJKWYLHZHULQ
the drawer front panel when the drawer is closed. This is
a reminder that the heat is on.
Moisture Selector
The moisture selector is located on the inside front of
the drawer.
To keep foods moist, slide the moisture selector control
DZD\IURPWKHFRQWURONQRE7KLVFORVHVWKHYHQWDQG
VHDOVWKHPRLVWXUHLQVLGHWKHGUDZHU:LWKWKHYHQW
FORVHGKRWIRRGVVWD\PRLVWDQGVRIW
,QWKLVVHWWLQJFRQGHQVDWLRQPD\RFFXUDURXQGWKHLQVLGH
edge of the drawer.
To keep foods crisp, slide the
moisture selector control to the
right towards the control knob.
This opens the vents and allows
the moisture to escape.
:LWKWKHYHQWVRSHQLWLV
normal for moisture to collect
on surfaces above the
warming drawer.
7KHZDUPLQJGUDZHUZLOONHHSKRWFRRNHGIRRGVDWVHUYLQJWHPSHUDWXUH$OZD\VVWDUWZLWKKRWIRRG'RQRWXVHWR
KHDWFROGIRRGRWKHUWKDQSURRILQJ\HDVWGRXJKFULVSLQJFUDFNHUVFKLSVRUGU\FHUHDO
Control Knob
The warming drawer controls are hidden with the drawer
shut. Open the drawer. The controls are on the right side
of the front frame.
To use the warming drawer, press the
ON/OFFVZLWFKWRWKH21SRVLWLRQ
Slide the moisture selector control to
the open or closed setting (See the
Moisture Selector section).
Turn the control knob to the desired setting.
PROOF.................... 75–95°F
LOW ...................... 140–160°F
MED ...................... 160–195°F
HIGH...................... 195–230°F
Moist
Closed
Vent
Crisp
Open
Vent

849-80507-5
Operating Tips
USING THE WARMING DRAWER:Operating Tips
When Using The Warming Drawer
'RQRWOLQHWKHZDUPLQJGUDZHUZLWKDOXPLQXPIRLO
Ŷ $OORZWLPHIRUWKHGUDZHUWREHSUHKHDWHG
LOW 8 minutes
MED PLQXWHV
HIGH 20 minutes
NOTE:,WLVQRWQHFHVVDU\WRSUHKHDWWKHGUDZHUIRU
proofing.
)RRGLQKHDWVDIHJODVVDQGJODVVFHUDPLFSDQVPD\
need higher thermostat setting as compared to food in
metal pans.
Ŷ 5HSHDWHGRSHQLQJRIWKHGUDZHUDOORZVWKHKRWDLU
to escape and the food to cool. Allow extra time
for temperature inside the drawer to stabilize after
adding items.
Ŷ :LWKODUJHORDGVLWPD\EHQHFHVVDU\WRXVHDKLJKHU
thermostat setting and cover some of the cooked
food items.
Ŷ )RRGVKRXOGEHNHSWKRWLQLWVFRRNLQJFRQWDLQHURU
transferred to a heat-safe serving dish.
Ŷ $OXPLQXPIRLOPD\EHXVHGWRFRYHUIRRGWRSUHYHQW
LWIURPGU\LQJRXW
CAUTION: Plastic containers or plastic wrap
will melt if in direct contact with the drawer. Melted
SODVWLFPD\QRWEHUHPRYDEOHDQGLVQRWFRYHUHG
XQGHU\RXUZDUUDQW\
Ŷ 5HPRYHVHUYLQJVSRRQVHWFEHIRUHSODFLQJ
containers in warming drawer.
Rack
Ŷ 5DFNZLOOILWIURPIURQWWREDFN
Ŷ 3UHKHDWZLWKWKHUDFNLQSODFH
Ŷ 8VLQJWKHUDFNDOORZVIRUGRXEOHVWDFNLQJRILWHPV
To Warm Serving Bowl And Plates
7RZDUPVHUYLQJERZOVDQGSODWHVVHWWKHFRQWURORQ/2:
Ŷ 8VHRQO\KHDWVDIHGLVKHV
Ŷ
3ODFHWKHHPSW\GLVKHVRQWKHUDFNWRUDLVHWKHPRIIWKH
ERWWRPRIWKHGUDZHU,I\RXZDQWKRWWHUGLVKHVRUZDQW
to heat fine china, please check with the manufacturer
of the dishes for their maximum heat tolerance.
Ŷ 3UHKHDWHPSW\VHUYLQJGLVKZKLOHSUHKHDWLQJWKH
drawer.
Ŷ :KHQKROGLQJKRWFRRNHGIRRGVDQGZDUPLQJHPSW\
serving dishes at the same time, place the serving
dishes on the high rack position and the food on the
bottom of the drawer.
CAUTION: 'LVKHVPD\EHKRW8VHSRW
holders or mitts when removing hot dishes.
Double stacking items with the rack in position.

49-80507-5 9
Operating Tips
USING THE WARMING DRAWER:Operating Tips
To Crisp Stale Items
Ŷ 3ODFHIRRGLQORZVLGHGGLVKHVRUSDQV
Ŷ 3UHKHDWRQ/2:VHWWLQJDQGRSHQWKHYHQW
Ŷ
&KHFNFULVSQHVVDIWHUPLQXWHV$GGWLPHDVQHHGHG
To Proof Yeast Bread Dough
Yeast dough can be proofed in the warming drawer.
Ŷ 3ODFH\RXUGLVKRQWKHZDUPLQJGUDZHUERWWRP
Ŷ <RXPXVWDOZD\VWXUQWKHFRQWURONQREWRLOW then
LPPHGLDWHO\EDFNWRPROOF.
Ŷ &ORVHWKHYHQW
Ŷ /LJKWO\RLOWKHWRSRIWKHGRXJKLQDERZOODUJHHQRXJK
WRGRXEOHWKHGRXJKVL]H&RYHUZLWKDFORWK
Ŷ 3UHKHDWLQJQRWUHTXLUHGIRUSURRILQJ
Ŷ &KHFNWKHGRXJKKHLJKWLQPLQXWHV$GGWLPHDV
needed. The dough should remain in the drawer until
it has doubled in size and a slight depression remains
ZKHQWKHVXUIDFHLVWRXFKHGJHQWO\ZLWKDILQJHU
Temperature Selection Chart for Crisp Foods
To keep several different foods hot, set the temperature
to the food needing the highest setting. Place the items
needing the highest setting on the bottom of the drawer
and items needing less heat on the rack.
Tips:
Ŷ /HDYHIRRGXQFRYHUHG
Ŷ 'RQRWXVHSODVWLFFRQWDLQHUVRUSODVWLFZUDS
Ŷ
Preheat prior to use according to recommended times.
Moist
Closed
Vent
Food Type Control
Setting Moisture
Selector Setting
Bacon HIGH OPEN
Bread, hard rolls MED OPEN
Fried foods HIGH OPEN
Pies, two crusts MED OPEN
Pizza HIGH OPEN
Potatoes, baked HIGH OPEN
Tortilla Chips LOW OPEN
Crisp
Open
Vent

10 49-80507-5
Operating Tips
Tips:
Ŷ &RYHUIRRGZLWKOLGRUDOXPLQXPIRLO
Ŷ 'RQRWSXWZDWHULQWKHZDUPLQJGUDZHU
Ŷ
'RQRWXVHSODVWLFFRQWDLQHUVRUSODVWLFZUDS
Ŷ
Preheat prior to use according to recommended times.
86'$)6,6UHFRPPHQGVDQLQWHUQDOWHPSHUDWXUHRI)DVWKH
PLQLPXPGRQHQHVVIRUEHHI8VHDSRUWDEOHPHDWWKHUPRPHWHUWRFKHFN
internal temperatures.
Temperature Selection Chart for Moist Foods
To keep several different foods hot, set the temperature
to the food needing the highest setting. Place the items
needing the highest setting on the bottom of the drawer
and items needing less heat on the rack.
Food Type Control
Setting Moisture
Selector Setting
Beef, medium and
well done* MED CLOSED
Bread, soft rolls MED CLOSED
Casseroles MED CLOSED
Cooked cereal MED CLOSED
Eggs MED CLOSED
Fish, seafood MED CLOSED
Fruit MED CLOSED
Gravy, cream sauces MED CLOSED
Ham MED CLOSED
Lamb MED CLOSED
Pancakes, waffles HIGH CLOSED
Pies, one crust MED CLOSED
Pork MED CLOSED
Potatoes, mashed MED CLOSED
Poultry HIGH CLOSED
Vegetables MED CLOSED
USING THE WARMING DRAWER:Operating Tips
Moist
Closed
Vent

49-80507-5 11
CARE AND CLEANING: Cleaning The Warming Drawer
Cleaning The Warming Drawer
Rack
&OHDQWKHUDFNZLWKGHWHUJHQWDQGZDWHU$IWHUFOHDQLQJ
ULQVHWKHUDFNZLWKFOHDQZDWHUDQGGU\ZLWKDFOHDQFORWK
%HVXUHWKHFRQWUROVDUHLQWKH2))SRVLWLRQDQGDOOVXUIDFHVDUHFRROEHIRUHFOHDQLQJDQ\SDUWRIWKHZDUPLQJGUDZHU
Painted Or Enameled Surfaces
8VHVRDSDQGZDUPZDWHUWRWKRURXJKO\FOHDQ
Stainless Steel
'RQRWXVHDVWHHOZRROSDGLWZLOOVFUDWFKWKHVXUIDFH
7RFOHDQWKHVWDLQOHVVVWHHOVXUIDFHXVHZDUPVXGV\
ZDWHURUDVWDLQOHVVVWHHOFOHDQHURUSROLVK$OZD\VZLSH
the surface in the direction of the grain. Follow cleaner
instructions for cleaning the stainless steel surface.
7RLQTXLUHDERXWSXUFKDVLQJFOHDQLQJSURGXFWVLQFOXGLQJ
stainless steel appliance cleaner or polish read the
Assistance and Accessories sections at the beginning of
this manual.
Control Knob
7KHFRQWURONQREPD\EHUHPRYHGIRUHDVLHUFOHDQLQJ
Make sure the knob is in the PROOF position and pull it
straight off the stem for cleaning.
7KHNQREFDQEHFOHDQHGLQDGLVKZDVKHURULWPD\DOVR
be washed with soap and water. Make sure the inside of
WKHNQRELVGU\EHIRUHUHSODFLQJ
Replace the knob in the PROOF position to ensure proper
placement.

12 49-80507-5
MATERIALS YOU WILL NEED
Installation
Warming Drawer
Instructions
BEFORE YOU BEGIN
Read these instructions completely
and carefully.
•IMPORTANT ³Save these instructions
for local inspector’s use.
•IMPORTANT ³Observe all governing
codes and ordinances.
• Note to Installer – Be sure to leave these
instructions with the Consumer.
• Note to Consumer – Keep these instructions
for future reference.
• Product failure due to improper installation is
not covered under the Warranty.
• WARNING ³This appliance must be
properly grounded.
• WARNING ³Insure that the power
cord does not contact the hot surfaces on
the bottom of ovens, cooktops, or any other
appliance.
•
ATTENTION INSTALLER ³
Proper installation is the responsibility of the
installer and product failure due to improper
installation is NOT covered under warranty.
PKD915, PTD915, CW9000, PJ7000 and PW9000
“If you have questions, call 800.GE.CARES or visit our website at: GEAppliances.com”
Wood screws and adhesive or other hardware for installing
runners or shelf to support warmer drawer.
Runners must be level, rigidly mounted and capable of
supporting 150 pounds.
2 x 4 or 2 x 2 lumber for runners and brace
INSTALLATION INSTRUCTIONS
TOOLS REQUIRED
Safety Glasses
Cut Resistant Gloves
Drill and
1/16” Bit Measuring Tape
Phillips Screwdriver
Hand Saw
Level

49-80507-5 13
INSTALLATION INSTRUCTIONS
Installation Instructions
GROUNDING THE APPLIANCE
,03257$17³3OHDVHUHDGFDUHIXOO\
FOR PERSONAL SAFETY, THIS APPLIANCE MUST
BE PROPERLY GROUNDED.
This warming drawer must be supplied with 120V,
60Hz, and connected to an individual, properly
grounded branch circuit, and protected by a 15
or 20 amp circuit breaker or time delay fuse.
• A properly grounded 3-prong receptacle should
be located within reach of the drawer’s 56"
long power cord.
• Locate the receptacle in an adjacent cabinet.
³within 42” of the right side or,
³within 16” of the left side or
³A recessed receptacle may be located on
the right side of the cutout, 7” maximum
from the back of the cabinet. In this location,
the excess power cord should be coiled and
taped to the right side of the unit.
,03257$17³3OHDVHUHDGFDUHIXOO\
The power cord of this appliance is equipped
with a 3-prong (grounding) plug that mates with
a standard 3-prong grounding wall receptacle
to minimize the possibility of electric shock. The
customer should have the wall receptacle and
circuit checked by a qualified electrician to make
sure the receptacle is properly grounded and has
the correct polarity.
• Where a standard 2-prong wall receptacle is
encountered, it is the personal responsibility
and obligation of the customer to have it
replaced with a properly grounded 3-prong
wall receptacle.
Do not, under any circumstances, cut or remove
the third (ground) prong from the power cord.
DO NOT USE AN EXTENSION CORD OR
ADAPTER PLUG WITH THIS APPLIANCE.
FOLLOW NATIONAL ELECTRICAL CODES AND
ORDINANCES.
IMPORTANT SAFETY INSTRUCTIONS
Rating plate
Recessed
receptacle 7"
max. from rear
on right side
Drill 11/2” hole for
power cord for
left or right side
outlet location
AWhen preparing warming drawer cabinet,
make sure the inside of the cabinet and the
warming drawer do not interfere with each
other. (see sections on preparing cabinet)
BREMOVE PACKAGING MATERIALS: Failure to
remove packaging materials could result in
damage to the appliance. Remove all packing
parts from warming drawer including lifting up
the warming drawer to confirm all packaging is
removed.
CRemove Installation Instructions from literature
pack and read them carefully before you begin.
Be sure to place all literature, Owner’s Manual,
Installations, etc in a safe place for future
reference.
PRE-INSTALLATION CHECKLIST

14 49-80507-5
INSTALLATION INSTRUCTIONS
Installation Instructions
• When installed, the front face of the warming
drawer will be nearly flush with cabinetry doors or
drawer fronts.
• Drawer overlaps will conceal cut edges on all
sides of the opening.
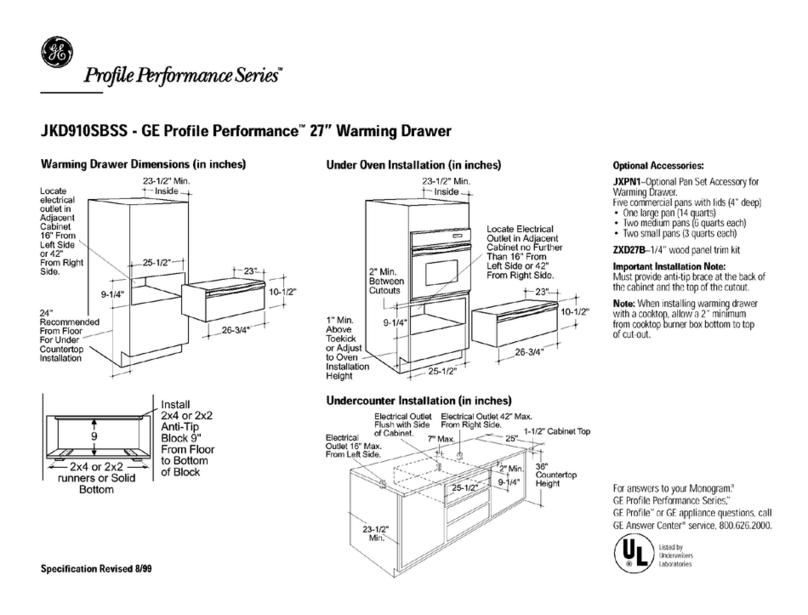
The rough opening for the drawer must be:
³'HSWK 231/2” minimum from inside back to
front of cabinet frame.
³:LGWK 251/2” for 27” wide models
281/2” for 30” wide models.
³+HLJKW 91/4”
• 5” minimum above floor or 1" above toekick.
231/4” from floor to bottom of cutout is
recommended for under countertop installation.
Installation below a cabinet drawer:
The warming drawer may be installed beneath a
cabinet drawer. In this installation, a solid barrier
should be installed above the warming drawer to
block access. Use any solid material such as 1/4”
thick plywood. Allow at least 1/4” air gap between
the barrier and the top of the warming drawer.
Observe the 5” min. above the floor or 1” above the
toekick min. installation height.
NOTE: If you are installing in frameless cabinets,
it may be necessary to install 1/2” wide cleats to
accept drawer mounting screws. See drawer to find
exact locations of mounting screws.
When installed under a cooktop:
Warming drawers are suitable for installation
below only certain specified cooktop models.
See the label attached to the top of the warming
drawer for suitable models. A solid barrier and
air gap between cooktop and warming drawer is
required. See Note above.
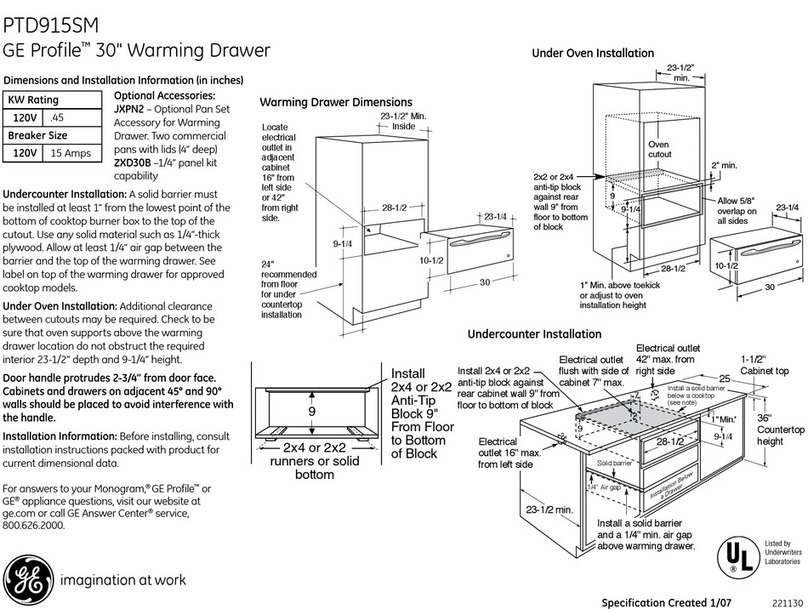
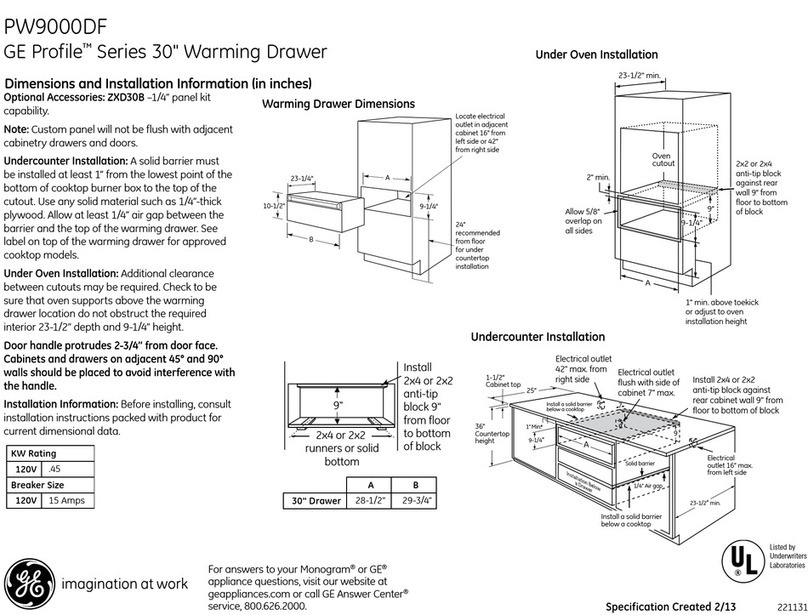
PREPARING CABINET: BELOW A COUNTERTOP
Electrical outlet 42"
max. from right side
1" Min.*
25"
9" 91/4”
231/2”Min.
36"
Countertop
height
Electrical
outlet 16” max.
from left side
Electrical outlet
flush with side of
cabinet 7" max.
Install 2x4 or 2x2
anti-tip block against
rear cabinet wall 9”
from floor to bottom
of block 7"
11/2” Cabinet top
Install a solid barrier
and a 1/4” min. air
gap above warming
drawer
1/4” Air gap
Solid barrier
Install a solid barrier below
a cooktop (see Note)
IN CANADA THIS DRAWER IS NOT
APPROVED FOR INSTALLATION
UNDER A COOKTOP.
*NOTE: When installing the warming drawer below a cooktop, a
solid barrier must be installed at least 1"from the lowest point of
the bottom of cooktop burner box to the top of cutout. Use any
solid material such as 1/4" thick plywood. Allow at least 1/4"air gap
between the barrier and the top of the warming drawer. See label on
top of the wa rming drawer for approved cooktop models.
Dimension A
27" Drawer 30" Drawer
251/2”28 1/2”
CAUTION

49-80507-5 15
INSTALLATION BELOW A SINGLE OVEN
INSTALLATION BELOW A DOUBLE OVEN
• When installed, the front face of the warming
drawer will be nearly flush with cabinetry doors
or drawer fronts.
• Drawer overlaps will conceal cut edges on all
sides of the opening.
The rough opening for the drawer must be:
³'HSWK 231/2” minimum from inside back to
front of cabinet frame.
³:LGWK 251/2” for 27” wide models
281/2” for 30” wide models.
³+HLJKW 91/4”
³Allow 2” minimum between oven and drawer
cutouts for clearance of overlaps
NOTE: If you are installing in frameless cabinets,
it may be necessary to install 1/2” wide cleats to
accept drawer mounting screws. See drawer to find
exact locations of mounting screws.
When installed under a wall oven:
Warming drawers are suitable for installation below
only certain specified wall oven models. See the
label attached to the top of the warming drawer for
suitable models.
NOTE: Electrical receptacle can be installed as
shown for countertop installations. Do not install
receptacle above the top of the warming drawer
cutout.
PREPARING CABINET: BELOW WALL OVENS
INSTALLATION INSTRUCTIONS
Installation Instructions
231/2”
Min.
2x2 or 2x4
anti-tip block
against rear
wall 9” from
floor to bottom
of block
1" Min. above toekick or
adjust to oven installation
height
A
NOTE: Additional clearance between cutouts
may be required. Check to be sure that oven
supports above the warming drawer location
do not obstruct the required interior 231/2”
depth and 91/4” height.
2" Min.
Allow 5/8”
overlap on
all sides
101/2”
231/4”
9"91/4”
B
Oven
cutout
Dimension A Dimension B
27" Drawer 251/2” 26 3/4”
30" Drawer 281/2” 29 3/4"
IN CANADA, THE WALL OVEN
IS ONLY APPROVED FOR
INSTALLATION WITH A BOTTOM
CUTOUT AT A MINIMUM OF
32.5” FROM THE FLOOR.
CAUTION
NOTE: Additional clearance between cutouts
may be required. Check to be sure that oven
supports above the warming drawer location
do not obstruct the required interior 231/2”
depth and 91/4” height.
2" Min
1" Min. above
toekick
2x2 or 2x4 anti-
tip block against
rear wall 9” from
floor to bottom
of block
231/2”
Min.
Allow 5/8” overlap
on all sides
A
231/4”
101/2”
9" 91/4”
Oven
cutout
B
IN CANADA, THIS DRAWER IS NOT APPROVED
FOR INSTALLATION UNDER A DOUBLE OVEN.
CAUTION

16 49-80507-5
INSTALLATION INSTRUCTIONS
Installation Instructions
IMPORTANT: When installed below a single or
double oven, check to be sure that any oven
supports above the cutout do not obstruct the
231/2” required depth of the warming drawer
cutout.
• A 2" minimum clearance between oven and
warming drawer cutouts are required. Additional
clearance may be required if 2 x 4 blocks are used
to support runners or solid floor of the oven above.
• The warming drawer may be supported by either
a solid bottom, 2 x 4 or 2 x 2 runners.
• The support must be level and rigidly mounted,
flush with the bottom edge of the cutout.
There is no way to level the drawer once it has
been installed. Be sure supports are level.
• The entire weight of the drawer is supported by
the runners or solid floor and must be capable of
supporting 150 lbs.
• WARNING: ANTI-TIP PRECAUTIONS:
The anti-tip brace must be installed to prevent the
drawer from tipping forward when opened and
loaded.
Failure to do so could result in personal injury.
INSTALLING CABINET SUPPORT
INSTALLING ANTI-TIP BRACE
231/2”
22"
27"
2" x 4" or equivalent runners
231/2”
25"
30"
2" x 4" or equivalent
runners
Install 2x4 or 2x2 anti-tip
brace against rear cabinet
wall 9" from floor to
bottom of brace
2x4 or 2x2 runners
or solid bottom
9"

49-80507-5 17
1. Slide the left corner into opening and push power
cord into the hole leading to the outlet location.
Thread the cord through as drawer is being
pushed back into the opening.
If the outlet is installed inside the opening, plug
the cord into the outlet. In this location, the
excess power cord should be coiled and taped to
the right side of the unit. Make sure the cord does
not get trapped by the drawer.
NOTE: Insure that the power cord does not
contact the hot surfaces on the bottom of ovens,
cooktops, or any other appliance.
2. Push the drawer back until the front flange is
flush to the cabinet front.
3. Open the drawer fully.
4. Drill pilot holes through the holes in the
overlapping frame, one on each corner.
5. Drive wood screws provided into each corner.
INSTALLING WARMING DRAWER
INSTALLATION INSTRUCTIONS
Installation Instructions

18 49-80507-5
Notes

49-80507-5 19
Notes

20 49-80507-5
Save time and money! Review the charts on the following pages first and you may not need to call for service.
Problem Possible Cause What To Do
Warming drawer will
not work A fuse in your home may be blown or the
circuit breaker tripped. Replace the fuse or reset the circuit breaker.
Warming drawer not plugged in. Plug in.
Controls improperly set. 6HHWKH8VLQJWKHZDUPLQJGUDZHUVHFWLRQ
Drawer does not slide
smoothly or drags Ball bearings out of alignment. )XOO\H[WHQGWKHGUDZHUDQGSXVKLWDOOWKH
ZD\LQ6HHWKH&DUHDQGFOHDQLQJVHFWLRQ
Drawer over-loaded or load unbalanced. 5HGXFHZHLJKWWROHVVWKDQSRXQGV
Redistribute drawer contents.
Excessive
condensation Liquid in warming drawer. 5HPRYHOLTXLG
Uncovered foods. &RYHUIRRGZLWKOLGRUDOXPLQXPIRLO
Temperature setting too high. Reduce temperature setting.
Incorrect Moisture Selector setting. Set the Moisture Selector to the open vent
setting to allow venting.
No heat in the PROOF
setting Room temperature may prevent the
thermostat from tripping on. 7XUQWKHNQREWR/2:WKHQEDFNWR3522)
Food dries out Moisture escaping. &RYHUIRRGZLWKOLGRUDOXPLQXPIRLO
Troubleshooting tips ... Before you call for service
TROUBLESHOOTING TIPS
Other manuals for Profile PKD915
2
This manual suits for next models
4
Table of contents
Other GE Warming Drawer manuals

GE
GE Monogram ZXD27B User manual

GE
GE Monogram ZTD910WBWW Manual

GE
GE WDP6000I User manual

GE
GE Monogram ZKD910 User manual

GE
GE Monogram ZKD910 User manual

GE
GE PW9000DFBB Manual

GE
GE JTD915BFBBC Operating instructions

GE
GE Profile PKD915 User manual

GE
GE PHB915SDSS User manual

GE
GE Monogram ZKD910 User manual

GE
GE MONOGRAM ZTD910BF/SF/WF User instructions

GE
GE Profile PTD915WMWW Manual

GE
GE JKD910 User manual

GE
GE JKD910SBSS User manual

GE
GE Monogram ZKD910 User manual

GE
GE JB705STSS Manual

GE
GE PKW7000 Series Original instructions

GE
GE PKW7000 Series Original instructions

GE
GE Monogram ZKD910 User manual

GE
GE Monogram ZKD910 User manual