manuals.online logo
Brands
  1. Home
  2. •
  3. Brands
  4. •
  5. GE
  6. •
  7. Warming Drawer
  8. •
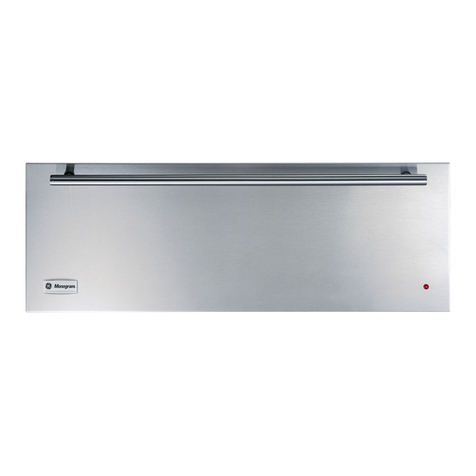
  9. GE Monogram ZKD910 User manual

GE Monogram ZKD910 User manual

Owner's
Manual
Electric
Warming Drawer
ZKD910
ZTD910
ge,com
@Monogram:
Consumer ]nff)rmation
Ele_tri( l,l_rmi_g" Drawer
Introduction ¥ot/r new Monogr_lI//"w_lril/illg dr:|wer makes an eloquent statement of style, convenience and
kitchen planning flexibility. Whether you chose it J[k_rits pm'ity of design, assiduous :|ttention to
detail--or flw both of these re_|sons--_ on'll find that your Monogram w:|rming drawer's superior
blend of fln'm and ftmction will delight you flw years to come.
Your Monogram warming drawer was designed to provide the flexibili w to blend in with
yore" kitchen cabinetry. Its sleek design can be beautifully integ*ated into the kitchen.
The infiwmafion on the fl_llowing pages will help you operate and maintain your warming
drawer properly.
If wm have any other questions--in the USA, please call the GE Answer Center < 800.626.2000.
In Canada, please call 1.888.880.3030.
Contents Care and Cleaning
_hmfing Drawer ......................... 11
R_Jck ................................... 11
Stainless Steel ............................ 11
Control Knob ............................ 11
Consumer Services
hnportant Phone Nmnbers ............... 14
Model and Serial Nmnbers ................. 2
Befiwe _im (;all For Service ................ 12
Sa_bty Instructions ....................... 4, 5
Warranty ............................. 15, 16
Waxrning Drawer
Features of Yore" Wanning Drawer . .......... 6
Llsing the _,.|rming Drawer .............. f_l 0
Moisture Selector . ........................ 7
Rark .................................... 8
Proofing ................................. 9
Crisping ................................. 9
Be[bre
using your
_u(lrfYllng
dr(lwer
Read this manual carefully. It is intended
to help you operate and maintain yore" new
wamfing drawer properly.
Kee I) it handy fl_r answers to yore" questions.
If vou don't understand something or need
more help, there is a list of toll-fl'ee consmner
service nmnbers included in the back section
of this manual.
Visit our Website at: ge.com
Write
down the
modal &
serial
nuTnDers
Yon can find them on a label located on the
backside of the lower drawer fl'ont.
These nmnbers are also on the Consmner
Product Ownership Registration Card packed
separately with yore" wamfing drawer.
Before sending in this card, please write these
ntmlbers here:
Model Nmnber
Serial Nmnber
lJse these numbers in any correspondence or
service calls concerning yore" warming drawer.
[[you
received (t
damaged
7O(l r?_l l_l_
([r(l_TlTeT"
Immediately contact the dealer (or builder) that
sold you the warming drawer.
Save time
& mon
gefi/re you request service, check the getore
You Call For Service section in the back of this
IX) _! IXual.
It lists causes of minor operating problems that
yo/1 Call correct yourself.
If you
7_lee([
service
To obtain service, see tile Consmner Services
page in the back of this guide.
We' re proud of our service and wan t you to be
pleased. If ti/r some reason you are not happy
with tile service you receive, here are two steps
to _illlow fi/r further help.
For euslomers in the USA:
FIRST, contact the people who serviced wlur
appliance. Explain wily you are not pleased.
In most cases, this will solve the problem.
NEXT, if you are still not pleased, write all the
details--including your phone nmnber--to:
Managei; Customer Relations
GE Appliances
Appliance Park
Louisville, KY 40225
For customers" in Canada:
FIRST, contact tile people who se*Mced your
appliance. Explain wily you are not pleased.
In most cases, this will solve tile problem.
NEXT, if you are still not pleased, write all the
details--including yore" phone nmnbe_to:
Manage_; Consumer Relations
Camco Inc.
1 Factor} Lane, Suite 310
Moncton, N.B. E1C 9M3
IMPORTANT SAFETY INSTRUCTIONS
WARNING!
For your satety, tile inli)rmation in this manual must be followed to minimize tile risk of fire or
explosion, electric shock, or to prevent property damage, personal il_jury or loss of lilb.
WARNING !--A N7 7-77P BRACE RE QUIt?ED
All waacming drawers can tip and injury could
result if not properly installed.
To prevent accidental tipping of the warming
draweL attach it to tl_e wall with all anti-tip brace
as described in tile installation instructions.
SAP>2TY PRECAUTIONS
When using your appliance, follow basic safety
precautions, including the following:
, Use this appliance only for its intended
purpose as described in tiffs manual.
* Be sure your appfiance is properly installed
and grounded by a qualified technician ill
accordance with the provided installation
instructions.
*Do not attempt to repair or replace any part
of your warming drawer unless it is specifically
recommended in this maJauaL All other
servicing should be reterred to a qualified
technician.
" Have the installer show you the location of the
circuit bma_ker or fuse. Mark it fiw easy retbrence.
, Before performing any service, tmplug or
disconnect the power supply at the household
distribution panel by removing the fuse or
switching off the circuit breaker.
, Do not leave children alone--children should
not be left alone or unattended ill an area
where an appliance is ill use. They should
never be allowed to sit or stand (m any part
of tile appliance.
, Do not allow anyone to climb, stand or hang
on the drawer. They could damage the warming
drawer, or cause severe personal ii_ju U.
, Be sure the warming drawer is securely
installed in a cabinet that is firmly attached
to the house structure.
"Never leave the drawer open when you
are not watching the warming drawer.
"Always keep combustible wall covering,
curtains or drapes a safe distance from
your warming drawer.
"Always keep wooden and plastic utensils
and canned food a safe distance away
from your warming drawer.
" Teach children not to play with the controls
or any other part of the warming drawer.
*Do not place more than 50 pounds into
the drawer.
, The purpose of the waacming drawer is to hold
hot cooked foods at serving temperature.
Always start with hot fl_od; cold food cannot
be heated or cooked in tile warming drawer.
, Do not warm food in the warming drawer for
more than two hours.
SAFETY PRE CA U7 70NS
.CAUTION: Items of interest to
children should not be stored in cabinets
above the win'ruing drawer; children climbing
on the drawer to reach items could be seriously
il/jured.
"Use only dry pot holders--moist or damp pot
holders on hot surfaces may result in burns
from steam. Do not let pot holders touch hot
heating elements. Do not use a towel or other
bulky cloth.
, For your safety, never use your appliance
for warming or heating the room.
"Do not let cooking grease or other flammable
materials accumulate in or near the warming
drawer.
"Do not use water on grease fires. Never pick
up aflaming pan. Turn the controls off.
Flalne in tile warnfing drawer can be
smothered by closing tile drawer or using
a multi-purpose dry chenfical or fl)an>t)pe
fire extinguisher.
• Do not touch the heating element or the
interior surface of the warming drawer.
These suriaces may be hot enough to burn.
REMEMBER: Tile inside sm'ihce of tile
warlning drawer inav be hot when the drawer
is opened.
• Do not store or use combustible materials,
gasoline or other flammable vapors and
liquids in the vicinity of this or any other
appliance.
• Never leave jays or cans of fat drippings in
or near your warming drawer.
•Use care when opening the drawer. Open the
drawer a crack and let hot air or steaan escape
before removing or replacing food. Hot air or
stealn which escapes can cause burns to hands,
lace and/or eves.
•Do not heat unopened food containers.
Pressure could build up and the container
could burst, causing an injury.
•Keep the vent unobstructed.
• Do not use the warming drawer to dry
newspapers. If overheated, they can catch on fire.
• Do not use the warming drawer for a storage
area. Items stored in the warming drawer
can ignite.
• Do not leave paper products, cooking utensils
or food in the warming drawer when not in use.
• Clean only parts listed in the Care and
Cleaning section.
• Do not use aluminum foil to line the drawer.
Foil is an excellent heat insulator and will
trap heat beneath it. This will upset the
l_eriblmance of tile drawer and it could
damage the interior finish,
• Wear proper apparel, i,oose fitting or halaging
garlnei_ts should never be worn while using
this appliance.
Read and jbllow this Sajety Injbrmation carqhlly.
SAVE THESE INSTRUCTIONS
Features of Your Warming Drawer
1+2le_tri_ Wa*'mi_g" Drawer
Design
injbrmation
(Not all features
are on all modds.
Appearance may
vary.)
(!)
®
®
®
®
®
Feature Index Page
1Warming Drawer 11
2Moisture Selector (on back of pmlel) 7, 9, 10
[lse this to keep tbods moist or crisp.
3 Control Knob 7
The control knob has settings tbr PROOF, LOW, MED and HIGH.
4 ON/OFF Switch 7
Use this swit(b to turn the warming drawer on.
5ON Signal Light 7
(;lows when the ON/OFF swit(h is in the ON position.
6 ON Signal Light Viewer Lens 7
The ON signal light is visible through the light viewer lens when ttle
drawer is closed.
Using the Warming [)rawer
• . y
Ele(:tIJ(: l,_arm_ng Drawer
Control
knob The warming drawer controls are hidden with
the drawer shut. Open the drawer. The controls
are on the right side of the fl'ont fl'ame.
To use the warming drawer, press the ON/OFF
switch to the ON position,
Slide the moisture selector control to the open
or closed setting, (See the Moisture Selector
section.)
Turn the control knob clockwise to the desired
settin ,
PROOF ... 75-95°E MED ..... 160-195°E
LOW ..... 140-160°E HIGH .... 195-230°E
PROOF
0
• MED
HI
Q
LO
ONsignal
li#zt The ON signal light is located below the
ON/OFF switch and glows when the ON/OFF
switch is in the ON position. It stays on until the
ON/OFF switch is moved to the OFF position.
The ON signal light is visible through the light
viewer in the drawer f/"ont panel when the
drawer is closed. This is a reminder that the
heat is on.
Moisture
selector
The moisture selector is located on the inside
fl'ont of the drawer.
To keep foods moist, slide the moisture selector
control awav fl'om the control knob. This closes
the vent and seals the moisture inside the
drawer, With the vent closed hot fi)ods stay
moist and soft.
In this setting condensation mav occur around
the inside edge of the drawer.
To keep foods crisp, slide the moisture selector
control to the right towards the control knob.
This opens the vents and allows the moisture
to escape.
With the vents open, it is normal tot moisture to
collect on surtaces above the warming drawer.
Additional
pans
An access(n') pan kitJXPN2 is available from
(;E at extra cost.
Two pans with lids (4" deep)
• One lar,*e_,pan (14 quarts)
• One medium pan (6 quarts)
Using the Warming Drawer
I¢le_t*i_ Warming Drawer
Rack
• Rack will fit from front to back.
• Preheat with the rack in place.
• Using the rack allows for double _stackim*
of item s.
Double stacking items with the rack in position.
Wizen using
the warming
dTa_oeT. . .
The warming drawer will kee I) hot, cooked
tim(Is at serving temperatm'e. Alwa}:s start with
hot tood. Do not use to heat cold fl)od other
than proofing yeast dough, crisping crackers,
chips or dry cereal.
Do not line the warming drawer with
aluminum foil.
• Allow time fi)r the drawer to be preheated:
LOW .................. 8 minutes
MED .................. 15 minutes
HIGH ................. 20 minutes
NOTE: It is not necessatw to preheat the
drawer for proofing.
• Food in heat-sate glass and glass ceramic
utensils may need higher thermostat setting
as compared to fi)od in metal utensils.
• Repeated opening of the drawer allows the
hot air to escape and the fired to cool. Allow
extra time for temperature inside the drawer
to stabilize after adding items,
• "_'_ith large, loads it may be necessary to use a
higher thermostat setting and cover some of
the cooked food items.
• Food should be kept hot in its cooking
('ontainer or transterred to a heat-safe seY\ino
dish.
• A1 mninmn toil mav be used to cover fl)od to
prevent it from drying out.
CAUTION: Plastic containers or
plastic wrap will melt if in direct contact with
the drawer or a hot utensil. Melted plastic may
not be removable mid is not covered m_der
your warrmlty.
• Remove serving spoons, etc., before placing
containers in warming drawer.
7b warm
s ving
bowl and
plates
To warm serving bowls and plates set the control
on LOW.
• Use only heat-safe dishes.
• Place the empty dishes on the rack to raise
them off the bottom of the drawer. If vou want
hotter dishes or want to heat fine china, please
check with the mantdhcttu'er of the dishes fin.
their maximmn heat tolerance.
• Preheat erupt) serving, dish while I)reheating,
the drawer.
• When holding hot, cooked fl)ods and warming
empty serving dishes at the same time, place
the serving dishes on the high rack position
and the fi)od on the bottom of the drawer.
CAUTION: Dishes Inav be hot. Use
pot holders or mitts when remoxino., hot dishes.
7b proof
yeast bread
dough
Yeast dough can be I)r°°tbd in the wanning, draxver.
• Place xour dish on the wanning drawer
bottoIll,
• You must always turn the control knob to
LOW then immediatelx back to PROOF.
• Close the ",ent.
• I,ightly oil the top of the douoho in a bowl
large enouoh_ to double the dough, size. Coxer
wifl_ a doth.
• Preheating not required fl_r proofing.
• Check the dough height in 40 minutes. Add
time as needed. The dough should remain in
the drawer until it has doubled in size and a
slight depression remains when the surtace is
touched gently with a finger.
7b crisp
stale items • Place food in low sided dishes or pans.
• Preheat on LOW setting and open the xent.
• Check crispness after 45 minutes. Add time
as needed.
7>mperature
selection
chart/br
cris ./bods
To kee I) several different toods hot, set the
temperature to the tood needing the highest
setting, Place the items needing the highest
setting on the bottom of the drawer and items
needing less heat on the rack.
Tips:
• Leave iood tlllCO\'el'ed.
• Do not use plastic containers or plastic wrap.
• Preheat prior to use according to
I'eCOl]/i//elided tim es.
Food Type
[_ac()n
Bread, hard rolls
Fried/hods
Pies, two crusts
Pizza
Potatoes, baked
"Ibrtilla (;hips
Conb'ol Setting
HIGH
MED
HIGH
MED
HIGH
HIGH
LOW
Moisture Selector Setting
OPEN
OPEN
OPEN
OPEN
OPEN
OPEN
OPEN
Using the Warming Drawer
7kmperature
selection
chartJbr
moist/hods
To kee I) several different fl_ods hot, set the
temperature to the fl_od needing the highest
setting. Place the items needing the highest
setting on the bottom of the drawer and items
needing less heat on the rack.
Tips:
* Cover fl_od with lidor aluminum fl_il.
* Do not put water in the warming drawer.
'_Do not use plastic containers or plastic wrap.
* Preheat prior to use according to
recommended times.
Food 7}pe
PJee], llledium and well (tol/e :i_
Bread, soft rolls
Casseroles
Cooked cereal
Eggs
Fish, seaR)od
Fruit
(',l'a\'v, cream sauces
Ham
I_amb
Pare akes, wattles
Pies, one CrllSt
Pork
Potatoes, mashed
Poultry
Xk'getables
Control Setting
MED
MED
MED
MED
MED
MED
MED
MED
MED
MED
HIGH
MED
MED
MED
HIGH
MED
Moisture Selector Setting
CLOSED
CLOSED
CLOSED
CLOSED
CLOSED
CLOSED
CLOSED
CLOSED
CLOSED
CLOSED
CLOSED
CLOSED
CLOSED
CLOSED
CLOSED
CLOSED
*{ Sl)A/1SI,'_I_commelldsmz illto'_zalZempemZul__ff145°E as the millimum doll_,m_ss/brbaj. { s_a polzahh, imaZthermometel to ched_imo'llaI
le!I_]lO'(tlttlES.
10
Care and Cleaning
Ele(tri_ ll_rming Drawer
Be sure the controls are in the OFF position and all surfaces are cool before cleani_g an), pan of tke
warming drawer.
Use soap and warm water to thoroughly clean.
Ra& Clean the rack with detergent and water. After
cleaning, rinse the rack with clean water and
dry with a clean cloth.
Stainless
steel Do not use a steel wool pad; it will scratch the
snrface.
To clean the stainless steel surihce, use warm
sudsy water or a stainless steel cleaner or polish.
_Mways wipe the surIhee in the direction of the
grain. Follow cleaner instructions flw cleaning
the stainless steel surihce.
To inquire about pro'chasing stainless steel
appliances cleaner or polish, or to find the
location of a dealer nearest you, please call
ore" toll-flee nmnber:
National Parts Center 800.626.2002 (U.S.)
888.880.3030 (Canada)
ge.com (U.S.)
www. GE_ppliances.ca (Canada)
Control
knob The control knob may be removed for easier
cleaning.
Beflwe removing the knob flw cleaning, please
note that it is in the PROOF position.
Wash the knob in soap and water or a vinegar
and hot water s(}luti(m but do not soak.
Dry and replace the knob.
11
Before You (;all For Service...
El¢_t*i_ 14_*mingDrawcr
Save time
and money.*
Review the
troubleshooting
tips on this
page first and
you may not
need to cag
./br service.
PROBLEM POSSIBLE CAUSE
WARMING DRAWER
WILL NOT WORK
DRAWER DOES NOT
SLIDE SMOOTHLY
OR DRAGS
FXCESSIVE
CONDENSATION
* A fuse in your home mav be blown or the circuit breaker tripped.
Replace the fuse or reset the circuit breaker.
* _%_rming drawer not plugged in. Plug in.
* _%u'ining drawer controls improperly set. See the Using the
_u'ming Drawer section.
* Ball bearings are out of alignment. Fully extend the drawer and
push it all the way in. See the Care and Cleaning section.
* Drawer ore>loaded or load unbalanced. Reduce weight to less than
50 pounds. Redistribme drawer contents.
Liquid in warming drawer. Remove liquid.
Uncovered foods. Cover food with lid or aluminum fl_il.
®
o
o
®
NO HEAT IN THE *
PRO OF SETTING
FOOD DRIES OUT * Moisture escaping. Coxer food with lid or ahuninum foil.
Temperature setting too high. Reduce temperature setting.
Incorrect Moisture Selector setting. Set the Moisture Selector to
the open vent setting to allow venting.
Room temperature may prevent the thermostat fl'om tripping on.
Turn the knob to LOW then back to PROOE
12
Notes
• • p
Iglectric _,_ar_n_n<¢ Dra*_,_er
13
Consumer Ser_,_ces
Ele_tri_ l,_?_rming" Drawer
G E Answer
Center ®
In the USA:
800.626.2000
With the purchase of your new Monogram appliance, receive the
assurance that if you ever need information or assistance from GE,
we'll be there. All you have to do is call--toll-free!
Whatever your question about any Monogram major appliance, GE Answer Center _:
infl)rmation service is available to help. Your call--and your question--will be answered
promptly and courteously. And you can call any time. GE Answer Cente_ _: se_Mce is open
24 hours a day, 7days a week.
OR
Visit our \'\Tebsite at: ge.com
In Canada, call L888.880.3030.
In-Home Repair
Service
In the USA:
800. 444.1845
In Canada:
1.888.880.3030
AGE consumer service professional will provide expert repair serxice, scheduled at a time
that's convenient tor you. Many GE Consumer Service company-(_perated locations oilier you
setwice today or tomorrow, or at wmr convenience (7:00 a.m. to 7:00 p.m. weekdays, 9:00 a.m.
to 2:00 p.m. Satm'days). Our thcto_wtrained technicians know your appliance inside and
out--so most repairs can be handled in just one visit.
For Customers
With Special
Needs...
In the USA:
800.626.2000
.............._1 I /I I I
set.oN
(;E offers Braille COlltro]s for a varietx of (;E appliances, and a
brochure to assist in l)lanuing, a barrie>free kitchen for pers(ms
*dth limited mobilitx.
Consumers with impaired he'u-im,,> or speech who haxe access to
a TDD or a conventional telet}pe>_riter ma_ call 800.TDD.GEAC
(8(/(/.833.4322) to request information or service.
Service Contracts"
In the USA:
800.626.2224
In Canada:
1.888.880.3030
YOu can have the secure teeling that GE Consumer Service will still be there after your
warranty expires. Purchase a GE contract while v(mr warrant_ is still in effect and you'll
receive a substantial discount. With a multipleuear contract, you're assm'ed of future
service at today's prices.
Par_ and
Accesso_es
In the USA:
800.626.2002
In Canada:
1.888.880.3030
Individuals qualified to service their own appliances can have parts or accessories sent directly
to their home. The GE parts system provides access to over 47,000 parts...and all GE Genuine
Renewal Parts are fully warranted. VISA, MasterCard and Discover cards are accepted.
User maintenance instructions contained in this guide cover procedures intended to be
performed by any user. Other servicing generally should be referred to qualified service
personnel. Caution must be exercised, since improper servicing may cause unsafe operation.
14
Warranty for custonlers in the USA
El_,_t*'i_ Warming Drawer
YOUR MONOGRAM WARMING DRAWER WARRANTY
Staple sales slip or cancelled check here. Proof of original purchase
date is needed to obtain service under warranty.
WHATIS
COVERED
l')_m the Date
of the O'_ginal
Pu,_hase
LIMITED ONE-Y_R WARRANTY
For one year fl'om date of original purchase,
we will provide, fl'ee of charge, parts and
service labor in yore" home to repair or
repla ce any part of the warming drawer tha t
tails beca use of a inanufilcturing defect.
.eeoe=eeo*eeeeoeeoeeeeo*eeeeoeeoeeeeo*eeee=eeoeee,
This warranty is extended to the original
imrchaser and any succeeding owner for
products imrchased tot ordinary home use
in the 48 mainland states, Hawaii and
Washington, D.C. If the product is located in
an area where service bv a GE Authorized
Servicer is not awfilable, you mav be
responsible tot a trip cha_ge or wm mav be
required to bring the product to an
Authorized GE Service i,ocation fl_r service.
In Alaska the warranty is the same except
that it is I,]MITED because you must pay to
ship the product to the service shop or for
the service technician's travel costs to wmr
h oi/1 e,
All warranw service will be provided by our
Factory Service Centers or bv our authorized
Customer Care <`:servicers dm'ing normal
working horn's.
Should wmr appliance need se_wice,
during warranty period or beyond, call
800.444.1845. Please have serial nmnber
and model nmnber available when calling
fl)r service.
WHAT IS NOT
COVERED
Service trips to Vo/lr hoille to teach you
how to use the product.
Replacement of house filses or resetting
of circuit breakers.
Failure of the product if it is abused,
misused, or used fl)r other than the
intended I)urI)ose or used COlmnerciallv.
hnproper installation, delivery or
I/l[l in te I1_1 n ce,
If you have an installation problem,
contact wmr dealer or installe_: You
are responsible tot providing adequate
electrical, gas, exhausting and other
cmmecting tacilities as described in the
Installation Instructions provided with the
product.
• Damage to the product caused bv
accident, fire, floods or acts of God.
• Incidental or consequential damage
caused by possible defects with this
appliance.
• Damage caused aiier delivery.
• Product not accessible to provide
required service.
EXCLUSIONOFIMPLIEDWARRANTIES--Yoursoleandexclusiveremedyisproductrepa#
asprovided in thisLimitedWarranty.Anyimpliedwarranties,includingtheimpliedwarranties
ofmerchantability orfitnessfora particularpurpose,are limitedtooneyearortheshortest
period allowed bylaw.
Some states do not allow the exclusion or limitation of incidental or consequential damages,
so the above limitation or exclusion mav not apply to you. This warranty gives you specific
legal rights, and wm may also have other rights which vary fl'om state to state.
To know what wmr legal rights are in yore" state, consult your local or state consumer affairs
office or wmr state's Attornev General.
WaJcrantor: General Electric Company. If further help is needed concerning this warranty,
write: Manager--Customer Relations, GE Applimaces, Louisville, KY 40225 15
n
Warranty fbr customers in Ca ada
Electric 1171rmir_g Drawer
WHATIS
C0 VERED
From the Date
of the Original
Purchase
YOUR MONOGRAM WARMING DRAWER WARRANTY
Staple sales slip or cancelled cheek here. Proof of original purchase
date is needed to obtain service under warranty.
LIMITED ONE-YEAR WARRANTY
For one year from date of original purchase,
we will provide, tiee of charge, })arts and
service labour in your home to repair or
replace any part of the warming drawer
that ihils because of a manufilctming detect.
This warranty is extended to the original
purchaser and any succeeding owner flw
pioducts purchased flw ordinary home use
in Canada. If the product is located in an area
where se_Mce by a GE Authorized Se_Mcer is
not av:dlable, you may be responsible tor a
trip charge or you may be required to bring
the product to an Authorized GE Service
I.ocation flw service.
All warranty service will be provided by our
Factory Se_Mce Cente_ or by ore" authorized
Customer Care _servicers during normal
working hours.
Should your appliance need service,
during warran F period or beyond, call
1.888.880.3030. Please have serial number
and model number a_:dlable when calling
fl_r service.
WHAT IS NOT
C 0 VERED
* Service trips to your home to teach you
how to use the product.
* Replacement of house fuses or resetting of
circuit breakers.
* Failure of the product if it is abused,
misused, or used fl>r other than the
intended purpose (>r used commercially.
* hnproper installation, delivery or
maintenance.
If vou have an insta}}ation prob}em, contact
vom" dea}er or insta}}er. You are responsib}e
fi)r providing adequate e}ectrica}, gas,
exhausting and other connecting taci}ities
as described in the Installation Inst_ uctions
provided with the product.
• Damage to the product caused bv accident,
fire, floods or acts of God.
• Incidenta} or consequentia} damage caused
by possib}e defects with this appliance.
• Damage caused atter de}iverv.
• Product not accessib}e to provide
required service.
EXCLUSIONOFIMPLIEDWARRANTIES--Yoursoleandexclusiveremedyisproductrepa#
asprovided inthisLimitedWarranty.Anyimpliedwarranties,includingtheimpliedwarrantiesof
merchantabilityorfitnessforaparticularpurpose,are limitedtooneyearortheshortestperiod
allowed bylaw.
] 49-80384 ]
12-05JR
Printed in the United States
Some provinces do not allow the exclusion or limitation of incidental (>r consequentia}
damages, so the above limitation or exclusion may not apply to you. This warranty gives you
specific legal rights, and you may also have other rights which vary ti'om pro\ ince to province.
To know what yore" legal rights are in your province, consult your local or provincial consumer
aflidrs office.
Warrantor: Cmnco Inc. If further help is needed concerning this warranty, write: Manager,
Consumer Relations, Camco Inc., 1 Factory Lane, Suite 310, Moncton, N.B. E1C 9M3.
GE Consumer &Industrial
Applionces
General Electric Compon U
Louisville, KY 40225
ge.com

Other manuals for Monogram ZKD910

10

This manual suits for next models

1

Other GE Warming Drawer manuals

GE Monogram ZKD910 User manual

GE

GE Monogram ZKD910 User manual

GE Monogram ZTD910SFSS User instructions

GE

GE Monogram ZTD910SFSS User instructions

GE Profile PTD915SMSS Manual

GE

GE Profile PTD915SMSS Manual

GE Profile PTD915WMWW Manual

GE

GE Profile PTD915WMWW Manual

GE Cafe CW9000SDSS Manual

GE

GE Cafe CW9000SDSS Manual

GE JKD910SBSS User manual

GE

GE JKD910SBSS User manual

GE Monogram ZKD910 User manual

GE

GE Monogram ZKD910 User manual

GE Monogram ZKD910 User manual

GE

GE Monogram ZKD910 User manual

GE PKW7000 Series Original instructions

GE

GE PKW7000 Series Original instructions

GE Monogram ZKD910 User manual

GE

GE Monogram ZKD910 User manual

GE JTD915BFBBC Operating instructions

GE

GE JTD915BFBBC Operating instructions

GE Profile PKD915SMSS Manual

GE

GE Profile PKD915SMSS Manual

GE Monogram ZKD910 User manual

GE

GE Monogram ZKD910 User manual

GE Monogram ZTD910WBWW Manual

GE

GE Monogram ZTD910WBWW Manual

GE Monogram ZKD910 B Series How to use

GE

GE Monogram ZKD910 B Series How to use

GE PHB915SDSS User manual

GE

GE PHB915SDSS User manual

GE JKD910 User manual

GE

GE JKD910 User manual

GE Cafe CTW900P2NS1 Manual

GE

GE Cafe CTW900P2NS1 Manual

GE JTD910 User manual

GE

GE JTD910 User manual

GE WDP6000I User manual

GE

GE WDP6000I User manual

GE PJ7000SFSS Manual

GE

GE PJ7000SFSS Manual

GE Monogram ZKD910BF User instructions

GE

GE Monogram ZKD910BF User instructions

GE Cafe CW9000SDSS User manual

GE

GE Cafe CW9000SDSS User manual

GE PHB925STSS User manual

GE

GE PHB925STSS User manual

Popular Warming Drawer manuals by other brands

Frigidaire PLEW30S3C Factory parts catalog

Frigidaire

Frigidaire PLEW30S3C Factory parts catalog

Caple WD140CLSS instruction manual

Caple

Caple WD140CLSS instruction manual

Alto-Shaam 500-1D Installation operation & maintenance

Alto-Shaam

Alto-Shaam 500-1D Installation operation & maintenance

Jenn-Air JWD2030 Use & care guide

Jenn-Air

Jenn-Air JWD2030 Use & care guide

Fisher & Paykel 9 Series Quick reference guide

Fisher & Paykel

Fisher & Paykel 9 Series Quick reference guide

Monogram ZDK910 Use and care guide

Monogram

Monogram ZDK910 Use and care guide

Lakeland 31863 Instruction booklet

Lakeland

Lakeland 31863 Instruction booklet

Gaggenau WSP 221 instruction manual

Gaggenau

Gaggenau WSP 221 instruction manual

Bosch HSC 140 Series instruction manual

Bosch

Bosch HSC 140 Series instruction manual

Wolf ICBWWD30 Use & care information

Wolf

Wolf ICBWWD30 Use & care information

KitchenAid KOWT107ESS installation instructions

KitchenAid

KitchenAid KOWT107ESS installation instructions

Cardini WD6299 instruction manual

Cardini

Cardini WD6299 instruction manual

Franke FMY 14 DRW manual

Franke

Franke FMY 14 DRW manual

American Range ARR-27WD installation manual

American Range

American Range ARR-27WD installation manual

Jenn-Air JJD3030IL Use & care guide

Jenn-Air

Jenn-Air JJD3030IL Use & care guide

Miele ESW 4700 Operating and installation instructions

Miele

Miele ESW 4700 Operating and installation instructions

AEG KD91403E user manual

AEG

AEG KD91403E user manual

Bauknecht DWK 724 Instructions for use

Bauknecht

Bauknecht DWK 724 Instructions for use

manuals.online logo
manuals.online logoBrands
  • About & Mission
  • Contact us
  • Privacy Policy
  • Terms and Conditions

Copyright 2025 Manuals.Online. All Rights Reserved.