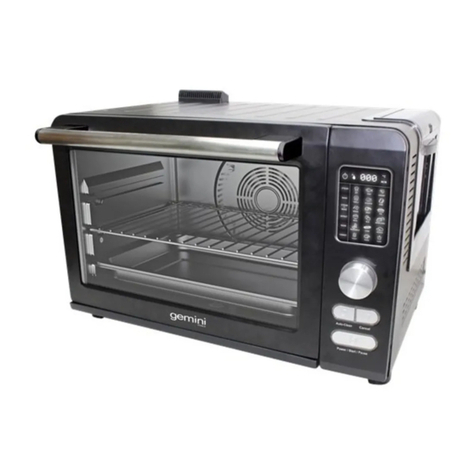
Gemini GOG20N User manual

Electric Oven
Model No : GOG20N

在使用本產品前,請先詳細閱讀說明書。
重要安全指引
1. 請於操作前詳閱操作指引 (以英文版為準) 。
2. 兒童、傷健人仕、精神及感官受到影響及缺乏操作常識和經驗者不適宜獨自使
用、操作此產品。如需操作,需有相關人仕從旁指引及對其行為安全負責。
3. 如器材出現問題,請聯絡代理商或合資格人仕處理,不要自行對其進行維修,以
免發生危險。
4. 請遵從器材上的規格表資料連接電源。
5. 此器材只適用於家居室內操作,並不適用於商業用途。
6. 不要在濕度高的室間內使用。
7. 使用此器材時需放置在穩定、平面、防熱及防滑的平台上操作。
8. 不要放置電源線在工作平台的邊緣,以防發生危險。
9. 使用器材時需保持雙手乾爽,以免發生危險。
10. 當停止使用器材(包括清潔器材前,安裝或移除配件及儲藏器材)或出現故障時,
請從電源接駁處移除插頭。
11. 使用時確保受到監控。
12. 當器材運作時或其表面仍高於室溫時,切勿移動。移動前確保已關機及等待其表
面已冷卻至室溫。
13. 確保有充足的運作空間 (兩側距離為10厘米,上方距離為30厘米)。
14. 使用時及使用後的焗爐機門會處於較高溫度,切勿用手直接觸摸及開啟。
15. 使用時及使用後的焗爐處於較高溫度,請使用附設的工具取出烤焗配件。
16. 不要放置焗爐於其他電器及易燃物品上。
17. 當機門開啟時,不要置重物於機門上。
18. 使用後避免立刻用水接觸機門,以免造成玻璃破裂。
19. 切勿放置器材於其他發熱器材(如爐灶、暖爐等)側或於使用後立刻置於風扇等器
材降溫,以避免影響其溫度控制。
20. 當器材墜入水時,立刻移除插頭及不要再使用此器材。
21. 不要連接外置時間掣或其他遙控器材使用。
注意!此電器只適合家庭用途,並不適合作商業及工業用途。
操作指引
首次使用前:
1. 先移除所有包裝並進行適當處理。
2. 請於首次煮食前先行對焗爐及其配件進行清潔並徹底擦乾。
3. 打開機門並開動上下發熱部件並調至最高溫度,設定時間為15分鐘。用此方法可
排走機內的味道。
注意!初次運作時可能有微量白色煙霧排出而此為正常情況。使用前請
確保有足夠的通風空間。
關於控制面板
發熱部件選擇掣
1. 關機
2. 上發熱部件開啟
3. 下發熱部件開啟
4. 上下發熱部件開啟
使用焗爐
有用貼士
如想獲得理想烤焗效果,請先行對焗爐進行預熱工作。例:對烤焗肉類用中度進行預
熱。
使用焗爐
焗製功能
1. 開啟焗爐機門。
2. 先將預備好的食物放置在烤焗盤並置於焗爐內。注意!食物放置時需留意高度。
3. 關閉機門。
4. 完成後,請按烹調需要調節溫度調節掣至合適溫度。
5. 選擇發熱部件選擇掣控制。
6. 根據烹調需要調節時間選擇掣,完成後開/關顯示燈會亮著。
7. 烤焗會按設定運作並至完成時間後自行關機,完成時會發出聲音提示使用者。 接
著開/關顯示燈會熄掉。
8. 開啟機門前先戴上隔熱手套。
9. 開啟機門時要注意焗爐有高溫及可燙傷。
10. 使用烤焗盤取出用具從焗爐取出烤焗盤。
11. 關掉焗爐機門。
1. 電線和插頭(只作參考用)
2. 烤焗盤取出用具
3. 顯示燈
4. 時間選擇掣
5. 發熱選擇掣
6. 溫度調節掣
7. 發熱部件
8. 烤焗用欄柵
9. 烤焗盤
10. 機門
11. 機門把手
12. 烤焗叉
13. 烤焗叉取出用具
1
4
5
3
6
2
7
11
8
9
10
12
13

12. 用食具協助從烤焗盤取出食物至載具上。注意!食物尚處於高溫狀態並可導致燙
傷。
13. 當所有食物已取出,請謹記關掉發熱部件選擇掣並切斷電源。
注意!當食物己烹調完成而預設時間尚未完結,可以先行關掉發熱部件
選擇掣。雖然時間選擇掣會繼續運行,但器材已停止運作。
烤焗功能
1. 開啟焗爐機門。
2. 先將預備好的食物放置在烤焗盤並置於焗爐內低層位置。注意!食物放置時需留
意高度。(烤焗的作用是用作收集烤焗時食物流出的汁液影響操作的發熱部件)
3. 將食物放置至烤焗用欄柵上並將烤焗用欄柵放在焗爐內中或上的位置。
4. 關閉機門但可留小量位置待焗爐內可以保持空氣流通。
5. 完成後,請按烹調需要調節溫度調節掣至合適溫度。
6. 選擇發熱部件選擇掣控制
7. 根據烹調需要調節時間選擇掣,完成後開/關顯示燈會亮著。
8. 烤焗會按設定運作並至完成時間後自行關機,完成時會發出聲音提示使用者。 接
著開/關顯示燈會熄掉。
9. 開啟機門前先戴上隔熱手套。
10. 開啟機門時要注意烤焗尚有高溫及可燙傷。
11. 使用烤焗盤取出用具從焗爐取出烤焗用欄柵。
12. 用食具協助從烤焗盤取出食物至載具上。注意!食物尚處於高溫狀態並可導致燙
傷。
13. 使用烤焗盤取出用具從焗爐取出烤焗盤。注意!烤焗盤內的汁液尚處於高溫狀態
並可導致燙傷。
14. 關掉焗爐機門。
15. 當所有食物已取出,請謹記關掉發熱部件選擇掣並切斷電源。
注意!當食物己烹調完成而預設時間尚未完結,您可以先行關掉發熱部
件選擇掣。雖然時間選擇掣會繼續運行,但此器材已停止運作。
烤焗叉功能
使用烤焗叉功能可令食物達至理想的金黃色烤焗效果。
1. 開啟焗爐機門。
2. 先將預備好的食物放置在烤焗盤並置於焗爐內低層位置 (注意!食物放置時需留
意高度)。烤焗的作用是用作收作烤焗時食物流出的汁液影響操作的發熱部件。
3. 將食物放置至烤焗用欄柵上,並將烤焗用欄柵放在焗爐內中或上的位置。
4. 將烤焗叉移除烤焗叉夾鉗。
5. 將食物放置於烤焗叉上中間確保食物能穩妥置於烤焗叉上。
6. 關上烤焗叉夾鉗。
7. 將烤焗叉穩妥放入烤焗叉插槽內。注意!不要將食物觸碰到發熱部件。
8. 關閉機門但可留小量位置待焗爐內可以保持空氣流通。
9. 完成後,請按烹調需要調節溫度調節掣至合適溫度。
10. 選擇發熱部件選擇掣控制。
11. 根據烹調需要調節時間選擇掣,完成後開/關顯示燈會亮著。
12. 烤焗會按設定運作並至完成時間後自行關機,完成時會發出聲音提示使用者。 接
著開/關顯示燈會熄掉。
13. 開啟機門前先戴上隔熱手套。
14. 開啟機門時注意焗爐尚有高溫及可燙傷。
15. 使用烤焗叉取出用具從焗爐取出烤焗叉。
16. 先解開烤焗叉夾鉗並用食具協助從烤焗叉取出食物至載具上。注意!食物尚處於
高溫狀態並可導致燙傷。
17. 使用烤焗盤取出用具從焗爐取出烤焗盤。注意!烤焗盤內的汁液尚處於高溫狀態
並可導致燙傷。
18. 關掉焗爐機門。
19. 當所有食物已取出,請謹記關掉發熱部件選擇掣並切斷電源。
日常清潔
1. 每次使用後都要清潔整個電器,以防止油脂積聚,避免發出惡臭氣味。
2. 煮食後清理屑盤
3. 清潔前讓電器冷卻和拔除插頭
4. 切勿浸濕電器或在沖水下清洗
5. 可移除的欄柵、焗盤可當正常廚具清洗。
6. 以濕海綿清洗電器外面。
7. 切勿使用腐蝕性清潔劑或尖銳用具清潔焗爐,因這會刮花焗爐機身。
8. 操作前讓所有配件和機身完全乾透。
附有貼士
烤焗詳列
食物種類 溫度 (°C) 時間 (分鐘)
麵包 190 10 – 15
蛋糕 190 25 – 35
魚類 250 20 – 25
雞/ 鴨220 ~ 250 30 – 70
烘烤 / 薄烤餅 160 10 – 15
烤肋骨 250 25 – 30
蛋/ 花生 125 ~ 150 10 – 18
注意: 以上資料只作參考用

Please read these instructions carefully and retain them for reference.
IMPORTANT SAFEGUARDS
1. Use this appliance solely in accordance with these instructions.
2. This appliance is not intended for use by persons (including children) with reduced
physical,sensory or mental capabilities, or lack of experience and knowledge,
unless they have been given supervision or instruction concerning use of the
appliance by a person responsible for their safety. Children should be supervised
to ensure that they do not play with the appliance.
3. Have any repairs carried out solely by a qualified electrician. Never try to repair the
appliance yourself.
4. Before use please verify that the mains voltage is the same as indicated on the
rating plate of the appliance.
5. Never use the appliance outdoors.
6. Never use the appliance in a humid room.
7. Place the appliance on a flat, stable surface.
8. Do not place the power lines the edge of the working platform to prevent
dangerous.
9. Make sure that your hands are dry before touching the appliance, power cord or
plug
10. Switch off the appliance and remove the plug from the wall socket in the event of a
malfunction during use, and before cleaning the appliance, fitting or removing an
accessory, or storing the appliance after use.
11. Never leave the appliance unsupervised whilst it is in use.
12. Never move the appliance whilst it is switched on or is still hot. Switch off the
appliance, and wait until it has cooled down before you move it.
13. Make sure there is sufficient free space around the appliance (at least 10 cm for
each sides and 30cm on top of the oven),
14. Certain parts of the appliance may get hot. Do not touch these parts to prevent
burning yourself.
15. Use Tray Handle to insert or remove the tray form the oven.
16. Make sure that the appliance, the power cord or the plug do not make contact
with hot services, such as a hot hob or naked flame.
17. Do not set anything heavy on the open door.
18. Do not splash water onto the glass during or immediately after use. It may cause
the glass to break.
19. Do not put the oven close to a gas burner or other source of high temperature or
direct to an electric fan which may affect proper temperature control.
20. To avoid electric shock, do not immerse cord, plug or any parts of the oven in the
water.
21. Do not connect External timer and other Remote Control Equipment
This unit is for HOUSEHOLD USE ONLY.
OPERATION INSTRUCTIONS
Before using the oven for the first time:
1. Remove the packaging.
2. Clean all the accessories to remove any residue that may be left from the
manufacturing process (see "Cleaning and maintenance"). Dry them thoroughly.
3. Turn on the top and bottom heating elements for 15 minutes at the highest
temperature with the door open. This will remove any packaging odour from the
appliance.
Note The appliance may emit a little smoke and a characteristic smell when you
switch it on for the first time. This is normal, and will soon stop. Make sure the
appliance has sufficient ventilation.
ABOUT THE CONTROL PANEL
HEATING ELEMENT SELECTOR
1. OFF
2. Upper heating tube
3. Lower heating tube
4. Upper & lower heating tube
USING YOUR OVEN
HELPFUL HINTS
In general, it is not necessary to preheat the oven, but you may have better results if
you heating the oven before cooking some delicate meals, such as rare medium meat
and cakes.
1. Power cord and plug
2. Tray handle
3. Indicator
4. Timer selector
5. Heating selector
6. Temperature selector
7. Heating element
8. Bake grill
9. Bake tray
10. Door
11. Door handle
12. Rotisserie spit
13. Rotisserie handle
1
4
5
3
6
2
7
11
8
9
10
12
13

HOW TO USE THE OVEN
Baking
1. Open the oven door.
2. Place the baking tray with the food at the desired height in the grooves in the oven.
3. Close the oven door.
4. Use the TEMPERATURE knob to set the required temperature.
5. Rotate the SELECTOR knob to the Upper & lower heating tube (4)setting.
6. Use the TIMER knob to set the baking time. The amount of time required depends
on the type and quantity of food.The On/Off indicator will be lit.
7. Bake the food until it is cooked.The oven will turn itself off automatically and a
sound signal will be heard once the baking time has elapsed. The On/Off indicator
light will go out.
Note If the food is ready but the baking time has not yet elapsed, you can turn off the
oven by rotating the SELECTOR knob to "OFF". The timer will continue, but the oven
will no longer be heated.
8. Wear oven gloves.
9. Open the oven door. Take care! The door is hot.
10.Use the removal tool to remove the baking tray from the oven.
11.Close the oven door.
12.Remove the food from the baking tray and put it on a plate. Take care! The food is
hot.
13.Once you have finished, rotate the SELECTOR knob to “OFF” and remove the
plug from the plug socket.
Grilling
You can use the grill function to give fish, poultry and oven dishes a golden brown
crust.
1. Open the oven door.
2. Place the baking tray in the bottom groove in the oven. The baking tray will collect
any juice and fat whilst grilling and prevent the juice and fat from getting on the
bottom heating element.
3. Place the grille with the food in the middle or top grooves in the oven.
4. Leave the oven door slightly open so as to allow the air to circulate.
5. Use the TEMPERATURE knob to set the required temperature.
6. Rotate the SELECTOR knob to the Upper heating tube (2) setting.
7. Use the TIMER knob to set the grilling time. The amount of time required depends
on the type and quantity of food.The On/Off indicator will be lit.
8. Grill the food until it is cooked. The oven will turn itself off automatically and a
sound signal will be heard once the grilling time has elapsed. The On/Off indicator
light will go out.
9. Wear oven gloves.
10.Open the oven door. Take care! The door is hot.
11.Use the removal tool to remove the grille with the food from the oven.
12.Remove the food from the grille and put it on a plate. Take care! The food is hot.
13.Use the removal tool to remove the baking tray from the oven. Take care! Any
juice and fat on the baking tray will be hot!
14.Close the oven door.
15. Once you have finished grilling, rotate the SELECTOR knob to “OFF” and
remove the plug from the plug socket.
Using the roasting spit
You can use the roasting spit to roast meat and poultry to a nice, even brown colour.
1. Open the oven door.
2. Place the baking tray in the bottom groove in the oven. The baking tray will
collect any juice and fat whilst roasting and prevent it from getting on the bottom
heating element.
3. Remove the clamp from the round end of the roasting spit.
4. Spike the meat or poultry to be roasted on the round end of the roasting spit.
Make sure the roasting spit is inserted through the middle of the meat or poultry.
5. Use the clamps to secure the meat or poultry to the roasting spit.
6. Place the roasting spit with the meat or poultry in the oven. Insert the round end
of the roasting spit into the drive sleeve.
7. Place the straight end of the roasting spit on the support. Note Make sure the
meat or poultry does not touch the top heating element when turning.
8. Leave the oven door slightly open so as to allow the air to circulate.
9. Use the TEMPERATURE knob to set the required temperature.
10. Rotate the SELECTOR knob to the setting. When using the roasting spit we
advise you to use only the top heat, because the bottom heat elements are
covered by the baking tray which catches grease and therefore it has no effect.
11. Use the TIMER knob to set the roasting time. The amount of time required
depends on the type and quantity of food. The On/Off indicator will be lit.
12. Roast the meat or poultry until it is cooked. The oven will turn itself off
automatically and a sound signal will be heard once the roasting time has
elapsed. The On/Off indicator light will go out.
Note If the meat or poultry is ready but the roasting time has not yet elapsed, you can
turn off the oven by rotating the SELECTOR knob to "OFF". The timer will continue,
but the oven will no longer be heated.
13. Wear oven gloves.
14. Open the oven door. Take care! The door is hot.
15. Use the removal tool to remove the roasting spit with the meat or poultry and
place it on a plate.
16. Remove the clamp from the round end of the roasting spit and remove the meat
or poultry from the roasting spit. Take care! The roasting spit and the meat or
poultry are hot.
17. Use the removal tool to remove the baking tray from the oven. Take care! Any
juice and fat on the baking tray will be hot!
18. Close the oven door.
19. Once you have finished, rotate the SELECTOR knob to “OFF” and remove the
plug from the plug socket.

CLEANING
1. It is important that you clean the entire appliance after each use to prevent and
accumulation of grease and avoid unpleasant odors.
2. Use the crumb tray for clearing after cooking
3. Allow the appliance to cool and unplug from outlet before cleaning.
4. Do not immerse appliance in water or wash it under running water.
5. Removable grill, tray, can be washed as normal kitchenware.
6. Clean outside of appliance with a damp sponge.
7. Do not us abrasive cleaners or sharp utensils to clean the oven, as it will scratch
the oven body.
8. Let all parts and surface dry thoroughly prior to operate the oven.
Attached hints
BAKING LIST
Type of Food Temperature (°C) Time (Minutes)
Bread 190 10 – 15
Cake 190 25 – 35
Fish 250 20 – 25
Chicken/ Duck 220 ~ 250 30 – 70
Bake/ Pancake 160 10 – 15
Spare Ribs 250 25 – 30
Eggs/ Peanuts 125 ~ 150 10 – 18
Note: The above information is for reference only.

2/F, Shing Dao Industrial Building, 232 Aberdeen Main Road, Hong Kong
香港香港仔大道232號城都工業大廈2樓
太平洋行
本產品不斷改進中,如功能有所更改,恕不另行通知,如有疑問,請與客戶服務
中心聯絡,不便之處,敬請原諒。
說明書內容以英文版本為準
請記錄下列產品資料
型號
機身編號
經銷商名稱
購買日期
ToolBox Customer Service Centre 客戶服務中心:
7/F., Goodwill Industrial Building, 36-44 Pak Tin Par Street, Tsuen Wan, N.T.
新界荃灣白田壩街36-44號信義工業大廈7樓
Customer Service Hotline 客戶服務熱線:(852) 8210 8210
Service E-mail 電郵地址:[email protected]
Please register now at 請即上網登記:www.toolbox.hk
Website 網址:www.gilman-group.com
Table of contents
Other Gemini Oven manuals

Gemini
Gemini GOG28B User manual

Gemini
Gemini GOV12TT User manual

Gemini
Gemini GOV35DG User manual

Gemini
Gemini GOV12V User manual

Gemini
Gemini GSO17G1 User manual

Gemini
Gemini GOV12JW User manual

Gemini
Gemini GOV12SG User manual

Gemini
Gemini GOV12P User manual

Gemini
Gemini GOV8 User manual

Gemini
Gemini GOV25 User manual
Popular Oven manuals by other brands

VOX electronics
VOX electronics EBB7226 operating instructions

Simfer
Simfer B4EC18016 user manual

Smeg
Smeg Oven 9FBYON instruction manual

Kuppersbusch
Kuppersbusch EEBK 6400.5 Instructions for use and installation instructions

INNOLIVING
INNOLIVING INN-792 user manual

INNOLIVING
INNOLIVING INN-737 user manual