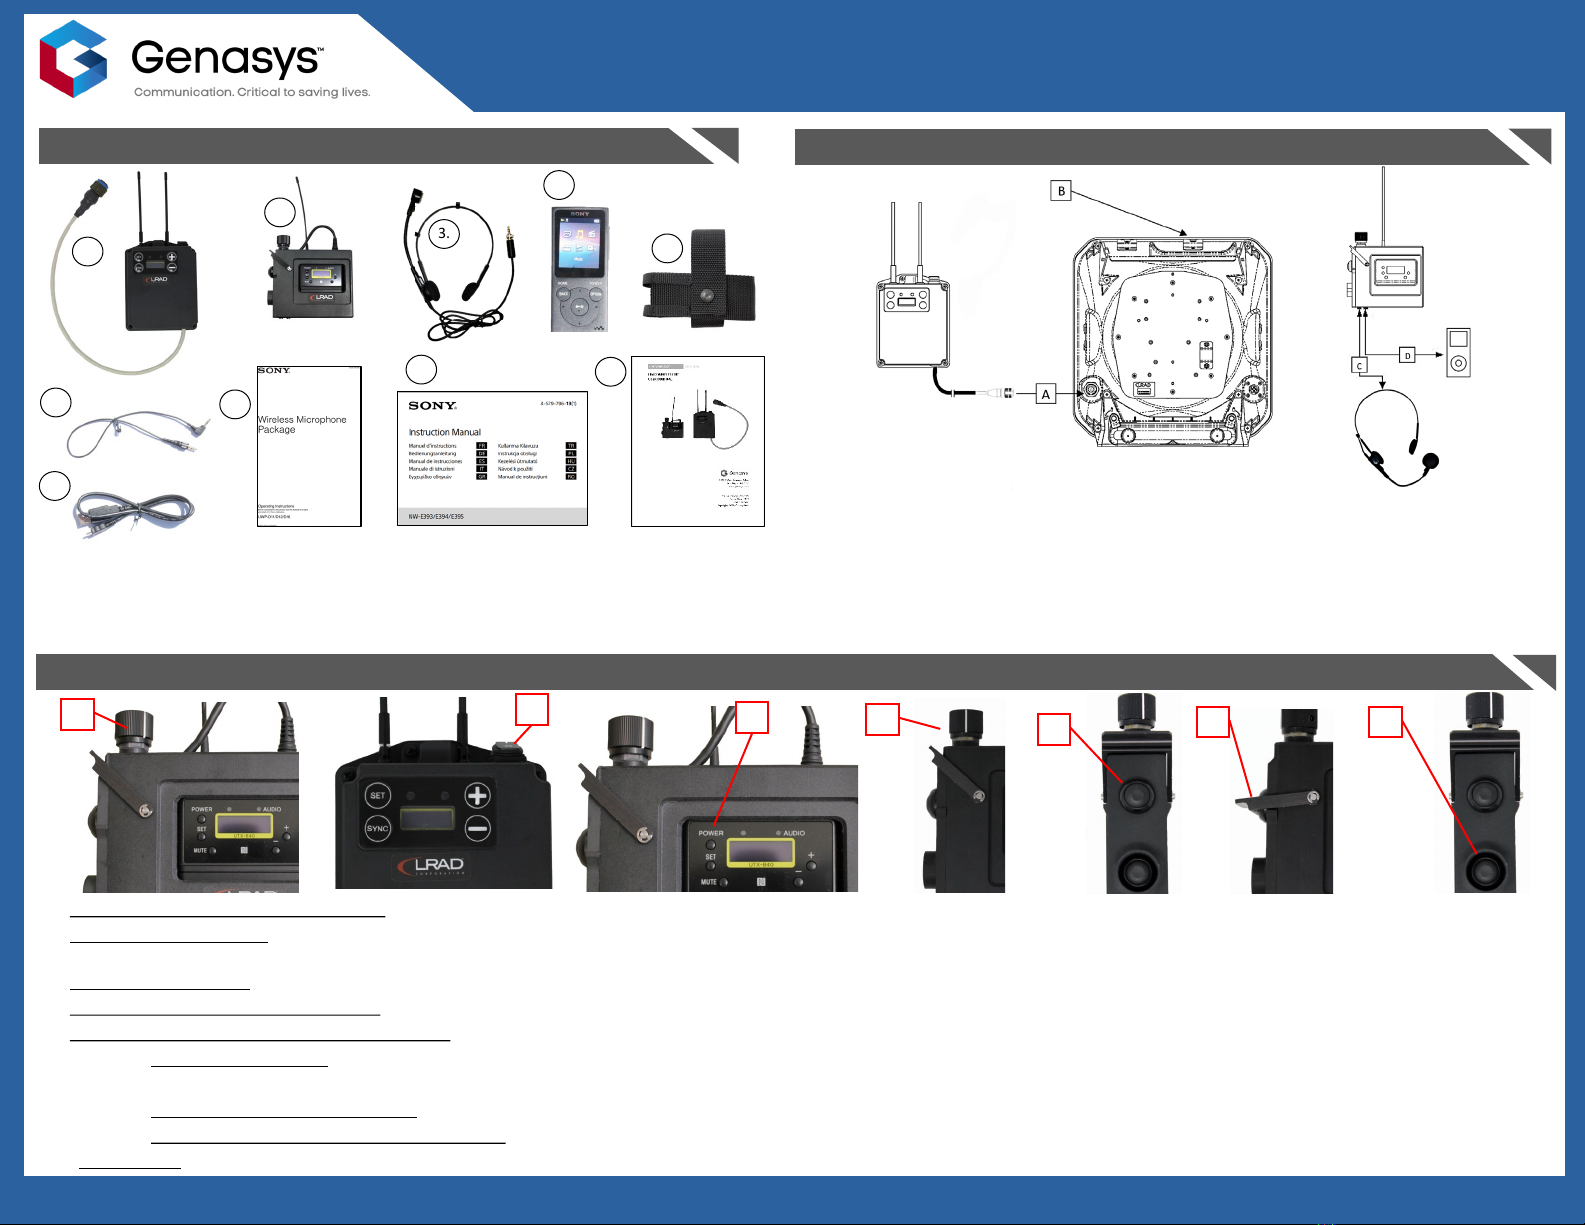
WIRELESS TRANSMITTER
LRAD WIRELESS KIT
REFERENCE INFORMATION
1 (858) 676-1112 |www.genasys.com | info@genasys.com |P/N 119513-00 Rev. 03 | Copyright © 2021 Genasys Inc.
Transmitter Channel Selection
1. Power on the transmitter by pressing and holding both the
Power Button and the Set Button.
2. Make sure the screen displays the GP/CH menu.
3. Press and hold the Set Button until the channel group starts
flashing.
4. Use the select buttons to scroll through channel groups. Then
press the Set Button to choose the desired channel group. The
channel group is now set.
5. Once the channel group is set, the channel number will start
flashing.
6. Use the Select buttons to scroll through channel numbers. Then
press the Set Button to choose the desired channel number.
The channel number is now set and the screen will stop
flashing.
BATTERY
POWER
INDICATOR
STATUS
Solid Green Sufficient battery level.
Flashing Green Battery level is getting low.
Flashing Orange Battery is charging.*
Flashing Red Charging not possible. User must
replace batteries.**
Not Illuminated Power is off or battery is empty.
AUDIO INPUT
INDICATOR
STATUS
Solid Green Audio input level is appropriate.
Solid Red Audio input level is too high. If sound is
distorted, lower volume using Volume
Control Knob.
Flashing
Orange
Audio is muted. Press Mute Button to
enable audio.
Not
Illuminated
There is no audio input, or the input
level is too low.
WIRELESS RECEIVER
FACTORY DEFAULT SETTINGS
1. Attenuation – 0
2. Power Level – H
Above settings required to effectively use LRAD speaker at
maximum volume.
See Wireless Microphone Package Manual for more information
on transmitter settings.
Receiver Channel Selection
1. Power on the receiver and make sure the screen displays the GP/CH
menu.
2. Press and hold the Set Button until the channel group starts flashing.
3. Use the Select Buttons to scroll through channel groups. Then press
the Set Button to choose the desired channel group. The channel
group is now set.
4. Once the channel group is set, the channel number will start
flashing.
5. Use the Select Buttons to scroll through channel numbers. Then
press the Set Button to choose the desired channel number. The
channel number is now set and the screen will stop flashing.
FACTORY DEFAULT SETTINGS
1. Monitor Level - 11
Above setting required to effectively use LRAD speaker at
maximum volume.
See Wireless Microphone Package Manual for more information
on receiver settings.
CLEAR CHANNEL SCAN
1. On the receiver, use the Select Buttons to scroll through menus until the CLR CH
SCAN menu is displayed.
2. Press and hold the Set Button until the GP ALL+ section starts flashing.
3. Press the (+) Select Button. This will initiate the clear channel scan.
The first clear channel number available will flash on the screen.
To display the next available clear channel number, press the (+) Select
Button.
To cancel searching press the (-) Select Button.
4. Press the Set Button when the desired channel number is displayed. The
receiver’s channel is now set, and the screen will stop flashing.
5. On the transmitter, manually set the channel group and channel number to
match that of the receiver.
6. After matching the channel group and channel number on both devices, cycle the
transmitter’s power. This should connect the two devices.
NOTE: The desired channel group must already be selected before performing
the clear channel scan.
Transmitter is compatible with the following size AA
battery types.
•Alkaline LR6 batteries
•Rechargeable nickel metal hydride batteries
•Lithium batteries
See LRAD Wireless Kit User Manual or Wireless
Microphone Package Manual for more information.
RECEIVER POWER SOURCE
The Receiver is powered by the
LRAD head unit and does not
require batteries.
*Charging requires rechargeable nickel metal hydride batteries. To
charge, the rechargeable batteries must be inserted in the
transmitter, and the transmitter’s power must be off. Then connect
the transmitter to a power source via USB cable.
**Charging is not possible with alkaline or lithium batteries, or if
the rechargeable batteries have deteriorated.