Genebre 73566 User manual

GENEBRE S.A. · Avda. Joan Carles I, 46-48 · EDIFICIO GENEBRE
Tel. +34 93 298 80 00/01 · Fax +34 93 298 80 06
08908 L’HOSPITALET DE LLOBREGAT Barcelona (Spain)
e-mail: genebre@genebre.es
internet: http://www.genebre.es
GENEBRE S.A. FECHA DE REVISIÓN: 02/11/2020 NÚMERO DE REVISIÓN: R0
Art. 73566
Equipo electrónico para la medición de la presión diferencial y caudal
Electronic differential pressure and flow measuring device
Características
Features
1. Equipo electrónico para la medición de la
presión diferencial por lectura directa, el valor del
caudal y la presión en circuitos hidráulicos.
2. El equipo se suministra en un maletín de
transporte con los siguientes accesorios:
Un protector de goma extraíble
Dos tubos de conexión, completos con
válvulas de aislamiento manuales
Dos adaptadores de conexión acodados tipo
Binder con agujas de 3,3 mm de diámetro.
Dos adaptadores de conexión acodados tipo
Binder con agujas de 2,0 mm de diámetro.
Un juego de llaves Allen (3 mm, 4 mm, 5 mm,
6 mm y 8 mm) y un destornillador.
Un kit de mantenimiento de los filtros.
Un juego de pilas de recambio PP3
Manual de instrucciones y guía de inicio rápido
1. Electronic differential pressure measuring
instrument suitable for the direct reading of flow
rate and pressure valve on water circuits.
2. The measuring device is supplied in a
carrycase with the following accessories:
A removable rubber protector
A pair of connectors tubes, complete with
manually operated isolation valves
A pair of angle-patterns binder-style
connection adaptors Ø3,3mm needles
A pair of angle-patterns binder-style
connection adaptors Ø2 mm needles
A set of hex keys (3mm, 4mm, 5mm, 6mm,
and 8mm) and a screwdriver
A strainer maintenance kit
A PP3 spare battery
Operating instructions and Quick-start guide
Datos tecnicos
Technic
al data
1. Precisión (% de lectura): ±1% de la lectura o
±0,10 kPa (el que sea mayor)
2. Presión estática máxima admisible: 10 bar
3. Rango de medición: de 0,5 kPa a 200 kPa
4. Tiempo efectivo de operación: 20 horas con pilas
alcalinas standard PP3 de 9V
5. Válvulas en base de datos: Alrededor de 4500
válvulas de 70 fabricantes están programadas en
el dispositivo.
1. Accuracy (% of reading): ±1% of reading or
±0,10 kPa (whichever is greater)
2. Max allowable static pressure: 10 bar
3. Measurement range: 0,5 kPa to 200 kPa
4. Effective operating time: 20 hours with
standard alkaline battery 9V
5. Valve database: The performance
characteristics of over 4500 valves from 70
manufacturers are preprogramed into the
device.
R
ef.
Dimesniones
/
Dimensions
(
mm
)
Peso
/
Weight (
K
g)
73566 00 00
440 x 320 x 100 3,450

GENEBRE S.A. · Avda. Joan Carles I, 46-48 · EDIFICIO GENEBRE
Tel. +34 93 298 80 00/01 · Fax +34 93 298 80 06
08908 L’HOSPITALET DE LLOBREGAT Barcelona (Spain)
e-mail: genebre@genebre.es
internet: http://www.genebre.es
GENEBRE S.A. FECHA DE REVISIÓN: 02/11/2020 NÚMERO DE REVISIÓN: R0
Descripción de la interfaz del dispositivo / Device interface description
Mantén pulsado el botón MENU para encender el dispositivo /
Press & hold the MENU button to switch the device “ON”
Conecta el tubo de conexión
ROJO a este conector.
Connect the RED connection
tube to this connector
Conecta el tubo de conexión
AZUL a este conector.
Connect the BLUE connection
tube to this connector
Anilla de seguridad. Utiliza la
correa incluida para colgar el
dispositivo de una tubería (u
otro elemento parecido) al
realizar las lecturas.
Securing ring. Use the la
nyard
supplied to suspend the
device fromadjacent
pipework (or similar) while
taking reading
Pulsa para poner a cero el
valor de referencia antes de
realizar una medición.
Press to set a zerodatum
before taking a measurement
Pulsa para confirmar los
menús seleccionados y las
entradasdel menú.
Press to accept menu
selectionsand screen entries
Utiliza los botones ▲►▼◄
para navegar por los menús e
introducir valores numéricos.
Use the▲►▼◄buttons for
menu navigation and to enter
numerical data
Pulsa para entrar en las
pantallas del menú.
Vuelve a pulsar menú para
opciones de idioma.
Press to enter menu screens.
Press menu again for language
options.
Los filtros internos protegen el
sensor
de las partículas pequeñas
de suciedad. Se pueden
cambiar y
mantener.
Internal strainers protect the
s
ensor unit from small dirt
particles. These are service parts.
Valvula de compensación
Equalising valve
Pulsa para cancelar una entrada o
para volver a una p
antalla
anterior.
También permite apagar
el dispositivo
Press to cancel an entry or to
return to a previous screen. Als
o
use to switch the device “OFF”
1 pila alcalina PP3 de 9V. Acceso a
la pila en la parte posterior.
Tiempo de funcionamiento
, hasta
20 horas.
1xAlkaline 9V PP3 battery. Ba
ttery
access rear. Effective o
peration
time 20hours
Boton de ayuda
Help button

GENEBRE S.A. · Avda. Joan Carles I, 46-48 · EDIFICIO GENEBRE
Tel. +34 93 298 80 00/01 · Fax +34 93 298 80 06
08908 L’HOSPITALET DE LLOBREGAT Barcelona (Spain)
e-mail: genebre@genebre.es
internet: http://www.genebre.es
GENEBRE S.A. FECHA DE REVISIÓN: 02/11/2020 NÚMERO DE REVISIÓN: R0
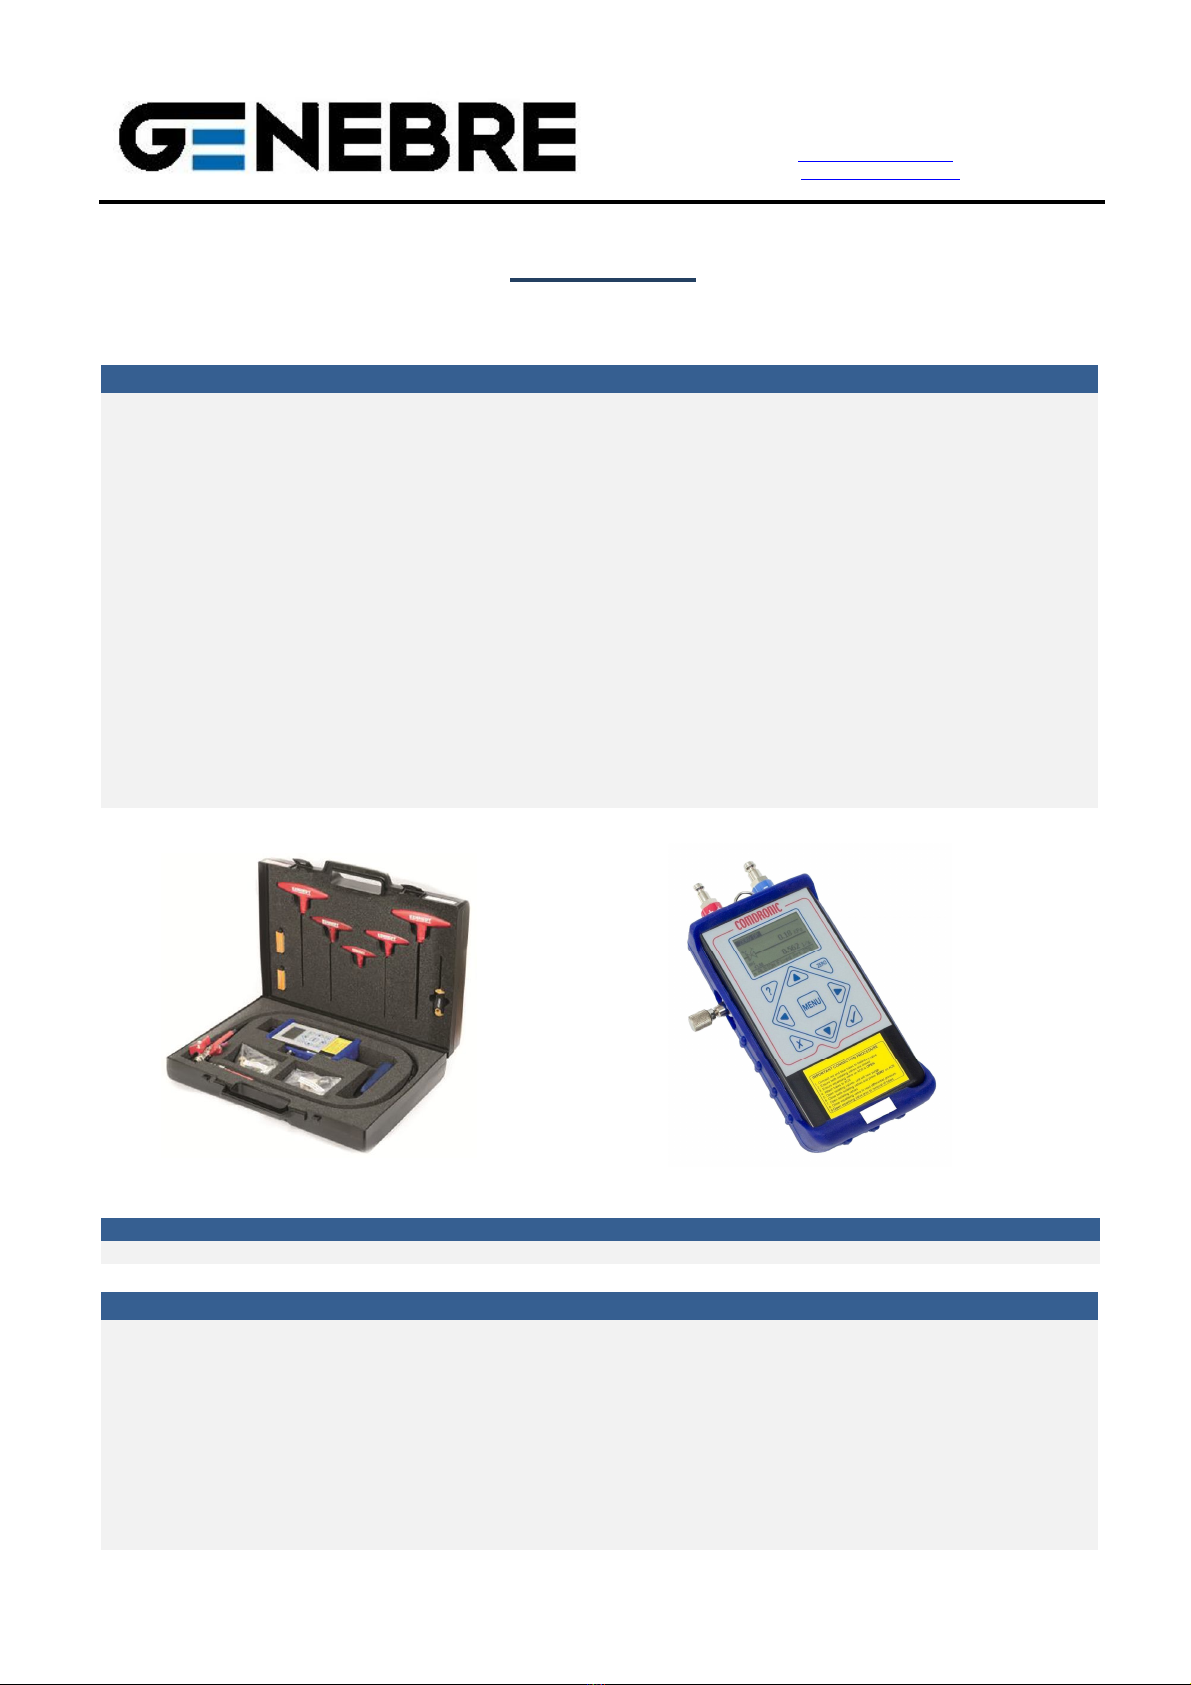
Procedimiento de conexión / Connection procedure
1. Selecciona los adaptadores de conexión correctos para la válvula objeto de la medición y conéctalos
a los tubos de conexión.
Select the correct connection adaptors for the valve being measured and attach them to the
connections tubes.
2. Verifica que las dos válvulas de aislamiento de los tubos de conexión estén en posición de CIERRE
Ensure that both isolation valves on the connection tubes are in CLOSED position
3. Conecta el adaptador de conexión del tubo de conexión ROJO al punto de comprobación de alta
presión (aguas arriba) de la válvula objetivo de medición.
Attach the connection adaptor on the RED connection tube to the hight-pressure (upstream) test point
on the subject measuring valve.
4. Conecta el adaptador de conexión del tubo de conexión AZUL al punto de comprobación de baja
presión (aguas abajo) de la válvula objetivo de medición.
Attach the connection adaptor on the BLUE connection tube to the low-pressure (downstream) test
point on the subject measuring valve.
5. Comprueba que la válvula de compensación del dispositivo esté ABIERTA.
Ensure that the equalising valve on the device is OPEN
6. Conecta los extremos libres de los tubos de conexión ROJO y AZUL a los puntos de conexión del
mismo color del dispositivo.
Attach the free ends of the RED and BLUE connections tubes to the colour-coded connection points
on the device.
7. ABIR las válvulas de aislamiento de los tubos de conexión para permitir que el fluido de la línea
purgue el aire del interior de los tubos. *
OPEN the isolation valves on the connection tubes to allow the line fluid to purge any air from the
inside the tubes. *
8. CERRAR las válvulas de aislamiento de los tubos de conexión.
CLOSED the isolation valves on the connection tubes.
9. Busca una posición estática y segura para el dispositivo. **
Find a safe and a static position for the device. **
10. Enciende el dispositivo y pulsa el botón ZERO para poner a cero el valor de referencia. ***
Switch the device “ON” and press the ZERO button to set the datum at zero. ***
11. ABRIR las válvulas de aislamiento de los tubos de conexión y CERRAR la válvula de compensación
del dispositivo.
OPEN the isolation valves on the connection tubes and CLOSE the equalising valve on the device.
12. El dispositivo leerá el Δp (diferencial de presión)
The device will now be reading Δp (differential pressure)
* Si el Δp (diferencial de presión) obtenido en la válvula es bajo, ralentizará el proceso de purga debido a la
resistencia interna del dispositivo.
* If the Δp (differential pressure) across the valve is low, the purging process will be slow due to the internal
resistance of the device.
**El dispositivo, es un equipo muy sensible, por lo que cualquier cambio de posición o ajuste después de
establecer el valor de referencia afectará a las lecturas. Se incluye una correa que puede usarse para colgarlo
de una tubería, si es necesario.
** The device is very sensitive, and reading will be affected if the position of the handset is moved or adjusted
after a datum has been set. A lanyard is provided and can be used to suspend the device from adjacent
pipework, as appropriate.
***Si el dispositivo se somete a un cambio brusco de temperatura en ese momento, el valor de referencia
podría desviarse de cero debido al cambio en la temperatura interna del medidor. Si esto sucede, habrá que
repetir este paso hasta que se estabilice la temperatura interna y el valor de referencia permanezca en cero.
*** If the device is being subjected to an extreme change of temperature at this point, the datum may drift from
zero as the internal temperature of the meter changes and, in this circumstances, it will be necessary repeat the
step until the internal temperature has stabilised and zero datum maintained.

GENEBRE S.A. · Avda. Joan Carles I, 46-48 · EDIFICIO GENEBRE
Tel. +34 93 298 80 00/01 · Fax +34 93 298 80 06
08908 L’HOSPITALET DE LLOBREGAT Barcelona (Spain)
e-mail: genebre@genebre.es
internet: http://www.genebre.es
GENEBRE S.A. FECHA DE REVISIÓN: 02/11/2020 NÚMERO DE REVISIÓN: R0
Procedimiento de decconexión / Disconnection procedure
1. ABRIR la válvula de compensación del dispositivo.
OPEN the equalising valve on the device.
2. CERRAR las dos válvulas de aislamiento de los tubo de conexión
CLOSED both isolating valve on the connections tubes.
3. Desconectar los tubos del dispositivo y de la valvula.
Disconnect the tubes from both the device and the valve.
Mapa de menús / Menu map
Nota: Las opciones de menú de color rojo requieren la entrada de valores numéricos con los botones del
teclado.
Note: menu options shown in red will require numerical date to be entered and this is achieved using the
buttons on the keyboard.
MENÚ
PRINCIPAL
MAIN MENU
►MENÚ
UNIDADES
UNITS MENU
►
MENÚ
VISUALIZACIÓN
DISPLAY MENU
►
MENÚ
ATENUACIÓN
DAMPING MENU
►
MENÚ
AVANZADO
ADVANCEDMENU
◄◄
◄
◄
Puede consultar el manual de instrucciones completo del equipo 73566 en la web www.genebre.es
You can consult the complete instruction manual of the 73566 equipment on the website www.genebre.es
Seleccionar
válvula
Selecta valve
Ajuste válvula
Valve Setting
Densidad
especifica
S
pecific Gravety
Caudal diseño
Design flow
Cambiar Kvs
Change Kvs
% Caudal
objetivo
Target
Flow
%
Seleccionar ΔP
unidades
Select ΔPunits
Seleccionar
unidades caudal
Select Flow units
SeleccionarΔP
y caudal
Select ΔP, flow
Avanzado
Advanced
Solo ΔP
ΔPonly
Solo Caudal
Flow Only
Acercade
About
Cambiar tiempo
actualización
Change u
pdated
time
Cambiar tiempo
muestra
Change sample
time
Alerta caudal
Flow Alerts
Tiempo
iluminación
Backlight time
Tiempo
apagada auto.
Auto
-
off timer
Tamaño
unidades
S
ize uni
ts
Øint. tuberia
Pipe ID
This manual suits for next models
1