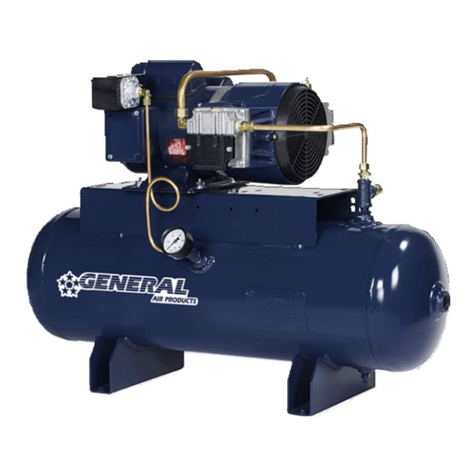
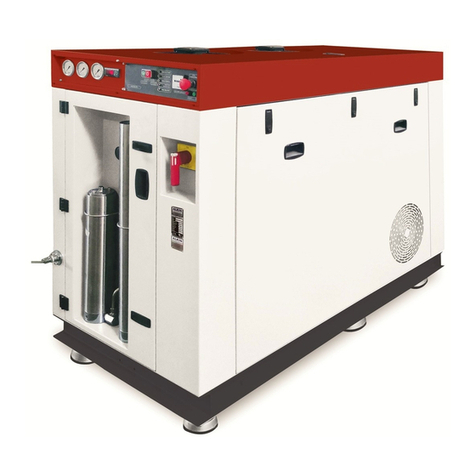
General Air Products Q Series User manual

Call 1-800-345-8207
or visit our web site for our complete product listing
www.GeneralA rProducts.com version 2.0
09-6-2016
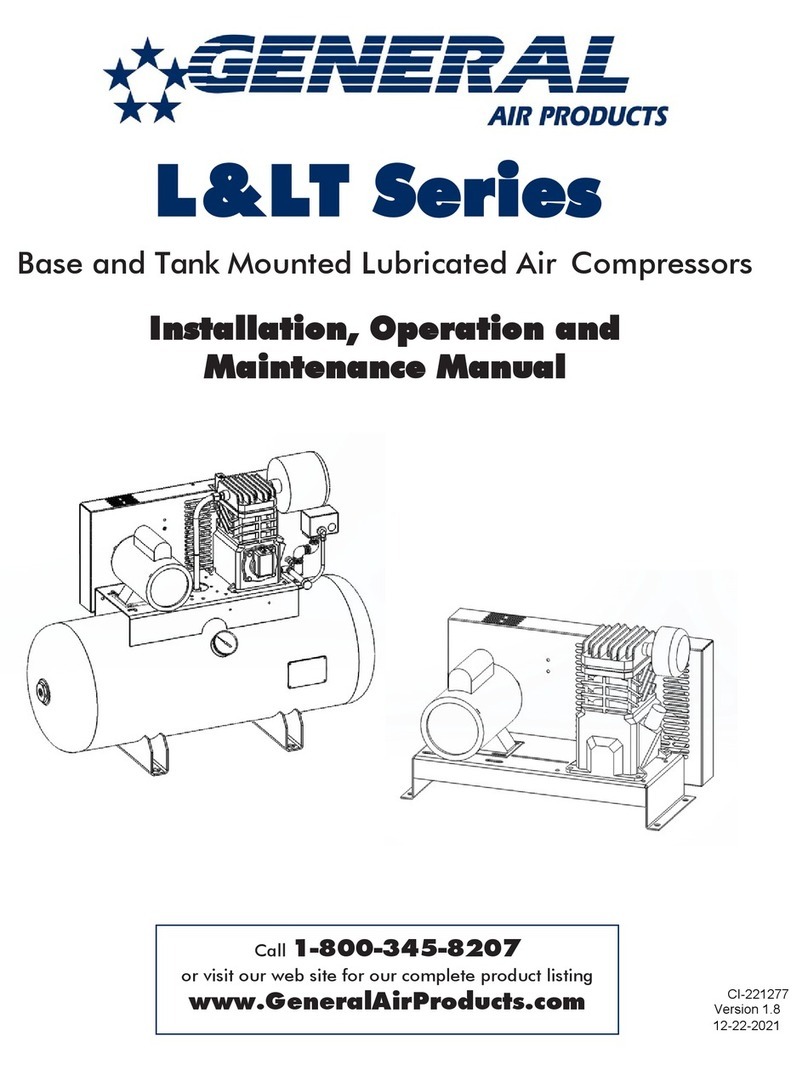
Q Series
Installation, Operation and
Maintenance Manual
Riser and Tank Mounted
Quiet Oilless Air Compressors

Table of Contents
1-800-345-8207
Section 1 - Safety & Warnings
1.1 Safety Guidelines
1.2 General Information
1.3 General Safety Information
1.4 Safety Notes
Section 2 - Receiving
Section 3 - Installation Location
Section 4 - Mounting
1.1 General Information
1.2 Basic Instructions - Riser Mounting Plate
1.3 Basic Instructions - QL Mounting Bracket
Section 5 - Lubrication
Section 6 - Piping
6.1 - Piping Instructions
6.2 - QL Series Riser Mounted Quiet Oilless Air Compressor Installation Drawing
6.3 - QLT Series Tank Mounted Quiet Oilless Air Compressor Installation Drawing
6.4 - Maintenance Compressor Installation Instructions
Section 7 - Wiring
7.1 - Wiring Instructions
7.2 - Oilless Air Compressor Single Phase Wiring Drawing
Section 8 - Maintenance Instructions
Section 9 - Troubleshooting Guide
Section 10 - Warranty Policy
IMP RTANT: ALL INF RMATI N SUBJECT T CHANGE WITH UT N TICE.
Consult factory for the most up to date version of this manual - 1-800-345-8207.
If there are any questions regarding installation, operation, or maintenance of this compressor, please
call 800-345-8207

1-800-345-8207
Sect on 1 - Safety & Warn ngs
1.1 Safety Guidelines
This manual contains information that is very important to know and understand. This information is provided for SAFETY
and to PREVENT EQUIPMENT PROBLEMS. To help recognize this information, observe the following symbols.
Danger indicates an imminently hazardo s sit ation which, if not avoided, WILL
res lt in death or serio s inj ry.
Warning indicates a potentially hazardo s sit ation which, if not avoided COULD
res lt in death or serio s inj ry.
Ca tion indicates a potentially hazardo s sit ation which, if not avoided, MAY res lt
in minor or moderate inj ry.
Notice indicates important information, that if not followed may ca se damage to
eq ipment.
1.3 General Safety Information
1. Read all manuals included with this product carefully. Be thoroughly familiar with the controls and the
proper use of the equipment
2. Follow all local electrical and safety codes as well as National Electrical Codes (NEC), Occupational
Safety and Health Act (OSHA), and National Fire Protection Association (NFPA)
3. Only persons familiar with these rules of safe operation should be allowed to use the equipment.
4. Keep visitors away and NEVER allow children in the work area.
5. Wear safety glasses and use hearing protection when operating the unit.
6. Do not stand on or use the unit as a handhold.
7. Periodic inspection and test of this equipment is required. Consult your installer and local codes to
meet all requirements.
8. Check all fasteners at frequent intervals for proper tightness.
DANGER
WARNING
CAUTION
NOTICE
1.2 General Information
This compressor is intended for installation indoors for use on dry sprinkler systems in accordance with the Standard for
Installation of Sprinkler Systems, NFPA 13 and the National Electrical Code, NFPA 70. The compressor should be sized to
restore and maintain the air pressure in the sprinkler system in accordance with the requirements in NFPA 13.

1-800-345-8207
Sect on 1 - Safety & Warn ngs
DANGER
1.4 Safety Notes
- This compressor is not equipped and should NOT be used “as is” to supply breathing
quality air.
- Motors, electrical equipment and controls can cause electrical arcs that will ignite
flammable gas or vapor. Never operate or repair in or near flammable gas or vapor.
Never store flammable liquids or gasses near the compressor.
- These compressors are suitable for pumping only atmospheric air. As defined in
Compressed Gas Association Pamphlet G-7, page 3, atmospheric air is a mixture of
elements and compounds where nitrogen and oxygen comprise more than 99% with all
other trace gasses comprising less than 1%. Do not use this compressor in
contaminated environments or for pumping mixtures other than atmospheric air.
- Compressed air contains liquid water and is saturated with water vapor, which can
freeze when surrounding temperatures are lower than 32oF (0oC). Component selection
to minimize the effects of water vapor must be considered.
- Do not touch any component inside compressor enclosure or on the discharge piping
when the compressor is operating or immediately after it has stopped. The components
are extremely hot and can cause sever injury. Before servicing the compressor,
disconnect the power and wait for it’s components to cool down.
WARNING
WARNING
WARNING
WARNING

1-800-345-8207
Section 3 - Installation Location
Locate the compressor in a clean, well ventilated area where air is relatively cool, clean and dry. A 110oF (35oC) maximum
and 40oF (4.5oC) minimum temperature for surrounding and inlet air are recommended. Provide at least 12 to 18 inches of
clearance from any wall or other obstruction that will interfere with airflow over and through the compressor. Blocking
airflow through the fan may cause the compressor to overheat. Do not place the compressor in an area of excessive heat,
such as near a boiler.
Section 2 - Receiving
Your compressor is inspected at the factory and packaged to protect against shipping damage. When the compressor is
unpacked, inspect for damage or missing parts. All claims should be settled directly with the freight company.
- Do not operate this compressor if damaged during shipment, handling or use. Any
damage may result in failure and cause injury or property damage.
WARNING
Section 4 - Mounting
QL Series (Riser mounted units) may be mounted to a firm level floor or system riser with mounting bracket. A mounting
bracket and straps are provided. Tank mounted units must be leveled and anchored to the floor; the vibration isolators (P/N
KVP4X4) supplied with the unit must be used. Both tank and riser mounted units are shipped with a flex hose. The flex
hose (P/N P3002MP) must be installed between the compressor or tank outlet and service piping.
The compressor must be mounted with a flat, level, horizontal orientation. The “L” shaped bracket is provided to ensure
this. Use the rubber mounts to fasten the feet of the compressor to the “L” shaped bracket. This can then be directly
mounted and fastened to the flat bracket provided for the riser.
1.1 General Information
1.2 Basic Instructions - Riser Plate Mounting
RMK - Riser Mounting Kit Contents:
A - Mounting Straps: Each RMK comes with 3
mounting straps.
B - Riser Mounting Plate
C - Nuts, Bolts, and Washers.
Necessary for mounting the QL Bracket.
D - Mounting Hooks
Bring the mounting straps in from the back side
through the left hole. Pass over the front of the
plate and put the strap through the right. Repeat
for straps 2 and 3.
A
1
2
3
BC
D

1 & 2 - Use the rectangular holes on the bracket to rest it on the riser plate
hooks.
A, B, C, D - Securely fasten the QL bracket to the riser plate through the slots
using the hardware from the RMK (riser mounting kit).
IMPORTANT NOTE:
Torque bolts to 12 ft - lbs
12
B
A
D
C
1-800-345-8207
Section 4 - Mounting
1.2 Basic Instructions - Riser Plate Mounting (continued)
Ensure that the hooks are on the top and that all three straps are fastened tight
against the riser (no slack).
Straps must be 90° angle to riser for proper installation.
IMPORTANT NOTE: Torque straps screws to 35 to 40 in - lbs.
1.3 Basic Instructions - QL Mounting Bracket
Before mounting the compressor, check that the top surface of the QL bracket is
level and parallel to the top edge of the riser plate.
The compressor comes with threaded rubber feet for mounting to the QL
bracket. Use the remaining hardware (nuts and washers) to secure these feet to
the bracket.
NOTE: Each QL model has different mounting feet. Mounting holes for all com-
pressors are provided on the QL bracket.
IMPORTANT NOTE:
Torque threaded feet to 12 ft - lbs
A - Mounting holes used for compressor model QL13525AC
B - Mounting holes used for compressor model QL25050AC (Fan end of com-
pressor will hang over brackets edge.
B
A
AA
A
B
B
B
Level
The compressor comes with male and female threaded rubber feet for mounting to
the QL bracket. Install the rubber feet male (stud) part into the mounting bracket
and the female part to secure the compressor. Use the remaining hardware (nuts,
bolts and washers) to secure these feet to the bracket and the compressor.

1-800-345-8207
Sect on 6 - P p ng
6.1 Piping Instructions
- Compressed air contains liquid water and is saturated with water vapor, which can
freeze when surrounding temperatures are lower than 32oF (0oC). Component
selection to minimize the effects of water vapor must be considered.
WARNING
Piping between the compressor, accessory items and the sprinkler system must be at least ½" internal diameter to
minimize pressure drop from the compressor to system. Larger pipe size may be required by code and may be
substituted with no adverse effects.
- Smaller line size must not be used and will restrict the compressor flow, lowering
capacity and causing the compressor/motor to work harder, which shortens
compressor/motor life. All piping connected to the compressor must be fully supported
and not transfer any loads to the compressor.
If an AMD-1 is used, allow sufficient distance between the compressor and AMD-1 to ensure that the maximum
temperature at the AMD-1 is 200oF or less.
- When an AMD is used with riser mounted units, a riser mounted tank kit (p/n OLR-TK)
is recommended to prevent short cycling the compressor.
All oil-less compressors include a relief valve. For riser mounted models, the relief valve is installed on the compressor.
For tank mounted models, an ASME Code relief valve is mounted on the compressor tank. This valve will open at a
preset value above the pressure switch setting to prevent excess tank pressure in the event of switch failure.
- Do not attempt to change the safety relief valve setting.
A manual drain is provided on the bottom of each tank mounted compressor. Moisture accumulated in the tank, must be
drained weekly. An automatic drain, P/N DVA-2T, is recommended in areas of high humidity.
The compressor outlet piping should contain an accessible drain. As a minimum a manual drain may be used, but an
automatic drain is recommended to remove excess water.
- Accumulation of condensed water in the system can cause corrosion of components
and reduction of system capacity.
- Warranty is void if a separate check valve is not installed to prevent water backflow to
compressor.
WARNING
NOTICE
NOTICE
NOTICE
NOTICE
Sect on 5 - Lubr cat on
This compressor is designed for non-lubricated service. Bearings are permanently
lubricated. Do not lubricate any part of the compressor or motor.
NOTICE
1-800-345-8207
Sect on 6 - P p ng
6.2 Q Seroes Riser Mounted Quiet illess Air Compressor Installation Drawing
! &&!$#'$
%+%&&$
"" %&$%
'!$
*%%("$%%'$
$!" $%'&
"" )$ &! !$
)&""%&&! &!
!%%!'""$!(+
$&!$
& !' &' &%$
$! !$'%
)&$&!$%
'&"
((%
% $%'&
!)$%+%&
"$%%'$%'&!
"$%%'$$!"%
*!%
" ""
$%$!' & &
' !"$%%!$
"
"$%%'$%)&%&&
%& $%&!"%'&
&!"%'&!'&!)
"$%%'$%"%'&
"%'&!'&"$%%'$%
"%'& "%'&!'&
"$& '$%%&$!$%%!$+&%$! !$!"& %&&!
%&$&$%
$! !$
% "%
!"$%%!$%! %'&
!!%
!$%"
$#'$ &%
$) %,!"$%%!$%,!%%$%$!' &,378-11-804337869.80437$07/64938#90/84256/77467
"$%%'$
'
%&+
$
((
&
$%$
&&
%&&! %&$'&! %
#'&!%%!"$%%!$%
$%$!' &
&
!
! %'&+!'$!%&$'&!$!$(&+
)$
! !& %&
$%*"!%&!
&"$&'$%!)
$%!$$%
*"!%&!)&$
! %'&&!$+
!&
!"$%%!$!' & $&
"$!()&$'$!' &
& !' & $)$

1-800-345-8207
Sect on 6 - P p ng
6.3 QLT Series Tank Mounted Quiet illess Air Compressor Installation Drawing
OR
AUTOMATIC DRAIN (P/N CDF2000)
RECOMMENDED ON DRIP LEG
TO REMOVE EXCESS WATER.
30" FLEX HOSE
P/N P3002MP
PRESSURE SWITCH SETTING:
STANDARD IS 27 TO 30 PSIG CUT -IN
/40 TO 44 PSIG CUT- OUT, LOW
PRESSURE IS 13 PSIG CUT-IN/18
PSIG CUT-OUT, HIGH PRESSURE IS
80 PSIG CUT-IN/100 PSIG CUT -OUT.
ACCELERATOR
TANK MOUNTED UNITS ARE
RECOMMENDED FOR USE
WITH ACCELERATORS
MULTIPLE CHECK
VALVES IN FEED
LINES CAN RESULT
IN LOWER SYSTEM
PRESSURES DUE TO
PRESSURE DROPS
CONNECT TO REQUIRED
SYSTEM TRIM
ALL PIPING AND WIRING
TO BE IN ACCORDANCE WITH
APPLICABLE STATE, LOCAL
AND NATIONAL CODES &
SHOULD BE APPROVED BY AHJ
STARTER IS
RECOMMENDED FOR
ALL SINGLE PHASE
COMPRESSORS. CONSULT
NEC AND LOCAL CODES
FOR SPECIFIC
REQUIREMENTS.
200° F MAX
VIBRATION ISOLATORS
P/N KVP 4X4
ASME
NAME
PLATE
WARNING!
DO NOT INSTALL IN
AREAS EXPOSED TO
TEMPERATURES BELOW
40 DEGREES F OR AREAS
EXPOSED TO WEATHER.
CONSULT FACTORY.
MANUAL DRAIN STANDARD.
AUTOMATIC DRAIN RECOMMENDED ( P/N APCX51-02-000 )
C
TITLE
INSTALLATION INSTRUCTIONS
TANK MOUNTED
QUIET OILLESS COMPRESSORS
G-215292 1
TJA 09-08-15
1 OF 1
PART NUMBERS LISTED ARE FOR ACCESSORY ITEMS RECOMMENDED FOR COMPLETE INSTALLATION-
CONSULT YOUR LOCAL DISTRIBUTOR FOR AVAILABILITY.
NOTE:
Drawing File\COMPRESSORS\HITACHI COMPRESSORS\Hitachi Tank Mount\G-215292 REV 1 QL Tank Mount Installation Instructions
1PER ECO 0086, ADD VIBRATION
MOUNTS, FLEX HOSE
08/11/16 DPH

C
TITLE
INSTALLATION INSTRUCTIONS
OIL-LESS MAINTENANCE COMPRESSORS
G-215294 2
TJA 09-11-15
1 OF 1
INSTRUCTIONS FOR USER INSTALLATION OF A QL
COMPRESSOR AS A SUPPLEMENT TO AN EXISTING
FIRE PROTECTION COMPRESSOR. THE PURPOSE
OF THIS IS TO REPLENISH SYSTEM LEAKAGE MUCH
QUIETER THAN A STANDARD COMPRESSOR. STEPS
BELOW*
1) VALIDATE THE EXISTING COMPRESSORS PRESSURE
SETTINGS.
2) TEE THE QL COMPRESSORS DISCHARGE INTO THE
AIR SUPPLY LINE BEFORE ANY AIR MAINTENANCE
DEVICES.
3) SET THE PRESSURE SWITCH ON THE QL
COMPRESSOR TO COME ON AND GO OFF 5 PSI ABOVE
THE EXISTING COMPRESSOR SET POINT. USE THE
RANGE SCREW ON THE PRESSURE SWITCH TO ADJUST
THIS SETTING.
EXISTING FILL
COMPRESSOR
MAINTENANCE
COMPRESSOR
1 ADDED TANK MOUNT FILL COMPRESSOR FIGURE 1/13/16
COMPRESSORS\HITACHI COMPRESSORS\HITACHI RISER MOUNT\G-215294 REV 2 QL MAINTENANCE INSTRUCTIONS.DWG
2 PER ECO 0086, ADD VIBRATION MOUNTS 08/11/16 DPH
1-800-345-8207
Sect on 6 - P p ng
6.4 Maintenance Compressor Installation Instructions

Sect on 7 - W r ng
1-800-345-8207
7.1 Wiring Instructions
- Wiring should be in accordance with the national electrical code and any local codes
or regulations. Have a licensed and competent electrician ensure that the voltage
supplied matches the compressor voltage.
- Inadequate wiring size can cause insufficient voltage at the compressor during
start-up. Overheating and damage can result to the motor and controls.
- Failure to use the pressure switch may result in overpressure of the compressor or
other components in the system. Overpressure of the compressor can result in blown
head gaskets or other damage.
- Grounding Instructions: This product must be connected to a grounded, metallic,
permanent wiring system, or an equipment grounding terminal or lead on the product.
WARNING
CAUTION
NOTICE
The supply wire must be of adequate size and no other equipment
should be connected to the same line. The adjacent table lists the rec-
ommended wire size for each model based on a 100’ run and lowest
operating voltage. Consult factory for longer runs.
- Single-phase motors include internal thermal overload protection, which has an
automatic reset device.
- Disconnect electrical power before servicing to disable reset devices. Thermal
protection can automatically start the motor when the protector resets.
On single phase models, the motor is pre-wired to the pressure switch provided, which controls starting (cut in pressure)
and stopping (cut out pressure) of the motor. The pressure switch is factory set. Standard models switch is set at 27 to
30 psig cut in and 40 to 44 psig cut out. Low pressure models ("-LP") switch is set at 13 psig cut in and 18 psig cut out.
Consult General Air Products before adjusting the pressure switch.
A motor starter is recommended, for all single phase models. Consult the National Electric Code and local codes
for motor starter requirements. Refer to the proper wiring instruction drawing for recommended wiring to a starter.
NOTICE
WARNING
Minimum Recommended Wire Size
Model # 1 Phase
QL13525AC 12
QL25050AC 12
QL25050ACT 12
QL500100ACT 12
NOTICE - Failure to use the pressure switch can result in overpressure of the compressor or
other components in the system. Over-pressure of the compressor can result in blown
head gaskets or other damage.
NOTICE
If a pair of contacts is needed to energize an alarm showing the compressor is running:
De-energize the unit. Remove the neutral line from the pressure switch and the corresponding neutral leg on the motor
side of the switch. Tie these together with a wire nut safely in the switch housing. This will put the neutral into a non-
switching state, which is acceptable. the switch contacts that were used by the neutral line are now available and can be
utilized for alarm switching. Be sure to comply with all local and National code requirements if mixed voltages are being
used. If using other than 115V an auxiliary relay in the alarm control panel is recommended.
Consult with the manufacturer if there are any questions on this arrangement.

Sect on 7 - W r ng
7.2 illess Air Compressor Single Phase Wiring Diagram
1-800-345-8207

Sect on 8 - Ma ntenance Instruct ons
1-800-345-8207
WARNING Disconnect, tag and lock out power source then release all pressure from the system
before attempting to install, service, relocate or perform any service.
The following instructions are based on normal operation. If the compressor is in an excessively dusty area, increase
frequency of maintenance checks.
Weekly:
- Drain condensate from receiver and traps
- Check for unusual noise or vibration
- Clean air filters (only with non-petroleum based products)
- Clean all external parts of the compressor and motor
Monthly:
- Manually test safety relief valve
- Inspect air system for leaks
- Tighten fittings, nuts and screws as required
- Clean the intake filter
Annually:
- Inspect and clean the air valve, lip ring, and cylinder
Warranty can be voided if modifications or adjustments
are made without consultation and approval from
factory personnel.
If there are any questions regarding installation,
operation, or maintenance of this compressor,
please call 800-345-8207
Sect on 9 - Troubleshoot ng Gu de
Symptom Possible Cause(s) Corrective Action
Motor hums and runs
slowly or not at all.
1. Low or no voltage
2. Shorted or open motor
winding
3. Defective check valve
4. Defective pressure switch
contacts will not close
1. Check voltage during start. Voltage must be within +/- 10% of
nominal voltage to start motor. Increase wire size if necessary to
lower voltage drop.
2. Replace compressor
3. Replace check valve
4. Repair or replace pressure switch
Reset mechanism
cuts out or fuses blow
repeatedly
1. Insufficient voltage to motor
2. Pressure switch set too high
3. Wrong fuse size
4. Piping too restrictive
5. Defective motor
1. Check voltage during start. Voltage must be within +/- 10% of
nominal voltage to start motor. Increase wire size if necessary to
lower voltage drop.
2. Consult factory, adjust or replace
3. Be sure fuses, heaters and/or overloads are properly rated or
set
4. Add receiver vessel or increase pipe volume after compressor
5. Consult factory
Unit short cycles
repeatedly
1. Piping too restrictive
2. Air leaks
1. Add receiver vessel or increase pipe volume after
compressor
2. Repair leaks
Compressor
overheating
1. Dirty intake filter
2. Wrong motor rotation
3. Air flow to fan blocked
1. Clean intake filter
2. Correct rotation
3. Clean air flow to fan or relocate unit
Excessive noise in
operation
1. Damaged bearings
2. Worn piston cup
3. Broken valves
4. Loose fan
5. Damaged fan guard
1. Contact General Air Products for technical support by calling 1-
800-345-8207
System pressure
builds slowly
1. Compressor sized incorrectly
2. Leaks or restrictions in piping
3. Dirty intake filter
1. Check system size and compressor sizing
2. Correct leaks and remove restrictions
3. Clean intake filter
Reset Button is
Tripped
1. Motor Overload
2. Overheating
1. Disconnect the compressor power source.
2. Ensure that the wiring and power source used conform to the
specifications required by the compressor.
3. Wait approximately 5 minutes for the compressor to cool down,
then press the reset button.
4. Start up, if the motor still stops during operation, please contact
the manufacturer.

Sect on 10 - Warranty Pol cy
GENERAL PROVISIONS & LIMITATIONS
General Air Products, Inc. (the “Company”) warrants to each
original purchaser (“Purchaser”) of its new products from the
Company or its Authorized Distributor that such products are, at
the time of delivery to the Purchaser, made with good materials
and workmanship. No warranty is made with respect to:
1. Any product, which has been repaired or altered in such
a way, in the Companies judgment, as to affect the
product adversely.
2. Any product, which has, in the Companies judgment
been subjected to negligence, accident, improper
storage, improper installation or application.
3. Any product, which has not been operated or
maintained in accordance with the recommendations of
the Company.
4. Components or accessories manufactured,
warranted and serviced by others.
5. Any reconditioned or prior owned product.
Claims for items described in 4. above should be submitted
directly to the manufacturer of the component or accessory.
WARRANTY PERIOD
The Company's obligation under this Warranty is limited to repair
or, at its option, replacing during normal business hours at the
designated facility of the Company, any part that in its sole
judgment proved not to be as warranted within
the applicable Warranty Period as follows.
COMPONENTS
All non-consumable components are warranted for 12 months from
the date of purchase or 18 months from date of manufacture,
which ever occurs first. Consumables are not covered under
warranty. The unit must have been installed by either a factory
authorized distributor or agent in accordance with the factory
recommendations taking into account all other local site conditions
not originally noted to the factory. The unit must be operated and
maintained in accordance with the Factory recommendations and
original design conditions. Failure to provide such proof of the
above may void warranty.
LABOR TRANSPORTATION & INSPECTION
The Company will repair or replace any product or part thereof
which in the Company’s sole judgement is defective in material or
workmanship. Labor costs are not covered under warranty.
All costs of transportation of product, labor or parts claimed not to
be as warranted and, of repaired or replaced parts to or from
factory shall be borne by purchaser. The Company may require the
return of any part claimed not to be as warranted to one of its
facilities as designated by the Company, transportation prepaid by
Purchaser, to establish a claim under this warranty.
Replacement parts provided under the terms of the warranty are
warranted for the remainder of the Warranty Period of the product
upon which installed to the same extent as if such parts were
original components, or for 90 days whichever is longer.
DISCLAIMER
THE FOREGOING WARRANTY IS EXCLUSIVE AND IT IS
EXPRESSLY AGREED THAT, EXCEPT AS TO TITLE, THE
COMPANY MAKES NO OTHER WARRANTIES, EXPRESSED
OR IMPLIED OR STATUTORY, INCLUDING ANY IMPLIED
WARRANTY OR MERCHANTABILITY.
THE REMEDY PROVIDED UNDER THIS WARRANTY SHALL BE
THE SOLE, EXCLUSIVE AND ONLY REMEDY AVAILABLE TO
THE PURCHASER AND IN NO CASE SHALL THE COMPANY BE
SUB ECT TO ANY OTHER OBLIGATIONS OR LIABILITIES.
UNDER NO CIRCUMSTANCES SHALL THE COMPANY BE
LIABLE FOR SPECIAL, INDIRECT, INCIDENTAL OR
CONSEQUENTIAL DAMAGES, EXPENSES, LOSSES OR
DELAYS HOWSOEVER CAUSED.
No statement, representation, agreement, or understanding, oral
or written, made by any agent, distributor, representative or
employee of the Company which is not contained in this Warranty
will be binding upon the company unless made in writing and
executed by an officer of the Company.
This warranty shall not be effective as to any claim which is not
presented within 30 days after the date upon which the product is
claimed not to have been as warranted. Any action for breach of
this warranty must be commenced within one year after the date
upon which the cause of action occurred.
Any adjustment made pursuant to this warranty shall not be
construed as an admission by the Company that any product was
not as warranted.
PROMPT DISPOSITION & RETURNS POLICY
The Company will make a good faith effort for prompt correction or
other adjustment with respect to any product, which proves to be
defective within the warranty period. Before returning any product,
write or call the distributor, agent or authorized company from
which the product was purchased, describing defect and giving
date and number of original invoice, a well as proof of Factory
supplied consumables and proof of scheduled maintenance. No
products will be accepted for return without the Company issuing a
“Returned Goods Authorization” (RGA) to the Purchaser and
unless accompanied by a properly authorized RGA request form
initiated by the Purchaser. Return freight must be prepaid and each
returned product must have the RGA number clearly marked on
the product. Title and risk of loss pass to buyer upon delivery to the
common carrier.
PRODUCT SUITABILITY
Many States, Localities and Countries have codes and regulations
governing sales, construction, installation, and/or use of products
for certain purposes, which may vary from those in neighboring
areas. While General Air Products, Inc. attempts to assure that its
products comply with such codes, it cannot guarantee compliance,
and cannot be responsible for how the product is installed or used.
Before purchase and use of a product, please review the product
application, and national and local codes and regulations, and be
sure that the product, installation, and use will comply with them.
REV:9/6/16
General Air Products, Inc.
118 Summit Drive
Exton, PA 19341
P: 610-524-8950
F: 610-524-8965
This manual suits for next models
4
Table of contents
Other General Air Products Air Compressor manuals

General Air Products
General Air Products L20033 User manual

General Air Products
General Air Products LT Series User manual

General Air Products
General Air Products L Series User manual

General Air Products
General Air Products Dry Air Pac DAP500 User manual

General Air Products
General Air Products OL Plus Series User manual
Popular Air Compressor manuals by other brands

Doosan
Doosan HP1600WCU-T4i Operation and maintenance manual

Gardner Denver
Gardner Denver SAVG2-75 Installation, operating & service manual

Powerex
Powerex AS-XXX product manual

Black & Decker
Black & Decker ASI500 instruction manual

Atlas Copco
Atlas Copco XAS 127 Kd instruction manual

Sealey
Sealey SAC0607S manual