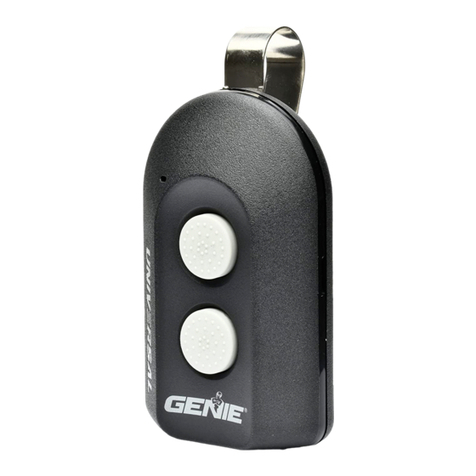
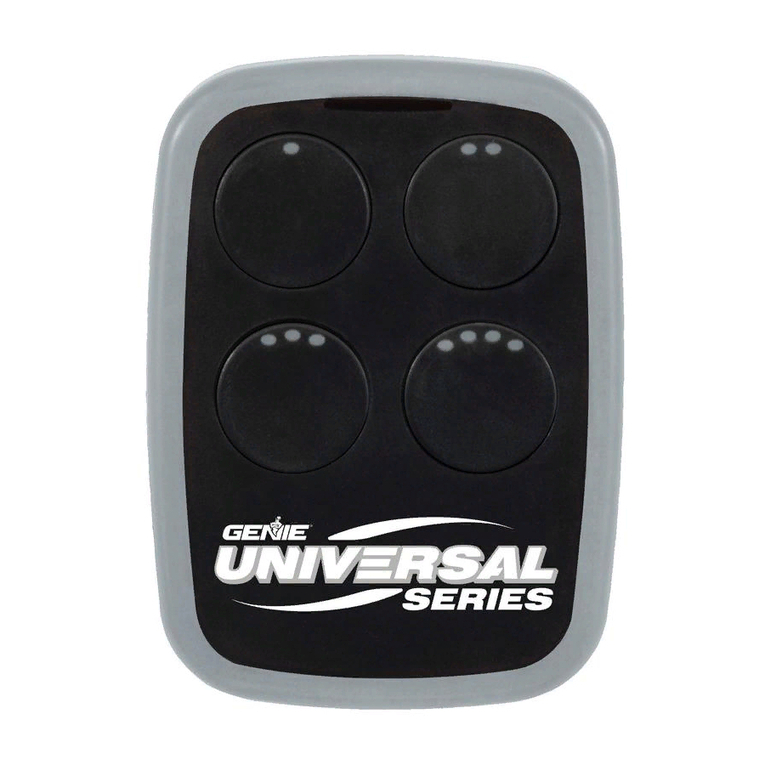
Genie Universal 4-Button User manual

Page 1
ALTERNATE INSTRUCTIONS
UNIVERSAL 4-BUTTON REMOTE
General Notes - This document contains alternate instructions for:
•Fixed Code/Dip Switch programming in remotes with software REVs v1.1.4 and higher
oAnother way to tell if you have software REV v1.1.4 or higher –Press and hold down
button #1. While still holding down button #1, press button #4 on the remote four
times, then release both buttons. If the white LED flashes then your software is v1.1.4
or higher.
•The Quick Start Method of programming for any software REV
•TEACH & PAIR programming method in software REVs v1.1.8 and lower. The software REV
of your remote can be found on etched on the back
oAnother way to tell if you have software REV v1.1.8 or lower –if you hold press and
hold down button #1 –while still holding down button #1, press button #2 on the
remote four times, then release both buttons. If the white LED flashes slowly, then
your software is v1.1.8 or lower.
•Information on programming to Marantec openers with the TEACH & PAIR method
Page 1: General Notes
Page 2-3: Fixed Code/Dip Switch Programming
Page 4: Quick Start Method –Using the Pre-Programmed Remote Settings
Page 5-6: TEACH & PAIR Programming Method
Page 7: TEACH & PAIR Programming Method with Marantec® openers

Page 2
ALTERNATE INSTRUCTIONS
DIP SWITCH / FIXED CODE PROGRAMMING
Step 1: Record Switch Positions
▪Each shaded box below represents a switch position. In these boxes, write in the number 1,
2 or 4 as it corresponds to the +, 0, or –switch position shown on the remote, opener or
receiver. If you have less than 12 switches, only fill in what you have. You will reference this
section in STEP 3.4 below.
Step 2: Determine Specifications
▪Find your specification from CHART B below and record the number here:
This box should have one number between 1-8. You will reference this in STEP 3.9 below.
Available in remotes with software REVs v1.1.4 and higher
If the opener has a group of switches with 3 positions per switch (TRINARY):
▪Switch in the UP (+) position = press button 1
▪Switch in the MIDDLE (0) position = press button 2
▪Switch in the DOWN (-) position = press button 4
In this example, the code would be:
If the opener has a group of switches with 2 positions per switch (BINARY):
▪Switch in the UP (+) position = press button 1
▪Switch in the DOWN (-) position = press button 4
In this example, the code would be:

Page 3
Step 3: Programming
ENTER LEARN MODE:
1. On the universal remote, press and hold down button #1.
2. While still holding down button #1, press button #4 on the universal remote four
times.
3. Release both buttons - The WHITE LED on the remote will quickly flash 4 times.
ENTER DIP SWITCHES:
4. On the universal remote, enter in order the numbers 1, 2 or 4 as you have written in
STEP 1. The LED lights with each button press.
5. After the last DIP switch position entry, simply wait for the BLUE LED to quickly flash
4 times and go out.
ENTER BUTTON SELECTION MODE:
6. On the universal remote, press and hold down button #2.
7. While still holding down button #2, press button #3 on the universal remote four
times.
8. Release both buttons - the BLUE LED on the remote will begin flashing.
9. Press the button of your choice on the universal remote the required number of
times indicated from Chart B in STEP 2 above. You will have 10 seconds to complete
your entry.
10.After your press(es), simply wait the remainder of the 10 seconds - the BLUE LED will
give a long blink and then go out.

Page 4
The Quick Start Method uses the pre-programmed manufacturer specifications on the universal
remote.
ALTERNATE INSTRUCTIONS
QUICK START METHOD
Reference FIG 1 to use any of these four manufacturer pre-sets to quickly program a button
Button 1: Genie Intellicode 1 or Overhead Door CodeDodger I
Button 2: Chamberlain® with a PURPLE LEARN Button
Button 3: Chamberlain® with an ORANGE/RED LEARN Button
Button 4: Chamberlain® with a YELLOW LEARN Button*
If using Button 1, 2 or 3:
1. On the garage door opener, press the LEARN button for 2-3 seconds and then release.
2. On the universal remote, press and release the pre-set button that corresponds with your
opener once every 2 seconds until the garage door opener operates. Programming is
complete.
TIP: Allow the LED light on the universal transmitter to stop flashing before your next button
press.
*If using Button 4 for a YELLOW LEARN Button from Chamberlain, LiftMaster or Craftsman:
1. Press and hold down the button #4 for 5 seconds - release button after white LED blinks 3
times and goes out.
1a. ONLY IF you had to manually change your Yellow Learn Button opener to a
390MHz due to interference issues - simply press and hold the button in the step
above for 10 seconds - after the white LEDs blink for the second time - all LEDs will
go out completely - then release the button. If you did not have to manually change
the opener to 390MHz, ignore this line 1a.
2. On opener, press LEARN/PROGRAM button for 2-3 seconds and then release.
3. On remote, press button you chose ONE time. Opener will click.
4. On opener, press LEARN/PROGRAM button again for 2-3 seconds and then release.
5. On remote, press button you chose again ONE time. Opener will click again.
The next button press should operate the opener.
TIP: Allow the LED light on the universal transmitter to stop flashing before your next button
press.
Available in remotes with any software REV.

Page 5
IMPORTANT: For ID#4 Chamberlain®/LiftMaster®/Craftsman® Yellow Learn Button - move
immediately to instructions on pg 6. For all other ID#s, proceed. For a brief explanation on
Marantec® openers, see pg 7.
ALTERNATE INSTRUCTIONS
TEACH & PAIR PROGRAMMING METHOD
for all openers EXCEPT ID#4 Yellow Learn Button
1. On universal remote, press and hold down button #1
2. While still holding down button #1, press button #2 on universal remote four times
3. Release both buttons - WHITE LED flashes slowly.
4. Place the existing, operational remote and universal remote within 4” of each other
5. Hold down the operational button from the original remote. Do not release until the
new universal remote blinks change from slow WHITE blinks to rapid BLUE blinks. You
will have 20 seconds to complete.
TIP: If the universal remote does not recognize the transmission, try different distances between 0”-4”
away from the side of the universal remote closest to button numbers 1 and 3.
6. Once the universal remote BLUE LED is blinking rapidly, press the button of choice on
the universal
remote ONE TIME. The BLUE LED turns solid and goes out.
7. On opener, press LEARN/PROGRAM button for 2-3 seconds and then release.
8. Press and release button you just programmed once every 2 seconds until the garage
door opener
operates.
9. Test the button - programming is complete.
TIP: Allow the LED light on the universal transmitter to stop flashing before your next button press.
Available in remotes with software REVs v1.1.8 and lower (also allows FAAC receiver compatibility)

Page 6
1. On universal remote, press and hold down button #1.
2. While still holding down button #1, press button #2 on universal remote four times.
3. Release both buttons - WHITE LED flashes slowly.
4. Place the existing, operational remote and universal remote within 4” of each other.
5. Hold down the operational button from the original remote. Do not release until the
new universal
remote blinks change from slow WHITE blinks to rapid BLUE blinks. You will have 20
seconds to complete.
TIP: If the universal remote does not recognize the transmission, try different distances between 0”-
4”away from the side of the universal remote closest to button numbers 1 and 3.
6. Once the universal remote BLUE LED is blinking rapidly, press the button of choice on
the universal
remote ONE TIME. The BLUE LED turns solid and goes out.
7. Press and hold down the button you just chose on the universal remote until the white
LED blinks 3 times and goes out (@5 seconds)
7a. ONLY IF you had to manually change your Yellow Learn Button opener to a
390MHz due to interference issues - simply press and hold the button in the step
above for 10 seconds - after the white LEDs blink for the second time - all LEDs
will go out completely - then release the button. If you did not have to manually
change the opener to 390MHz, ignore this line 7a.
8. On opener, press LEARN/PROGRAM button for 2-3 seconds and then release.
9. On remote, press button you chose ONE time. Opener will click.
10.Repeat STEPs 8 & 9.
11.Test the button - programming is complete.
TIP: Allow the LED light on the universal transmitter to stop flashing before your next button press.
TEACH & PAIR PROGRAMMING METHOD
for ID#4 Chamberlain®/LiftMaster®/Craftsman®Yellow Learn Button ONLY

Page 7
ALTERNATE INSTRUCTIONS
MARANTEC® and TEACH & PAIR PROGRAMMING
METHOD
General Information:
Marantec openers only allow ‘one’ set of code inside the operator. The transmitter(s) and/or keypad that came
with the opener are set to this single code.
When adding the universal transmitter to the existing Marantec family, the TEACH & PAIR programming method
should be used. This programming method allows the universal transmitter to listen and then repeat back that
existing transmission, becoming part of that single code family. If you use the LEARN method of programming with a
Marantec opener instead of the TEACH & PAIR method, it will generate a NEW code and WILL WORK with the
opener… BUT the existing transmitter/keypad family will no longer work.
How to program a Marantec opener using the TEACH & PAIR method:
1. Follow the TEACH & PAIR instructions on the previous page for all ID#s EXCEPT #4 –STOP after you have
completed STEP 6. Continue at STEP 7 in the instruction below.
On the Marantec opener:
7. To start the system setup, press and hold the button on the control panel for approximately 5
seconds. Once the display timer counter reaches the count of 5, release the button.
8. The blinking open door icon is displayed first on the control panel screen. Press the button to
move through different options.
When the transmission icon shows on the display, stop pressing the button - the transmission
icon will begin blinking. This indicates the opener is ready to recognize the universal remote.
9. Press the button you prepared on the universal remote one time –the transmission icon will stop
blinking and change to a solid icon. This indicates the remote has been successfully recognized by the
opener.
10. Press the button to save the entry and end the system setup. Press and release the remote
button one time. The opener should run. The display will look like this after setup is completed:
transmission icon
transmission icon
Available in remotes with software REVs v1.1.8 and lower (also allows FAAC receiver compatibility)
Table of contents
Other Genie Remote Control manuals

Genie
Genie 3 Button Remote User manual

Genie
Genie Remote Control User manual

Genie
Genie ACSCTG-UNIV2 User manual

Genie
Genie UNIVERSAL REMOTE User manual

Genie
Genie QN-RS283 Troubleshooting guide

Genie
Genie G3T-BX Installation manual

Genie
Genie 3 Button Remote User manual

Genie
Genie Series III User manual

Genie
Genie INTELLICODE GITR-3BX User manual

Genie
Genie UNIVERSAL REMOTE User manual
Popular Remote Control manuals by other brands

RANCHO
RANCHO myRide RS999705 Installation instruction

Mitsubishi Electric
Mitsubishi Electric PAR-21MAA operating manual

Conrad
Conrad 526925 operating instructions

Integral LED
Integral LED ILRC021 Guide

Graupher
Graupher HoTT-MX-12 Programming manual

Keystone
Keystone KTS-MW3-REMOTECONTROL quick start guide