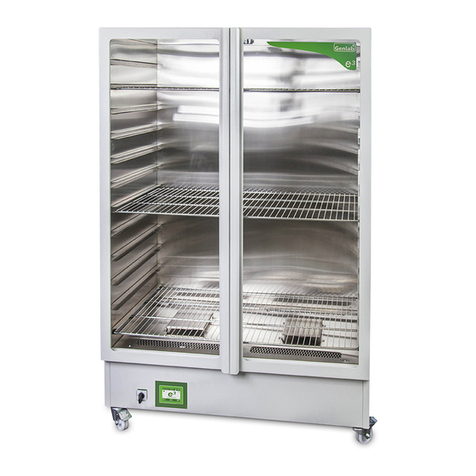
GenLab PRIME RANGE User manual

18/03/2013 Genlab Ltd OP INS PRIME RANGE Issue 1 Page 1 of 6
Tanhouse Lane, Riverview Industrial Estate
Widnes, Cheshire WA8 0SR England
Tel: 0151 424 5001
Fax: 0151 495 2197
Web site: wwww.genlab.co.uk
E-mail: [email protected]
_______________________________________________________________________
OPERATING INSTRUCTIONS FOR PRIME RANGE
1. UNPACKING
1.1 Remove all packing material from between the shelves and inner walls of the oven.
2. MAINS SUPPLY
2.1 240-volt units. Each unit comes supplied with a mains connection lead already fitted with
a correctly rated fuse. The fuse rating and other details for each unit is shown on the
voltage plate riveted to the back of the unit. It is important that, if the fuse needs to be
replaced, it must only be replaced with one of the correct rating.
2.2 110-volt units are supplied with a cable but without a plug or fuse. These units should be
wired in by a suitably qualified electrician to the following:-
BROWN ‘L’ Live pin Refer to voltage plate
BLUE ‘N’ Neutral pin for fuse requirement
GREEN/YELLOW ‘E’ Earth pin
WARNING
DO NOT CONNECT THE OVEN TO A D.C. MAINS SUPPLY OR
SERIOUS DAMAGE WILL OCCUR
3. OPERATION – Standard Control
3.1 Position the shelves within the work chamber.
3.2 Switch ‘ON’ the mains switch, indicated by lighting up green.
3.3 If unit is already in use press the ‘start/stop button ’ to extinguish the amber lamp.
3.5 Press and hold the ‘temperature button ’ for 2 seconds.
3.5 The ‘setpoint display’ will continue to show the setpoint as it is edited. The ‘temperature’
display will show “S” to indicate the setpoint is being edited.
3.6 Use the increment and decrement buttons to set the desired temperature in one
degree steps.
3.7 When no keys have been pressed for 10 seconds, or if the `temperature button ’ is
pressed again, the new value will be stored and the temperature display will return to normal.
3.8 Set the ‘overheat dial’ to approximately 10 to 15 degrees above your set point. Refer
to Page 6 for Overheat Scaling.
3.9 Press the ‘Overheat reset’ button to energise the overheat circuit
3.10 Press the ‘start/stop button ’

18/03/2013 Genlab Ltd OP INS PRIME RANGE Issue 1 Page 2 of 6
OPERATION – Standard Control (cont)
3.11 The ‘yellow running LED’ will illuminate to show the oven is on, the ‘temperature display’ will
show the current oven temperature, and the ‘setpoint display’ will continue to show the
selected setpoint.
3.12 When the ‘Temperature display’ has reached the ‘setpoint display’ you can turn down the
Overheat dial until the ‘Red Alarm LED’ comes on and an ‘Er1’ error message is displayed.
Then turn the Overheat dial back up a small amount and press the Overheat reset button to
energise the circuit again.
NOTE: If the Red Alarm LED won`t go out when Overheat Reset is pressed then turn the
Overheat dial up slightly more and retry the Overheat Reset button.
OPERATION – Timer Mode
3.13 Position the shelves within the work chamber.
3.14 Switch ‘ON’ the mains switch, indicated by lighting up green.
3.15 If the unit is already in use press the ‘start/stop button ’ to extinguish the amber lamp.
3.16 Set the target temperature as standard mode but do not press the start/stop button.
3.17 Press and hold the ‘timer button ’ for 2 seconds.
3.18 The ‘setpoint display’ will change to show the time the oven will stay on for in minutes. The
temperature display will show “t” to indicate the time is being adjusted.
3.19 Use the increment and decrement buttons to set the desired time. The time is set
in 5 minute steps up to 8 hours followed by 1 hour steps up to a maximum 99 hours.
3.20 When no keys have been pressed for 10 seconds, or if the `timer button ’ is pressed
again, the new value will be stored and the temperature display will return to normal.
3.21 Set the ‘overheat dial’ to approximately 10 to 15 degrees above your target setpoint.
3.22 Press the ‘Overheat reset’ button to energise the overheat circuit.
3.23 Press the ‘timer button ’ The oven will heat up to your target setpoint.
3.24 The ‘yellow running LED’ will flash to show the oven is in timer mode
3.25 When the set point has been reached the timer will start to time down.
3.26 Whe the timer expires the heat will turn off and the the ‘yellow running LED’ will go out.
3.27 The ‘temperature display’ will show the current oven temperature, and the ‘setpoint display’
will show time remaining.
3.28 The timer will automatically pause if the oven temperature falls more than 5 degrees below
the set point and will remain in pause mode until it is within 1 degree of the setpoint. To
indicate this feature, the timer display will flash the time remaining.

18/03/2013 Genlab Ltd OP INS PRIME RANGE Issue 1 Page 3 of 6
OPERATION – Program Mode
In program mode the oven will cycle automatically through a series of up to eight
steps. Each step will consist of a temperature, a ramp, and a time. The oven wil
warm up over the ramp time and then be held at the step temperature for the step
time before moving on to the next step. Once the last step has been completed the
oven will switch off. The step time will only begin once the oven has reached the step
temperature.
3.29 Position the shelves within the work chamber.
3.30 Switch ‘ON’ the mains switch, indicated by lighting up green.
3.31 If the unit is already in use press the ‘start/stop button ’ to extinguish the amber lamp.
3.32 Press and hold the ‘program button ’ for 2 seconds, the ‘setpoint display’ will change to
show the temperature for the first step. The temperature display will show “S 1” to indicate
that the setpoint for step one is being adjusted.
3.33 Use the increment and decrement buttons to set the desired temperature.
3.34 Press the ‘start/stop ’ button to move on and set the ramp for step one.
3.35 The ‘setpoint display’ will show the ramp time in minutes, the ‘temperature display’ will show
‘r 1’ to indicate the ramp for step one is being adjusted.
3.36 Use the increment and decrement buttons to set the desired ramp rate. A ramp of
rate of zero indicates the oven should heat up as quickly as possible.
3.37 Press the ‘temperature button ’ to enable hold-back. The ‘temperature display’ will
change to ‘rh1’ to indicate hold-back is enabled for step one.
3.38 If hold-back is enabled the ramping up of the oven temperature will be paused if actual
temperature drops more than five degrees behind the ramp.
3.39 Press the ‘timer button ’ to disable hold-back and revert to normal ramp.
3.40 Press the ‘start/stop’ button to move on and set the time for step one.
3.41 The ‘setpoint display’ will change to show the step time in minutes. The temperature display
will show “t 1” to indicate the time for step one is being adjusted.
3.42 Use the increment and decrement buttons to set the desired time.
3.43 Press the ‘start/stop ’ button to move on and set the parameters for steps 2 to 8 in the
same way, with the temperature display showing “S 2” and “t 2” etc.
3.44 If the step time is left at zero for any step then the program will end at that point.
3.45 When no button has been pressed for 5 seconds, or the ‘program button’ is pressed again,
the displays will return to normal and the new program will be saved.
If Oven is currently ‘on’:
o Press the ‘program button ’ , the program will start immediately.
If Oven is currently ‘off’:
o Press the ‘program button ’ , the program will start immediately.
During program:
o The yellow ‘running LED’ will flash.
o The ‘setpoint display’ will alternate between time remaining for the program step
and the step number; “st2” for example.
When the program finishes:
o The oven will turn off.
o The yellow ‘running LED will go out.
o The green ‘complete’ LED will come on.

18/03/2013 Genlab Ltd OP INS PRIME RANGE Issue 1 Page 4 of 6
4. MAINTENANCE
ROUTINE CHECKS ON EACH OCCASION OF USE
4.1 Check the condition of supply lead and plug top. These should be sound and undamaged.
4.2 Connect to mains supply and check:-
Supply switch operation.
Green Supply indicator is working.
Check at working temperature, that the heat indicator (This can be seen in the bottom
display far right hand side) cycle’s on and off without the overheat (red LED) illuminating.
A temperature check can be done by using a suitable temperature probe, inserted through
the rear vent and connected to a calibrated digital meter.
5. PREVENTATIVE MAINTENANCE
Ensure that the unit is maintained in a clean, dry condition and when not in use, stored in a normal
warm atmosphere.
Minimum recommendation every six months:-
5.1 Check the plug top connections are tight and the fuse rating is correct.
5.2 Check the operation of the overheat protection system by raising the desired temperature
above the overheat temperature.
5.3 Carry out an electrical safety check (Portable Appliances) using an appropriate appliance
tester operated by a competent person.
5.4 Check that the control temperature is maintained within limits.
The manufacturer can offer the above service on request.
6. SAFETY
When the unit is to be used for the incubation of microbiological specimens, please consider
carefully the siting and use of the unit to ensure safe operating conditions for all users.
Appropriate safety precautions are essential for any microbiological work and any guidelines
issued (for example, The Department of Education and Science guidelines) on this subject
must be followed exactly. They are necessary to protect both people and animals from
infection and to protect cultures of micro-organisms from infection by unwanted
contaminants.
If liquids contained in partially sealed vessels are to be heated in the unit, then at all times
the temperature setting must be such that no appreciable pressure build-up is allowed to
occur within the vessel. The risk of explosion becomes high if the temperature setting is
higher than that of the boiling point of the liquid. Therefore, any vessels that require heating
SHOULD NOT be completely sealed. These units are not suitable for use where
inflammable solvents are being used where the solvent concentration can reach inflammable
or explosive levels.

18/03/2013 Genlab Ltd OP INS PRIME RANGE Issue 1 Page 5 of 6
7. GENERAL
Mop up any spilled liquid from the floor of the unit.
Do not place samples on the chamber floor.
Take the normal precautions not to allow water to come into contact with the electrical
components.
The outer surfaces can be cleaned with a warm, damp, soapy cloth or any proprietary
cleaner suitable for a painted surface (do not use solvents or harsh abrasives).
The work chamber may also be cleaned as above.
8. Error Messages
Er1 Overheat trip Indication
Press reset button to reset when oven cooled down
Er2 Temperature High (10 deg C over setpoint – software alarm check)
Press start / stop to reset
Er3 Temperature Low (10 deg C under setpoint – software alarm check)
Press start / stop to reset
Er4 Probe failure, contact factory for replacement probe
Press start / stop to reset after new probe installed
Note:
The right-most decimal point of the ‘setpoint display’ is illuminated as an indication that power is
being applied to the heating element. This point will flash as it reached set point as a
representation of the PID values tuning to the desired set point.

18/03/2013 Genlab Ltd OP INS PRIME RANGE Issue 1 Page 6 of 6
PLEASE NOTE
Quote the model and serial number (shown on the voltage plate on the back of the unit) for
replacement parts. Fitting instructions are supplied with any replacement parts ordered.
The user controls are shown below:
The controls consist of:
Temperature display: RED
Setpoint display: GREEN
Alarm: LED indicator (RED)
Running: LED indicator (YELLOW)
Complete: LED indicator (GREEN)
Start/Stop: Keypad button.
Increment: Keypad button.
Decrement: Keypad button.
Temperature: Keypad button.
Timer: Keypad button.
Program: Keypad button
Test: Keypad button
Reset: Keypad button
OFF
ON
Overheat
Approximate
Scale
Oven
2 = 75 C
4 = 150 C
6 = 200 C
8 = 260 C
Incubator
4 = 30 C
5 = 40 C
6 = 50 C
7
=
6
0 C
RESET
TEST
OVERHEAT
0
2
4 6
8
10
Table of contents
Other GenLab Commercial Food Equipment manuals
Popular Commercial Food Equipment manuals by other brands

ITW
ITW MBM AQE477 operating instructions

Klarstein
Klarstein Garkeller Pro XL manual

Hatco
Hatco GLOMAX GMHD Series Installation and operating manual

Henny Penny
Henny Penny Evolution Elite Gas 14X quick guide

eta
eta 5342 Instructions for use

Electrolux Professional
Electrolux Professional HP Premium installation manual

orford
orford EB30CC-Sn-A Installation & operation manual

Diamond
Diamond N22/PT2T-N quick start guide

Ruhle
Ruhle SR 2 BiTurbo Original instructions

FWE
FWE PHU Series operating instructions

Proluxe
Proluxe FAST-FIRE'D BLAZE PIZZA DOUGHPRO DP2010MBZE Operation manual

Julabo
Julabo Fusion Chef Premium Sous Vide Diamond operating manual