TABLE OF CONTENTS
3
NOTICE
............................................................................ 1
INTRODUCTION
............................................................ 2
TABLE OF CONTENTS
................................................ 3
PRODUCT SPECIFICATIONS
.................................... 4, 5
SAFE RIDING
Wear Safety Gear, Make Yourself Visible
............. 6
Know Your Limits, Road Conditions ........................... 6
RECOMMENDED TORQUE VALUES
......................
7
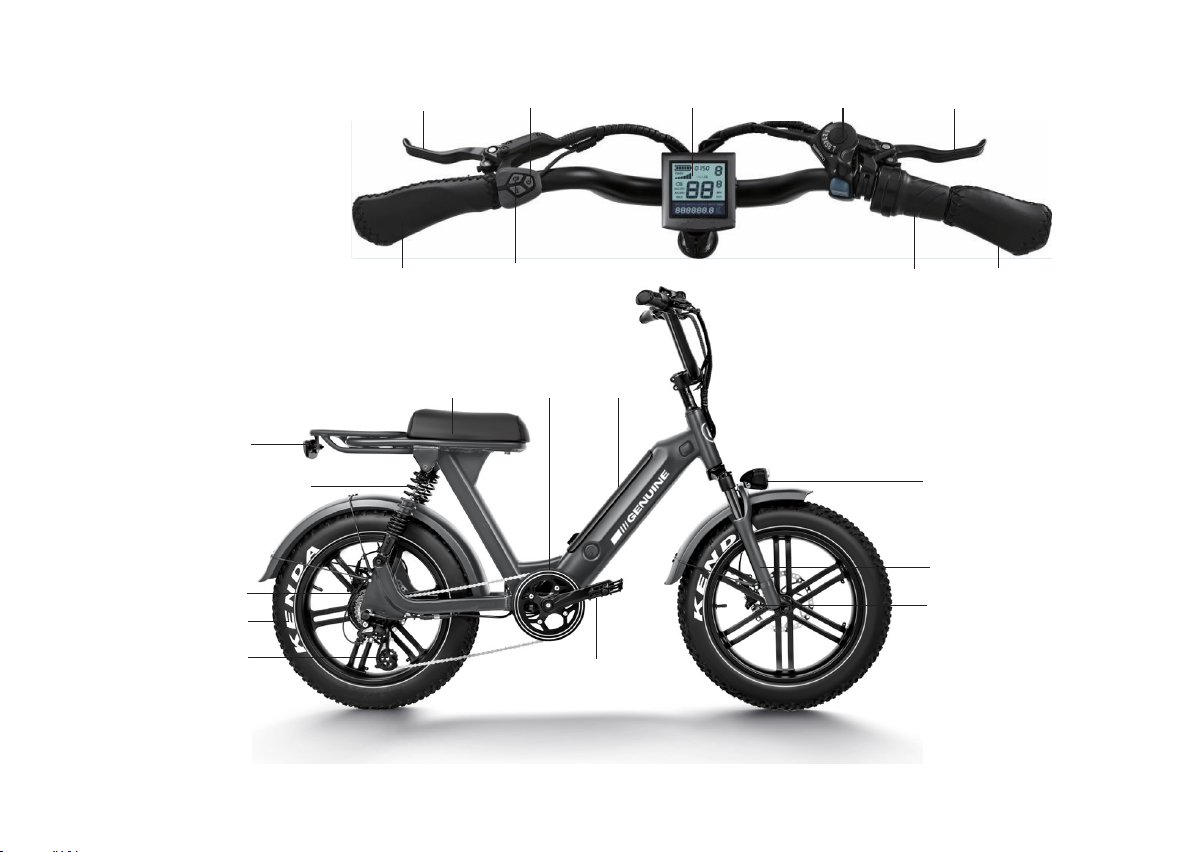
BICYCLE LAYOUT
Overview ...........................................
...................... 8
Handlebar Controls ...................................................... 9
Suspension .................................................................. 10
DIGITAL DISPLAY LAYOUT
...................................... 11
DIGITAL DISPLAY SETTINGS
Power On / Off, Display Interface ..........
................. 12
Battery Capacity, Motor Power, USB ..
................... 13
Trip Distance, Backlight Brightness ...........
.......... .. 14
Imperial / Metric Units, Clock ...........
....................... 15
Walk Mode, Lighting, Pedal-Assist Level ......
.... .... 16
SAFETY CHECKLIST
.............................................. 17,18
OPERATION
Sidestand, Pedal Assist Level Selection
................ 19
Pedal Assist, Throttle, USB Charging ........
............ 20
Shifting Gears, Brakes
.............................................
21
Suspension Preload Adjustment .
............................ 22
Suspension Rebound Adjustment .
.......................... 23
BATTERY
Battery Removal, Battery Installation
...................... 24
Battery Charging ....................................................
25
Battery Range, Battery Safety
.
................................
26
TROUBLESHOOTING
........................................
27,28
PARKING, TRANSPORT, STORAGE
....................
29
CARGO
...................................................................
3 0
BICYCLE CARE
......................................................
31
MAINTENANCE SCHEDULE
.................................
32
MAINTENANCE LOG
.............................................
33