GENWEC GW02 03 01 00 User manual

Español
®
Manual de instrucciones
Instruction manual
SECADOR DE PELO
HAIR DRYER
Ref.: GW02 03 01 00
GW02 03 01 03
GW02 03 01 00V1

Este secador de pelo se centra en la seguridad, la comodidad y el ahorro de energía, con una combi-
nación de tecnología y estética.
CARACTERÍSTICAS
COMPONENTES
1. Dispone de un interruptor de alimentación general que permite apagar la unidad cuando no esté
en uso.
2. 3 temperaturas.
3. Apriete ligeramente el botón con resorte para encenderlo y hacerlo funcionar; suéltelo para
apagarlo.
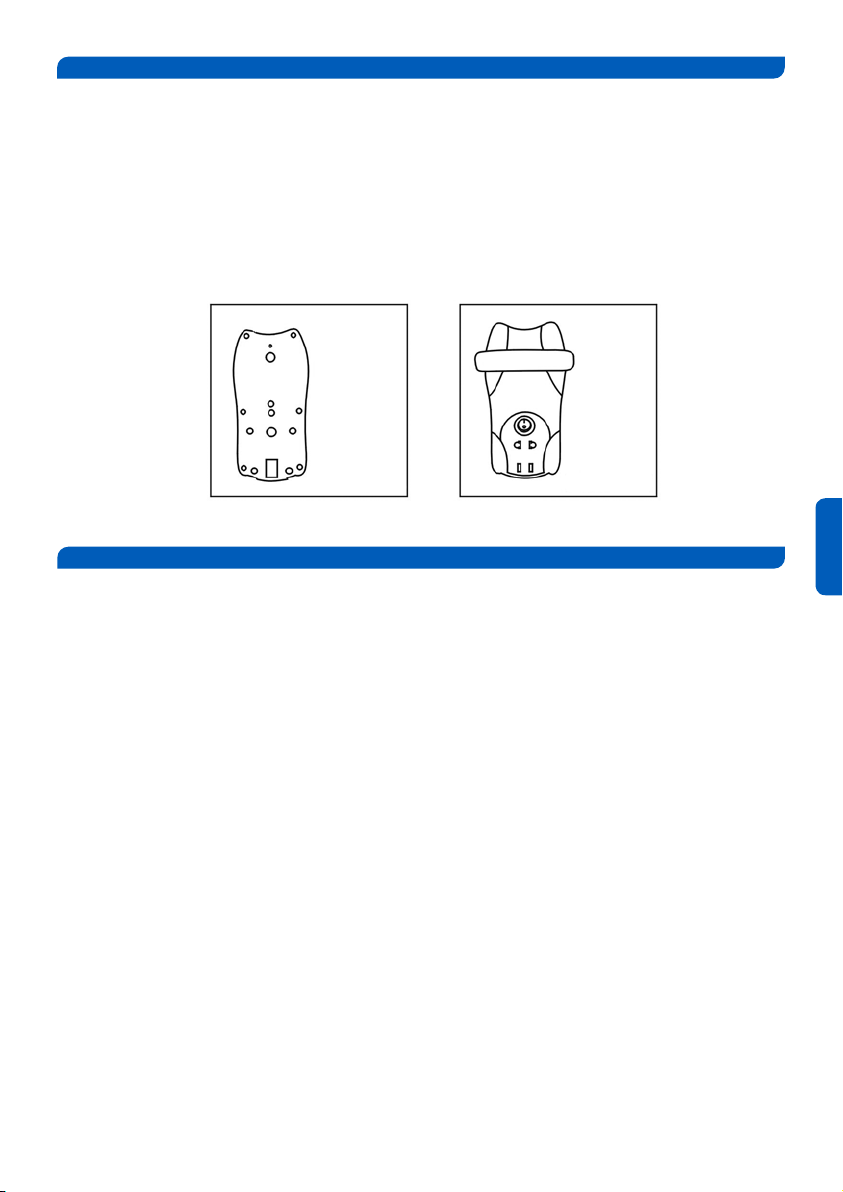
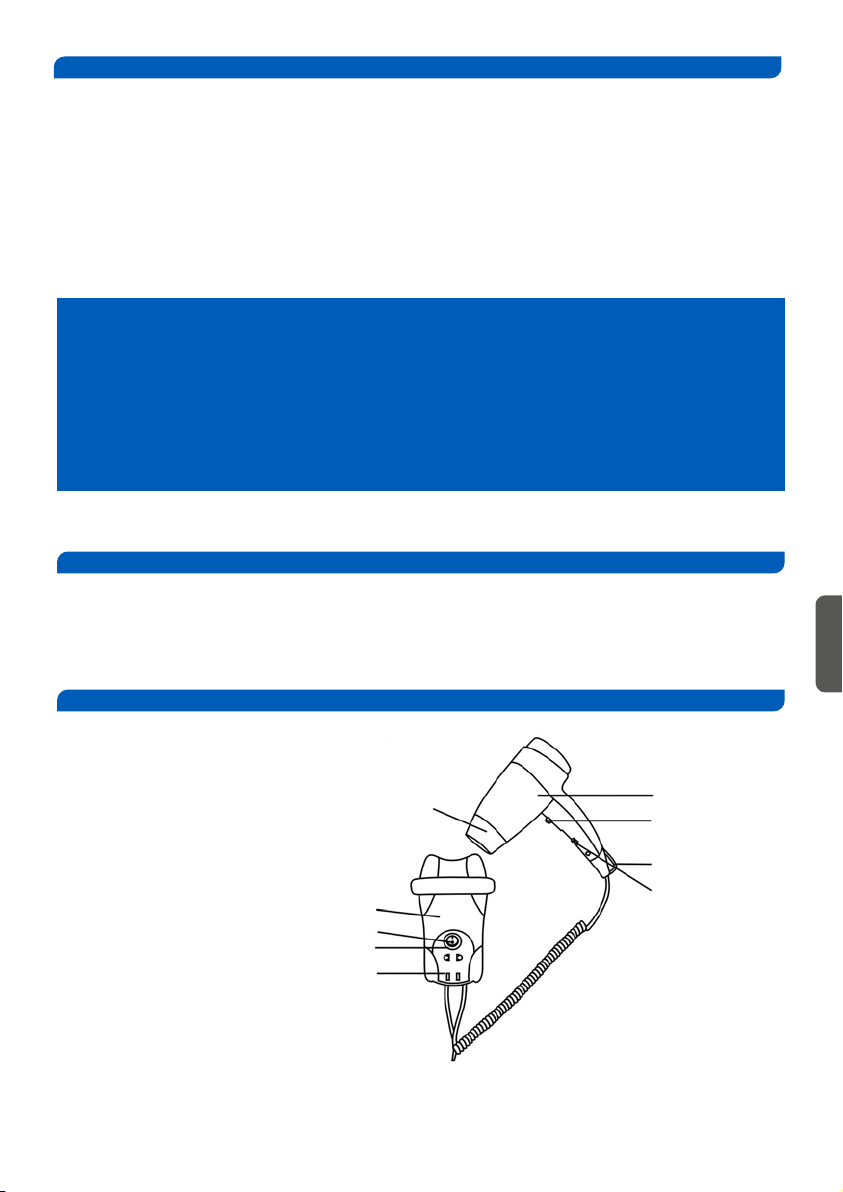
1. Cuerpo del secador
2. Soporte
3. Boquilla
4. Indicador
5. Alimentación
6. Enchufe
7. Interruptor
8. Parte superior colgante
9. Botón con resorte
1
9
8
7
3
4
2
5
6
Figura 1
Antes de realizar cualquier operación, lea cuidadosamente estas instrucciones y aplíquelas. Las
presentes instrucciones de seguridad pueden ayudarle a usar correctamente el secador eléctrico de
cabello y protegerle usted o a otros usuarios.
INSTRUCCIONES DE SEGURIDAD
• Sólo un técnico cualicado puede realizar tareas de instalación, ajuste y mantenimiento de este
aparato.
• Antes de realizar cualquier manipulación eléctrica, debe cortarse el suministro eléctrico que pro-
porciona la tensión que alimenta el secador.
• Se deben prever medios de desconexión de la red de alimentación, con una separación de contacto
de al menos 3 mm (0.12”), en todos los polos. Dichos medios de desconexión deben ser incorpora-
dos a la red ja, de acuerdo con la Normativa legal vigente.
• El secador con código GW02 03 01 00 es un dispositivo eléctrico perteneciente al tipo Clase II
según su aislamiento eléctrico.
Este aparato no está pensado para su uso con personas con capacidades físicas, sensoriales o
mentales reducidas (incluidos niños de edad inferior a 8 años) o con falta de experiencia o
conocimiento, a no ser que lo hagan bajo la supervisión de una persona responsable y conocedora
en lo que a su uso se reere y habiendo sido advertidos de los eventuales riesgos de seguridad.
Es necesario que se asegure y supervise que los niños no jueguen con el aparato secador.
Si el cable de alimentación está dañado, debe ser reemplazado por el que proporcione y sugiera el
fabricante, su agente de servicio o personas igualmente calicadas para evitar cualquier peligro o
riesgo que afecte a la seguridad.

Español
CÓMO INSTALAR ESTA UNIDAD CON EL CABLE DE ALIMENTACIÓN:
1. Perfore 2 oricios de 6 mm de diámetro y una profundidad de 35 mm en la pared y, a
continuación, inserte los tacos de plástico en los oricios siguiendo la imagen 2; je el
soporte de plástico con el tornillo incluido.
2. Alinee el clip de instalación de la cubierta posterior al soporte y empújelo.
3. Fije el soporte a la pared y atornille el tornillo de la parte superior de la cubierta posterior del
soporte, apretando bien fuerte el soporte.
4. Conéctelo con la alimentación general y mueva el interruptor de alimentación a la posición de
encendido (“ON”).
Figura 2 Figura 3
CÓMO INSTALAR ESTA UNIDAD SIN EL CABLE DE ALIMENTACIÓN:
1. Aoje el tornillo situado en la parte inferior del soporte del secador, desmonte la cubierta frontal
y abra el oricio de entrada del cable.
2. Introduzca el cable de alimentación de pared por el oricio, tal como muestra la imagen 2 (hay tres
oricios disponibles para el cableado directo).
3. Fije el cable de alimentación al terminal; tenga en cuenta la dirección del cable N y L, y vuelva a
poner el terminal en su posición original.
4. Fije el soporte a la pared y, a continuación, je la cubierta frontal al soporte apretando el tornillo
de la parte inferior para sujetar bien el soporte y la cubierta frontal. A continuación, alinee el clip
de instalación de la cubierta posterior al soporte y tire hacia abajo, jando el soporte.
5. Active la alimentación general y mueva el interruptor de alimentación a la posición de encendido
(“ON”).

Español
CÓMO USARLO:
PIEZAS DEL PAQUETE:
ACCESORIOS:
Encienda la alimentación general y agarre el cuerpo del secador; el secador funcionará al apretar el
botón con resorte. Mueva el botón hacia arriba y hacia abajo para aumentar o disminuir el grado de
calor. “2” para aire caliente, “1” para aire templado, “C” para aire frío.
Notas:
1. Asegúrese de que la tensión del secador de pelo es la misma que la del suministro de alimentación.
2. Siga este marco de seguridad al utilizar el secador de pelo. No utilice el secador de pelo si tiene las
manos mojadas. No tire del cable combinado.
Desconecte el cable de alimentación de la toma eléctrica cuando limpie el secador de pelo. Preste
atención al secador de pelo para evitar absorciones en la entrada del secador de pelo. Utilice una
solución de limpieza de agua con jabón para limpiar la carcasa del secador, no utilice líquidos de
pulverización ni abrasivos.
Un secador de pelo
Un manual
Dos tornillos. Dos tacos. Un clip de instalación.
Al nal de su vida útil, el producto no se puede desechar como residuo urbano. Se debe llevar a un punto
de recogida de residuos, establecido por la autoridad competente o por proveedores especializados en este
servicio. Reciclar un producto eléctrico o electrónico de forma adecuada evita las consecuencias negativas
para el medio ambiente, y para la salud derivadas de un reciclaje incorrecto y permite que las materias
primas que lo constituyen se reciclen, ahorrando en recursos naturales y energía. Como recordatorio de la
necesidad de reciclar productos eléctricos y electrónicos de forma adecuada, el producto está marcado con
un contenedor tachado.
Este secador de pelo debe colocarse fuera del alcance de una persona que se bañe o se duche.

English
This hair dryer on safety, convenience and power-saving with modern streamline shape.
FEATURES
COMPONENTS
1. Includes a general power switch to allow this unit be power o when is not in using.
2. 3 heating settings.
3. Slightly press on the spring button to turn on and work, release that switch to turn o.
1. Dryer body
2. Holder
3. Nozzle
4. Indicator
5. Power
6. Socket
7. Switch
8. Hanging top
9. Spring button
3
4
2
5
6
Picture 1
Before to carry on any operation, please read carefully and take into account the following
instructions. The Safety Instruction here can help you use the electric hair dryer successfully while
protecting the user yourself or other.
SAFETY INSTRUCTION
• Only a qualied technician can install, adjust and maintain this device.
• Before any electrical manipulation, the electrical supply from mains must be cut.
• Means for disconnection, with contact separations at least 3 mm (0.12”), must be incorporated in
the xing wiring involving all poles, in accordance with wiring rules.
•The appliance typed GW02 08 01 00 (GW02 08 01 03) is a Class II insulation electrical device
This appliance is not intended for use by persons (including children aged less than 8 years old) with
reduced physical, sensory, or mental capabilities, or lack of experience and knowledge, unless they
have been given supervision or instruction concerning use of the appliance by a person responsible for
their safety.
Children should be supervised to ensure that they do not play with the appliance.
If the supply cord is damaged, it must be replaced by the manufacturer, its service agent, or similarly
qualied persons in order to avoid a hazard.

English
HOW TO INSTALL THIS UNIT WITHOUT PLUG-CONNECTED WIRE:
HOW TO USE:
Switch on general power and pick up the dryer body, the dryer will work when the spring button is
held on, move the push button up and down for higher or lower heating. “2” for hot heating, “1” for
warm heating, “C” for ambient temperature.
Notes:
1. Ensure the voltage of hair dryer is same with the power supply.
2. Please follow the below safety frameworks when you operate the hair dryer. Don’t operate the hair
dryer when your hands are wet. Don’t pull out the combined cord.
Please pull out the power plug from electrical outlet when you cleaning the hair dryer. Please pay
attention the hair dryer to avoid absorbing in the inlet of hair dryer. Please use the cleaning solution
of water with soap to clean the housing of hair dryer, don’t use spray liquid or abrasive.
1. Loosen the screw on the bottom of the dryer bracket to disassemble the front cover, open the
wire entry hole.
2. Pull the reserved wire through the hole showed in picture 2 (there are three holes available for
the direct wiring).
3. Fix the reserved wire on terminal, please notice its direction of N, L wire replace terminal to its
original position.
4. Fix the bracket to the wall then x the front cover to the bracket screwing the screw on the bottom
to make the bracket and front cover tightly. Then align installation clip on the back cover to the
hanger and pull down, x bracket.
5. Connect with general power and move power switch to “ON” position.
HOW TO INSTALL THIS UNIT WITH PLUG CONNECTED WIRE:
1. Drill 2 holes of 6mm diameter and depth of 35mm on the wall then insert the plastic wall anchors
into the holes according to picture 2 and x the plastic hanger with 1 screw enclosed.
2. Align installation clip on the back cover to the hanger and push down.
3. Fix the bracket to the wall, then screwing the screw in top of the bracket back cover, x the bracket
tightly.
4. Connect with general power and move power switch to “ON” position.
Picture 2 Picture 3

PARTS IN THE PACKAGE:
ACCESSORIES:
One set hair dryer.
One manual.
Two screws.
Two wall anchors.
One installation clip.
At the end of its useful life, the product cannot be disposed of as urban waste. It must be taken to a
waste collection point, established by the competent authority or by suppliers specialized in this service.
Recycling an electrical or electronic product in an adequate way avoids the negative consequences for the
environment and for health derived from incorrect recycling and allows the raw materials that constitute it
to be recycled, saving on natural resources and energy. As a reminder of the need to recycle electrical and
electronic products properly, the product is marked with a crossed out container.
This hair dryer must be xed out of reach of a person taking a bath or shower.

Av. Joan Carles I, 46-48
08908 L´Hospitalet de Llobregat - Barcelona - (SPAIN)
www.genwec.com
WA
SHROOM EQUIPMENT & COMP.
®
This manual suits for next models
2
Table of contents
Languages:
Other GENWEC Hair Dryer manuals