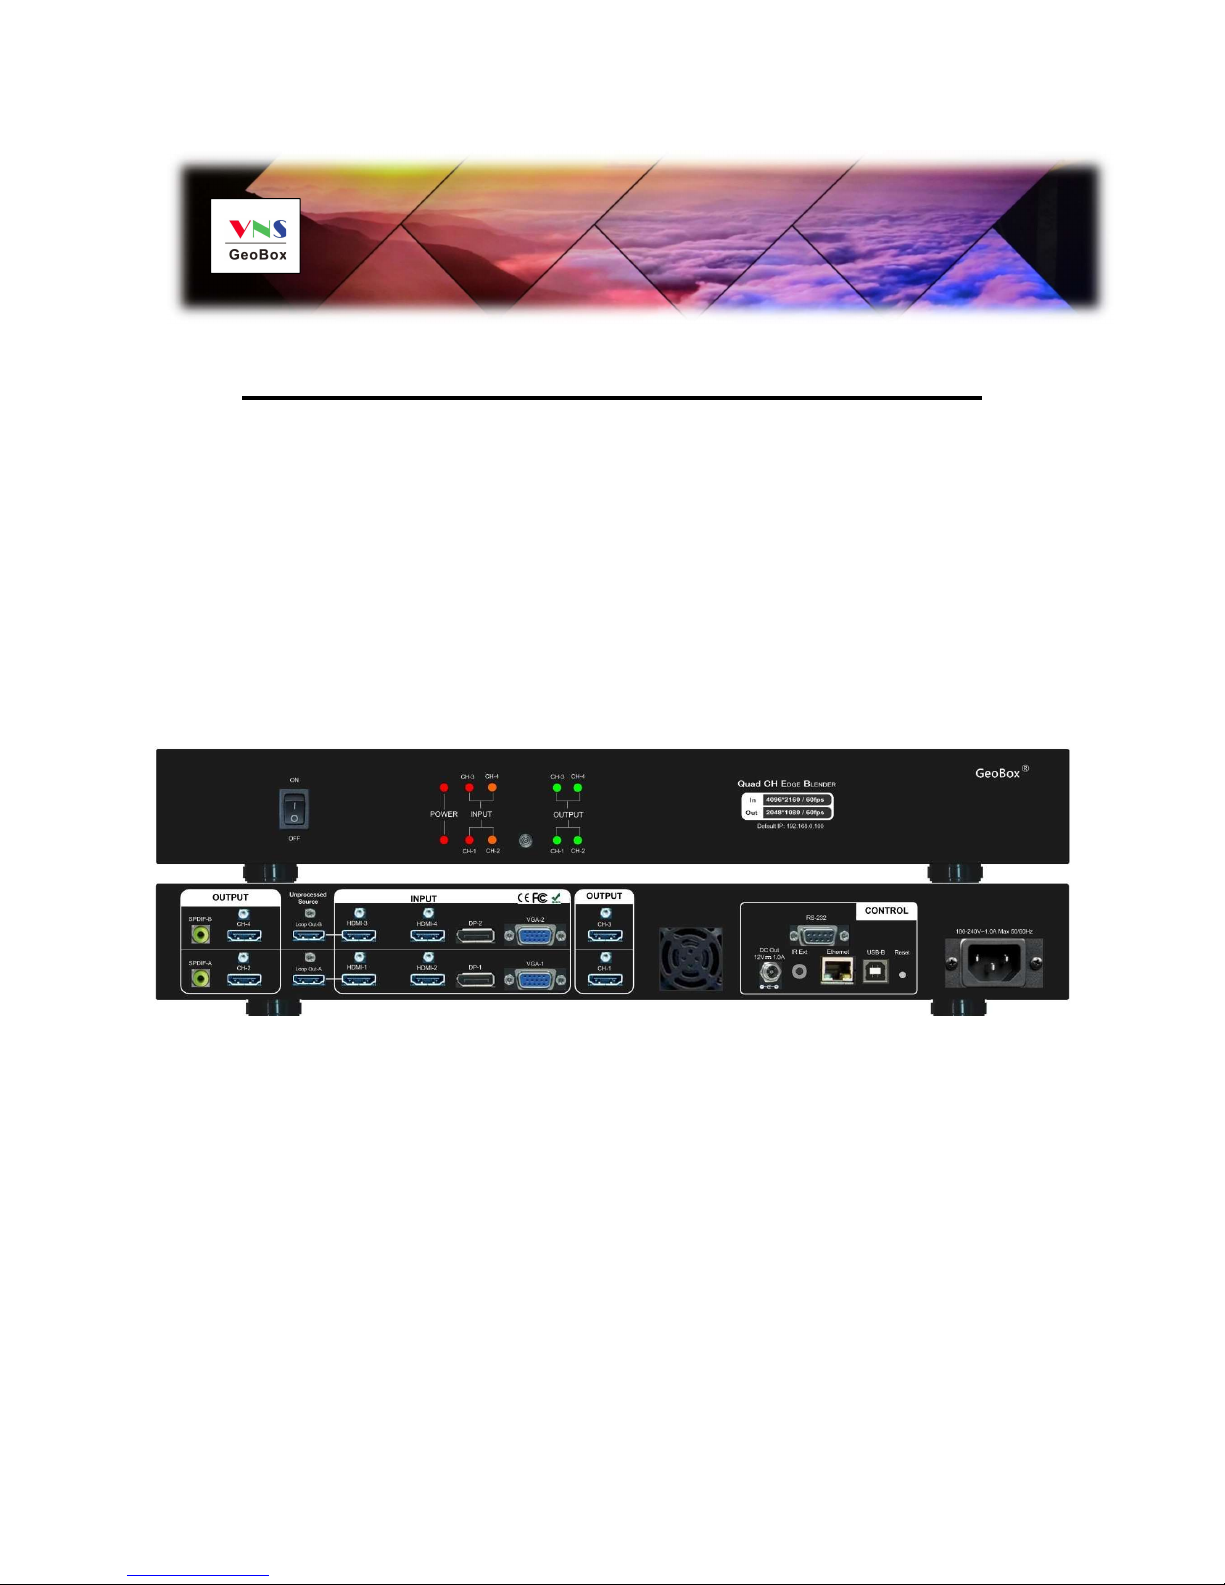
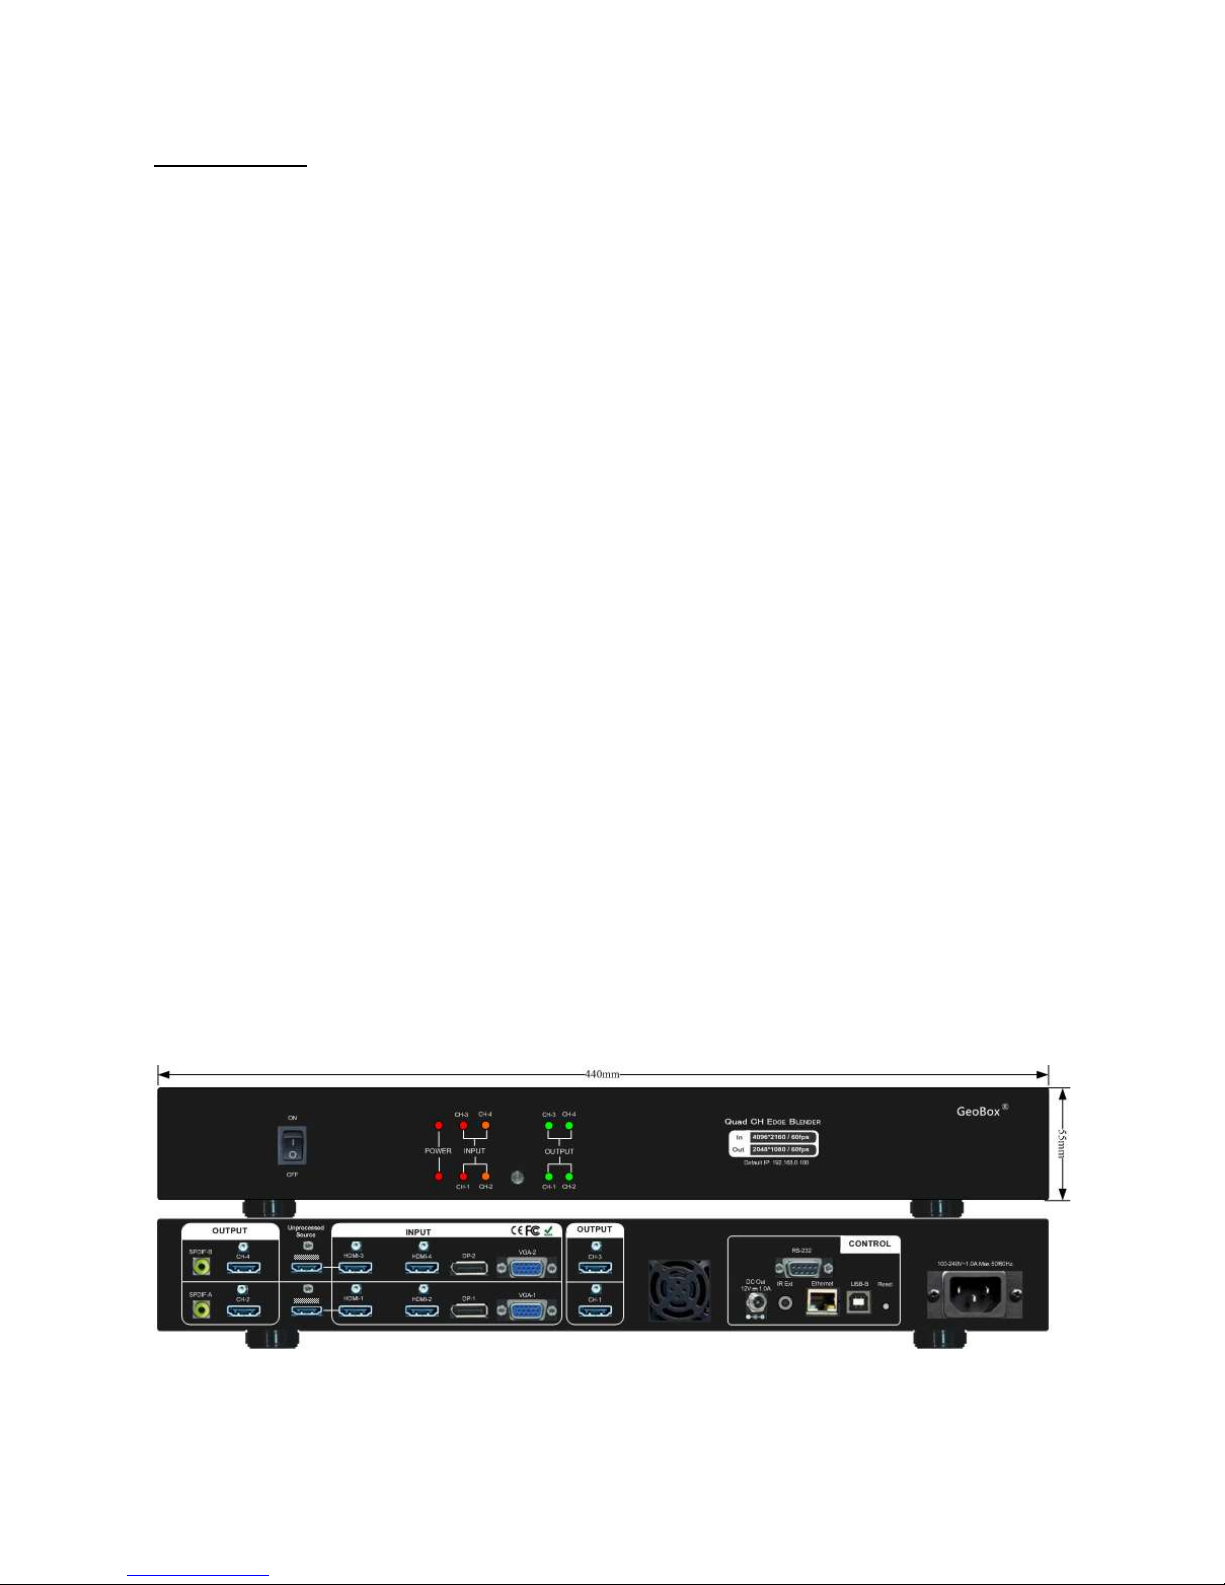
G804 User Guide Document: G804-3
-----------------------------------------------------------------------------------------------------------------------------------------------
-
3
13.1. Front panel LED indicators………………………………………………………………………... 67.
13.2. Intermittent or loss of input signal………………………………………………………………... 67
13.3. Video quality issues………………………………………………………………………………… 68
13.4. Image position shift after installation……………………………………………………………… 68
13.5. System crash and malfunction ……………………………………………………………………. 69
13.6. Synchronization issue in the outputs……………………………………………………………… 69
14. Technical support…………………………………………………………………………………………… 69
15. Safety precaution and maintenance……………………………………………………………………… 70
Specification ……………………………………………………………………………………………………... 72
Revision History…………………………………………………………………………………………………… 73
Disclaimer/Copyright Statement
Copyright 2018, VNS Inc. All Right Reserved
This information contained in this document is protected by copyright. All rights are reserved by VNS Inc.
VNS Inc. reserves the right to modify this document without any obligation to notify any person or entity of such revision. Copying,
duplicating, selling, or otherwise distributing any part of this document without signing a non-disclosure agreement with an authorized
representative of VNS Inc. is prohibited. VNS Inc. makes no warranty for the use of its products and bears no responsibility for any error of
omission that may appear in this document.
Product names mentioned herein are used for identification purposes only and may be trademarks of their respective companies.
Limited Warranty and RMA statement
This device is designed and tested to the highest standards and backed by two years’ parts and labor warranty. Warranties are effective upon
the first delivery date to the end customer and are non-transferable. Warranty related repairs include parts and labor, but do not include
repair of faults resulting from user negligence, special modifications, abuse (mechanical damage), shipping damage, and/or other unusual
damages. The customer shall pay shipping charges when the unit is returned for repair. Manufacturer will pay shipping charges for return
shipments to customers.
Manufacturer does not assume responsibility for consequential damages, expenses or loss of revenue, inconvenience or interruption in
operation experienced by the customer. Warranty service shall not automatically extend the warranty period.
User can pay extension fee to extend the warranty period. Please contact us for more details. In the event that a product needs to be returned
for repair, inform manufacturer and ask for a Return Material Authorization number.
FCC/CE statement
Note: This equipment has been tested and found to comply with the limits for a Class A digital device, pursuant to Part 15 of FCC Rules. These
limits are designed to provide reasonable protection against harmful interference in a residential installation. This equipment generates,
uses and can radiate radio frequency energy and, if not installed and used in accordance with the instruction, may cause harmful
interference to radio communications. However, there is no guarantee that interference will not occur in a particular installation. If this
equipment does cause harmful interference to radio or television reception, which can be determined by turning the equipment off and on,
the user is encouraged to try to correct the interference by one or more of the following measures:
Reorient or relocate the receiving antenna.
Increase the separation between the equipment and receiver.
Connect the equipment into an outlet on a circuit different from that to which the receiver is connected.
Consult the dealer or an experienced radio/TV technician for help.
Notice:
(1) An Unshielded-type power cord is required in order to meet FCC emission limits and also to prevent interference to the nearby radio and
television reception. It is essential that only the supplied power cord by used.
(2) Use only shielded cables to connect I/O devices to this equipment.
(3) Changes or modifications not expressly approved by the party responsible for compliance could void the user’s authority to operate the
equipment.