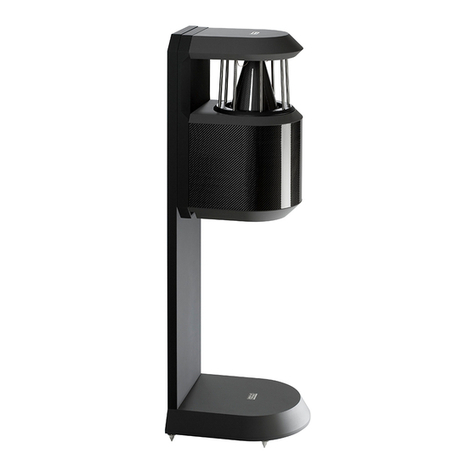
German Physiks HRS-130 User manual

This product complies with European Union EMC Directive
(89/336/EEC) and the Low Voltage Directive (73/23/EC)
© German Physiks 2007-2023
Revision m
Released 7th June, 2023
We reserve the right to change the information contained in this manual without notice. For the
latest version please see our web site at www.german-physiks.com
HRS 130 User Manual

2
1. INTRODUCTION ........................................................................................................................... 3
2. UNPACKING YOUR LOUDSPEAKERS ........................................................................................ 3
3. THE PRINCIPAL FEATURES OF THE HRS-130 ......................................................................... 5
4. CONNECTING YOUR LOUDSPEAKERS ..................................................................................... 6
High Frequency Level Control ................................................................................................... 6
Loudspeaker Cables ................................................................................................................. 7
Input Terminal Connections ....................................................................................................... 7
Single Wire Connection ........................................................................................................ 7
Bi-Wire Connection .............................................................................................................. 7
5. REMOVING THE DDD SHIPPING COVERS ................................................................................ 7
6. LOUDSPEAKER PLACEMENT AND SET-UP .............................................................................. 8
Listening Room Layout .............................................................................................................. 8
Loudspeaker Placement ............................................................................................................ 8
Distance from the Front Wall ................................................................................................ 8
Distance from the Side Wall ................................................................................................. 9
Fitting and Adjusting the Spikes ................................................................................................ 10
7. LOUDSPEAKER BREAK-IN .......................................................................................................... 11
8. CARE OF YOUR LOUDSPEAKERS ............................................................................................. 12
9. WARRANTY .................................................................................................................................. 12
10. SERVICE AND SUPPORT .......................................................................................................... 14
11. HOW TO CONTACT US ............................................................................................................... 16
12. HRS-130 SPECIFICATIONS ........................................................................................................ 17
13. WARRANTY REGISTRATION ..................................................................................................... 18
TABLE OF CONTENTS

3
1. INTRODUCTION
Thank you for selecting the German Physiks HRS-130 loudspeakers for your audio system. The HRS-130
is a 2-way design using a single German Physiks DDD driver and a high-performance woofer coupled to
a Helmholtz resonator. It is entirely handmade and is built and tested by highly skilled technicians at our
factory in Germany. Every step in the design and manufacture of this product has been dedicated to
producing a loudspeaker that will provide a lifetime of musical enjoyment.
We strongly recommend that you read this manual before attempting to use these loudspeakers, as it will
enable you obtain the best performance from them.
2. UNPACKING YOUR LOUDSPEAKERS
NOTE: When lifting the loudspeakers out of the shipping carton hold
them around the cabinet.
Do not lift them by the DDD driver support pillars (figure 5) as
this may damage the driver.
Do not lift them by the cabinet supports (figure 5) as this may
damage the cabinet.
Each HRS-130 weighs approximately 35kg (77lbs) and should
not be lifted by one person alone. Always have help when
lifting a loudspeaker.
The DDD drivers may be protected with a cover. This should be
left in place until the loudspeakers have been set in their final
location, to guard against accidental damage during handling.
Each HRS-130 is packed in single carton. This must be kept horizontal as shown in figure 1. Before
opening the cartons, please inspect them for damage. If you see any damage, please contact the
supplying audio dealer immediately and provide them with a full description of the damage. Do not unpack
the loudspeakers until you have spoken with the dealer and have been advised how to proceed.
To unpack the loudspeakers please follow the instructions below:
NOTE: When cutting the sealing tape on the top of the carton make
sure that the cutter blade does not penetrate more than 1cm
into the carton.
1. Place the carton upright as shown in figure 1 and carefully cut the sealing tape on the top flaps.
Figure 1. HRS-130 shipping carton

4
2. Open the carton flaps. The wallet containing the spikes and other accessories will be found on the top
packing piece of one of the inner cartons as shown in figure 2.
In addition to the user manual the wallet should contain:
Item
Quantity
Description
1
8
Spikes
2
8
Spike locking nuts
3
8
Spike cups
4
1
Hex key for removing transit screws from base
5
8
Self-adhesive felt pads – for use under spike cups
6
1
Cleaning cloth
If any of these items is missing, please contact the supplier.
3. Remove the top packing piece figure 3.
Figure 3. HRS-130 shipping carton top packing piece
Figure 2. HRS-130 accessories

5
Front View
Input terminals
& crossover
adjustment
DDD driver
DDD driver
support pillars
Cabinet
supports
Base
plates
Rear View
Figure 5. Principal features of the HRS-130
4. Remove the foam packing pieces from between the top and bottom of the cabinet and the carton – A
and B figure 4 – then, with the help of another person, lift the loudspeaker out of the carton by holding
around the top and bottom of the cabinet and stand it up on its base.
Do not lift by the DDD driver support pillars or by the cabinet supports – see figure 5.
5. Remove the blue protective ring from the top of the loudspeaker and pull the white cover up and off the
loudspeaker. Leave the blue ring – C figure 4 – in position for the time being, as this will protect the base
of the cabinet while it is being moved.
Please retain all of the packing, as you will need this should it be necessary in the future to ship the
loudspeakers. The use of any other packing may result in the loudspeakers sustaining damage in transit.
Such damage is not covered by the warranty. Should you require replacement packing, please contact
your German Physiks dealer, the national distributor or the factory directly.
Please also be aware that if it is necessary to ship the loudspeakers, they must be shipped securely
strapped to a Euro size pallet. Failure to use a pallet may result in damage that will not be covered by the
warranty.
3. THE PRINCIPAL FEATURES OF THE HRS-130
Figure 4. HRS-130 shipping carton
A
B
C

6
4. CONNECTING YOUR LOUDSPEAKERS
NOTE: An amplifier capable of delivering at least 70W into 4 ohms
per channel should be used for each loudspeaker.
The four cap-head socket screws which are fitted flush with
the underside of each base plate should not be removed at
this stage. These are fitted to prevent dirt entering the spike
mounting inserts during shipping. They will be removed
when the final position of the loudspeakers has been
determined and the spikes are fitted.
Referring to the instructions in section 6 and figure 7, move the loudspeakers to their initial position and
then follow the instructions below to connect the loudspeaker cables.
The HRS-130 is a 2-way design with separate input terminals for the low frequency and high frequency
sections of the crossover. These drive the woofer and DDD drivers respectively and are labelled
accordingly. The loudspeaker also has a high frequency level control.
The input terminals and high frequency level control are located on a panel fitted on the back of the
cabinet – figure 6.
High Frequency Level Control
This adjusts the output from the DDD driver and is centred at 8,000Hz. 4 settings are provided: -2dB,
Flat, +2dB and +4dB. To adjust the control, pull the jumper out and then push it back into the appropriate
pair of sockets. For the initial setting of the loudspeakers this should be set to the Flat position. The final
setting should be made once the loudspeakers have been broken in and the final position in the listening
Figure 6. Input terminals and high frequency level control
High frequency
level control
Crossover input for
DDD driver
Crossover input for
woofer
Input jumper

7
room established. We suggest that you experiment with different settings to determine which gives the
most satisfactory frequency balance.
Loudspeaker Cables
We recommend that you use loudspeaker cables terminated with high quality spade lugs, as these
provide the best electrical connection. The lugs should be either soldered or crimped to the loudspeaker
cable – the latter is preferred. We do not recommend the use of bare wire to connect to the loudspeaker
terminals. This produces an inferior connection that will further degrade as the bare conductors become
tarnished.
Input Terminal Connections
NOTE: The loudspeaker terminals should be tightened as firmly as
possible by hand. Do not use pliers or any other tools as
this may damage the terminals.
There are two recommended methods of connecting the HRS-130 to the amplifier.
Single Wire Connection
This uses one cable to connect each loudspeaker to the power amplifier. The two red terminals and the
two black terminals on the input terminal plate should be linked together as shown in figure 6. The
loudspeakers will be shipped with high quality jumpers in this position.
Connect the loudspeaker cable to the DDD input terminals taking care to ensure that the DDD positive
terminal is connected to the power amplifier positive output terminal and the DDD negative terminal is
connected to the power amplifier negative output terminal.
Bi-Wire Connection
In this method of connection, the DDD driver and woofer inputs are connected to the power amplifier
with separate loudspeaker cables. Ensure that the jumpers between the two red terminals and the two
black terminals on the input terminal plate have been removed.
Connect one loudspeaker cable to the DDD driver input terminals taking care to ensure that the positive
terminal is connected to the power amplifier positive output terminal and the negative terminal is
connected to the power amplifier negative output terminal.
Connect the other loudspeaker cable to the woofer input terminals taking care to ensure that the woofer
positive terminal is connected to the power amplifier positive output terminal and the woofer negative
terminal is connected to the power amplifier negative output terminal.
5. REMOVING THE DDD SHIPPING COVERS
NOTE: Do not touch the DDD driver diaphragms.
If the DDD drivers are covered with plastic film, carefully remove this by hand. Do not use a knife or any
other tool.

8
6. LOUDSPEAKER PLACEMENT AND SET-UP
Listening Room Layout
The following points will help you optimise your listening room layout.
1. The left and right sides of the room should be symmetrical. If the room is asymmetrical, this will
degrade the quality of the stereo image. This is because most of the sound energy that you hear is
reflected before it reaches your ears.
2. Place the loudspeakers symmetrically in the room, i.e. the same distance from the centre line of the
room and the same distance from the front wall.
3. Avoid placing the loudspeakers similar distances from the side and front walls, as this may lead to an
uneven bass response
4. Avoid having any hard surfaces between your listening position and the loudspeakers. This will
generate additional reflections that may degrade the stereo image. For this reason, wherever possible
the electronics should be located at the side of the room. If you have a hard floor (tile or wood), it may
be advantageous to place a carpet on the floor covering the area between the loudspeakers and the
listening position, as this will reduce unwanted early reflections.
5. Avoid having the listening position closer than 1.2m from the rear wall, as early reflections from this
wall will degrade the stereo image. If you must have the listening position close to the rear wall, it may
be helpful to have some sound absorption on the wall behind the seat to reduce reflections.
6. If your has room acoustic treatments installed, we suggest that this be removed for the time being.
Room treatment arrangements that work well with a conventional loudspeaker can be excessive with an
omnidirectional design, as this type of loudspeaker relies on reflections to generate its stereo image.
Once the optimum position in the room has been established, the treatments can be re-introduced piece
by piece, to see what arrangement produces the best result.
Loudspeaker Placement
Figure 7 gives a general guide to loudspeaker positioning and the location of the listening position. Note
how the recommended listening position varies with the separation between the loudspeakers. Because
the HRS-130 is an omnidirectional design, there is no need to adjust the toe-in angle. They should
always be set with the German Physiks logo on top of the loudspeaker facing forward.
In most cases the initial position will produce a good sound to start with. Experimenting with the distances
between the loudspeakers and the side and front walls should provide improvements. If the
loudspeakers are new and have not been run very much, we recommend that they be run for at least 24
hours to loosen up the bass units before you attempt to do any serious position adjustment. See section
7 for more information on the break in process.
Omnidirectional loudspeakers interact with the room very differently to conventional loudspeakers, so be
prepared to try them closer together than you would with a conventional design. Let your ears be your
guide and don’t be afraid to try out what, based on your experience with conventional loudspeakers, you
may think are unusual positions.
Distance from the Front Wall
We recommend that you start with the loudspeakers positioned 1.5m from the front wall. As you move
the loudspeakers closer to the wall, the level of the bass response will be increased. The converse will
be true as you move the loudspeakers away from the front wall. In most cases, the HRS-130 should not
be placed closer than 1m from the front wall. If the loudspeakers are too close to the front wall, not only
will the bass response be excessive, but the stereo image will be degraded due to an increase


9
in early reflections. Aim to find a position that provides an even bass response, combined with the best-
defined and most realistic stereo image when you are seated at the listening position.
Distance from the Side Wall
We recommend that the distance of the listening position from the loudspeakers be 1.5 to 2 times the
distance between the centres of the loudspeakers – please see figure 7 below. Moving the loudspeakers
further apart will degrade the stereo image.
We do not recommend placing the loudspeakers closer than 1m from the sidewalls, as the early
reflections will degrade the stereo image. Positioning the loudspeakers too close to the sidewalls will
also lead to an uneven bass response and degrade the stereo image. Aim to find a position that provides
an even bass response, combined with the best-defined and most realistic stereo image when you are
seated at the listening position.
Listening
Position
Figure 7. Listening room arrangement
Do not have the listening
position closer than 1.2m
from the rear wall
1.5 to 2 times “d”
Minimum:
1 metre/3.3 feet
Minimum:
1 metre/3.3 feet
Minimum:
1 metre/3.3 feet
Distance = “d”
Minimum:
1 metre/3.3 feet

10
Fitting and Adjusting the Spikes
NOTE: We strongly recommend having an assistant help to hold the
loudspeakers while the spikes are being fitted and adjusted.
The HRS-130 is supplied with four double-ended spikes, which screw into inserts in the cabinet base
plate. One end of the spike is pointed and is intended to be used on carpeted floors. The other end is
rounded and may be used together with a spike cup on hard floors. Knurled, circular nuts are supplied
to enable the spikes to be locked in the inserts. Self-adhesive felt pads are supplied which the user may
attach to the underside of the spike cups to protect wooden floors from being scratched.
When placing the loudspeakers on a carpeted floor, ensure that the spikes are set to protrude sufficiently
from the base plate so that they pass through the carpet and make firm contact with the underlying floor.
To fit the spikes, you will need to lay the loudspeaker on its side. We suggest you lay it on to a soft clean
blanket to protect the finish. When laying the loudspeaker down, support it by the cabinet and not by
the DDD driver.
Use the supplied 5mm hex key to remove the four cap-head socket screws from the spike inserts – figure
9. These are fitted when the loudspeaker is shipped in order to keep foreign matter out of the insert.
Do not disturb the screws located in the recesses of the base plate.
Spike
Lock nut
Spike cup
Figure 8. Spikes and support hardware
Figure 9. Removing a transit screw
5mm hex key
Turn screw anti-clockwise
to remove

11
NOTE: If the loudspeaker is to be shipped these screws must be
replaced. Do not ship the loudspeakers with the spikes
fitted.
Fit four spikes with the appropriate ends outermost and with at least 5mm of thread inside the insert.
Adjust the spikes so that they all protrude about the same amount from the base plate. Fit lock nuts to
the rear two spikes and front left spike, and screw them up against the base plate so that the spikes are
locked. Only do the lock nuts up finger tight. Do not use any tools. Fit a lock nut to the front right spike
and screw it to within about two turns from the insert. We want this spike to be free to turn so that it can
be adjusted to level the loudspeaker.
If the blue protective ring is still fitted to the base plate, remove it now. Keep it safe with the rest of the
packing in case it is ever necessary to ship the loudspeakers.
Stand the loudspeaker up. If the spike cups are to be used and the loudspeaker is to stand on a polished
wooden floor, you may wish to fit the supplied self-adhesive felt pads under the cups to protect the floor
from scratches. This will also make it easier to move the loudspeaker should any small changes in
position be necessary. Place a cup under each spike, making sure that the spike is properly located in
the bottom of the cup.
If the loudspeaker is to be placed on a carpet, push downwards on the cabinet at the base of the DDD
driver and ensure that the spikes are in firm contact with the underlying floor. Do not push on the top of
the DDD driver.
To check that the loudspeaker is sitting squarely on its spikes:
1. If the loudspeaker can be rocked in the 10 o’clock to 4 o’clock direction, lean the
loudspeaker to the left and screw out the right-hand front spike by the amount of
movement you saw at the base of the cabinet. It is best to have an assistant to help hold
the loudspeaker. Stand the loudspeaker back up and repeat the process until it is
sitting squarely on its spikes. Lean the loudspeaker to the left again and lock the nut on
the right front spike, taking care not to change the spike’s setting. Only do the lock nut
up finger tight. Do not use any tools.
2. If the loudspeaker can be rocked in the 2 o’clock to 8 o’clock direction, lean the
loudspeaker to the right and screw in the right-hand front spike by the amount of
movement you saw at the base of the cabinet. It is best to have an assistant to help hold
the loudspeaker. Stand the loudspeaker back up and repeat the process until it is sitting
squarely on its spikes. Lean the loudspeaker to the right again and lock the nut on the
left front spike, taking care not to change the spike’s setting. Only do the lock nut up finger
tight. Do not use any tools.
7. LOUDSPEAKER BREAK-IN
Like all audiophile equipment, German Physiks loudspeakers require a break-in period from new before
they reach their optimum level of performance. Initially the sound may seem harsh. Please do not be
concerned. The sound will become more relaxed and smoother, as the break in progresses. The music
used for the break-in should be dynamic in order to properly exercise all the components of the
loudspeakers.
In most cases the loudspeakers will be fully broken-in after 20 to 30 hours of use, but you may see some
further improvement after this. The actual time required to break-in the loudspeakers will depend on the
type of music you listen to and how loud you play them. The break-in time playing music with a wide
dynamic range, played at high level, will be shorter than with music that has a narrower dynamic range and
played at lower level. When continued use no longer produces improvement in any aspect of the
loudspeaker’s sound, you may consider the break-in process to be complete.

12
8. CARE OF YOUR LOUDSPEAKERS
NOTE: NEVER attempt to open the cabinets. There are no user
serviceable parts inside the loudspeakers.
NEVER touch the diaphragms on the DDD drivers or
woofers, or allow any object to come into contact with them.
NEVER attempt to clean dust off the diaphragms. Dust has
no effect on their performance and may be safely ignored.
NEVER attempt to clean the loudspeakers with any abrasive
materials or any cleaners containing ammonia, alcohol or
other solvents, as these may damage the finish.
The only maintenance the loudspeakers will require is periodic dusting to remove dust and any finger
prints from the cabinets. Please use the cleaning cloth supplied with the loudspeakers. This cloth should
be used dry. Do not use any form of liquid with it. Additional cloths may be obtained from your local
German Physiks dealer, national distributor or direct from German Physiks.
9. WARRANTY
Guarantee – European customers only
Under EU law, the person who sells a new product to a customer, whether it is a dealer or manufacturer,
is legally obliged to offer a 2-year guarantee. This is what is described as the Gewährleistung in
Germany. During this period the customer must make any claim to the original seller.
Outside of this period, the German Physiks warranty described below applies.
Warranty – All other countries
German Physiks warrants this product to be free from defects in materials and/or manufacture if used
under normal domestic conditions for a period of 5 years from the date of original purchase. To simplify
any future warranty claim, we advise the buyer to register their purchase with German Physiks within 30
days of the purchase. This may be done by completing the registration form at the end of the user manual
and returning it to German Physiks together with a copy of the sales receipt, or by using the product
registration form on the German Physiks web site. This may be found under the menu items
Contact/Product Registration. Alternatively, scanning the QR code below with your mobile phone camera
should take you to the product registration page on the German Physiks web site.
Figure 10. QR code for the product registration page on the German Physiks web site.

13
If this product is re-sold in the original country of sale, the remaining part of the warranty may be transferred
to the new owner.
The new owner should register their purchase by completing the registration form at the end of the user
manual and returning it to German Physiks with a copy of the sales receipt.
If the registration form is missing, a new form may be obtained by downloading new copy of the user
manual from the German Physiks web site. This may be found under the menu items
Media/Product Resources. Alternatively, scanning the QR code below with your mobile phone camera
should take you to the Product Resources page on the German Physiks web site, from where you will be
able to download a copy of the manual.
The new owner can also register their purchase by using the product registration form on the German
Physiks web site.
Please keep the original sales receipt, as it may be required in the event of warranty support being
requested. Second and subsequent owners should request this from the seller.
Modifications or repairs performed by the factory, or by an authorised repair agent, shall be guaranteed
for the remaining period of the warranty, or for 1 year, whichever is greater.
German Physiks offers no other express warranty on their products. This warranty shall not extend
beyond the stated warranty period. No responsibility is assumed for incidental or consequential damage.
This warranty complements any obligations on national distributors or dealers imposed by national or
regional law and does not affect your legal rights as a consumer.
Exclusions to the warranty
This warranty is only valid in the original country of sale.
This warranty is only valid for products initially purchased from an authorised German Physiks re-seller, or
distributor.
This warranty does not cover damage caused by normal wear and tear.
This warranty will be invalidated if the serial number has been removed, defaced or altered.
This warranty will be invalidated if the product has been used otherwise than in accordance with the user
manual.
This warranty will be invalidated if the product has been subject to an unauthorised modification, or repaired
by someone other than a factory authorised repair technician, or company.
Figure 11. QR code for the Product Resources page on the German Physiks web site.

14
The warranty will be invalidated if German Physiks determines that the product has been subject to misuse
including, but not limited to, exposure to excessive heat or humidity; liquid spills; use of inappropriate
cleaning methods and in the case of loudspeakers, burnt out voice coils and dents or scratches on driver
diaphragms.
This warranty does not cover any fault that is not due to defects in materials and/or manufacture.
This warranty will not cover any damage incurred as a result of failing to use factory approved shipping
cartons/crates, and methods.
10. SERVICE AND SUPPORT
In all cases the customer should contact the seller and provide them with the following information:
• Model name or number
• Serial number
• Date of purchase
• Description of the problem
They will then contact German Physiks via the local distributor. We will liaise with them to diagnose the
fault and decide the best way to affect a repair.
If the dealer/seller or local distributor is unable to assist you, please contact German Physiks using the
contact form which may be found under the Contact menu item on our web site at www.german-
physiks.com. If you scan the QR code below with the camera on your mobile phone, it should open the
contact form on the German Physiks web site.
You can also contact us by email at service@german-physiks.com, by phone on + 49 6109 502 9823, or
by fax on + 49 6109 502 9826. In each case you will need to provide the information listed above.
Should you need to phone us, please take into account time differences between Germany and where you
are calling from. We can only take calls in German and English. Email is our preferred method of initial
contact.
We may request a copy of the original sales receipt to determine if the product(s) is within their warranty
period.
In the vast majority of cases, the repair will be dealt with by sending spare parts from the factory to the
local distributor who will carry out the repair, or at their discretion authorise the dealer to do so on their
behalf. Any costs involved in shipping the products(s) to and from the dealer, or distributor are the
responsibility of the customer and the customer does so at their own liability.
Figure 12. QR code for the contact form on the German Physiks web site.

15
Shipping products
The products(s) must be shipped packed in their original packing, or packing that has been approved by
German Physiks.
Cartons must be securely strapped to a Euro pallet, or other suitable size pallet and then shrink
wrapped. Consult German Physiks for advice.
Loudspeaker spikes, if fitted, must be removed and any transit screws securely fitted in their place. Do not
over tighten them.
All jumper cables, remote controls and other accessories must be returned so that these can be tested if
necessary.
If the spikes or any other accessories are being returned with loudspeakers, place them in the original
packing, or a strong plastic bag, seal this with self-adhesive tape and then place it on top of one of the top
packing pieces and secure it firmly with tape, so that it cannot move and damage the loudspeaker whilst
in transit. Do not attach this to any part of the loudspeaker. Do not leave any loose items in the shipping
cartons that might damage the drivers or cabinet. Any such damage will not be covered by the warranty.
Failure to follow these instructions may result in damage that will not be covered by the warranty.
Returning goods to the factory
In the event that it becomes necessary to return a product(s), or any part of them to the factory in Germany,
we will issue a Return Authorization (RA) number. This number must be clearly marked on the outside of
the packing. Returns made without a RA number will not be accepted. Any returned items must be
shipped in the original packing, or packing approved by German Physiks. German Physiks will not be
responsible for any damage that occurs as a result of the use of non-approved packing. Returns received
in non-approved packing will have this replaced with new packing at the owner's expense. If you need
new packing, please contact your German Physiks dealer, local distributor or the factory.
The customer is responsible for all costs involved in shipping the product(s) to and from German
Physiks. German Physiks accepts no liability for any loss or damage to the product that may occur during
shipping.
A shipping company approved by German Physiks must be used.
German Physiks reserves the right to make a charge for items returned to the factory under warranty if:
• The fault was due to mis-use
• No fault is found
• Approved packing was not used
Any components replaced by German Physiks at their factory become the property of German Physiks.

16
11. HOW TO CONTACT US
If you wish to get in touch with us, please use the contact information shown below. Please note that
our office hours are from 10.00 a.m. to 5.00 p.m. Monday to Friday, excluding public holidays and that
we cannot respond to enquiries outside of these hours. We recommend that where ever possible you
contact us by email, as this will allow us to give your enquiry more consideration and thus provide a more
detailed reply.
Address
DDD-Manufactur GmbH
Gutenbergstrasse 4
D-63477 Maintal
GERMANY
Telephone
+ 49 6109 502 9823
Fax
+ 49 6109 502 9826
Email
service@german-physiks.com
Web
www.german-physiks.com

17
12. HRS-130 SPECIFICATIONS
Impedance
4 ohms
Frequency Response
29 - 24,000Hz
Power Handling
Nominal
120W
Short term
200W
Amplification required
Minimum 70W/4 ohms
Crossover frequency
220Hz
Crossover slopes
DDD section
12dB/octave electronic & 18dB/octave acoustic
Woofer section
12dB/octave electronic & 18dB/octave acoustic
High frequency adjustment
-2dB, Flat, +2dB or +4dB centred at 8,000Hz
Sensitivity
86.9dB for 1W at 1m
Operating principle
2-way loudspeaker with 360° radiation using the
German Physiks DDD driver
Input connectors
2 sets of binding posts
Drivers
1 x Carbon fibre DDD driver
1 x 10-inch woofer
Dimensions
325mm W x 1,259mm H x 325mm D
12.8" W x 49.6" H x 12.8" D
Weight
34.5kg
75.9lbs
Warranty
5 years
As part of our process of continually improving our products, we reserve the right to change specifications without notice

18
13. WARRANTY REGISTRATION
In order to register your purchase and obtain the full 5-year warranty, please complete the form below
within 30 days of purchase and return it by post together with a copy of the receipt of purchase to:
DDD-Manufactur GmbH
Gutenbergstrasse 4
D-63477 Maintal
GERMANY
Alternatively, you can:
Email scans of this registration form and proof of purchase to us at:
registration@german-physiks.com
Complete the product registration form on the German Physiks web site at:
https://bit.ly/3BytSJM
Title (Mr, Mrs, Dr. etc)
Name
Address
Country
Zip/Post Code
Model
HRS-130
Serial Number
Finish
Date of
Purchase
Where
Purchased
Address
Country
Zip/Post Code
Table of contents
Other German Physiks Speakers manuals

German Physiks
German Physiks Loreley Mk III User manual

German Physiks
German Physiks PQS 402 User manual

German Physiks
German Physiks DDD-Manufactur Ultimate User manual

German Physiks
German Physiks PQS 402 User manual

German Physiks
German Physiks Unicorn Mk II User manual

German Physiks
German Physiks PQS-100 Plus User manual

German Physiks
German Physiks PQS-202 Mk II User manual

German Physiks
German Physiks Limited 11 User manual

German Physiks
German Physiks PQS-202 Mk II User manual

German Physiks
German Physiks PQS 201 Mk II User manual