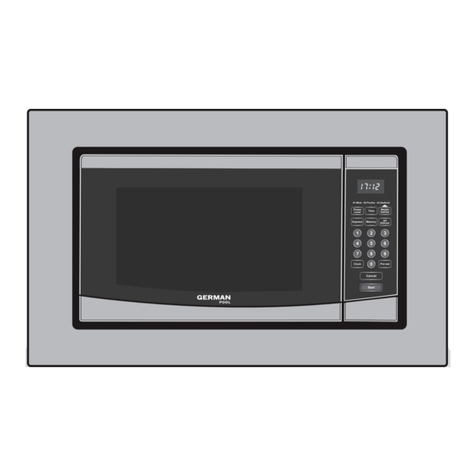
German pool MVH-125M User manual

Please read these instructions and warranty information carefully
before use and keep them handy for future reference.
Online Warranty Registration
Built-in Grill/Microwave Oven MVH-125M
USER MANUAL

P.2 P.3
Table of Contents
Notice Before Use 03
Installation Instructions 05
Utensils Guide 07
Cooking Tips 08
Product Structure 09
Control Panel 10
Operating Instructions 11
Care & Maintenance 16
Technical Specications 17
Warranty Terms & Conditions 35
Notice Before Use
1. Read all instructions before using.
2. Make sure the voltage in your living area corresponds to the one shown on the rating label of the
appliance and the wall socket is properly grounded.
3. To reduce the risk of re in the oven cavity:
a) Do not overcook the food.
b) Remove wire twist -ties from paper or plastic bags before placing bags in the oven.
c) Do not heat oil or fat for deep frying as the temperature of oil cannot be controlled.
d) After use wipe the waveguide cover with a damp cloth, followed by dry cloth to remove any food
splashes and grease. Built -up grease may overheat and begin to cause smoke or catch re.
e) If materials inside the oven should smoke or ignite, keep oven door closed, turn oven off and
disconnect the power supply.
f) When heating food in plastic or paper containers, keep an eye on the oven due to the possibility of ignition.
4. To reduce the risk of explosion and sudden boiling:
a) WARNING: Liquids and other foods must not be heated in sealed container since they are liable to
explode; Baby bottles tted with a screw cap or teat are considered to be sealed containers.
b) Use the wide -mouthed container to cook liquid, and the cooked liquid should not be removed out
immediately. Several moments should be waited before removing. In order to avoid possible hazards
caused by delayed eruptive boiling of liquids.
c) Potatoes, sausage and chestnut should be peeled or pierced before cooking. Eggs in their shell,
whole hard -boiled eggs should not be heated in microwave ovens since they may explode, even after
microwave heating has ended.
d) The contents of feeding bottles and baby food jars are to be stirred or shaken and the temperature is
to be checked before consumption, in order to avoid burns.
5. If the supply cord is damaged, it must be replaced by the manufacturer or its service agent or a
qualied technician in order to avoid a shock hazard.
6. After cooking, the container is very hot. Using gloves to take out the food and avoid steam burns by
directing steam away from the face and hands.
7. Slowly lift the furthest edge of dishes cover and microwave plastic wrap and carefully open popcorn
and oven cooking bags away from the face.
8. To prevent the glass tray from breaking:
a) Let the glass tray cool down before cleaning.
b) Do not place hot foods or utensils on the cold glass tray.
c) Do not place frozen foods or utensils on the hot glass tray.
9. Make sure the utensils do not touch the interior walls during cooking.
10. Only use utensils that are suitable for use in microwave ovens.
11. Do not store food or any other things inside the oven.
12. Do not operate the oven without any liquid or food inside the oven. This would damage the oven.
13. When the appliance is operated in the combination mode, children should only use the oven under
adult supervision due to the temperatures generated.
14. Any accessories not recommended by the manufacturer may cause injuries to persons.
15. Do not use the oven outdoors.

P.4 P.5
Notice Before Use
16. Save these instructions.
17. WARNING: If the door or door seals are damaged or the oven malfunctions, the oven must not be
operated until it has been repaired by a qualied technician;
18. WARNING: It is hazardous for anyone other than a qualied technician to carry out any service or repair
operation that involves the removal of a cover which gives protection against exposure to microwave energy;
19. If smoke is emitted, switch off or unplug the appliance and keep the door closed in order to stie any ames;
20. Microwave heating of beverages can result in delayed eruptive boiling; therefore care must be taken
when handling the container;
21. Do not use harsh abrasive cleaners or sharp metal scrapers to clean the oven door glass since they can
scratch the surface, which may result in shattering of the glass.
22. The lamp of microwave oven is not intended for other purposes.
23. The appliances are not intended to be operated by means of an external timer or separate remote
-control system.
24. This appliance is intended to be used in household and similar applications, such as:
• Staff kitchen areas in shops, ofces and other working environments;
• Farm houses;
• By clients in hotels, motels and other residential environments;
• Bed and breakfast type environments.
25. The microwave oven is intended for heating food and beverages. Drying of food or clothing and heating
of warming pads, slippers, sponges, damp cloth and similar may lead to risk of injury, ignition or re.
26. This appliance can be used by children aged from 8 years and above and persons with reduced physical,
sensory or mental capabilities or lack of experience and knowledge if they have been given supervision or
instruction concerning use of the appliance in a safe way and understand the hazards involved. Children
shall not play with the appliance. Cleaning and user maintenance shall not be made by children unless they
are older than 8 and supervised. Keep the appliance and its cord out of reach of children less than 8 years.
27. This appliance is not intended for use by persons (including children) with reduced physical, sensory or
mental capabilities, or lack of experience and knowledge, unless they have been given supervision or
instruction concerning use of the appliance by a person responsible for their safety.
28. Children should be supervised to ensure that they do not play with the appliance.
29. A steam cleaner is not to be used.
30. The door or the outer surface may get hot when the appliance is operating.
31. WARNING: Accessible parts may become hot during use. Young children should be kept away.
32. During use the appliance becomes hot. Care should be taken to avoid touching heating elements inside
the oven.
33. The surfaces are liable to get hot during use.
CAUTION: HOT SURFACE
Household use only
Installation Instructions
Installation Precautions
1. Keep the microwave oven away from TV, radio or antenna to avoid image interference or noise.
2. The device must be placed in a position where the plug can be inserted.
3. Since the kitchen cabinet’s space may be limited, the microwave oven must be installed as described
below to avoid danger.
Structure Illustration
Note:
1. The thickness of the load-bearing plate must be greater than 1.8 cm, and the minimum installation
height is 85 cm. Do not block the exhaust vents and air inlets of the furniture.
2. If the kitchen cabinet has a decorative door, the decorative door must be opened when the microwave
oven is working.
Unpacking and Inspection
Open the package, please check the following:
1. Whether the appearance of the product shows signs of deformation due to impact or pressure;
2. Whether the connection between the oven door and the operation panel is smooth, and whether the
opening of the door is smooth and exible;
3. Whether the power cord is broken or loose;
4. Check if the following accessories are complete:
1 accessory package (including 4 inset frame xing screws) and 1 user manual.
390
360
595
Exhaust vents
Air inlets
50
≥20
≥15
≥378
330
500
≥550
35
≥505
272
100
72
Dimensions (mm)

P.6 P.7
Installation Instructions
3 Move the product in parallel in the
kitchen cabinet according to the
direction of the arrow in the gure,
and keep it centered.
4 Use the mounting screws to secure
the microwave oven in the cabinet.
1 Put the microwave oven into built-in
cabinet, and push it forward.
PUSH
MOVE
2 Push the microwave oven till to the
end.
Installation Procedures
Utensil Guide
It is strongly recommended that you use the containers which are suitable and safe for microwave cooking.
Generally speaking, the containers which are made of heat-resistant ceramic, glass or plastic are suitable
for microwave cooking. Never use the metal containers for microwave cooking and combination cooking as
spark is likely to occur. You can take the reference of below table.
Material Of Container Microwave Grill Combination Notes
Heat-resistant ceramic О О О Never use the ceramics which are decorated with
metal rim or glazed
Heat-resistant plastic ОX X Can not be used for long time microwave cooking
Heat-resistant glass О О О -
Plastic lm О X X It should not be used when cooking meat or chops
as the over-temperature may do damage to the lm
Grill rack X О О -
Metal container X X X It should not be used in microwave oven. Microwave
can not penetrate through metal.
Lacquer X X X Poor heat-resistant. Can not be used for High-
temperature cooking
Bamboo wood and
paper X X X Poor heat-resistant. Can not be used for High-
temperature cooking

P.8 P.9
Cooking Tips
The following factors may affect the cooking result:
Food Arrangement
Place thicker areas towards outside of dish, the thinner part towards the centre and spread it evenly. Do not
overlap if possible.
Cooking Time Length
Start cooking with a short time setting, evaluate it after it times out and extend it according to the actual
need. Over cooking may result in smoke and burns.
Cooking Food Evenly
Food such as chicken, hamburger or steak should be turned once during cooking.
Depending on the type of food, if applicable, stir it from outside to centre of dish once or twice during
cooking.
Allow Resting Time
After cooking times out, leave the food in the oven for an adequate length of time, this allows it to complete
its cooking cycle and cooling it down in a gradual manner.
Whether the Food is Done
Color and hardness of food help to determine if it is done, these include:
- Steam coming out from all parts of food, not just the edge
- Joints of poultry can be moved easily
- Pork or poultry shows no signs of blood
- Fish is opaque and can be sliced easily with a fork
Browning Dish
When using a browning dish or self-heating container, always place a heat-resistant insulator such as a
porcelain plate under it to prevent damage to the glass tray and roller ring.
Microwave Safe Plastic Wrap
When cooking food with high fat content, do not allow the plastic wrap come into contact with food as it
may melt.
Microwave Safe Plastic Cookware
Some microwave safe plastic cookware might not be suitable for cooking foods with high fat and sugar
content. Also, the preheating time specied in the dish instruction manual must not be exceeded.
Product Structure
1) Door Safety Lock
Microwave oven door
must be properly
closed in order for it to
operate.
2) Oven Window
Allow user to see the
cooking status.
4) Shaft
The glass tray sits on
the axis; the motor
underneath it drives
the glass tray to
rotate.
5) Roller Ring
The glass tray sits on its
wheels; it supports the
glass tray and helps it to
balance when rotating.
3) Glass Tray
The food sits on the glass tray, its rotation
during operation helps to cook food evenly.
CAUTION
- Place the roller ring rst.
- Fit the glass tray onto the shaft and make
sure that it is geared in properly.
6) Waveguide Cover
It is inside the microwave oven,
next to the wall of control panel.
WARNING: Never remove the
waveguide cover.
8) Control Panel
See below in details (the
control panel is subject to
change without prior notice).
7) Grill Rack
Use to place the
roasting food.
2
4
38
6
7
5
1
Micro Power Grill / Combi
Preset/ Defrost/ Clock Pause / Cancel
Instant / Start
Time
Weight
Auto
Cooking
C

P.10 P.11
Micro Power Grill / Combi
Preset/ Defrost/ Clock Pause / Cancel
Instant / Start
Time
Weight
Auto
Cooking
C
Control Panel Operating Instructions
Functions – Common Functions
1. Self-test
After power is turned on, the screen
ashes three times and shows
“1:00”. “ : ” ashes one time per
second, “ ” is lit and a buzz sound
is heard.
2. Clock Setting
Steps Setting
1In standby mode, press and hold the “Preset/Defrost/Clock” button for 3 seconds to enter the clock
setting state. The display shows the clock, where the hour unit is ashing, awaiting input.
2At this time, rotate the dial knob to enter the hour: rotate anticlockwise for 23-22...0 hours; rotate
clockwise for 0-1...23 hours.
3
After setting the hour, press the “Preset/Defrost/Clock” button once again to enter the minute setting,
rotate the dial knob to input the minute. Rotate anticlockwise for 59-58...00 minutes; rotate anticlockwise
for 00, 01...59 minutes.
4
After setting the clock time, press the “Preset/Defrost/Clock” button again to conrm (or let the system
automatically conrm the time set after 60 seconds), and the clock enters the operation state. At this
time, the “ : ” display ashes once per second; the clock error is plus or minus 10 seconds / 24 hours.
3. Functions
On Clock or “:” status:
a) Instant/Start Button: Instant Cooking
Press the button once to start immediately. The preset working time is (microwave high power) 1 minute,
and the working time can be increased based on needs. Press once or rotate the dial knob to increase the
time. Clockwise rotation is to add the time and anticlockwise to reduce it.
0-5 minutes Pressing the "Instant/Start" button or rotating the "Dial Knob" increases the time
by 10 seconds;
5-10 minutes Pressing the "Instant/Start" button or rotating the "Dial Knob" increases the time
by 30 seconds;
10 - 60 minutes Pressing the "Instant/Start" button or rotating the "Dial Knob" increases the time
by 1 minute.
When setting up programs, 2 minutes of inactivity will render the setting invalid and the system goes back
to “:” or current clock mode.
Pressing the Instant/Start button will be valid only in any of the following conditions:
a) Within 2 minutes after the oven door is closed
b) Within 2 minutes after pressing the Pause/Cancel button
c) Within 2 minutes after the end of a cooking session
Otherwise, the function key is locked and pressing it is invalid (meaning pressing this key will not make the
oven operate for 1 minute in high power). Press any other key when the Instant/Start button is locked to
cancel the lock status.
Operation Video
Tutorial
Micro Power Grill / Combi
Preset/ Defrost/ Clock Pause / Cancel
Instant / Start
Time
Weight
Auto
Cooking
C
Micro Power
Preset/Defrost/Clock
Display
Grill/Combi
Pause/Cancel
Instant/Start
Dial Knob
Door Open

P.12 P.13
b) Pause/Cancel Button: Pause and Cancel
While the oven is in operation, press the “Pause/Cancel” button once (or open the oven door) to pause the
work. Press “Pause/Cancel” twice to cancel the program.
At the end of the work, the buzzer sounds three times.
When the press of the button is valid and effective, the buzzer sounds once; when the press of the button is
invalid and ineffective, the buzzer sounds three times.
During the setting process, you can cancel the setting by pressing the “Pause/Cancel” button and return to
the standby state.
c) Micro Power Button: Setting Power
Press “Micro Power” button and the display shows 100P — 80P — 60P — 40P — 20P in a cycle.
100P - High power 100% microwave power. Applicable for quick and thorough cooking. Microwaving is always on.
80P - Medium
High power
80% microwave power. Applicable for medium express cooking. Microwaving is on for every
26 seconds and cut off for 7 seconds.
60P - Medium power 60% microwave power. Applicable for steaming food. Microwaving is on for every 20 seconds
and cut off for 13 seconds.
40P - Medium
Low power
40% microwave power. Applicable for defrosting food Microwaving is on for every 13 seconds
and cut off for 20 seconds.
20P - Low power 20% microwave power. Applicable for keeping warm. Microwaving is on for every 7 seconds
and cut off for 26 seconds.
After selecting power level, rotate the knob to select the desired working time, and press the “Instant/Start”
button to start the selected program. In order to protect the microwave oven, the 100P high power will be
reduced after a continuous period of time of operation. At the end of the work, the buzzer sounded three times.
CAUTION
a. The max time which can be set is 60 minutes.
b. Never operate the oven empty.
c. If you turn the food during operation, press the Instant/Start button once and the preset cooking
procedure will continue.
d. If you intend to remove the food before the preset time, you must press Pause/Cancel button once to
clear the preset procedure to avoid unintended operation of next time use.
e. At the maximum microwave power, the oven will automatically lower the power after a certain time of
cooking to lengthen the service life.
While the microwave is in cooking mode, press “Micro Power” button for the display to show current power
level, release the button to show remaining cooking time. The cooking process will not be interrupted.
When operation is completed, there will be three beep sounds.
Example: To cook at P80 for 10 minutes
Steps Display
1After power-up, the colon ashes. 1:00
2 Select the desired microwave power by pressing Micro Power button consecutively. 80P
3 Set cooking time by turning Dial Knob. 10:00
4Press Instant/Start button to start and LCD will count down to show running time. -
Operating Instructions Operating Instructions
d) Defrost
In the standby mode, press the “Defrost/AutoCooking/Temp/Preset/Clock” button to select the defrosting
function once, the display shows “DEF”, then rotate the knob to set the weight, press the “Instant/Start”
button to start. During the defrosting process, the buzzer three times.
Weight(kg)
0.1 0.2 0.3 0.4 0.5 0.6 0.7 0.8 0.9 1.0 1.12 1.4 1.6 1.8 2.0
Total Time (min)
1:19 2:38 3:57 5:16 6:35 7:54 9:13 10:31 11:50 26:27 31:43 37:01 42:18 47:35 52:52
CAUTION
a. It is necessary to turn over the food during operation to obtain uniform effect.
b. Usually defrosting will need longer time than that of cooking the food.
c. If the food can be cut by knife, the defrosting process can be considered completed.
d. Microwave penetrates around 4cm into most food.
e. Defrosted food should be consumed as soon as possible, it is not advised to put back to fridge and freeze again.
Example: To defrost 0.4kg poultry
Steps Display
1After power-up, the colon ashes. 1:00
2 Press Preset/Defrost/Clock button once to set the food kind. DEF
3 Turn Dial Knob to set the defrost weight. 0.4
4 Start cooking by pressing Instant/Start. -
5
During defrosting 3 beep sound will be heard two times to prompt you turn over the food.
Open the door and turn over the food. Then close the door. Press Instant/start button again
to continue defrosting.
-
e) Multi-sequence Cooking
The maximum time input for each sequence is 60 minutes and 00 seconds. Up to four sequences can be
set. After setting the rst sequence (power and time), press the “Micro Power” button to set the second
sequence. Press the “Instant/Start” button to start the multi-sequence cooking. The rst sequence will be
performed and then the second sequence will be performed and so on, until the last sequence is nished.
Example: You want to cook food with 100P microwave for 3 minutes then 20P for 9 minutes. This is 2-sequence setting.
Steps Display
1 100P microwave for 3 min. -
1.1 Press Micro Power button to select power level. 100P
1.2 Turn Dial Knob to set cooking time. 3:00
2 20P for 9min. -
2.1 Press Micro Power button to select desired power level. 20P
2.2 Turn Dial Knob to set cooking time. 9:00
3 Start cooking by pressing Instant/Start. -
P.14 P.15
Operating Instructions
CAUTION
a. When microwave 100 power cooking is nished, it will begin next operation automatically.
b. Max 4 sequences can be set per time, repeat the steps.
f) Preset Timer
1. In the clock state, such as "8:28", select a program (microwave/hot air/grill mode) and cooking time.
2. Press and hold the “Preset/Defrost/Clock” button for 3 seconds to enter the preset timer function
state. “8” on the left ashes and “28” on the right is static. Rotate the knob to select the hour.
3. Press the “Preset/Defrost/Clock” button again to enter the minute setting. “28” on the right will ash.
The hour unit on the left is static. Rotate the knob to set the minute.
4. After setting the hour and minute, press the “Preset/Defrost/Clock” button to conrm. If there is no
conrmation within 10 seconds, the system automatically cancels the timer setting.
5. After conrming the setting, the display will return to the current clock time and continue to run. When the
preset time (8:28) is reached, the microwave oven will automatically start running the cooking program.
To view the preset working time, press and hold the “Preset/Defrost/Clock” button to display the set
scheduled working time and release “Preset/Defrost/Clock” to return to the current clock time.
After entering the preset timer function, if you want to start cooking immediately, press the “Instant/Start”
button; to cancel the appointment, press the “Pause/Cancel” button.
g) Auto Reminder
1. Every time you press the button and input a valid parameter there is one beep sound.
2. When your preset cooking procedure is nished, the LCD display shows End and three beeps sound will
be heard. If you do not press Pause/Cancel button once or open the door, three beep sounds will be
heard at an interval of 3 minutes.
h) Child Lock Function
Locking - In standby clock mode, press and hold Pause/Cancel button for three seconds. The display shows
icon and there is a beep sound. The microwave oven is locked and cannot operate.
Unlocking – press and Pause/Cancel button for three seconds . There is a beep sound. The indicator light of
the icon is off. The microwave oven is unlocked and the display shows clock.
i) Auto Cooking
The oven has default cooking menu for simple operation. When the LCD ash colon, then turn the Dial Knob
to Auto cooking and LCD will cycle to show A.1-A.2 … A.8.
Choose the appropriate menu according to the food type and weight and strictly observe the directions in
below table, otherwise the cooking effect will be largely inuenced.
Display Kind Method
A.1 Popcorn
Suitable for popping a small bag of corn, which is available in the market weighted 3.0 Oz
or 85g. Popcorn prior to completing, if the popping speed has been decreased to 1 time
per 1-2 seconds you should press Pause/Cancel button to stop the popping process.
A.2 Popcorn Suitable for popping a big bag of corn, which is available in the market weighted 3.5 Oz or
100g.
A.3 Pizza Warm 1 share pizza which is weighted 150g.
A.4 Beverage Heating a cup of 250ml liquid.
A.5 Beverage Heating a cup of 500ml liquid.
A.6 Potato Cooking the potato strips, cut into 5mm width and height, length. Total weight is about 0.45
kg. Place the strips on a large dish and cover the dish with a thin lm to prevent water loss.
A.7 Potato Cook the potato strips which is weighted about 0.65 kg.
A.8 Fish Cook the Fish which is weighted about 0.45 kg.
CAUTION
a. The temperature of food before cooking would be 20-25°C. Higher or lower temperature of the food
before cooking would require increase or decrease of cooking time.
b. The temperature, weight and shape of food will largely inuence the cooking effect. If any deviation
has been found to the factor noted on above menu, you can adjust the cooking time for best result.
Example: To cook 0.65 kg potato
Steps Display
1After power-up, the colon ashes. 1:00
2 Turn the Dial Knob for auto cooking. A.7
3 Press Instant/start to set cooking menu. -
j) Grill/Combination
This function is used for grilling food. Press this button and the LCD display will show G – C.1 – C.2 in a cycle.
GGrill - the heat element will be energized during operation time. Applicable to rolling thin meats or pork,
sausage, chicken wing as good brown color can be obtained.
C.1 Combination of grill and microwave cooking. 30% of time will be microwave output and 70% of time grilling.
C.2Combination of grill and microwave cooking. 55% of time will be microwave output and 45% of time grilling.
CAUTION
In the mode of grill/combi, all of the oven parts, as well as the rack and cooking containers, may become very hot.
Use caution when removing any item from the oven. Use heavy potholders or oven mitts to PREVENT BURNS.
Example: To grill food with C.2 cook menu for 10 minutes
Steps Display
1After power-up, the colon ashes. 1:00
2 Press Grill/Combi button to select desired grill menu. C.2
3 Set cooking time by turning the Dial Knob. 10:00
4 Press Instant/Start to start cooking. -
Operating Instructions

P.16 P.17
Cleaning
CAUTION
The oven should be cleaned regularly and any food deposits should be removed.
WARNING:
1. Remove the power cord from the wall outlet before cleaning. Don't immerse the
appliance in water or other uids when cleaning.
2. Failure to maintain the oven in a clean condition could lead to deterioration of the
surface that could adversely affect the life of the appliance and possibly result in a
hazardous situation.
3. Never use hard detergent, gasoline, abrasive powder or metal brush to clean any
part of the appliance
4. Do not remove the waveguide cover.
5. When the microwave oven has been used for a long time, there may be some
strange odors exist in oven, Following 3 methods can get rid of them:
a. Place several lemon slices in a cup, then heat with high Micro Power for 2-3 min.
b. Place a cup of red tea in oven, then heat with high micro power.
c. Put some orange peel into oven, and then heat them with high Micro Power for 1 minute.
6. Only allow children to use the oven without supervision when adequate instructions have been given so that
the child is able to use the oven in a safe way and understands the hazards of improper use.
Tips for Cleaning
Details for cleaning door seals, cavity and adjacent parts:
Exterior Wipe the enclosure with a dampened soft cloth.
Door
Using a dampened soft cloth, wipe clean the door and window.
Wipe the door seals and adjacent parts to remove any spill or spatter.
Wipe the control panel with a slightly dampened soft cloth.
Interior Walls Wipe clean the cavity with a dampened soft cloth.
Wipe clean the waveguide cover to remove any food splashed.
Glass Tray / Roller Ring / Shaft Wash with mild soap water.
Rinse with clean water and allow drying thoroughly.
Maintenance
Servicing
Please check the following before calling for services.
Place one cup of water (approx.150ml) in a glass measure in the oven and close the door securely. Oven
lamp should go off if the door is closed properly. Let the oven work for 1 min. Check the following:
1. Does the oven lamp light?
2. Does the cooling fan work? (Put your hand over the rear ventilation openings.)
3. Does the glass tray rotate? (The glass tray can rotate clockwise or counter clockwise. This is quite normal.)
4. Is the water inside the oven hot?
If “NO” is the answer to any of the above questions, please check your wall socket and the fuse in your
meter box.
If both the wall socket and the fuse are functioning properly, contact customer service.
Care & Maintenance Care & Maintenance
Servicing Safeguards
Caution: MICROWAVE RADIATION
1. The high voltage capacitor remains charge after disconnection; short the negative terminal of H. V
capacitor to the oven chassis (use a screwdriver) to discharge before touching.
2. During servicing below listed parts are liable to be removed and give access to potentials above250V to earth.
● Magnetron
● High voltage transformer
● High voltage capacitor
● High voltage diode
● High voltage fuse
3. The following conditions may cause undue microwave exposure during servicing.
Improper tting of magnetron;
Improper matching of door interlock, door hinge and door;
Improper tting of switch support;
Door, door seal or enclosure has been damaged.
Correct Disposal of This Product
This marking indicates that this product should not be disposed with other household
wastes throughout the EU. To prevent possible harm to the environment or human health
from uncontrolled waste disposal, recycle it responsibly to promote the sustainable reuse of
material resources. To return your used device, please use the return and collection systems
or contact the retailer where the product was purchased. They can take this product for
environmental safe recycling.
Model MVH-125M
Voltage / Frequency 230 V / 50Hz
Power (Max) 1000 W (Grill)
1400 W (Microwave)
Product Dimensions (H)390 mm (W)595 mm (D)360 mm
Net Weight 15.8 kg
Specications are subject to change without prior notice.
If there is any inconsistency or ambiguity between the English version and the Chinese version, the English
version shall prevail.
Refer to www.germanpool.com for the most up-to-date version of the user manual.
Technical Specications
Cleaning Video
Tutorial

P.18 P.19
目錄 注意事項
1.使用產品前,請仔細閱讀以下說明。
2.確保您居住地區的電壓符合額定標籤上顯示的電壓,並確保牆壁插座正確接地。
3.為防止微波爐內發生火災:
a)不可過度烹煮食物。
b)將紙袋或塑料袋放入微波爐之前,先移除袋子上的繩結。
c)不可加熱食油或脂肪作油炸用途,因為油的溫度無法控制。
d)使用後用濕布擦拭波導口,然後用乾布擦去食物飛濺和油脂。否則油脂可能會過熱並
開始冒煙或着火。
e)如果爐內的食物開始冒煙或點燃,不要打開爐門,須關掉微波爐並斷開電源。
f)在塑料或紙質容器中加熱食物時,請注意爐內有否發生點燃。
4.為防止爆炸和突然沸騰:
a)警告:液體和其他食物不得在密封容器中加熱,因為它們容易爆炸;裝有螺帽或奶嘴
的嬰兒奶瓶也屬於密封容器。
b)烹煮液體須使用寬口容器,並且煮熟後須待涼片刻,不要立即取出,以避免因延遲噴
出的液體沸騰而造成危險。
c)烹煮薯仔、香腸和栗子應先去皮或刺穿。雞蛋不應該連殼及整顆放在微波爐中加熱,
因為它們可能會爆開,即使在微波加熱結束後仍有機會爆開。
d)餵食瓶和嬰兒食品罐的食物應攪拌或搖動,並在食用前檢查溫度,以免燙傷。
5.如果電源線損壞,必須由製造商或其服務代理商或合格的技術人員更換,以避免電擊危險。
6. 加熱後的容器會非常熱。請使用手套取出食物,並避免臉部和手部直接接觸蒸汽,以免灼傷。
7.慢慢抬起餐具蓋和微波爐保鮮膜的最邊緣,小心地將爆米花和煮食袋從面部打開。
8.為防止轉盤破裂︰
a)清潔前先讓轉盤冷卻下來。
b)不要將熱的食物或器具放在冷轉盤上。
c)不要將冷凍食品或器具放在熱轉盤上。
9.烹飪過程中確保器具不要接觸內牆。
10.只能使用適合在微波爐中使用的器具。
11.不要將食物或任何其他東西存放在微波爐內。
12.微波爐內沒有任何液體或食物時,請勿操作微波爐。這會損壞微波爐。
13.當微波爐以組合模式運行時,由於微波爐會產生高溫,兒童只能在成人監督下使用微波爐。
14.使用製造商不推薦的任何配件可能會對使用者造成傷害。
15.不要在戶外使用。
16.保存說明書,以便日後參考。
17.警告:如果門或門密封件損壞或微波爐出現故障,在合格人員修理微波爐之前,不得操作
微波爐。
18.警告:除合格人員以外,任何人不得進行任何涉及拆除微波防護罩的維修工作,以免發生
危險。
注意事項 19
安裝說明 21
適用器皿 23
烹調指南 24
產品結構 25
操作面板 26
操作說明 27
清潔與保養 32
技術規格 34
保用條款 35

P.20 P.21
390
360
595
排風口
進風口
50
≥20
≥15
≥378
330
500
≥550
35
≥505
272
100
72
19.如果發出煙霧,請關掉微波爐或拔下電器插頭,並關閉爐門以熄滅任何火焰。
20.使用微波爐加熱飲料,可能會導致噴發沸騰延遲,因此在處理容器時必須小心。
21.請勿使用研磨性清潔劑或鋒利的金屬刮刀清潔微波爐玻璃門,因為它們會劃傷表面,有可
能會導致玻璃破碎。
22.微波爐燈不能用於其他用途。
23.微波爐不能通過外部計時器或搖控進行操作。
24.本產品適用於家用和類似用途,例如:
●商店、辦公室和其他工作環境中的員工廚房區域;
●農莊;
●酒店、汽車旅館和其他住宅環境的客戶;
●床和早餐的環境。
25.微波爐用於加熱食物和飲料。不可用於烘乾食品或衣物,以及加熱墊子、拖鞋、海綿、或
濕布等,這可能導致受傷、着火或起火的風險。
26.微波爐可供8歲以上的兒童使用,以及身體、感官或精神能力下降或缺乏經驗和知識的
人,他們需要接受有關使用本產品的監督或指導並且了解涉及的危害。8歲以下和無人監
督的兒童不得使用本產品、或進行清潔和維修。將設備及其電源線放在8歲以下兒童接觸
不到的地方。
27.本設備不適合身體、感官或精神能力下降,缺乏經驗和知識的人(包括兒童)使用,除非
他們受到負責人監督或指導。
28.應對兒童進行監督,確保兒童不可玩耍微波爐。
29.不得使用蒸汽清潔器。
30.當設備運行時,門或外表面可能變熱。
31.警告:可接觸部件在使用過程中可能會變熱。幼兒應該遠離。
32.在使用過程中,設備會變熱。應注意避免接觸微波爐內的加熱元件。
33.表面在使用過程中容易變熱。
小心燙傷
僅供家庭使用
注意事項 安裝說明
安裝注意事項
1. 微波爐的位置應遠離電視、收音機或天線,以免圖像干擾或產生噪音。
2. 必須將設備放置在可以插入插頭的位置。
3. 由於廚櫃空間有限,必須按照下面的說明安裝微波爐,以避免危險。
結構示意圖
注意:
1. 承重板厚度必須大於18毫米,最小安裝高度為85厘米,不要堵住傢俱的排風口及進風口。
2. 如廚櫃有一個裝飾性門,微波爐工作時裝飾門必須打開。
開箱檢查
打開包裝,請對以下內容進行檢查︰
1. 產品外觀是否有因撞擊或重壓而變形的跡象;
2. 爐門與操作面板對接是否平整,開門是否順暢靈活;
3. 電源線是否破損鬆脫;
4. 檢查如下配件是否齊全:
包裝附件1個(內含嵌入框固定螺釘4個)、說明書1份。
單位(mm)

P.22 P.23
安裝說明 適用器皿
安裝步驟 強烈建議使用適合微波爐烹飪的容器。一般而言,由耐熱陶瓷、玻璃或塑料製成的容器適用於微波
烹調。切勿使用金屬容器進行微波烹調和組合烹調,因為可能會產生火花。您可以參考下表。
器皿 微波烹調 燒烤烹調 組合烹調 備註
耐熱陶瓷器 О О О 切勿使用裝飾有金屬邊框或玻璃的陶瓷。
耐熱塑料 О X X 不能長時間用於微波爐烹飪。
耐熱玻璃 О О О -
保鮮膜 О X X 烹飪肉類或排骨時不應使用,因為過熱可
能會損壞保鮮膜。
烤架 X О О -
金屬容器 X X X 它不應該用在微波爐中,微波不能穿透
金屬。
漆器 X X X 耐熱性差,不能用於高溫烹飪。
竹木和紙 X X X 耐熱性差,不能用於高溫烹飪。
3. 按圖中箭頭方向將產品在廚櫃中平
行移動,保持居中。
4. 使用安裝螺釘把微波爐固定在廚櫃
內。
1. 將微波爐平放於嵌入式廚櫃中,向
前推動。
前推
移動
2. 將微波爐推到廚櫃中最入位置,直
至推不動為止。

P.24 P.25
烹調指南 產品結構
以下因素可能會影響烹飪結果:
食物的放置
將較厚的部分放在盤子的外面,較薄的部分朝向中心並均勻地展開。盡可能請勿重疊放置食物。
烹調的時長
使用微波爐首先設置一段短時間,在完成後進行評估,並根據實際需要加長時間。過度烹飪可能導
致煙霧和灼傷。
烹調的均勻度
烹飪過程中,雞肉、漢堡或牛排等食物應翻轉一次。根據食物的類型,如果適用,在烹飪過程中將
其從外至內攪拌一至兩次。
擱置的時間
烹飪完成後,讓食物留在微波爐中足夠長的時間,這樣可以完成烹飪週期並讓食物逐漸冷卻。
食物是否煮好
可根據食物的顏色和硬度確定是否煮好,包括:
-蒸汽從食物的所有部分流出,而不僅僅是邊緣。
-家禽的關節可以很容易地移動。
-豬肉或家禽沒有血跡。
-魚是不透明的,可以用叉子輕鬆切片。
烤盤
使用烘烤盤或自加熱容器時,請在其下方放置耐熱絕緣體,如瓷盤,以防止損壞轉盤和轉盤支承。
微波爐安全保鮮膜
烹飪高脂肪食物時,不要讓保鮮膜與食物接觸,因為食物保鮮膜會溶化。
微波爐安全塑料炊具
一些微波爐安全塑料炊具可能不適合烹飪高脂肪和含糖量的食物。此外,不得超過說明手冊中指定
的預熱時間。
1.爐門安全聯鎖
開關
微波爐門必須正確
關閉才能運行。
2.視屏窗
查看烹飪狀態。
4.轉軸
玻璃轉盤位於轉軸
上,它下面的摩打
驅動轉盤旋轉。
5.轉盤支承
玻璃轉盤放在轉盤支承
的輪子上,它支撐轉盤
並在旋轉時幫助轉盤
平衡。
3.玻璃轉盤
食物放在轉盤上,轉盤旋轉有助於均勻烹煮
食物。
小心
- 首先放置轉盤支承。
- 將轉盤安裝到轉軸上,確保轉盤正確嚙合。
6.波導口
它位於微波爐內,靠近操
作面板內壁。
警告:切勿拆下波導口。
8.操作面板
詳見下文(操作面板如有
更改,恕不另行通知)。
7.烤架
用於放置烘烤食物。
2
4
38
6
7
5
1
Micro Power Grill / Combi
Preset/ Defrost/ Clock Pause / Cancel
Instant / Start
Time
Weight
Auto
Cooking
C

P.26 P.27
操作面板 操作說明
Micro Power Grill / Combi
Preset/ Defrost/ Clock Pause / Cancel
Instant / Start
Time
Weight
Auto
Cooking
C
微波
預約/解凍/時鐘
顯示屏
燒烤/組合
停止/取消
開始
控制旋鈕
開門按鍵
功能介紹-常用功能介紹
一、自檢
接通電源,螢幕全部顯示閃動3次
後,為預設顯示時鐘1:00,“:”
閃爍,1秒/次,“ ”點亮,(自
檢後蜂鳴器鳴叫一聲)。
二、時鐘設置
步驟 設置
1在待機狀態下,長按“預約/解凍/時鐘”鍵3秒鐘,進入時鐘設置狀態,此時顯示屏顯示
時鐘,其中小時位閃動。
2此時,旋轉控制旋鈕,輸入小時︰逆時針旋轉,顯示屏循環顯示23,22…0小時;順時針
旋轉,顯示屏循環顯示0,1…23小時。
3
設置好小時後,再按“預約/解凍/時鐘”鍵一次,進入分鐘設置,旋轉“控制旋鈕”,
輸入分鐘︰逆時針旋轉,顯示屏循環顯示59,58…00分鐘;順時針旋轉,顯示屏循環顯
示00,01…59分鐘。
4
設置好時鐘時間後,最後再按一次“預約/解凍/時鐘”鍵進行確認(或延時60秒後自動確
認剛才所設時間),時鐘進入運行狀態。此時“:”閃動顯示,每秒1次,時鐘誤差正負
10秒/24小時。
三、功能
在時鐘或“:”閃爍狀態下︰
a)開始鍵:快速啟動烹調
按該鍵一次為即時開始,預設工作時間為(微波高火)1分鐘,並可根據需要增加工作時間,按一
次為增加時間,也可旋轉控制旋鈕來實現,順時針旋轉為增加,逆時針旋轉為減少。
0-5分鐘內 每按一次“開始”鍵或旋轉“控制旋鈕”可增加10秒;
5-10分鐘內 每按一次“開始”鍵或旋轉“控制旋鈕”可增加30秒;
10-60分鐘內 每按一次“開始”鍵或旋轉“控制旋鈕”為增加1分鐘。
若在設置功能程式過程中,相隔2分鐘未繼續輸入程式則自動重定,並恢復到當前“:”或當前的
時鐘時間狀態。
“開始”鍵,只有在以下三種條件中任一情況下才是有效的:
a)關上爐門2分鐘之內
b)按“停止/取消”鍵後2分鐘之內
c)某一烹調工作完成之後2分鐘之內
否則,此功能鍵被鎖住,按鍵無效(直接按此鍵不能以微波高火1分鐘工作),若鎖定後按其他任
何按鍵,即可解除“開始”鍵鎖定模式。
Micro Power Grill / Combi
Preset/ Defrost/ Clock Pause / Cancel
Instant / Start
Time
Weight
Auto
Cooking
C
觀看操作視頻

P.28 P.29
操作說明 操作說明
b)停止/取消鍵:停止/取消
在工作過程中,按“停止/取消”鍵一次(或將爐門打開)為暫停工作,按“停止/取消”兩次為取消
程式。
工作結束,蜂鳴器響三聲。
按鍵有效,響一聲;按鍵無效,響三聲。
在設置過程中,可按“停止/取消”鍵取消,回到待機狀態。
c)微波鍵:微波火力設置
按“微波”鍵,依次顯示100P-80P-60P-40P-20P-100P循環。
100P:微波高火 100%微波,適用於快速和徹底煮食。微波持續。
80P︰微波中火 80%微波,適用於快速煮食。微波通26秒/斷7秒,循環。
60P:微波中火 60%微波,適用於蒸熱食物。微波通20秒/斷13秒,循環。
40P︰微波中低火 40%微波,適用於解凍食物。微波通13秒/斷20秒,循環。
20P:微波低火 20%微波,適用於保溫食物。微波通7秒/斷26秒,循環。
選擇微波功率後,旋轉“控制旋鈕”選擇所需的烹調時間,然後按“開始”開始烹調。為了保護微
波爐,經過一段長時間連續操作後,100P的高功率將會降低。在工作結束時,蜂鳴器響起三次。
小心
a.可設置的最長時間為60分鐘。
b.切勿將微波爐空轉。
c.如果在操作過程中轉動食物,請按一下“開始”鍵,預設烹飪程序將繼續。
d.如果您打算在預設時間之前取出食物,則必須按一次“停止/取消”鍵以清除預設程序,以避
免下次使用時意外操作。
e.在最高火的微波功率下,微波爐會在一定的烹飪時間後自動降低功率,以延長使用壽命。
在烹調狀態時,按下“微波”鍵,即顯示當前進行的烹調火力,鬆開後將顯示剩餘烹調時間,而
不影響操作。
工作結束,蜂鳴器響三聲。
例子︰以80P火力烹調10分鐘
步驟 顯示
1開機後,“︰”閃爍。 1:00
2連續按“微波”鍵選擇所需的微波功率。 80P
3通過旋轉“控制旋鈕”,設置烹飪時間。 10:00
4 按“開始”開始,顯示屏將倒計時顯示運行時間。 -
d)解凍功能
在待機狀態,按“預約/解凍/時鐘”鍵一次選擇解凍功能,顯示為“DEF”,然後旋轉“控制
旋鈕”設定重量,按“開始”鍵啟動,解凍過程中,蜂鳴器響“嗶嗶”三次,提示翻轉。
重量(kg)
0.1 0.2 0.3 0.4 0.5 0.6 0.7 0.8 0.9 1.0 1.12 1.4 1.6 1.8 2.0
總時間(min)
1:19 2:38 3:57 5:16 6:35 7:54 9:13 10:31 11:50 26:27 31:43 37:01 42:18 47:35 52:52
小心
a.在操作過程中必須翻轉食物以獲得均勻的效果。
b.通常解凍比烹飪食物需要更長的時間。
c.如果用刀可以切開食物,代表解凍過程已完成。
d.微波穿透大部分食物約4厘米。
e.解凍後的食物應盡快食用,不建議放回冰箱再次冷凍。
例子︰解凍0.4公斤雪藏家禽
步驟 顯示
1開機後,“︰”閃爍。 1:00
2按“預約/解凍/時鐘”鍵一次,設置食物種類。 DEF
3旋轉“控制旋鈕”設置解凍重量。 0.4
4 按“開始”開始解凍。 -
5在解凍期間,將聽到三次“嗶嗶”聲,提示您翻轉食物。打開門,把食物翻
過來,然後關上門,再次按“開始”繼續解凍。 -
e)分段(組合)功能
每一次(或段)有效的最長時間輸入為60分鐘00秒,一共可輸入最多為四次(段)有效操作。在設定
好第一段的火力、時間後,先不按“開始”鍵啟動,接著按“微波”鍵,設定第二段的火力、
時間,再按“開始”鍵,即以設定的程式分段運行,工作時先執行第一段程式,時間逐秒遞減
至“0”後,跳到第二程式繼續運行,如此類推,直至最後一段運行完畢,整個運行程序結束。
舉例:設置2段分段,第一段以100P運行3分鐘,第二段以20P運行9分鐘。
步驟 顯示
1 設置第一段以100P運行3分鐘。 -
1.1 按“微波”設定第一段火力為100P。 100P
1.2 旋轉“控制旋鈕”,設定時間為3分鐘。 3:00
2 設置第二段以20P運行9分鐘。 -
2.1 按“微波”設定第二段火力為20P。 20P
2.2 旋轉“控制旋鈕”,設定時間為9分鐘。 9:00
3 按“開始”鍵,開始運行。 倒計時

P.30 P.31
操作說明
小心
a.當微波100P功率烹飪完成後,它將自動開始下一段操作。
b.每次最多可設置4個分段,重複這些步驟。
f)預約啟動功能操作
1. 在時鐘狀態下,如“8:28”,按正常操作輸入程式(僅微波/熱風/燒烤模式)及烹調時間。
2. 按住“預約/解凍/時鐘”鍵3秒,即進入預約功能設置狀態,“︰”左邊“8”閃動,“:”右
邊的“28”靜止顯示,旋轉“控制旋鈕”選擇小時。
3. 再按“預約/解凍/時鐘”鍵,進入分鐘設置,“:”右邊的“28”閃動,“:”左邊已設定好
的小時會靜止顯示,旋轉“控制旋鈕”選擇分鐘。
4. 設定好預約的時、分後,按“預約/解凍/時鐘”鍵進行確認,即進入預置功能狀態。如10秒內
沒有確認,系統自動預設取消預約。
5. 確認設置完成後,顯示器回復當前時鐘時間,繼續運行。當到達預置時間(8:28),微波爐會
自動運行烹調程式。
如欲查看預置工作時間,按住“預約/解凍/時鐘”鍵,顯示設定的預約工作時間,鬆開“預約/解
凍/時鐘”,即回復到當前時鐘時間。
進入預約功能後,若想立即開始烹調工作,可按“開始”鍵;若要取消預約,則按“停止/取消”鍵。
g)自動提示
1. 每一次輸入有效操作後應有“嗶”一聲蜂鳴響聲提示。
2. 每個程式工作完畢,應有三聲“嗶”蜂鳴響聲提示,每聲“嗶”為1秒鐘,共3秒,並且顯示
屏上顯示為“END”狀態,若不按“停止/取消”鍵或不打開門,每隔3分鐘蜂鳴響三次(每
秒/1次),直至按“停止/取消”鍵或把門打開後顯示時鐘時間。
h)童鎖功能設定
童鎖功能:在待機時鐘狀態下,按下“停止/取消”鍵3秒。此時,蜂鳴聲響“嗶”一聲,顯示屏
顯示 亮起,童鎖被鎖上,微波爐便不能操作。
解除童鎖功能:按下“停止/取消”鍵3秒,蜂鳴聲響“嗶”聲音,童鎖被解開, 不亮,顯示屏
顯示待機時鐘。
i)自動烹調
微波爐具有默認烹飪菜單,操作簡單。當顯示屏“︰”閃爍時,逆時針轉動“控制旋鈕”,顯示
屏將循環顯示A.1-A.2...A.8。
根據食物種類和重量選擇合適的菜單,嚴格遵守下表中的說明,否則烹飪效果會受到很大影響。
顯示 食物種類 做法
A.1 爆谷 適用於一小袋玉米(3.0盎司或85克)。爆谷在完成之前,如果彈出速度已經
降低到每1-2秒一次,你應該按下“停止/取消”按鈕來停止彈出過程。
A.2 爆谷 適用於一大袋玉米(3.5盎司或100克)。
A.3 薄餅 加熱一份重150克的披薩。
A.4 飲料 加熱一杯250毫升飲料。
A.5 飲料 加熱一杯500毫升飲料。
A.6 薯仔 烹調薯條,切成5毫米寬度、高度、長度。總重量約為0.45公斤。將薯條放
在一個大盤子上,用保鮮膜蓋住盤子以防止水分流失。
A.7 薯仔 烹調重約0.65公斤的薯條。
A.8 魚 烹調重約0.45公斤的魚。
小心
a.烹飪前的食物溫度為20-25℃。需要按照烹飪前食物的溫度高低,增加或減少烹飪時間。
b.食物的溫度、重量和形狀將在很大程度上影響烹飪效果。如果發現上述烹調指南中註明的
因素有任何偏差,您可以調整烹飪時間以獲得最佳效果。
例子︰烹調重約0.65千克的薯仔
步驟 顯示
1 開機後,“︰”閃爍。 1:00
2 逆時針轉動“控制旋鈕”。 A.7
3 按“開始”設置烹調模式。 -
j)燒烤/組合
此功能用於燒烤食物。按此按鈕,顯示屏將循環顯示G–C.1–C.2–G。
G燒烤時,加熱元件將在運行期間通電。適用於製作薄肉或豬扒、香腸、雞翅等。
C.1 燒烤和微波煮食的組合,30%時間用微波,70%時間燒烤。
C.2 燒烤和微波煮食的組合,55%時間用微波,45%時間燒烤。
小心
在燒烤/組合模式中,所有微波爐部件以及烤架和烹飪容器可能變得非常熱。從微波爐中取出
任何物品時要小心。請使用厚的隔熱墊或烤箱手套來預防燙傷。
例子︰用C.2菜單燒烤食物10分鐘
步驟 顯示
1 開機後,“︰”閃爍。 1:00
2 按“燒烤/組合”鍵選擇燒烤菜單。 C.2
3 轉動“控制旋鈕”設置燒烤時間。 10:00
4 按“開始”開始烹調。 -
操作說明

P.32 P.33
清潔與保養清潔與保養
清潔
小心
應定期清潔微波爐,並清除任何食物沉積物。
警告:
1. 清潔前,從牆壁插座上拔下電源線。清潔時,請勿將本產品浸入水中或其
他液體中。
2. 如果未將微波爐保持清潔,可能會導致表面老化,對產品的使用壽命產生
不良影響,並可能導致危險情況。
3. 切勿使用硬質清潔劑、汽油、研磨粉或金屬刷清潔設備的任何部件。
4. 不要拆下波導口。
5. 當微波爐使用很長時間後,爐內可能會有一些奇怪的氣味,以下3種方法
可以辟除異味:
a.將幾片檸檬放入杯中,然後用高火加熱2-3分鐘。
b.將一杯紅茶放入微波爐,然後用高火加熱。
c.將一些橙皮放入微波爐,然後用高火加熱1分鐘。
6. 只有得到充分和適當的指示後,兒童才能在沒有監督的情況下使用微波爐,以便兒童能夠以
安全的方式使用微波爐,並了解不當使用的危險。
清潔提示
如何清潔爐門、內腔及相鄰零件:
外面 用蘸濕的軟布擦拭外面。
爐門 擦拭門密封件和相鄰部件,以清除任何溢出物或飛濺物。
用稍微蘸濕的軟布擦拭操作面板。
內腔 用蘸濕的軟布擦拭內腔。
擦拭波導口以清除飛濺的食物。
轉盤/轉盤支承/轉軸 用溫和的肥皂水清洗。
用清水沖洗並徹底晾乾。
維護
維修服務
請在致電服務之前檢查以下內容。
將一杯水(約150毫升)放入微波爐中,然後將門關好。如果門正確關閉,微波爐燈應該熄滅。讓
微波爐工作1分鐘。檢查︰
1.微波爐燈是否亮着?
2.冷卻風扇是否工作?(將手放在後部通風口上。)
3.轉盤是否旋轉?(轉盤可以順時針或逆時針旋轉,屬於正常。)
4.微波爐中的水是熱的嗎?
如果上述任何問題的答案是“否”,請檢查您的牆壁插座和儀表箱中的保險絲。
如果牆壁插座和保險絲都正常工作,請與服務中心聯繫。
維修保障
注意:微波輻射
1. 斷開後高壓電容器保持充電狀態,將H.V電容器的負極端子短接到微波爐底盤(使用螺絲刀),
然後再觸摸。
2. 在維修期間,下列部件可能會被拆除,並且可以接觸到高於地電壓250V的電位。
●磁控管
●高壓變壓器
●高壓電容器
●高壓二極管
●高壓熔斷器
3. 以下情況可能會導致維修期間過度的微波暴露︰
磁控管安裝不當;
門聯鎖、門鉸鍊和門並不匹配;
開關支架安裝不當;
門、門封或外殼已損壞。
產品的正常處置
此標記表明產品在歐盟不應與其他家庭廢物一起處理。為防止廢物處理可能
對環境或人類健康造成危害,請負責任地回收利用,以促進物質資源的可持
續再利用。要退回舊設備,請使用退貨和收集系統或聯繫購買產品的零售
商。他們可以將此產品用於環境安全回收。
觀看清潔視頻

P.34
保用條款
此保用提供德國寶產品之機件在正常使用下壹年保用
(自購買日起計算)。
Warranty Terms & Conditions
Under normal operations, the product will gurantee a 1-year full
warranty provided by German Pool (effective from the date of
purchase).
1. Customer who fails to present original purchase invoice will
not beeligible for free warranty service.
2. Customer should always follow the operating
instructions. Thiswarrantydoes not apply to:
- labour costs for on-site installation, check-up, repair,
replacement of parts and other transportation costs;
- damages caused by accidents of any kind (including
material transfer and others);
- operating failures resulting from applying incorrect voltage,
improperusage, and unauthorized installations
or repairs.
3. Thiswarranty is invalid if:
- the purchase invoice is modified by an unauthorized party;
- the product is used for any commercial or industrial purposes;
- the product is repaired or modifiedby unauthorized
personnel, or unauthorizedparts are installed;
- the serial number is modified, damagedor removed from
the product.
4. German Poolwill, at its discretion, repair or replace any
defective part.
5. Thiswarranty will be void if there is any transfer of
ownership from the original purchaser.
1. 未能出示購買發票正本者,將不獲免費維修服務。
2. 用戶應依照說明書的指示操作。本保用並不包括﹕
- 上門安裝、檢驗、維修或更換零件之人工以及
一切運輸費用﹔
- 因天然與人為意外造成的損壞 (包括運輸及其他)﹔
- 電源接合不當、不依說明書而錯誤或疏忽使用本
機所引致之損壞。
3. 於下列情況下,用戶之保用資格將被取消﹕
- 購買發票有任何非認可之刪改;
- 產品被用作商業或工業用途;
- 產品經非認可之技術人員改裝或加裝任何配件;
- 機身編號被擅自塗改、破壞或刪除。
4. 總代理有權選擇維修或更換配件或其損壞部份。
5. 產品一經被轉讓,其保用即被視作無效。
機身號碼 Serial No. :
購買商號 Purchased From :
發票號碼 Invoice No. :
購買日期 Purchase Date :
型號 Model No. :
另請填妥以下表格並與正本發票一併保存,以便維修時核對資料。用戶提供之所有資料必須正確無誤,否則免費保用將會無效。
Please fill out the form below. This information and the original purchaseinvoice will be required for anyrepairs. Warranty will be
invalidated if information provided is found to be inaccurate.
此保用只適用於香港及澳門 This warranty is valid only in Hong Kong and Macau
客戶服務及維修中心 Customer Service & Repair Centre
Hong Kong
10/F, Kowloon Godown
1-3 Kai Hing Road, Kowloon Bay,
Kowloon, Hong Kong
Tel : +852 2333 6249
Fax : +852 2356 9798
Email : repairs@germanpool.com
Macau
3/F, Edificio Industrial Pou Fung,
145 Rua de Francisco Xavier Pereira,
Macau
Tel : +853 2875 2699
Fax : +853 2875 2661
香港
九龍灣啟興道1-3號
九龍貨倉10樓
電話:+852 2333 6249
傳真:+852 2356 9798
電郵:repairs@germanpool.com
澳門
澳門俾利喇街145號
寶豐工業大廈3樓
電話:+853 2875 2699
傳真:+853 2875 2661
*
貴戶須在購機十天內,以下列其中一種方式向本公司
登記資料,保用手續方正式生效﹕
1)
填妥本公司網頁內之
保用登記表格
www.germanpool.com/
warranty
2)
填妥保用登記卡,
郵寄至本公司。
* This warrantyis not valid until customer registration information
is receivedby ourService Centre within10 days ofpurchase
via one of the following means:
1) Visit our website and register
online:
www.germanpool.com/
warranty
2)
Complete all the fields on the
attachedWarranty Card and
mail it back to our Customer
Service Centre.
MVH-125M
技術規格
型號 MVH-125M
電壓/ 頻率 230 V / 50Hz
功率(最大) 1000W (燒烤)
1400W (微波)
機身尺寸 (H)390mm (W)595mm (D)360mm
淨重 15.8 kg
產品規格及設計如有變更,恕不另行通知。
中英文版本如有出入,一概以英文版為準。
本產品使用說明書以www.germanpool.com網上版為最新版本。

G e rman Pool (Hong Kong) Limi t e d
www.germanpool.com
Hong Kong
Room 113. Newport Centre Phase II. 116 Ma Tau
Kok Road. Tokwawan. Kowloon. Hong Kong.
Tel: +852 2773 2888
Fax:+852 2765 8215
China
Tel:+86 757 2980 8308
Fax:+86 757 2980 8318
8th, Xinxiang Road, Wusha Industrial Park,
Daliang, Shunde, Foshan, Guangdong
3/F, Edificio Industrial Pou Fung,
145 Rua de Francisco Xavier Pereira, Macau
Tel:+853 2875 2699
Fax:+853 2875 2661
Macau
© All rights reserved. Copying, reproducing or using the contents of this manual is not allowed without prior authorization from German Pool, violators will be prosecuted.
HONG KONG TOP BRAND TEN YEAR
ACHIEVEMENT AWARD
20152005 2008 2007 2008 2007 2015 2014 2015 2015
MVH-125M-M-20(2)
Table of contents
Other German pool Microwave Oven manuals

German pool
German pool MAG-280 User manual

German pool
German pool SGM-T4228 User manual

German pool
German pool MVG-1712 User manual

German pool
German pool SGM-2519 User manual

German pool
German pool WP700ASJ17Q-2B User manual

German pool
German pool SGM-3620 User manual

German pool
German pool MVG-3014 User manual
Popular Microwave Oven manuals by other brands

Schaub Lorenz
Schaub Lorenz MW823GR instruction manual

Magic Chef
Magic Chef MCD1310ST user manual

Glen Dimplex Home Appliances
Glen Dimplex Home Appliances UIMW600 user manual

Magic Chef
Magic Chef C1010 Instruction manual and cooking guide

Magic Chef
Magic Chef MCD991R operating instructions

ACP
ACP Amana HDC18SD2 Quick start & reference guide