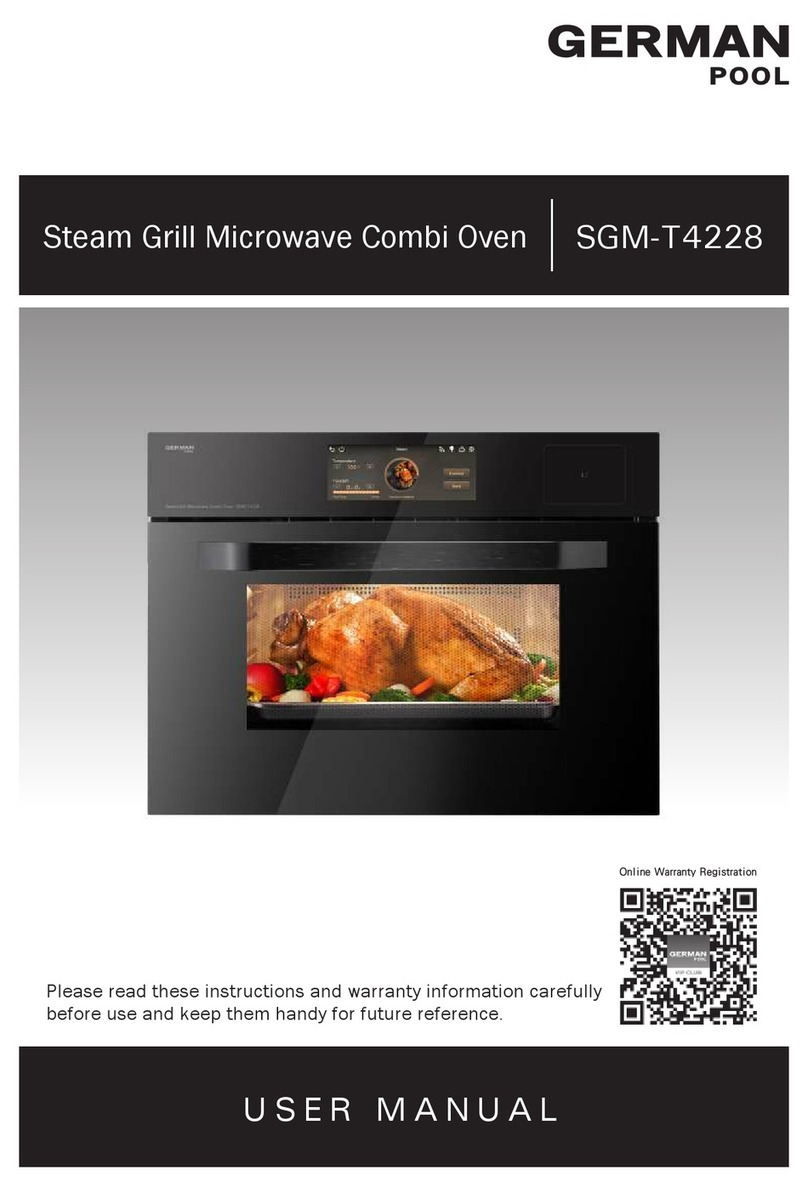
German pool SGM-3620 User manual

2-in-1 Free Standing Steam Oven GPU-6SSL
GPNB-6SSL
Please read these instructions and warranty information carefully
before use and keep them handy for future reference.
Online Warranty Registration
USER MANUAL
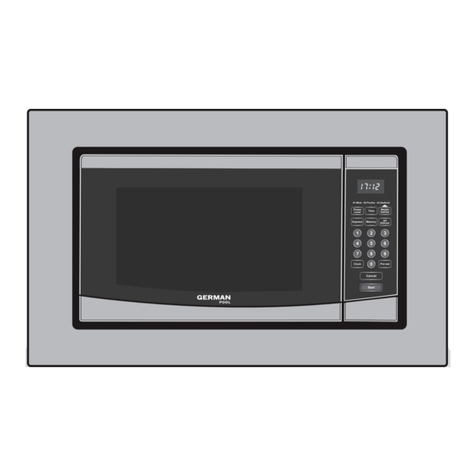
SGM-3620Built-in Steam & Grill Microwave Oven

P.2 P.3
Contents
Safety Instructions 3
Product Structure 6
Installation Instructions 7
Operating Instructions 10
Cleaning & Maintenance 25
Troubleshooting 26
Technical Specication 27
Warranty Terms & Conditions 51
Safety Instructions
1. Please read all instructions carefully before using this product, in order to avoid property
damage and personal injury due to improper use.
2. This product must be installed and repaired by manufacturer’s authorized after-sales per-
sonnel only; if consumers entrust personnel not designated by the manufacturer, or if con-
sumers perform the above operations on their own, there may be a risk of personal injury or
property loss.
3. If the provisions of this manual conflict with the mandatory provisions of the law, the legal
provisions shall prevail.
DANGER!
1. DO NOT use metal cooking utensils when operating the product in Microwave mode, other-
wise it may cause fire or explosion.
2. DO NOT pierce the oven door mesh, otherwise may cause microwave leakage.
3. If oven door or door sealing is damaged, stop using the product immediately; and the prod-
uct must not be operated until it has been repaired by a qualified technician.
4. DO NOT run the microwave function when there is no food in the oven; without food or liquid
in the oven to absorb the microwave energy, the microwave energy will reflect continuously
inside the oven cavity, and will cause the cavity to overheat and malfunction.
5. The microwave oven is intended for heating food and beverages. Drying of food or clothing
and heating of warming pads, slippers, sponges, damp cloth and similar items may lead to
risk of injury, ignition or fire.
6. DO NOT use microwave to heat chemical reagents or other non-food objects, to avoid caus-
ing microwave leakage.
7. This product will generate heat when in use, DO NOT touch the heating elements inside the
oven cavity. When retrieving food container from the oven, user should wear heat-resistant
gloves or oven mittens to avoid getting burnt.
8. Keep children away from the product when it is in use, as accessible parts may become hot
to the touch.
9. Disconnect the product from the power source before cleaning, maintenance and reinstalla-
tion to avoid electric shock.
10.To avoid fire hazard, DO NOT use this product for storing items.
11. DO NOT place this product near gas pipes. Gas pipes installed in the surrounding vicinity of
this product must have sufficient safety insulation (such as metal gag pipe sleeve) to ensure
the gas pipes will not be affected by the high temperature emitted by this product.

P.4 P.5
Safety Instructions
WARNING!
1. DO NOT place objects near the heat vent of this product in order to avoid accidents.
2. DO NOT let persons (including children) with reduced physical, sensory or mental capabil-
ities, or lack of experience and knowledge use this product without supervision; DO NOT
place this product where young children can reach, in order to avoid burns, electric shock or
other accidents; when product is operated in Combination Mode, the oven will become very
hot, and children must not be allowed to use it without adult supervision.
3. When product is in use, and after cooking when the oven door is still hot, DO NOT pour
water on the oven door as it may cause the glass to break.
4. Use a separate power outlet for this product; sharing the outlet with other appliances may
lead to overheating and fire hazard.
5. If product malfunctions during usage, stop using product immediately, and proceed to
“TROUBLESHOOTING” section.
6. When microwaving baby food, make sure to shake or stir the contents of feeding bottles and
baby food jars, and check the temperature before consumption in order to avoid scalds.
7. DO NOT directly heat food or liquid in sealed container to avoid explosion. (eg. canned food,
sealed glass jar, etc.)
8. When microwaving food with skin, must first puncture the skin to avoid it from exploding.
(eg. potato, sausage, etc)
9. DO NOT microwave eggs in their shell to avoid explosion.
10.Keep constant watch when microwaving foods wrapped in plastic or paper, as the wrapping
may catch fire.
11. If smoke is detected, switch off or unplug the appliance immediately, and keep the oven
door closed in order to stifle any flames.
12.When microwaving liquids, the cooked liquid should not be removed out immediately. Let it
sit for a moment before removing in order to avoid possible hazards caused by the delayed
eruptive boiling of liquids.
13.When operating in modes with steam, DO NOT stand near the heat vent; when opening the
oven door, be cautious of hot steam in order to avoid steam burns.
14.Power connection to this product must be equipped with an air switch or leakage protection
switch that meets the electrical parameters marked on the product nameplate before it can
be connected and used.
15.DO NOT put heavy objects on top of the power cord to avoid accidents.
16.Please keep the product and power cord away from heat-generating objects, flammable and
explosive materials, to avoid product damage or fire or explosion hazards.
17. If the power cord is damaged, in order to avoid danger, it must be replaced by professionals
from the manufacturer's maintenance department or similar qualified technicians.
Safety Instructions
18.Please use suitable steaming trays and containers to avoid spilling oil droplets and causing
a fire.
19.Please place the cooking container on the shelf correctly, DO NOT place directly on the bot-
tom of the oven cavity to avoid accidents.
20.The oven door surface behind the door handle will get hot, be careful to avoid getting burnt.
21. After cooking, the temperature around the oven cavity is still hot, please wait for the cavity
to cool down before cleaning to avoid getting burnt.
ATTENTION:
1. Do not use the product door to hang heavy objects, or lean against or sit on the product
door to avoid damaging the product.
2. Please do not touch the product or plug/unplug the power plug with wet hands, or when
feet are wet or barefooted to avoid electric shock.
3. DO NOT use harsh abrasive cleaners or sharp metal scrapers to clean the oven door glass,
as it may scratch the surface and result in shattering of the glass.
4. This product must be placed on a sturdy and level surface. DO NOT install the product under
plastic lighting equipment or plastic rack to avoid deformation or explosion hazard.
5. Handle the product with care, and lift from the bottom of the product when transporting and
placing it; DO NOT use the oven door handle as a supporting point for transport to avoid
damage due to excessive force.
6. DO NOT use steam cleaner to clean this product.
7. To prevent possible hazards, the control panel of the product can only be connected to the
specified heating element.
P.6 P.7
ATTENTION:
• Do not place food directly on glass ceramic surface.
• The product will only operate after oven door is properly shut.
Product Structure
1. Control Panel
2. Metal Rack
3. Glass Tray
4. Door Safety Lock
5. Glass Door
6. Handle
7. Water Tank
8. Glass Ceramic
1
2
3
4
5
6
7
8
Installation Instructions
INSTALLATION REQUIREMENTS
1. In order to ensure that the product can be used safely for a long time, the product must be
installed on a perfectly sturdy surface, and the electronic components must be isolated to
prevent the possibility of contact with metal accessories.
2. The kitchen cabinet where the product is installed and all adhesives used must be able to
withstand a temperature of not less than 90°C to avoid deformation and paint cracking.
3. Before connecting to the power source, make sure:
• According to regulations, there should be an earthing system. The socket and circuit
connected to the power supply must be reliably grounded.
• After installation, the control buttons are easily accessible and operable.
• After the product is connected to the power source, please check whether the power
cord is in contact with heat-prone accessories. If there is contact, move it away to a safe
distance.
• Do not use reducers, shunts and adapters that can cause overheating or self-ignition.
The manufacturer is not responsible for any direct or indirect losses caused by incorrect
installation or connection of any electronic components. Therefore, all installation and
connection operations must be performed by qualified technicians following local regu-
lations.
• DO NOT connect the ground wire to gas pipes, water pipes, lightning rods and telephone
lines to avoid accidents caused by electric shock due to poor grounding. The socket
should not be installed in a place exposed to moisture, water or near a heat source.
4. When installing electrical appliances, be sure to wait until the installation is complete
before turning on the power source.
ATTENTION:
This product is equipped with a power cord approximately 1.5 meters long. Users are required
to use a 13A socket, and the socket must be connected to a leakage protection switch.

P.8 P.9
Socket location
≥560
≥560
≥450
≥450
550
595
445
572
22
≥528
22
≥528
350
455
528
22
≥560
≥560
35
35
≥
20
≥
15
50
50
Air Inlet
Air Inlet
Exhaust vents
Exhaust vents
Tall cabinet installation
Remove back
panel for
ventilation
Remove back
panel for
ventilation
Installation Top View Installation Side View
Low cabinet installation
Installation Instructions
PRODUCT DIMENSIONS
Cabinet Cutout Dimensions (in mm)
INSTALLATION PROCEDURE
1. Open the oven door and use the self-tapping screws to fix the product onto the kitchen
cabinet (there are self-tapping screw holes on both sides of the front panel of the product).
Make sure that the product is firmly fixed, so that the product will not slant forward and
damage the contents in the oven during use.
2. Please refer to the diagram below when installing the product. To ensure that the product
has enough installation space and adequate ventilation, user is recommended to remove
the kitchen cabinet back panel.
Socket location
≥560
≥560
≥450
≥450
550
595
445
572
22
≥528
22
≥528
350
455
528
22
≥560
≥560
35
35
≥
20
≥
15
50
50
Air Inlet
Air Inlet
Exhaust vents
Exhaust vents
Tall cabinet installation
Remove back
panel for
ventilation
Remove back
panel for
ventilation
Installation Top View Installation Side View
Low cabinet installation
Self-tapping screw securing point
Installation Instructions
Cabinet Cutout Dimensions (in mm)

P.10 P.11
Operating Instructions
BEFORE INITIAL USE
1. Remove the special film covering the door glass.
2. Thoroughly clean the interior of the product (use moist cloth to wipe the product’s exterior).
3. Fill the water tank with water, and run the product in Steam Mode at 100°C for 45 minutes
(or above) to remove the new product smell.
NOTICES FOR USE
1. Maximum Mark On Water Tank
The maximum water level mark is affixed on the top of the outside of the water tank. When
adding water to the water tank, please fill to the highest water level in order to maximize the
cooking time. Do not fill to beyond the highest water level to avoid water spilling out when
removing the water tank.
2. Low Water Tank Warning
Low Water Tank Warning indicator light on the Control Panel will light up and buzzer will
beep, indicating water tank level is below the minimum mark and product has stopped oper-
ating. User should refill the water tank immediately, or long press to cancel cooking.
3. Selecting Cooking Utensil
When choosing cooking utensil, it is preferable to use a porous container. The utensil
should not be too deep. For steaming food, use utensil that is 3-5 cm deep, so that the
steam can fully penetrate the ingredients and optimize the taste of the steamed food.
4. Burnt Smell When Product Is Used For The First Time
When the product is used for the first time, user may detect an odor or smoke due to the
high temperature. User is recommended to fill the water tank and steam the oven cavity for
more than 45 minutes, and let the product cool down before actually cooking with it.
5. If Left Unused For A Prolonged Period
If product will be left unused for a prolonged period, please clean the oven cavity and use
Baking Mode to dry out residual water in the oven cavity to avoid bacterial growth and odor.
6. Default Cooking Mode Temperature And Time
Each cooking mode has a default temperature and time. The default temperature and time
can meet most cooking needs under normal conditions. When user is cooking at a default
temperature and time, and find that the food is not thoroughly cooked, you can consider
extending the cooking time or increasing the cooking temperature.
7. Standby Mode And Sleep Mode
When connected to the power source, this product will enter Sleep Mode, and will light
up (in Sleep Mode the power output is less than 1W). Press to enter into Standby Mode;
if product does not receive any instructions and there is no operation within 10 minutes, the
product will automatically return to Sleep Mode.
Operating Instructions
8. Oven Lamp Energy-Saving Mode
After this product has been operating for a period of time, if user does not press any key,
the oven lamp will automatically switch off.
9. Fan Delayed Turn Off (For Cooling Purposes)
When product is paused or after cooking is finished, the built-in fan will continue to run for
5 minutes or more to dissipate residual heat.
10.Common Phenomena When Using Microwave Function
• A "bang" sound when starting is a normal phenomenon, it is the starting sound of the
transformer operating under high voltage and high frequency.
• Loud noises during operation are normal, they are the operating and resonanting
sounds of the transformer, magnetron and high-speed cooling fan.
• The metal barrier will reflect microwave energy back into the oven, and the oven glass
door only allows light to pass through, and microwaves cannot pass through to prevent
microwave leakage.
• Microwave cooking will accumulate energy in the food. Be aware that after the food is
taken out of the oven, the inside of the food will continue to heat for 2-3 minutes
• Lightning and crackling sounds during cooking may be due to the use of tableware that
contain metal (including gold and silver); putting forks or other metal utensils in the fur-
nace; using too much metal foil; using metal wires to bind food
• When product is operating in Microwave Mode, the high-voltage transformer and fan will
make a "humming" sound. This is a normal phenomenon, please rest assured the prod-
uct is working normally.
• The product emitting wind, light or smell when operating in Microwave Mode is normal
and will not cause microwave leakage.

P.12 P.13
Operating Instructions
ADJUSTMENTLAMP
OPERATINGPREHEAT
EGG
SEAFOOD NOODLE
VEG.
FISH
CORN
MILK
QUICK
HEAT
PRESET
RECIPE
DEFROST
CAKE
BREAD GRILL
STEAM
MEAT
g
Inch
Pcs
CONTROL PANEL
Control Key Control Keys and Turn Knob
LED Display
CONTROL KEY FUNCTION
POWER
Turn product on or off
During cooking, long-press to cancel cooking
process
PAUSE/START
Pause/Start operation
During cooking, long-press to return to previous
step
ADJUSTMENT During cooking, press this key to adjust
temperature and time
LAMP Turn oven lamp on or off
STEAM Select Steam Function
Cycles among different Steam Modes
GRILL Select Grill Function
Cycles among different Grill Modes
MICROWAVE Select Microwave Function
Cycles among different Microwave Modes
PRESET RECIPE Select Preset Recipe Function
TURN KNOB/
CONFIRM
Turn knob to adjust
Press knob to conrm
Operating Instructions
LED Display
ICON FUNCTION
STEAM FUNCTION Icon lights up when operating in Steam Mode
GRILL FUNCTION Icon lights up when operating in Grill Mode
MICROWAVE
FUNCTION Icon lights up when operating in Microwave Mode
PRESET
RECIPE
PRESET RECIPE
FUNCTION Icon lights up when cooking a Preset Recipe
STEAM CLEAN Icon lights up when product is steam-cleaning
DRYING Icon lights up when product is drying off residual
water in oven cavity
LOW WATER TANK Icon lights up when the water tank is low. Rell
water immediately
QUANTITY
SELECTION
In Preset Recipe Function, when these icons
light up, user can choose quantity of food being
cooked

P.14 P.15
Operating Instructions
STEAM/GRILL/MICROWAVE FUNCTION
1. Press to enter into Standby Mode.
2. Press (pic. 1) or (pic. 2) or (pic. 3) to select STEAM, GRILL or
MICROWAVE function, then rotate Turn Knob to select desired mode.
(pic. 1)
(pic. 2)
(pic. 3)
ADJUSTMENTLAMP
ADJUSTMENTLAMP
EGG
SEAFOOD NOODLE
VEG.
FISH MEAT
ADJUSTMENTLAMP
VEG.
FISH
CORN CAKE
BREAD GRILL
STEAM
MEAT
ADJUSTMENTLAMP
OPERATINGPREHEAT
MILK
QUICK
HEAT
DEFROST
Operating Instructions
ATTENTION:
• During cooking, user can adjust time and temperature setting at any time:
Press to pause cooking, press to select temperature or time rotate Turn Knob to
adjust temperature or time press to resume cooking.
• During cooking, long-press 3 seconds to cancel cooking.
ADJUSTMENTLAMP
ADJUSTMENTLAMP
ADJUSTMENTLAMP
OPERATING
3. Press Turn Knob to confirm selected mode rotate Turn Knob to set temperature or
power output, then press knob to confirm rotate Turn Knob to set time, then press
knob to confirm oven starts to preheat (if in Microwave mode, product will not pre-
heat).
4. After oven has preheated to set temperature, buzzer will beep for 1 min, then it will auto-
matically start cooking. User may also choose to open then close oven door, and oven will
start cooking right away.
5. During cooking, LED Display will show“OPERATING”, and simultaneously display cooking
temperature and countdown timer.
6. After cooking is completed, LED Display will show “End”.

P.16 P.17
STEAM/GRILL/MICROWAVE (COOKING FUNCTION) SETTINGS
Operating Instructions
FUNCTION MODE
DEFAULT
TEMPERATURE/
POWER
ADJUSTABLE
RANGE
DEFAULT
TIME
ADJUSTABLE
RANGE
Steam
Steam 100°C
60°C -
110°C
20 min
1-120 min
Fish 90°C + 600W
(Steam + Microwave) 14 min
Meat 100°C + 900W
(Steam + Microwave) 16 min
Vegetable 100°C + 900W
(Steam + Microwave) 10 min
Seafood 90°C + 600W
(Steam + Microwave) 9 min
Noodle 100°C 30 min
Egg 100°C 27 min
Grill
Grill 180°C
100°C -
230°C
20 min
1-120 min
Fish 180°C + 900W
(Grill + Microwave) 13 min
Meat 180°C + 900W
(Grill + Microwave) 18 min
Vegetable 180°C + 900W
(Grill + Microwave) 12 min
Corn 200°C + 900W
(Grill + Microwave) 35 min
Cake 170°C 30 min
Bread 180°C 20 min
Steam Grill 180°C
(Steam + Grill)
100°C -
200°C 25 min
Microwave
Microwave 300W / 600W /
900W
/ 2 min 1-30 min
Quick Heat 300W / 600W /
900W
Defrost 300W
Milk 900W
PRESET RECIPE FUNCTION
1. Press to enter into Standby Mode.
2. Press to enter into Preset Recipe function (pic. 1) rotate Turn Knob to select desired
recipe (refer to "PRESET RECIPE" P.19) (pic. 2).
Operating Instructions
ATTENTION:
Default times and temperatures are for reference only; the actual cooking effect is affected
by the ingredients and cooking utensils, and can be adjusted according to the actual situation
and personal preference.
ADJUSTMENTLAMP
(pic. 1)
(pic. 2)
ADJUSTMENTLAMP
PRESET
RECIPE
ADJUSTMENTLAMP
PRESET
RECIPE

P.18 P.19
3. Press Turn Knob to confirm selected recipe (pic. 3).
4. If quantity is shown in LED Display, user may rotate Turn Knob to adjust to a specific
quantity (pic. 4).
5. After oven has reached preheated temperature, buzzer will beep for 1 minute, then automa-
tically start cooking. User may also choose to open then close oven door, and oven will start
cooking right away.
6. During cooking, LED Display will show “OPERATING”, and simultaneously display cooking
temperature and countdown timer.
7. After cooking is completed, LED Display will show “End”.
Operating Instructions
ADJUSTMENTLAMP
OPERATING
(pic. 3)
(pic. 4)
ADJUSTMENTLAMP
Inch
PRESET
RECIPE
ADJUSTMENTLAMP
Inch
PRESET
RECIPE
Operating Instructions
PRESET RECIPES
CLASSIFICATION CODE RECIPE SUGGESTED
PROPORTIONS
SUGGESTED
RACK
Preset
H01 Ferment 200-700 g Bottom
H02 Yoghurt 550 g Middle
H03 Defrost 300-800 g Bottom
H04 Rice 300 g Middle
H05 Quick Heat 600 g Middle
Steam
H06 Chinese bun 900 g Middle
H07 Egg custard with
shrimp 1-3 pcs Middle
H08 Crab 8 pcs Middle
H09 Scallop on
vermicelli 8 pcs Middle
H10 Cranberry cake 6 inch Middle
H11 Chinese cake 6 inch Middle
Microwave
Steam
H12 Corn/Legume 1,000 g Middle
H13 Steamed spare rib 300-800 g Middle
H14 Minced pork patty 400 g Middle
H15 Steamed sliced
pork 300-500 g Middle
H16 Steamed chicken
with mushroom 500 g Middle
H17 Curry chicken 500 g Middle
H18 Spicy sh head 500 g Middle
H19 Steamed sh 400 g Middle

P.20 P. 21
Operating Instructions
PRESET RECIPES
CLASSIFICATION CODE RECIPE SUGGESTED
PROPORTIONS
SUGGESTED
RACK
Microwave
Steam
H20 Steamed prawn
with garlic 500 g Middle
H21 Baby cabbage 500 g Middle
H22 Short rib 400 g Middle
H23 Pumpkin bisque 400 g Middle
H24 Apple puree 300 g Middle
Grill
P01 European bread 600 g Middle
P02 Chiffon cake 5-8 inch Middle
P03 Egg tart 12 pcs Middle
P04 Cookie 24 pcs Middle
P05 Toast 450 g Middle
P06 Finger biscuit 15 pcs Middle
P07 Donut 6 pcs Middle
P08 Pizza 9 inch Middle
P09 Pudding 6 pcs Middle
P10 Chicken 1,000 g Middle
P11 Prawn 500 g Middle
P12 Scallop 3 pcs Middle
P13 Corn 3 pcs Middle
Operating Instructions
PRESET RECIPES
CLASSIFICATION CODE RECIPE SUGGESTED
PROPORTIONS
SUGGESTED
RACK
Microwave Grill
P14 Bacon 300 g Middle
P15 Stuffed pepper 600 g Middle
P16 Pork belly 500 g Middle
P17 Kebab 500 g Middle
P18 Beef and mushroom
roll 500 g Middle
P19 Squid 500 g Middle
P20 Capelin 500 g Middle
P21 Pike 4 pcs Middle
P22 Mushroom 400 g Middle
Microwave
Steam Grill
P23 Cajun chicken wing 1,000 g Middle
P24 Garlic chicken wing 2 pcs Middle

P.22 P.23
STEAM CLEAN FUNCTION
1. Press to enter into Standby Mode.
2. Long-press for 3 seconds to enter into Steam Clean function.
3. The product will automatically start the selected function, LED Display will show
“OPERATING” and time left.
4. When operation is completed, LED Display will show “End”.
Operating Instructions
ADJUSTMENTLAMP
ADJUSTMENTLAMP
OPERATINGPREHEAT
g
Inch
Pcs
ADJUSTMENTLAMP
OPERATINGPREHEAT
g
Inch
Pcs
DRYING FUNCTION
1. Press to enter into Standby Mode.
2. Long-press for 3 seconds to enter into Drying function.
3. The product will automatically start the selected function, LED Display will show
"OPERATING” and time left.
4. When operation is completed, LED Display will show “End”.
Operating Instructions
ADJUSTMENTLAMP
ADJUSTMENTLAMP
OPERATINGPREHEAT
g
Inch
Pcs
ADJUSTMENTLAMP
OPERATINGPREHEAT
g
Inch
Pcs

P.24 P.25
STEAM CLEAN AND DRYING SETTINGS
FUNCTION MODE
DEFAULT
TEMPERATURE/
POWER
ADJUSTABLE RANGE DEFAULT TIME
Steam Clean / / / 25 min
Drying 10 min
ATTENTION:
When product is operating, do not stand in front of the heat vent; when opening the oven
door, first press to pause the product, and step back to avoid being burnt by the hot
steam; when inserting and removing steam tray or cooking utensil, wear heat-proof gloves to
avoid getting burnt.
Operating Instructions
ATTENTION:
• After each use, wipe dry any residual moisture in oven cavity to prevent water dripping out
onto kitchen cabinet.
• After each steaming session, empty water tank to avoid residual water causing coagula-
tion or breeding germs.
• DO NOT use abrasive cleaners or cleaning agents with soda, acid or chlorine, and do not
use cleaning sprays, dishwasher detergent or corrosive cleaning agent to clean the prod-
uct.
• DO NOT use hard brush, scouring pad or wire scrubber to clean the product as it may
scratch its surfaces.
CLEANING OVEN DOOR AND DISPLAY PANEL
To clean stubborn stains on oven door, use neutral cleaning agents. DO NOT use metallic spiral
ball to clean oven door to avoid scratching the protective layer on the glass. Clean with neutral
agent then wipe dry with soft cloth.
CLEANING OVEN DOOR SEAL
1. After every use, use soft sponge moistened with warm water to clean the oven door sealing
strip, then wipe dry with soft cloth.
2. DO NOT use cleaning agents to clean the door seal, as they may contain components which
may corrode the strip.
3. Over time, holes or cracks may form on the oven door sealing strip; when this happens, the
sealing strip will have to be replaced.
STAINLESS STEEL OVEN CAVITY
1. After every steaming session, clean oven cavity thoroughly using a sponge or cloth to wipe
off any stain on the walls, and leave oven door opened to let it air dry.
2. After every grilling session, let the product cool down completely then clean thoroughly. Use
neutral cleaning agents to clean off greasy stains, then rinse off with wet cloth.
Cleaning & Maintenance

P.26 P. 27
WARNING! Unplug product from power source before maintenance.
Troubleshooting
PROBLEM POSSIBLE CAUSE SOLUTION
Display Panel
shows E1
Temperature sensor open circuit or
short circuit
Cut off power supply, and contact
Customer Service & Repair
Centre
Display Panel
shows E2 Steam pipe malfunction
Display Panel
shows E4 Heating element malfunction
Display Panel
shows E5
Power circuit connection
malfunction
The product does
not respond after
turning on the
power
Power outlet malfunction
Control panel cable is not connected
Display shows
empty water tank
despite it being
lled
Water level detection switch
malfunction
Oven lamp will not
light
Lamp connection wiring
disconnected
Light bulb may be damaged
Product emits
steam but food
will not cook
Oven cavity temperature sensor
malfunction
Steam pipe is broken
Control Panel
malfunction Control Panel circuitry malfunction
Product emits
strange sounds
Cooling fan damaged and causing
noise
Back fan is damaged
Technical Specications
• All information in this manual is for reference only. If there are any errors or omissions, the
specications produced by the factory shall prevail. Specication is subjected to change
without prior notice.
• If there is any inconsistency or ambiguity between the English version and the Chinese
version, the Chinese version shall prevail.
• Specications are subject to change without prior notice. Refer to www.germanpool.com for
the most up-to-date version of the Operating Instructions.
Model SGM-3620
Rated Voltage/Frequency 220V / 50Hz
Rated Power 2,000W
Product Dimensions (H) 455 (W) 595 (D) 550 mm
Oven Cavity Volume 36L
Net Weight 32kg

P.28 P.29
目錄
警告及注意事項 29
產品結構 30
安裝說明 31
使用說明 34
清潔與保養 49
故障檢修 50
技術規格 50
保用條款 51
警告及注意事項
1. 請嚴格按照本說明書規定使用本產品,以免因使用不當造成財產損失、人身傷害。
2. 本產品必須由本公司指派的售後人員進行安裝、維修等,如果消費者委託非本公司指派的
人員或者消費者自行進行以上操作,可能存在造成人身損害或財產損失的風險。
3. 本說明書的各項規定若有與法律強制性規定相衝突,以法律規定為準。
危險
1. 微波爐微波加熱時,不得使用金屬器皿進行烹調,否則會發生打火現象。
2. 不要戳穿爐門網孔,否則會造成微波洩漏。
3. 如果產品門或門封已損壞,請暫停使用,需專業人員維修好後再使用。
4. 切勿在沒有放食物情況下啟動本產品微波功能,沒有食物或者水分在爐腔內吸收微波能量
時,微波能量會在爐腔內不停的反射,會引起爐內溫度過高而發生異常。
5. 產品不能做烹飪以外用途。例如用於烘乾物品等,有可能引發火災。
6. 勿使用微波爐加熱化學試劑,或其他非食物製品,以免引起微波外洩。
7. 產品在使用期間會發熱,注意避免接觸產品內部的發熱單元,從產品內提取食物與器皿
時,需戴上隔熱手套,以免燙傷。
8. 產品在使用時,可觸及部份可能會發熱,兒童應遠離。
9. 產品在清潔、安裝和維修服務前,必須斷開電源,以免觸電。
10. 禁止在產品內放置雜物,以免發生火災。
11. 確保產品遠離燃氣管。當燃氣管從產品旁邊經過時,燃氣管應採取有效隔離保護措施,確
保燃氣管不受高溫影響,如採取燃氣管外套鐵管。
警告
1. 禁止在散熱口塞入雜物,以免發生意外。
2. 請不要讓兒童或行動不便者單獨使用,更不要放在幼兒可觸及的地方使用,否則可能導致
燙傷、觸電或其他意外;當產品以組合模式工作時,因溫度過高,兒童必須在成年人的監
督下使用。
3. 使用過程中或使用後,禁止水淋產品門,以免發生玻璃爆裂危險。
4. 請使用獨立的帶有開關的電源插座,使用排插可能造成異常發熱而引發火災。
5. 如果產品在使用過程中出現任何故障,請立即停止使用,並參照「故障檢修」進行相應處
理。
6. 使用微波功能對奶瓶和嬰兒食品應經過攪拌或搖動,餵食前應檢查食物溫度,避免燙傷。
7. 禁止直接加熱裝在密封容器內的液體或其他食物,可能引起爆炸。例如:罐頭食品、密閉
玻璃瓶等。
8. 使用微波功能時對帶皮食物要進行刺孔處理,以避免食物炸裂。
9. 使用微波功能時禁止對帶殼蛋類進行烹飪,防止飛濺炸裂。
10. 當加熱用塑料或紙包裝的食物時,應注意觀察微波爐,因為有著火的可能。
11. 如發現有煙霧,應關掉器具開關或拔掉電源插頭,並保持爐門關閉,以抑制火焰蔓延。
12. 微波加熱飲料會導致延遲噴濺沸騰,因此取出時必須小心謹慎。
13. 在有蒸氣模式的工作狀態下,請勿長時間站在散熱口處;打開產品門時,要注意避開高溫
蒸氣,以免燙傷。
14. 產品連接電源必須裝有符合產品銘牌上標識的電氣參數的空氣開關或者漏電保護開關,方
可進行連接並使用。
15. 禁止重物碾壓電源軟線,以免發生意外。
16. 請保持產品及電源線遠離發熱物體、易燃易爆物,以免產品損壞或發生火災、爆炸危險。
17. 如果電源軟線損壞,為了避免危險,必須由製造商其維修部或類似部門的專業人員更換。
18. 請使用合適的蒸盤、容器,以免溢出油滴引發火災。
19. 請將烹飪容器正確放置於層架上,不要直接放在腔體底部,以免發生意外。
20. 把手內側中部表面會發燙,請避免燙傷。

P.30 P. 31
警告及注意事項
21. 烹飪完畢後,內膽四周溫度仍然較高,請待內膽冷卻後再行清潔,以免燙傷。
注意
1. 禁止以產品門負載重物或靠、坐在產品門上,以免損壞產品。
2. 請不要在手腳潮濕、赤腳的狀態下觸摸產品或插拔電源插頭,以免觸電。
3. 不要使用粗糙的抹布或鋒利的金屬刮刀清潔產品門玻璃,以免擦傷玻璃表面,導致玻璃
破碎。
4. 產品需安裝在強度足夠的平台表面上。請勿在塑料照明設備或塑料架下安裝產品,以免
發生變形或爆炸危險。
5. 搬運放置時從產品底部抬起,輕搬輕放,切勿將產品拉手作為搬運的支撐點,以免受力
過大而損壞。
6. 不能使用蒸氣清潔器。
7. 為防止可能的危害,產品的控制面板只能連接到規定的發熱單元。
注意:
• 微晶玻璃表面不能直接放置食物。
• 必須確保爐門關閉後,產品才能正常運作。
產品結構
1. 控制面板
2. 層架
3. 玻璃盤
4. 門勾
5. 玻璃爐門
6. 爐門把手
7. 水箱
8. 微晶玻璃
1
2
3
4
5
6
7
8
安裝說明
安裝注意事項
1. 為保證產品能夠長期安全使用,必須用絕對堅固的方法固定產品,並且隔離電子元件以
防止和金屬配件接觸的可能。
2. 安裝產品的廚櫃以及所有使用的黏合劑必須能承受不低於90°C的溫度,以避免變形和塗
料斷裂。
3. 在連接電源之前,請確保:
• 根據規定,應有接地的供給系統。電源連接的插座和電路必須可靠接地。
• 產品安裝後,開關是易於操作的。
• 產品連接電源後,請檢查電源線是否接觸易受熱的配件,如有接觸,須遠離到安全距
離。
• 不要使用會導致過熱或自燃的減速器、分流器及適配器。製造商對於任何電子錯誤安
裝或連接所造成的直接或間接損失,概不承擔任何責任。因此,所有的安裝和連接操
作都須由遵循當地實施規定的專業人士進行。
• 不得將地線連接在煤氣管、自來水管、避雷針及電話線上,避免因接地不良造成觸電
而引發意外事故。插座不能裝在受潮、被水淋濕或靠近熱源的地方。
4. 進行電器安裝時,務必等安裝完畢後再通電。
注意:
本產品配備約1.5米長的電源線。要求用戶使用13A的插座,且插座必須與漏電保護開關
相連。

P.32 P.33
≥560
≥560
≥450
≥450
550
595
445
572
22
≥528
22
≥528
350
455
528
22
≥560
≥560
35
35
≥
20
≥
15
50
50
通風口
通風口
通風口
通風口
高櫃安裝
後壁敞開通風
後壁敞開通風
安裝俯視圖 安裝側視圖
低櫃安裝
插座可選位置
安裝說明安裝說明
產品尺寸
廚櫃開孔尺寸 (單位:毫米)
安裝方法
1. 打開產品門,用附贈的自攻螺絲將產品固定在廚櫃上(產品前板的兩側有自攻螺絲孔)。
要確保產品固定牢靠,以免使用過程中產品前傾損壞機內物品。
2. 安裝產品時請參照以下示意圖,為保證產品有足夠的安裝空間以及周圍的空氣流通,建議
安裝時去掉廚櫃背板。
≥560
≥560
≥450
≥450
550
595
445
572
22
≥528
22
≥528
350
455
528
22
≥560
≥560
35
35
≥
20
≥
15
50
50
通風口
通風口
通風口
通風口
高櫃安裝
後壁敞開通風
後壁敞開通風
安裝俯視圖 安裝側視圖
低櫃安裝
插座可選位置
廚櫃開孔尺寸 (單位:毫米)
自攻螺絲固定位置

P.34 P.35
使用說明
首次使用產品
1. 移去覆蓋在爐門玻璃上的特殊薄膜。
2. 仔細清洗產品內部(用濕布將產品外部擦拭乾淨)。
3. 水箱加滿水後,以蒸模式100°C及45分鐘(或以上),將產品空蒸以去除新品初次使用
的氣味。
`
使用注意事項
1. 水箱最高水位線
水箱外側上方貼有最高水位線標識,向水箱加水時,請盡量將水加至最高水位線,以便
能最大限度延長烹飪時間,加水請不要超過最高水位線,以免抽拉水箱時水箱中的水濺
出。
2. 加水提示
控制面板缺水指示燈亮起,及蜂鳴器發出聲響時,即表示水箱中的水低於最低水位要
求,產品已停止工作,請取出水箱並及時加水,或長按 停止提示。
3. 烹飪容器選擇
在選用烹飪容器時,請盡量選擇多孔的容器,容器深度不宜過深,放置蒸煮食物的高度
以3-5厘米為佳,使蒸氣能更大程度地接觸食材,最佳化蒸煮食物的口感。
4. 首次使用產品時產生焦味
首次使用時,有機會因高溫產生氣味或煙味,建議加滿水箱空蒸45分鐘以上,待產品放
涼後再正式烹飪。
5. 長時間不使用
若長時間不使用本產品,請將產品內部清潔乾淨並使用烤模式將產品內的餘水烘乾,以
避免細菌滋生和產生異味。
6. 關於烹飪模式的默認溫度與時間
每一種烹飪模式均有預設溫度和時間,預設溫度和時間在正常情況下可滿足絕大多數的
烹飪需求。當你在使用預設溫度和時間進行烹飪時,如發現食物不熟,可考慮適當延長
烹飪時間或提高烹飪溫度。
7. 待機與休眠
產品通電後即處於休眠狀態, 常亮(待機功率小於1W),在休眠狀態下按 以進
入待機狀態;如非預熱或烹飪過程中,10分鐘內無任何操作,產品自動進入休眠狀態。
8. 爐燈節能模式
本產品工作一段時間後,如無按鍵操作,爐燈會自動熄滅。
9. 風扇延時降溫功能
暫停或結束工作後,散熱風扇會延遲5分鐘或以上關閉,以進行散熱。
使用說明
10. 微波爐使用常見現象
• 啟動時有「砰」的聲音屬正常現象,是變壓器在高電壓、高頻率情況下運作的啟
動聲音。
• 運作時噪音大是變壓器、磁控管及高速散熱風扇的運作聲音和共振聲音。
• 金屬屏障會將微波能量反射回爐內,玻璃爐門只允許光線通過,微波無法通過,
以防止微波外洩。
• 微波烹飪會使食物聚集能量,在爐中取出食物後,食物內部會繼續加熱2-3分鐘。
• 烹飪時會發生閃電和清脆的響聲可能是因為使用了含金屬成分的餐具(包括金、
銀);將叉子或其他金屬用具放入爐內;使用過多金屬箔;使用金屬線捆綁食物。
• 微波爐工作時高壓變壓器以及風扇正常運作時發出「嗡」的聲音,屬於正常現象,
請放心使用。
• 微波爐運作時有風、燈光或氣味屬於正常現象,不會引起微波洩漏。

P.36 P. 37
使用說明
ADJUSTMENTLAMP
OPERATINGPREHEAT
EGG
SEAFOOD NOODLE
VEG.
FISH
CORN
MILK
QUICK
HEAT
PRESET
RECIPE
DEFROST
CAKE
BREAD GRILL
STEAM
MEAT
g
Inch
Pcs
控制面板
控制按鍵及旋鈕
控制按鍵及旋鈕
LED顯示屏
按鍵 功能
電源鍵 開啟/關閉產品,在烹飪過程中長按此鍵取消
烹飪
暫停/開始鍵 在烹飪過程中按此鍵暫停/開始工作,長按返回
上一步
時間/溫度鍵 在烹飪過程中按此鍵調節溫度及時間
照明鍵 開啟/關閉照明燈
蒸煮鍵 選擇蒸煮功能,循環選擇各種蒸煮模式
燒烤鍵 選擇燒烤功能,循環選擇各種燒烤模式
微波鍵 選擇微波功能,循環選擇各種微波模式
預設食譜鍵 選擇預設食譜功能
旋鈕/確認鍵 扭動進行調節;按鍵進行確認
使用說明
LED顯示屏
圖標 功能
蒸氣功能 圖標常亮表示正在使用蒸氣模式
燒烤功能 圖標常亮表示正在使用燒烤模式
微波功能 圖標常亮表示正在使用微波模式
PRESET
RECIPE 預設食譜功能 圖標常亮表示正在運行預設食譜
蒸氣清潔 圖標常亮表示正在進行蒸氣清潔
烘乾 圖標常亮表示正在烘乾爐內水份
缺水 圖標閃爍表示水箱缺水,請及時加水
份量選擇 在使用預設食譜功能時,當此圖標亮起表示可
選擇食物份量。

P.38 P.39
使用說明
1. 按 進入待機狀態。
2. 按 (圖1)或 (圖2)或 (圖3)選擇「蒸煮」或「燒烤」或「微波」
功能 然後扭動旋鈕選擇所需模式。
蒸烤微波功能操作
ADJUSTMENTLAMP
(圖1)
(圖2)
(圖3)
ADJUSTMENTLAMP
EGG
SEAFOOD NOODLE
VEG.
FISH MEAT
ADJUSTMENTLAMP
VEG.
FISH
CORN CAKE
BREAD GRILL
STEAM
MEAT
ADJUSTMENTLAMP
OPERATINGPREHEAT
MILK
QUICK
HEAT
DEFROST
使用說明
注意:
• 烹飪過程中,可隨時更改時間及溫度設置:
先按 暫停烹飪,再按 選擇溫度或時間,然後扭動旋鈕進行調節,完成後按
繼續烹飪。
• 烹飪過程中,長按 3秒可取消烹飪。
3. 按旋鈕確認所選擇的模式 扭動旋鈕設定溫度或功率後按旋鈕確認 扭動旋鈕設
定時間後按旋鈕確認 本產品開始預熱(微波功能無預熱)。
4. 預熱完成後,蜂鳴器發出聲響1分鐘後自動進入烹飪狀態,或打開爐門再關爐門即時進入
烹調狀態。
5. 烹飪進行時LED顯示屏顯示「OPERATING」,同時顯示溫度及倒數時間。
6. 烹飪結束後,LED顯示屏顯示「End」。
ADJUSTMENTLAMP
ADJUSTMENTLAMP
ADJUSTMENTLAMP
OPERATING
Table of contents
Other German pool Microwave Oven manuals

German pool
German pool MVG-3014 User manual

German pool
German pool MVH-125M User manual

German pool
German pool SGM-2519 User manual

German pool
German pool MAG-280 User manual

German pool
German pool SGM-T4228 User manual

German pool
German pool WP700ASJ17Q-2B User manual

German pool
German pool MVG-1712 User manual