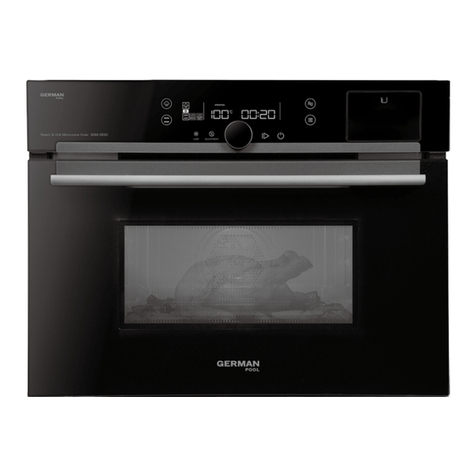
German pool SGM-2519 User manual

P.1
360° Multi-Oscillation Fan RHS-126
Please read these instructions and warranty information carefully
before use and keep them handy for future reference.
Online Warranty Registration
USER MANUAL
Steam & Grill Microwave Oven SGM-2519

P.3P.2
Table of Contents
Warnings & Safety Precautions
Cooking Utensils Guide
Product Structure
Installation Instructions
Operation Instructions
Cleaning & Maintenance
Troubleshooting
Technical Specication
Warranty Terms & Conditions
04
07
09
10
11
15
16
18
35
Please register your warranty information now !
For Warranty Terms & Conditions,
please refer to the last page of this user manual.
請即進行保用登記!
有關保用條款細則,請看說明書最後一頁。

P.5P.4
Warnings & Safety Precautions Warnings & Safety Precautions
WARNING!
• Read all instructions carefully before using this product.
• This product is not intended for use by children or persons with reduced physical, sensory
or mental capabilities, or lack of experience and knowledge, unless they have been given
supervision or instruction concerning use of this product by a person responsible for their safety.
• Mind your children and DO NOT let children play with this product.
• Cleaning and user maintenance shall not be made by children without supervision.
• Check the voltage indicated on the rating label before using this product.
• This product is for domestic indoor use only.
• If the supply cord is damaged, it must be replaced by the manufacturer, its service agent or
similarly qualied persons in order to avoid hazards.
• Unplug this product from the power source before cleaning and maintenance.
• Contact German Pool authorized service technician for repair or maintenance of this product.
PRECAUTIONS TO AVOID POSSIBLE EXPOSURE TO EXCESSIVE MICROWAVE
• DO NOT attempt to operate this oven with the door open since this can result in harmful exposure
to microwave energy. It is important not to break or tamper with the safety interlocks.
• DO NOT place any object between the oven front face and the door or allow soil or cleaner residue
to accumulate on sealing surfaces.
• WARNING! If the door or door seals are damaged, the oven must not be operated until it has
been repaired by a competent person.
ADDENDUM
If the apparatus is not maintained in a good state of cleanliness, its surface could be degraded and
affect the lifespan of the apparatus and lead to a dangerous situation.
IMPORTANT SAFETY INSTRUCTIONS
To reduce the risk of re, electric shock, injury to persons or exposure to excessive microwave oven
energy when using your appliance, follow basic precautions, including the following:
1. Read and follow the specic: “PRECAUTIONS TO AVOID POSSIBLE EXPOSURE TO EXCESSIVE
MICROWAVE ENERGY”.
2. This appliance can be used by children aged from 8 years and above and persons with reduced
physical, sensory or mental capabilities or lack of experience and knowledge if they have been
given supervision or instruction concerning use of the appliance in a safe way and understand the
hazards involved. Children shall not play with the appliance. Cleaning and user maintenance shall
not be made by children without supervision.
3. Keep the appliance and its cord out of reach of children less than 8 years.
4. If the supply cord is damaged, it must be replaced by the manufacturer, its service agent or
similarly qualied persons in order to avoid a hazard.
5. WARNING! Ensure that the appliance is switched off before replacing the lamp to avoid the
possibility of electric shock.
6. WARNING! It is hazardous for anyone other than a competent person to carry out any service
or repair operation that involves the removal of a cover which gives protection against exposure to
microwave energy.
7. WARNING! Liquids and other foods must not be heated in sealed containers since they are
liable to explode.
8. When heating food in plastic or paper containers, keep an eye on the oven due to the possibility
of ignition.
9. Only use utensils that are suitable for use in microwave ovens.
10. If smoke is emitted, switch off or unplug the appliance and keep the door closed in order to stie
any ames.
11. Microwave heating of beverages can result in delayed eruptive boiling, therefore care must be
taken when handling the container.
12. The contents of feeding bottles and baby food jars shall be stirred or shaken and the temperature
checked before consumption, in order to avoid burns.
13. Eggs in their shell and whole hard-boiled eggs should not be heated in microwave ovens since
they may explode, even after microwave heating has ended.
14. The oven should be cleaned regularly and any food deposits removed.
15. Failure to maintain the oven in a clean condition could lead to deterioration of the surface that
could adversely affect the life of the appliance and possibly result in a hazardous situation.
16. The appliance must not be installed behind a decorative door in order to avoid overheating. (This
is not applicable for appliances with decorative door.)
17. Only use the temperature probe recommended for this oven.
18. The microwave oven shall not be placed in a cabinet unless it has been tested in a cabinet.
19. The microwave oven must be operated with the decorative door open. (for ovens with a decorative
door.)
20. This appliance is intended to be used in household and similar applications such as:
- staff kitchen areas in shops, ofces and other working environments;
- by clients in hotels, motels and other residential type environments;
- farm houses;
- bed and breakfast type environments.
21. The microwave oven is intended for heating food and beverages. Drying of food or clothing and
heating of warming pads, slippers, sponges, damp cloth and similar may lead to risk of injury,
ignition or re.
22. Metallic containers for food and beverages are not allowed during microwave cooking.
23. The appliance shall not be cleaned with a steam cleaner.
24. The appliance is intended to be used freestanding.
25. The rear surface of appliances shall be placed against a wall.
26. The appliances are not intended to be operated by means of an external timer or separate
remote-control system.
27. The temperature of accessible surfaces may be high when the appliance is operating.
28. WARNING! When the appliance is operated in the combination mode, children should only use
the oven under adult supervision due to the temperatures generated.
29. WARNING! In order to avoid a hazard due to inadvertent resetting of the thermal cut-out, this
appliance must not be supplied through an external switching device, such as a timer, or connect-
ed to a circuit that is regularly switched on and off by the utility.
30. During use the appliance becomes hot, care should be taken to avoid touching heating elements
inside the oven.es hot, care should be taken to avoid touching heating elements inside the oven.
P.7P.6
Warnings & Safety Precautions Cooking Utensils Guide
TO REDUCE THE RISK OF INJURY TO PERSONS
GROUNDING INSTALLATION
Touching some of the internal components can cause serious personal injury or death. DO NOT
disassemble this appliance.
ELECTRIC SHOCK HAZARD
Improper use of the grounding can result in electric shock.
• WARNING! DO NOT plug into an outlet until appliance is properly installed and grounded.
• WARNING! This appliance must be grounded. In the event of an electrical short circuit,
grounding reduces the risk of electric shock by providing an escape wire for the electric current.
• WARNING! This appliance is equipped with a cord having a grounding wire with a grounding
plug. The plug must be plugged into an outlet that is properly installed and grounded.
• WARNING! Consult a qualied electrician or serviceman if the grounding instructions are not
completely understood or if doubt exists as to whether the appliance is properly grounded.
• WARNING! If it is necessary to use an extension cord, use only a 3-wire extension cord.
• A short power-supply cord is provided to reduce the risks resulting from becoming entangled in or
tripping over a longer cord.
• If a long cord set or extension cord is used:
• The marked electrical rating of the cord set or extension cord should be at least as great as the
electrical rating of the appliance.
• The extension cord must be a grounding-type 3-wire cord.
• The long cord should be arranged so that it will not drape over the counter top or tabletop where it
can be pulled on by children or tripped over unintentionally.
WARNING! It is hazardous for anyone other than a competent person to carry out any service or
repair operation that involves the removal of a cover which gives protection against exposure to
microwave energy.
Please refer to the following “Cooking Utensils Guide” when selecting cookware to be used in the
microwave oven. Please note that some non-metallic materials are NOT suitable for heating in a
microwave oven.
Materials You Can Use In Microwave Oven
Browning dish
Dinnerware
Glass jars
Glassware
Oven cooking bags
Paper plates and cups
Paper towels
Parchment paper
Plastic
Plastic wrap
Plastic wrap
Wax paper
Follow manufacturer’s instructions. The bottom of browning dish must be at
least 3/16 inch (5mm) above the oven cavity base panel. Incorrect usage
may cause the oven cavity base panel to break.
Heat-resistant oven glassware only. Make sure there is no metallic trim.
DO NOT use cracked or chipped dishes.
Use to cover food for reheating and absorbing fat. Use with supervision for
short-term cooking only.
Microwave-safe only. Use to cover food during cooking to retain moisture.
DO NOT allow plastic wrap to touch food.
Microwave-safe only. Follow manufacturer’s instructions. DO NOT use
cracked or chipped dishes.
Follow manufacturer’s instructions. DO NOT close with metal tie.
Make slits to allow steam to escape.
Use as a cover to prevent splattering or a wrap for steaming.
Microwave-safe only (meat and candy thermometers).
Always remove lid. Use only to heat food until just warm. Most glass jars are
not heat-resistant and may break.
Use for short–term cooking/warming only. DO NOT leave oven unattended
while cooking.
Microwave-safe only. Follow the manufacturer’s instructions.
Must be labeled “Microwave Safe”. Some plastic containers soften as the
food inside gets hot. “Boiling bags” and tightly closed plastic bags should be
slit, pierced or vented as directed by package.
Use as a cover to prevent splattering and retain moisture.

P.9P.8
Product StructureCooking Utensils Guide
Aluminum tray
Food carton with metal handle
Metal or metal trimmed utensils
Metal twist ties
Paper bags
Plastic foam
Wood Wood will dry out when used in the microwave oven and
may split or crack.
May cause arcing. Transfer food to microwave-safe dish.
Metal shields the food from microwave energy. Metal trim
may cause arcing.
May cause arcing and could cause a re in the oven.
May cause a re in the oven.
Plastic foam may melt or contaminate the food inside
when exposed to high temperature.
When in doubt whether the utensil can be used in the microwave oven, you can test the utensil in
question following the procedure below.
1. Fill a microwave-safe container with 1 cup of cold water (250ml) along with the utensil in
question.
2. Microwave on maximum power for 1 minute.
3. Remove the utensil from the oven, and carefully feel the utensil. If the empty utensil is warm, DO
NOT use it for microwave cooking.
4. When doing this test, DO NOT exceed 1 minute cooking time.
Note:
• Before cooking, ll the water tank with puried water, snap the water tank lid shut and insert the
water tank properly into the designated slot; after cooking, empty the water tank.
• When using Microwave function, DO NOT place grease collecting tray or wire rack inside the oven.
When using other functions besides the Microwave, wire rack and/or grease collecting tray may
be placed inside the oven. Please note that when using the wire rack, the grease collecting tray
MUST be placed underneath to avoid drippings ruining the base panel.
Control Panel
Oven Door Handle
Water Tank
Grease Collecting Tray
Water Tank
Water Drip Collector
Wire Rack

P.11P.10
Before Installation
1. Remove all packing material and accessories.
2. Examine the oven for any damage such as dents or broken door. DO NOT install if oven is
damaged, and immediately contact Customer Service and Repair Centre.
Countertop Installation
1. Select a level surface that provides enough open space for the intake and/or outlet vents.
.The minimum installation height is 85cm.
.The rear surface of the product should be placed against a wall. Leave a minimum clearance
of 30cm above the product, and a minimum clearance of 20cm between the product and any
adjacent wall.
.DO NOT remove the legs from the bottom of the oven.
.DO NOT block intake and/or outlet vents to avoid damaging the product.
2. Make sure the voltage and frequency of your electrical outlet is the same as the voltage and
frequency on the rating label before plugging the product into the outlet.
WARNING!
• DO NOT install the product over cook hob or other heat-producing appliance. If installed near or
over a heat source, the heat may damage the product and the warranty will be void.
• When the product is in use, its accessible surfaces may become hot.
Installation Instructions
Control Panel
Operation Instructions
Keys & Functions
KEY FUNCTION
Grill
Steam
Microwave
Preset Recipes
Select
Start/Conrm
Pause/Cancel
Turn Knob
In Standby status:
• Press 1 time to enter into Grill function (with preheat)
• Press 2 times to enter into Grill function (without preheat)
• Press 3 times to enter into Microwave +Grill combi function
• Press 4 times to enter into Steam+Grill combi function
In Standby status, press key to enter into Steam function
In Standby status, press key to enter into Microwave function
In Standby status, press key to enter into Preset Recipes
function
When setting cooking function, press key to enter into Timer
setting
Rotate Turn Knob to adjust cooking temperature and time, or
select Preset Recipe code(01-33)
Press key to conrm setting or start cooking
• In Standby status, long press key 3 seconds to activate
or deactivate Child Lock
• During cooking, press key to pause cooking. Press 2
times to cancel cooking and return to Standby status.
30cm
20cm
20cm
min 85cm

P.13P.12
Operation Instructions Operation Instructions
Standby Status & Sleep Status
1. When connected to the power source, the product enters Sleep status.
2. Open and close oven door to turn on oven. LED Display shows “0” and product enters Standby
status.
3. In Standby status, if oven is left standing idle for 5 minutes, buzzer will beep once and product
automatically enters Sleep status. Display Panel will go dark.
Note:
In Sleep status, all control keys will be locked and all functions will be inoperable; opening and closing
oven door will return the product to Standby status.
Child Lock
1. To Lock: In Standby status, long press PAUSE/CANCEL key for 3 seconds, buzzer will beep once,
Child Lock will be activated and all function keys will be inoperable.
2. To Unlock: When Child Lock is activated, long press PAUSE/CANCEL key for 3 seconds, Child Lock
will in inactivated and all function keys become operable.
Microwave Function
1. In Standby status, press MICROWAVE key to enter Microwave function.
2. Press MICROWAVE key repeatedly to cycle among 900W/700W/500W/300W/100W power, then
press SELECT key to conron power.
3. Rotate Turn Knob to adjust cooking time if needed, then press START/CONFIRM key to start
cooking.
Steam Function
1. In Standby status, press STEAM key to enter Steam function.
2. Rotate Turn Knob to adjust temperature, then press START/CONFIRM key or SELECT key to
enter Timer setting.
3. Rotate Turn Knob to adjust cooking time, then press START/CONFIRM key to start cooking.
Note:
Use only puried water for steaming to avoid scale forming in the water tank.
Grill Function (with preheat)
1. In Standby status, press GRILL key to enter Grill function (with preheat).
2. Rotate Turn Knob to adjust temperature, then press START/CONFIRM key to start preheating
oven.
3. After oven has reached the desired preheat temperature, open the oven door and place in food, then
close the oven door. LED display will show 30 minutes.
4. Rotate Turn Knob to adjust cooking time, then press START/CONFIRM key to start cooking.
Grill Function (without preheat)
1. In Standby status, press GRILL key 2 times to enter Grill function (without preheat).
2. Rotate Turn Knob to adjust temperature, then press START/CONFIRM key or SELECT key to
enter Timer setting.
3. Rotate Turn Knob to adjust cooking time, then press START/CONFIRM key to start cooking.
Note:
• During cooking, if user wishes to pause cooking, press PAUSE/CANCEL key or open the oven
door to pause cooking. Cooking time on LED Display will ash.
• In paused status, press START/CONFIRM key to resume cooking.
• In paused status, press PAUSE/CANCEL key will cancel cooking and oven will return to Standby
status.
Microwave + Grill Combi Function
1. In Standby status, press GRILL key 3 times to enter Microwave + Grill Combi function.
2. Rotate Turn Knob to adjust temperature, then press START/CONFIRM key or SELECT key to
enter Timer setting.
3. Rotate Turn Knob to adjust cooking time, then press START/CONFIRM key to start cooking.
Steam + Grill Combi Function
1. In Standby status, press GRILL key 4 times to enter Steam + Grill Combi function.
2. Rotate Turn Knob to adjust temperature, then press START/CONFIRM key or SELECT key to
enter Timer setting.
3. Rotate Turn Knob to adjust cooking time, then press START/CONFIRM key to start cooking.
Preset Recipes Function
1. In Standby status, press Preset Recipes key to enter Preset Recipes function.
2. Rotate Turn Knob to select Preset Recipe code (refer to table on P.14), then press START/
CONFIRM key or SELECT key to enter Timer setting.
3. Rotate Turn Knob to adjust cooking time, then press START/CONFIRM key to start cooking. If
user does not need to adjust cooking time, directly press START/CONFIRM key to start cooking.

P.15P.14
WARNING!
Unplug the product from the power source, and allow the product to cool down completely before
cleaning or maintenance; DO NOT wet or immerse the product in water to avoid electric shock.
1. After each cooking session, empty water tank to avoid residual water causing coagulation or
breeding germs.
2. After each cooking session, please wipe oven door seal with warm wet cloth, then wipe dry with
soft cloth.
3. Over time, holes or cracks may form on the oven door sealing strip; when this happens, the
sealing strip will have to be replaced.
4. After each cooking session, please use wet cloth to wipe off stains in the oven cavity, then wipe
dry with soft cloth.
5. Most cooking stains can be wiped off with cloth soaked in mild detergent or warm water.
6. After each cooking session, please use dry cloth or other tools to clean and dry off residual water
collected in the water trough (located at bottom front of the oven cavity).
CLEANING OVEN DOOR GLASS AND DISPLAY PANEL
1. Clean oven door and Control Panel regularly. Remove stubborn stains with cloth moistened with
neutral detergent.
2. DO NOT use hard brush, scouring pad or wire scrubber to clean the product as it may scratch its
surfaces. Dry off with clean soft cloth.
CLEANING THE OVEN CAVITY
1. Use warm water or neutral detergent, do not use abrasive cleansers.
2. Use soft nylon brush to clean off stubborn stains, do not use steel scourer ball to avoid scratching
the product’s surfaces.
3. When using cleaner to clean the oven cavity, make sure it is completely rinsed off, then use soft
cloth to dry all surfaces completely, and keep the oven cavity dry at all times.
CODE CODE RECIPE WEIGHT/
QUANTITY DEFAULT TIME MODE
01
02
03
04
05
06
07
08
09
10
11
12
13
14
15
16
17
18
19
20
21
22
23
24
25
26
27
28
29
30
31
32
33
100-2000g
400g
3pcs
450g
400g
450g
150g
600g
300g
500g
12pcs
2pcs
5bunch
250g
4bunch
1plate
500g
9pcs
9pcs
1pcs
9pcs
400g
600g
600g
600g
300g
300g
100g
500g
1000g
-
-
-
-
4min
12min 30sec
6min 50sec
6min 30sec
5min
22min
5min
22min
10min
19min
14min
11min
11min
15min
9min
60min
18min
18min
17min
23min
10min
20min
20min
10min
120min
120min
2min 30sec
50min
360min
10min
20min
5min
Microwave
Microwave
Microwave
Microwave
Microwave
Microwave
Microwave
Microwave
Microwave
Grill
Grill
Grill
Grill
Grill
Grill
Grill
Grill
Grill
Grill
Grill
Grill
Steam
Steam
Steam
Steam
Steam
Steam
Microwave
Grill
Grill
Steam
-
Conrection
Fast defrost
Auto reheat
Potato
Meat
Vegetable
Fish
Pasta
Soup
Tomato rice
Baked shrimps with salt and pepper
Sweet chicken wings
Sweet potatoes with cream cheese
Chicken kebabs
Steak with black pepper
Roasted vegetables skewers
Cookies
Chiffon cake
Crème brûlée
Croissant
Pizza
Portuguese egg tarts
Steam vegetables
Potato slices
Chicken breast
Steam fresh steak
Beef
Salmon
Butter softening
Dough fermentation
Yoghurt fermentation
Oven cavity cleaning
Scale cleaning
Cavity deodorizing
Operation Instructions Cleaning and Maintenance

P.17P.16
NORMAL
Radio and TV reception may be interfered when microwave
oven is operating. It is similar to the interference of small
electrical appliances. This is a normal phenomenon.
In low power microwave cooking, oven light may become dim.
This is a normal phenomenon.
During cooking, food may release steam. Most of the steam
will escape through the vents, but some may condense on
the oven door. This is a normal phenomenon.
DO NOT run the oven without any food inside. This can cause
great danger.
Microwave oven interfering with TV
reception
Steam accumulating on oven door,
hot air coming out of vents
Oven started accidentally with no
food inside
Dim oven light
TROUBLE POSSIBLE CAUSE SOLUTION
Power cord is not plugged
in properly
Fuse blown or open circuit
No power
Trouble with outlet
Oven door is not closed
properly
Unplug from the power source,
wait 10 seconds then re-plug
Contact Customer Service &
Repair Department
Test outlet with other electrical
appliances
Close oven door properly
Oven does not start
Oven does not heat
Troubleshooting Troubleshooting
WARNING!
If error remains, please contact Customer Service & Repair Centre. DO NOT disassemble oven unless
by a qualied technician.
ERROR
CODE POSSIBLE FAULT TEST METHOD REPAIR METHOD
E-1 PCB leaking electricity:
Before microwave start-up, PCB detects
large IB signal fed back by the inverter
(IB signal is an important signal to
indicate whether the inverter is working
normally. Before microwave start-up,
IB should be 0), the back three bits of
the LCD main window are always on to
display “E-1”, and the buzzer sounds
three times.
Before microwave
start, IB signal >0.3V
Replace new
main control PCB
E-5 Inverter has no power output:
If the IB signal is monitored continuously
for 9 seconds during the microwave
working, if it is not detected, pause the
microwave output for 3 seconds, and
then continue to detect the IB signal.
If the IB signal is not detected after 4
times of detection, the back three bits
of LCD main window will always light up
“E-5”, and the buzzer will sound 3 times.
When the microwave stops output, the
fan and so on continue to work.
Disconnect the signal
connection between
PCB and inverter
Replace new
inverter
E-6 Inverter power output too high:
If the IB signal detected during micro-
wave operation is greater than 200%
of the normal output of the microwave,
microwave output will be stopped, and
the “E-6” will be displayed in the back
three bits of the LCD main window, and
the buzzer will sound three times.
After microwave start
up, IB is connected to
a voltage > 4.0V
Replace new
inverter
E-8 Inverter power output too low
(probably due to cracked ring magnet):
If the IB signal detected during the
microwave working is less than 50% of
the normal output time of the microwave
for more than 12s, the microwave output
will be stopped, and the “E-8” will be
displayed in the back three bits of the
LCD main window, and the buzzer will
sound three times.
After microwave start
up, IB of inverter and
PCB is connected to a
voltage < 1.0V
1. Test inverter: if
meet above, the
inverter is ok.
2. If still can’t solve,
then need to test the
PCB.
1. If the IB of
inverter is error,
replace with new
inverter.
2. If the IB of PCB
is error, replace
PCB.

P.19P.18
目錄
警告及注意事項
烹調器皿使用指南
產品結構
安裝說明
使用說明
清潔與保養
故障檢修
技術規格
保用條款
20
23
25
26
27
31
32
34
35
MODEL
Voltage/Frequency
Input Power (Microwave)
Output Power (Microwave)
Output Power (Grill)
Output Power (Steam)
Maximum Power (Steam)
Maximum Power (Grill)
Product Dimensions (mm)
Oven Cavity Volume
Net Weight
SGM-2519
220 V ~ 50 Hz
1,450 W
900W
1,500 W
1,500 W
1,900 W
1,900 W
(H) 337 (W) 468 (D) 383
23 L
18.3 kg
Specications are subject to change without prior notice.
If there is any inconsistency or ambiguity between the English version and the Chinese version, the English version shall prevail.
Refer to www.germanpool.com for the most up-to-date version of the Operating Instructions.
Technical Specication

P.21P.20
警告及注意事項
警告!
• 使用本產品前,請仔細閱讀所有說明。
• 請勿讓兒童或身體有殘障、精神不健全及對本產品缺乏經驗或知識的人士單獨使用本產品;如
需使用,必須要在負責任的成年人監管下方可使用。
• 應照顧好兒童,確保他們不會玩耍本產品。
• 無成年人監管下,勿讓兒童清潔及維護本產品。
• 使用前,請先檢查所有電壓是否與本產品標籤上的電壓相符。
• 本產品只宜在家居室內使用。
• 如果電源線損壞,為免發生意外,電源線必須由廠方、廠方指定的維修中心或同等合格的技術
人員進行更換。
• 清潔或檢查本產品前,必須先關機及拔掉插頭。
• 請聯繫德國寶授權的技術人員進行維修或保養本產品。
避免過度暴露於微波的預防措施
• 嚴禁在爐門打開時操作本機,否則可能導致暴露於微波中,對人體有害。嚴禁損壞或撬開爐門
安全鎖。
• 嚴禁在本產品正面和爐門之間放置任何物品,或讓污垢、清潔劑殘留在密封條上。
• 警告!若爐門或爐門密封條出現破損,必須待專業人員維修後方可使用。
附錄
請保持本產品清潔,任何污垢皆有機會破壞或使本產品表面退化,影響使用壽命,甚至造成危險。
重要安全說明
為減少使用本產品時發生火災、電擊、人身傷害或暴露於過多微波爐能量的風險,請遵守以下預防
措施:
1. 細閱並遵守「避免過度暴露於微波的預防措施」。
2. 在清晰的安全指引及監督下,並清楚瞭解危險性後,8歲或以上的兒童以及肢體、感覺或精神
能力較弱或缺乏經驗和知識的人員可操作本產品。嚴禁讓兒童把玩本產品。若需由兒童為本產
品進行清潔及保養,則只可在受監督下進行。
3. 將本產品及其電源線放在8歲以下兒童接觸不到的地方。
4. 如電源線損壞,必須由廠方、廠方指定的維修中心或同等合資格的技術人員進行更換,免生意
外。
5. 警告!更換爐燈前,請確保本產品已斷電,以防觸電。
6. 警告!非合資格人員,切勿進行涉及移除微波爐蓋的檢查或維修,以免微波洩漏。
7. 警告!嚴禁對密封於容器內的食物或液體進行加熱,以免發生爆炸。
警告及注意事項
8. 將膠容器或紙容器內的食物加熱時,可能導致冒煙或燃燒,必須小心留意。
9. 只可使用適合於微波爐的器皿。
10. 如出現冒煙情況,立即關機或拔除電源插頭,並保持爐門緊閉,令火焰自行熄滅。
11. 微波加熱飲料或會導致延後沸騰及飛濺的情況出現,拿取容器時必須加倍小心。
12. 加熱奶瓶或嬰兒食品瓶內的食物後,必須先攪拌、搖動並檢查溫度,以免燙傷。
13. 嚴禁使用本產品加熱連殼蛋類,因微波加熱時或加熱後可能使蛋爆炸。
14. 必須定期清洗本產品,並去除任何殘留的食物殘渣。
15. 如不保持本產品清潔,或會令其表面破損,縮短使用壽命,甚至造成危險。
16. 嚴禁將本產品安裝於裝飾門後,以免阻礙通風,導致過熱。
17. 只可使用適用於本產品的溫度計。
18. 本產品不適合嵌入安裝於櫥櫃內,除非已通過嵌入櫥櫃測試。
19. 使用本產品時,裝飾門(如有)必須保持開啟。
20. 本產品只適用於家居及其他類近環境使用,例如:商舖、辦公室及其他工作環境的員工廚房;
酒店、汽車旅館及其他住宅型環境;農舍;民宿類環境。
21. 本產品只可用於加熱食物和飲料。如用於烘乾食物或衣物、加熱暖墊、拖鞋、海綿、濕布等物
品可能導致受傷或引致火災。
22. 嚴禁使用金屬容器盛載食品和飲料進行微波烹調。
23. 嚴禁使用蒸氣清潔器清潔本產品。
24. 本產品只可座檯使用。
25. 本產品背面必須緊靠牆壁。
26. 嚴禁將本產品連接外置計時器或獨立遙控操作系統。
27. 使用本產品時,可接觸表面可能會變熱。
28. 警告!本產品以組合模式運行時會產生高溫,兒童必須在成人監督下才可使用。
29. 警告!為了避免意外重置熱斷路器而造成危險,嚴禁將本產品放置於高溫環境,或使用外
部開關裝置(如計時器),或連接至經常開關的電路。
30. 使用過程中,本產品會變熱,應小心避免接觸爐腔內的受熱元件。

P.23P.22
為減少人身傷害的風險
接電及安裝
接觸本產品內部元件可導致嚴重人身傷害,甚至死亡。嚴禁擅自拆卸本產品。
觸電危險
• 接地安裝不當,可能會導致觸電。
• 警告!在正確安裝和接地前,請勿插入電源插座。
• 警告!本產品必須接地。如發生短路時,接地可通過為電流提供排電線,減低觸電風險。
• 警告!本產品配有接地線與接地插頭的電源線,插頭必須插入正確安裝和接地的電源插
座。
• 警告!若對於接地安裝有任何疑問,請向合資格維修人員查詢。
• 警告!如需要使用延長線,只可使用三線式延長線。
• 本產品配備短電源線,以減低被長電源線纏住或絆倒的風險。
• 如需使用長電源線或延長線:
• 標記電源線或延長線的電氣額定值,應不少於本產品的電氣額定值。
• 延長線只可使用接地型三線式電源線。
• 長電源線應妥善放置,不應懸掛於櫃檯或桌面上,以免被兒童拉扯或無意絆倒。
警告!
非合資格人員,切勿進行涉及移除微波爐蓋的檢查或維修,以免微波洩漏。
警告及注意事項 烹調器皿使用指南
燒烤盤
餐具
玻璃瓶
玻璃器皿
微波爐烹調袋
紙碟和紙杯
廚房紙
烘焙紙
塑膠
保鮮膜
溫度計
食品蠟紙
必須遵守製造商指引。燒烤盤底部必須與轉盤距離至少3/16英寸(5毫
米)。不當使用可能會令爐腔底盤破裂。
必須使用耐熱且適用於微波爐的玻璃器皿。必須確認該器皿沒有任何
金屬裝飾。嚴禁使用破損或有缺口的碗碟。
用於覆蓋食物或吸收油脂。只能短時間烹調或加熱。烹調時切勿離開。
必須適用於微波爐。用於覆蓋食物保持水分。由於保鮮膜有溶化的可
能,嚴禁讓保鮮膜接觸食物。
必須適用於微波爐,並遵守製造商指引。嚴禁使用破裂或有缺口的碗
碟。
必須遵守製造商指引。嚴禁用金屬帶索緊,須預留縫隙散出蒸氣。
用於覆蓋食物防止飛濺,或包裹食物進行蒸煮。
必須適用於微波爐(肉類和糖果溫度計)。
必須取下瓶蓋。只適用於將食品加熱至溫暖,因大多數玻璃瓶並不耐
熱,高溫可能導致破裂。
只能短時間烹調或加熱。烹調時切勿離開。
必須適用於微波爐並印有「適用於微波爐」安全標籤,必須遵守製造
商指引。有些塑膠器皿加熱後會略為變軟。蒸煮袋及塑膠袋應按包裝
建議,預留縫隙或散氣孔。
用於覆蓋食物,防止飛濺和保持水分。
有關微波爐烹調器皿選擇,請參閱以下「烹調器皿使用指南」。請注意,有些非金屬物料也不適合
放進微波爐內加熱。
可以微波爐加熱的器皿

P.25P.24
鋁盤
帶金屬提手的食品紙盒
金屬或金屬包邊容器
金屬紮絲
紙袋
發泡膠
木材
可能引起火花,請轉用微波爐專用器皿。
可能引起火花,請轉用微波爐專用器皿。
金屬會遮蓋微波能量接觸食物。金屬包邊可能引起火花。
可能引起火花甚至火警。
可能導致微波爐內著火。
當處於高溫時,塑膠泡沫可能會熔化,污染盛載的食物。
微波爐加熱時,木材會變乾,可能導致容器裂開或產生裂紋。
除以上列出的烹調器皿外,你亦可自行進行以下測試,以判斷該烹調器皿是否適合放進本產品:
1. 把250毫升冷水注入可放進微波爐的器皿,並和有疑問的器皿一起放進爐內。
2. 以最大火力運行微波功能1分鐘。
3. 取出器皿,如果該器皿是暖的,則嚴禁用於微波加熱。
4. 進行此測試時,嚴禁加熱超過1分鐘。
嚴禁微波爐加熱的器皿
烹調器皿使用指南 產品結構
爐門把手
控制面板
接水盤
儲水箱
烤架
集油盤
儲水箱
接水盤
注意:
• 烹調前以純淨水注滿水箱,確保水箱蓋蓋好後裝回爐身;烹調完成後把水箱內的剩水倒掉。
• 當使用微波功能時,嚴禁使用集油盤及烤架。使用其他功能時,可使用集油盤及烤架,但烤架
必須放在集油盤上使用。

P.27P.26
安裝前注意事項
1. 移除所有包裝物料及取出所有配件。
2. 仔細檢查機身及爐門有否破損。如有任何損壞,切勿安裝,並聯絡客戶服務及維修中心。
座枱式安裝
1. 選取一個有足夠空間進氣及排氣的平面:
.安裝位置離地面至少85厘米。
.機背靠牆,機頂上方預留至少30厘米空間,機身離旁邊牆身至少20厘米。
.嚴禁拆除機底的腳墊。
.嚴禁遮擋進氣及排風位,否則有機會損壞本產品。
2. 將電源線與插座連接前,必須確認電壓及頻率符合標籤上所示數值。
警告!
.嚴禁將本產品安裝於爐頭或其他會發熱的裝置上。如安裝於熱源附近或上方,而導致本產品
損壞,相關保養將會作廢。
.使用本產品時,可接觸表面可能會變熱。
30cm
20cm
20cm
min 85cm
安裝說明 使用說明
控制面板
操作指令
按鍵 功能
烤焗鍵
蒸煮鍵
微波鍵
預設食譜鍵
選擇鍵
開始/確認鍵
暫停/取消鍵
旋鈕
在待機狀態下:
.按1次進入烤焗功能(預熱)
.按2次進入烤焗功能(不預熱)
.按3次進入微波+烤焗組合功能
.按4次進入蒸煮+烤焗組合功能
在待機狀態下,按鍵進入蒸煮功能
在待機狀態下,按鍵進入微波功能
在待機狀態下,按鍵進入預設食譜功能
在烹調設置期間,按鍵確認設置
按鍵確認設置或開始烹調
.在待機狀態下,長按3秒啟用或停用童鎖功能
.在烹調期間,按鍵暫停烹調,再按取消烹調
旋轉旋鈕調校溫度、時間或選擇食譜

P.29P.28
使用說明
待機狀態及睡眠狀態
1. 接通電源後,本產品即處於睡眠狀態。
2. 打開再關上爐門,LED顯示屏顯示「0」並進入待機狀態。
3. 在待機狀態下,如5分鐘內沒有任何操作,蜂鳴器會出提示聲1聲,自動進入睡眠狀態。
注意:
在睡眠狀態下,所有按鍵將被鎖定,任何功能均不可操作;開關爐門以返回待機狀態。
童鎖功能
1. 鎖定:在待機狀態下,長按「暫停/取消鍵 」3秒,蜂鳴器會出提示聲1聲,啟用童鎖功能,
所有按鍵將被鎖定。
2. 解鎖:童鎖功能啟用時,長按「暫停/取消鍵 」3秒,蜂鳴器會出提示聲1聲,所有按鍵回復
正常。
微波功能
1. 在待機狀態下,按「微波鍵 」進入微波功能。
2. 重複按「微波鍵 」循環選擇900W、700W、500W、300W、100W火力,完成後按「選擇鍵 」
進入時間設置。
3. 扭動旋鈕以調校烹調時間,完成後按「開始/確認鍵 」開始烹調。
蒸煮功能
1. 在待機狀態下,按「蒸煮鍵 」進入蒸煮功能。
2. 扭動旋鈕以調校溫度,完成後按「開始/確認鍵 」或「選擇鍵 」進入時間設置。
3. 扭動旋鈕以調校時間,完成後按「開始/確認鍵 」開始烹調。
注意:
儲水箱只宜注入純淨水以防水垢積聚。
烤焗功能(預熱)
1. 在待機狀態下,按「烤焗鍵 」進入烤焗功能(預熱)。
2. 扭動旋鈕以調校溫度,完成後按「開始/確認鍵 」開始預熱。
3. 預熱完成後,打開爐門放入食物再關上,LED顯示屏顯示30分鐘。
4. 扭動旋鈕以調校時間,完成後按「開始/確認鍵 」開始烹調。
使用說明
烤焗功能(不預熱)
1. 在待機狀態下,按「烤焗鍵 」2次進入烤焗功能(不預熱)。
2. 扭動旋鈕以調校溫度,完成後按「開始/確認鍵 」或「選擇鍵 」進入時間設置。
3. 扭動旋鈕以調校時間,完成後按「開始/確認鍵 」開始烹調。
注意:
.烹調時,按「暫停/取消鍵 」或打開爐門,進入暫停狀態,此時LED顯示屏上的烹調時間會閃
爍。
.在暫停狀態下,按「開始/確認鍵 」繼續烹調。
.在暫停狀態下,按「暫停/取消鍵 」取消烹調並返回待機狀態。
微波+烤焗組合功能
1. 在待機狀態下,按「烤焗鍵 」3次進入微波+烤焗組合功能。
2. 扭動旋鈕以調校溫度,完成後按「開始/確認鍵 」或「選擇鍵 」進入時間設置。
3. 扭動旋鈕以調校時間,完成後按「開始/確認鍵 」開始烹調。
蒸煮+烤焗組合功能
1. 在待機狀態下,按「烤焗鍵 」4次進入蒸煮+烤焗組合功能。
2. 扭動旋鈕以調校溫度,完成後按「開始/確認鍵 」或「選擇鍵 」進入時間設置。
3. 扭動旋鈕以調校時間,完成後按「開始/確認鍵 」開始烹調。
預設食譜功能
1. 在待機狀態下,按「預設食譜鍵 」進入預設食譜功能。
2. 扭動旋鈕以選擇食譜代號(對應食譜見P.28),完成後按「開始/確認鍵 」或「選擇鍵 」
進入時間設置。
3. 扭動旋鈕以調校時間,完成後按「開始/確認鍵 」開始烹調;如無需調校時間,可直接按
「開始/確認鍵 」開始烹調。

P.31P.30
代號 食譜 重量/數量 預設時間 工作模式
01
02
03
04
05
06
07
08
09
10
11
12
13
14
15
16
17
18
19
20
21
22
23
24
25
26
27
28
29
30
31
32
33
100-2000克
400克
3個
450克
400克
450克
150克
600克
300克
500克
12隻
2個
5串
250克
4串
1盤
500克
9個
9個
1個
9個
400克
600克
600克
600克
300克
300克
100克
500克
1000克
-
-
-
-
4分
12分30秒
6分50秒
6分30秒
5分
22分
5分
22分
10分
19分
14分
11分
11分
15分
9分
60分
18分
18分
17分
23分
10分
20分
20分
10分
120分
120分
2分30秒
50分
360分
10分
20分
5分
微波
微波
微波
微波
微波
微波
微波
微波
微波
燒烤
燒烤
燒烤
燒烤
燒烤
燒烤
燒烤
燒烤
燒烤
燒烤
燒烤
燒烤
蒸汽
蒸汽
蒸汽
蒸汽
蒸汽
蒸汽
微波
燒烤
燒烤
蒸汽
-
吹風
解凍
翻熱
薯仔
肉類
蔬菜
魚類
意粉
湯水
蕃茄飯
椒鹽焗蝦
蜜糖雞中翼
忌廉芝士蕃薯
巴西烤雞串
黑椒牛扒
烤雜菜串
曲奇餅
戚風蛋糕
法式焦糖布丁
牛角包
意大利薄餅
葡撻
蒸菜
切片薯仔
雞胸
蒸肉扒
牛肉
三文魚
牛油解凍
麵糰發酵
乳酪發酵
爐腔清潔
除水垢
爐腔除味
使用說明 清潔與保養
警告!
清潔前請先確保已拔掉電源插頭,並待機器冷卻;不可把本產品浸入水中或弄濕,以防漏電。
1. 每次使用後,請將水箱餘水倒盡,避免水箱形成凝結物或滋生細菌。
2. 每次使用後,請用溫水擦拭爐門密封條,再用乾布擦乾。
3. 密封條可能因長時間使用出現穿孔、裂開,如出現此情況,請更換新的密封條。
4. 每次使用後,請先用濕布擦去爐腔的凝結物,再用乾布擦乾。
5. 大部份烹飪殘餘物都可用抹布及溫和清潔劑、溫水清潔。
6. 每次使用後,請用乾布或其他工具將水槽(內腔前板下部)內的水清潔乾淨。
玻璃面板清潔
1. 經常清潔爐門和控制面板,牢固的污垢可用中性清潔劑清洗。
2. 不可用鋼絲球擦洗,以免劃傷表面,清潔後用乾布擦乾。
爐腔內部
1. 用溫水或中性清潔劑清洗,請勿使用具有腐蝕性的清潔劑清洗。
2. 難以去除的污漬可用尼龍刷清潔,請勿使用鋼絲球擦洗,以免造成表面不可修復的損傷。
3. 爐腔的清潔劑必須清洗乾淨不能有殘留,清洗後用乾布擦乾,保持爐腔乾燥。

P.33P.32
故障檢修 故障檢修
常見疑難 可能原因
微波功能運作時或會影響收音機和電視接收,就如其他小
型電器一樣,屬正常情況。
在低火力微波烹調下,爐燈會較淡,屬正常情況。
烹調時會產生蒸氣,大部份會經排氣口排出,但有些會積
聚在爐門上,屬正常情況。
沒有食物下不應啟動,這是非常危險的情況。
微波功能影響電視接收
爐門上有蒸氣,排氣口
有熱氣排出
沒有食物下啟動
爐燈暗淡
故障現象 可能原因 解決方法
插頭沒有插好
燒了保險絲或電路斷開
插座損壞
爐門沒有關好
拔掉插頭,10秒後重插
聯絡客戶服務及維修中心
用其他電器測試插座是否能正
常通電
關好爐門
無法開啟
無法加熱
警告!
如無法順利排除故障,請與客戶服務及維修中心聯絡,嚴禁非專業人員對本機拆卸。
故障
代碼 可能原因 測試方法 維修方法
E-1 PCB主控板漏電:
PCB主控板檢測到變頻器回饋的大IB信
號(IB信號是指變頻器工作是否正常的
信號),此時顯示屏顯示「E-1」,蜂
鳴器發出提示聲響3次。
接通微波繼電器,
延時等待200ms後開
始連續3次判斷IB
值,當電壓>0.3V觸
發此故障。
更換PCB主控板
E-5 變頻器無功率:
使用微波功能時,在運作過程中會檢測
IB信號,如未檢測到信號,暫停微波輸
出3秒並繼續檢測;如連續4次未檢測到
信號,此時顯示屏顯示「E-5」,蜂鳴
器發出提示聲響3次,停止微波輸出,
風扇繼續工作。
斷開PCB主控板和
變頻器之間的信號
連接。
更換變頻器
E-6 變頻器功率過高:
使用微波功能時,在運作過程中會檢測
IB信號,如IB信號大於微波正常輸出的
200%,此時顯示屏顯示「E-6」,蜂鳴
器發出提示聲響3次,停止微波輸出。
微波啟動後,IB連
接到>4.0V的電壓。
更換變頻器
E-8 變頻器功率過低
(原因多為磁環破裂):
使用微波功能時,在運作過程中會檢測
IB信號,如IB信號小於微波正常輸出的
50%並持續12秒以上,此時顯示屏顯示
「E-8」,蜂鳴器發出提示聲響3次,停
止微波輸出。
微波啟動後,變頻
器和PCB主控板的
IB連接到<1.0V的
電壓:
1. 測試變頻器,如
滿足上述要求,則
變頻器正常。
2. 如仍無法解決,
需測試PCB主控板。
1. 如變頻器IB錯
誤,更換新的變頻
器。
2.如PCB主控板的IB
錯誤,更換新的PCB
主控板。

P.35P.34
保用條款
此保用提供德國寶產品之機件在正常使用下壹年保用
(自購買日起計算)。
Warranty Terms & Conditions
Under normal operations, the product will gurantee a 1-year full
warranty provided by German Pool (effective from the date of
purchase).
1. Customer who fails to present original purchase invoice will
not beeligible for free warranty service.
2. Customer should always follow the operating
instructions. Thiswarrantydoes not apply to:
- labour costs for on-site installation, check-up, repair,
replacement of parts and other transportation costs;
- damages caused by accidents of any kind (including
material transfer and others);
- operating failures resulting from applying incorrect voltage,
improperusage, and unauthorized installations
or repairs.
3. Thiswarranty is invalid if:
- the purchase invoice is modified by an unauthorized party;
- the product is used for anycommercial or industrial purposes;
- the product is repaired or modifiedby unauthorized
personnel, orunauthorizedparts are installed;
- the serial number is modified, damagedor removed from
the product.
4. German Poolwill, at its discretion, repair or replace any
defective part.
5. Thiswarranty will be void if there is any transfer of
ownership from the original purchaser.
1. 未能出示購買發票正本者,將不獲免費維修服務。
2. 用戶應依照說明書的指示操作。本保用並不包括﹕
- 上門安裝、檢驗、維修或更換零件之人工以及
一切運輸費用﹔
- 因天然與人為意外造成的損壞 (包括運輸及其他)﹔
- 電源接合不當、不依說明書而錯誤或疏忽使用本
機所引致之損壞。
3. 於下列情況下,用戶之保用資格將被取消﹕
- 購買發票有任何非認可之刪改;
- 產品被用作商業或工業用途;
- 產品經非認可之技術人員改裝或加裝任何配件;
- 機身編號被擅自塗改、破壞或刪除。
4. 總代理有權選擇維修或更換配件或其損壞部份。
5. 產品一經被轉讓,其保用即被視作無效。
機身號碼 Serial No. :
購買商號 Purchased From :
發票號碼 Invoice No. :
購買日期 Purchase Date :
型號 Model No. :
另請填妥以下表格並與正本發票一併保存,以便維修時核對資料。用戶提供之所有資料必須正確無誤,否則免費保用將會無效。
Pleasefill out the form below. This information and the original purchaseinvoice will be required for anyrepairs. Warranty will be
invalidated if information provided is found to be inaccurate.
此保用只適用於香港及澳門 This warranty is valid only in Hong Kong and Macau
客戶服務及維修中心 Customer Service & Repair Centre
Hong Kong
Unit B, G/F, Sunshine Kowloon Bay
Cargo Centre, 59 Tai Yip Street, Kowloon
Kowloon, Hong Kong
Tel : +852 2333 6249
Fax : +852 2356 9798
Email : repairs@germanpool.com
Macau
3/F, Edificio Industrial Pou Fung,
145 Rua de Francisco Xavier Pereira,
Macau
Tel : +853 2875 2699
Fax : +853 2875 2661
香港
九龍大業街59號
三湘九龍灣貨運中心地下B室
電話:+852 2333 6249
傳真:+852 2356 9798
電郵:repairs@germanpool.com
澳門
澳門俾利喇街145號
寶豐工業大廈3樓
電話:+853 2875 2699
傳真:+853 2875 2661
*
貴戶須在購機十天內,以下列其中一種方式向本公司
登記資料,保用手續方正式生效﹕
1)
填妥本公司網頁內之
保用登記表格
www.germanpool.com/
warranty
2)
填妥保用登記卡,
郵寄至本公司。
* This warranty is not valid until customer registration information
is receivedby ourService Centre within10 days ofpurchase
via one of the following means:
1) Visit our website and register
online:
www.germanpool.com/
warranty
2)
Complete all the fields on the
attached Warranty Card and
mail itback to our Customer
Service Centre.
SGM-2519
型號
電壓/頻率
輸入功率 (微波爐)
輸出功率 (微波爐)
輸出功率 (烤焗)
輸出功率 (蒸煮)
最大功率 (蒸煮)
最大功率 (烤焗)
產品尺寸 (毫米)
容量
淨重
SGM-2519
220 V ~ 50 Hz
1,450 W
900W
1,500 W
1,500 W
1,900 W
1,900 W
(H) 337 (W) 468 (D) 383
23 L
18.3kg
技術規格
產品規格及設計如有變更,恕不另行通知。
中英文版本如有出入,一概以英文版為準。
本產品使用說明書以 www.germanpool.com 網上版為最新版本。

P.36 SGM-2519-M-20(1)
G e rman Pool (Hong Kong) Limi t e d
www.germanpool.com
Hong Kong
Room 113. Newport Centre Phase II. 116 Ma Tau
Kok Road. Tokwawan. Kowloon. Hong Kong.
Tel: +852 2773 2888
Fax:+852 2765 8215
China
Tel: +86 757 2219 6888
Fax:+86 757 2219 6809
8th, Xinxiang Road, Wusha Industrial Park,
Daliang, Shunde, Foshan, Guangdong
3/F, Edificio Industrial Pou Fung,
145 Rua de Francisco Xavier Pereira, Macau
Tel:+853 2875 2699
Fax:+853 2875 2661
Macau
© All rights reserved. Copying, reproducing or using the contents of this manual is not allowed without prior authorization from German Pool, violators will be prosecuted.
HONG KONG TOP BRAND TEN YEAR
ACHIEVEMENT AWARD
Table of contents
Other German pool Microwave Oven manuals

German pool
German pool MVH-125M User manual

German pool
German pool SGM-T4228 User manual

German pool
German pool SGM-3620 User manual

German pool
German pool MVG-1712 User manual

German pool
German pool WP700ASJ17Q-2B User manual

German pool
German pool MAG-280 User manual

German pool
German pool MVG-3014 User manual