:.
~
·
················~~:·:~:·::·~·;···1
'
_ :
co
:-=
.~
~
~
\J
o
dllll~==
'level
\ \ \ \ I
COLOR
I
A
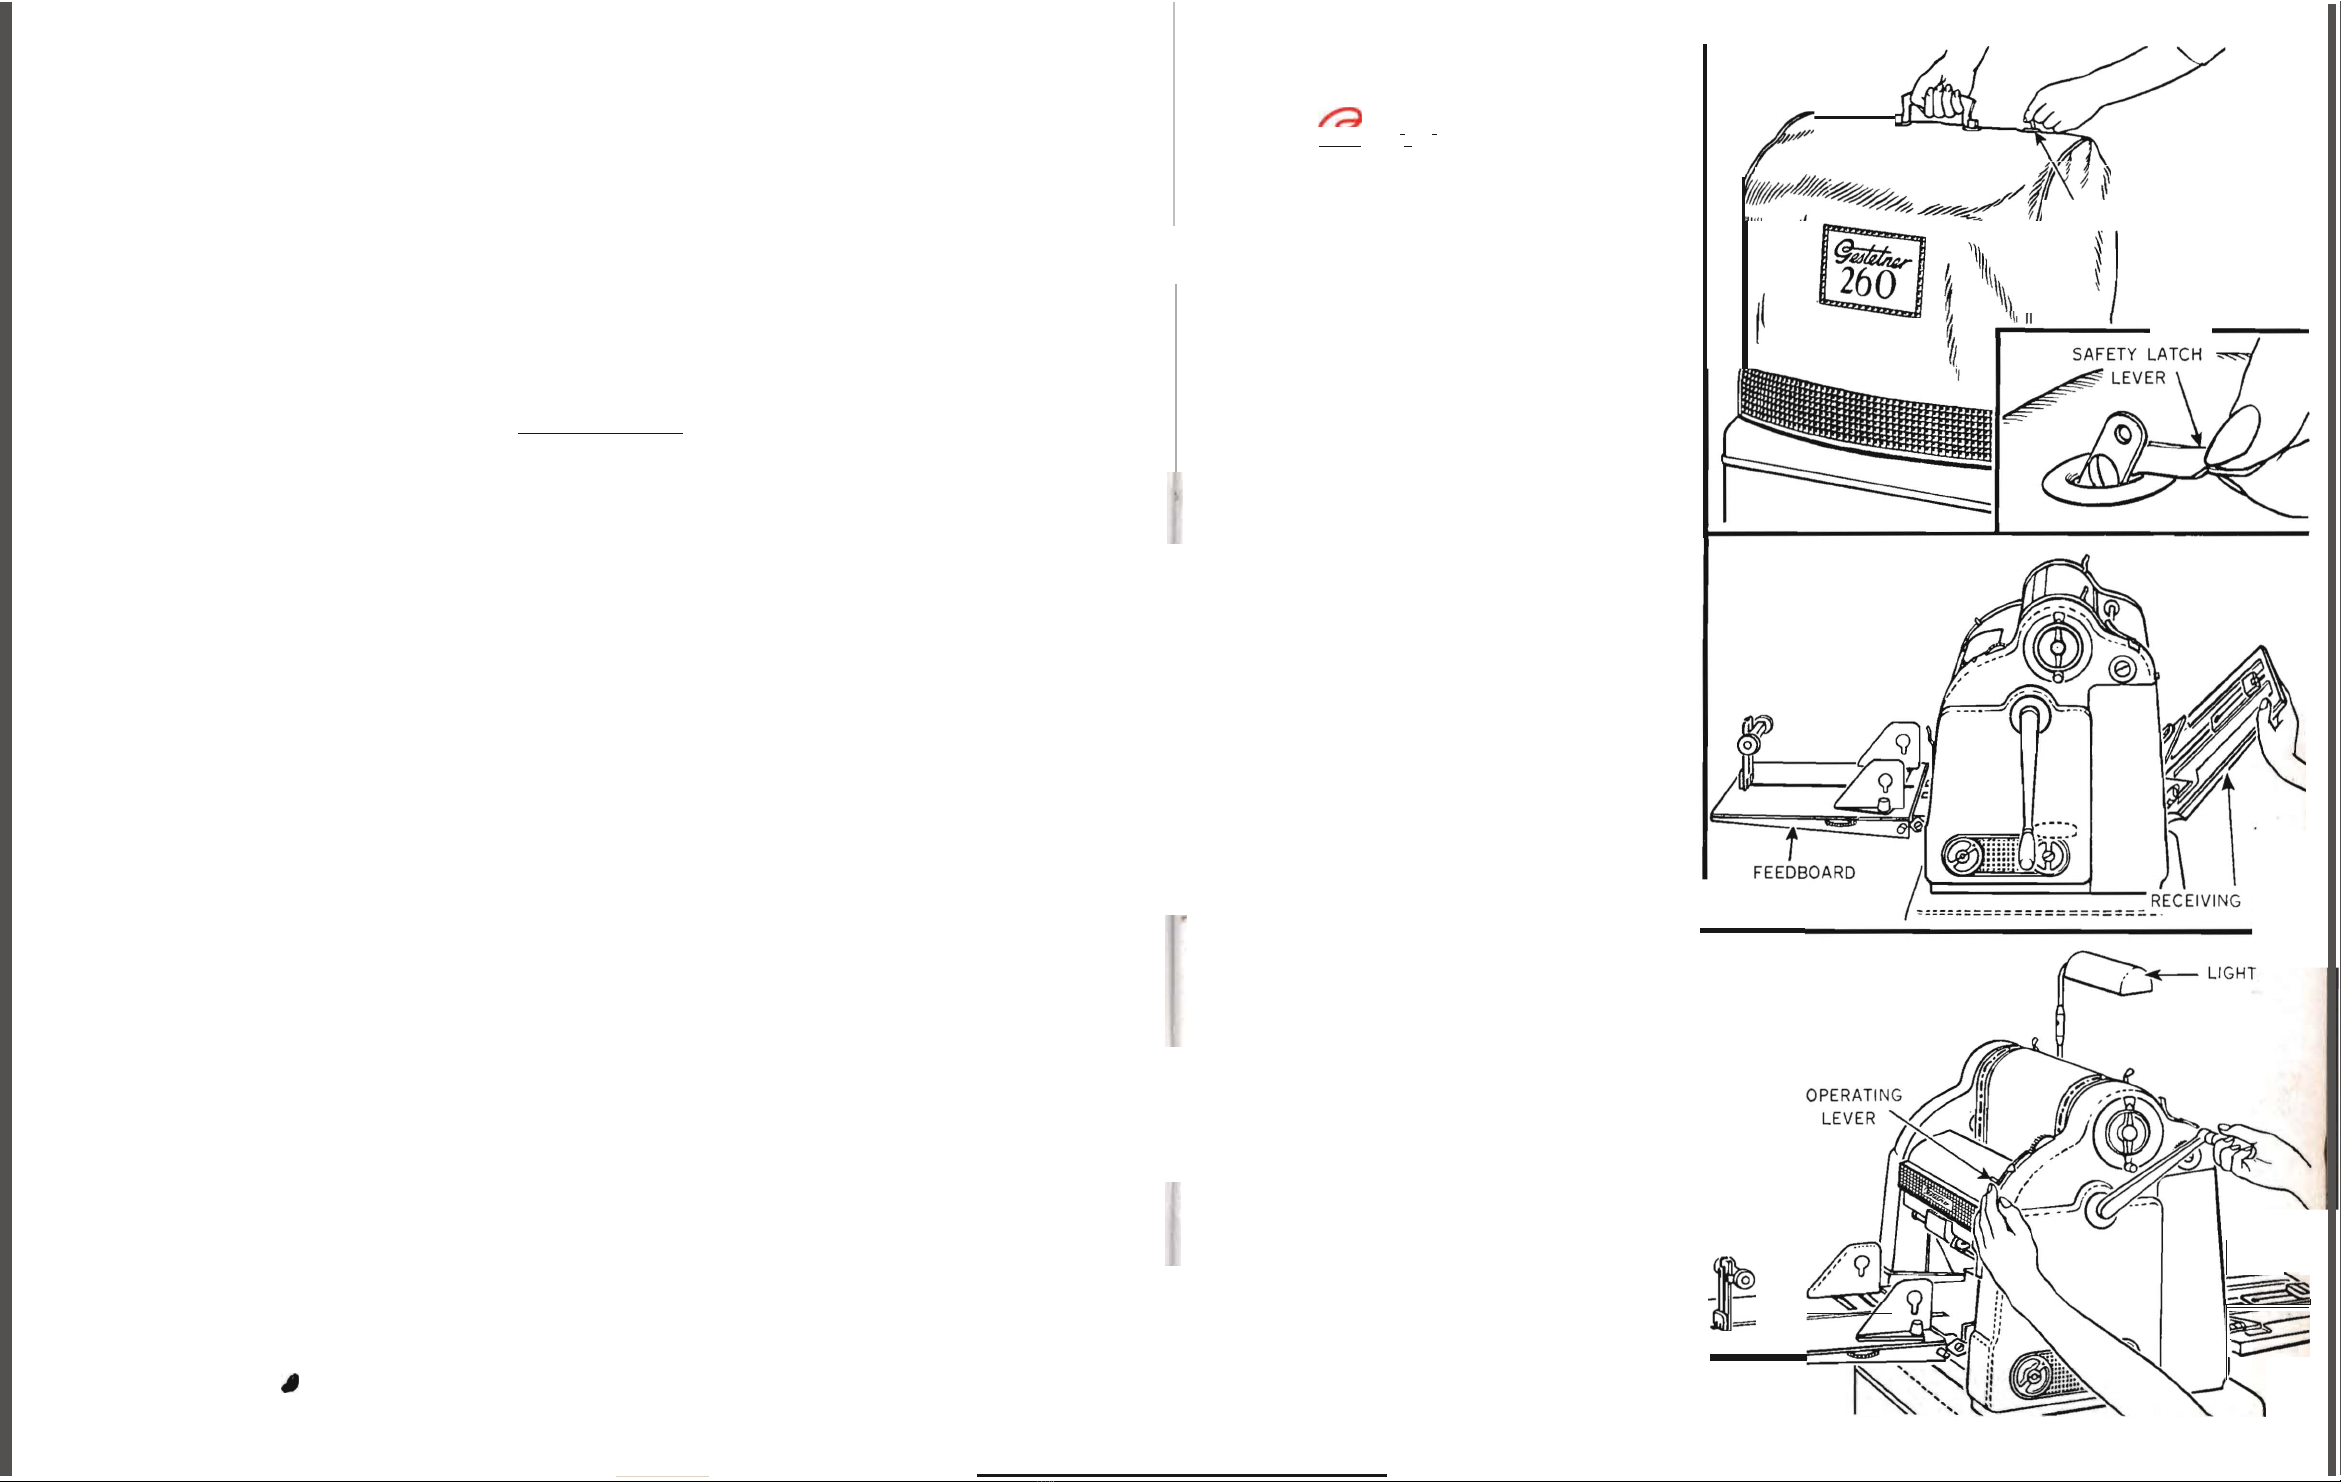
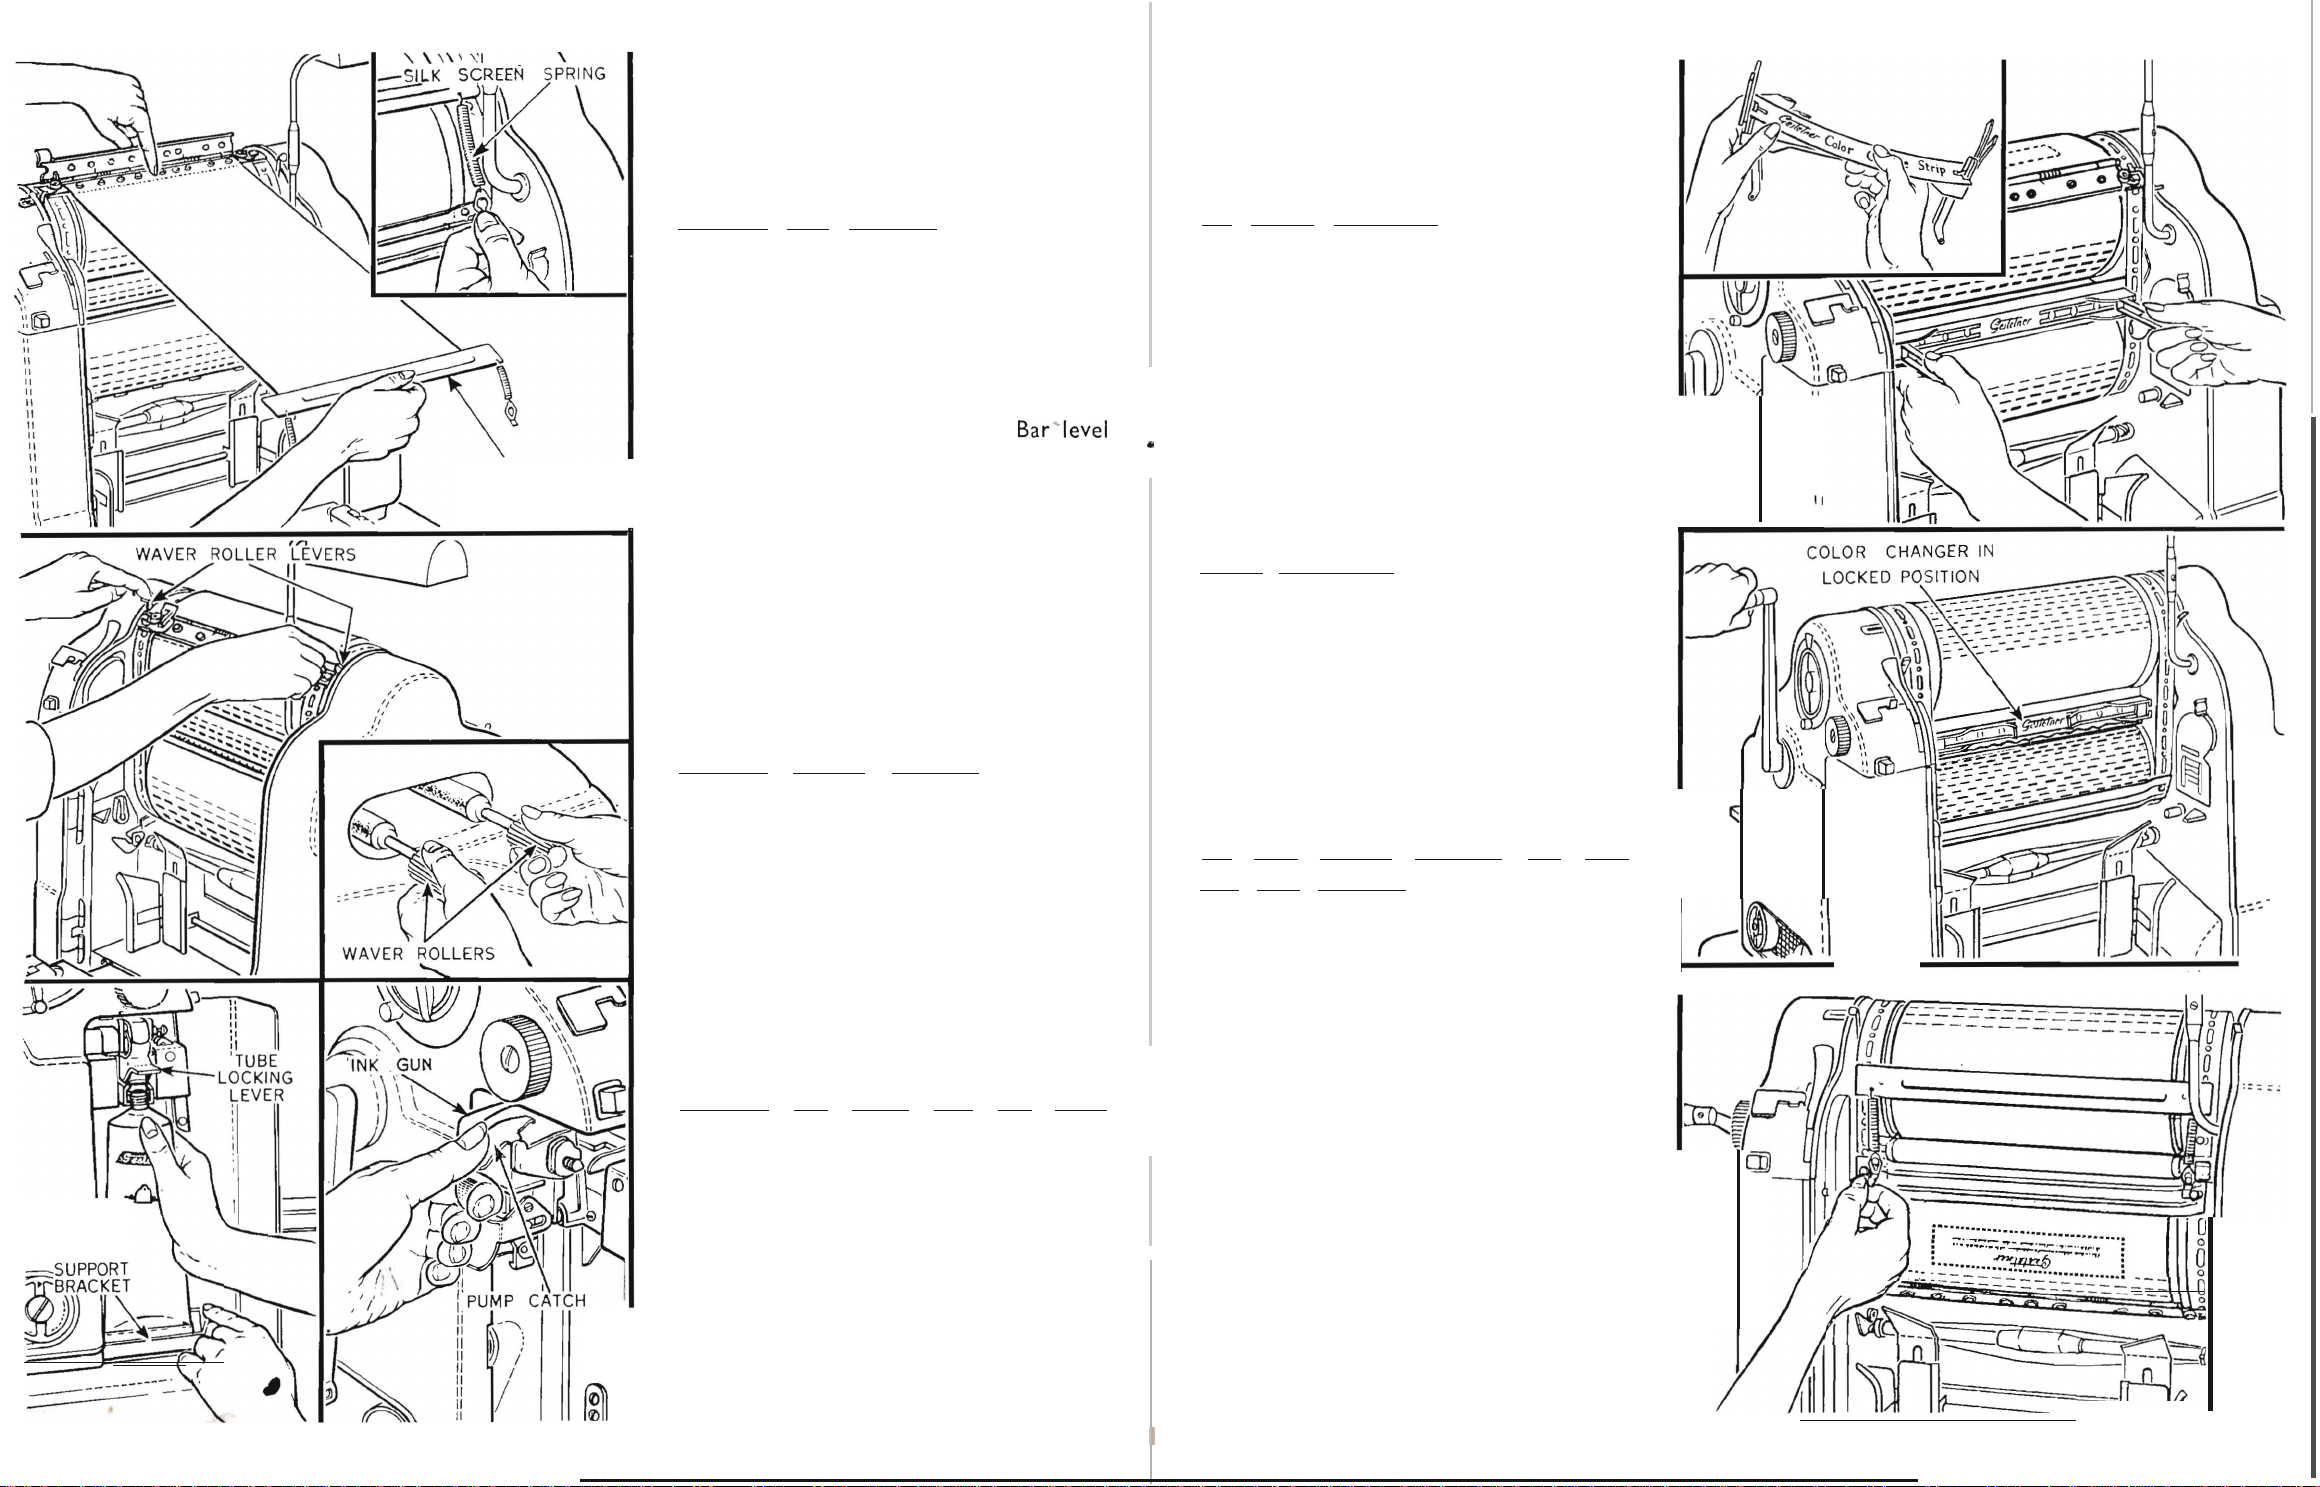
Remove
Silk
Screen.
Turn Handle
clockwise until Spring Bar
is
opposite
Waver
Roller Levers. Disengage the
two
Silk Screen Springs, lift
up
Spring Bar with
the
right hand and
turn
Handle anti-clock-
wise until Stencil Fixing Bar
is
above Top
Cylinder.
Lift
up
Stencil Fixing Bar Cover
then, while holding
the
Spring
..
.
"
I,
I ,
II
II
"
"
"
II
"
II
11
II
11
"
"
"
"
II
II
II
II
II
I I
II
.
with the Top Cylinder, disengage Silk
S
PR
I
NG
BAR
Screen Heading
by
pushing it backwards
using slot provided and
\Ift
Screen away
from Machine.
B
Remove Waver Rollers. Depress
Waver
Roller Levers and withdraw
Waver
Rollers from Machine.
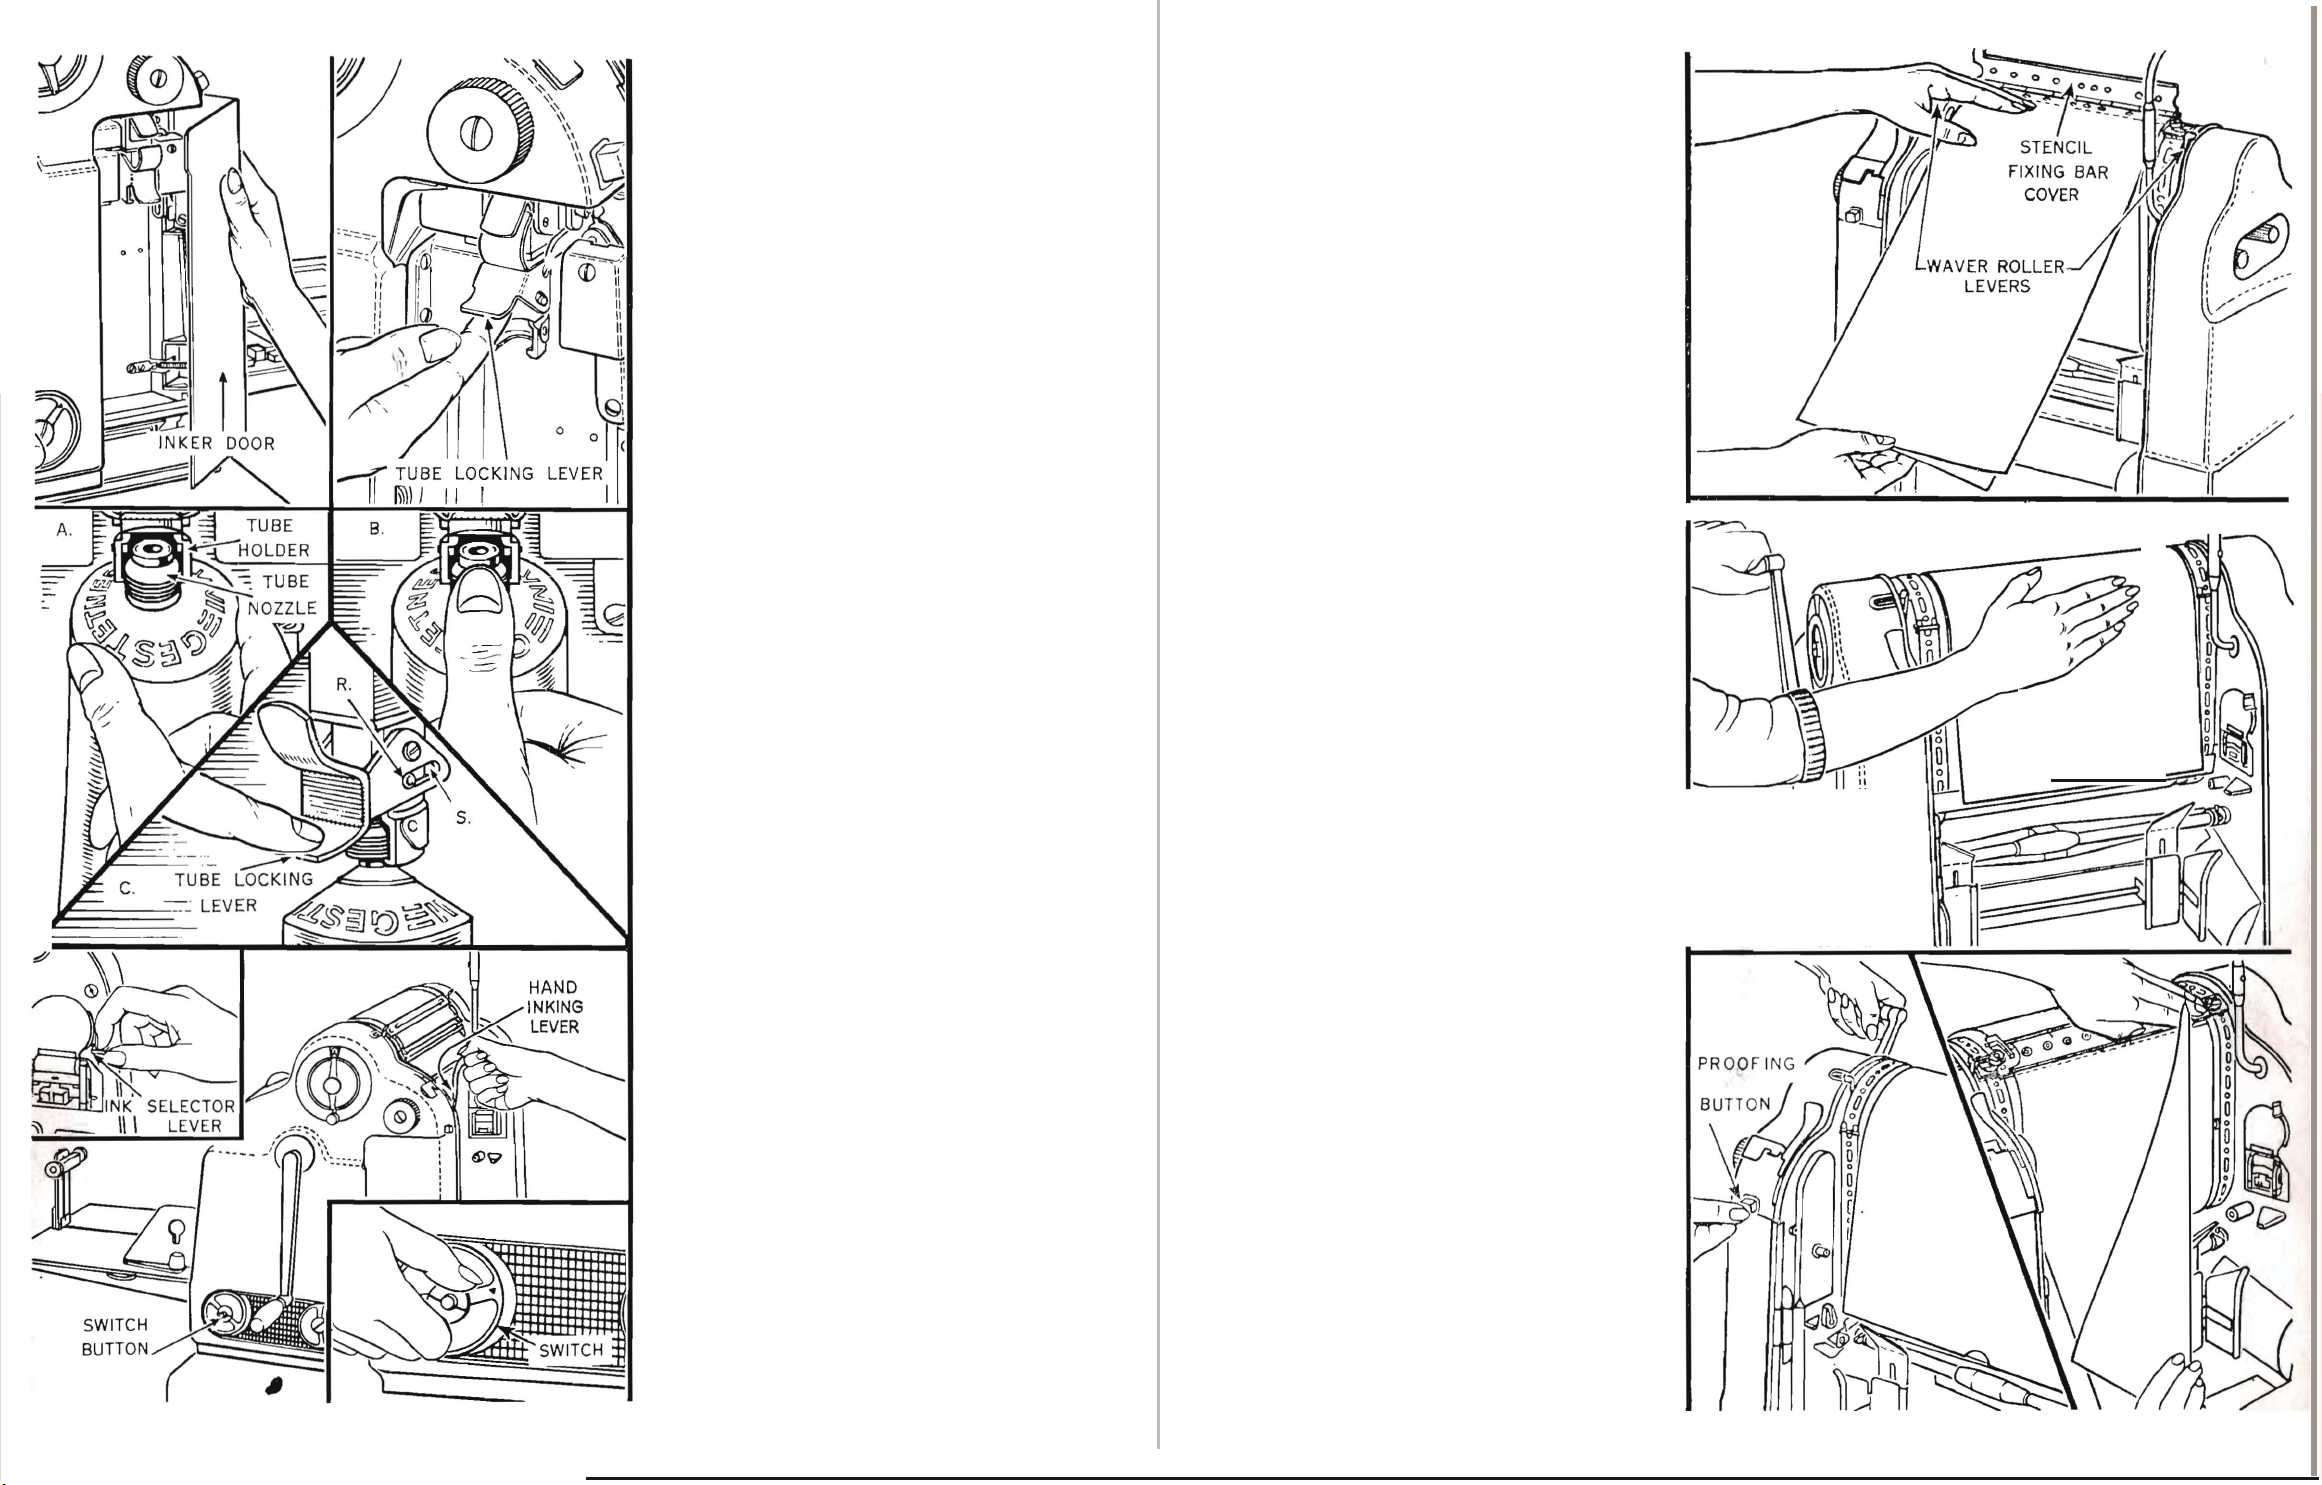
c
Remove Ink
Tube
and Ink Gun.
Open Inker Door.
Raise
Tube Locking
Lever, hold down Tube Support Bracket,
remove Ink Tube and replace its cap.
Depress Pump Catch and withdraw
Ink
TUBE
Gun. Close Inker Door.
10
11
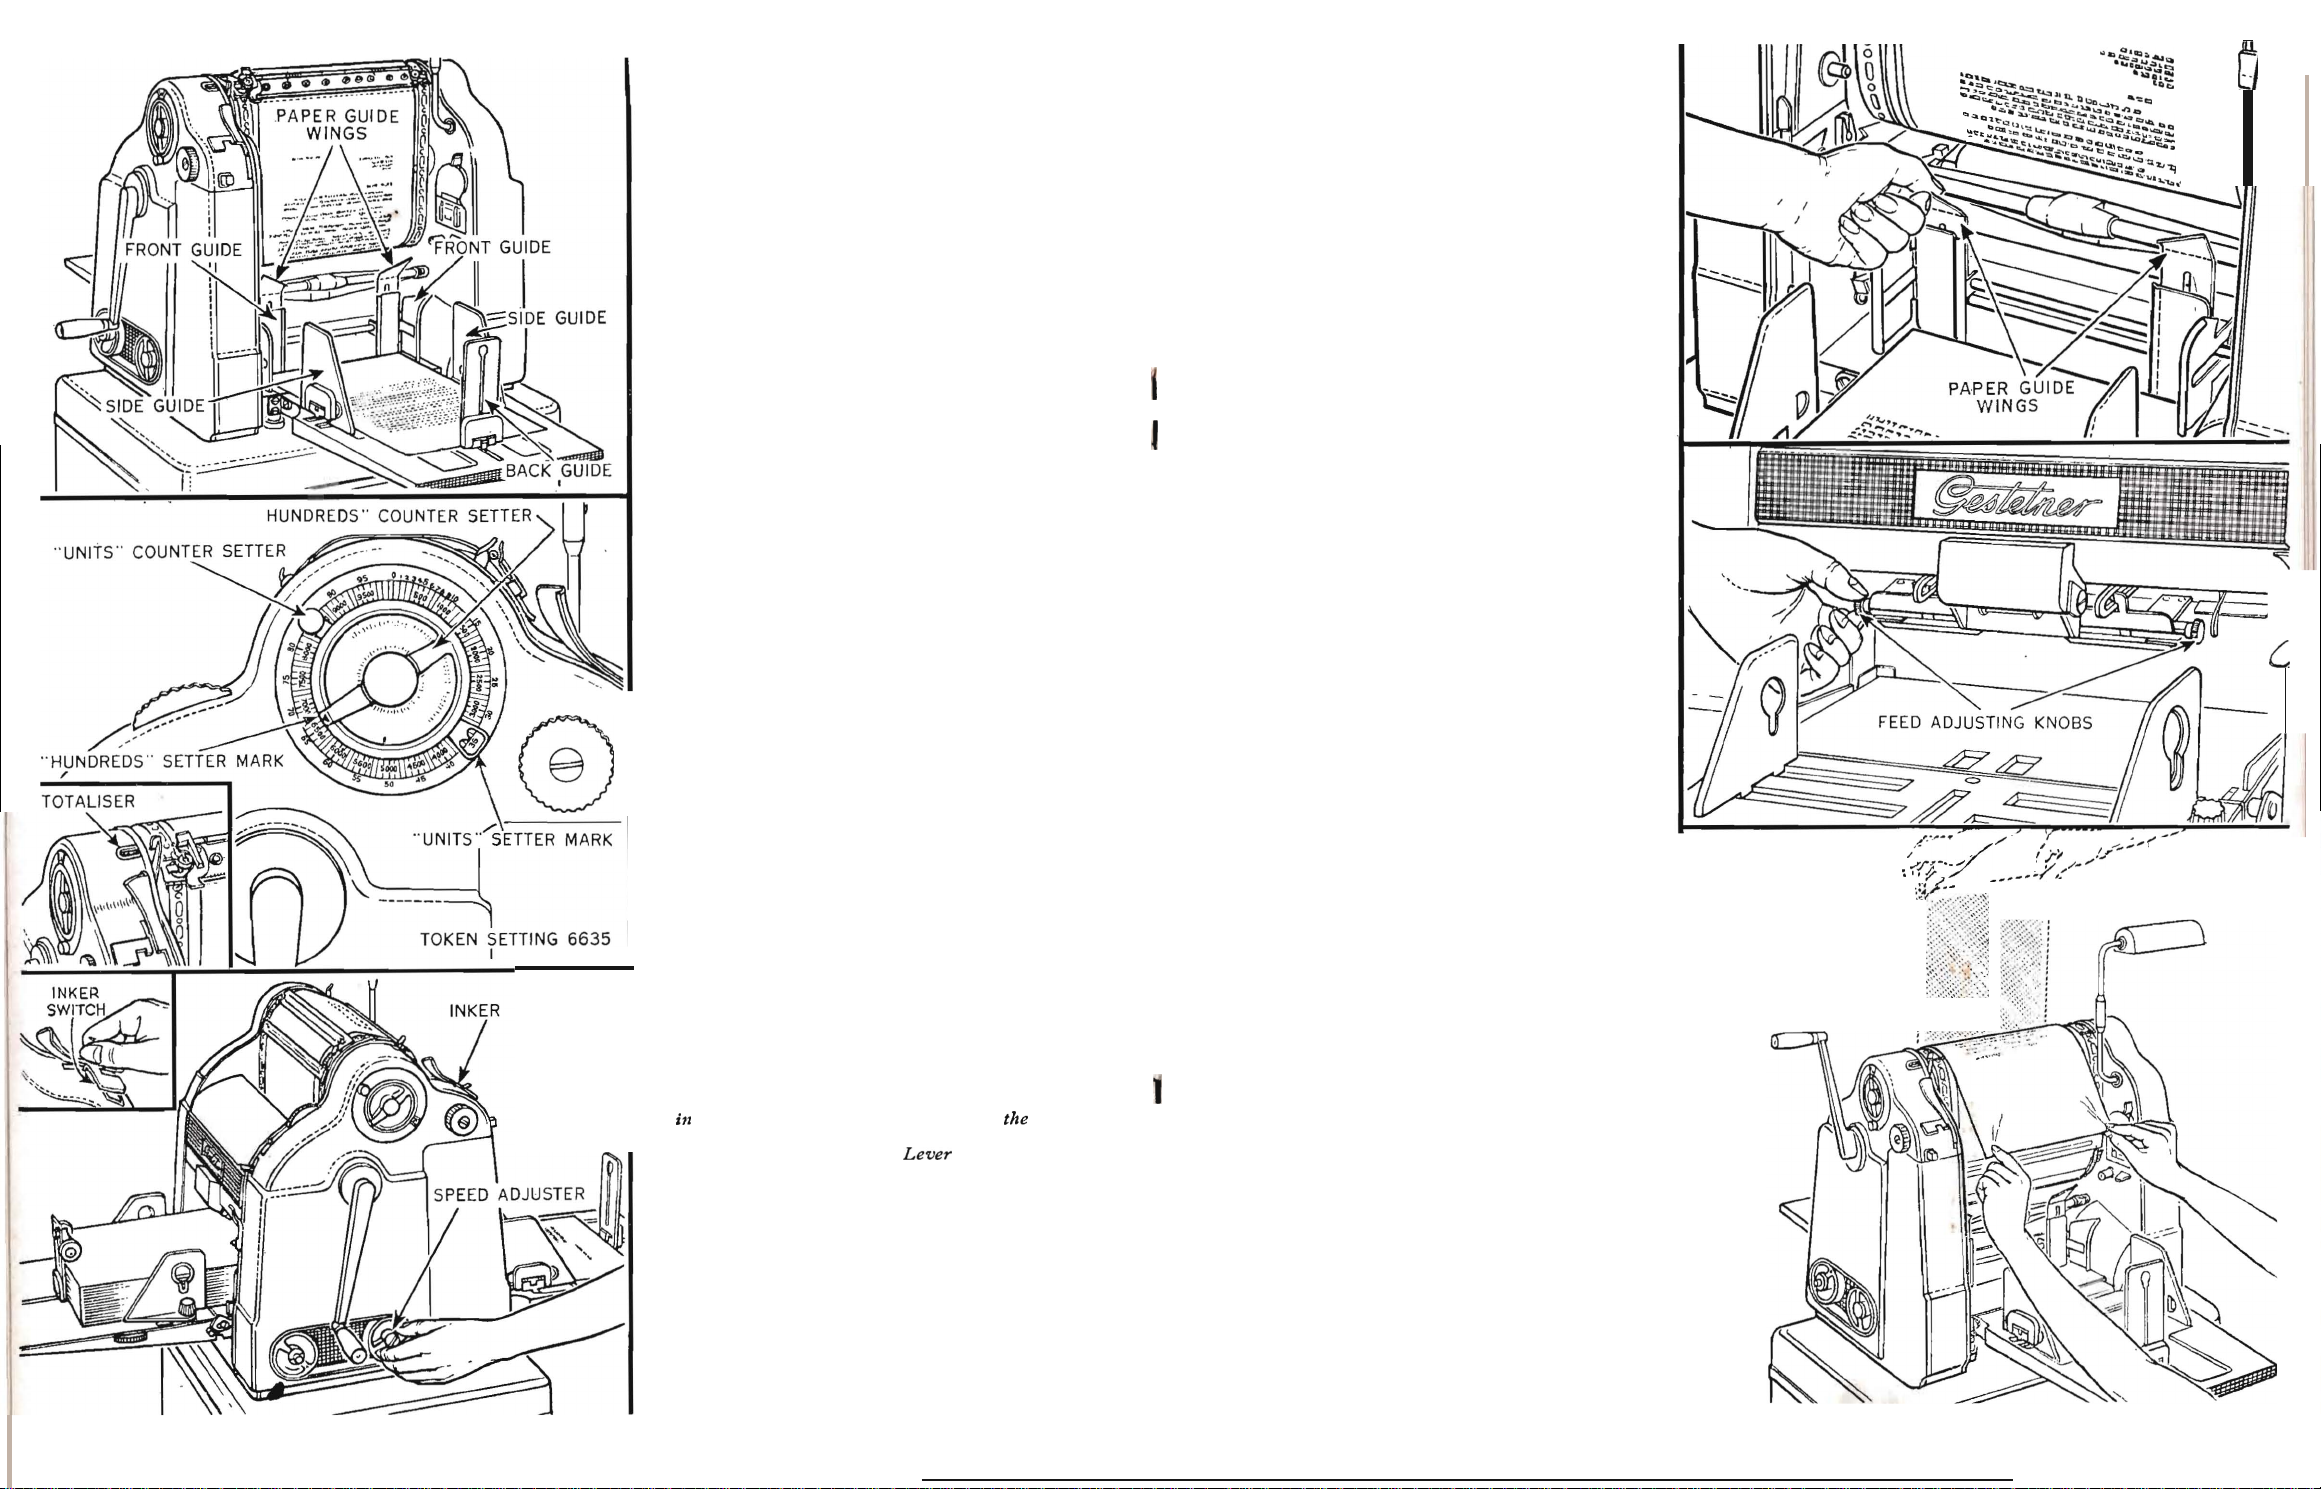
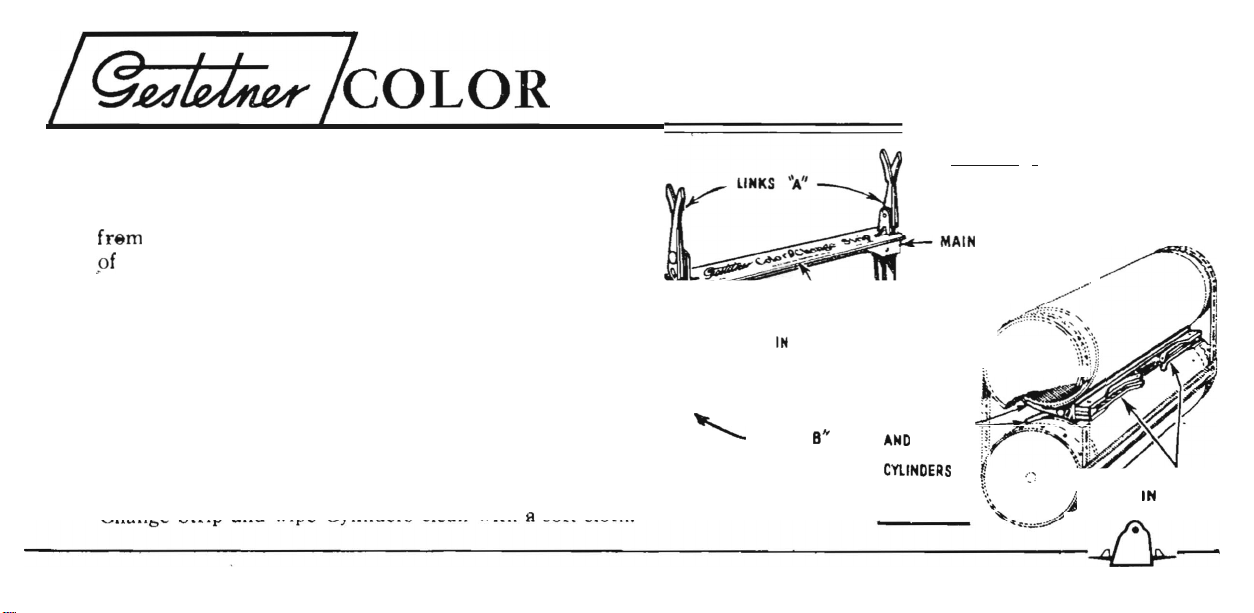
CHANGING
D
Fit
Color
Changer. Place a Color
Change Strip (printing upwards) firmly on
the
main
bar of the Color Changer. Hold
the
Color Changer
by
its Levers and insert
it between
the
Cylinders, at
the
back
ofthe
Machine, with the pronged links inwards.
Fold
Levers fully inwards
to
lock.
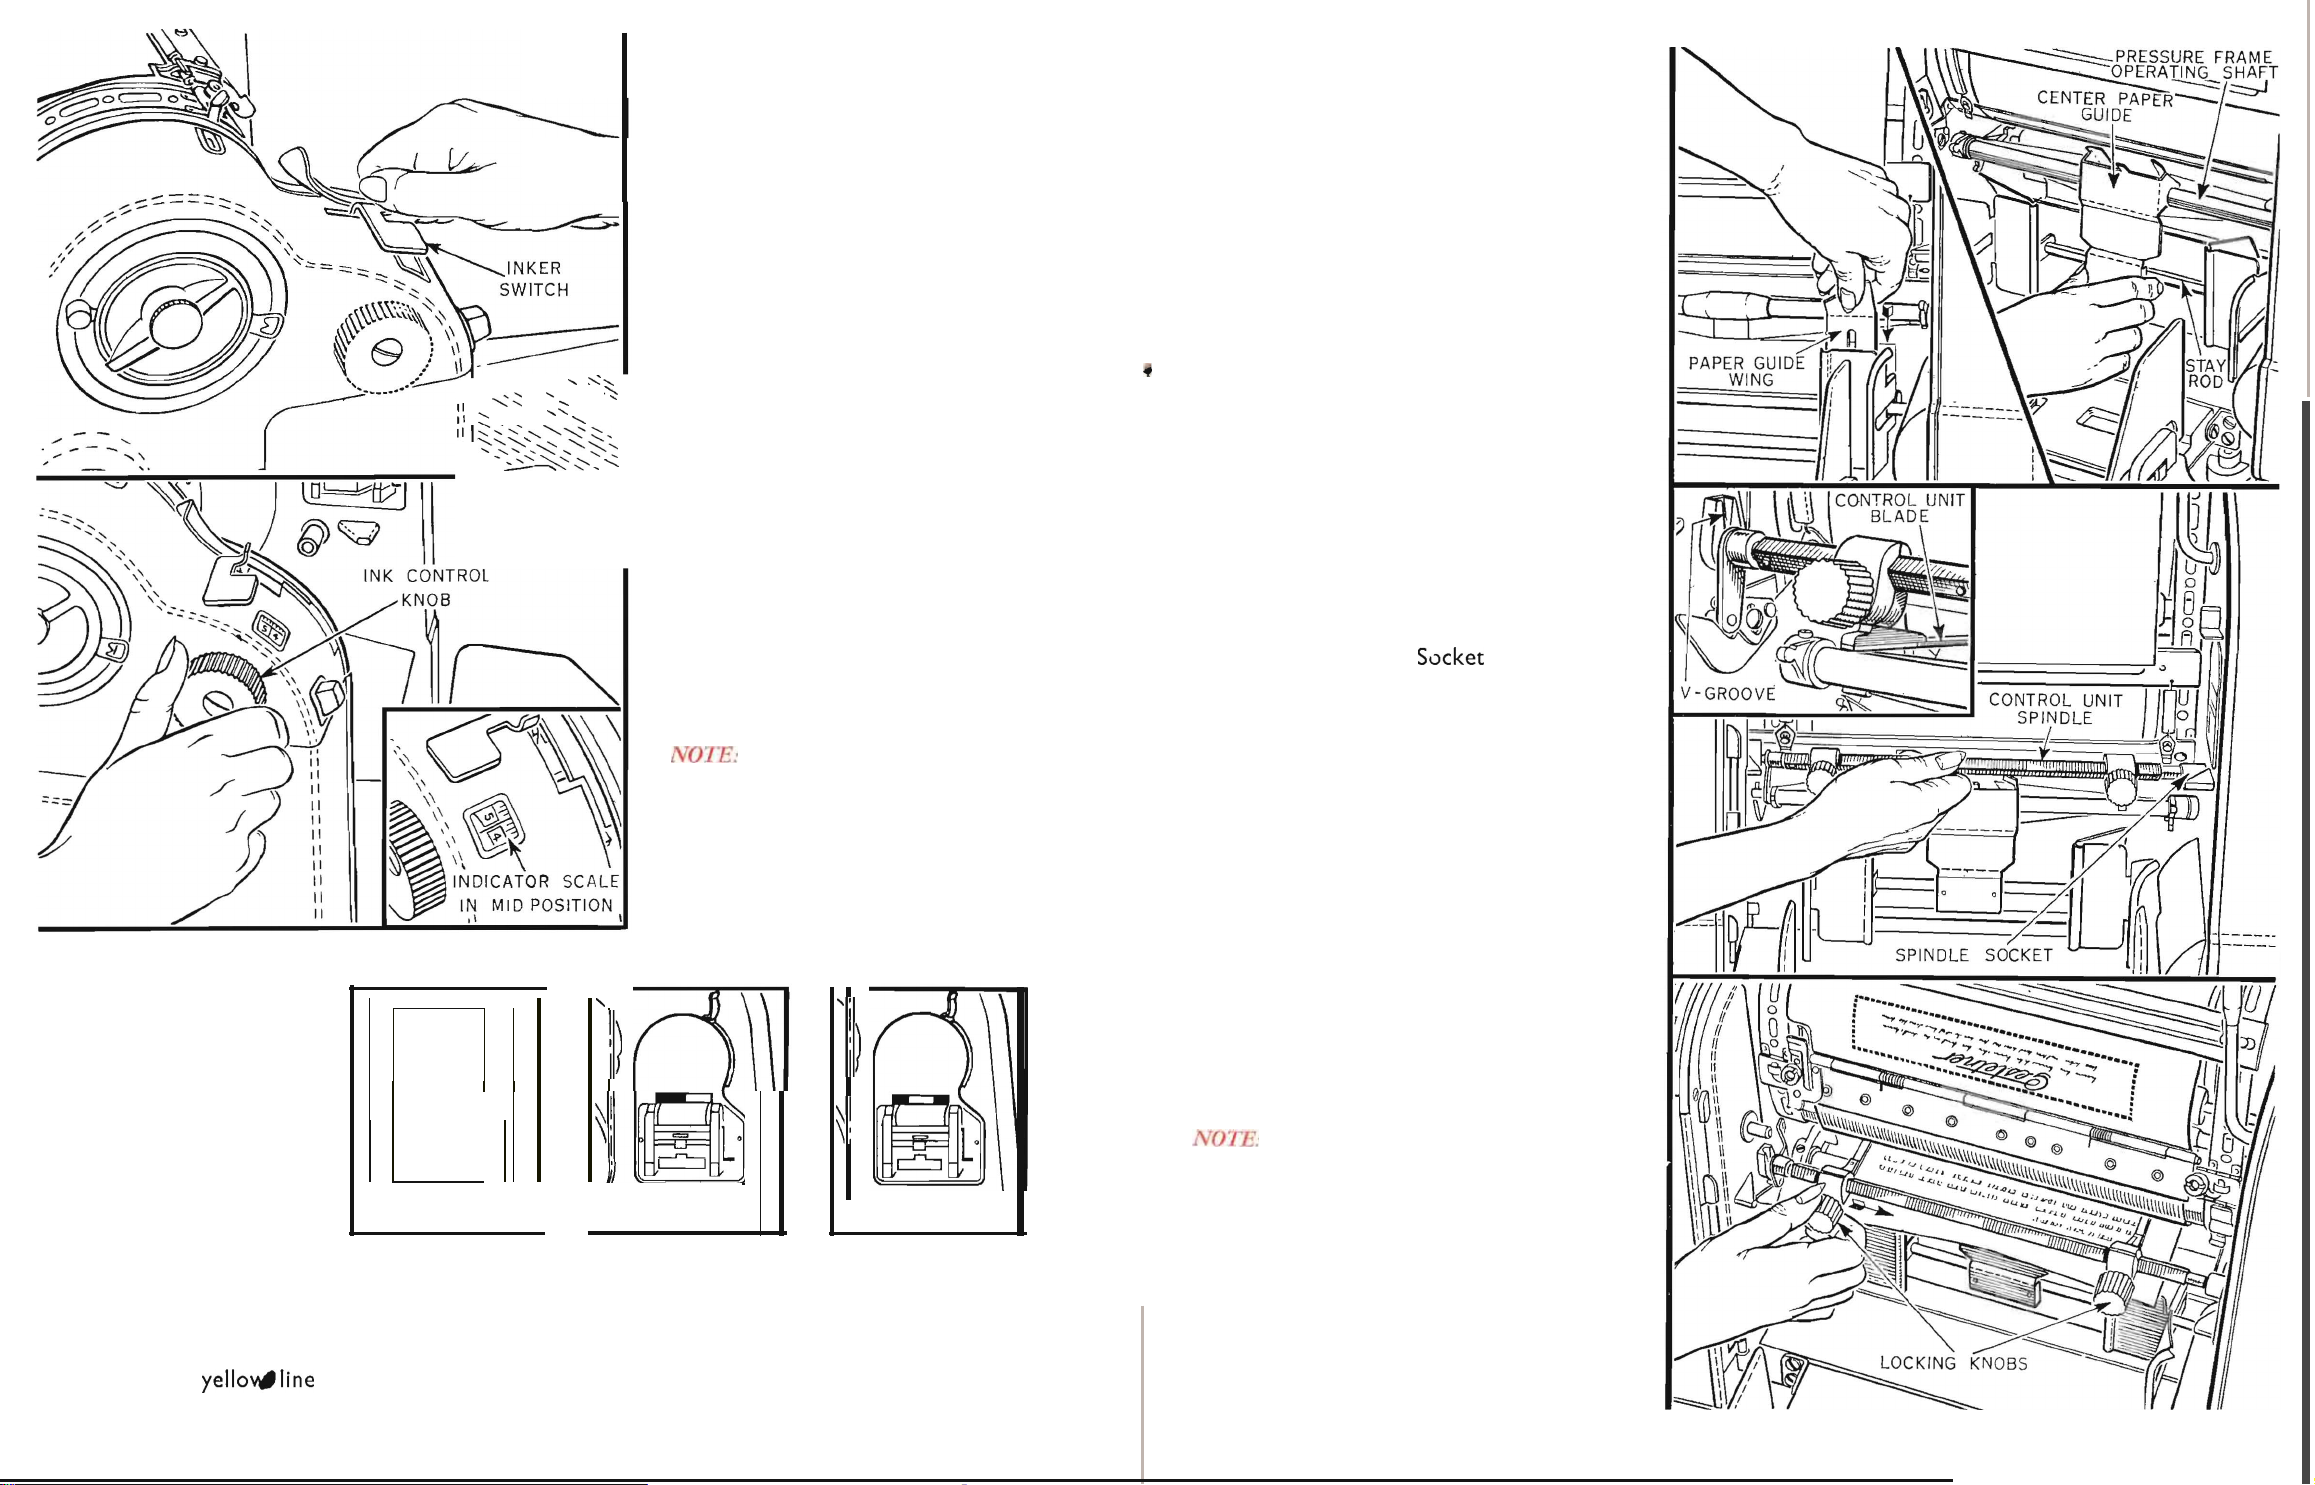
E
Clean Cylinders. Turn Handle slowly
for one complete revolution. Open
Levers outwards, wi
thdraw
Color Changer,
discard
Color
Change Strip and wipe
Cylinders clean with a soft cloth.
F
Fit
new
Waver
Rollers, Ink Gun
and
Silk
Screen.
Insert new
Waver
Rollers fully into Machine and raise
Waver
Roller Levers. Turn Handle
to
check
that
Waver
Rollers rotate and oscillate. Insert
new
Ink
Gun into Machine making sure
that
the
pointed end fits into its holder. Push
Ink Gun inwards until locked
in
position
by
the Pump Catch.
Turn Handle until Stencil Fixing Bar
is
at
top
of Machine.
Raise
Fixing
Bar
Cover
and engage Heading of new Silk Screen
with studs of Stencil Fixing Bar. Hold
Spring Bar
of
Silk Screen and
turn
Handle until Silk Screen Springs
can
be
fastened
to
their
studs. Continue
as
from
Step 4, page 2.
II