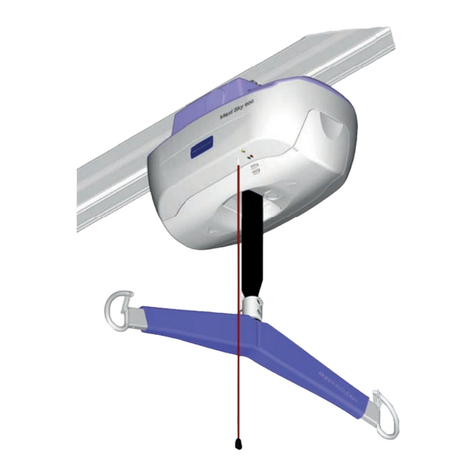
Getinge Arjohuntleigh Maxi Sky 600 Operating instructions

001-14154-33-EN rev. 2 ● September 2013 1 of 8
PROGRAMMING GUIDE FOR CEILING LIFT
№ 910XXXX, 911XXXX, 912XXXX, 913XXXX, 923XXXX, LDXXXX, LFXXXX
V4, V4i, V10, MAXI SKY 600, MAXI SKY 1000, VOYAGER DUO, V5 DUO
1. User Service Mode page 2
2. Technical Service Mode page 4
Note: A 6-button hand control № 700.13650.XX or 700-1384X is required to access service mode.
UP BUTTON
RIGHT BUTTON
LEFT BUTTON
DOWN BUTTON
PROG BUTTON
RETURN TO CHARGE BUTTON
Fig. 1
NOTE: When you encounter the instruction “turn on the lift”, bear in mind that this action is
performed differently from one lift model to another:
Models without plastic insert:
The unit is turned on or off by pulling on the red cord.
Models with plastic insert:
The unit is turned on by pressing on the plastic insert located at
the top of the red cord.
The unit is turned off by pulling on the red cord.
Fig. 2

001-14154-33-EN rev. 2
2 of 8
1. User Service Mode
This Mode allows the user to adjust certain lift parameters with the hand control.
A) Turn off the lift by pulling the red cord (the green indicator light will turn off).
B) Press and keep down the PROG button on the hand control down (see Fig. 1).
C) While still pressing the PROG button, turn on the lift (see Fig. 2).
D) The green indicator light will flash and the buzzer will beep three times.
E) Release the PROG button.
F) The red indicator light will turn stay on, confirming that the lift is now in a service programming mode.
G) Use the UP button on the hand control to select the parameter you want to adjust. Each push on the
button will bring you to a different selection:
1 beep = Speed displacement
2 beeps = Length of the strap
3 beeps = Return to Charge/Return to Home - Enable/Disable
H) To confirm your selection, press the PROG button once.
1.1 Speed Adjustment
The horizontal speed displacement adjustment allows you to change
the speed of the lift. Four different speeds can be selected.
A) Enter into User Service Mode and select the first choice (consult section 1).
B) Use the LEFT button on the hand control to select the required speed as per the selection chart below.
Each push of the button allows you to go from one selection to the next.
LIFT MODELS
SPEED SETTING
Maxi Sky 600 / V4 / V4i / V5 Duo
1 beep
2 beeps
3 beeps *
4 beeps
10 cm/sec
15 cm/sec
20 cm/sec
25 cm/sec
Maxi Sky 1000 / V10
1 beep
2 beeps
3 beeps *
4 beeps
10 cm/sec
14 cm/sec
16 cm/sec
20 cm/sec
* Default setting from factory
C) To confirm your choice of speed, press the PROG button
D) You can now choose a new program selection by pressing on the UP button on the hand control. To
return to normal use, turn off the lift and turn it back on.

001-14154-33-EN rev. 2
3 of 8
1.2 Adjust the height of the spreader bar when it returns to charger or when it returns to
home position (ECS).
At the activation of the Return to Charge/Return to Home, the spreader bar will rise all the
way up to avoid any obstacles during the run. When the lift is at the charge/home station,
the spreader bar lowers by itself to the adjusted height to be easily accessible.
A) Enter into the User Service Mode and select the second choice (consult section 1).
B) The strap will wind up completely.
C) Once the strap is completely wound up, press the UP and DOWN buttons to position the spreader bar to
the desired height whenever the unit returns back to charge or back to home.
D) To confirm the desired height, press the PROG button.
E) You can now choose a new program selection by pressing on the UP button on the hand control. To
return lift to normal use, turn off the lift and turn it back on.
1.3 Enable / Disable –Return to Charge or Return to Home (ECS)
1.3.1For unit not equipped with IR option
The automatic direction Return to Home (RTH) function is factory disabled and can be enabled by
the user. It may also be enabled left or right, according to the user’s needs.
A) Enter into USER SERVICE MODE and select the third choice (consult section 1).
B) Use hand control LEFT button to select “ENABLE or DISABLE” SELECTION.
LIFT MODELS
RTH / RTC SETTING
Model not featuring IR option
1 beep
2 beeps*
3 beeps
4 beeps
DISABLE
DISABLE
ENABLE
LEFT
ENABLE
RIGHT
C) To confirm your selection, press the PROG button.
D) Now you can choose a new program selection by pressing on the UP button on the hand control. To return
to normal use, turn off the lift and turn it back on.
1.3.2 For unit equipped with IR option
The automatic direction Return to Charge (RTC) function is factory enabled and can
be disabled by the user. It may also be enabled left or right, according to the user’s needs.
A) Enter into USER SERVICE MODE and select the third choice (consult section 1).
B) Use hand control LEFT button to select “ENABLE or DISABLE” SELECTION.
LIFT MODELS
RTH / RTC SETTING
Model featuring IR option
1 beep*
2 beeps
3 beeps
4 beeps
ENABLE
“AUTO.”
DISABLE
ENABLE
LEFT
ENABLE
RIGHT
* Default setting from factory
C) To confirm your selection, press the PROG button.
D) Now you can choose a new program selection by pressing on the UP button on the hand control.
To return to normal use, turn off the lift and turn it back on.

001-14154-33-EN rev. 2
4 of 8
2. Technical Service Mode
The Technical Service Mode allows the technician to adjust, activate,
read or modify certain lift parameters with the hand control.
A) Turn off the lift by pulling the red cord (the green indicator light must turn off).
B) Press and keep down the PROG and RETURN TO CHARGE/HOME buttons on the hand control.
C) While still pressing the PROG and RETURN TO CHARGE/HOME buttons, turn the lift back on.
D) Still maintaining the PROG and RETURN TO CHARGE/HOME buttons pressed, press successively the
DOWN, LEFT and RIGHT buttons.
E) The green indicator light will flash and the buzzer will beep five times.
F) Release all buttons.
G) The solid red indicator light confirms that the lift is now in the Technical Service Mode.
H) Use the UP button on the hand control to select the parameter you want to access. Each push of the
button moves you from one selection to the next:
1 beep = Overload protector
2 beeps = Not Used
3 beeps = Pre-Programmed positions (FIDO)
4 beeps = Resetting the service counter
5 beeps = Time to detect the charge station/Not used with Maxi Sky 600 ECS
6 beeps = Reading the service counter
7 beeps = Duty cycle sensor
8 beeps = Programming the lift with 2 or 4-functions
I) To confirm the selection and go to the adjustment, press once on the PROG button.
2.1 Adjust the Overload Protector
Adjusting the overload protector allows fine tuning of the load the unit will
be permitted to lift. DO NOT exceed the safe working load limit rating.
A) Enter into the Technical Service Mode and select the first choice (consult section 2).
B) Use the LEFT button to reduce the lifting capacity and the RIGHT button to increase it. Each push on
the button will reduce or increase the overload protector approximately from 10 to 20 lb (5 to 10 kg).
C) To confirm the overload protector setting, press on the PROG button.
D) Now you can choose a new selection by pressing the UP button on the hand control. To return to normal
use, turn the lift off and turn it back on.
2.2 Not Used

001-14154-33-EN rev. 2
5 of 8
2.3 Activate the Pre-Programmed Positions Function (FIDO)
Activating the Pre-Programmed Position function allows the unit to detect stations (positions)
spread along the unit’s course. The unit will be capable of going to the station designated with
the hand control. The user indicates to the unit the position of the desired station (e.g., the third
station equals to three pushes on the PROG button) followed by the direction (LEFT or RIGHT
buttons). The unit then moves by itself to the station designated and stays on hold.
A) Enter the Technical Service Mode and select the third choice (consult section 2).
B) Use the LEFT button to disable or enable the mode. Each push of the button allows you to go from one
section to the next in the table below.
LIFT MODELS
FIDO SETTING
All Models
1 beep*
2 beeps
3 beeps
4 beeps
DISABLE
DISABLE
DISABLE
ENABLE
* Default setting from factory
C) To confirm the activation mode for the FIDO function, press the PROG button.
D) Now you can choose a new selection by pressing on the UP button on the hand control. To return to
normal use, turn off the lift and turn it back on.
2.4 Reset the Service Counter
Resetting the Service Counter allows you to reset the unit’s cycle counter.
This count equals to the number of lift cycles.
A) Enter the Technical Service Mode and select the fourth choice (consult section 2).
B) Use LEFT button to select the reset mode. Each push on the button allows you to move from one
section to the next in table below:
LIFT MODELS
RESET
All Models
1 beep
2 beeps
3 beeps
4 beeps
NO EFFECT
NO EFFECT
RESET
NO EFFECT
C) To confirm the selection, press on the PROG button.
D) Now you can choose a new selection by pressing on the UP button on the hand control. To return to
normal use, turn off the lift and turn it back on.

001-14154-33-EN rev. 2
6 of 8
2.5 Adjust the Charger Detection Time Limit
NOTE: Not available for Maxi Sky 600 ECS models
Adjusting the charger detection time limit will restrict the time the unit is
allowed to detect the charge station when the Return to Charge button is
pressed, stopping the motor after the selected time delay.
A) Enter into the Technical Service Mode and select the fifth choice (consult section 2).
B) Use the LEFT button to select the charger detection time limit during the return to charge as per the
TIME ADJUSTMENT chart below. Each push of the button allows you to go from one section to the
next:
LIFT MODELS
TIME ADJUSTMENT
All Models
1 beep*
2 beeps
3 beeps
4 beeps
2.5 min
5 min
7.5 min
10 min
* Default setting from factory
C) To confirm the time adjustment of the charger detection, press on the PROG button.
D) Now you can choose a new selection by pressing on the UP button on the hand control. To return to
normal use, turn off the lift and turn it back on.
2.6 Reading of the Service Counter
The Service Counter allows you to know the total number of lifts the unit has
performed since its manufacturing or resetting. One cycle is recorded for
every approximately 60 cm (24 in) the strap travels in the up direction, then
approximately 60 cm (24 in) it travels in the down direction.
2.6.1 For units not equipped with a plastic insert switch and all Maxi Sky 1000 / V10
A) Enter the Service Technical Mode and select the sixth choice (consult section 2).
B) The number of beeps will equal to the cumulative lifts since the last reset of the service counter.
Each beep equals to 250 cycles (see chart below).
Beeps
1
2
3
4
5
6
7
8
9
10
11
12
13
14
15
Cycles
250
500
750
1000
1250
1500
1750
2000
2250
2500
2750
3000
3250
3500
3750
Beeps
16
17
18
19
20
21
22
23
24
25
26
27
28
29
30
Cycles
4000
4250
4500
4750
5000
5250
5500
5750
6000
6250
6500
6750
7000
7250
7500
The unit begins to
produce audible
warning beeps.
Lift service
indicator is
turned on

001-14154-33-EN rev. 2
7 of 8
2.6.2 For units equipped with a plastic insert switch
(Excluding Maxi Sky 1000 and V10)
A) Enter the Service Technical Mode and select the sixth choice (consult section 2).
B) The number of beeps will equal to the cumulative lifts since the last reset of the service counter.
Each long beep equals to 1000 cycles and each short beep equals to 250 cycles (see chart
below).
Beep(s
2 long,
3 short
3 long
3 long,
1 short
3 long,
2 short
3 long,
3 short
4 long
4 long,
1 short
4 long,
2 short
4 long,
3 short
5 long
Cycles
2750
3000
3250
3500
3750
4000
4250
4500
4750
5000
Beep(s
5 long,
1 short
5 long,
2 short
5 long,
3 short
6 long
6 long,
1 short
6 long,
2 short
6 long,
3 short
7 long
7 long,
1 short
7 long,
2 short
Cycles
5250
5500
5750
6000
6250
6500
6750
7000
7250
7500
C) Now you can choose a new selection by pressing on the UP button on the hand control. To
return to normal use, turn off the lift and turn it back on.
2.7 Duty Cycle Sensor
This function allows you to disable the duty cycle sensor
which stops the motor if excessive use occurs.
A) Enter the Service Technical Mode and select the seventh choice (consult section 2).
B) Use the LEFT button to disable or enable the duty cycle security system. Each push of the button allows
you to go from one selection to the next. Refer to the chart below:
LIFT MODELS
DUTY CYCLE SENSOR SETTING
All Models
1 beep*
2 beeps
3 beeps
4 beeps
ON
ON
ON
OFF
* Default setting from factory
C) To confirm your selection, press the PROG button.
D) Now you can choose a new selection by pressing on the UP button on the hand control. To return to
normal use, turn off the lift and turn it back on.
Beep(s)
1 short
2 short
3 short
1 long
1 long,
1 short
1 long,
2 short
1 long,
3 short
2 long
2 long,
1 short
2 long,
2 short
Cycle(s)
250
500
750
1000
1250
1500
1750
2000
2250
2500
Lift service
indicator is
turned on
The unit begins to
produce audible
warning beeps.

001-14154-33-EN rev. 2
8 of 8
2.8 2 or 4-Function Programming
This function allows for the configuration of the circuit board from 4-function to 2-function
(without powered lateral movement). This function deactivates all functions related to
the unit’s powered lateral movement (LEFT, RIGHT, FIDO, RETURN TO CHARGE)
A) Enter the Technical Service Mode and select the seventh choice (consult section 2).
B) Use the LEFT button to select the number of functions desired. Each push on the button allows you to
go from one selection to the next. Refer to the NUMBER OF FUNCTIONS chart below:
LIFT MODELS
NUMBER OF FUNCTIONS
All Models
1 beep*
2 beeps
3 beeps
4 beeps
4
4
2
4
* Default setting from factory
C) To confirm your selection, press the PROG button.
D) Now you can choose a new selection by pressing on the UP button on the hand control. To return to
normal use, turn off the lift and turn it back on.
Other manuals for Arjohuntleigh Maxi Sky 600
1
This manual suits for next models
8
Table of contents
Other Getinge Lifting System manuals