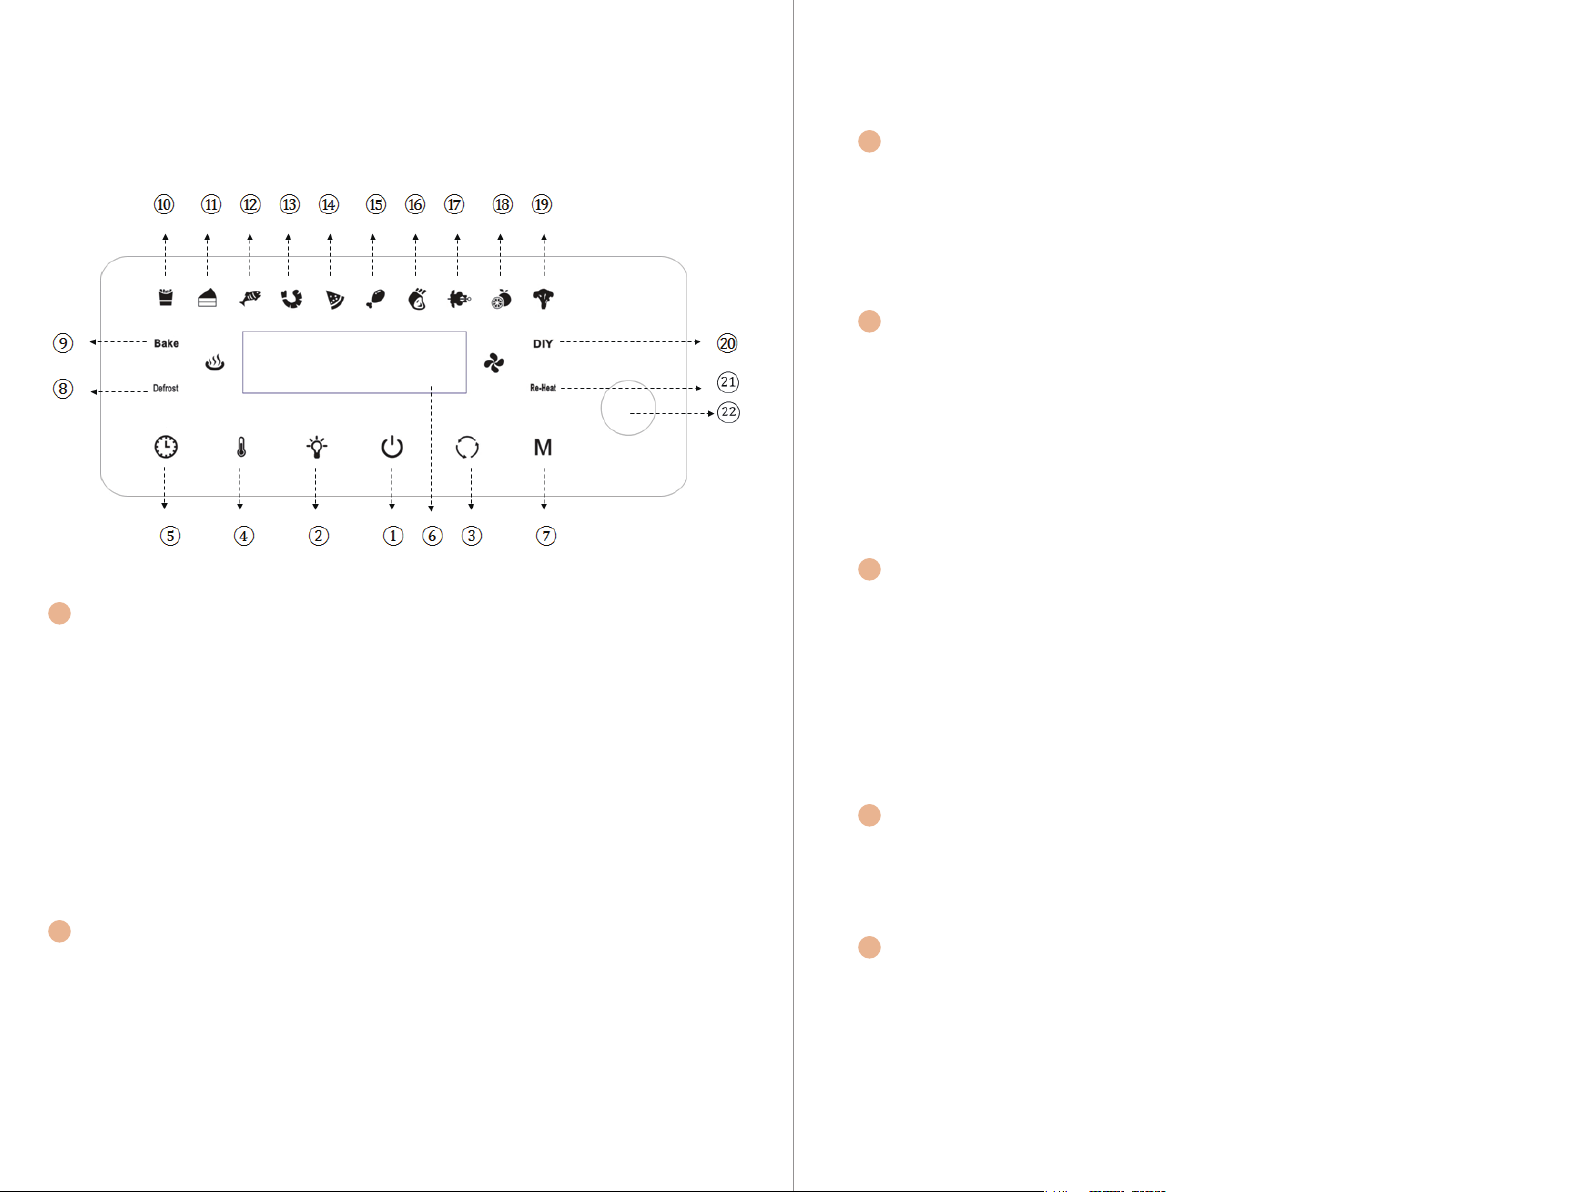
Plug in the power cord. the light button, power button
and rotation button will light up.
Press the power button, the screen and LCD display will
light up. There are 14 menu functions you can select.
After pressing the "M" button it will flash, the default
function is “Defrost”. Rotate the control knob to select the
menu functions. Once select the any function, it will flash,
and the LCD will display its corresponding default temp
and corresponding default time.
If you want to adjust the default time and temp before
operation. After pressing the “Time” or “Temperature”
button, it will flash. Rotate the control knob to select the
time or temperature.
1.
2.
3.
4.
NOTE: If you did not adjust any button, the machine will
operate in its default setting.
Before operation, if you want to add the light button or
rotation button(Rotate button is to use the fork to make
the food rotate and cook), press the button it will be flash.
Open the front door, put the food into the oven.
Press the control knob to start working. The fan indicator
will light up, the heating pipe will start heating. After a few
seconds, the heating indicator will light up. (if the set
temperature is reached, it will stop heating and the
heating indiator will shut down.)
During operation, if you want to add the light button or
rotation button(Rotate button is to use the fork to make
the food rotate and cook), press the button it will be flash.
During operation, If you want to adjust the default time
and temp before operation. After pressing the “Time” or
“Temperature” button, it will flash. Rotate the control
knob to select the time or temperature.
NOTE:During operation, pressing the knob at any time can
stop working, and pressing the knob again will continue to
work.
When the set time is reached, the machine will stop
automatically. The delicious food is done.
5.
6.
7.
8.
9.
10.
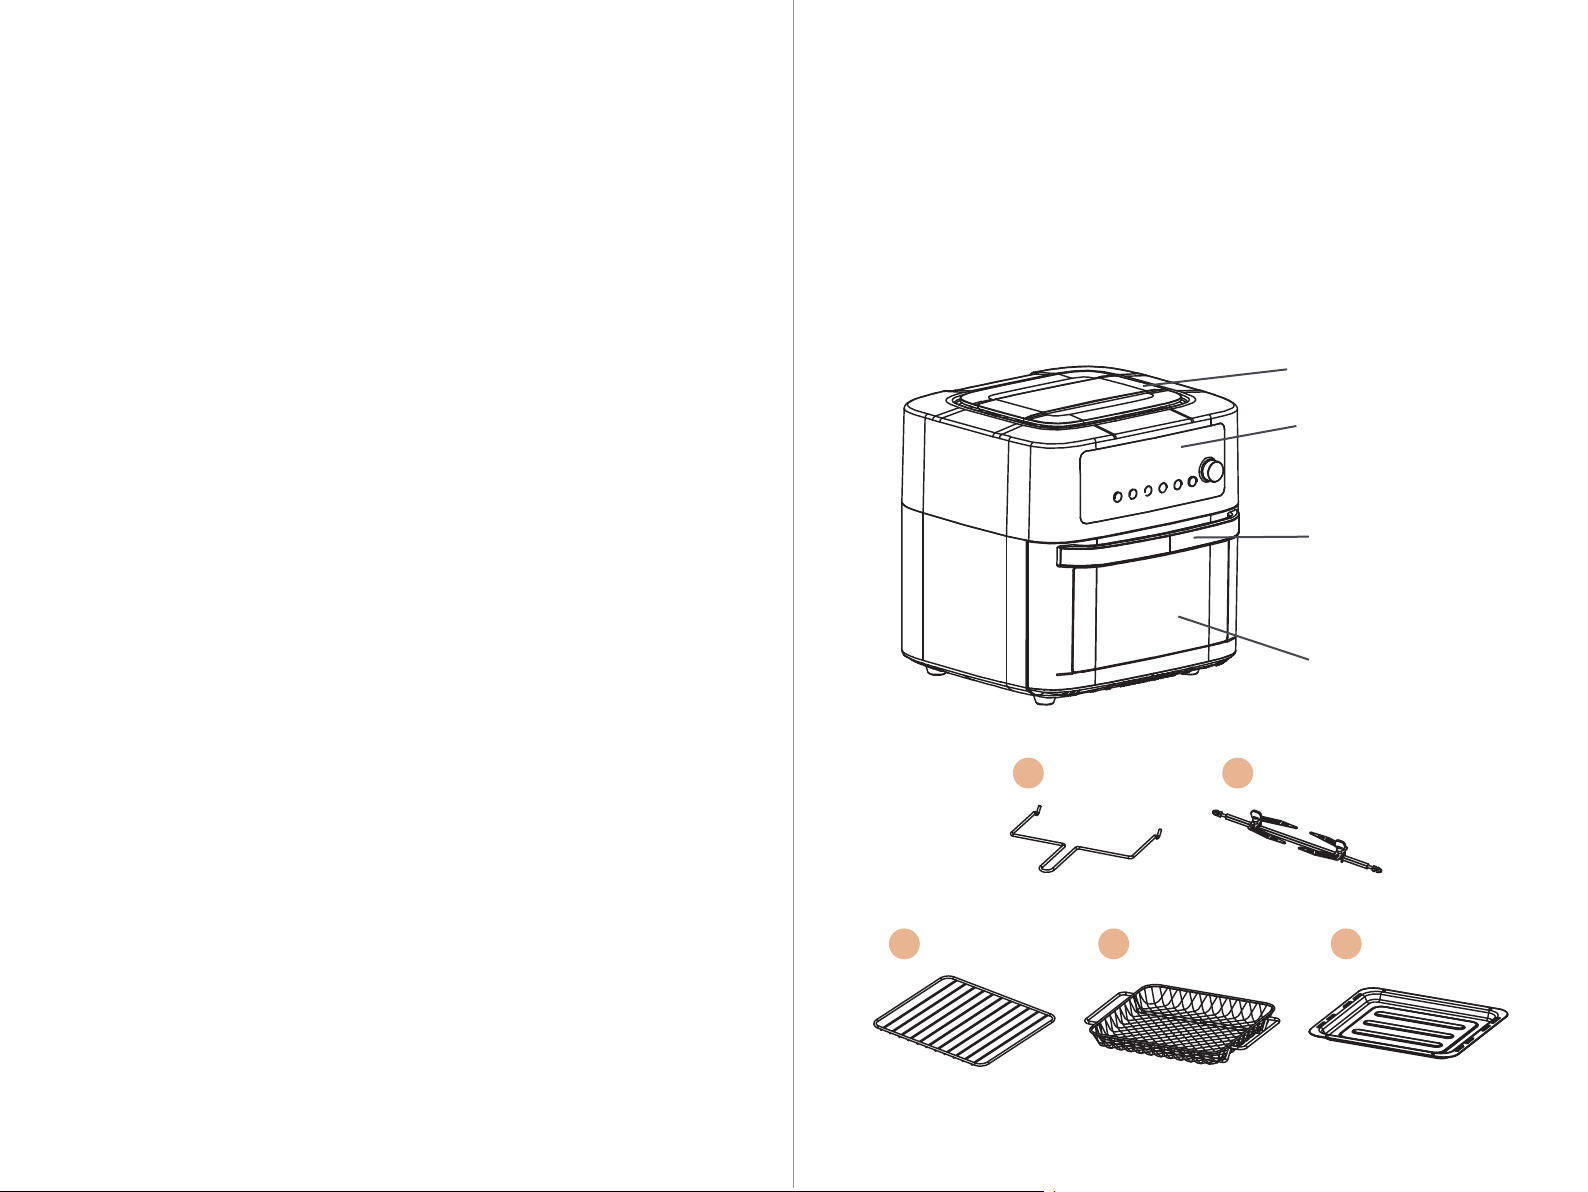
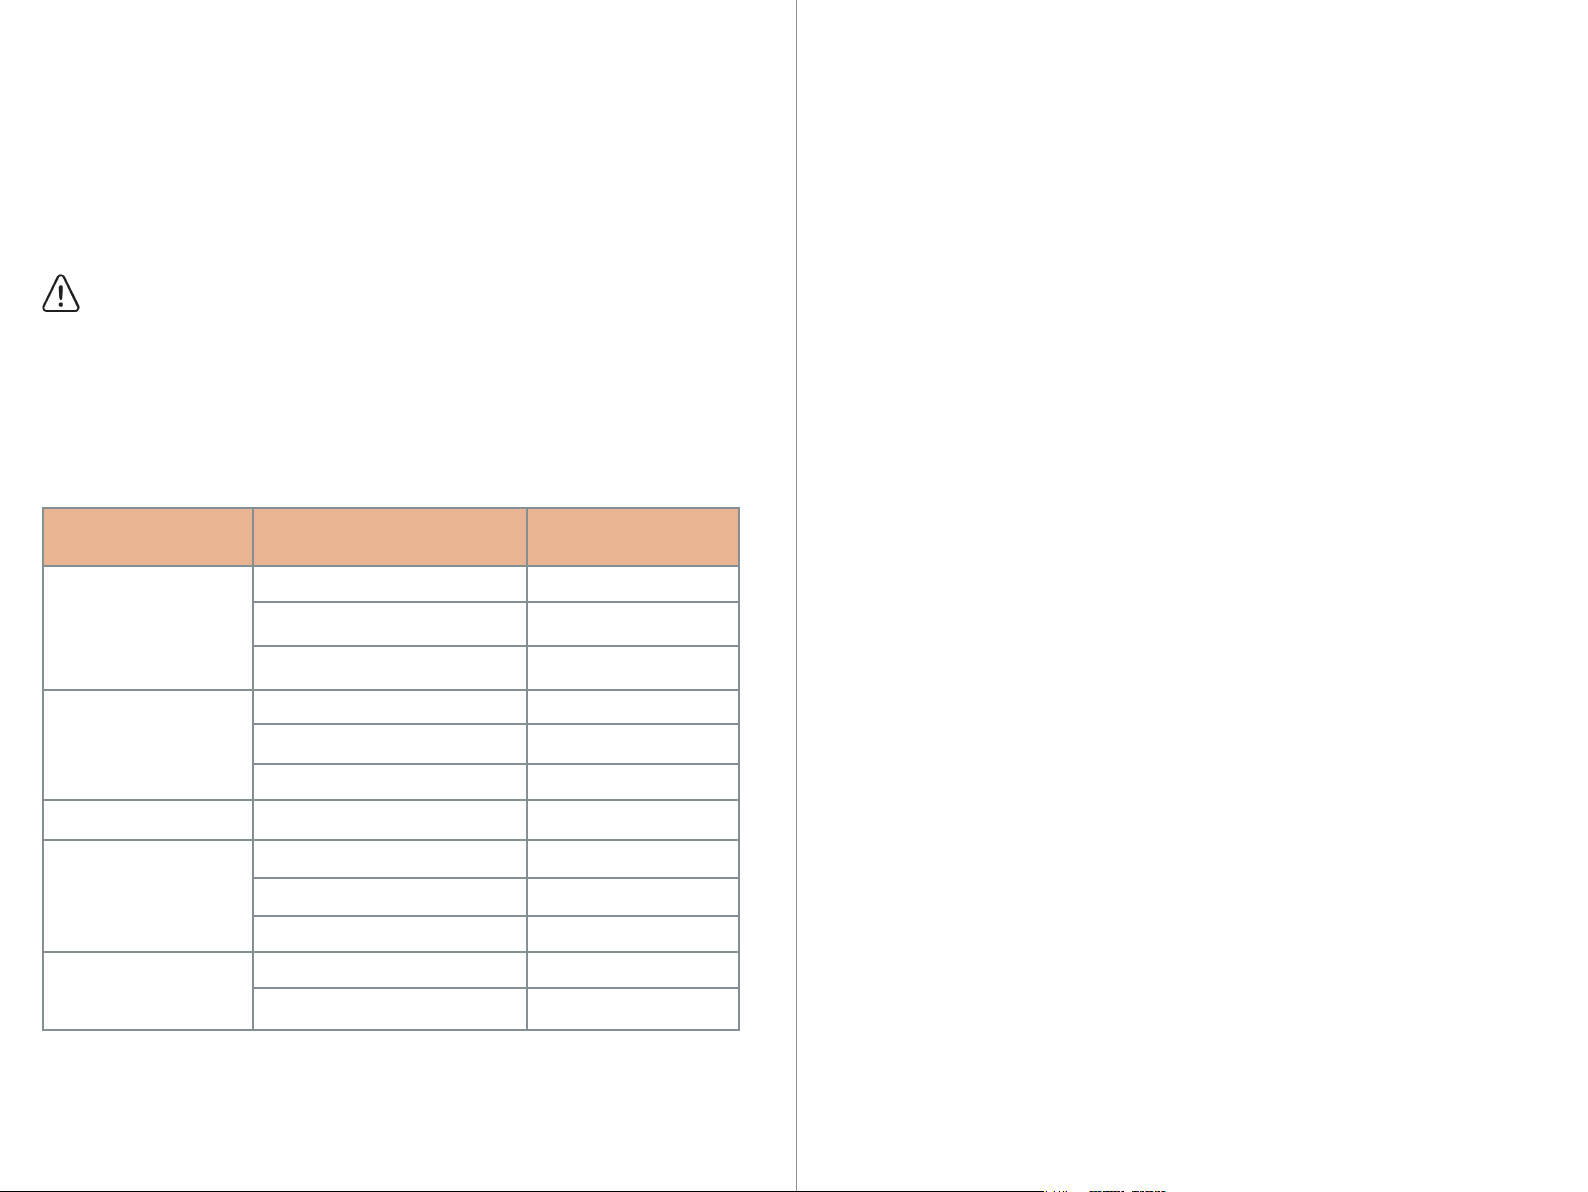
GENERAL OPERATING INSTRUCTIONS
COOKING WITH THE AIR FRYER OVEN
Warning
•NEVER put anything on top of the appliance.
•NEVER cover the air vents on the top and back of the cooking Unit.
•NEVER fill any cooking vessel with oil or liquid of any kind. This
Unit cooks with hot air only.
•NEVER use the Oven Door as a place to rest a hot Fry Basket filled
with food. The Hot Fry Basket could damage the Oven Door or
cause the Unit to tip. Personal injury could result.
•ALWAYS use oven mitts when removing hot Air Flow Racks.