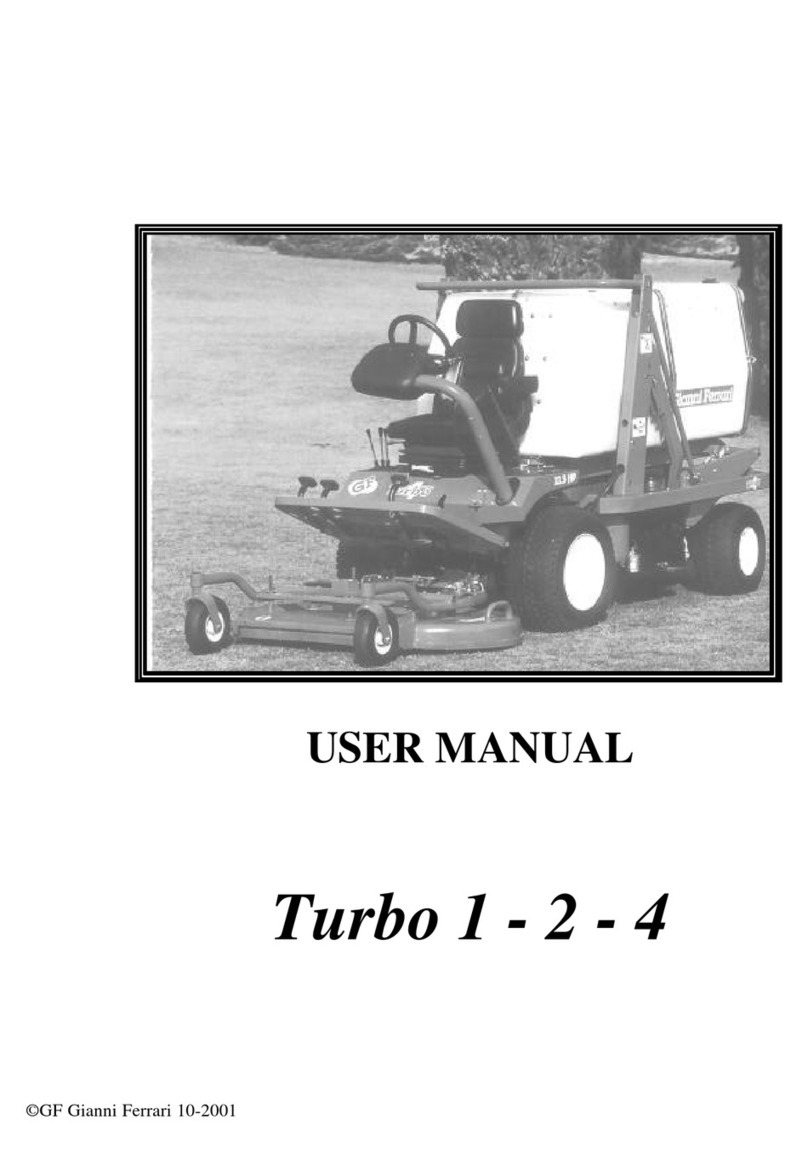
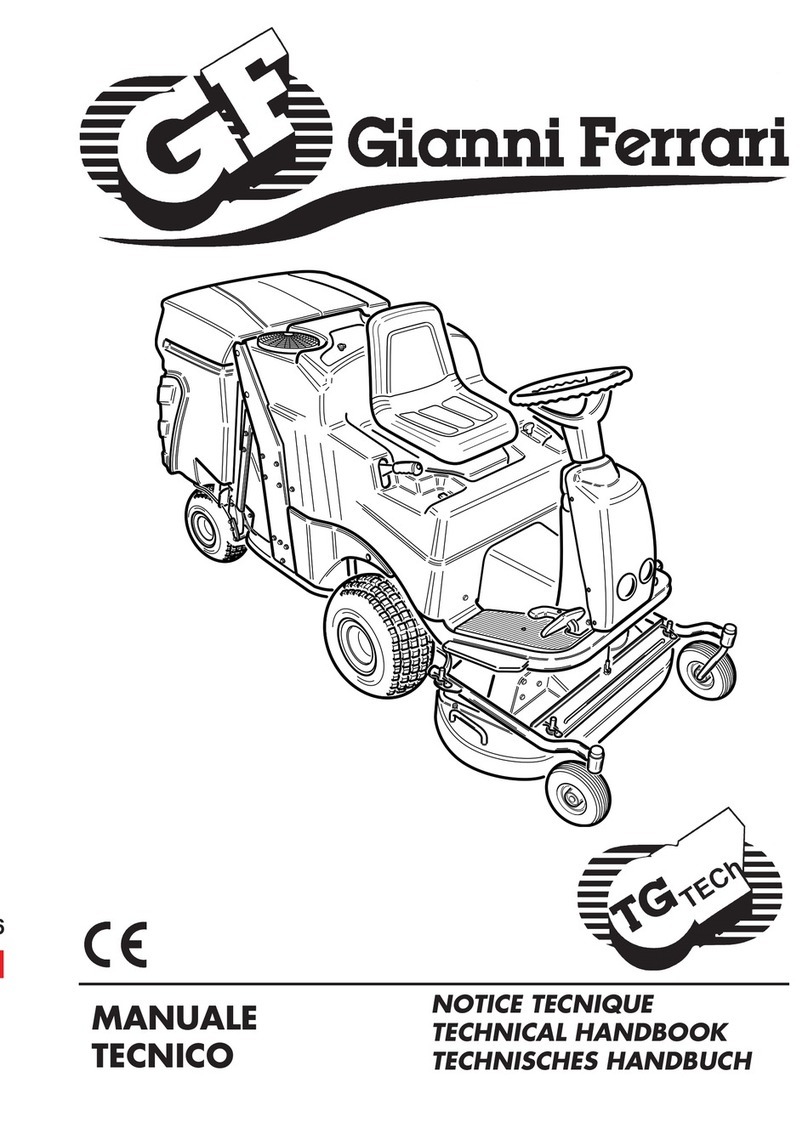
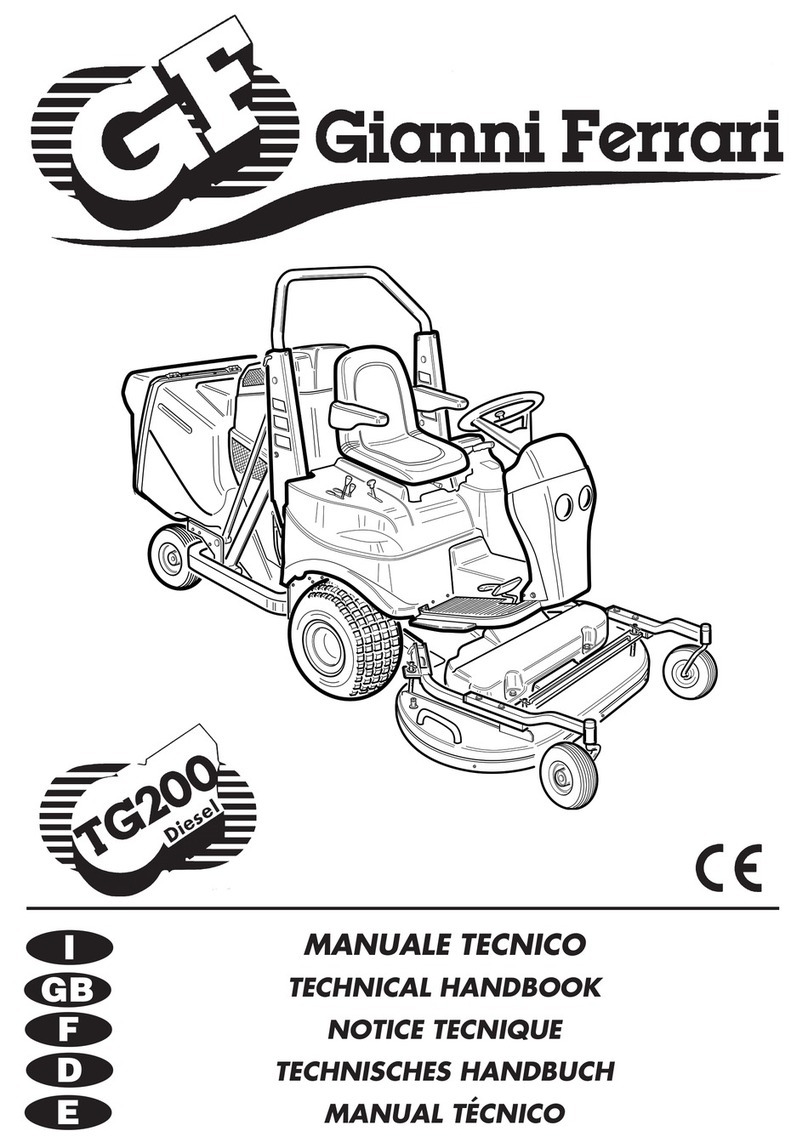
Gianni Ferrari GTM 160 User manual

MANUALE d’istrUzioNE
UsEr’s MANUAL
NotiCE tECNiQUE
tECHNisCHEs HANdBUCH
tECHNisCH HANdBoEK
MANUAL tÉCNiCo
KÄyttÖoHjE
iNstrUKtioNBoG


3
pag.
6.............. MANUALE d’istrUzioNE IT
15 ........................ UsEr’s MANUAL EN
24 ....................... NotiCE tECNiQUE FR
33 ........... tECHNisCHEs HANdBUCH DE
42 ............... tECHNisCH HANdBoEK NL
51 .......................MANUAL tÉCNiCo ES
60 ..............................KÄyttÖoHjE FI
69 ....................... iNstrUKtioNBoG DK
iLLUstrAzioNi E sCHEMi
iLLUstrAtioNs ANd diAGrAMs
iLLUstrAtioNs Et sCHÉMAs
BiLdEr UNd zEiCHNUNGEN
iLLUstrAtiEs EN diAGrAMMEN
iLUstrACiÓNEs y EsQUEMAs
VAroitUstArrAt jA KUVAt
77 .......................... diAGrAMtEGNiNGEr
LiNGUA oriGiNALE

6
iNdiCE
NOTE PER LO SMALTIMENTO DEL PRODOTTO VALIDE PER LA COMUNITÀ EUROPEA ............................. 6
0. TARGHETTA CE........................................................................................................................................... 7
1. AI NOSTRI CLIENTI ..................................................................................................................................... 7
2. RESPONSABILITA’ DELL’OPERATORE....................................................................................................... 7
3. NORME DI SICUREZZA............................................................................................................................... 7
3.1 PENDENZE ...................................................................................................................................................................... 8
3.2 TRASPORTO E SCARICO................................................................................................................................................ 8
4. CARATTERISTICHE TECNICHE .................................................................................................................. 9
4.1 PESO MACCHINA ........................................................................................................................................................... 9
4.2 APPARATO RASAERBA/ATTREZZATURA ....................................................................................................................... 9
4.3 LIVELLO DI POTENZA ACUSTICA .................................................................................................................................. 9
4.4 OPERATORE.................................................................................................................................................................... 9
5. COMANDI E STRUMENTI......................................................................................................................... 10
6. UTILIZZO COMANDI E STRUMENTI......................................................................................................... 10
6.1 AVANZAMENTO - RETROMARCIA................................................................................................................................ 10
6.2 FRENO DI STAZIONAMENTO........................................................................................................................................ 10
6.3 PRESA ACQUA PER PULIZIA PIATTO .......................................................................................................................... 10
6.4 BY-PASS ........................................................................................................................................................................ 10
6.5 ACCELERATORE A MANO ............................................................................................................................................ 10
6.6 PRESA DI FORZA .......................................................................................................................................................... 10
6.7 SOLLEVAMENTO PIATTO DI TAGLIO - REGOLAZIONE ALTEZZA DI TAGLIO ............................................................. 10
6.8 RIBALTAMENTO CESTO................................................................................................................................................ 10
6.9 RUBINETTO COMBUSTIBILE........................................................................................................................................ 10
7. SCHEMA ELETTRICO................................................................................................................................ 10
7.0 LEGENDA COLORI ........................................................................................................................................................ 10
7.1 BRIGGS & STRATTON................................................................................................................................................... 10
8. AVVIAMENTO MOTORE ............................................................................................................................ 11
9. MOVIMENTAZIONE DELLA MACCHINA ................................................................................................... 11
10. TAGLIO DELL’ERBA E SISTEMA DI RACCOLTA AUTOMATICO............................................................. 11
10.1 SCARICO POSTERIORE DELL’ERBA.......................................................................................................................... 11
11. ARRESTO MOTORE................................................................................................................................ 11
12. RIFORNIMENTO...................................................................................................................................... 11
13. MANUTENZIONE ORDINARIA ................................................................................................................ 11
13.1 RABBOCCO OLIO MOTORE....................................................................................................................................... 11
13.2 SCARICO OLIO MOTORE ........................................................................................................................................... 11
13.3 BATTERIA..................................................................................................................................................................... 12
13.4 FUSIBILI....................................................................................................................................................................... 12
13.5 FILTRO ARIA ................................................................................................................................................................ 12
13.6 FILTRO OLIO MOTORE (GTM160)............................................................................................................................... 12
13.7 FILTRO CARBURANTE ................................................................................................................................................ 12
13.8 PRESSIONE PNEUMATICI........................................................................................................................................... 12
13.9 PULIZIA DELLA MACCHINA........................................................................................................................................ 12
13.10 INGRASSAGGIO.......................................................................................................................................................... 12
13.11 SOSTITUZIONE E/O MANUTENZIONE LAME............................................................................................................ 12
13.12 SOSTITUZIONE RETE CESTO .................................................................................................................................... 12
14. MANUTENZIONE STRAORDINARIA ....................................................................................................... 12
15. INATTIVITA’ DEL RASAERBA................................................................................................................... 12
16. ETICHETTE DI SICUREZZA..................................................................................................................... 12
17. NOTE GENERALI..................................................................................................................................... 12
18. TABELLA MANUTENZIONI...................................................................................................................... 13
19. TABELLA D’INDIVIDUAZIONE DEI GUASTI ............................................................................................ 13
NotE PEr Lo sMALtiMENto dEL Prodotto VALidE PEr LA CoMUNitÀ EUroPEA
Non smaltire il prodotto come rifiuto solido urbano ma smaltirlo negli appositi centri di raccolta.
Abbandonando il prodotto nell’ambiente si potrebbero creare gravi danni all’ambiente stesso. Nel
caso il prodotto contenga delle batterie è necessario rimuoverle prima di procedere allo smalti-
mento. Queste ultime debbono essere smaltite separatamente in altri contenitori in quanto con-
tenenti sostanze altamente tossiche. Il simbolo rappresentato in figura rappresenta il bidone dei
rifiuti urbani ed è tassativamente vietato riporre l’apparecchio in questi contenitori. L’immissione
sul mercato dopo il 1° luglio 2006 di prodotti non conformi al DLgs 151 del 25-07-05(Direttiva RoHS RAEE) è
amministrativamente sanzionata.

7
IT
1) Indirizzo fabbricante
2) Modello
3) Massa
4) Motore
5) Anno di costruzione
- Siamo orgogliosi di averLa come cliente.
- Prima della messa in funzione l’operatore dovrà studiare attentamente questo manuale per una migliore com-
prensione della macchina e per i suggerimenti in esso indicati per il suo uso e manutenzione.
- Le macchine sono state studiate e realizzate per il miglior lavoro nelle più disparate condizioni; come sempre
la qualità del lavoro è in relazione alla manutenzione ordinaria eseguita.
- Per specifiche informazioni e consigli d’uso non contenute in questo libretto si rivolga al Rivenditore, il quale
sarà lieto di aiutarla rispondendo alle Sue domande sull’uso e manutenzione di queste macchine.
QUESTO SIMBOLO E’ USATO PER RICHIAMARE LA VOSTRA ATTENZIONE SULLE PRECAUZIONI
DI SICUREZZA CHE DEVONO ESSERE ESEGUITE DALL’OPERATORE PER EVITARE INCIDENTI.
QUANDO VEDETE QUESTO SIMBOLO FATE ATTENZIONE, NE VA DELLA SICUREZZA VOSTRA E
DEGLI ALTRI.
E’ responsabilità dell’operatore leggere attentamente il manuale e capire il corretto procedimento operativo delle
macchine, di lubrificare e di mantenere la stessa secondo le istruzioni di questo manuale.
L’operatore è responsabile del controllo della sua macchina e della sostituzione e riparazione delle parti soggette
a continua usura che potrebbero causare danni ad altre persone.
L’operatore è responsabile dei danni cagionati a terzi, a se stesso e a cose, dall’uso improprio della macchina ed
in contrasto alle indicazioni riportate su questo manuale.
La macchina deve essere utilizzata e sottoposta a manutenzione esclusivamente da persone a conoscenza delle
caratteristiche specifiche e che abbiano compreso le norme di sicurezza.
Mai consentire l’uso della macchina a bambini e adolescenti. Eventuali normative locali possono fissare un’età
minima per l’operatore.
Utilizzare solo attacchi, parti e accessori studiati e forniti dalla Nostra azienda per lo specifico modello da Voi
acquistato; per informazioni rivolgersi al vostro Rivenditore.
E’ fatto quindi assoluto divieto di eseguire trasformazioni e modifiche sulla macchina non previste da questo
libretto.
L’OPERATORE NELL’USO DELLA MACCHINA DEVE OSSERVARE SCRUPOLOSAMENTE LE NORME DI SICUREZZA CONTENUTE IN
QUESTO LIBRETTO, LE NORME DI PREVENZIONE DEGLI INFORTUNI, ALTRE NORME DI SICUREZZA GENERICHE, LE DISPOSIZIONI
DI MEDICINA DEL LAVORO.
2. rEsPoNsABiLitA’ dELL’oPErAtorE
1. Ai Nostri CLiENti
0. tArGHEttA CE
Vedi figura 0.
IL PRUDENTE OPERATORE E’ IL MIGLIORE OPERATORE
Molti incidenti possono essere evitati osservando le precauzioni indicate in questo libretto.
PARTE GENERALE
1) Leggete attentamente il manuale in ogni sua parte.
2) Ogni volta prima dell’uso ispezionate la macchina in ogni sua parte e prestate attenzione a malfunzionamenti,
bulloni e viti allentate, coltelli, e altre parti danneggiate o non ben fissate. E’ fatto assoluto divieto l’uso della
macchina non in perfette condizioni, quindi prima dell’uso intervenite eseguendo le operazioni di controllo e
manutenzione consigliate.
3) Famigliarizzate con tutte le parti ed i controlli della macchina prima della messa in moto.
4) L’uso della macchina è consentito a una sola persona adulta e consapevole. Non permettere l’uso a bambini
e adolescenti.
Evitate di utilizzare il rasaerba in condizioni fisiche non idonee.
5) Tenere persone e cose a distanza di sicurezza come prescritto successivamente.
6) Utilizzate solo parti e accessori forniti da Noi e non permettete nessuna modifica o trasformazione. Per infor-
mazioni contattate il Vs. Rivenditore.
7) Riapplicare di nuovo tutte le decalcomanie di sicurezza e ammonimento danneggiate, illeggibili o mancanti.
Controllate la lista delle decalcomanie nella apposita sezione di sicurezza. Mantenere pulite le decalcomanie da
fango, sporcizia e polvere.
8) Tenete mani, piedi e voi stessi lontani da ogni parte in movimento.
9) Non usate la macchina senza protezioni e coperchi nella giusta posizione e in buone condizioni.
Non impiegare la macchina se i dispositivi di sicurezza non sono in perfetta efficienza.
3. NorME di siCUrEzzA

8
3.1 PENdENzE
- Non utilizzare la macchina con pendenze longitudinali superiori a 15°.
- Non utilizzare la macchina con pendenze laterali superiori a 10°.
- Non fermare o avviare improvvisamente la macchina durante la salita o la discesa lungo un pendio.
- Mantenere bassa la velocità della macchina sui pendii e durante le curve strette.
- Prestare attenzione ad eventuali dossi, buche o altri pericoli nascosti. Se il terreno è irregolare, la macchina
può ribaltarsi più facilmente.
- Non operare in prossimità di banchine, fossi o argini; la macchina potrebbe ribaltarsi improvvisamente se una
ruota supera il bordo di questi ultimi, oppure se la banchina cede.
3.2 trAsPorto E sCAriCo
La macchina è pesante e può provocare seri danni da schiacciamento.
Caricarla e scaricarla con cautela utilizzando rampe di carico.
Trasportare la macchina su un rimorchio omologato. Durante il trasporto, applicare il freno di stazionamento, e
fissare la macchina con dispositivi omologati come cinghie, catene o funi.
N.B.: Se la macchina è imballata e posta sopra al proprio pallets è possibile movimentarla con il muletto.
PORTATA MINIMA 350 Kg
IMPORTANTE:
Il freno di stazionamento non è sufficiente a bloccare la macchina durante il trasporto. Fissare
adeguatamente la macchina al veicolo con dispositivi omologati.
Vedi figura 3.1
Vedi figura 3.2
Non manomettere mai per alcun motivo i dispositivi di sicurezza.
10) Se colpite o agganciate un oggeto fermate immediatamente la macchina, disattivare la presa di forza, spe-
gnere il motore, appoggiate l’attrezzatura a terra e controllatela in ogni sua parte. Prima di ripartire assicuratevi
di aver ripristinato le condizioni per un funzionamento ottimale della macchina.
11) Quando non utilizzate la macchina, disattivate la PTO, abbassate l’attrezzatura facendola appoggiare a terra,
spegnete il motore e togliete la chiave.
12) Non accendete mai il motore della macchina in luogo chiuso o senza adeguata ventilazione. I fumi di scarico
sono tossici.
Prima di eseguire le operazioni di manutenzione sulla macchina assicurarsi che la stessa sia spenta. Se si deve
intervenire sull’impianto elettrico, scollegare i cavi di tensione dai poli della batteria.
13) Non permettete che si sviluppino fiamme o scintille vicino al serbatoio del carburante o alla batteria.
14) Mai parcheggiare la macchina in discesa.
15) Utilizzate la macchina e le attrezzature ad una velocità compatibile con le esigenze di sicurezza e le carat-
teristiche del modello usato.
16) Usate estrema prudenza utilizzando la macchina sui pendii. Riducete al minimo la velocità.
17) Nell’uso e manutenzione della macchina indossate un abbigliamento adeguato: occhiali, guanti ed altri in-
dumenti di protezione.
18) Utilizzare la macchina in condizioni di visibilità buone.
19) Non utilizzare la macchina per trainare.
20) E’ tassativamente vietato avviare la macchina senza l’attrezzatura correttamente montata.
21) Tutti i conducenti dovrebbero ricevere una formazione professionale e pratica. Tale formazione dovrebbe
mettere in risalto:
- la necessità di prestare attenzione e di essere concentrati quando si lavora con le macchine con conducente
seduto.
- il controllo di una macchina che slitta lungo un pendio non potrà essere ristabilito azionando i freni. Le principali
ragioni della perdita di controllo sono:
a) insufficiente aderenza delle ruote;
b) guida troppo veloce;
c) frenata inadeguata;
d) tipo di macchina inadatto al lavoro richiesto;
e) mancata consapevolezza dell’effetto delle condizioni del terreno, in particolare dei pendii;
f) attacco non corretto delle attrezzature e conseguente mal ripartizione dei carichi.
22) Durante le fasi di lavoro, indossare sempre calzature resistenti e pantaloni lunghi. Non utilizzare la macchina
quando si è a piedi scalzi o si indossano sandali.
23) Ispezionare a fondo l’area nella quale deve essere utilizzata la macchina e rimuovere tutti gli oggetti che
potrebbero essere lanciati dalla macchina.
24) Disinnestare sempre la presa di forza durante le fasi di trasferimento della macchina.

9
IT
4. CArAttEristiCHE tECNiCHE
Motore GTM155 GTM160
BRIGGS & STRATTON
Potenza (HP) 15,5 16
Cilindrata (cc.) 508 480
N° Cilindri 1 2
Giri al min. 3600
Ruote motrici Posteriori
Tipo di avanzamento Idrostatico
Freno di servizio Idrostatico
Freno di stazionamento Meccanico a disco
Velocità max (Km/h) 9
Capacità serbatoio
carburante (L) 19
Lame Monolama
Rotazione lame Rotanti per mezzo di frizione elettromagnetica
Regolazione altezza di taglio (cm)
4 ÷ 8,5
Larghezza taglio effettiva (mm)
800
Capacità cesto di raccolta (L) 280
✱✱
Vedi manuale tecnico dell’attrezzatura
Vedi figura 4.
Misure espresse in mm.
4.1 PEso MACCHiNA
Modello Massa (Kg)
GTM160 260
GTM155 260
4.2 APPArAto rAsAErBA/AttrEzzAtUrA
4.3 LiVELLo di PotENzA ACUstiCA
Larghezza di taglio 80 cm
Rilevato 98
Garantito 100 dB (A)
4.4 oPErAtorE
• Vibrazionedellemembrasuperiori:....................................................................................< 2,5 m/s2.
• Vibrazionedelcorpo: ............................................................................................................0,4 m/s2.
• Valorerumorositàpostooperatore:................................................................................... 85,8 dB(A)
Piatto rasaerba raccolta L = 80 cm

10
6. UtiLizzo CoMANdi E strUMENti
6.1 AVANzAMENto - rEtroMArCiA
6.2 FrENo di stAzioNAMENto
6.3 PrEsA ACQUA PEr PULiziA PiAtto
Vedi figura 6.1
Vedi figura 6.2
Vedi figura 6.3
6.4 By-PAss
ATTENZIONE:
Evitare il traino della macchina per lunghi tratti con by-pass inserito.
6.5 ACCELErAtorE A MANo
6.6 PrEsA di ForzA
Vedi figura 6.6
6.7 soLLEVAMENto PiAtto di tAGLio - rEGoLAzioNE ALtEzzA di tAGLio
6.8 riBALtAMENto CEsto
Vedi figura 6.7
Vedi figura 6.4
Vedi figura 6.5
Vedi figura 6.8
7. sCHEMA ELEttriCo
7.0 LEGENdA CoLori
A Azzurro
B Bianco
C Arancio
G Giallo
7.1 BriGGs & strAttoN
H Grigio
L Blu
M Marrone
N Nero
R Rosso
S Rosa
V Verde
Z Viola
Vedi figura 7.1
QUESTO SIMBOLO INDICA
LA MASSA
6.9 rUBiNEtto CoMBUstiBiLE
Vedi figura 6.9
RIF. DESCRIZIONE
1Interruttore avviamento
2Avvisatore acustico cesto pieno
3Deviatore pulsante frizione
4Interruttore fari lavoro
5Faro lavoro
6Faro lavoro
7Frizione lame
8Micro cesto pieno
9Motorino avviamento
10 Connessioni motore
11 Micro cofano chiuso
12 Micro cesto chiuso
13 Micro sedile
14 Micro freno a mano
15 Relè stacca frizione lame
16 Relè avvia frizione lame
17 Relè arresto motore sicurezze
18 Relè arresto motore
19 Teleruttore avviamento
20 Batteria 12V
21
Contaore
22
Diodo per relè avviamento frizione lame
23 Diodo soppressore su frizione lame
24 Fusibile protezione impianto
5. CoMANdi E strUMENti
1) Volante
2) Freno di stazionamento
3) Regolazione longitudinale sedile
4) By-Pass
5) Leva azionamento cesto
6) Presa acqua per pulizia piatto
7) Inserimento PTO
8) Leva acceleratore
9) Leva sollevamento attrezzatura/Regolazione altezza di taglio
10) Interruttore luci
11) Chiave avviamento
12) Rubinetto combustibile
13) Pedale avanzamento - retromarcia
14) Starter (GTM160)
15) Contaore
Vedi figura 5.
Il sistema di guida del tosaerba è composto dai seguenti comandi:

11
IT
10.1 sCAriCo PostEriorE dELL’ErBA
1) Regolare la leva acceleratore.
2) Disinserire il freno di stazionamento.
3) Selezionare la velocità desiderata mediante il pedale posto sul lato DX.
4) Azionando il volante si comandano le ruote anteriori.
N.B.: Per arrestare le macchina é sufficiente rilasciare il pedale di avanzamento o retromarcia; una volta
ferma, inserire il freno di stazionamento.
ATTENZIONE: Finchè non sarete esperti nella guida, avanzate a velocità ridotta. Mantenere sem-
pre persone e animali ad almeno 3 mt. di distanza.
Vedi figura 9.
9. MoViMENtAzioNE dELLA MACCHiNA
8. AVViAMENto MotorE
1) Prendere posto correttamente sul sedile.
2) Assicurarsi che il freno di stazionamento sia completamente inserito.
3) Inserire lo starter per la partenza a motore freddo e girare la chiave di accensione sulla posizione “ON”.
4) Girare la chiave di accensione verso il simbolo per accendere il motore.
5) Disinserire lentamente lo starter una volta che il motore è acceso.
Vedi figura 8.
10. tAGLio dELL’ErBA E sistEMA di rACCoLtA AUtoMAtiCo
11. ArrEsto MotorE
1) Arrestare la macchina.
2) Disinnestare la PTO
3) Inserire il freno di stazionamento.
4) Portare il motore al n° minimo dei giri.
5) Girare la chiave di accensione dalla posizione “ON” alla posizione “STOP”.
Vedi figura 10.
Vedi figura 10.1
12. riForNiMENto
Il rifornimento del carburante deve essere eseguito in luoghi aperti o sufficientemente ventilati, con motore spen-
to e in assenza di fiamme o scintille. Assicurarsi inoltre che il carburante sia quello indicato.
AVVERTENZA: IL CARBURANTE E’ ALTAMENTE INFIAMMABILE.
CONSERVARE IL CARBURANTE IN APPOSITI RECIPIENTI. FARE RIFORNIMENTO DI CARBURANTE SO-
LAMENTE ALL’APERTO E NON FUMARE DURANTE QUESTA OPERAZIONE. AGGIUNGERE CARBURAN-
TE PRIMA DI AVVIARE IL MOTORE. NON TOGLIERE MAI IL TAPPO DEL SERBATOIO NE’ AGGIUNGERE
CARBURANTE QUANDO IL MOTORE E’ IN FUNZIONE O QUANDO E’ CALDO.
In caso di fuoriuscita del carburante, non tentare di avviare il motore ma allontanare la macchina dall’area dove è
avvenuta la fuoriuscita evitando di creare fonti di accensione finchè non si sono dissipati i vapori. Rimettere a posto
correttamente i tappi del serbatoio e del contenitore del carburante.
Non immagazzinare mai la macchina con carburante nel serbatoio all’interno di un edificio dove i vapori possono raggiungere una
fiamma libera o una scintilla. Lasciare raffreddare il motore prima di immagazzinare la macchina in un qualunque ambiente chiuso.
Vedi figura 12.
13. MANUtENzioNE ordiNAriA
Dovendo eseguire operazioni di manutenzione, impiegare esclusivamente ricambi originali, per garantire alla
macchina sempre la massima affidabilità.
Prima di eseguire le operazioni di manutenzione, prendere visione completa delle indicazioni fornite nel paragrafo
3 “Norme di Sicurezza”.
13.1 rABBoCCo oLio MotorE
• BRIGGS & STRATTON
Consultare il Manuale Uso e Manutenzione del motore.
OIL SHELL HELIX PLUS 10W-40
Vedi figura 13.1
13.2 sCAriCo oLio MotorE
Vedi figura 13.2
Vedi figura 13.

12
13.3 BAttEriA
Verificare periodicamente il livello dell’elettrolito e, se necessario, aggiungere acqua distillata, prestando atten-
zione al livello indicato sul corpo della batteria.
Vedi figura 13.3
13.5 FiLtro AriA
Controlli periodici.
Vedi figura 13.5
13.4 FUsiBiLi
13.7 FiLtro CArBUrANtE
Vedi figura 13.4
Vedi figura 13.7
13.8 PrEssioNE PNEUMAtiCi
Se i pneumatici anteriori sono gonfiati ad una pressione diversa, le lame taglieranno l’erba ad altezza diversa.
13.9 PULiziA dELLA MACCHiNA
13.10 iNGrAssAGGio
Vedi Tabella manutenzioni.
14. MANUtENzioNE strAordiNAriA
Per la manutenzione straordinaria della macchina rivolgersi esclusivamente ad un’officina di assistenza autorizzata.
15. iNAttiVitA’ dEL rAsAErBA
Se si verifica il caso in cui il rasaerba GTM debba rimanere inutilizzato per parecchio tempo, è conveniente ese-
guire alcune operazioni per garantire l’efficienza al suo riutilizzo e la durata nel tempo dello stesso:
- Eseguire tutte le indicazioni fornite nel manuale uso e manutenzione del motore per predisporre lo stesso in
“fuori servizio”.
- Smontare la batteria, ricaricarla e deporla in un luogo asciutto e areato.
- Pulire accuratamente la motrice avendo un occhio di riguardo dove si sono formate incrostazioni dovute a
residui di terriccio e di erba.
- Eseguire le operazioni di “manutenzione ordinaria” descritte precedentemente e, se necessario, eseguire anche
la “manutenzione straordinaria”.
- Parcheggiare la motrice in un luogo asciutto e areato, coprendola con un adeguato telo di protezione non
impermeabile.
- Durante il periodo di inattività, mantenere sempre alla pressione indicata i pneumatici e, periodicamente, variare
il punto d’appoggio dei pneumatici con il suolo.
- Svuotare il serbatoio carburante.
- Chiudere il rubinetto combustibile.
13.6 FiLtro oLio MotorE (GtM160)
Consultare il Manuale Uso e Manutenzione del motore.
Vedi figura 13.8
Vedi figura 13.9
Vedi figura 13.10
Vedi figura 13.6
16. EtiCHEttE di siCUrEzzA
17. NotE GENErALi
A) Per interventi tecnici non contemplati nel seguente manuale,interpellare un nostro centro
assistenza autorizzato
B) Conservare il libretto uso e manutenzione in luogo adatto a mantenerlo inalterato.Il presente manuale può
essere modificato senza preavviso, ne ulteriori obblighi, al fine di includere variazioni e miglioramenti alle unità
già inviate. É vietata la riproduzione o la traduzione di qualsiasi parte di questo libretto senza preavviso scritto
del propietario.
Vedi figura 16.
13.11 sostitUzioNE E/o MANUtENzioNE LAME
Vedi figura 13.11
13.12 sostitUzioNE rEtE CEsto
Vedi figura 13.12

13
IT
18. tABELLA MANUtENzioNi
19. tABELLA d’iNdiVidUAzioNE dEi GUAsti
Qualora il problema non fosse elencato in questa tabella, rivolgersi al concessionario autorizzato.
Se una volta controllate tutte le cause possibili elencate nella tabella il problema dovesse persistere, rivolgersi
al concessionario autorizzato.
Motore
PROBLEMA CAUSA/SOLUZIONE
Scarse prestazioni del motore Sporcizia nell’impianto di alimentazione o combusti-
bile vecchio, filtro combustibile e dell’aria sporco.
Il motore non si avvia
Operatore non a bordo.
Freno di stazionamento disinserito
Cofano motore è sollevato o non chiuso corret-
tamente.
Il rubinetto d’arresto del combustibile è CHIUSO.
Il combustibile è esaurito o non è del tipo cor-
retto.
Il filtro del combustibile è ostruito.
Problema all’impianto elettrico. Fare riferimento a
“Impianto elettrico”, in questo capitolo.
INTERVALLO
OPERAZIONI PRINCIPALI
DI MANUTENZIONE
CONTROLLO
INIZIALE
GIORNALIERO
SETTIMANALE
OGNI
30
ORE
OGNI
50
ORE
OGNI
100
ORE
NOTE FIG.
ORE
PULIZIA RETE CONTENITORE X+
•
13.10
PULIZIA GENERALE DI MASSIMA X
•
13.10
PULIZIA GENERALE ACCURATA X
•
13.10
INGRASSAGGIO X
13.11
PULIZIA FILTRO ARIA X+
13.6
LIVELLO OLIO MOTORE X
13.1
CAMBIO OLIO MOTORE
10
X
13.3
CAMBIO CARTUCCIA FILTRO
OLIO MOTORE
10
X
13.8
CAMBIO FILTRO CARBURANTE X
13.8
CAMBIO FILTRO ARIA X+
13.6
MANUTENZIONE MOTORE
CONTROLLO CONDIZIONI LAME X+
13.11
CONTROLLO PRESSIONE PNEUMATICI X
13.9
CONTROLLO SERRAGGIO BULLONI
RUOTE POSTERIORE X
91
±2
Nm
13.9
+
In caso di condizioni di lavoro particolarmente gravoso la periodicità deve essere inferiore.
Manutenzione motore: consultare il manuale Uso e Manutenzione del motore.
•
Queste operazioni di pulizia devono essere fatte preferibilmente con aria compressa. Evitare acqua.

14
PROBLEMA CAUSA/SOLUZIONE
Il motore si avvia con difficoltà
L’uso dello starter è scorretto.
Il filtro del combustibile è ostruito.
Il combustibile è vecchio o non è del tipo corretto
Il motore gira in modo irregolare
Lo starter non è completamente spento.
La tubazione o il filtro del combustibile sono intasati.
Il combustibile è stantio o sporco.
L’iniettore del combustibile è otturato.
L’elemento del filtro dell’aria è ostruito
Prolema all’impianto elettrico. Fare riferimento a “Im-
pianto elettrico”, in questo capitolo.
il motore perde colpi sotto carico
Lo starter non è completamente spento.
Il combustibile è stantio o sporco.
Il filtro del combustibile è ostruito.
Fuoriuscita di fumo nero dal tubo di scarico
Lo starter non è completamente spento.
l’elemento del filtro dell’aria è sporco.
Impianto elettrico
PROBLEMA CAUSA/SOLUZIONE
Il motorino d’avviamento non si avvia
Freno di stazionamento disinserito.
La batteria non è carica.
Il fusibile è bruciato.
Operatore non a bordo.
Macchina
PROBLEMA CAUSA/SOLUZIONE
A motore in funzione la macchina non si sposta
Bypass del transaxle è in posizione di innesto.
Cinghia di trasmissione rotta o danneggiata.

15
EN
iNdEx
NOTES FOR THE DISPOSAL OF THE PRODUCT VALID FOR THE EUROPEAN COMMUNITY .................... 15
0. NAMEPLATE CE ........................................................................................................................................ 16
1. TO OUR COSTUMERS.............................................................................................................................. 16
2. USER’S RESPONSIBILITY ........................................................................................................................ 16
3. SAFETY STANDARDS ............................................................................................................................... 16
3.1 SLOPES ......................................................................................................................................................................... 17
3.2 TRANSPORT AND UNLOADING ................................................................................................................................... 17
4. TECHNICAL FEATURES ............................................................................................................................ 18
4.1 MACHINE WEIGHTS...................................................................................................................................................... 18
4.2 MOWER DECK / ATTACHMENTS.................................................................................................................................. 18
4.3 LEVEL OF ACOUSTIC POWER...................................................................................................................................... 18
4.4 OPERATOR .................................................................................................................................................................... 18
5. CONTROLS AND INSTRUMENTS............................................................................................................. 19
6. USING CONTROLS AND INSTRUMENTS ................................................................................................ 19
6.1 FORWARD - REVERSE.................................................................................................................................................. 19
6.2 PARKING BRAKE........................................................................................................................................................... 19
6.3 JOINT FOR CLEANING MOWER................................................................................................................................... 19
6.4 BY-PASS ........................................................................................................................................................................ 19
6.5 HAND THROLLE............................................................................................................................................................ 19
6.6 P.T.O ............................................................................................................................................................................... 19
6.7 LIFT OF THE EQUIPMENT - PLATE HEIGHT ADJUSTMENT........................................................................................ 19
6.8 BASKET OVERTURNING............................................................................................................................................... 19
6.9 FUEL TAP....................................................................................................................................................................... 19
7. WIRING DIAGRAM..................................................................................................................................... 19
7.0 COLOUR PALETTE ........................................................................................................................................................ 19
7.1 BRIGGS & STRATTON................................................................................................................................................... 19
8. STARTING THE ENGINE............................................................................................................................ 20
9. DRIVING THE MACHINE ........................................................................................................................... 20
10. CUTTING AND AUTOMATIC GRASS COLLECTION............................................................................... 20
10.1 REAR DISCHARGE OF THE GRASS ........................................................................................................................... 20
11. STOPPING THE ENGINE......................................................................................................................... 20
12. TANK FILLING.......................................................................................................................................... 20
13. ORDINARY MAINTENANCE .................................................................................................................... 20
13.1 ADD MOTOR OIL......................................................................................................................................................... 20
13.2 ENGINE OIL REPLACEMENT ...................................................................................................................................... 20
13.3 BATTERY...................................................................................................................................................................... 20
13.4 FUSES.......................................................................................................................................................................... 21
13.5 AIR FILTER ................................................................................................................................................................... 21
13.6 ENGINE OIL FILTER (GTM160) .................................................................................................................................... 21
13.7 CARBURATEUR FILTER............................................................................................................................................... 21
13.8 TYRE PRESSURE ........................................................................................................................................................ 21
13.9 CLEANING THE MACHINE.......................................................................................................................................... 21
13.10 GREASING................................................................................................................................................................. 21
13.11 CHANGING/MAINTENANCE BLADES ...................................................................................................................... 21
13.12 HOPPER GRID CHANGE........................................................................................................................................... 21
14. EXTRAORDINARY MAINTENANCE......................................................................................................... 21
15. INACTIVITY OF THE MACHINE............................................................................................................... 21
16. SAFETY STICKERS ................................................................................................................................. 21
17. NOTES..................................................................................................................................................... 21
18. TABLE MAINTENANCES ......................................................................................................................... 22
19. TROUBLESHOOTING.............................................................................................................................. 22
NotEs For tHE disPosAL oF tHE ProdUCt VALid For tHE EUroPEAN CoMMUNity
Do not dispose the product as a solid urban waste but dispose it by dropping it at a dumping site.
By salvage dumping the product you risk to pollute the nature. If the product is provided with a
battery, you must dump the battery in a separate container as the battery contains highly toxic sub-
stances. The above shown figure represent a local garbage bin. It is absolutely forbidden to throw
the product in such a bin. The introduction after the 1st of July 2006 of products not complying with
the decree law 151 (directive RoHS RAEE) is punished by Law.

16
1) Manufacturer’s address
2) Model
3) Weight
4) Engine
5) Construction’s year
We are pleased to welcome you as one of our customers. To ensure best possible performance of your machine
as well as for useful tips for using and maintaining it, we kindly ask you to read through carefully the User’s
Manual.
Themachine hasbeendesignedto givebestperformance underdifficultconditions.Its workingperformancelargely
depends of course on its maintenance. Should queries arise that have not been dealt with in these instructions,
then please contact your dealer who will be able to assist you further.
2. UsEr’s rEsPoNsiBiLity
1. to oUr CostUMErs
0. NAMEPLAtE CE
See figure 0.
3. sAFEty stANdArds
THIS SIGN IMPLIES THAT SAFETY REGULATIONS MUST BE COMPLIED WITH AT ALL TIMES BY THE
USER SO AS TO AVOID ACCIDENTS. PLEASE, BE CAREFUL WHEN YOU SEE THIS SIGN. IT IS FOR
YOUR AND OTHER PEOPLE’S SAFETY.
It is imperative that the user reads through this manual carefully so as to become acquainted with its working
procedure, maintenance of parts and proper lubrication according to our instructions.The user is also responsible
for checking, repairing and for possible replacement of wornout parts which could cause injuries.The user is re-
sponsible for damages caused to third parties by improper use. The machine must be used and maintained only
by persons with a good knowledge of its specific features and who have fully understood the safety rules.
Never let children or minors near the machine.
Local laws, if any, may state a minimum age for the operator. Never take passengers.
Only factory approved attachments and accessories are permitted.
It is strictly prohibited to do any alterations or reconstructions to the machine which are not mentioned in this
manual.
WHEN USING THE MACHINE, THE OPERATOR MUST SCRUPULOUSLY OBSERVE THE SAFETY RULES CONTAINED IN
THIS MANUAL, THE RULES FOR THE PREVENTION OF ACCIDENTS, OTHER GENERAL SAFETY RULES, THE PROVISIONS
OF WORK MEDICINE.
ONLY A CAREFUL USER IS A GOOD USER
If you follow the Safety Instructions in the manual you can avoid accidents.
MAIN PART
1) Read through carefully each section of these instructions.
2) Check the machine before every use for defect, for e.g. loose screws and bolts, loosened or damaged blades
or other parts which are not secure. It is absolutely forbidden to use the machine in improper conditions.
Therefore, before starting your machine go through the control and service instructions as recommended.
3) Before starting the machine acquaint yourself with all the parts and with the checking system.
4) The machine should only be used by adults with experience. Don’t let children use it.
Avoid using the lawnmower if you do not feel physically fit for the job.
5) Keep people within a certain security distance as explained hereafter.
6) Only use original parts and accessories. Do not make any changes thereto.
For information, please consult your dealer.
7) Replace lost or damaged safety stickers or warning labels. Chek the list of safety stickers in the “SAFETY PRE
CAUTIONS” section of this manual. Wipe dust and dirt off the stickers.
8) Keep hands and feet, as well as your body away from the moving parts.
9) Never use the machine without protection and covers in the right position and perfect condition.
Do not use the machine if its safety devices are not perfectly efficient.
For no reason, tamper with the machine safety devices.
10) Should an object have been run over or got stuck, stop immediately. Turn off the engine and remove the igni-
tion key. Disengage the P.T.O., put the attachment onto the ground and inspect it. Do not start using the machine
until you are sure that it is in perfect working order.
11) When you have finished working with the machine, disengage the P.T.O., put the attachment lower down so
that it touches the ground, turn off the engine and remove the key.
12) Never start the engine in a closed room. Exhaust fumes are poisonous.
Before carrying out maintenance operations on the machine make sure that the same is off.

17
EN
3.1 sLoPEs
See figure 3.1
Before intervening on the electrical installation, disconnect the power cables from the battery terminals.
13) Be careful that flames or sparks do not get near the petrol tank.
14) Never park on slopes.
15) Machine speed should be suited to the ground you are working on.
16) Working on slopes requires extreme caution and reduced speed.
17) When using the machine wear suitable clothing, glasses, gloves and any other protective clothing.
18) Only use the machine with good visibility.
19) Do not use the machine for towing.
20) It is absolutely forbidden to start the machine if the equipment is not correctly mounted.
21) All drivers should receive a professional and practical training. Such training should highlight the following:
- the necessity of paying attention and being concentrated when working
on machines where the driver is sitting.
- a machine sliding down a slope can be brought again under control by pulling the brakes. The main causes for
the loss of control are:
a) insufficient grip of the wheels;
b) driving too fast;
c) inadequate braking;
d) type of machine unsuitable for the job required;
e) lack of awareness of the effect of the condition of the ground, particularly of slopes ;
f) the equipments are wrongly attached and the loads are consequently badly distributed.
22) During the phases of work, always wear strong shoes and long trousers. Do not use the machine when you
are bare-footed or wearing sandals.
23) Inspect thoroughly the area where the machine is to be used and remove all the object that could be thrown
by the machine.
24) Always disengage the P.T.O. when transferring the machine.
- Do not use the machine on longitudinali slopes of more than 15°.
- Do not use the machine on lateral slopes higher of more than 10°.
- Do not stop or start suddenly the machine when going up or down a slope.
- Proceed with low speed on slopes or narrow curves.
- Pay attention to any road humps, potholes or other hidden dangers. If the ground is irregular,
the machine can overturn more easily.
- Do not operate in the proximity of shoulders, ditches or river banks; the machine could suddenly overturn if a
wheel goes beyond the edge of the latter, or if the shoulder cedes.
3.2 trANsPort ANd UNLoAdiNG
The machine is heay and can cause serious crushing damages.
Load and unload it with care and use loading ramps.
Transport the machine on a homologated trailer. During transport, use the the parking brake and fix the machine
with homologated devices, such as belts, chains or ropes.
N.B.: If the machine is packed and mounted on its pallet, it is possible to move it with a forklift.
CAPACITY 350 Kg
IMPORTANT:
The parking brake is not sufficient for locking the machine during transport. Fix appropriately
the machine to the vehicle with homologated devices.
See figure 3.2

18
4.1 MACHiNE wEiGHts
4.2 MowEr dECK / AttACHMENts
Collection deck L = 80 cm
4.3 LEVEL oF ACoUstiC PowEr
4.4 oPErAtor
• Expositionofaccelerationofsuperiorlimbs:.....................................................................< 2,5 m/s2.
• Expositionofbodyacceleration:...........................................................................................0,4 m/s2.
• Noisevalueatoperator’splace:........................................................................................ 85,8 dB(A)
4. tECHNiCAL FEAtUrEs
See figure 4.
Measurement in mm.
✱✱
See technical manual for the equipment.
Width of cut 80 cm
Found 98 dB (A)
Guaranteed 100 dB (A)
Engine GTM155 GTM160
BRIGGS & STRATTON
Engine power (HP) 15,5 16
Displacement (cc.) 508 480
N° of cylinders 1 2
RPM 3600
Driving wheels Rear
Type of progress Hydrostatic
Service brake Hydrostatic
Parking brake Disk brake
Max speed (Km/h) 9
Fuel tank (L) 19
Blades Single-blades
Rotating blades Rotating by electromagnetic clutch
Cutting height regulation (cm) 4 ÷ 8,5
Width of cut (mm) 800
Basket capacity (L) 280
Model Mass (Kg)
GTM155 260
GTM160 260

19
EN
5. CoNtroLs ANd iNstrUMENts
1) Steering wheel
2) Parking brake
3) Adjusting the longitudinal seat
4) By-pass lever
5) Elevator activating basket
6) Joint for cleaning mower
7) P.T.O. and turbine engagement
8) Acelerator
9) Lever for lifting the equipment/Plate height adjustment
10) Light switch
11) Switch key
12) Fuel tap
13) Forward speed pedal - reverse gear
14) Engine choke control (GTM160)
15) Hourmeter
See figure 5.
The machine includes the following controls:
6. UsiNG CoNtroLs ANd iNstrUMENts
6.1 ForwArd - rEVErsE
6.2 PArKiNG BrAKE
6.3 joiNt For CLEANiNG MowEr
See figure 6.1
See figure 6.2
See figure 6.3
6.4 By-PAss
IMPORTANT:
Avoid towing the machine for long stretches with inserted by-pass.
6.5 HANd tHroLLE
6.6 P.t.o
See figure 6.6
6.7 LiFt oF tHE EQUiPMENt - PLAtE HEiGHt AdjUstMENt
See figure 6.7
See figure 6.4
See figure 6.5
6.8 BAsKEt oVErtUrNiNG
See figure 6.8
6.9 FUEL tAP
See figure 6.9
7. wiriNG diAGrAM
THIS SIMBOL INDICATE
THE EARTH
7.0 CoLoUr PALEttE
A Sky-blue
B White
C Orange
G Yellow
H Grey
L Blue
M Brown
N Black
R Red
S Pink
V Green
Z Violet
7.1 BriGGs & strAttoN
See figure 7.1
RIF. DESCRIPTION
1Ignition Switch
2Full Load Buzzer Hopper
3Clutch switch
4Headlights Switch
5Headlights
6Headlights
7Blade clutch
8Hopper Full Switch
9Motor
10 Motor Connector
11 Close Hood Micro Switch
12 Basket Closed Microswitch
13 Seat Switch
14 Parking Brake Microswitch
15 Blades Decluting Relay
16 Blades Clutching Relay
17 Motor stop safety relay
18 Motor Stop Relay
19 Starting Relay
20 12V Battery
21 Hourmeter
22 Diode for blade clutch relay
23 Suppressor diode on blade clutch
24 Fuse 20A

20
13. ordiNAry MAiNtENANCE
If you have to carry out maintenance operations, use only original spare parts, to ensure the same maximum
reliability to the machine. Before carrying out any maintenance work, read carefully the indications given in the
paragraph 3 “Safety rules”.
13.1 Add Motor oiL
• BRIGGS & STRATTON
Consult the Use and Maintenance manual of the motor.
OIL SHELL HELIX PLUS 10W-40
See figure 13.1
See figure 13.
13.2 ENGiNE oiL rEPLACEMENt
13.3 BAttEry
Check periodically the electrolyte level and, if necessary, add distilled water, checking the level indicated on the
battery body.
See figure13.3
See figure13.2
1) Set throttle lever.
2) Disengage the parking brake.
3) Selelect the desired speed though the pedal fitted on the right side.
4) By moving the steering wheel one steers the front wheel.
N.B.: To stop the machine, just release the forward or reverse pedal; once stopped, engage the parking brake.
IMPORTANT: To being drive at slow speed, for safety reasons make sure that people and ani-
mals are at least 3 meters away
See figure 9.
9. driViNG tHE MACHiNE
8. stArtiNG tHE ENGiNE
1) Take your place correctly on seat
2) Make sure that the parking brake in enturely engaged
3) Set engine choke control to for cold starts and turn the ignition key to the “ON” position
4) Turn the ignition key onto the symbol to start the motor
5) Slowly return choke to run position once the engine has started
See figure 8.
10. CUttiNG ANd AUtoMAtiC GrAss CoLLECtioN
11. stoPPiNG tHE ENGiNE
1) Stop the machine.
2) Declutch the PDP.
3) Engage the parking brake.
4) Reduce the motor revolution on minimum.
5) Turn the ignition key from “ON” position to “STOP” position.
See figure 10.
12. tANK FiLLiNG
Only fill the tank in open air or in a sufficiently ventilated room. The engine must be turned off and no flames or sparks
should be made. Check that carburant is the one indicated by the label on the tank.
WARNING: CARBURANT IS HIGHLY INFLAMMABLE.
KEEP THE CARBURANT IN JERRYCANS. FILL THE TANK WITH PETROL ONLY IN OPEN AIR AND DO NOT
SMOKE DURING THIS OPERATION. ADD CARBURANT BEFORE STARTING THE ENGINE. NEVER REMOVE
THE TANK LID NOR ADD CARBURANT WHEN THE ENGINE IS WORKING OR IS HOT.
In case of carburant escape, do not try to start the engine but move the machine away from the place where the escape
took place and avoid creating ignition sources until carburant fumes have dissipated. Replace the correct lids on the
tank and the jerrycan. Never store the machine with carburant in the tank inside a building where the fumes might reach
some free flames or sparks. Let the engine cool down before storing the machine in any closed environment.
See figure 12.
10.1 rEAr disCHArGE oF tHE GrAss
See figure 10.1

21
EN
13.5 Air FiLtEr
Periodical checks.
13.6 ENGiNE oiL FiLtEr (GtM160)
Consult the use and maintenance manual of the motor.
13.8 tyrE PrEssUrE
If the front tires are inflated at different pressure, the blades will mow the grass at different heights
13.9 CLEANiNG tHE MACHiNE
See figure 13.9
See figure 13.8
See figure 13.6
See figure 13.5
14. ExtrAordiNAry MAiNtENANCE
For the extraordinary maintenance of the machine, contact only an authorised service center.
13.10 GrEAsiNG
See tab. maintenance.
See figure 13.10
15. iNACtiVity oF tHE MACHiNE
In case the GTM lawnmower has to remain idle for a long period of time, it is convenient to carry out some ope-
rations to ensure its efficiency when reused and the duration of the same for years:
-Carry out all the indications given in the use and maintenance manual of the motor prearrange the same for
“out of service”.
-Remove the battery, recharge it and store it in a dry and ventilated place.
-Clean carefully the engine with an eye in particular where there are incrustations due to soil and grass resi-
dues.
-Carry out the of “ordinary maintenance” operations described above and,if necessary, carry out also the “ex-
traordinary maintenance”.
-Park the engine in a dry and ventilated place and cover it with a suitable non-impermeable protection sheet.
-During the period of inactivity, always maintain the pressure indicated for the tyres and, periodically, change the
resting point of the tyres on the ground.
- Clear a tank of fuel.
- Closed fuel tap.
16. sAFEty stiCKErs
17. NotEs
A) Please contact our authorised dealer for anything that is not dealt with in this manual.
B) Always keep this technical handbook in a safe place for future reference. It can be modified without prior
notice or any additional obligations in order to improve the product. Reproduction or translation of any part of
this manual is not allowed without the owner’s prior written consent.
See figure 16.
13.4 FUsEs
13.7 CArBUrAtEUr FiLtEr
See figure 13.4
See figure 13.7
13.11 CHANGiNG/MAiNtENANCE BLAdEs
See figure 13.11
13.12 HoPPEr Grid CHANGE
See figure 13.12

22
19. troUBLEsHootiNG
If you are experiencing a problem that is not listed in this chart, see your authorized dealer for service. When you
have checked all the possible causes listed and you are still experiencing the problem, see your authorized dealer.
Engine
IF CHECK
Poor engine performance Dirt in fuel system or fuel is old, fuel filter and air filters
are dirty.
Engine will not start
Man is not in his seat.
Parking brake off.
Engine compartment is open or not correctly clo-
sed.
Fuel shutoff valve is in OFF position.
Out of fuel or improper fuel.
Plugged fuel filter.
Electrical problem - See Electrical Troubleshooting
section.
18. tABLE MAiNtENANCEs
INTERVAL
MAIN MAINTENANCE OPERATIONS
FIRST
CHECK
DAILY
WEEKLY
EVERY
30
HOURS
EVERY
50
HOURS
EVERY
100
HOURS
NOTES FIG.
HOURS
HOPPER GRID CLEANING X+
•
13.10
OVERHALL CLEANING X
•
13.10
ACCURATE GENERAL CLEANING X
•
13.10
GREASING X
13.11
AIR FILTER CLEANING X+
13.6
MOTOR OIL LEVEL X
13.1
MOTOR OIL CHANGE
10
X
13.3
MOTOROIL FILTER CARTRIDGE
CHANGE
10
X
13.8
CARBURATEUR FILTER CHANGE X
13.8
AIR FILTER CHANGE X+
13.6
MOTOR MAINTENANCE
MOWER BLADES CHECK X+
13.11
TYRES PRESSURE CHECK X
13.9
WHEEL BOLTS TIGHTENING CHECK X
91
±2
Nm
13.9
+
In case of particularly heavy working conditions, these operation must be carried more frequently.
Motor maintenance: check the motor operating and maintenance manual.
•
These cleaning operations must be carried out preferably with compressed air. Avoid using water.
This manual suits for next models
3
Table of contents
Languages:
Other Gianni Ferrari Lawn Mower manuals
Popular Lawn Mower manuals by other brands

Toro
Toro Z Master Professional 7500-DSeries Operator's manual

Toro
Toro 74926 Z Master G3 Operator's manual

Garland
Garland SIOUX 1255 ZSG instruction manual

BE Ag & Industrial
BE Ag & Industrial BE-AGF Series Operations & parts manual

Weed Eater
Weed Eater WE14542K owner's manual

Craftsman
Craftsman 247.370251 owner's manual