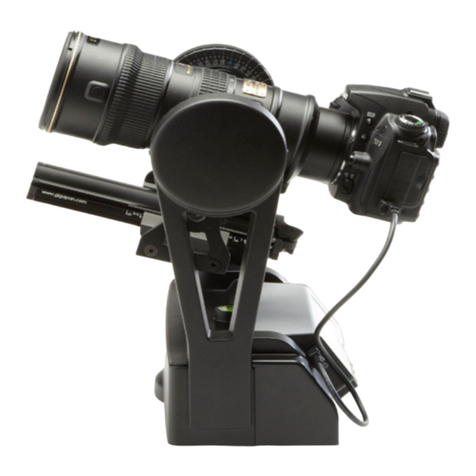
GigaPan EPIC PRO V User manual

User Guide
&
Proudly manufactured and distributed in the U.S. by OmegaBrandess

1. Introduction 4
1.1 The GigaPan Solution 4
1.2 GigaPan Parts 6
1.3 GigaPan Features 8
1.4 Navigate the GigaPan Menu 9
1.5 Menu Options 10
1.6 Set up the GigaPan Quick Menu 14
1.7 Electronic Trigger Cable Compatibility 14
2. Setting up your GigaPan 15
2.1 Get your equipment ready 15
2.2 Charge and Install Batteries 15
2.3 Mount the GigaPan on a tripod 17
2.4 Mount your camera and lens 18
2.5 Set up your camera 19
2.6 Align your camera to the GigaPan 20
2.7 Set the manual focus or auto focus 21
2.8 Test Your Set-up 23
2.9 Minimize Parallax Error 23
3. Using the GigaPan 25
3.1 Start a new panorama 25
3.2 Shoot a 360 panorama 25
3.2 Repeat your last panorama 26
3.4 Guide to Epic Pro V Specic Features 27
4. GigaPan Additional Instructions 30
4.1 Balance Exposure Bracketing Settings 31
4.2 Using the GigaPan to Control Bracketing Exposure 32
4.3 Frequently Asked Questions 33
4.4 Mirror Lock-Up 37
4.5 Shutter Teach 38
4.6 Timelapse/Series 39
4.7 Save/Load Cong 40
4.8 Last Pic Hold 40
4.9 Shutter Feedback 40
5. Stitch and Share 41
5.1 Embed Your Panoramas 41

6. Troubleshooting 42
6.1 My photos are blurry 42
6.2 My photos have a narrow depth of eld 44
6.3 My camera is missing pictures, or the rst exposure 44
6.4 The electronic trigger cable is not actuating the camera shutter 45
6.5 The electronic trigger cable is not allowing my camera to auto focus 45
6.6 My panoramas are distorted or misaligned 46
6.7 My computer freezes while GigaPan Stitch is working 46
6.8 My panoramas have vignetting 47
7. Tips and tricks 48
7.1 Shoot more than you need 48
7.2 Shooting Outdoors 49
7.3 Shooting Indoors 50
7.4 Night Shots 51
7.5 City Scenes 52
7.6 Panoramas in Motion: Capturing a Crowd 53
8. Parts & Accessories 54
8.1 Repairs 55

GigaPan User Guide
4
1. Introduction
Capturing stunning gigapixel images is easy with GigaPan - a complete solution with
integrated equipment, software and website. The GigaPan works seamlessly with the
GigaPan Stitch software and GigaPan.com to capture, upload and share gigapixel
panoramas. Zoom into thousands of stunning panoramas from around the world with the
amazing GigaPan Viewer. Join GigaPan.com to view and share with friends, take snapshots
and embed panoramas on your own website.
Here is an overview of how easy and fun it is to use the GigaPan System, in 4 simple steps:
1. Pick a scene
The GigaPan system automates the panorama-taking process by taking hundreds of
images of the selected scene.
2. Click
The GigaPan system automatically operates your camera to take a series of photographs of
your scene.
1.1 e GigaPan Solution

5
3. Stitch
The Gigapan Stitch software assembles, aligns and blends the individual images into one
large panorama.
4. Share
The GigaPan Stitch software then uploads your panorama to GigaPan.com to share with
friends and the GigaPan community. You also have the ability to embed your uploaded
panorama on any website.
Images created using the GigaPan are able to be stitched together using a variety of 3rd
party software programs as well including Adobe Photoshop, PTGui and others. The
popularity of gigapixel images has also led to the creation of new websites for sharing.
One example may be found at https://www.prodibi.com/

GigaPan User Guide
6
1.2 GigaPan Parts
Camera Rail
Adjustment Knob
Platform thumbscrew
Camera Rail
Arm
Tripod Mount
Mounting Plate Tension Knob
Navigation Panel
(See page 4 for detail)
Camera Mounting Platform
Camera Mounting Plate
Battery Compartment

7
Please see Chapter 2: Setting Up Your GigaPan for more information about how
to adjust the Gigapan parts to t your camera and lens.
The GigaPan Body
Camera Rail - Holds the camera mounting plate and can be adjusted forward or back to
accommodate the size of your camera and lens.
Rail Adjustment Knob - Loosen or tighten the knob to move the camera rail when
mounting a camera and lens.
Camera Mounting Platform - Holds the camera rail and can be adjusted up or down to
accommodate your camera.
Platform Thumbscrews - Loosen or tighten the thumbscrews to move the camera
mounting platform.
Camera Mounting Plate - Attaches to the camera or lens to mount it on the GigaPan.
Camera Mounting Plate Lever - Holds the camera mounting plate securely in place.
Move the small silver pin below the lever clockwise and rotate the lever clockwise to
release the camera mounting plate.
Navigation panel - Contains the LCD display and directional buttons for operating the
GigaPan Menu.
Tripod Mount - Attaches the GigaPan to your tripod.
Bubble Level - Measures that your GigaPan is level on your tripod and on the ground.
Battery Chamber - Holds the GigaPan battery. Turn the latch counterclockwise and pull it
the battery holder away from the unit to remove it from the chamber.
LCD Display
Directional Keys
Trigger cable port
Power/OK Button
Cancel/X button
Remote trigger port
Battery Port

GigaPan User Guide
8
1.3 GigaPan Features
HIGHLIGHTS
DSLR camera compatible - GigaPan works with almost all digital DSLR and mirrorless
cameras introduced after 2004.
Large lenses are supported - Camera and lens combinations of up to 10 lbs can
be used with the GigaPan.
Precision accuracy - Powered camera movement and simple fore/aft up/down
adjustment for optimal positioning of the nodal point and varied camera/lens
combinations.
Quick set up - Easy to secure GigaPan to tripod. Fits standard tripods, with 1/4”
or 3/8” thread. Onboard bubble level for horizontal alignment.
Clear and simple to navigate menu - Access frequently-used functions with the
touch of a button, such as to move the camera or set the shutter delay. Screen is
highly visible with back lit display.
Strong and durable yet lightweight - Excellent design with magnesium chassis
and aluminum arm, the GigaPan weighs less than 8 lbs with battery pack.
SPECIAL FEATURES
Rechargeable battery pack (7.2V, 4300mAH) included - Charge the battery on
its own or while inserted in the GigaPan, convenient for charging while shooting. Charger
included.
Multiple triggering option - Allows the GigaPan to take multiple pictures at each
image location up to 20 times per position for exposure bracketing or multiple
image enhancement.
Optimized range of motion - 360 panoramic and -65/+90 tilt range of motion
with precision incremental movement. (Inclined & Declined Angle of Motion for Pro V)
Remote trigger port - Enables you to start taking a panorama from a dierent
location using a remote trigger with a Canon E3 type connector. (not included).
Advanced settings include: option to repeat last panorama, pause and scroll,
and order pictures as rows or columns.
Adjustable features include: time between exposures, pre trigger delay, focus assertion
time ( shutter length ), motor speed, aspect
ratio, and picture overlap.
Navigation Panel
LCD Display - Displays the GigaPan menu.
Directional Keys - Press up, down, left or right buttons to select items in the GigaPan
Menu, or move the camera left to right and up or down to select parameters when
shooting a panorama.
Cancel Button - Cancel selections in navigating the GigaPan menu.
Power/OK Button - Hold down for a few seconds to power the GigaPan ON or OFF, or use
to select items when navigating the menu.
Trigger cable port - Use with electronic trigger cable to actuate the shutter and cause the
camera to focus if you are using auto focus.
Remote trigger port - Use with a pocket wizard or a wireless shutter release that has a
2.5mm miniplug to trigger the GigaPan to capture a panorama.
Battery port - Plug the power cord into the battery port to charge the battery while it is in
the GigaPan.

9
1.4 Navigate the GigaPan Menu
GigaPan Menu Tree
New Panorama
360 Panorama <---------
Options
Time/Exposure
Mult Shutter
Brackets
EV Step Size*
Mirror Lock-up
Lock-up Time*
Shutter Teach
Start Del/Trigger
Pic Order
Time-lapse Series
Battery Status
Save/Load Cong
Factory Reset
Expert Options
Checklist
Shutter Mode
Shutter Length
Motor Speed
Motors Rigid
Pre trigger Delay
Bracket Delay
Backlight Mode
Auto O Timer
Aspect Ratio
Picture Overlap
Last Pic Hold
Optimize Pan
Shutter Feedback
Shutter Retries*
Quick Menu Set-up
Firmware Ver
Test Shutter
Panorama Memory
Previous
Save Previous
Recall
Camera Setup
Move Camera
Turn the GigaPan on by pressing the Power/OK button. The rst menu option, ‘New
Panorama’, will appear. To navigate to other menu options, push the down button. To reach
submenus within a menu option, push the OK button once you reach the desired main
menu option, then the down button to access the submenu choices. To exit a menu or
submenu, push the X button.
Note: The Epic Pro V will have
additional menu item “ New
Video Pan”. This option is how
you access Motion Time-
Lapse and Video Panning. See
Chapter 3.4 for instructions for
these additional features.

GigaPan User Guide
10
*Note: Some menu items will be available dependant upon other settings.
When “Shutter Teach”is set to “ON” a small “T” icon will be displayed in the upper
right hand corner. The“Options”menu items “Time/Exposure”, and“Brackets” will
not be displayed as they are not needed when “Shutter Teach”is enabled. When,
or if, you wish to return to the normal mode, set the “Shutter Teach” option to
“OFF”. When“Options”-> “Brackets” is set to a value greater than one, the“Options”
-> “EV Step Size” menus item will appear. You can also access “Options” -> “EV Step
Size” from the“Options”-> “Brackets”menu by pressing the right arrow key.
1.5 Menu Options
Reminder: See chapter 3.4 for options specic to Epic Pro V
Main Menu
New Panorama – Sets the upper left photo and lower right photo that denes the
rectangular area of the panorama.
360 Panorama – Sets the upper pitch and the lower pitch of a panorama that is 360
degrees and completes a full circle.
Options – Contains submenus that allow you to change more settings.
Test Shutter - Allows you to optionally test you settings such as single shutter, multiple
shutters, exposure bracketing, and or mirror ip-up before starting the capture of a
panorama. To set, select “Test Shutter” from the menu. Once you press the “OK” button,
the GigaPan will trigger the camera with current settings.
Panorama Memory – Recalls a previously dened panorama or a previously saved
panorama. Also allows you to save a panorama. When you save a new panorama, you must
also set a reference point. The reference point provides a method to orient the GigaPan
body in the same position. The reference point is in addition to placing the tripod in the
same location.
Camera Setup – Any time you change the camera, lens, or zoom lens focal length, you need
to do a camera setup. “Camera Setup” determine the coverage of a single photograph by
measuring the vertical angles that the lens and camera sensor sees. Choose a unique point
and move the lens so that the point is at the top of the lens. Then move the lens so that the
unique point is at the bottom of the lens. The the GigaPan knows the vertical angles and
calculates the horizontal angle of view using the aspect ratio. The GigaPan also accounts for
image overlap which has a default setting of 30%. The default aspect ratio is 3:2, but can be
set in the “Expert Options” menu.
Move Camera – Moves the camera and lens from left to right and up and down using the
directional keys.

11
Options Menu
Time/Exposure - This was previously named“Time per Pic”in rmware 128.1 and is the
amount of time that the GigaPan will wait until it moves the camera to the next position. It
is important to allow enough time for the camera to process the current photograph and
copy the data from the camera’s buer memory to the ash memory. This is the most likely
reason the camera would miss a photograph. Some cameras will light an LED while the
photograph is being transferred.
Mult Picture – This was previously called “Multi Shutter” and allows you to take multiple
photographs that will be ti\triggered per position. If you have “Brackets” enabled, “Mult
Picture” will repeat the bracket sequence per the number of photographs you selected
when setting “Mult Picture”
Brackets – Exposure bracketing of 1,3,5,7, or 9 photographs for HDR images by working
with the camera AEB (automatic exposure bracketing) rmware. Use the “EV Step”setting
to set the separation of exposure values to {0.3, 0.7, 1.0, 1.3, 1.7, or 2.0} EV (exposure value).
You may exceed the capability of your camera AEB rmware by setting the “Expert Options”
-> “Shutter Length”to “Bulb”if all exposures are slower than about 1/10 of a second, such as
night photography.
EV Step Size – Use in conjunction with the “Brackets” setting to capture multiple exposures
per position to create HDR panoramas. You can set the exposure value separation to {0.3,
0.7, 1.0, 1.3, 1.7, or 2.0} EV. One exposure value separation is equivalent to doubling or
halving the shutter speed when you keep the aperture and ISO constant.
Mirror Lock-up – This is used in conjunction with the camera rmware to ip up the
mirror and wait a delay of “Options” -> “Lock-up Time” before triggering the shutter. When
“Mirror Lock-up” is enabled in the GigaPan and your camera, there will be two shutter
signals for each photograph taken. The rst assertion of the signal will ip up the mirror.
The second shutter signal will be asserted after the “Options” -> “Luck-up Time” and will
trigger the shutter. “Mirror Lock-up” is useful for longer focal length lenses where any lack
of setting is amplied by the optical magnication. If you are using a large 200-400mm
f/4.0 lens, you might set the lock-up time to 1.8 seconds. If you are using a 50mm or
100mm prime lens you might disable “Mirror Lock-up”.
Lock-up Time – Is used in conjunction with “Mirror Lock-up” and your camera’s mirror
lockup settings. You may set a lock-up time of {0.25s, 0.50s, 0.75s, 1.00s, 1.25s, 1.50s, 1.75s,
2.00s, 2.25s, 2.50s, 3.00s}.
Shutter Teach – This setting is an alternative method of dening exposure bracketing
timing or multiple pictures where you“teach”the GigaPan how you would like the camera’s
shutter button to be pressed. The Pro will then remember how many times you want the
shutter to be pressed as well as the extra timing between shutters.“Shutter Teach”is located
in the”Options” submenu and the left arrow button is used to teach the imager. End the
sequence with the “OK” button.
Start Del/Trig – Enables a timer delay of {External trigger, 15s, 30s, 45s, 1m, 2m, 5m, Timer}
before the panorama capture begins. The external trigger setting is designed to work with
a Canon E3 style remote shutter that is inserted in the GigaPan remote trigger port.

GigaPan User Guide
12
Pic Order - Allows for dierent patterns of capturing the individual photographs such as
{column-right, column-left, row - down, row - up}
Time lapse/Series – Used to capture a sequence of panoramas over a period of time. You
may use a timer of zero seconds to 99 days or an external trigger to change when each
panorama in the sequence is taken. When you choose the timer, the value includes the time
to capture the panorama. When external trigger has been selected, use a Canon E3 style
remote shutter that is inserted in the GigaPan remote trigger port.
Battery Status – Tells you the percentage voltage level of the battery. 100% means the
battery is fully charged: a percentage around 20% means your battery will not be able to
operate the GigaPan much longer.
Save/Load Cong – Allows you to save up to three congurations, which is convenient
when you want to quickly change lenses or bracketing options.
Language – Enable to GigaPan menu to display a choice of four languages: English,
Español, Français, or Deutsch.
Factory Reset – Resets certain options to their default values. The “Camera Setup”, “Time Per
Pic”, “Start Delay”, “Multi Shutter”, “Pic Order”, “Saved Panoramas”, and vertical eld of view
will be reset.
Expert Options Submenu
Checklist - If this option is set to ON, a checklist of things that need to be done in order to
successfully create a technically good image are presented to the user before the panorama
is taken. Selecting OFF will disable these prompts.
Shutter Mode – Allows you to choose how the unit will operate your camera’s shutter. The
settings are Remote or Manual. The Remote setting will use the electronic trigger cable to
connect the GigaPan to the remote shutter port on your camera. If the Manual mode is
used, the user must manually actuate the shutter and press the OK button on the GigaPan
to advance to the next photograph.
Shutter Length – The amount of time that the focus and the shutter signals are asserted
{Exposure (bulb), 0.5s, 0.6s, 0.7s, 0.8s, 1.0s, 2.0s, 2.2s, 2.4s, 4.0s, 4.5s, 5.0s, 8.0s}. You are able
to incrementally increase the amount of time that the focus signal is asserted when using
auto focus. You are able to quickly nd a trade-o between allowing for enough time for
your camera’s auto focus subsystem to achieve good focus and not requiring too much
time to capture the entire gigapan image. When “Shutter Length”exceeds“Time/Exposure”,
then “Shutter Length”takes precedent. You can also use the bulb so that the remote shutter
controls the exposure time when using auto focus or doing exposure bracketing to capture
HDR images.
Motor Speed - Options are Slow, Med, or Fast. It is recommended that you use the
Slow setting when using large lenses to reduce the setting time after accelerating and
decelerating a large lens.
Motors Rigid - The On setting will help hold large lenses in position when you are not in a
“Move” mode, or actively capturing a panorama.

13
Pre-Trigger - Delay {0.0s, 0.5s, 1.0s, 1.5s, 2.0s, 2.5s, 3.0s}. This delay is between the GigaPan
movements and the electronic trigger signal to your camera. This allows a lens and camera
body to settle after an GigaPan movement. This is especially important for large and longer
focal length lenses.
Bracket Delay – Time delay added to allow your camera to not overow its memory buer
while capturing exposure brackets for HDR images. Programmable between 0.1s and 8.0s.
Backlight Mode – This setting allows you to choose when the backlight is in use. The
options are Power Save, Always O, or Always On.
Auto O Timer – This setting controls when the GigaPan unit will power down
automatically if idle. The default setting is 5 minutes. You can also set auto-o to 10 Minutes
or Disable.
Aspect Ratio – The ratio of the width to height of the camera system. The default setting
is 3 units wide by 2 units high, which is the default setting for standard DSLR cameras. You
can set the Aspect Ratio to the following values of width and height {1:1, 3:2, 4:3, 16:9, and
custom values 0.50:1, 0.55:1,... through 2.00:1}
Picture Overlap – Overlap {25%, 30%, 35%, 40%, 45%, 50%, 55%, 60%, 65%, 70%, 75%}
This setting allows you to increase the overlap to compensate for vignetting, or poor
performance of a lens at the edges of the glass. Increasing this value may help give the
stitch software more common area to nd control points. The GigaPan default picture
overlap value is 30%.
Last Pic Hold – Continues to assert the shutter signal after the last photograph in the
panorama so that a camera does not power down. This is especially useful for the time lapse
function.
Optimize Pan – Whenever a pan motion greater than n 180 degrees is required, the
GigaPan will travel in the opposite direction (which is shorter and takes less time) to reach
the next position. The default setting is ON. Use caution if you are doing a 360-panorama for
example; each subsequent row will cause the unit to rotate another revolution, winding up
and cable that are attaches to the unit (e.g. battery chargers or remote switches). Turning
this setting to OFF will cause pan motions to move strictly back and forth and prevent any
wind-up. When doing a 360-panorama and you nd cords are wrapping around the unit,
turn optimize pan to OFF.
Shutter Feedback – Used to automatically detect a missed photograph at each position
and retry gain up to ten times. You must set the camera to focus priority, set“Expert Options”
-> “Shutter Retries” and connect a sync cable between the camera and the GigaPan. The
sync cable has a PC connector at one end and a mini plug at the other. You connect the
PC end to the camera and the mini plug to the GigaPan remote trigger cable port. If your
camera does not include a PC connector, you can purchase a hot shoe adapter that has a PC
connector.
Shutter Retries – Determines the maximum number of times to retry per position when the
shutter fails to trigger. Only visible when the “Expert Options” -> “Shutter Feedback” is set to
ON. May be set from one to ten retries.
Firmware Version – This allows you to see what rmware version is currently installed for
your unit.

GigaPan User Guide
14
1.6 Set up the GigaPan Quick Menu
Access the Quick Menu at any time by pressing and holding the X button until the
Quick Menu appears. You can choose which items appear on this menu to suit your
preferences. Use the ‘Expert Options’ submenu item ‘Quick Menu Setup’ to set one
of the four menu items on the Quick Menu. You have the ability to choose one of the
following items for each of the four quick menu items.
Move Camera
Time/Exposure
Start Del/trig
Mult Picture
Brackets
EV Step Size
Shutter Teach
Mirror Lock-up
Lock-up Time
Pic Order
Time lapse Series
Battery Status
Motor Speed
Motors Rigid
Pre trigger Delay
Bracket Delay
Backlight Mode
Auto O Timer
Aspect Ratio
Picture Overlap
Shutter Mode
Shutter Length
Checklist
Last Pic Hold
Optimize Pan
Shutter Feedback
Shutter Retries
Language
1.7 Electronic Trigger Cable Compatibility
Your GigaPan arrived with six electronic trigger cables, for a full list of compatible cameras,
please visit www.omegabrandess.com/products/gigapan then click on “Epic Pro Camera
Compatability Chart by Cable”
Cables Included
Canon N3 Cable
Canon E3 Cable (Also compatible with most current Fuji & Pentax cameras)
Nikon 10-pin Cable
Nikon MC-DC2
Olympus RM-UC1
Sony RM-S1AM
*Sony S2 Micro 10-pin cable sold separately for Sony Mirrorless Cameras
*Nikon MC-DC1 cable sold separately for certain Nikon models

15
2. Setting up the GigaPan
2.1 Get your equipment ready
To start shooting panoramas with the GigaPan, you will need:
• GigaPan battery and power cord (included with the unit)
• A tripod, tted with a standard 1/4-20 tripod screw
• Digital camera & lens and compatible electronic trigger cable
• Camera battery and/or charger
• A memory card (at least 4 GB) Make sure you have enough memory on your memory card
to take the number of pictures the panorama requires.
• A memory card reader, or your camera’s USB cable
Carefully follow the steps below to capture the highest quality panoramas.
2.2 Charge and Install Batteries
Your GigaPan will arrive with its battery ready to be charged. There are two ways to
charge the battery – you can charge the battery while it is in the GigaPan or remove the
battery to charge it on its own.
To charge the battery inside the GigaPan:
1. You can charge the battery in the GigaPan while it is powered on or o. You can also
operate the unit while the battery is charging, if there is a sucient level of charge on
the battery.
2. Insert the battery into the GigaPan battery compartment until the end of the battery
is ush with the opening. When the battery is inserted, ip the latch clockwise to lock
the battery into place.
3. Plug the power cord into the GigaPan battery port under the right side of the LCD
display.
4. Plug the power cord into an AC wall socket. A plug icon will appear in the lower right
corner of the LCD display When the GigaPan is powered o, the plug icon will not
appear while the battery is charging.
5. Place the GigaPan level in a space that has ample ventilation.
The power cord will show a red light indicating the battery is charging. When the
battery is fully charged, the red light will change to green, signaling the battery is ready
to use.

GigaPan User Guide
16
To charge the battery on its own:
1. To remove the battery from the GigaPan, open the battery compartment by ipping
the latch counter-clockwise.
2. Plug the connector end of the power cord into the battery and then plug the power
cord into an AC wall socket.
3. Place the battery level in a space that has ample ventilation.
The charger LED light will display a red light, indicating the battery is charging. When
the battery is fully charged, the red light will change to green signaling the battery is
ready to us.
To check the GigaPan battery status:
When the battery is low, a low battery icon will ash in the lower right corner of the
GigaPan LCD display. When the battery is so low that proper functionality is no longer
possible, a “Please recharge the battery” message will appear.
To check the battery status, press the directional keys until you reach the ‘Options’
menu item and press OK. Select the ‘Battery Status’ menu item and press OK. 100%
means the battery is fully charged; a percentage around 20% means your battery will
not be able to operate the unit much longer.
Charger LED light
Battery Battery Latch

17
To ensure a steady series of images, use the GigaPan with a sturdy tripod tted with a standard
1/4-20 tripod screw.
1. Set up the tripod. Ensure that the legs have a solid footing on the ground and that the tripod
is relatively level. If the tripod has a bubble level use it to help level the tripod. Tighten the
adjustment screws on the tripod
2. Remove the tripod quick release plate and attach it to the GigaPan’s tripod mount at the
bottom.
3. Gently tighten the screw until the quick release plate is rmly attached to the GigaPan.
4. Clip the plate back onto the tripod.
5. Use the bubble level to center and level the GigaPan. Adjust the tripod legs and mount as
necessary.
6. You can also mount the Gigapan directly on to a tripod without a head. To do this,
remove the 1/4-20 thread adapter in the Gigapan tripod mount, and secure it to the 3/8”
stud on the top of your tripod.
2.3 Mount the GigaPan on a tripod
Tripod Mount
Bubble Level
Quick-Release Plate

GigaPan User Guide
18
2.4 Mount your camera and lens
Use these steps below to mount your camera and lens on the GigaPan. Refer to the
GigaPan diagram and part names in Chapter 1.2 as you follow these steps.
1. Turn the GigaPan on by pressing and holding the OK button for one to two seconds.
2. Level the camera rail by pressing the down button until the ‘Move Camera’ menu
item is selected. Press OK.
3. Use the up and down arrows to move the camera rail to a level position,
approximately even and parallel to the base of the GigaPan.
4. To remove the camera mounting plate from the camera rail, turn the tension knob
counter-clockwise until the mounting plated slides freely. Then remove the camera
mounting plate.
5. Mount either the camera body or the lens mount to the camera mounting plate.
Larger lenses have a mount because a camera body is not able to support the mass
and size of the lens.
6. Re-attach the camera mounting plate to the camera rail with the lens and camera
attached. Ensure that it is securely fastened.
7. Loosen the camera rail by turning the camera rail adjustment knob underneath the
rail clockwise.
8. Slide the camera rail so that the mass of the camera and lens is centered over the
axis of rotation so that the GigaPan can easily move the lens and is less susceptible
to external forces such as wind or vibration from vehicles. If you are photographing
subjects that are closer with a medium to small mass lens you may opt to adjust
the lens so that the optical center is centered at the axis of rotation. This choice
aects the adjustment of the rail forward or backward. It does not eect the height
adjustment, which will be adjusted to the center of the lens or as close as possible.
Tension knob

19
2.5 Set up your camera
1. Turn on your camera and select the ‘Manual mode’.
2. Adjust the focus and exposure. (ISO, aperture value, shutter speed )
3. Set your camera’s ‘White Balance’ (Daylight, Cloudy, Tungsten or Fluorescent) based on
the lighting conditions. You may use a device such as an expodisc, color card, or grey
card to get better white balance.
4. Connect the electronic trigger cable to the trigger cable port, which is located to the
left of the LCD display. Connect the cable to the camera.
5. Set the GigaPan ‘Time/Exposure’ in the ‘Options’ submenu to ensure enough time for
the camera to be ready to capture another photograph. You need to account for the
shutter speed and enough time to write the image to ash memory. It is important to
allow sucient ‘Time/Exposure’ to avoid missing photos.
Follow the steps below to optimize your digital camera settings for panorama taking.
Camera rail adjustment knob
Camera rail
9. Adjust the rail forward to center the mass over the axis of rotation unless you
are very close to your subject. If you are close to your subject you will need
to use a lens that allows you to position the camera rail so that the lens is
approximately at the optical center which minimizes parallax error. This
position will be close to the region of the lens between the front glass element
and the focus ring in most cases.
10. Adjust the height of the camera rail and the camera mounting plate so that the
center of the lens is at the level of the platform thumbscrews attached to the
GigaPan arms. Loosen the platform thumbscrews to allow for adjustment of the
camera mounting plate and lens height. A few larger cameras, such as the
Nikon D3X, will not allow you to perfectly center the height of the lens to the
midpoint. For the majority of usage, this should not be an issue.

GigaPan User Guide
20
2.6 Align your a camera to the GigaPan
Any time you change the lens, camera body, or the focal length on a zoom lens you will
need to use the menu item ‘Camera Setup’ to tell the GigaPan how much your camera can
see for each photograph taken. The term “Field of View” (FOV) is used for image viewers
and “angle of view” is used for lenses.
By setting the angle of view, the GigaPan will be aligned with the specic focal length of
your camera. This allows the GigaPan to calculate how far to move between each position
to ensure the proper amount of image overlap. And, when combined with the parameters
set for your panorama, the GigaPan can calculate the number of images to be taken.
1. To set the eld of view, select ‘Camera Setup’ from the GigaPan Menu.
2. The rst time you select “Camera Setup”, you will be asked if you want to set the eld
of view. Set your eld of view and press “OK”. (After setting up the eld of view the
rst time, the current eld of view will be displayed)
3. If you have not disabled the “Checklist” function under “Options” -> “Expert Options”
-> “Checklist” by setting it to “OFF”, you will be prompted to set the camera’s zoom.
Press “OK” after you have set this.
4. Now the GigaPan will prompt you to align a unique point with the top of the camera
viewnder or the top of the LCD screen. Ensure you choose a feature that you can
easily identify and use the directional keys to move the camera so that this unique
point is at the top, middle of the lens, then press “OK”.
5. The GigaPan will momentarily display “Reference Set!”
6. Now the GigaPan will prompt you to move the camera using the up and down keys.
7. Adjust the position of the lens so that the unique point that you chose in step 4 is
located at the bottom of the lens, then press “OK”.
8. The GigaPan will momentarily display “Field of View Set!”
Additional Information
Verify the eld of view at any time by selecting the “Camera Setup” function. If you wish to
preserve the current angle of view, press the “X” button. If you wish to change the angle of
view, press “OK” and follow the directions above in chapter 2.7.
Other manuals for EPIC PRO V
1
This manual suits for next models
1
Table of contents
Other GigaPan Camera Accessories manuals