Gigaware HD Radio Receiver User manual

TM
Thank you for purchasing your HD Radio Docking System. Please read
this user’s guide before installing, setting up, and using your docking
system.
HD Radio Docking System
Remote Control with Battery
Eight cradles
AM Antenna
FM Antenna
User’s Guide
What’s Included
HD RadioTM Docking System for iPod®or iPhoneTM
12-551

2
C
ontents
Features................................................................................................... 3
Setup....................................................................................................... 4
Top Panel..........................................................................................................................4
Back Panel .......................................................................................................................5
Remote Control................................................................................................................6
Power Your Docking System..........................................................................................7
Replacing the Remote Control Battery........................................................................7
Functions................................................................................................. 8
Docking and Charging Your iPod/iPhone....................................................................8
Listening to Your iPod.....................................................................................................8
Listening to the Radio and Using iTunes Tagging.......................................................9
Listening to an External Audio Source .......................................................................10
Settings ................................................................................................. 11
Setting Your Docking System......................................................................................11
Setting the Clock Time.................................................................................................11
Setting the Alarm..........................................................................................................11
Snooze Function............................................................................................................12
Setting Sleep Mode.......................................................................................................12
Additional Information............................................................................ 13
Care and Service............................................................................................................13
Troubleshooting.............................................................................................................13
6SHFLÀFDWLRQV.................................................................................................................14
FCC Information.............................................................................................................15
Important Safety Instructions......................................................................................15
Limited Warranty...........................................................................................................17

3
Features
Features
• Receive FM, AM, and HD Radio signals
• Dual full-range speakers deliver robust stereo sound
• Tag song information from HD Radio stations for purchase from iTunes
Music Store
• 20 FM Presets and 10 AM Presets
• Includes 8 docking cradles compatible with iPod nano, iPod video, iPod
classic, iPod touch, and iPhone models
• Dual alarm to wake you up by iPod, Buzzer, HD Radio, or FM/AM radio
stations
• Adjustable, backlit LCD display shows time, audio source, and alarm
mode
• Snooze Function/ Adjust the display brightness
• Sleep Function
• Remote control for changing the volume, HD Radio station, or song on
your iPod from a distance

4
Setup
Setup
Top Panel
SELECT/TUNE
Tune stations or set the clock and alarm
time.
VOLUME
Adjust the volume.
POWER
Turn your docking system
on/off.
FUNC./WAKE TO
Toggle between: iPod, Aux,
or Radio mode.
Select a wake-up mode: iPod,
Buzzer, HD Radio FM/AM
stations.
TAG
Store song information from
HD radio stations.
PRESET
Select preset radio stations.
PROGRAM
Store radio stations.
SET
Hold down to set and
confirm the clock time.
EQ
Repeatedly press to
set EQ from Pop,
Classic,Jazz, Bass,
Normal, Rock.
PLAY/PAUSE
Play or pause playback
in iPod mode.
ALARM 1/2
Set, activate, deactivate,
or reset either alarm.
SNOOZE/DIM
Silence the alarm
for 9 minutes
when the alarm
sounds.
Adjust the display
brightness.

5
Setup
Back Panel
FM Antenna
Connect the FM
antenna.
AM Antenna
Connect the AM antenna.
For best reception, move
the AM antenna 12
inches away from the
docking system and iPod.
AUX IN
Connect an external
audio source
(audio cable not
included) to use
docking system as a
speaker.
Select AUX mode to
listen.
*(Headphone Jack)
Connect headphones
(not supplied) for private
listening.
Plug the power
cord into a
standard outlet.
R-AUDIO-L
Connect to audio inputaudio input
jacks on your stereoyour stereo
system or speaker
(neither supplied).
VIDEO
Connect to your TV video
input jack (video cable
not included).
ZNote: You must
turn on the iPod’s TV
Out feature. See iPod’s
documentation for
instructions.

6
Setup
Remote Control
Volume Up/Down
MENU
Show iPod menu.
ENTER
Confirm menu
selection.
MU
TE
P
ress once to mute
th
e soun
d
; press
ag
ain to resume
t
h
e
sou
n
d
.
F
UNC
T
ogg
l
e
b
etween:
iP
o
d
,
A
ux, or
R
a
di
o
m
ode.
andand
Go to the previous/
next track.
Press and hold to
rewind/fast forward.
PLAY/PAUSE
Play tracks in
random order
Play tracks in
repeat mode
Se
l
ects
m
e
n
u
ite
m
s
.
P
R
OG
S
tore radio stations.
SLEEP
Set the docking system to turn
off after a certain time period.
After setting, press to view
remaining time.
TAG
Store song
information from
music on HD Radio
stations.
Turn on or off.
EQ
Toggle audio settings:
Pop, Classic, Jazz,
Bass, Normal, or Rock

7
Setup
Power Your Docking System
• Install one 9V battery (not included) in
the battery compartment at the bottom
of your docking system, matching polarity
symbols (+ and –) marked inside. It
provides backup power for retaining clock
setting.
• Connect the power cord to a standard power outlet.
Replacing the Remote Control BatteryBattery
Remove the insulating plastic before using the
remote control.
Press the tab on the battery compartment
tray and slide the tray out. Insert a new
battery of the same type (3V, CR2032),
positive (+) side up. Slide the tray back into the
battery compartment until it clicks.
ZBattery NotesBattery Notes
• Use only fresh batteries of the required size and
recommended type.
• Dispose of old batteries promptly and properly. Do not burn or bury
batteries.
• Keep button-cell batteries away from children. Swallowing a button-cell
battery can be fatal.
• If you do not plan to use your docking system for a long period, remove
the batteries. Batteries can leak chemicals that can destroy electronic
parts.
Press Tab
Slide Out

8
Functions
Functions
Docking and Charging Your iPod/iPhone
Insert the cradle that fits your iPod/iPhone model, then plug in your iPod/
iPhone. The table below shows cradle markings (on the back of the cradle)
and iPod/iPhone models.
ZNote: When the iPod is connected, it charges automatically except
when the docking system is in radio mode.
Marking iPod Model
9
5G iPod with video (30GB), iPod with video (30GB), iPod classic (80GB)
10 5G iPod with video (60GB & 80GB), iPod classic (160GB)
11 iPod nano 2nd generation (2GB,4GB,8GB)
12 iPhone (4GB & 8GB )
13 iPod nano 3rd generation (4GB & 8GB)
14 iPod touch (8GB & 16GB)
15 iPhone 3G
17 iPod nano 4th Generation (8GB & 16GB)
Listening to Your iPod/iPhone
Connect the iPod/iPhone to the docking system. The docking system
automatically switches to iPod mode and starts playback if the iPod/iPhone
is turned on and playing music. If the iPod/iPhone is not on and playing,
C
radle
L
i
f
t
f
rom this
s
l
ot
to
r
e
m
o
v
e
.

9
Functions
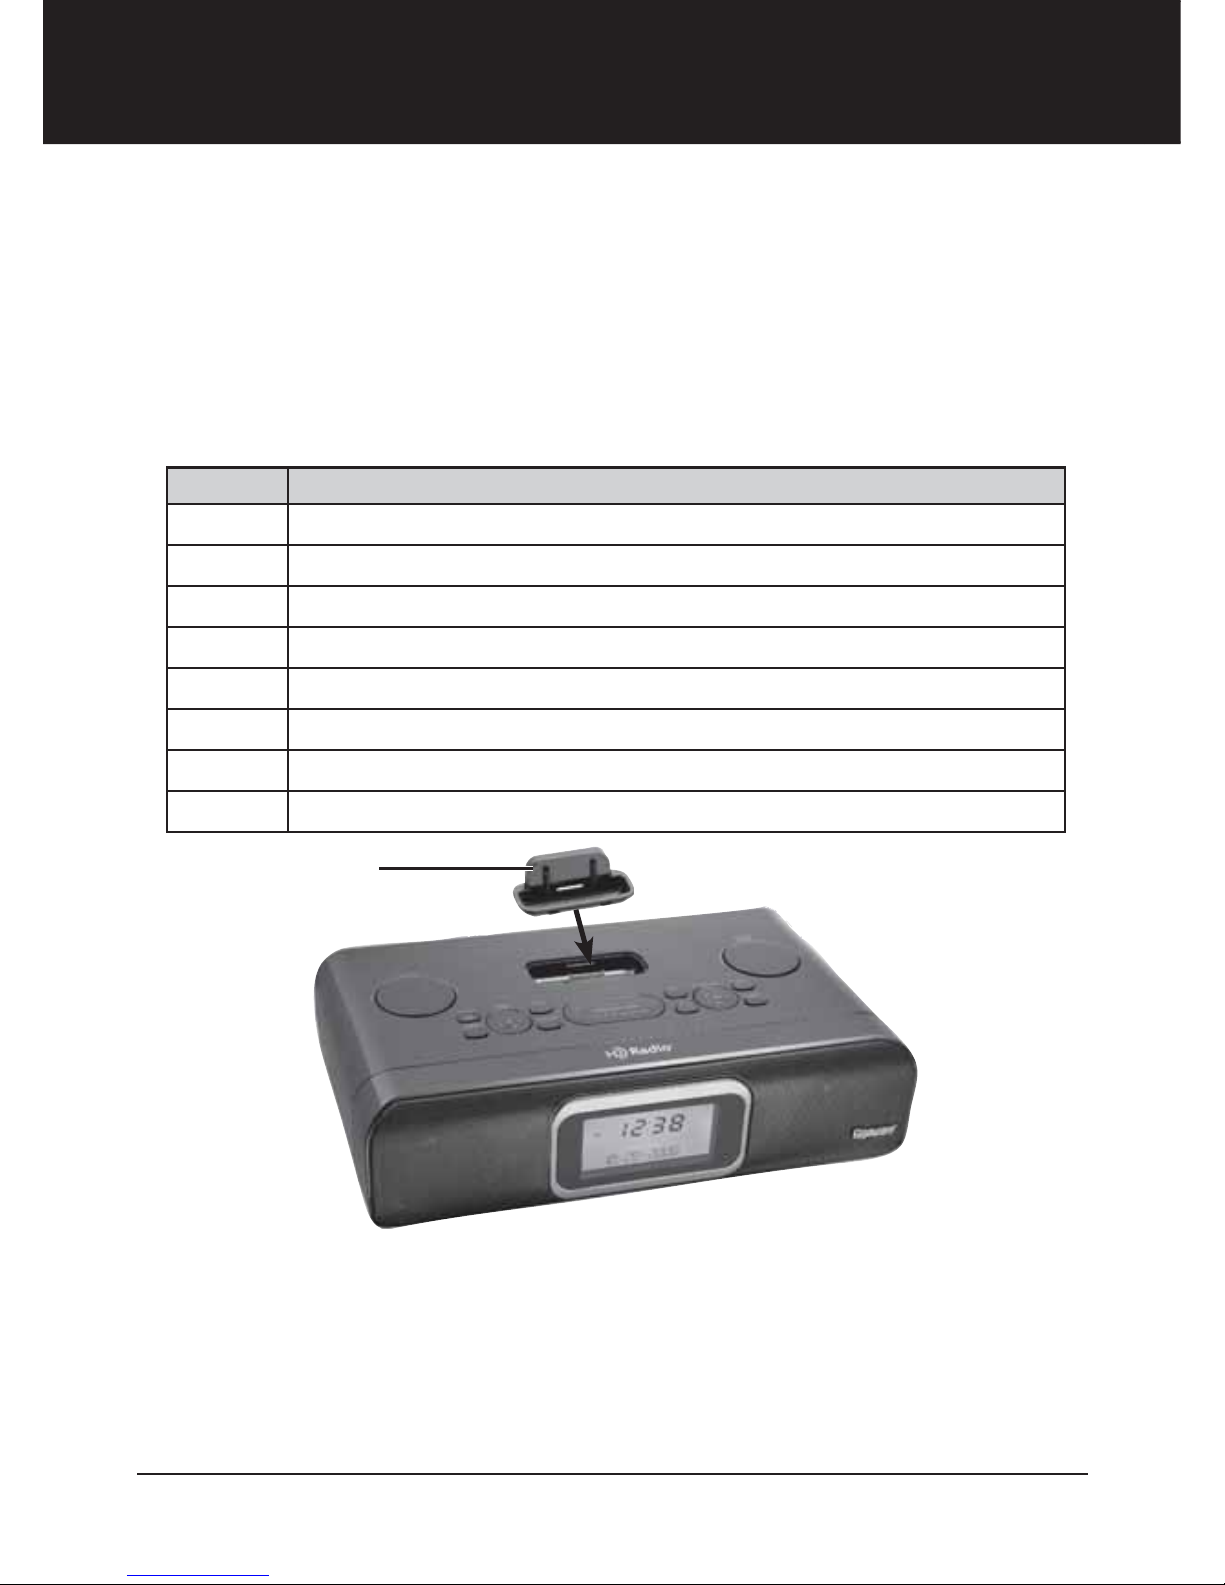
turn it on to play mode and the docking system will enter iPod mode. Use
– VOLUME + on the docking system or / on the remote control to
adjust the volume level.
To customize iPod mode functions, see “Setting Your Docking System” on
Page 11.
Listening to the Radio and Using iTunes Tagging
Make sure you have installed the supplied antennas before listening.
1. Turn on your docking system.Turn on your docking system.
2. Press FUNC./WAKE TO on the docking
system or FUNC on the remote control to
select AM or FM mode.
3. RotateRotate SELECT/TUNE to manually tune
to the desired radio station, or press
and hold
or
on the remote control
to automatically tune to the next station. When your docking systemWhen your docking system
recognizes an HD Radio channel, the HD Radio logo “ ” appears.
4. Press TAG to store song information in the HD Radio docking system.
The docking system will transfer the tagged song information to the
iPod when an iPod is connected. When you connect the iPod to a
computer, it synchs with iTunes. iTunes then displays the song title,
artist, album, and other saved information for songs you’ve tagged.
You can save, review, delete, or purchase any of the songs through the
iTunes store.
Audio Delay in HD Radio Systems
Digital systems inherently produce an audio delay. The docking system uses
a station’s analog signal to tune the station. After approximately 5 seconds,
the analog audio blends to digital. The blend is typically smooth, but if the
station has not implemented its HD Radio broadcast correctly, you may
experience a skip. This is not a problem with your radio. It is a broadcast
implementation issue, which the station should correct over time.
Only the main channel contains an analog signal. If you tune directly to
a station’s multicast channel, the audio will delay for approximately 5
seconds. This is normal.
ZNote: HD Radio signal broadcasts in AM band may terminate at night
due to FCC regulations.

10
Functions
HD Radio multicast channels (FM only)
In addition to digital quality sound, some HD Radio broadcasters offer
multiple programs simultaneously using multicast channels on their existing
frequency.
If the station offers multicast programming, “-1” appears next to the station
frequency. Use the tuner buttons to select multicast channels. Tuning up
the frequency band will take you to that radio station’s next subchannel,
which will have a “-2” after its frequency.
To store preset radio stations
You can store up to 10 preset AM stations and up to 20 preset FM
stations.
1. Press PROGRAM on the docking system or PROG on the remote
control. “MEMORY” displays and the memory location digits flash.
2. Press PRESET on the docking system or press )or (on the remote
control to select a location (01 to 20) to store the station.
3. Press PROGRAM on the docking system or PROG on the remote
control again to confirm your choice.again to confirm your choice.
4. Repeat steps 1-3 to store other stations.
ZWNote: When tuning FM stations, pressing
or
steps at the rate of
200 KHz. When tuning AM stations, pressing
or
steps at the rate
of 10 KHz.
To listen to preset radio stations
In AM or FM mode, press PRESET or press )or (on the remote
control to select the desired station.to select the desired station.
Listening to an External Audio Source
1. Use a 1/8” (3.5 mm) audio patch cord (not supplied) to connect the(not supplied) to connect theto connect the
audio source’s earphone jack to the AUX IN jack on your dockingyour docking
system.
2. Turn on your docking system and press FUNC./WAKE TO on the
docking system or FUNC on the remote control to select AUX mode.
3. Turn on the audio source to start listening.

11
Settings
Settings
Setting Your Docking System
Turn on your docking system and use the buttons on the docking system or
on the remote control to make the following settings.
Setting Mode Button Option
Repeat iPod
• Press once to repeat a track nonstop.
• Press again to repeat all selected
tracks nonstop.
Shuffle iPod Play all selected tracks once through in
random order.
Equalizer iPod, Radio, AUX EQ Pop, Classic, Jazz, Bass, Normal, Rock
Sleep iPod, Radio, AUX SLEEP
Select a time period of 15, 30, 45, 60,
75, 90 or 120 minutes to turn off the
docking system automatically. Or select
OFF to deactivate the sleep feature.
ZNote:Note:: If you set repeat and shuffle together, iPod randomly plays all
selected tracks continuously.
Setting the Clock Time
1. Turn off your docking system.
2. Press and hold SET on the docking
system. ““SET 12H OR 24H” displays and ““12”
or “24” flashes.
3. Rotate SELECT/TUNE on the docking
system or press
and
on the
remote control to select the 12 or 24
hour display. Press SET to confirm and move to the hour.
4. Repeat steps 1-3 to adjust minute, month, date, and year. The clock
format is saved even if the docking system is switched off.
ZNoteNote:AM or PM appears only in 12 hour display.
Setting the Alarm
1. Turn off the docking system..

12
Settings
2. Press and hold ALARM1.'and “ALARM1
SET” display. “IPOD,” “BUZZER,” “HD RADIO FM,” or
“HD RADIO AM” flashes. Press FUNC./WAKE
TO to select one of the four wake-up modes.
3. Press ALARM1 again and hour digits flash.
Rotate SELECT/TUNE on the docking
system or press
and
on the remote
control to adjust. Press ALARM1 to confirm and move to the minutes.
4. When the minutes digits are flashing, rotaterotate SELECT/TUNE on the
docking system or press
and
on the remote control to adjust..
Press ALARM1 to confirm and move to volume.
5. Rotate VOLUME on the docking system or press and on the
remote control to set the alarm volume.
To set alarm 2, press and hold ALARM2 until 'displays. Then follow steps
1-5. After setting alarm 1 and alarm 2, you can use them separately or at
the same time. Press ALARM1/2 to show 'or ', or both as desired.
When the alarm sounds, press POWER or FUNC/WAKE TO on the docking
system or 1or FUNC on the remote control to stop the alarm for 24 hours.
Snooze Function
When the alarm sounds, press SNOOZE/DIM once to stop for 9 minutes.
'or 'flashes in snooze mode. The alarm sounds again after another 9
minutes. The snooze function repeats up to 5 times.The snooze function repeats up to 5 times.
ZNotes:
• To wake up to an iPod, it must be properly docked and turned off. If the
iPod is not docked, the alarm defaults to the buzzer.
• Adjust the volume loud enough to wake you up.
• When you set the wake-up mode to radio, the alarm triggers the station
you last listened to.
• To deactivate the alarm, press ALARM1/2 until 'and 'disappear.
Setting Sleep Mode
You can set the docking system to turn off automatically during iPod,
Aux, or radio playback. Press SLEEP on the remote control to select a
time period of 15, 30, 45, 60, 75, 90, or 120 minutes. Select OFF to
deactivate the sleep feature. The docking system turns off automatically
when the set time elapses.
2
12
12
12
1

13
Additional Information
Care and Service
• Keep the docking system dry; if it gets wet, wipe it dry immediately.
• Use and store the docking system only in normal temperature
environments.
• Handle the docking system carefully; do not drop it.
• Keep the docking system away from dust and dirt, and wipe it with a
damp cloth occasionally to keep it looking new.
• Some furniture materials may cause the docking system feet to soften,
leaving marks on the furniture. To prevent this, use a pad.
• Modifying or tampering with the docking system’s internal componentsModifying or tampering with the docking system’s internal componentsor tampering with the docking system’s internal components
can cause a malfunction and might invalidate its warranty. If your
docking system is not performing as it should, take it to the local SCK,
Inc. dealer for assistance.
Troubleshooting
Why won’t the docking system turn on?
• Check that the power cord is properly connected or that batteries are
not dead and are correctly installed.
Why won’t my iPod play?
• Make sure the cradle you use fits your iPod model.
• Make sure your iPod is properly docked.
• Make sure there are songs in your iPod.
• Make sure the hold function is not activated on your iPod.
• Your iPod may be malfunctioning. Make sure your iPod is working
properly before you dock it into your docking system.
• Remove your iPod from the docking compartment and clean the
connectors in the docking compartment and on your iPod.
• Your iPod software may be outdated. Upgrade its software. For details,
visit www.apple.com.
• This docking system works with versions of iPod nano, iPod video, iPod
touch, iPod classic and iPhone. Check the table on page 8 to make sure
your iPod is supported.
Why is there no sound?
• Check that the docking system is turned on and in iPod mode.

14
Additional Information
• Make sure your iPod is not paused.
• Make sure the volume is not extremely low.
Why doesn’t my iPod charge after docking?
• Make sure your iPod is properly docked, and the docking system is set
to iPod mode. The iPod will not charge while docking system is in Radio
mode.
• Make sure the hold function is not activated on your iPod.
• Check if your iPod battery is faulty.
• Make sure the power cord is plugged in. iPod does not charge from
battery power.
Why is the AM radio noisy?
• Move the AM antenna away from the docking system, extend the
antenna as high as it will go, and keep it in an upright position.
Why is there no AM radio sound?
• Make sure the AM antenna is properly plugged into the AM ANTENNA
jack on the back of the docking system.
Why does my HD Radio sound delay?
• See “Audio Delay in HD Radio Systems” on page 9 for an explanation.
Why doesn’t the remote control work?
• Check the battery power and replace the battery if needed.
• Point the remote control towards the docking system and move within
10 feet around the docking system.
Specifications
Power Supply ............................ AC 120V, 60Hz, or one 9V Battery for backup
Frequency Range..................... AM: 530 – 1710 KHz; FM: 87.5 – 107.9 MHz
Frequency Response ............................................................ 60 – 18,000Hz
Output Power......................................................................... 4W × 2 RMS
Impedance.............................................................................. 4 ohms 5W
Dimensions (W×H×D) ...............11.8 × 3.94 × 7.09 in (300 × 100 × 180 mm)
Specifications are subject to change and improvement without notice. Actual
product may vary from the images found in this document.

15
Additional Information
FCC Information
This equipment has been tested and found to comply with the limits for a Class B digital
device, pursuant to Part 15 of the FCC Rules. These limits are designed to provide reasonable
protection against harmful interference in a residential installation. This equipment generates,
uses, and can radiate radio frequency energy and, if not installed and used in accordance with
the instructions, may cause harmful interference to radio communications. However, there
is no guarantee that interference will not occur in a particular installation. If this equipment
does cause harmful interference to radio or television reception, which can be determined by
turning the equipment off and on, the user is encouraged to try to correct the interference by
one or more of the following measures:
• Reorient or relocate the receiving antenna.
• Increase the separation between the equipment and receiver.
• Connect the equipment into an outlet on a circuit different from that to which the receiver
is connected.
• Consult the dealer or an experienced radio/TV technician for help.
If you cannot eliminate the interference, the FCC requires that you stop using your equipment.
Changes or modifications not expressly approved by SCK, Inc. may cause interference and void
the user’s authority to operate the equipment.
This device complies with Part 15 of the FCC rules. Operation is subject to the following two
conditions: (1) This device may not cause harmful interference, and (2) This device must
accept any interference received, including interference that may cause undesired operation.
IMPORTANT SAFETY INSTRUCTIONS
Read and Retain Instructions — Safety and operating instructions should be read prior to
use. The safety and operating instructions should be retained for future reference.
Heed Warnings — Follow all warnings on the device and in the instructions.
Cleaning — Unplug this device from the wall outlet before cleaning. Clean only as
recommended by the manufacturer. Clean by wiping with a cloth slightly dampened with water.
Avoid getting water inside the device. Do not use liquid or aerosol cleaners.
Water and Moisture — Do not use this device near water (for example, near a bathtub,
washbowl, kitchen sink, or laundry tub; in a wet basement; or near a swimming pool).
Accessories — Do not place device on an unstable cart, stand, tripod, bracket, or table.
The device may fall, causing injury to a child or adult, and damage the device. Use only with
a cart, stand, tripod, bracket, or table recommended by the manufacturer or sold with the
device. Follow the manufacturer’s mounting instructions, and use a recommended mounting
accessory.
Ventilation — Slots and openings in the cabinet provide ventilation, ensure reliable operation,
and protect from overheating. Do not block or cover these openings, and do not place the
device on a bed, sofa, rug, or other similar surface. Do not place the device in a built-in
installation such as a bookcase or rack unless it provides proper ventilation as specified by the
manufacturer.
Heat — The device should be situated away from heat sources such as radiators, heat
registers, stoves, or other devices that produce heat.
Power Sources — Use this device with the power source indicated on its marking label. If you
are not sure of your home’s power type, consult your appliance dealer or local power company.

16
Additional Information
Grounding or Polarization — This product is equipped with a polarized alternating-current
line plug (a plug having one blade wider than the other). This plug will fit into the power outlet
only one way. This is a safety feature. If you are unable to insert the plug fully into the outlet,
try reversing the plug. If you still are unable to insert the plug into the outlet, contact your
electrician to replace your obsolete outlet. Do not defeat the safety purpose of the polarized
plug.
Power-Cord Protection — Route power-supply cords so they are not likely to be walked on
or pinched by items placed on or against them, paying particular attention to cords at plugs,
outlets, and the point where they exit from the device.
Non-use Periods — The device’s power cord should be unplugged from the outlet when it is to
be left unused for a long period of time.
Overloading — Do not overload wall outlets, extension cords, or other outlets. This can result
in fire or electric shock.
Objects and Liquids — Never spill liquids or push objects of any kind into this device through
openings, as they may touch dangerous voltage points or short out parts that could result in a
fire or electric shock.
Carts and Stands — If the device is used with a cart or stand, the cart or stand should be
a type recommended by the manufacturer. A device and cart combination should be moved
with care. Quick stops, excessive force, and uneven surfaces cause the device and cart
combination to overturn.
Damage Requiring Service — Refer servicing to qualified service personnel under these
conditions:
* When the power-supply cord or plug is damaged.
* Liquid was spilled or objects fell in the device.
* If the device has been exposed to rain or water.
* If the device does not operate normally by following the operating instructions. Adjust only
those controls that are covered by the operating instructions, as an improper adjustment
of other controls may result in damage and will often require extensive work by a qualified
technician to restore the device to normal operation.
* If the device has been dropped or damaged.
* When there a distinct change in performance.
Servicing — Do not attempt to service this device yourself, as opening or removing covers
may expose you to dangerous voltage or other hazards. Refer all servicing to qualified service
personnel.
Replacement Parts — When replacement parts are needed, use only parts specified by the
manufacturer or parts with the same characteristics as the original part. Substitutions may
result in fire or electric shock.
Safety Check — Upon completion of service or repairs, ask the service technician to perform
safety checks to determine if the device is in operating condition.
Lightning — For added protection during a lightning storm, or when the device is unused for
long periods of time, unplug it from the wall outlet. This prevents damage due to lightning and
power surges.
Attachments — Do not use attachments not recommended by the product manufacturer as
they may cause hazards.
Wall or Ceiling Mounting — The product should be mounted to a wall or ceiling only as
recommended by the manufacturer.
SAVE THESE INSTRUCTIONS

17
Additional Information
90-Day Limited Warranty
SCK, Inc. warrants this product against defects in materials and workmanship under normal use by the
original purchaser for ninety (90) days after the date of purchase. SCK, INC. MAKES NO OTHER EXPRESS
WARRANTIES.
This warranty does not cover: (a) damage or failure caused by or attributable to abuse, misuse, failure to
follow instructions, improper installation or maintenance, alteration, accident, Acts of God (such as floods or
lightning), or excess voltage or current; (b) improper or incorrectly performed repairs by persons who are not
a SCK, Inc. Authorized Service Facility; (c) consumables such as fuses or batteries; (d) ordinary wear and tear
or cosmetic damage; (e) transportation, shipping or insurance costs; (f) costs of product removal, installation,
set-up service, adjustment or reinstallation; and (g) claims by persons other than the original purchaser.
Should a problem occur that is covered by this warranty, take the product and the sales receipt as proof of
purchase date to the place of purchase. SCK, Inc. will, at its option, unless otherwise provided by law: (a)
repair the product without charge for parts and labor; (b) replace the product with the same or a comparable
product; or (c) refund the purchase price. All replaced parts and products, and products on which a refund
is made, become the property of SCK, Inc. New or reconditioned parts and products may be used in the
performance of warranty service. Repaired or replaced parts and products are warranted for the remainder
of the original warranty period. You will be charged for repair or replacement of the product made after the
expiration of the warranty period.
SCK, INC. EXPRESSLY DISCLAIMS ALL WARRANTIES AND CONDITIONS NOT STATED IN THIS LIMITED
WARRANTY. ANY IMPLIED WARRANTIES THAT MAY BE IMPOSED BY LAW, INCLUDING THE IMPLIED
WARRANTY OF MERCHANTABILITY AND, IF APPLICABLE, THE IMPLIED WARRANTY OF FITNESS FOR A
PARTICULAR PURPOSE, SHALL EXPIRE ON THE EXPIRATION OF THE STATED WARRANTY PERIOD.
EXCEPT AS DESCRIBED ABOVE, SCK, INC. SHALL HAVE NO LIABILITY OR RESPONSIBILITY TO THE PUR-
CHASER OF THE PRODUCT OR ANY OTHER PERSON OR ENTITY WITH RESPECT TO ANY LIABILITY, LOSS OR
DAMAGE CAUSED DIRECTLY OR INDIRECTLY BY USE OR PERFORMANCE OF THE PRODUCT OR ARISING OUT
OF ANY BREACH OF THIS WARRANTY, INCLUDING, BUT NOT LIMITED TO, ANY DAMAGES RESULTING FROM
INCONVENIENCE AND ANY LOSS OF TIME, DATA, PROPERTY, REVENUE, OR PROFIT AND ANY INDIRECT,
SPECIAL, INCIDENTAL, OR CONSEQUENTIAL DAMAGES, EVEN IF SCK, INC. HAS BEEN ADVISED OF THE
POSSIBILITY OF SUCH DAMAGES.
Some States do not allow limitations on how long an implied warranty lasts or the exclusion or limitation
of incidental or consequential damages, so the above limitations or exclusions may not apply to you. This
warranty gives you specific legal rights, and you may also have other rights which vary from State to State.
You may contact SCK, Inc. at:
SCK, Inc. 350 N. Henderson Street, Fort Worth, TX 76102-1950 11/08
CAUTION
RISK OF ELECTRIC SHOCK
DO NOT OPEN
WARNING: 7RUHGXFHWKHULVNRI¿UHRUVKRFNKD]DUGGRQRWH[SRVHWKLVSURGXFW
WRUDLQRUPRLVWXUH
CAUTION:725('8&(7+(5,6.2)(/(&75,&6+2&.'21275(029(
7+(&29(525%$&.1286(56(59,&($%/(3$576,16,'(5()(5
6(59,&,1*7248$/,),('3(56211(/
!
The lightning symbol is intended to alert you to
the presence
of uninsulated, dangerous voltage within this product’s enclosure
WKDWPLJKWEHRIVXI¿FLHQWPDJQLWXGHWRFRQVWLWXWHDULVNRIHOHFWULF
VKRFN'RQRWRSHQWKHSURGXFW¶VFDVH
The exclamation symbol is intended to inform you that important
operating and maintenance instructions are included in the
OLWHUDWXUHDFFRPSDQ\LQJWKLVSURGXFW
!

TM
12-551
01A09
Printed in China
iPod is a trademark of Apple Computer, Inc., registered in
the U.S. and other countries. This product is not designed,
manufactured, sponsored, or endorsed by Apple Computer, Inc.
HD Radio™ Technology Manufactured Under
License From iBiquity Digital Corporation.
U.S. and Foreign Patents. HD Radio™
and the HD Radio logo are proprietary
trademarks of iBiquity Digital Corp.
©2009. SCK, Inc. All rights reserved. Gigaware is a trademark
used by SCK, Inc.
Protect the environment. Go to E-CyclingCentral.com
to find an electronic recycling center near you.
Other manuals for HD Radio Receiver
1
This manual suits for next models
1
Table of contents
Other Gigaware Docking Station manuals