Ginnys 735233 User manual

6-SLICE TOASTER OVEN
WITH ROTISSERIE
Instruction Manual
ITEM: 735233
Ginnys.com • 1.800.544.1590
BRAND

TABLE OF CONTENTS
“Life is happening.
We’ll help you live it...one moment at a me.”
President, Ginny’s
IMPORTANT SAFEGUARDS 3
2IMPORTANT SAFEGUARDS 32 IMPORTANT SAFEGUARDS
Ginnys.com •1.800.544.1590
IMPORTANT SAFEGUARDS
Important Safeguards 3
Electrical Safety and Specications 4
Part Names 5-6
How to Operate 6-9
Cleaning & Care 10
Recipes 11-15
Warranty 16
Thank you for purchasing a Ginny’s
Brand 6-Slice Toaster Oven with
Rotisserie. It’s like having a mini kitchen
in one small appliance! Not only can it
toast several pieces of bread at once,
but it also bakes, broils, roasts and
warms—without taking up the energy of
a full-sized oven.
Enjoy!
• Close supervision is necessary when any appliance is used
near children.
• Do not operate appliance with damaged cord or plug, or after the
appliance malfunctions, or has been damaged in any manner.
• The use of accessories or attachments not recommended by
Ginny’s may cause injury, or damage the appliance.
• Place the toaster oven on a dry, level, heat-resistant surface
when using, away from your stovetop or hot burners.
• Keep at least 4” of space between the oven and other
appliances or wall, to allow for adequate air circulation.
• A re may occur if the oven is covered or touching ammable
material, including curtains, draperies and walls. Do not store
any item on top of the appliance.
• Remove all packaging and labels before use.
• Do not place any of the following materials in the oven:
cardboard, plastic, paper, etc.
• Extreme caution must be used when moving a drip pan
containing hot oil or other hot liquids.
• Wash all accessories (see Cleaning & Care page 10).
• Always wear protective, insulated oven gloves when inserting or
removing items from the hot oven.
• This appliance has a tempered, safety glass door. The glass is
stronger than ordinary glass and more resistant to breakage.
Tempered glass can still break around edges. Avoid scratching
the door surface or nicking edges.
• This appliance is OFF when the timer control button is in the
OFF position.
• Do not use outdoors.
• Do not use appliance for anything other than its intended use.
• For household use only.
READ CAREFULLY BEFORE USING & SAVE THESE INSTRUCTIONS:

4
IMPORTANT SAFEGUARDS PRECAUTIONS/SPECIFICATIONS 5
IMPORTANT SAFEGUARDS
4 5
ELECTRICAL SAFETY AND SPECIFICATIONS Ginnys.com • 1.800.544.1590
SPECIFICATIONS
Product Size: 19.5L x 14” D x 10-1/2”H
Cord Length: 36”
Voltage Supply: AC120V 60Hz
Wattage: 1,300W
Model: CS1803B
ELECTRICAL SAFETY
This Toaster Oven is equipped with a polarized plug in which one
prong is wider than the other. This is a safety feature, to reduce the
risk of electrical shock. The plug will t into a polarized outlet only one
way. If you are unable to insert the plug into the electrical outlet, try
reversing the plug. If the plug still does not t, contact a qualied
electrician. Do not attempt to modify the plug in any way.
1
2
3
4
5
7
10
9
8
11
12
13
14
1. Housing
2. Upper Heating Element (not shown)
3. Door
4. Handle
5. Lower Heating Element
6. Temperature Control Knob
7. Function Control Knob
8. Timer Control Knob
9. Power Indicator Light
10. Base
11. Bake Tray/Drip Pan
12. Wire Rack
13. Rotisserie Removal Tool
14. Rotisserie Spit (with 2 forks)
(continued on next page)
6
7
8
9
PART NAMES
No user-serviceable parts inside. A short cord is provided to
reduce the hazards resulting from entanglement or tripping over a
long cord. An extension cord may be used with care; however,
the marked electrical rating should be at least as great as the
electrical rating of this appliance. The cord should not be allowed
to drape over the counter or tabletop where it can be pulled on or
tripped over.
6

7
INSTALLATION & GROUNDING
6
10 HOW TO OPERATE
Ginnys.com • 1.800.544.1590
6 7
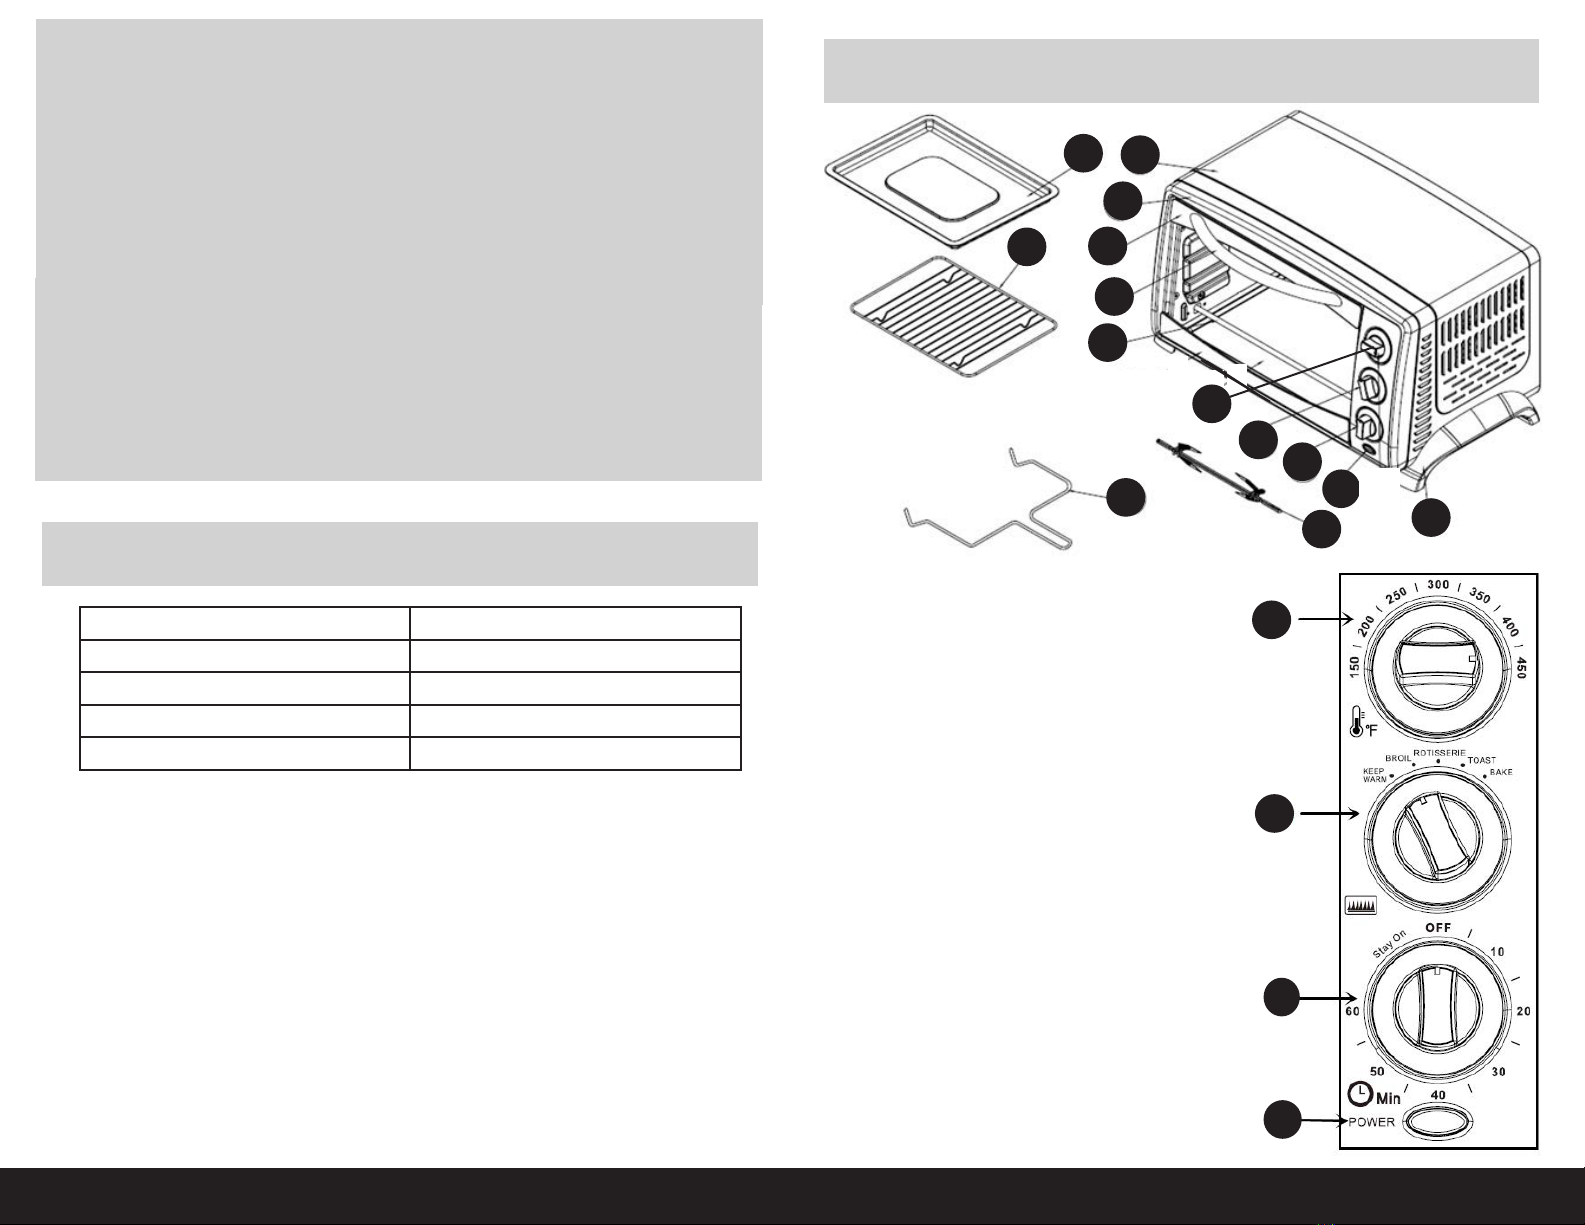
PART NAMES HOW TO OPERATE
•Temperature Control (6): choose the desired temperature.
•Funcon Control (7): this oven is equipped with ve positions for
a variety of cooking needs.
•Timer Control (8): when you turn the control to the left,
(counter-clockwise), the oven will STAY ON until it is manually shut
OFF. To activate the timer segment of the control, turn to the right
(clockwise). This function has a bell that rings at the end of the
programmed time.
•Bake Tray/Drip Pan (11): use for baking, or collecting the drippings
when broiling and roasting.
•Wire Rack (12): for toasting, baking, and general cooking in oven-
safe dishes and pans. Wire rack should be positioned in the oven
as needed.
TIP: Before using your toaster oven for the rst time, we recommend
that you run it at the highest temperature on the TOAST
function for approximately 15 minutes to eliminate any packing
residue that may remain after shipping. This may result in minimal
smell and smoke.
BROIL:
Upper element heating for sh, steak, browning an open-face sandwich or
melting cheese on anything!
1. Turn function control to BROIL.
2. Preheat the oven at the desired temperature about 10 minutes.
3. Place food on the wire rack and brush with sauces or oil, as desired.
4. When preheating is done, place the wire rack on the bake tray/drip
pan and slide into a middle rack support guide.
5. Turn timer control to STAY ON or to the desired time.
6. It is advisable to leave the door slightly ajar when broiling.
7. Turn food over midway through the cooking mes shown below.
8. When broiling is completed, turn the timer control to OFF and
unplug the oven.
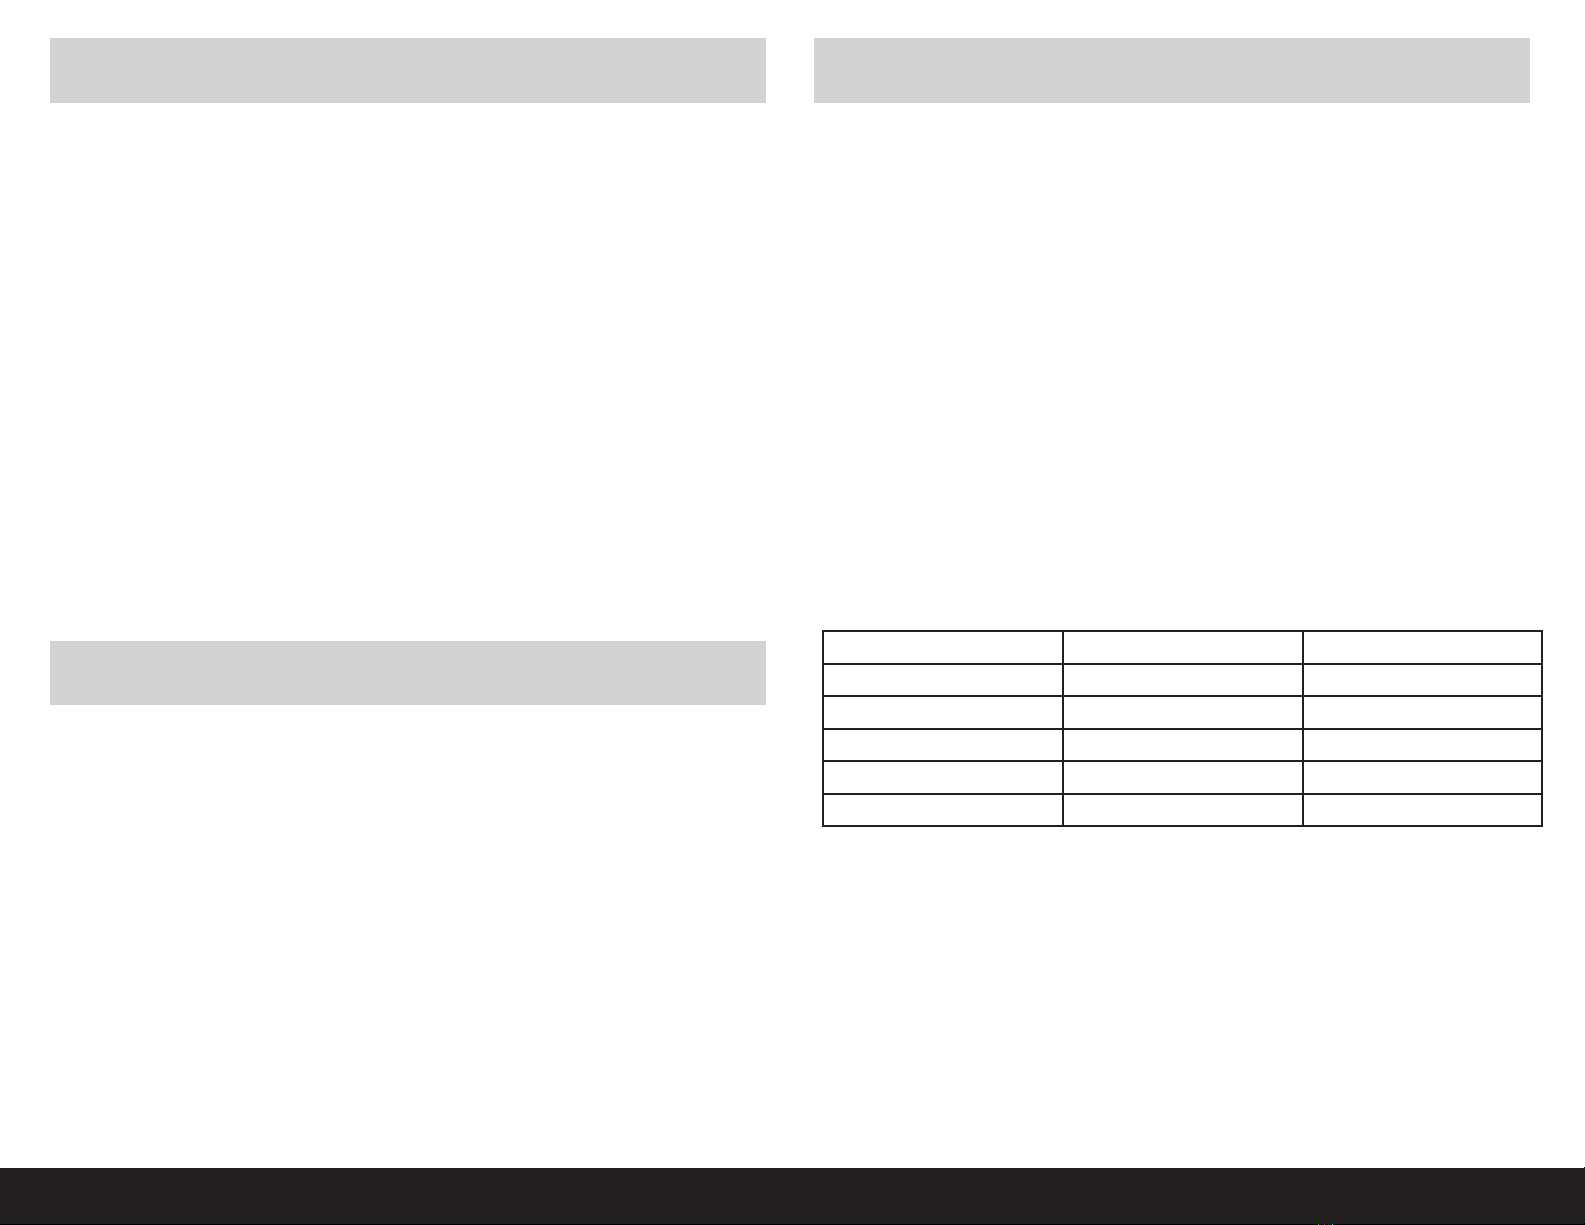
MEAT OVEN TEMP. TOTAL COOKING TIME
Rib Steak 450°F 20-30 mins.
T-Bone Steak 450°F 20-30 mins.
Hamburger 450°F 15-20 mins.
Breaded Fish Filet 375°F 20-30 mins.
Salmon Steak (1” thick) 400°F 20-25 mins.
BROILING GUIDE:
Cooking results may vary. Adjust these mes to your individual
requirements. Use of a meat thermometer is recommended.
HOW TO OPERATE
KEEP WARM:
Keeps cooked food warm for up to 30 minutes. Longer periods of time
are not recommended, as your food may over-cook or dry out.
1. Turn the function control to KEEP WARM.
2. Turn the timer control to STAY ON or to the desired time.
3. Turn the timer control to OFF when nished, and unplug the oven.

UTENSILS & COOKING CUSTOMER REVIEWS
HOW TO OPERATE
8
7
9
HOW TO OPERATE Ginnys.com • 1.800.544.1590
8 9
HOW TO OPERATE
ROTISSERIE:
Upper element heating for roasts, chicken, ham, etc.
NOTE: We recommend that you do not cook anything larger than 4 lbs. on the
rotisserie spit. Chicken and roasts should be bound in cooking string to help
them cook evenly, and so the rotisserie rotates smoothly.
1. Turn the function control to ROTISSERIE.
2. Preheat the oven to the desired temperature about 10 minutes.
3. Insert the meat onto the rotisserie spit. Secure the forks with screws,
centering the meat on the spit.
4. When preheating is done, insert the pointed end of the spit into the
drive socket on the right side of the oven wall. Make sure that the
square end of the spit rests on the support on the left side of the
oven wall.
5. Slide the bake tray/drip pan onto a lower position to catch the food
drippings.
6. Turn the timer control to STAY ON or the desired time.
7. When cooking is completed, turn the timer control to OFF and unplug
the oven.
8. Remove the meat from the oven by placing the hooks of
the Rotisserie Removal Tool under the grooves on either side of
the spit. Lift the left side of the spit rst by lifting up and out.
Then pull the spit out of the drive socket and carefully remove the
roast from the oven.
9. Carefully remove the meat from the spit.
ROTISSERIE GUIDE:
Cooking results may vary. Adjust these mes to your individual
requirements. Use of a meat thermometer is recommended.
MEAT OVEN TEMP. TIME PER LB.
Beef Roast 350°F 30-35 mins.
Pork Roast 350°F 45-50 mins.
Ham 350°F 45-50 mins.
Chicken 450°F 30-40 mins.
Turkey 450°F 30-40 mins.
TOAST:
Upper and lower element heating.
1. Set the the temperature control to 450°F.
2. Turn the function control to TOAST.
3. Place food to be toasted on the wire rack.
4. Turn the timer control to STAY ON or to the desired time.
5. When toasting is completed, turn the timer control to OFF and
unplug the oven.
BAKE:
Lower element heating for cakes, pies, cookies, poultry, beef, pork, etc.
1. Turn function control to BAKE.
2. Preheat the oven at the desired temperature about 10 minutes.
3. When pre-heating is done, place food on the wire rack on a
center rack support guide.
4. Turn timer control to STAY ON or the desired time.
5. When baking is completed, turn the timer control to OFF and
unplug the oven.

RECIPES
RECIPES
Ginnys.com • 1.800.544.1590
10 11
AVOCADO TOAST WITH EGG
INGREDIENTS:
1 slice bread
1 egg
½ avocado
DIRECTIONS:
1. Preheat oven to 450° F.
2. Spray an oven safe bowl with cooking spray, then add the egg.
3. Place the bowl on the center rack and toast at 450° F for 2 minutes.
4. When the 2 minutes have passed, add the slice of bread to the
center rack next to the bowl.
5. Toast both items for approximately 3 minutes at 450° or until done.
6. Remove the toast and spread with avocado; top with the egg.
7. Salt and pepper to taste or add a dash of hot sauce.
Serves 1
BRUSCHETTA
INGREDIENTS:
1 baguette, sliced into ¾“ thick pieces 2 tsp. minced garlic
¼ c. extra virgin olive oil ½ tsp. salt
1 can (14 oz.) diced tomatoes, drained ¼ tsp. black pepper
3 tbsp. fresh basil, chopped ¼ c. grated Parmesan cheese
DIRECTIONS:
1. Preheat oven to 350°F.
2. Brush the baguette slices with olive oil on one side; place slices with
olive oil side-up on an oven safe pan.
3. Toast bread until lightly browned on top.
4. Mix the remaining olive oil, tomatoes, basil, garlic, salt and pepper
in a bowl.
5. When toast is done, top each slice with tomato mixture and sprinkle
with Parmesan. Serve immediately.
Serves 4
INTERIOR:
If desired, wipe the walls with a damp sponge, cloth or nylon scouring pad
and mild detergent. DO NOT USE STEEL WOOL SCOURING PADS, ABRASIVE
CLEANERS, OR SCRAPE THE WALLS WITH A METAL UTENSIL, AS ALL OF THESE
METHODS MAY DAMAGE THE INTERIOR COATING.
EXTERIOR:
Wipe the exterior with a damp sponge and dry with a soft cloth. DO NOT USE
AN ABRASIVE CLEANER, OR SCOURING PAD, AS IT MAY DAMAGE THE EXTERIOR
FINISH.
ACCESSORIES:
All accessories should be washed in hot soapy water or can be cleaned in
a dishwasher. DO NOT USE ABRASIVE CLEANERS OR SCOURING PADS.
NOTE: Dry all parts and surfaces thoroughly prior to plugging oven in
and turning on.
WARNING: BE SURE TO UNPLUG THE OVEN AND ALLOW IT TO COOL BEFORE
CLEANING! DO NOT IMMERSE OVEN, CORD OR PLUG IN WATER.
CLEANING & CARE

RECIPES
RECIPES Ginnys.com • 1.800.544.1590
11 12 13
RECIPES
CLASSIC MARGHERITA PIZZA
INGREDIENTS:
1 tbsp. olive oil 8 oz. fresh mozzarella cheese, sliced
2 cloves roasted garlic, minced into 1/2 inch thick pieces
12” premade pizza crust 2 plum tomatoes, sliced
1/4 c. pizza or tomato sauce handful of fresh basil
fresh ground pepper (to taste)
DIRECTIONS:
1. Preheat oven to 475°F.
2. Mix the olive oil and chopped garlic together. Spread on top of crust.
3. Top with sauce, mozzarella and tomato.
4. Bake for 14-16 minutes or until the crust is lightly browned and the
cheese is bubbling.
5. Remove from the oven and top with fresh basil and pepper.
Serves 4-6
TOASTER OVEN MEATLOAF
INGREDIENTS:
1 lb. lean ground beef 1 stalk celery, nely chopped
1 small onion, nely chopped 1 slice of bread, cubed
2 eggs 2 cloves of garlic, minced
salt & pepper to taste ketchup
DIRECTIONS:
1. Preheat oven to 400° F.
2. Mix all ingredients except ketchup in a medium bowl (use your
hands to mix well).
3. Form the mix into a loaf shape in an oven safe pan (if loaf is more
than 2½” thick, may need to add more time).
4. Drizzle ketchup over the top of the loaf, to taste.
5. Bake on middle rack at 400° F for approximately 30 minutes or until
center of meatloaf reaches 160° F.
Serves 4
RECIPES

PART NAMES & CONTROL PANEL PART NAMES & CONTROL PANEL 11
1010
10 11
Ginnys.com • 1.800.544.1590
14
RECIPES 15
QUICK LEMON COOKIES
INGREDIENTS:
1 package lemon cake mix 1 tsp. lemon extract
2 eggs 1/3 c. confectioners’sugar
1/3 c. vegetable oil
DIRECTIONS:
1. Preheat oven to 375°F.
2. Pour cake mix into a large bowl.
3. Stir in eggs, oil, and lemon extract until well blended.
4. Drop dough by teaspoon into a bowl of confectioners' sugar.
Roll the dough ball around until lightly covered.
5. Place on an ungreased cookie sheet.
6. Bake for 6 to 9 minutes. The bottoms will be light brown, and the
insides chewy.
Serves 12-16 cookies
RECIPES
SPICE RUBS:
Spice rubs are an excellent way to add avor and seal in juices while
using a rotisserie spit.
Chicken or Pork Loin Rub
INGREDIENTS:
2 tbsp. kosher salt ½ tbsp. dried rosemary
2 tbsp. brown sugar ½ tbsp. dry mustard
1 tbsp. onion powder ½ tbsp. ground cumin
1 tbsp. garlic powder ½ tbsp. dried thyme
1 tbsp. smoked paprika ½ tbsp. cayenne pepper
½ tbsp. black pepper
Beef or Venison Tenderloin Rub
INGREDIENTS:
3 cloves fresh garlic, pressed 2 tbsp. kosher salt
1 tbsp. ground black pepper 1 tbsp. ground coriander
1 tbsp. smoked paprika 1 tbsp. onion powder
DIRECTIONS:
1. Center the meat on the rotisserie spit and lock in place.
2. Mix all ingredients together and pat generously on the meat.
3. Follow the Rotisserie Guide on page 8 for times and temperatures
for your cut of meat.
4. When done, carefully remove the meat from the spit, and let it rest
at least 5 minutes before serving.
RECIPES

WARRANTY
Ginny’s warrants this product free from defects in material
and workmanship for one year from provable date of purchase.
Within this warranty period, Ginny’s will repair or replace,
at its option, defective parts at no charge, provided the
product is returned, freight prepaid with proof of
purchase to Ginny’s.
Allow 2-4 weeks for return shipping.
This warranty does not cover improper installation, misuse,
abuse or neglect on part of the owner.
Warranty is also invalid in any case that the
product is taken apart or serviced by an
unauthorized service station.
This warranty gives you specic legal rights
and they may vary from state to state.
THE FOREGOING WARRANTIES ARE IN LIEU
OF ALL OTHER WARRANTIES AND CONDITIONS,
EXPRESS OR IMPLIED,
INCLUDING BUT NOT LIMITED TO THOSE OF
MERCHANTIBILITY OR FITNESS
FOR A PARTICULAR PURPOSE.
Customer Service
Phone: 1•800•544•1590
8:00 am to Midnight, Monday through Friday
WARRANTY
16
Other manuals for 735233
1
Table of contents
Other Ginnys Oven manuals