Giorgio Bormac BL 224 User manual

BL 224
User manual
Analytical Balance
220 g –0,0001 g

UM bilancia analitica BL224 ENG rev.0 13.05.2020
2
Index
Precautions.........................................................................................................................................................................3
Before starting ....................................................................................................................................................................3
Layout ................................................................................................................................................................................. 4
Assembly.............................................................................................................................................................................4
Placement and installation .................................................................................................................................................5
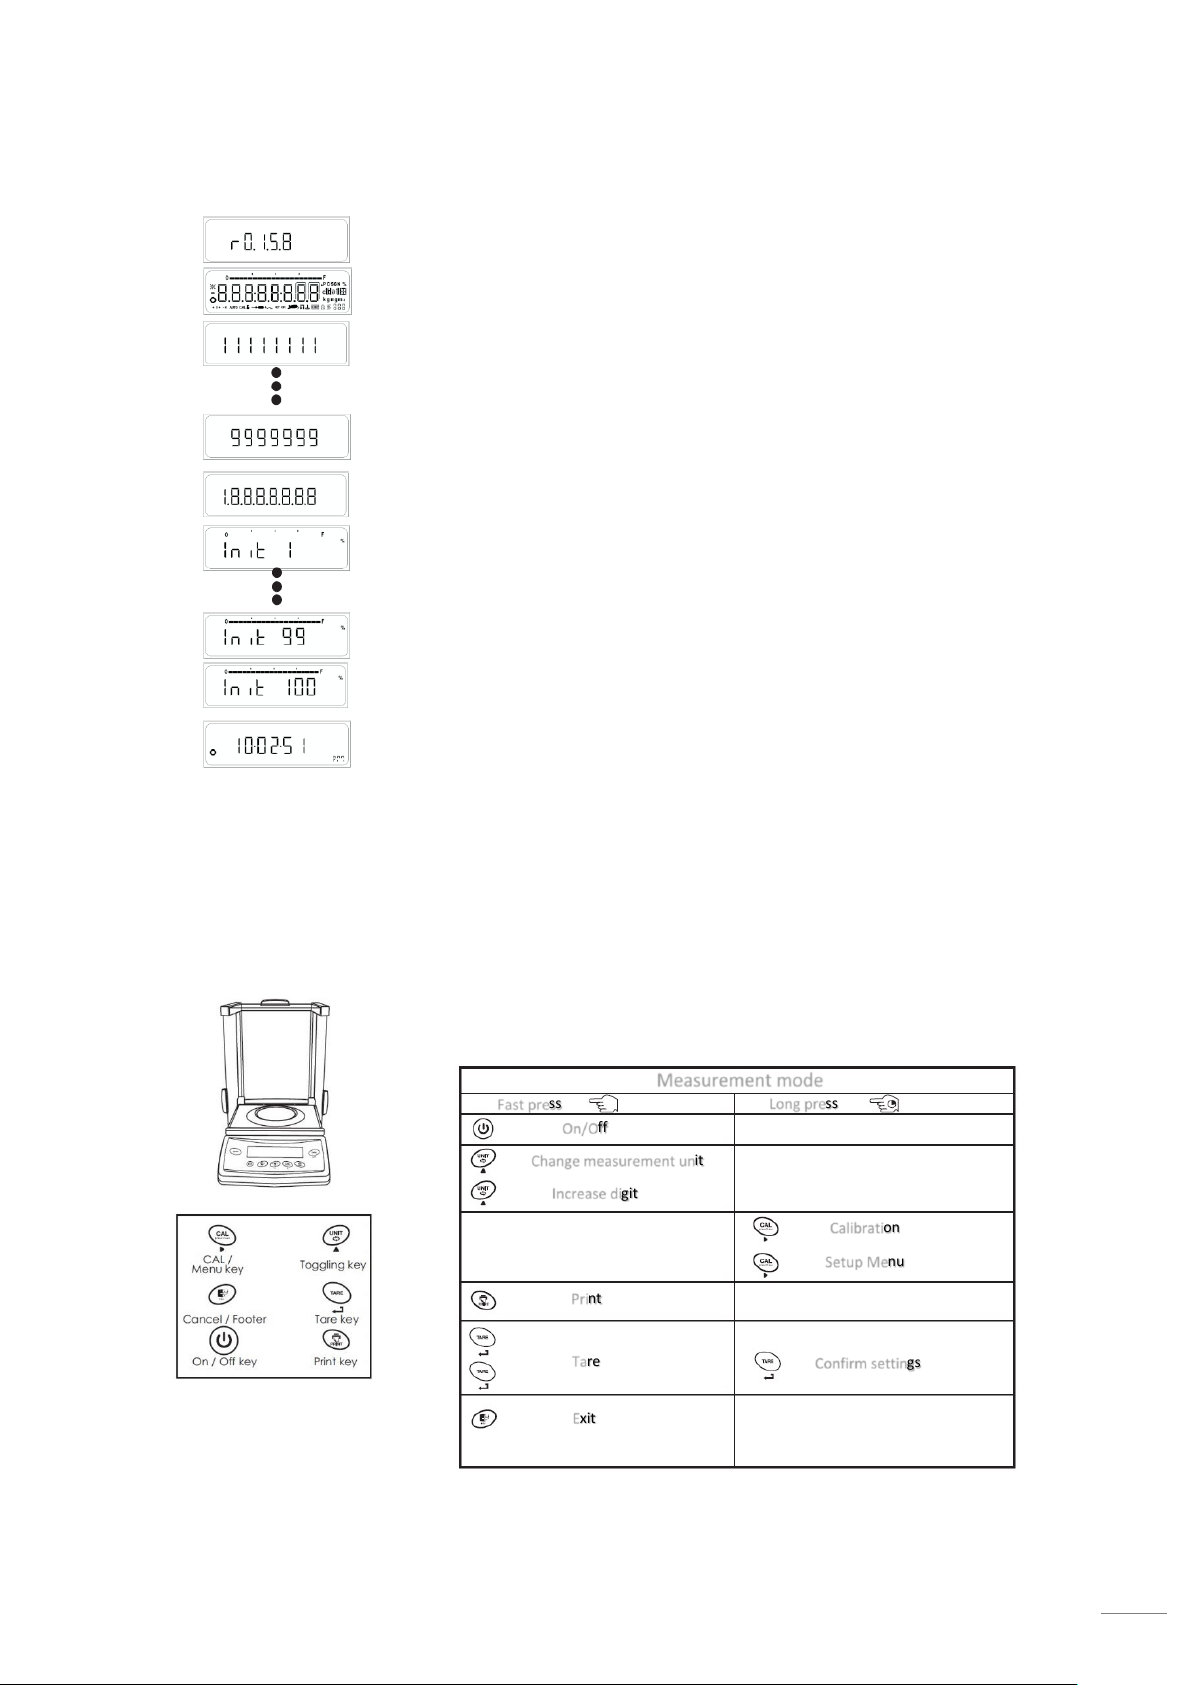
Keyboard.............................................................................................................................................................................6
Power on............................................................................................................................................................................. 7
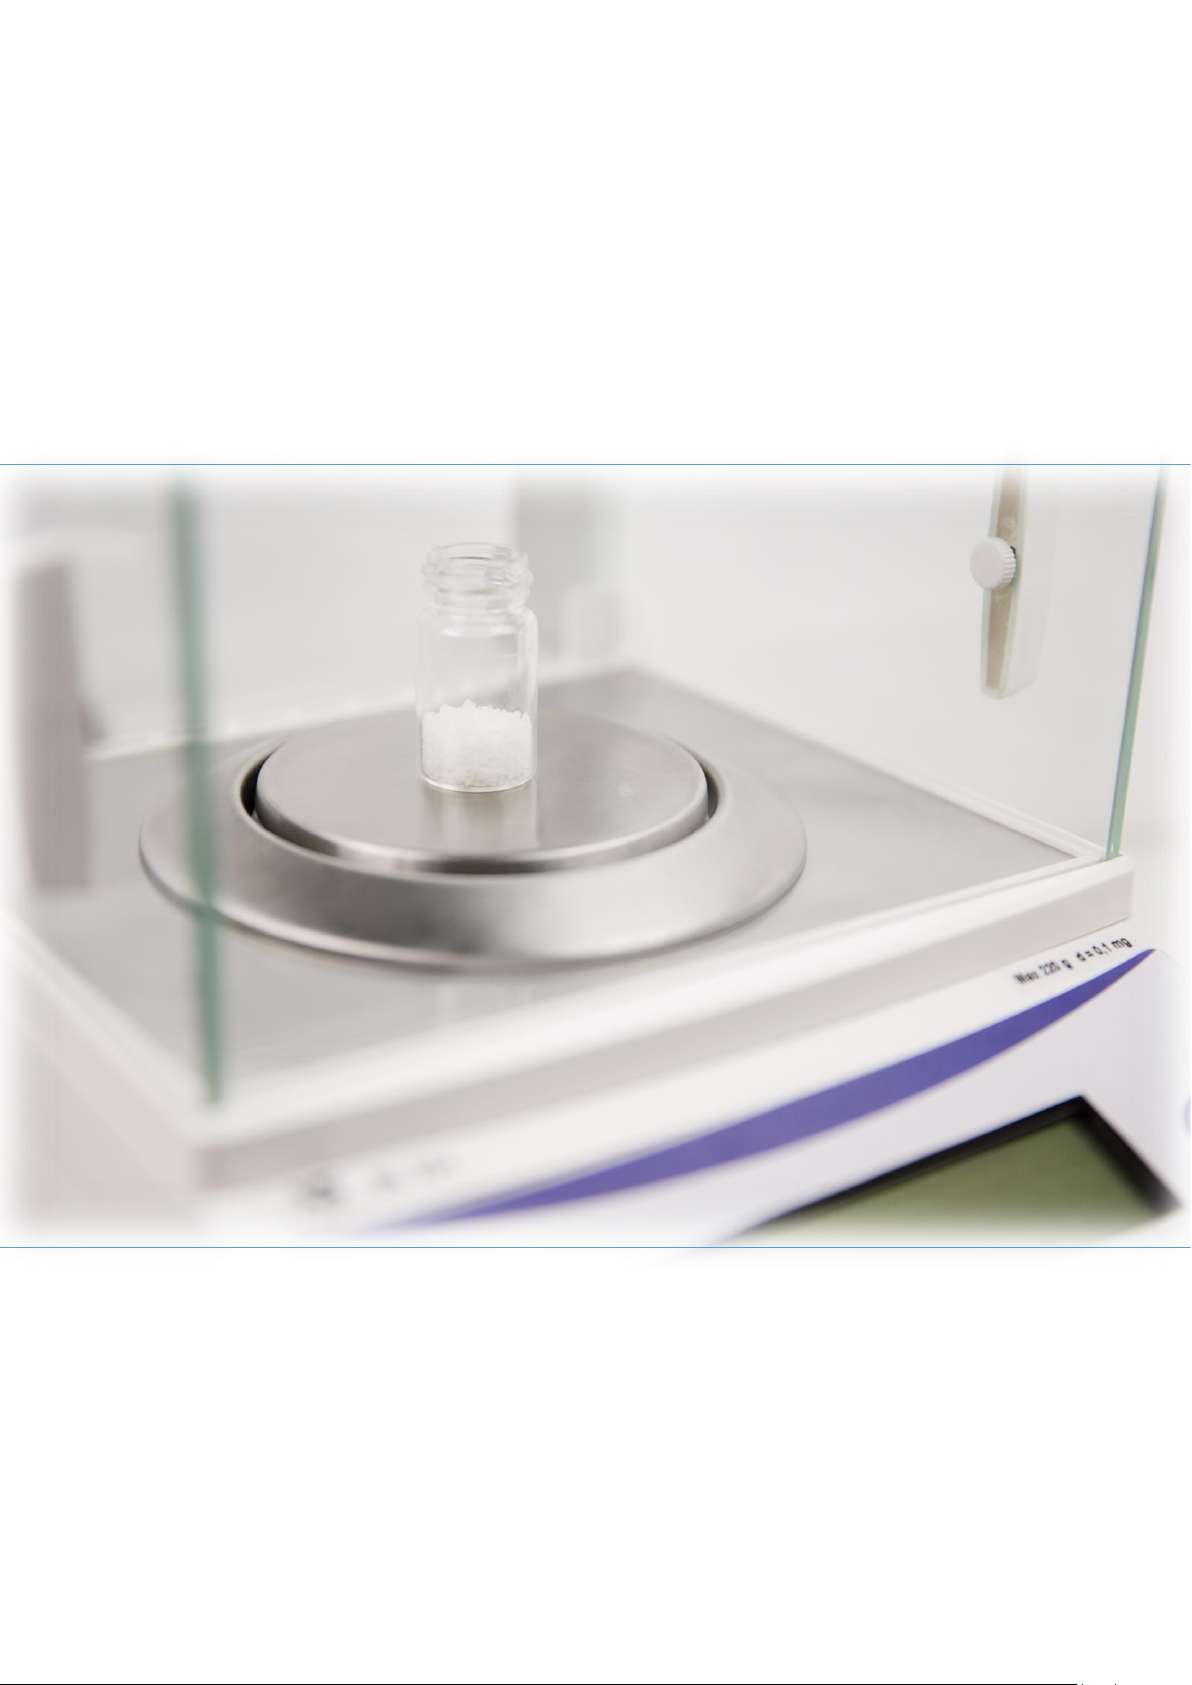
Simple weighing.................................................................................................................................................................. 8
Calibration .......................................................................................................................................................................... 8
User Menu ........................................................................................................................................................................10
Application menu..............................................................................................................................................................12
Measurement unit............................................................................................................................................................13
Stability filter .................................................................................................................................................................... 13
Calibration settings...........................................................................................................................................................14
Calibration test .................................................................................................................................................................14
Auto Zero Tracking............................................................................................................................................................ 14
Print Menu........................................................................................................................................................................15
GLP....................................................................................................................................................................................16
Auto Off ............................................................................................................................................................................16
Factory reset.....................................................................................................................................................................16
PCS function (conta-pezzi)................................................................................................................................................17
Custom Unit......................................................................................................................................................................21
Dynamic weighing.............................................................................................................................................................23
Formulation ......................................................................................................................................................................24
Check Weighing ................................................................................................................................................................25
Totalization .......................................................................................................................................................................26
Densità..............................................................................................................................................................................27
Pipette calibration ............................................................................................................................................................ 29
Stats ..................................................................................................................................................................................30
Date and Time................................................................................................................................................................... 31
ID and LID settings ............................................................................................................................................................31
Automatic Calibration.......................................................................................................................................................32
Data Interface and Serial Communication........................................................................................................................33
Errors ................................................................................................................................................................................ 34
Datasheet..........................................................................................................................................................................35
Dimensions ....................................................................................................................................................................... 35
Cleaning........................................................................................................................................................... 36
Warranty.......................................................................................................................................................... 36

UM bilancia analitica BL224 ENG rev.0 13.05.2020
3
Precautions
The scale was built in accordance with the European Directives on electromagnetic compatibility.
Please read the following instructions carefully before operating the scale.
•Do not use in high hazard areas;
•If you are installing the balance in environments that require higher safety standards, please comply with the
provisions specified in national legislation;
•Make sure that the voltage provided by the power supply is in line with the AC adapter label;
•The only way to completely turn off the balance is to unplug the power adapter;
•Use only original accessories that are compatible with the instrument in question;
•Protect the power supply from contact with liquids;
•When cleaning the scale, make sure that no liquid is entering the electrical compartment.
•Contact your authorized service department for problems.
•The scale should be used in closed and dry environments.
Before starting
Shipment and storage
Do not expose the balance to:
•Temperatures above 40 ° C and below 4 ° C;
•Airflow;
•High humidity environments;
•Shock and vibrations;
Check equipment and accessories
After opening the balance box, carefully check that there is no damage caused by the transport.
In the event of damage contact the dealer or the transport company immediately.
Store the original packaging.
If the instrument is shipped to service center without original packaging, the warranty will expire.

UM bilancia analitica BL224 ENG rev.0 13.05.2020
4
Layout
Assembly
Assemble the components listed below, following the given
order:
•Rectangular base
•Plate protection
•Weighing plate
Suspended weighing
The hook for weighing under weighing is located on the underside of
the scale.
•Remove protection plug
•Connect the hook
1. Keyboard
2. Display
3. Model and features
4. Plate
5. Sliding windows
6. Feet
7. Plate protection
8. Power input
9. Anti-theft ring
10. Levelling bubble
11. RS-232
12. AUX 1 (additional display)
13. AUX 2
14. Calibration switch (OIML)

UM bilancia analitica BL224 ENG rev.0 13.05.2020
5
Placement and installation
Right placement
The correct positioning of the balance greatly influences the
accuracy of the measurements.
It is important to ensure a stable and anti-vibration support.
To avoid
•Direct light
•Temperature fluctuations
•Dust
•Conditioners and fans
Antitheft
The balance is equipped with an anti-theft system, designed to
discourage a possible attempted theft.
The cable and the padlock are not supplied with the scale.
Levelling the balance
The BL 224 has a level control and adjustable feet to compensate for
minor irregularities in the weighing surface.
The scale is exactly horizontal when the air bubble is in the middle of
the target.
Before turning on the balance, level it by rotating the adjustable feet so
that the level air bubble is in the center of the ring.
Make sure all the feet are securely fixed on the bench.
Connection of peripheral electronic devices
Turn off the balance before connecting or disconnecting a device
(printer, PC).
Before performing the first measurement, the weighing sensor
temperature must align with the ambient temperature in order to
obtain the best results.
Warm up: 60 min.

UM bilancia analitica BL224 ENG rev.0 13.05.2020
6
Keyboard
1. On/Off
2. Tare: Press to make the tare of a
container, so you can measure the net
weight of a sample.
3. Esc: The button stops the current
action
4. Unit: Press to change the unit of
measurement. Increase values in Setup.
5. Cal: Hold down for 3 seconds to
calibrate. The button also allows access
to the settings menu.
6. Print: Press to send the data to the PC /
printer, connected via the RS-232 mail.
7. Measurement unit
8. Measurement value
9. Capacity indication: Helps to see how
much load you can apply before
reaching the full scale.
10. Stability: appears when measures are
stable.
11. Stability filter: The number indicates
the intensity of the selected filter.
12. Indication of automatic or manual
calibration.
13. Indication of operating mode
14. Battery level.
15. Printing.
16. GLP activated.

UM bilancia analitica BL224 ENG rev.0 13.05.2020
7
Power on
Connect the scale to the supplied power supply (use only original power
supplies) and press the <ON/OFF>. button
Are shown:
•Software versions
•Countdown
•Loading (1 →100%)
•Standby mode (time)
Stand-by mode
•Press the on/off button to switch from standby mode to
measurement mode.
•Press the on/off button to switch from measurement mode to
standby mode
The following table describes the key functions in simple (standard)
metering mode.
By activating different functions, the same buttons may take on different
features.
Measurement mode
Fast press
Long press
On/Off
Change measurement unit
Increase digit
Calibration
Setup Menu
Print
Tare
Confirm settings
Exit

UM bilancia analitica BL224 ENG rev.0 13.05.2020
8
Simple weighing
Simple weighing is always accessible, and can be used in combination with other functions (counters - animal
weighing - statistics - etc.)
Simple weighing
•Tare the scale
•Place the sample on the pan
•Wait for the stability
•Take the result
Tare
•Place an empty container on the pan
•Wait for the stability, and press <TARE>
display shows “0,0000”
•Place the sample inside the container
•Take the measurement
Removing the container from the dish will display a negative value
on the display.
If you press the <TARE> key before stabilizing, the display will show
"----------" until the measurement is stable
Measurement unit
The balance can convert the result into 3 different measurement
units.
Default settings
•unit 1 = gm
•unit 2 = ct
•unit 3 = gm
Press <UNIT> key switch from unit 1 to unit 2, from 2 to 3 ecc.
In the setup menu, Is possible to choose the 3 units to use.

UM bilancia analitica BL224 ENG rev.0 13.05.2020
9
Calibration
To get the best possible results, Balance must be calibrated in the place of use.
Calibration is necessary:
•At the first use;
•at regular intervals over time;
•After a change of placement.
For homologated scales, the calibration can be deactivated during installation, as required by national regulations.
Is possible to stop the calibration at any time by pressing <ESC> key.
Display shows “Abort”.
External calibration
•Switch on and wait for the warm-up time
•Make sure there is no weight on the plate
•Close the sliding windows
•Display shows ”0,0000” g
•Keep pressed <CAL> key for 3 seconds = “Cal Et”
•The display shows the weight to use to calibrate.
•Place the weight for calibration at the center of the
weighing pan.
The weight must be in the appropriate accuracy class.
•Wait until display shows “CAL donE”.
The balance returns to measurement mode, ready for sample
weighing.
Internal calibration
•Switch on and wait for the warm-up time
•Make sure there is no weight on the plate
•Close the sliding windows
•Display shows ”0,0000” g
•Keep pressed <CAL> key for 3 seconds = “Cal Int”
It starts the automatically internal calibration procedure.
"C" appears on the display when the internal weight is loaded.
When removed, "CC" appears.
When "Int Done" appears, the process is completed, and the
balance returns to measurement mode.

UM bilancia analitica BL224 ENG rev.0 13.05.2020
10
User Menu
•Access the User Menu: In the measurement mode, hold down the <CAL> key until "MENU" appears. The first
item displayed is "F none".
•Switch to the next parameter: All menu items (F none →Unit 1 →Unit 2→Unit 3 →Stability Filter →ecc ...)
are scrolled with a fast press of the <CAL> key.
•Change the parameter: To set a different value to the parameter, press the <UNIT> key until the desired
value is displayed.
•Setting Confirmation: When the correct option is displayed, press the <TARE> key to confirm. The symbol "O"
appears on the upper left of the display.
•Parameter Saving: Press and hold the <TARE> key until "StorED" appears.
•Abort: Pressing the <ESC> button exits the User Menu without saving the changes
The following table shows the key functions in the User Menu.
On/Off
Modify the parameter
Increase digit
Pressione veloce
Pressione lenta
Switch to next parameter
Change position (right direction)
Confirm
Save and exit
Print the menu
Exit without saving

UM bilancia analitica BL224 ENG rev.0 13.05.2020
11
User menu view

UM bilancia analitica BL224 ENG rev.0 13.05.2020
12
Application menu
The BL 224 can do more than simply weigh. The many features in the software expand its capabilities and facilitate
your daily work.
Below we will explain all the features and applications that is possible to use.
Preselection of a function
In the Functions menu you can select a particular function, which can then be used during measurement mode.
Piece counting
The balance counts the items that are added or removed from the container
placed on the balance plate.
Percent Weighing
Determinate the percentage difference in weight
Custom Unit
It allows to weigh using a user-defined Custom Unit
Animal Weighing
It allows you to accurately weigh a moving sample, like a live animal.
Check Weighing
It allows to see if the weight of a sample falls within a certain acceptable
range, defined by the user.
Formulation / Toatalization
Allows to obtain a total result of the sum of several individual weights.
Density Determination
Determine the density of a solid
Pipette Calibration
Allows the calibration of the pipettes used in the laboratory
Statistics
Displays the statistical data for each weighing performed.
No Function (F none)
Simple weighing (default setting)

UM bilancia analitica BL224 ENG rev.0 13.05.2020
13
Measurement unit
In the user menu, you can preset 3 different measurement units (Unit 1 - Unit 2- Unit 3), which can then be easily
recalled in the measurement mode.
Is possible to choose from the following preset units:
Stability filter
It is possible to set the stability filter to adjust the balance to external conditions, in order to obtain the best possible
result.
Stability filter value:
•1= Very good external conditions;
Very fast, but very sensitive to external influences (vibration, etc.)
•2= “Normal” conditions (default settings)
•3= Unstable external conditions
The balance is slower but less sensitive to external influences
•4= Extremely unstable external conditions;
Slow but less sensitive to external influences

UM bilancia analitica BL224 ENG rev.0 13.05.2020
14
Calibration settings
Is possible to choose:
•CAL Et = External Calibration, using a certified external sample mass.
•CAL Int = Internal calibration, using the sample mass inside the balance
•Cal Off = no calibration.
Calibration test
Is possible to enable or disable the Calibration Test function.
If enabled, the calibration test will be performed both for internal calibration
and for external calibration.
Auto Zero Tracking
This menu item allows you to enable or disable the Auto Zero tracking function.
Auto Zero tracking: If the scale detects small variations from 0,0000, for
example due to powder particles, it corrects it automatically and returns to
0,0000.

UM bilancia analitica BL224 ENG rev.0 13.05.2020
15
Print Menu
Baud Rate
This setting determines the speed of data transmission.
1 Baud [Bd] = 1 bit/sec
Parity Bit Setting
•None (default setting)
•Odd
•Even
•Mark
•Space
Stop Bit
Allows you to select the data transmission stop bit:
•Stop bit 1 (default setting)
•Stop bit 2
Print Mode
Menu for selecting a data transfer mode to a device (RS 232 printer/PC).
•Prn. Req : Press the Print button to print the value when it is
stable.
•Prn. Con : The measurements are printed continuously,
independent of stability.
•Prn. Off : Print deactivated.
•Prn. Aut : The measurement is printed automatically when a 1
digit weight difference is recorded and the measurement is
stable.
•Prn A.Ld : The measurement is printed automatically when a
difference of ± 10 digits is recorded and the measurement is
stable.

UM bilancia analitica BL224 ENG rev.0 13.05.2020
16
GLP
GLP activation
GLP Off (default setting):;
Data printing is not compliant ISO/GLP/GMP
GLP On:
Data printing is compliant ISO/GLP/GMP
Example of print with GLP and without GLP.
Auto Off
Automatic power off
•You can set how many minutes the balance enters Standby mode
automatically
•A.Off - : No power off
•A.Off 1 : power off after 1 minute
•A.Off 5 : power off after 5 minutes
•A.Off 10 : power off after 10 minutes
Factory reset
Restoring factory settings
•Press <UNIT> key to choose “Yes”.
•Press <TARE> to confirm.
•Display shows “Stored”.
All balance parameters returns to the factory settings, and the scale
returns in measurement mode.

UM bilancia analitica BL224 ENG rev.0 13.05.2020
17
PCS function (conta-pezzi)
Procedure
1. Make sure you have activated the "F count" function in the
user menu.
2. Place an empty container on the plate.
3. Adjust the scale by pressing the <TARE> key.
4. Press the <UNIT> key until "pcs" appears on the display.
5. A reference quantity is now required.
Holding down the ▲key gives you access to the reference
number.
Always with the ▲key you can change the number,
selectable between 5, 10, 20, 50, 100 pieces, Free, wref,
Update)
6. After placing the exact quantity of pieces corresponding to
the selected reference number inside the container, press
the <TARE>
As soon as the measure is stable, the average weight of each
piece will be calculated, and the quantity will be shown.
7. You can now add the remaining pieces to count.
Note:
Is possible to switch between the amount display and the weight display at any time by pressing the <UNIT>
key.
It is advisable to use the highest possible reference quantity, so that the scale can have a very large
reference from which to calculate the average.
The pieces you want to count must have the same weight.
The settings remain in memory until a new reference weight is determined.

UM bilancia analitica BL224 ENG rev.0 13.05.2020
18
FREE (reference setting)
This option allows you to use a reference number for the function counts pieces other
than the preset ones (maximum possible value = 999)
Procedure
1. Follow the standard procedure until point 5
2. Select “Free” and press <TARE> key
3. The last set value flashes. Use the ▲and> keys to set the desired number.
4. Place the correct number of pieces inside the container, and press <TARE>
key.
wRef (reference settings)
If we know the weight of the sample to be counted, we can enter it directly.
Procedura
1. Follow the standard procedure until point 5
2. Select “wRef” and press <TARE> key
3. The value of the last set sample weight flashes on the display. Use the ▲and
▶keys to set the weight of the reference sample.
4. Press <TARE> to confirm.
Update
The Update option allows you to improve the score of the pieces count.
By increasing the amount of reference samples inside the plate, and by recalculating
the mean weighing weight, the count results will be more accurate.
1. Select“Update”, palce the other samples on the pan and press <CAL> key.
2. Display shows “Update”

UM bilancia analitica BL224 ENG rev.0 13.05.2020
19
Percentage Weighing
The "Percentage Weighing" function allows to weigh a default value (1, 10,20,50,
100%, free, 100R, 100L, AtroM, AtroD) and determine the differences from the
reference value.
Procedure
1. Make sure you have selected the "F for" function in the user menu.
2. Place an empty container on the plate.
3. Adjust the scale by pressing the <TARE> key.
4. Press the <UNIT> key until "PER (%)" appears on the display.
5. A reference quantity is now required.
Holding down the ▲key opens the selection of the reference.
Always with the ▲key you can change the reference, selectable between 1,
10, 20, 50, 100%, Free, 100r, 100L, OtherM, OtherD)
6. Place the reference sample inside the container and press the <TARE> key
Once the measure is stable, the reference percentage will be determined
7. It is now possible to weigh the percentage.
Note:
It is possible to switch between the percentage display and the weight display at any time by pressing the
<UNIT> key.
The settings remain in memory until a new percentage determination is made.
FREE (reference setting)
The Free option allows you to use a reference percentage other than the preset ones.
Procedure
1. Follow the standard procedure until point 5
2. Select “Free” and press <TARE> key
3. The last set value flashes. Use the ▲and ▶keys to set the desired value.
4. Place the reference sample inside the container, and press <TARE> key.

UM bilancia analitica BL224 ENG rev.0 13.05.2020
20
Differential weighing
The differential weighing is used to determine the weight variation of one or more
samples.
The first step is to determine the initial weight of the sample.
Following operations such as scratching, centrifuging, filtering, vaporization, etc. The
sample is weighed again, and the difference is determined with respect to the initial
value.
100L (Loss)
The moisture content is displayed as a percentage of the initial sample.
The humidity value is shown with a negative sign, and with a unit of measure 100L%
example: -11.35 100.00L%
100R (residue)
The dry content content is displayed as a percentage of the initial sample.
The dry residue value is shown with a positive sign, and with a unit of measurement
100R
example: +8.25 100.00R%
AtroM (Humidity content)
Atro's moisture content is the percentage value of moisture relative to the dry residue.
The ATRO humidity value is shown with negative sign, and with AtroM unit of
measure%
example: -255.33AtroM%%
AtroD (Dry content)
Atro's moisture content is the percentage value of moisture relative to the dry residue.
The ATRO humidity value is shown with negative sign and with AtroM unit of
measure%.
example; 312.56 AtroD%%
Table of contents