manuals.online logo
Brands
  1. Home
  2. •
  3. Brands
  4. •
  5. Gioteck
  6. •
  7. Headset
  8. •
  9. Gioteck EX-05 Military Style User manual

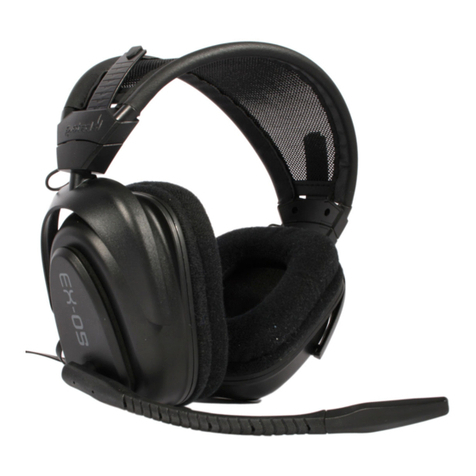
Gioteck EX-05 Military Style User manual

XBOX PS3/PC
XBOX PS3/PC
HDMI OUTPUT
HDMI CABLE
(NOT SUPPLIED)
TV / MONITOR
HDMI INPUT
TV / MONITOR AUDIO
OUT
SLIDE SWITCH
TO UN-MUTE
RED
WHITE
03
02
01
04
USB
XBOX PS3/PC
HDMI OUTPUT
HDMI CABLE
(NOT SUPPLIED)
AV MULTI OUT
USBAV RCAADAPTOR
(NOT SUPPLIED)
TV/MONITOR
HDMI INPUT
SLIDE SWITCH
TO UN-MUTE
03
0201 04
05
XBOX PS3/PC
AV MULTI OUT
USB
SLIDE SWITCH
TO UN-MUTE
YELLOW/
VIDEO
AV RCA CABLE
(SUPPLIED WITH
XBOX CONSOLE)
TV/MONITOR
AUDIO/VIDEO
INPUTS
03
02
01 04
05
XBOX PS3/PC
HDMI OUTPUT USB
HDMI CABLE
(NOT SUPPLIED)
TV / MONITOR
HDMI INPUT
WHITE
RED
SLIDE SWITCH
TO PS3
SLIDE SWITCH
TO UN-MUTE
TV / MONITOR
AUDIO OUT
03
02
01
04
XBOX PS3/PC
AV MULTI OUTHDMI OUTPUT
USB
HDMI CABLE
(NOT SUPPLIED)
TV/MONITOR
HDMI INPUT
AV RCA CABLE
(SUPPLIED WITH
PS3 CONSOLE)
SLIDE SWITCH
TO PS3
SLIDE SWITCH
TO UN-MUTE
03
0201
04
05
XBOX PS3/PC
AV MULTI OUT
USB
AV RCA CABLE
(SUPPLIED WITH
PS3 CONSOLE)
SLIDE SWITCH
TO PS3
SLIDE SWITCH
TO UN-MUTE
YELLOW/
VIDEO
TV/MONITOR
INPUTS
03
02
01
04
05
XBOX PS3/PC
RCA PASS
THROUGH CABLE
(NOT REQUIRED)
USB SLIDE SWITCH
TO PS3
SLIDE SWITCH
TO UN-MUTE
XBOX PS3/PC
03
02
01
04
05
07
08
10
09
06
11
03
02
04
precautions
This product has been designed
with the highest concern for
safety. However, any electrical
device, if used improperly, has
the potential to cause harm. To
help ensure risk-free operation
please pay attention to the
following guidelines:
 Use only as intended.
This is a precision product,
handle with care.
 Contains small parts.
Not suitable for children under
three years of age.
 Store in a dry & dust free area.
Do not store in areas of extreme
heat or cold, and avoid direct
sunlight or heat sources
e.g. heaters.
 Do not allow the product to get
wet or dir ty; doing so may cause
damage.
 Do not clean with benzene,
paint thinner, acetone, alcohol, or
other such solvents.
 Do not take the product apart;
doing so will void your warranty
and may cause electrical shock
on your console.
This symbol indicates
important installation,
operational or maintenance
instructions. Follow these
instructions closely.
environment
Please help to conserve
the environment by
recycling the cardboard
packaging of this product.
This product should NOT
be disposed of in normal
household waste. It should
be disposed of separately.
Please take it to an electrical
waste collection point.
legals
This product complies with the
following legal regulations.
For further information go to
www.gioteck.com.
 
a Class B personal
computers and peripherals for
which the following markings,
instructions and Declaration of
Conformity are required.
Gioteck hereby declares
that this headset is in
compliance with the essential
requirements and other
provisions of Directive 2004/108/
EC. To view the full version of the
Declaration of Conformity please
go online to: doc.gioteck.com
EX-05
WIRED STEREO HEADSET
FOR XBOX / PS3 / PC / MAC
Thank you for purchasing the
EX-05 Wired Stereo Headset
from Gioteck.
We hope that this product will
go beyond your expectations for a
quality made accessory.
Please read this booklet thoroughly
before using the product and review
specific console manuals for
additional operation details.
Thank you & enjoy!
Features & Details
gB
01| Lightweight Headband
02| Headset Adjusters
03
04| Flexible Rubber Mic Boom
05| Gioteck Inline Controller
06| Chat Volume
07| Game Volume
08| PS3/XBOX Switch
09| Mute
10| LED
11 | Xbox Live Chat Input
Fr
01| Serre-tête léger
02| Ajusteurs casque
03
04| Microphone en caoutchouc souple
05| Contrôleur Inline Gioteck
06| Volume de chat
07| Volume du jeu
08| PS3/XBOX changer
09| Commutateur de mode Muet (Mute)
10| Voyant lumineux
11 | Entrée Chat Xbox Live
es
01| Banda ligera
02| Ajustes del auricular
03
04
05| Controlador Inline de Gioteck
06| Volumen de charla
07| Volumen del juego
08| PS3/XBOX cambiar
09| Interruptor de silencio
10| LED
11 | Entrada de charla de Xbox Live
it
01| Fascia per la testa leggera
02
03
04
05| Connettore in linea con cavo
06| Volume chat
07| Volume gioco
08| PS3/XBOX passare
09| Interruttore silenziamento audio
10| LED
11 | Ingresso chat Xbox live
pt
01| Suporte para a cabeça de peso reduzido
02| Ajustadores dos auscultadores
03
04
05
06| Volume da conversação
07| Volume do jogo
08| PS3/XBOX mudar
09| Interruptor para desligar o som
10| LED
11 | Entrada para conversação Xbox LIVE
cz
01
02
03
04
05
06| Hlasitost pro chat
07
08
09 
10| LED
11 | Vstup pro Xbox Live Chat
De
01| Leichtes Kopfband
02| Einstellbügel
03| Ohrmuscheln aus Mikro-Faser
04
05| Gioteck Inline Controller
06| Chat-Lautstärke
07| Game-Lautstärke
08| PS3/XBOX wechsel
09| Stummschalter
10| LED
11 | Xbox LIVE Chat-Eingang
set up 1: With a/v caBles (Without hDmi)
1. Connect the AV RCA cable into the back of your PS3.
2. Connect the RED/WHITE connectors into the corresponding
RED/WHITE sockets of the cables coming from the
Gioteck Inline Controller.
3. Connect the yellow VIDEO connector into the Video IN socket
of your TV/Monitor.
4. Connect the USB lead attached to the Gioteck Inline Controller
into an available USB port on the front of your PS3 console.
5. Make sure the switch on the Gioteck Inline Controller
is set to PS3 and the microphone is not set to mute.
6. Turn on your PS3 console.
7. Make sure the microphone is not set to mute.
8. Go to Settings > Accessory Settings > Audio Device Settings
and select EX-05 Headset (which will appear in the drop down
menu) for both the Input and Output. You will be able to hear
yourself talking into the microphone through the headset
earcups. Set the desired volume level.
9. Go to Settings > Sound Settings > Audio Output Settings,
choose Audio Input Connector/ Scart / AV Multi.
ps3 set up
pc/mac set up
set up 2: With hDmi (option a)
1. Connect the HDMI lead between the PS3 console and
your TV/Monitor.
2. Connect the AV RCA cable into the back of your PS3.
3. Connect the RED/WHITE connectors into the corresponding
RED/WHITE sockets of the cables coming from the
Gioteck Inline Controller.
4. Connect the USB lead attached to the Gioteck Inline Controller
into an available USB port on the front of your PS3 console.
5. Make sure the switch on the Gioteck Inline Controller is set to
PS3 and the microphone is not set to mute.
6. Turn on your PS3 console.
7. Make sure the microphone is not set to mute.
8. Go to Settings > Accessory Settings > Audio Device Settings
and select EX-05 Headset (which will appear in the drop down
menu) for both the Input and Output. You will be able to hear
yourself talking into the microphone through the headset
earcups. Set the desired volume level.
9. Go to Settings > Sound Settings > Audio Output Settings,
choose Audio Input Connector/ Scart / AV Multi.
set up 2: With hDmi (option B)
1. Connect the HDMI lead between the PS3 console
and TV/Monitor.
2. Connect the RED/WHITE connectors attached to the
Gioteck Inline Controller into the Audio OUT RED/WHITE
sockets on your TV/Monitor.
3. Connect the USB lead attached to the Gioteck Inline Controller
into an available USB port on the front of your PS3 console.
4. Make sure the switch on the Gioteck Inline Controller is set to
PS3 and the microphone is not set to mute.
5. Turn on your PS3 console.
6. Make sure the microphone is not set to mute.
7. Go to Settings > Accessory Settings > Audio Device Settings
and select EX-05 Headset (which will appear in the drop down
menu) for both the Input and Output. You will be able to hear
yourself talking into the microphone through the headset
earcups. Set the desired volume level.
8. Go to Settings > Sound Settings > Audio Output Settings,
choose Audio Input Connector/ Scart / AV Multi.
1. Connect the Headset into the Gioteck Inline Controller.
2. Make sure the microphone is not set to mute.
3. Check that the switch on the Gioteck Inline Controller is set
to PS3 as this is also the correct position for PC or MAC use.
4. Plug the USB cable into an available port on your PC or MAC.
5. The RED/WHITE audio cables are not required.
6. 
and assign it as the device for audio output.
7. For MAC, open system preferences and go to sound. (You can
then assign the audio output to the Gioteck EX-05 Headset.)
set up 1: With a/v caBles (Without hDmi)
1. Connect the AV RCA Cable into the back of your
XBOX 360 console.
2. Connect the RED/WHITE connectors into the corresponding
sockets of the cables coming from the Gioteck Inline Controller.
3. Connect the yellow VIDEO connector into the Video IN socket
on your TV/Monitor.
4. Connect the USB lead of the Gioteck Inline Controller into an
available USB port on your console.
5. Make sure the microphone is not set to mute.
6. Turn on your console and make sure that your controller is
wirelessly connected to your console (do not leave the
controller charging or it will transfer electrical noise into
your headset).
7. Go to chat set up.
XBoX set up chat set up : XBoX live
set up 2: With hDmi (option a)
1. Connect the HDMI (not included) lead between the XBOX 360
and your TV/Monitor.
2. Connect the AV RCA Adaptor Cable (not included) into the
XBOX 360.
3. Connect the RED/WHITE connects that are attached to the
Gioteck Inline Controller into the correct inputs of the AV RCA
Adaptor Cable (not included).
4. Connect the USB lead of the Gioteck Inline Controller into an
available USB port on your console.
5. Make sure the microphone is not set to mute.
6. Turn on your console and make sure that your controller is
wirelessly connected to your console (do not leave the
controller charging or it will transfer electrical noise into
your headset).
7. Go to chat set up.
IMPORTANT: The AV cable supplied with the
XBOX 360 does not allow for simultaneous use with
a HDMI cable, as the shape of the AV connector
covers the HDMI socket. You will need to purchase
one from Amazon for this set up method:
http://tinyurl.com/360-RCA-Adaptor
set up 2: With hDmi (option B)
1. Connect the HDMI (not included) lead between your
XBOX 360® and TV/Monitor.
2. Connect the RED/WHITE connectors attached to the
Gioteck Inline Controller into the Audio OUT RED/WHITE
sockets on your TV/Monitor.
3. Connect the USB lead of the Gioteck Inline Controller into an
available USB port on your console.
4. Make sure the microphone is not set to mute.
5. Turn on your console and make sure that your controller is
wirelessly connected to your console (do not leave the
controller charging or it will transfer electrical noise into
your headset).
6. Go to chat set up.
1. Plug one end of the short mini jack cable into the correct
socket on the Gioteck Inline Controller and the other end into
your XBOX 360 controller. (It is important to do this in the
correct order so that the console connects to the headset’s
microphone!)
2. Go to XBOX Dashboard > Settings > Preferences > Voice.
3. Set Voice Output to: Play through Headset.
4. Set the desired volume for the Game Sound and Voice.
(You should now hear sound from your XBOX 360® through
your headset.)
5. To test the microphone go to messages and record and
play back a message.
FOR TROUBLESHOOTING &
VIEW THIS MANUAL ONLINE:
www.gioteck.com
PLEASE NOTE: You may need to make some
adjustments to your TV/Monitor’s settings to enable
the audio to come through the headset
(Consult your TV manual).
PLEASE NOTE: Your TV/Monitor will need to have
Audio Out (RED/WHITE) sockets. Most, but not all
TVs/Monitors have RED/ WHITE Audio IN and
YELLOW Video IN sockets but not all TV’s, and even
fewer monitors have RED/WHITE Audio OUT sockets.
VERSION 1.0 | EX5UNI-M0
EX-05
WIRED STEREO HEADSET
PS3 / XBOX / PC / MAC
amBiente
Ajude a pr oteger o ambiente rec icland o a embalagem de car tão deste p roduto.
 
   
meDio amBiente
Para ayuda r a preser var el medio ambiente, recicle el paquete de cartón de este producto.
Este producto NO se de berá desechar en la basura doméstica normal. Deberá eliminarse
por separado. Llévelo a un punto limpio de rec ogida de residuos e léctricos.
environnement
Protégez l’environnement en recyclant l’emballage carton de c e produit.
Ce produit ne doit PAS êtr e jeté dans un e poubell e ménagère. Il doit être mis au rebut
séparém ent. Veillez à le dépose r à un point de c ollecte de déchet s électr iques.
umWeltschutz
Bitte he lfen Sie, die Umwelt zu schützen, und recyc eln Sie die K artonve rpackung
dieses Produkts.
Dieses Produkt darf NICHT im normalen Haushaltsabfall entso rgt werden. Es muss separat
entsorgt werden. Bitte bringen Sie es zu einer Abfallsammelstelle für Elektroabfall.
Fr
remerciements
   
de-gamme répondra à vos attentes, et saura même les dépasser. Lisez attentivement ce manuel
avant d’util iser le produit ; pour toute infor mation sur le fonct ionnement de la XBOX 3 60® / PS3™,
repor tez-vous à la d ocument ation correspondant à votre consol e. Merci et a musez-vou s bien !
précautions
  
de moins de 3 ans.
  
endroits très chauds ou très f roids, et év itez toute ex position directe à la lumière du soleil ou aux
sources de chaleur (radiateurs, par exemple).
 
  
d’alcool,ou d’autres solvants similaires.
 
une électrocution sur votre console.
avertissements
Ce symbole indique la présence d’importantes instructions concernant
l’installation, le fonctionnement ou la maintenance de votre appareil.
situaciÓn 1: con caBles a/v (sin hDmi)
1. Conecte el cable RCA de A/V a la parte posterio r de su consola PS3™.
2. Enchufe los conectores Rojo/Blanco en las tomas Roja/Blanca correspondientes de los cables que parten
del cont rolador Inline de Gioteck.
   
4. Enchufe el cable USB c onecta do al Controlador Inline de Gioteck en un puerto US B disponi ble de la par te
delantera de su cons ola PS3™.
5. Asegúres e de que el sel ector del controlador Inli ne de Giote ck tiene seleccionado PS3™ y que el
micrófono no está e n la posición de sile ncio.
6. Encienda su c onsola PS3™.
7. Asegúres e de que que el micrófon o no esté en la p osición de silenc io.
    
    
mismo hab lando por el micrófono a través de los auriculares. Selecc ione el nivel de volume n que desee.
  
Conector de entrada de audio/ Scart / AV Multi.
situaciÓn 2: con hDmi (opciÓn a)
1. Enchufe el cable HDM I entre la consola PS 3™ y su TV/Mon itor.
2. Conecte el cable RCA de A/V a la parte posterio r de su consola PS3™
3. Enchufe los conectores Rojo/Blanco en las tomas correspondientes conectadas al Controlador
Inline de Gioteck.
4. Enchufe el cable USB c onecta do al Controlador Inline de Gioteck en un puerto US B disponi ble de la par te
delantera de su cons ola PS3™.
5. Asegúres e de que el sel ector del controlador Inli ne de Giote ck tiene seleccionado PS3™ y que el
micrófono no está e n la posición de sile ncio.
6. Encienda su c onsola PS3™.
7. Asegúres e de que que el micrófon o no esté en la p osición de silenc io.
    
    
mismo hab lando por el micrófono a través de los auriculares. Selecc ione el nivel de volume n que desee.
  
Conector de entrada de audio/ Scart / AV Multi.
situaciÓn 2: con hDmi (opciÓn B)
1. Enchufe el cable HDM I entre la consola PS 3™ y el TV/Monitor.
2. Enchufe los conectores Rojo/Blanco conectados al Controlador Inline de Gioteck en las tomas Roja/
Blanca d e salida de audio de su T V/Monitor.
3. Enchufe el cable USB c onecta do al Controlador Inline de Gioteck en un puerto US B disponi ble de la par te
delantera de su cons ola PS3™ .
4. Asegúres e de que el sel ector del Controlador Inline de Giote ck tiene selecci onado PS3™ y que el
micrófono no está e n la posición de sile ncio.
5. Encienda su c onsola PS3™ .
6. Asegúres e de que que el micrófon o no esté en la p osición de silenc io.
    
    
mismo hab lando por el micrófono a través de los auriculares. Selecc ione el nivel de volume n que desee.
  
Conector de entrada de audio/ Scart / AV Multi.
  
televiso res/monitores tienen tomas Roja/Blanca de Entrada de Audio y una tom a Amarilla de Entrada
     
de Audio.
    
para hace r que el audio salga por l os auric ulares (consulte el manual de su T V).
it
grazie

qualità s appia non solo sodd isfare, ma anche superare le tue aspettative! Ti preghiamo di leggere
   
ulteriori dett agli sul funzionamento della c onsole.Grazie e bu on diver timento!
precauzioni
Per garantire un util izzo pri vo di rischi, prestare attenzione alle seguenti linee guid a.
   
maneggiarlo con cura.
 
 
o freddo estremi, ed evitare la l uce diret ta del sole o le fonti di calore, c ome le stufe.
   
  
 
cortocircuiti alla console.
avvertimenti
Questo simbolo indica istruzioni di installazione, operazione e manutenzione importanti.
situaciÓn 1: con caBles a/v (sin hDmi)
1. Enchufe el cable RCA de A /V en la parte posterio r de su consola XBOX 36 0®.
2. Enchufe los conectores Rojo/Blanco en las tomas correspondientes de los cables que parten del
controlador Inline de Gioteck.
   
4. Enchufe el cable USB de l contro lador Inline de Gioteck en un pue rto USB disponible de su consola.
5. Asegúres e de que el mic rófono no esté en la pos ición de s ilencio.
6. Encienda la consola y a segúres e de que su controlador está co nectado de modo ina lámbrico a su cons ola
(no deje el controlador cargándose, o se t ransfer irá ruid o eléctr ico a los auriculares).
 
situaciÓn 2: con hDmi (opciÓn a)
1. Enchufe el cable HDM I (no incluido) entre la XBOX 360® y su TV/Monitor.
2. Enchufe el cable adapt ador RCA de A /V (no incluido) en la XBOX 360®
3. Enchufe los conectores Rojo/Blanco del controlador Inline de Gioteck en las |entradas correspondientes
del Cable adaptador RCA de A/V (no incluido).
4. Enchufe el cable USB de l contro lador Inline de Gioteck en un pue rto USB disponible de su consola.
5. Asegúres e de que el mic rófono no esté en la pos ición de s ilencio.
6. Encienda la consola y a segúres e de que su controlador está co nectado de modo ina lámbrico a su cons ola
(no deje el controlador cargándose, o se t ransfer irá ruid o eléctr ico a los auriculares).
 
Desafor tunadamente, el diseño del c able A/V suministrado con la XBOX 3 60® no p ermite el u so
simultáneo con un c able HDMI debido a que la forma del conector A/ V cubre la toma HDMI.
situaciÓn 2: con hDmi (opciÓn B)
1. Enchufe el cable HDM I (no incluido) entre su XBOX 360® y el TV/Monitor.
2. Enchufe los c onecto res Rojo/Blanc o del controlador Inline de Gi oteck en las tomas Roja /Blanca de sali da
de audio de su TV/Monitor.
3. Enchufe el cable USB de l contro lador Inline de Gioteck en un pue rto USB disponible de su XBOX 360®.
4. Asegúres e de que el mic rófono no esté en la pos ición de s ilencio.
5. Encienda la consola y a segúres e de que su controlador está co nectado de modo ina lámbrico a su cons ola
(no deje el controlador cargándose, o se t ransfer irá ruid o eléctr ico a sus au riculares).
 
  
televiso res/monitores tienen tomas Roja/Blanca de Entrada de Audio y una tom a Amarilla de entra da
   
de Audio.
    
para hace r que el audio salga por l os auric ulares (consulte el manual de su T V).
conFiguraciÓn De charla: XBoX live
1. Enchufe un extremo del c able con miniconector corto en la toma correspondiente del c ontrolador Inline de
Gioteck y el otro ext remo en su controlador XBOX 36 0®. (Es im portante hacer lo en el orden correcto para
que la consola se conecte al mi crófono de los auriculares).
 
 
          
su XBOX 36 0® a través de los auri culares).
5. Para probar e l micrófo no, vaya a Mens ajes y grabe y reproduzca un mensaje.
De
vielen Dank
Danke, dass Sie sich für den verdrahteten Ste reo- Kopfhörer EX- 05 von Gioteck. Wir h offen, dass
dieses Produkt Ih re Erwar tungen zu einem er stklassigen Kopf hörer üb ertrifft. Lesen Sie b itte vor
Gebrauch des Prod uktes diese Brosc hüre ganz durch, und beachten Sie für weitere Einzelheiten
zum Betrieb der Konsole die entsprechenden Handbücher. Vielen Dank und viel Spaß!
sicherheitshinWeise
Um einen gefahrlosen Betrieb zu garantieren, beachten Sie bitte die folgenden Richtlinien.
    
 

lagern und direktes Sonnenlicht und Wärmequellen wie Heizungen vermeiden.
  


beschädigt werden.
WarnhinWeise
Dieses Symbol weist auf wichtige Installations-Betriebs- und Wartungsanweisungen hin.
es
gracias
  
producto superará sus expec tativas para auric ulares de alta gama. Lea este manual a fondo
antes de utilizar el producto y c onsulte en los manuales de su consola los detalles adicionales
  
precauciones
Para garantizar un funcionamiento libre de riesgo, preste atención a las siguientes directrices.
   


y evite la luz del sol directa y fuentes de calo r (p. ej., calentadores).
   
  

en su consola.
aDvertencias
  
operación o mantenimiento.
pt
agraDecimentos
  
ultrapasse as suas ex pectat ivas em termos do que po deria es perar de uns auscult adores de
qualidade. Leia atentamente este folheto antes de utilizar o pro duto e cons ulte os manu ais
     
Obrigado e divirta-se!
precauções
De modo a ga rantir um funcionamento sem r iscos, p reste atenção às seguintes directrizes.
  
cuidadosamente.
  

excessivamente bai xas ou elevadas e evite a exposição di recta ao s ol ou a fontes de calor
como, por exemplo, aquecedores.
 
 
 
na conso la.
aDvertências
  
cz
poděkování
   

   

bezpečnostní opatření
   

 

  
  
   
 
upozornění
    
setup 1: mit a/v-kaBeln (ohne hDmi)
1. Das AV/RCA-Kabel an der Rückseite der PS3 -Konso le anschließen.
2. Die Stecker ROT/WEISS a n der entsprechenden Buchse ROT/WEISS der Kabel vom Giotec k Inline
Controller anschließen.
3. Den gelben V IDEO- Stecker an der Video IN-Buchse Ih res TV/Monitor s anschließen.
4. Das USB- Kabel vom Gioteck Inline Co ntrolle r an einem fr eien USB -Anschluss auf der Frontseite der
PS3-Konsole anschließen.
5. Sicherstellen, dass der Scha lter am Gio teck Inline Contro ller auf PS 3 geschaltet und das Mikrofon
nicht stumm geschaltet ist.
6. Die PS3- Konsole einschalten.
7. Sicherstellen, dass das Mikr ofon nicht stumm geschaltet ist.
8. Zu Einstellungen > Einstellungen Zubehör > Einstellungen Audio gerät wec hseln und E X-05 Kopfhörer
(aus dem Drop-Down- Menü) für Eingang und Ausgang wählen. Sie kö nnen sich selbst in den
Hörmuscheln des Kopfhörers höre n, wenn Sie in das Mikrofon sprechen. Die gewünschte
Lautstärke einstellen.
9. Zu Einstellungen > Klangeinstellungen > Audioausgang Einstellungen wechseln,
Audioeingangstecker/ Scart / AV Multi wählen.
setup 2: mit hDmi (option a)
1. Das HDMI -Kabel an der PS3 -Konsole und Ihren TV/Monitor ans chließen.
2. Das AV/RCA-Kabel an der Rückseite der PS3 -Konso le anschließen.
3. Die Stecker ROT/WEISS a n den entsprechenden Buchsen am Gioteck Inline C ontroller anschließen.
4. Das USB- Kabel vom Gioteck Inline Co ntrolle r an einem fr eien USB -Anschluss auf der Frontseite der
PS3-Konsole anschließen.
5. Sicherstellen, dass der Scha lter am Gio teck Inline Contro ller auf PS 3 geschaltet und das Mikrofon
nicht stumm geschaltet ist.
6. Die PS3- Konsole einschalten.
7. Sicherstellen, dass das Mikr ofon nicht stumm geschaltet ist.
8. Zu Einstellungen > Einstellungen Zubehör > Einstellungen Audio gerät wec hseln und E X-05 Kopfhörer
(aus dem Drop-Down- Menü) für Eingang und Ausgang wählen. Sie kö nnen sich selbst in den
Hörmuscheln des Kopfhörers höre n, wenn Sie in das Mikrofon sprechen. Die gewünschte
Lautstärke einstellen.
9. Zu Einstellungen > Klangeinstellungen > Audioausgang Einstellungen wechseln,
Audioeingangstecker/ Scart / AV Multi wählen.
setup 2: mit hDmi (option B)
1. Das HDMI -Kabel an der PS3 - Konsole und Ihren T V/Monitor ansch ließen.
2. Die Stecker ROT/WEISS d es Gioteck Inline Controll ers in die Au dio OUT-Buchsen ROT/ WEISS Ih res
TV/Monitors anschließen.
3. Das USB- Kabel vom Gioteck Inline Co ntrolle r an einem fr eien USB -Anschluss auf der Frontseite der
PS3-Konsole anschließen.
4. Sicherstellen, dass der Scha lter am Gio teck Inline Contro ller auf PS 3 geschaltet und das Mikrofon
nicht stumm geschaltet ist.
5. Die PS3- Konsole einschalten.
6. Sicherstellen, dass das Mikr ofon nicht stumm geschaltet ist.
7. Zu Einstellungen > Einstellungen Zubehör > Einstellungen Audio gerät wec hseln und E X-05 Kopfhörer
(aus dem Drop-Down- Menü) für Eingang und Ausgang wählen. Sie kö nnen sich selbst in den
Hörmuscheln des Kopfhörers höre n, wenn Sie in das Mikrofon sprechen. Die gewünschte
Lautstärke einstellen.
8. Zu Einstellungen > Klangeinstellungen > Audioausgang Einstellungen wechseln, Audioeingangstecker/
Scart / AV Multi wählen.
Ihr TV/M onitor mu ss Audio OUT-Buchs en (ROT/WEISS) haben. D ie meisten, aber nicht alle TV/
Monitor e haben Audio IN- (ROT/ WEISS) und Audio IN - (GELB) Buch sen, aber nicht alle Fernsehgeräte
und noch we niger Monitore haben Audio OUT-Buchs en (ROT/WEISS).
   
den Kopfhörer übertragen wird (siehe Handbuch des Fernsehgeräts).
conFigurazione 1: con cavi a/v (senza hDmi)
1. Collegar e il cavo AV RCA al retro della c onsole PS3.
2. Collegar e i connet tori ROS SO/BIA NCO alle prese ROSSO/BIA NCO cor rispondenti dei cavi del
Controller Inline Gioteck.
3. Collegar e il connettore VIDEO Giallo alla presa Video IN della TV/ Monitor.
4. Collegar e il cavo USB c onness o al Controller Inline Gioteck a una por ta USB disponibile sul lato
anteriore della console PS3.
5. Accertarsi che l’interr uttore d el Controller Inline Gioteck sia impo stato su PS3 e il microfono non sia
impostato sul silenziamento audio.
6. Accendere la console PS3.
7. Accertarsi che il microfono non sia i mpostato sul silenziamento audio.
8. A ndare a Imp ostazioni > Impostazioni access ori > Impo stazio ni dispositivo audi o e selezio ne
   
   
9. Andare a Impostazioni > Impostazioni audio > Impostazioni uscita audio, selezionare Connettoreingresso
audio/ Scart / AV Multi.
conFigurazione 2: con hDmi (opzione a)
1. Collegar e il cavo HDMI alla console PS3 e l a TV/Monitor.
2. Collegar e il cavo AV RCA al retro della c onsole PS3.
3. Collegar e i connet tori ROS SO/BIA NCO alle prese corrispo ndenti collegate a l Controller Inline Gioteck.
4. Collegar e il cavo USB c onness o al Controller Inline Gioteck a una por ta USB disponibile sul lato
anteriore della console PS3.
5. Accertarsi che l’interr uttore d el Controller Inline Gioteck sia impo stato su PS3 e il microfono non sia
impostato sul silenziamento audio.
6. Accendere la console PS3.
7. Accertarsi che il microfono non sia i mpostato sul silenziamento audio.
8. A ndare a Imp ostazioni > Impostazioni access ori > Impo stazio ni dispositivo audi o e selezio ne
   
   
9. Andare a Impostazioni > Impostazioni audio > Impostazioni uscita audio, selezionare Connettoreingresso
audio/ Scart / AV Multi.
conFigurazione 2: con hDmi (opzione B)
1. Collegar e il cavo HDMI alla console PS3 e l a TV/Monitor.
2. Collegar e i connet tori ROS SO/BIA NCO connessi al C ontroll er Inline G ioteck al le prese Au dio OUT
ROSSO/BIANCO della TV/Monitor.
3. Collegar e il cavo USB c onness o al Controller Inline Gioteck a una por ta USB disponibile sul lato
anteriore della console PS3.
4. Accertarsi che l’interr uttore d el Controller Inline Gioteck sia impo stato su PS3 e il microfono non sia
impostato sul silenziamento audio.
5. Accendere la console PS3.
6. Accertarsi che il microfono non sia i mpostato sul silenziamento audio.
7. A ndare a Imp ostazioni > Impostazioni access ori > Impo stazio ni dispositivo audi o e selezio ne
   
   
8. Andare a Impostazioni > Impostazioni audio > Impostazioni uscita audio, selezionare Connettoreingresso
audio/ Scart / AV Multi.
La TV/M onitor deve d isporre di prese Audio Out (ROSSO/BI ANCO). La maggior parte, ma non tutte le
TV/Monitor disp ongono di prese Audio IN ROSSO/BIAN CO e Video I N GIALLO, ma non tutte l e TV e
un numero ancora più r idotto di monitor h anno pres e Audio OUT ROSSO/B IANCO.
Si prega di n otare che può esser e necess ario ef fettuare delle regolazio ni alle imp ostazioni della T V/
     
conFiguraçÃo 1: com caBos a/v (sem hDmi)
1. Ligue o cabo AV RCA à parte po sterior da consol a PS3.
   
    
    
   
da consola PS3.
    
não está c om o som desligado.
6. Ligue a cons ola PS3.
  
    
   
   
   
de entrad a de áudio/ S cart /AV Multi.
conFiguraçÃo 2: com hDmi (opçÃo a)
1. Ligue o cabo H DMI entre a consola PS3 e a televisão/monitor.
2. Ligue o cabo AV RCA à parte po sterior da consol a PS3.
       
   
da consola PS3.
    
não está c om o som desligado.
6. Ligue a cons ola PS3.
  
    
   
   
   
de entrad a de áudio/ S cart /AV Multi.
conFiguraçÃo 2: com hDmi (opçÃo B)
1. Ligue o cabo H DMI entre a consola PS3 e a televisão/monitor.
  
VERMELHA/BRANCA da televisão/monitor.
   
da consola PS3.
    
não está c om o som desligado.
5. Ligue a cons ola PS3.
    
    
   
   
   
de entrad a de áudio/ S cart /AV Multi.
      
    
     
  
    
seja reproduzido pelos ausc ultadores (consulte o manual da televisão).
nastavení 1: s a/v kabeLY (bez HdMI)
 
  
  
  
   
   
 
 
     
  
  
   
zvuku / Sc art / AV Multi.
nastavení 2: s HdMI (voLba a)
 
  
   
   
   
 
 
     
  
  
   
Scart / AV Multi.
nastavení 2: s HdMI (voLba b)
 
 
   
     
   
 
  
     
  
  
  
Scart / AV Multi.
      
      
    
  
   
conFiguration 1 : avec cÂBles a/v (sans sortie hDmi)
1. Branchez le câble RCA A/V sur la part ie arrière de votre c onsole P S3.
2. Branchez les connecteurs ROUGE/BLANC sur les prises ROUGE/BLANC correspondantes des câbles
fournis avec le cont rôleur Inline Gioteck.
3. Branchez le connec teur VIDEO jaune sur la p rise ENTREE Vidéo de votre téléviseur/moniteur.
4. Branchez le connec teur USB du c ontrôl eur Inline Gioteck sur l’un des ports USB d e la partie avant
de votre console PS3.
  
ne soit pas e n mode Muet (Mute).
6. A llumez vot re console PS3.
7. Assurez-vous que le mic rophone n’est pas en mode M uet (Mute).
8. Accédez à Paramètre s > Paramètres accessoires > Paramètres de l’appareil audio, puis sélec tionnez
   
parler dans le microphone via les oreillettes du casque. Réglez le volume.
9. Accédez à Paramètre s > Paramétrage son > Par amétrag e sorti e audio et sélectionnez Connecteur
d’entrée audio/ PERIT EL / A/ V Multi.
conFiguration 2 : avec sortie hDmi (option a)
1. Branchez le câble HDMI à votre c onsole PS3 et à votre téléviseur/moniteur.
2. Branchez le câble RCA A/V sur la part ie arrière de votre c onsole P S3.
3. Branchez les connecteurs ROUGE/BLANC sur les prises correspondantes du contrôleur Inline Gioteck.
4. Branchez le connec teur USB du c ontrôl eur Inline Gioteck sur l’un des ports USB d e la partie
avant de votre console PS3.
  
ne soit pas e n mode Muet (Mute).
6. A llumez vot re console PS3.
7. Assurez-vous que le mic rophone n’est pas en mode M uet (Mute).
8. Accédez à Paramètre s > Paramètres accessoires > Paramètres de l’appareil audio, puis sélec tionnez
   
parler dans le microphone via les oreillettes du casque. Réglez le volume.
9. Accédez à Paramètre s > Paramétrage son > Par amétrag e sorti e audio et sélectionnez Connecteur
d’entrée audio/ PERIT EL / A/ V Multi.
conFiguration 2 : avec sortie hDmi (option B)
1. Branchez le câble HDMI à votre c onsole PS3 et à votre téléviseur/moniteur.
2. Branchez les connecteurs RO UGE/BLAN C du contrôleur Inline Gioteck sur les pr ises SOR TIE Audio
(ROUGE/BL ANC) de votre téléviseur/moniteur.
3. Branchez le connec teur USB du c ontrôl eur Inline Gioteck sur l’un des ports USB d e la partie avant de
votre console PS3.
  
ne soit pas e n mode Muet (Mute).
5. A llumez vot re console PS3.
6. Assurez-vous que le mic rophone n’est pas en mode M uet (Mute).
7. Accédez à Paramètre s > Paramètres accessoires > Paramètres de l’appareil audio, puis sélec tionnez
   
parler dans le microphone via les oreillettes du casque. Réglez le volume.
8. Accédez à Paramètre s > Paramétrage son > Par amétrag e sorti e audio et sélectionnez Connecteur
d’entrée audio/ PERIT EL / A/ V Multi.
Votre téléviseur/moniteur doit être équipé de prises SORTIE Audio (ROUG E/BL ANC). Les téléviseurs/
moniteurs sont, po ur la plupart,équipés de pri ses ENTREE Audio (RO UGE/BLAN C) et de prises
  
rarement des prises SORTIE Audio (ROUGE/BLANC).

de permet tre au son d’être acheminé dans le casque (consultez la document ation de votre téléviseur).
conFiguration 1: avec cÂBles a/v (sans sortie hDmi)
1. Branchez le câble RCA A/V sur la part ie arrière de votre c onsole X BOX 360 ®.
2. Branchez les connecteurs RO UGE/BLAN C sur les prises
correspondantes des câbles du contrôleur Inline Gioteck.
3. Branchez le connec teur VIDEO jaune sur la p rise ENTREE Vidéo de votre téléviseur/moniteur.
4. Branchez le câble US B du contrôleur Inline Gioteck sur l’un des ports USB de votre c onsole.
5. Assurez-vous que le mic rophone n’est pas en mode M uet (Mute).
6. Mettez votr e consol e sous tension et assurez-vous que le contrô leur a pu éta blir une connexion
  
présence d’un bruit électr ique dans votre casque).
 
conFiguration 2 : avec sortie hDmi (option a)
1. Branchez le câble HDMI (non inclus) entre la XBOX 360® et votre téléviseur/mo niteur.
2. Branchez le câble RCA A/V (non inclus) à la XBOX 360®
3. Branchez les câble s ROUGE/BLA NC du contrôleur Inline Gioteck
aux entrées appropriées du câble RCA A/V (non inclus).
4. Branchez le câble US B du contrôleur Inline Gioteck sur l’un des ports USB de votre c onsole.
5. Assurez-vous que le mic rophone n’est pas en mode M uet (Mute).
 
         
électr ique dans votre casque).
 
Malheureusement, la conc eption du c âble A /V fourni avec la co nsole XB OX 360® ne permet pa s
l’utilisation simultanée d’un câble HDMI, en raison de la ta ille du câble A/ V qui recouvre la prise HDM I.
conFiguration 2 : avec sortie hDmi (option B)
1. Branchez le câble HDMI (non inclus) entre la XBOX 360® et votre téléviseur/mo niteur.
2. Branchez les connecteurs RO UGE/BLAN C du contrôleur Inline Gioteck sur les pr ises
SORTIE Audio (ROUGE/BLANC) de votre téléviseur/moniteur.
3. Branchez le câble US B du contrôleur Inline Gioteck sur l’un des ports USB de votre c onsole X BOX 360 ®.
4. Assurez-vous que le mic rophone n’est pas en mode M uet (Mute).
 
         
électr ique dans votre casque).
  
Votre téléviseur/moniteur doit être équipé de prises SORTIE Audio (ROUG E/BL ANC). Les téléviseurs/
moniteurs sont, po ur la plupart, équi pés de prises ENTREE Audio (RO UGE/BLAN C) et de prises
  
rarement des prises SORTIE Audio (ROUGE/BLANC).
     
de permet tre au son d’être acheminé dans le casque (consultez la document ation de votre téléviseur).
conFiguration Du chat : XBoX live
1. Branchez l ’une des extrémités du câble min i-jack sur la pris e appropriée du contrôleur Inline Gi oteck,
    
console puisse se connecter au microphone du c asque.)
2. Accédez à Tableau de bord XBOX > Paramètres > Préfér ences > Voix.
 
4. Ré glez le volume souhai té pour les effets sonores et voix du jeu. (Vous devez désormais entendre le son
de votre console XBOX 360® d ans votre casque.)
5. Pour tester le m icrophone, accédez aux messages et enregistrez un message, que vous
écouterez ensuite.
setup 1: mit a/v-kaBeln (ohne hDmi)
1. Das AV/RCA-Kabel an der Rückseite Ihrer XBOX 360® -Konsole ansc hließen.
2. Die Stecker ROT/WEISS S tecker an den entspre chenden Buchsen d er Kabel anschließen,
die vom Gioteck Inline Controller kommen.
3. Den gelben V IDEO- Stecker an der Video IN-Buchse an I hrem TV/ Monitor anschließen.
4. Das USB- Kabel des Giotec k Inline Controllers an eine m freien USB-A nschluss an Ihrer
Konsole anschließen.
5. Sicherstellen, dass das Mikr ofon nicht stumm geschaltet ist.
6. Die Konsole einschalten und prüfen, dass I hr Controller drahtlos an Ihrer Konsol e angeschlossen i st (den
  
7. Mit dem Chat-Setup for tfahren.
setup 2: mit hDmi (option a)
1. Das HDMI -Kabel (nicht im Lieferumfang enthalten) an die XBOX 360® und Ihren TV/Monitor anschließen.
2. Das AV/RCA-Adapterkabel (nicht im Lieferumfang enthalten) an der XBOX 360® anschließen.
3. Die Stecker ROT/WEISS d es Gioteck Inline Controll er- Kabels an den entsprechenden
Eingängen des AV/RCA- Adapterkabels (nicht im Lieferumfang enthalten) anschließen.
4. Das USB- Kabel des Giotec k Inline Controllers an eine m freien USB-A nschluss an Ihrer
Konsole anschließen.
5. Sicherstellen, dass das Mikr ofon nicht stumm geschaltet ist.
6. Die Konsole einschalten und prüfen, dass I hr Controller drahtlos an Ihrer Konsol e angeschlossen i st (den
  
7. Mit dem Chat-Setup for tfahren.
Leider kann aufgrund des Desi gns des mit d er XBOX 36 0® mitge liefer ten AV-Kabels nicht gleichzeitig
das HDMI -Kabel angeschlossen werden, da der AV-Stec ker die HDMI-Buchse verd eckt.
setup 3: mit hDmi (option B)
1. Das HDMI -Kabel (nicht im Lieferumfang enthalten) an die XBOX 360® und Ihren TV/Monitor anschließen.
2. Die Stecker ROT/WEISS d es Gioteck Inline Controll er-Kabe ls an die Audio OUT-Buchsen ROT/WEISS
Ihres TV/Monitors anschließen.
3. Das USB- Kabel des Giotec k Inline Controllers an eine m freien USB-A nschluss an Ihrer
XBOX 360® anschließen.
4. Sicherstellen, dass das Mikr ofon nicht stumm geschaltet ist.
5. Die Konsole einschalten und prüfen, dass I hr Controller drahtlos an Ihrer Konsol e angeschlossen i st (den
  
6. Mit dem Chat-Setup for tfahren.
Ihr TV/M onitor mu ss Audio OUT-Buchs en (ROT/WEISS) haben. D ie meisten, aber nicht alle TV/
Monitor e haben Audio IN- (ROT/ WEISS) und Audio IN - (GELB) Buch sen, aber nicht alle Fernsehgeräte
und noch we niger Monitore haben Audio OUT-Buchs en (ROT/WEISS).
   
den Kopfhörer übertragen wird (siehe Handbuch des Fernsehgeräts).
chat-setup: XBoX live
  
andere Ende an Ihrem X BOX 360 ®-C ontroller anschließen. ( Wichtig ist, dass der Anschluss in der
richtigen Reihenfolge erfolgt, damit die Konsole am Mikrofon des Kopfhörers angeschlossen wird!)
2. Im XBOX Hauptmenü > Einste llungen > Vor einstellungen > Stimme wähle n.
3. Sprachausgang einstellen auf: Über Kopfhörer wiedergeben.
4. Die gewünschte Lautstärke für Game- Sound und -Stimm e einstellen. (Sie sollten den von d er XBOX®
erzeugten Sound über den Kopfhörer hören.)
5. Um das Mikrofon zu prüfen, zu Mitteilungen wechseln, eine Mitteilung aufnehmen und diese wiedergeben.
conFigurazione 1: con cavi a/v (senza hDmi)
1. Collegar e il cavo AV RCA al retro della c onsole X BOX 360 ®.
2. Collegar e i connet tori ROS SO/BIA NCO alle prese corrispo ndenti del Controller Inlin e Gioteck.
3. Collegar e il connettore VIDEO giallo a lla presa Video IN della TV/Monitor.
4. Collegar e il cavo USB d el Controller Inline Gioteck a una por ta USB disponibile della co nsole.
5. Accertarsi che il microfono non sia i mpostato sul silenziamento audio.
6. Accendere la console e accertars i che il controller sia conne sso in wireless all a consol e (non lasciare il
    
  
conFigurazione 2: con hDmi (opzione a)
1. Collegar e il cavo HDMI (non in dotazione) all’XBOX 360® e alla T V/Monitor.
2. Collegar e il Cavo adat tatore AV RCA (no n in dotazione) all’X BOX 360®.
3. Collegar e i connet tori BIANCO/ROSSO con nessi al Controll er Inline G ioteck ag li ingres si corretti del
Cavo adattatore AV RCA (non in dotazione).
4. Collegar e il cavo USB d el Controller Inline Gioteck a una por ta USB disponibile della co nsole.
5. Accertarsi che il microfono non sia i mpostato sul silenziamento audio.
6. Accendere la console e accertars i che il controller sia conne sso in wireless all a consol e (non lasciare il
       
  
Sfortunatamente il desig n del cavo AV in dot azione c on la XBOX 360® non consente l’utilizzo
simultaneo con un c avo HDMI, in quanto la fo rma del connetto re AV copre la presa HDM I.
conFigurazione 2: con hDmi (opzione B)
1. Collegar e il cavo HDMI (non in dotazione) all’XBOX 360® e alla T V/Monitor.
2. Collegar e i connet tori ROS SO/BIA NCO connessi al C ontroll er Inline G ioteck al le prese Au dio OUT
ROSSO/BIANCO della TV/Monitor.
3. Collegar e il cavo USB c onness o al Controller Inline Gioteck a un porta USB disponibile dell’XBOX 360®.
4. Accertarsi che il microfono non sia i mpostato sul silenziamento audio.
5. Accendere la console e accertars i che il controller sia conne sso in wireless all a consol e (non lasciare il
    
  
La TV/M onitor deve d isporre di prese Audio Out (ROSSO/BI ANCO). La maggior parte, ma non tutte le
TV/Monitor disp ongono di prese Audio IN ROSSO/BIAN CO e Video I N GIALLO, ma non tutte l e TV e
un numero ancora più r idotto di monitor h anno pres e Audio OUT ROSSO/B IANCO.
Si prega di n otare che può esser e necess ario ef fettuare delle regolazio ni alle imp ostazioni della T V/
     
conFigurazione Della chat: XBoX live
1. Inserire un’estremità del cavo min i jack cor to nella presa co rretta del Contr oller Inl ine Giote ck e l’altra
estremità nel controller XBOX 360 ® (è impor tante far lo nell’or dine cor retto in modo che la c onsole si
  
2. A ndare a Dashboard XBOX > Impostazioni > Pr eferenze > Voc e.
    
4. Impostare il volume de siderato per i suoni e la voce del gi oco (si dovr ebbe ora sentire
  
5. Per testare il microfo no andare ai messaggi e registrare e ripr odurre un messagg io.
conFiguraçÃo 1: com caBos a/v (sem hDmi)
1. Ligue o cabo AV RCA à parte po sterior da consol a XBOX 360 ®.
  
  
    
 
   
       
 
 
conFiguraçÃo 2: com hDmi (opçÃo a)
    
    
     
 
 
   
       
 
 
Infelizmente o desi gn do cabo AV fornecid o com a XBOX 3 60® não permite a utilizaç ão em
    
conFiguraçÃo 2: com hDmi (opçÃo B)
    
   
de áudio VERMELHA/BRANCA da televisão/monitor.
   
   
       
 
    
      
    
     
  
    
seja reproduzido pelos ausc ultadores (consulte o manual da televisão).
conFiguraçÃo Da conversaçÃo: XBoX live
   
a
   
      
   
  
  
(Agora deverá conseguir escutar os sons da XBOX 360® através dos auscultadores.)
5. Para testar o microfon e aceda às mensagens e grave e reproduza uma mensagem.
nastavení 1: s a/v kabeLY (bez HdMI)
 
   
 
   
  
  
  
  
 
nastavení 2: s HdMI (voLba a)
   
 
  
 
  
  
  
  
 
   
   
nastavení 2: s HdMI (voLba b)
   
 
     
    
  
   
  
  
           
      
    
  
   
nastavení cHatu: XboX LIve
    
   
mikrofonem sluchátek!)
  
   
  
zvuk z XBOX.
    
ps3
XBoX
ps3
XBoX
ps3
XBoX
ps3
XBoX
ps3
XBoX
ps3
XBoX
situaciÓn pc o mac
1. Asegúrese de que que el mic rófono no esté en la posición de s ilencio.
2. Compruebe q ue el selector del Controlad or Inline d e Gioteck tiene seleccionado PS3, pues
esta tambi én es la posición co rrecta para uso con PC o MAC.
3. Enchufe el cab le USB en un puerto disponible de su PC o MAC.
4. No se necesit an los cables Rojo/Blanc o de Audio.
5. Su PC (Window s 7) encontrará auto máticamente los Au riculares y los asi gnará co mo
dispositivo para la salida de audio.
6. Para MAC, abra Preferencias del sistema y vaya a Soni do. (A continuación podrá asi gnar la
salida de audio a los Auriculares Gioteck E X-05).
conFiguration pc ou mac
1. Assurez-vous q ue le microphone n’est pas en mode Muet (Mute).
   
pour PC ou MAC.
3. Branchez le câble USB sur l’un des por ts de votre PC ou MAC.
4. Les câbles audio ROUGE /BLANC ne sont pas néce ssaires.
5. Les PC (Windows 7) trouvent automat iquement le casque et le consi dèrent comme
l’appareil de s ortie audio.
6. Pour les MAC, ouvrez les Préf érences systèmes, puis accé dez à la section Sons .
Vous p ouvez ensu ite assoc ier la sor tie audio au casqu e EX-05 Gioteck.
setup pc oDer mac
1. Sicherstellen, dass d as Mikrof on nicht stumm gesch altet ist.
2. Sicherstellen, dass d er Schalter am Giote ck Inline C ontroller auf PS3 geschaltet, da dies au ch
di e richti ge Positi on für PC und MAC ist.
3. Das USB-Kabel an einem freie n Anschluss am PC oder MAC anschließen.
4. Die Audiokab el ROT/WEISS werden nicht benötigt.
    
den Audioausgang.
6. Bei MAC die Syste mvoreinstellunge n öffnen und zu Sound wechseln. (Sie können den Audio -
ausgang dem Gioteck EX- 05 Kopfhörer zuweisen.)
conFigurazione pc o mac
1. Accerta rsi che il microfon o non sia impostato su l silenziamento audio.
2. Accerta rsi che l’i nterruttore del Control ler Inline Gioteck s ia impost ato su PS3, in quanto que sta
è an che la posizione corrett a per l’uso con il PC o MAC
3. Inserire il cavo USB in una porta di sponibi le del PC o MAC .
4. I cavi audio ROSSO/BIA NCO non sono necessari.
    
per l’uscita audio.
6. Per il MAC, aprir e le preferenze di sistema e andare a d audio (è possibile assegnare l’uscita
  
conFiguraçÃo pc ou mac
   
   
também é a pos ição correcta para utilização com um PC ou MAC.
  
4. Os cabos de áudio VERMELHO/BR ANCO não são nec essários.
5. O PC (Windows 7 ) irá detectar automaticamente os auscultadores e design á-los c omo o
 
6. Para MAC, abra as preferênc ias do sistema e aceda ao som. (Em seguida, pode designar a
  
nastavení pc nebo Mac
 
  
 
   
  
   
  
   
:
WWW.GIOTECK.COM
RISOLUZIONE DEI PROBLEMI E VISUALIZZAZIONE DEL MANUALE ONLINE:
WWW.GIOTECK.COM

WWW.GIOTECK.COM
CONSELHOS PARAA RESOLUÇÃO DE PROBLEMAS E CONSULTAR ESTE MANUAL ONLINE:
WWW.GIOTECK.COM
SUGERENCIAS PARA SOLUCIONAR PROBLEMAS Y VER ESTE MANUAL EN INTERNET:
WWW.GIOTECK.COM
TIPPS ZUR FEHLERBEHEBUNG UND WIE DIESES HANDBUCH ONLINE ANGEZEIGT WIRD:
WWW.GIOTECK.COM
amBiente
Contribuire a pre servar e l’ambiente ricicl ando la confezione i n carto ne del prodotto.
  
  
žIvotní prostředí
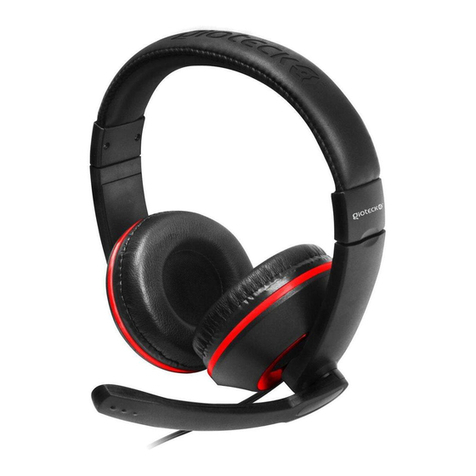
    
  
    

Other manuals for EX-05 Military Style

6

Other Gioteck Headset manuals

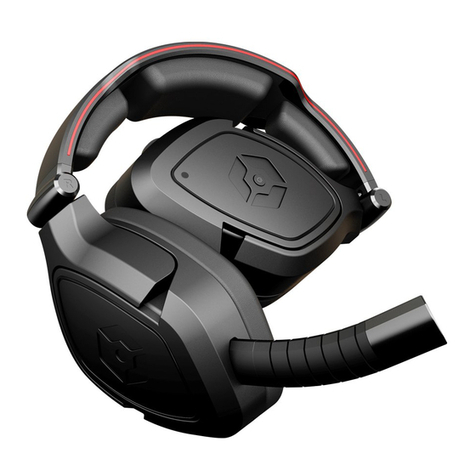
Gioteck EX1-RT User manual

Gioteck

Gioteck EX1-RT User manual

Gioteck E3RPS4-11 User manual

Gioteck

Gioteck E3RPS4-11 User manual

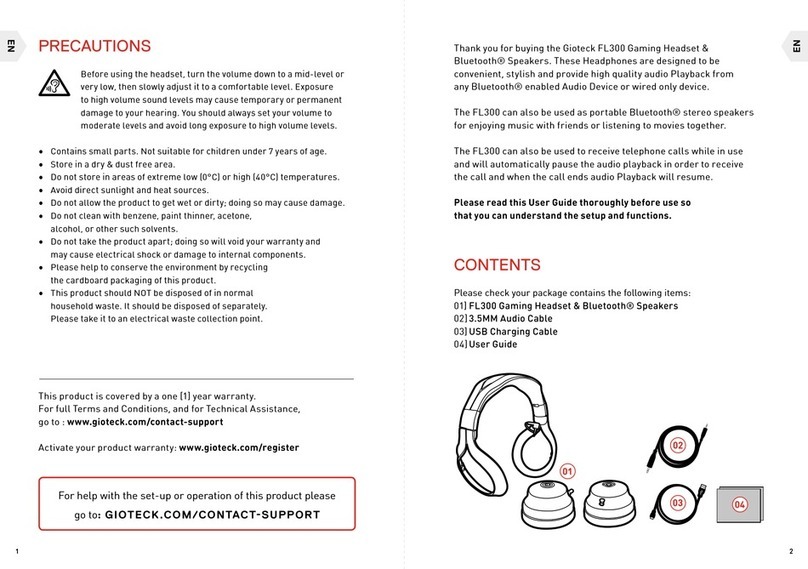
Gioteck FL300 User manual

Gioteck

Gioteck FL300 User manual

Gioteck EX-01 User manual

Gioteck

Gioteck EX-01 User manual

Gioteck EX-03 User manual

Gioteck

Gioteck EX-03 User manual

Gioteck EX-03 User manual

Gioteck

Gioteck EX-03 User manual

Gioteck EX-02s NEXT GEN Installation and operation manual

Gioteck

Gioteck EX-02s NEXT GEN Installation and operation manual

Gioteck EX-06 User manual

Gioteck

Gioteck EX-06 User manual

Gioteck FL400 User manual

Gioteck

Gioteck FL400 User manual

Gioteck TX-1 User manual

Gioteck

Gioteck TX-1 User manual

Gioteck EX-05 Military Style User manual

Gioteck

Gioteck EX-05 Military Style User manual

Gioteck EX-05S User manual

Gioteck

Gioteck EX-05S User manual

Gioteck EX-0S User manual

Gioteck

Gioteck EX-0S User manual

Gioteck HC3UNI User manual

Gioteck

Gioteck HC3UNI User manual

Gioteck FL400 User manual

Gioteck

Gioteck FL400 User manual

Gioteck EX-01 User manual

Gioteck

Gioteck EX-01 User manual

Gioteck XH-100 User manual

Gioteck

Gioteck XH-100 User manual

Gioteck FL200UNI-11-MU User manual

Gioteck

Gioteck FL200UNI-11-MU User manual

Gioteck EX-06 User manual

Gioteck

Gioteck EX-06 User manual

Gioteck EX-01 User manual

Gioteck

Gioteck EX-01 User manual

Gioteck EX-02 User manual

Gioteck

Gioteck EX-02 User manual

Gioteck FL300UNI-31-MU User manual

Gioteck

Gioteck FL300UNI-31-MU User manual

Gioteck HC-2 User manual

Gioteck

Gioteck HC-2 User manual

Gioteck EX-05 Military Style User manual

Gioteck

Gioteck EX-05 Military Style User manual

Popular Headset manuals by other brands

Philips SHM7405 Specifications

Philips

Philips SHM7405 Specifications

JPL JPL-502S-USB quick start guide

JPL

JPL JPL-502S-USB quick start guide

MySound BH-03 user manual

MySound

MySound BH-03 user manual

Sennheiser DECT headset quick guide

Sennheiser

Sennheiser DECT headset quick guide

Cobra CBTH4 Sport user manual

Cobra

Cobra CBTH4 Sport user manual

Sony DRBT160AS - Bluetooth Stereo Headset Specifications

Sony

Sony DRBT160AS - Bluetooth Stereo Headset Specifications

Auerswald comfortel Setup and quick guide

Auerswald

Auerswald comfortel Setup and quick guide

Beyerdynamic HS 200 Trend Features and specifications

Beyerdynamic

Beyerdynamic HS 200 Trend Features and specifications

Samsung HM1700 manual

Samsung

Samsung HM1700 manual

Advanced Wireless Communications ABH-400 user manual

Advanced Wireless Communications

Advanced Wireless Communications ABH-400 user manual

Logitech ClearChat Style quick start guide

Logitech

Logitech ClearChat Style quick start guide

Bluedio T-WH 3RD Generation user manual

Bluedio

Bluedio T-WH 3RD Generation user manual

Jabra PRO 925 user manual

Jabra

Jabra PRO 925 user manual

Plantronics M140 - QUICK START GUIDES quick start guide

Plantronics

Plantronics M140 - QUICK START GUIDES quick start guide

AT&T TL7600 user manual

AT&T

AT&T TL7600 user manual

Asus REPUBLIC OF GAMES ROG STRIX FUSION WIRELESS quick start guide

Asus

Asus REPUBLIC OF GAMES ROG STRIX FUSION WIRELESS quick start guide

Sony XBA-20iP operating instructions

Sony

Sony XBA-20iP operating instructions

Jabra GN 9050 user manual

Jabra

Jabra GN 9050 user manual

manuals.online logo
manuals.online logoBrands
  • About & Mission
  • Contact us
  • Privacy Policy
  • Terms and Conditions

Copyright 2025 Manuals.Online. All Rights Reserved.