INTRODUCTION
Congratulations on purchasing your Gizmo GZ1 touring car! The GZ1 car was designed in Denmark and produced by Gizmo Racing
registered in Denmark. The Gizmo GZ1 car utilizes many unique features and newly developed innovations.
Before you start
The Gizmo GZ1 is a high end, high quality, and innovative 1 /10th scale touring car. The car should be built only by persons who have
experience with building R/C model racing cars. This is not a toy and is not intended for use by children without supervision of a
responsible, knowledgeable adult. The instruction manual must be read carefully and understand to the fullest before beginning
assembly. If you have any problems or questions, do not hesitate to
contact Gizmo Racing Team at
[email protected].
The Gz1 kit is a radio controlled model racing product and could cause harm and personal injury. The GZ1 car is designed for use on
R/C race tracks and should not be used in general public areas. Gizmo Racing ApS accept no responsibility for any injuries caused by
making or using this kit.
Due to policy of continues product development, the exact specifications of the kit may vary.
Gizmo Racing ApS reserve all the right to change any specifications without prior notifications. All rights reserved.
ASSEMBLY NOTES
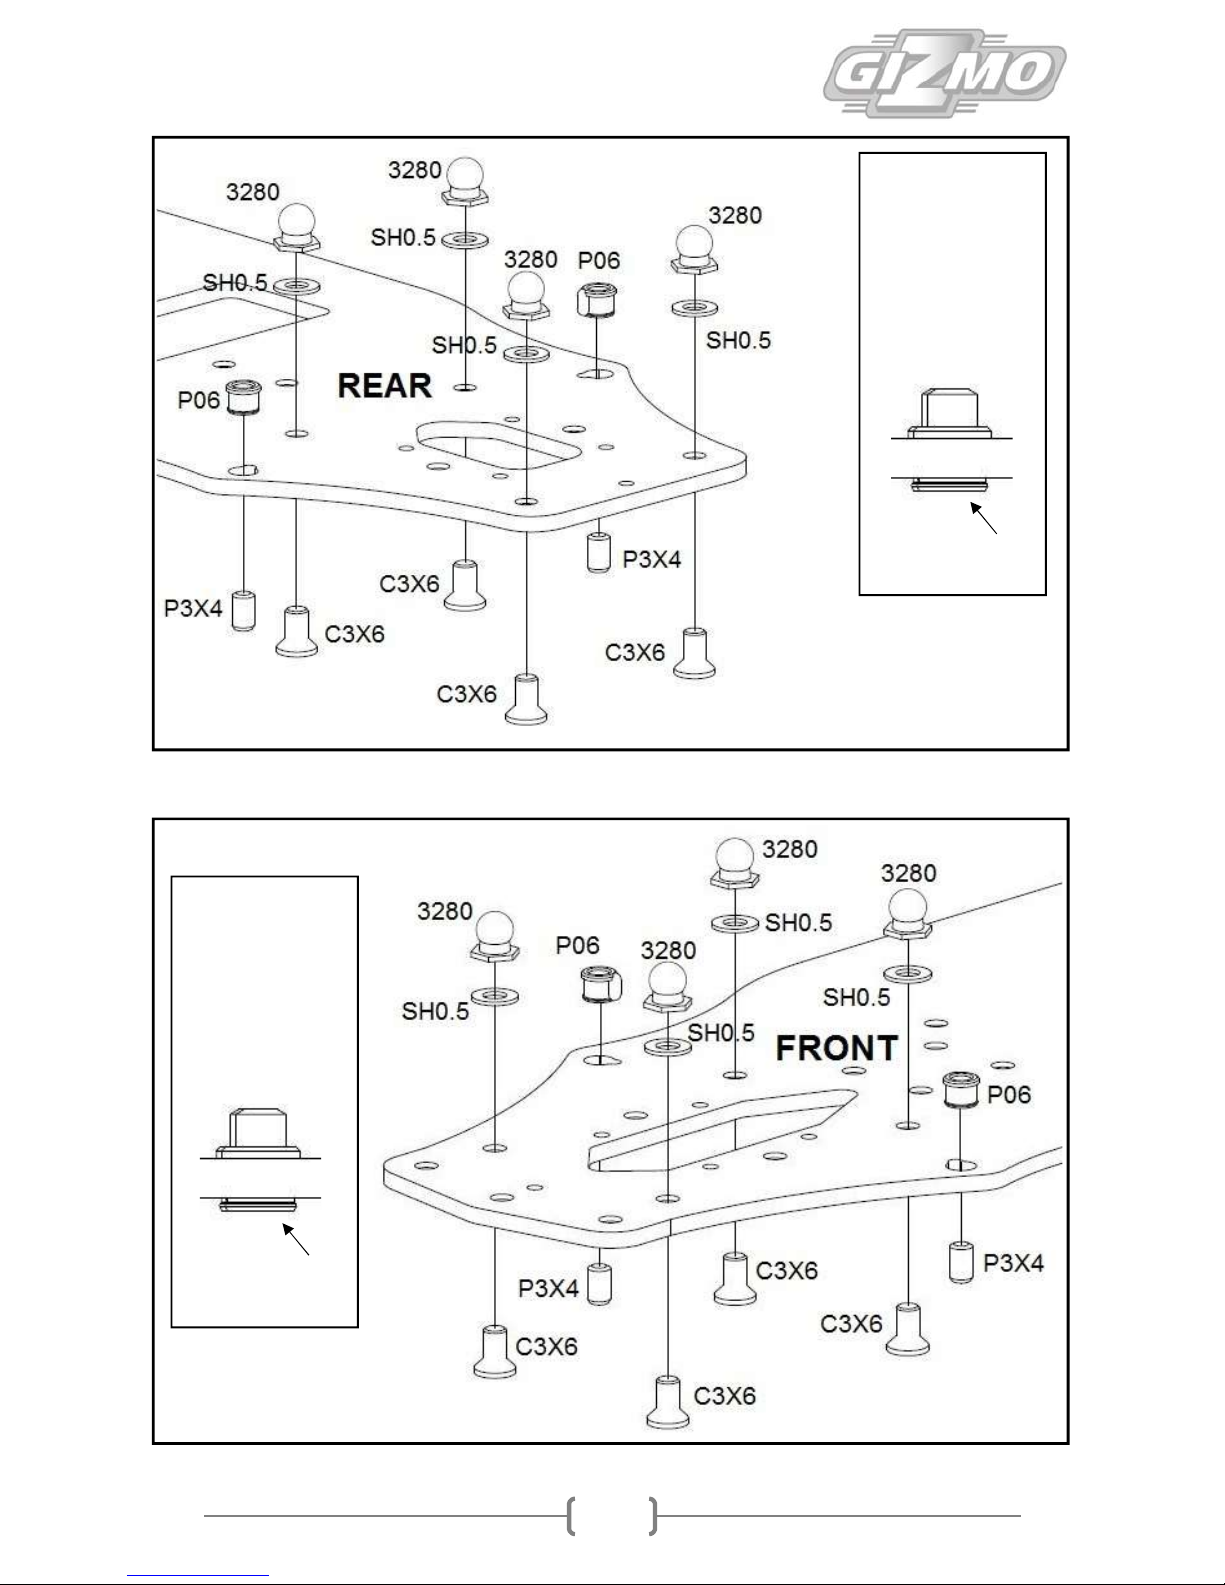
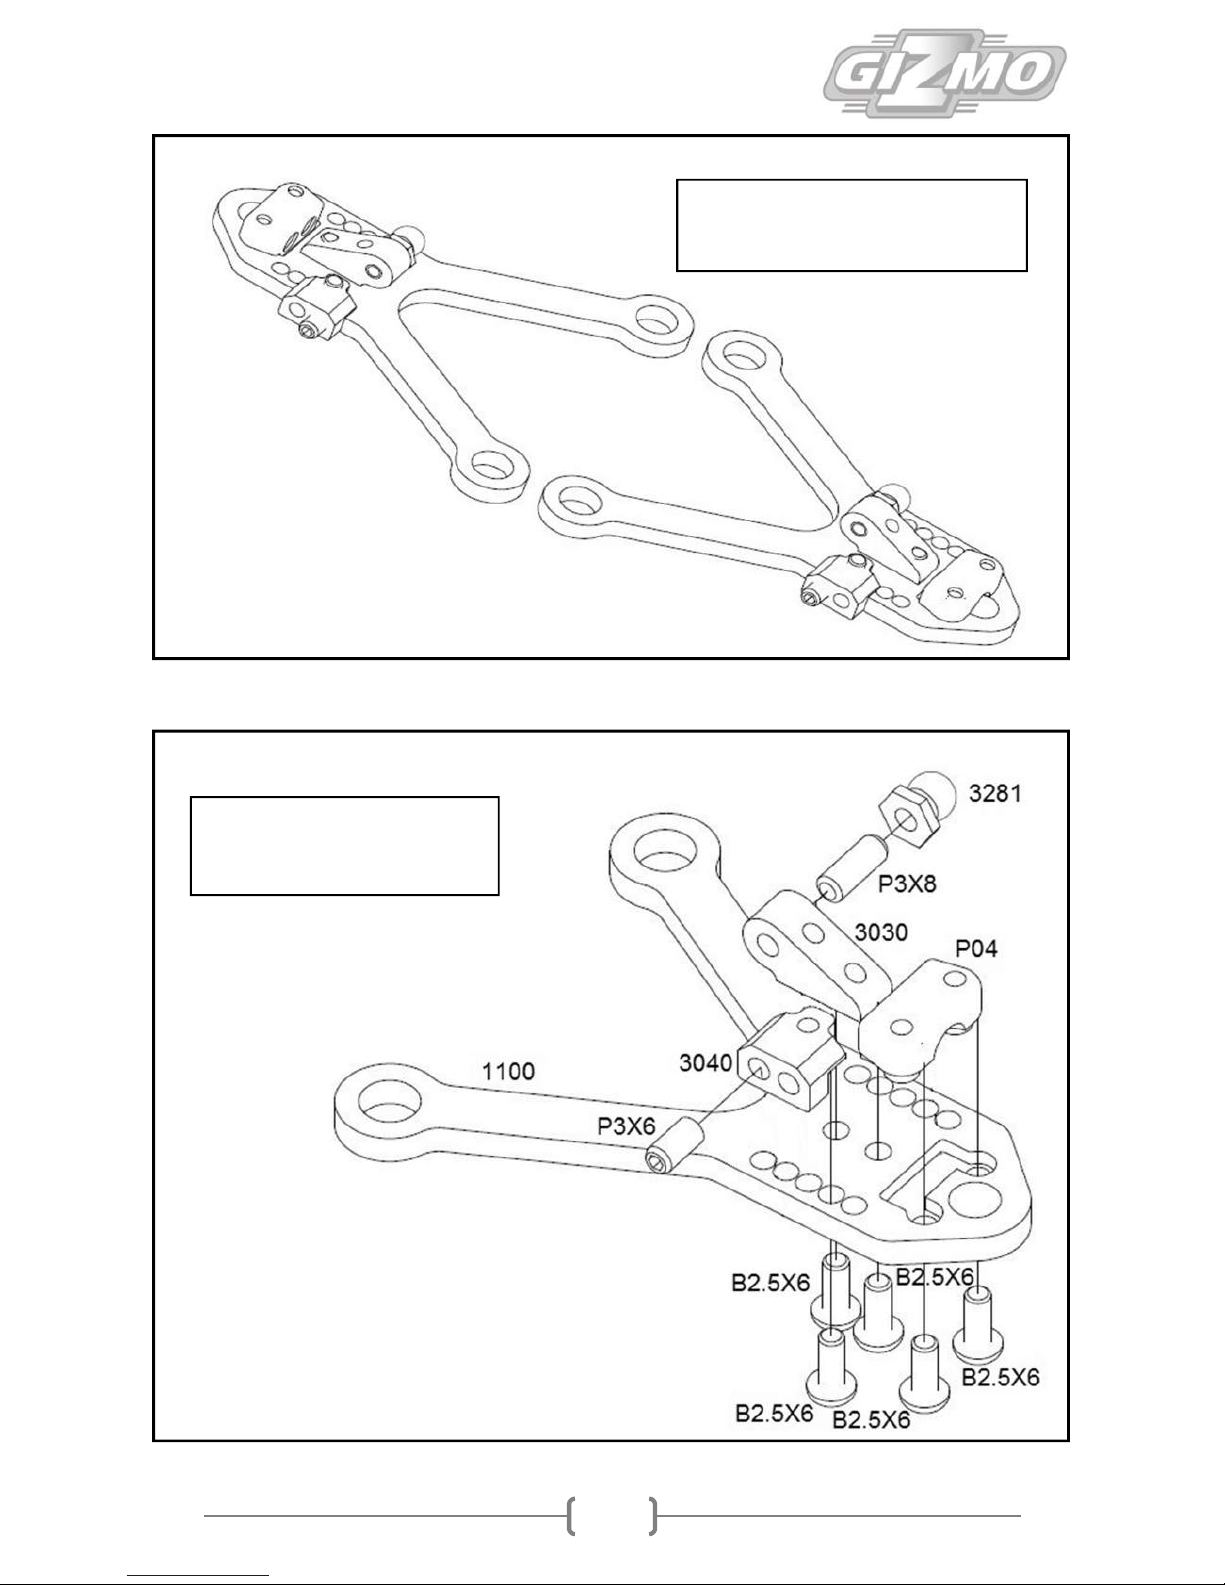
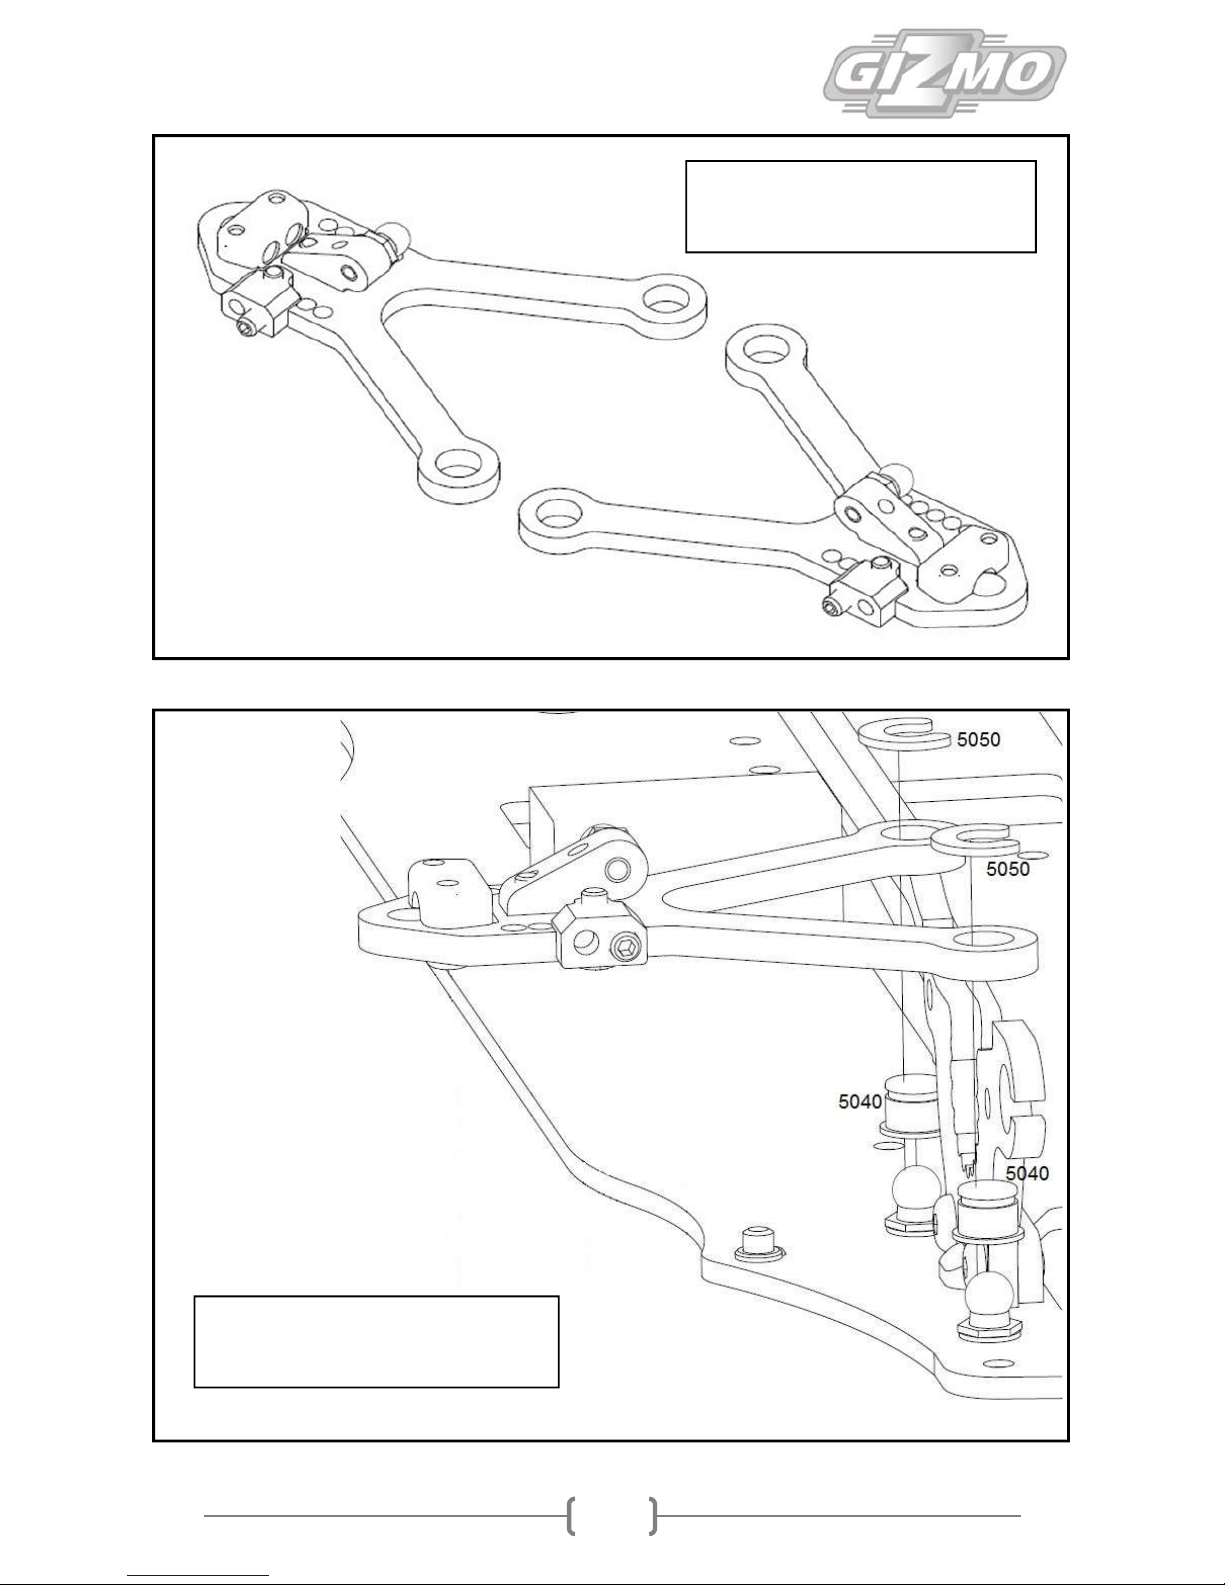
Before starting assembly of each build stage, check that you have the right quantity and size of items for the build stage. To assist
you with the assembly of your Gizmo GZ1, we have included full size images of all the hardware parts in the manual.
The Gizmo GZ1 Manual and setup sheet is available on Gizmo’s webpage: www.gizmoracing.com/support
General precautions
Many of the items in this kit are small enough to accidentally swallow and therefore potential choking hazards, making
them potentially fatal. Please ensure that when assembling the kit, you do so out of reach of small/young children.
Take care when assembling the kit, as some of the parts have sharp edges.
Please read this manual carefully to understand which ancillary items are used with this kit.
Gizmo Racing ApS accept no responsibility for the operation of such ancillary items.
Exercise care when using tools and sharp instruments.
Follow the instructions for the radio equipment at all times.
Never touch rotating parts of the car as this may cause injury.
Keep wheels of the model off the ground when checking operation of the radio equipment.
To prevent any serious personal injury and/or damage to property, please be responsible when operating all remote
controlled models.
The Gizmo GZ1 model car is not intended for use on roads or areas where its operation can conflict with or disrupt
pedestrians of vehicle traffic.
Do not run the car in poor light or if it goes out of sight. Any impairment to your vision may result in damage to your car or
injury others of their property.
As a radio controlled device, such as your car, is subject to radio interference from things beyond your control. Any such
interference may cause in loss of control of your car. Please consider this possibility at all times.
When not using your RC model, always disconnect and remove battery.
Insulate any exposed electrical wiring to prevent short circuits.
Take maximum care in wiring, connecting and insulating cables. Make sure cables are always connected securely.
Check connections for if they become loose and if so, reconnect them securely. Never use RC models with damaged wires.
A damaged wire is extremely dangerous and can course short circuits resulting in fire.
EQUIPTMENT RECOMMENDE (NOT INCLUDED) TOOLS RECOMMENDED (NOT INCLUDED)
Radio Transmitter
Radio Receiver
Electronic Speed Control
Steering Servo
Electric Motor
Pinion Gear (64 or 48 pitch)
7,4 V Li-Po Battery
190mm Body Shell
Touring Car Wheels, Tires, Inserts
1.5mm, 2mm Hex Driver
2mm Ball End Hex Driver
5,5mm, 7mm, 9mm, 10mm, 12mm Wrench
2.5mm Flat Head Screwdriver
Callipers
Hobby Knife
Camber Gauge
Ride Height Gauge
Thin CA Glue
Tread Lock
Joint Grease