Glacier Ridgeline SR User manual

Ridgeline SRTablet PC
User Manual

i
Preface
About This Manual
This manual explains how to install, operate and maintain the Ridgeline
SR Tablet PC.
No part of this publication may be reproduced or used in any form, or by
any electrical or mechanical means, without permission in writing from
the manufacturer. This includes electronic or mechanical means, such
as photocopying, recording, or information storage and retrieval sys-
tems. The material in this manual is subject to change without notice.
Microsoft and Windows are either registered trademarks or trademarks
of Microsoft Corporation. Other product names mentioned in this man-
ual may be trademarks or registered trademarks of their respective
companies and are hereby acknowledged.
Regulatory Compliance Statements
FCC Statement
FCC Caution: To assure continued compliance, any changes or modifi-
cations not expressly approved by the party responsible for compli-
ance could void the user's authority to operate this equipment.
(Example - use only shielded interface cables when connecting to
computer or peripheral devices).
FCC Radiation Exposure Statement
This equipment complies with FCC RF radiation exposure limits set
forth for an uncontrolled environment. This equipment should be
installed and operated with a minimum distance of 20 centimeters
between the radiator and your body.
This device complies with Part 15 of the FCC Rules. Operation is sub-
ject to the following two conditions:
(1) This device may not cause harmful interference, and (2) This device must
accept any interference received, including interference that may cause undes-
ired operation.
This transmitter must not be co-located or operating in conjunction with
any other antenna or transmitter.

ii
The antennas used for this transmitter must be installed to provide a
separation distance of at least 20 cm from all persons and must not be
co-located or operating in conjunction with any other antenna or trans-
mitter.
Federal Communications Commission Notice
This equipment has been tested and found to comply with the limits for
a Class B digital device, pursuant to Part 15 of the FCC Rules. These
limits are designed to provide reasonable protection against harmful
interference in a residential installation.
This equipment generates, uses, and can radiate radio frequency
energy. If this equipment does cause harmful interference to radio or
television reception, which can be determined by turning the equip-
ment off and on, the user is encouraged to try and correct the interfer-
ence by one or more of the following measures:
• Reorient or relocate the receiving antenna.
• Increase the distance between the equipment and the
receiver.
• Connect the equipment to an outlet on a circuit different from
that to which the receiver is connected.
• Consult the dealer or an experienced radio/TV technician for
help.
Canada-Industry Canada (IC)
The wireless radio of this device complies with RSS 139 & RSS 210
Industry Canada. This Class B digital apparatus complies with Cana-
dian ICES-003.
Cet appareil numérique de la classe B conforme á la norme NMB-003
du Canada.
Europe-European Union Notice
Radio products with the CE alert marking comply with the R&TTE
Directive (1999/5/EC) issued by the Commission of the European
Community. Compliance with this directive implies conformity to the
following European Norms (in brackets are the equivalent international
standards).
• EN 60950-1 (IEC60950-1) - Product Safety
• EN 300 328 Technical requirement for radio equipment
• ETS 301 489 General EMC requirements for radio equipment.
Products that contain the radio transmitter are labeled with CE alert
marking and may also carry the CE logo.

iii
Safety
Use the following safety guidelines to help protect yourself and the
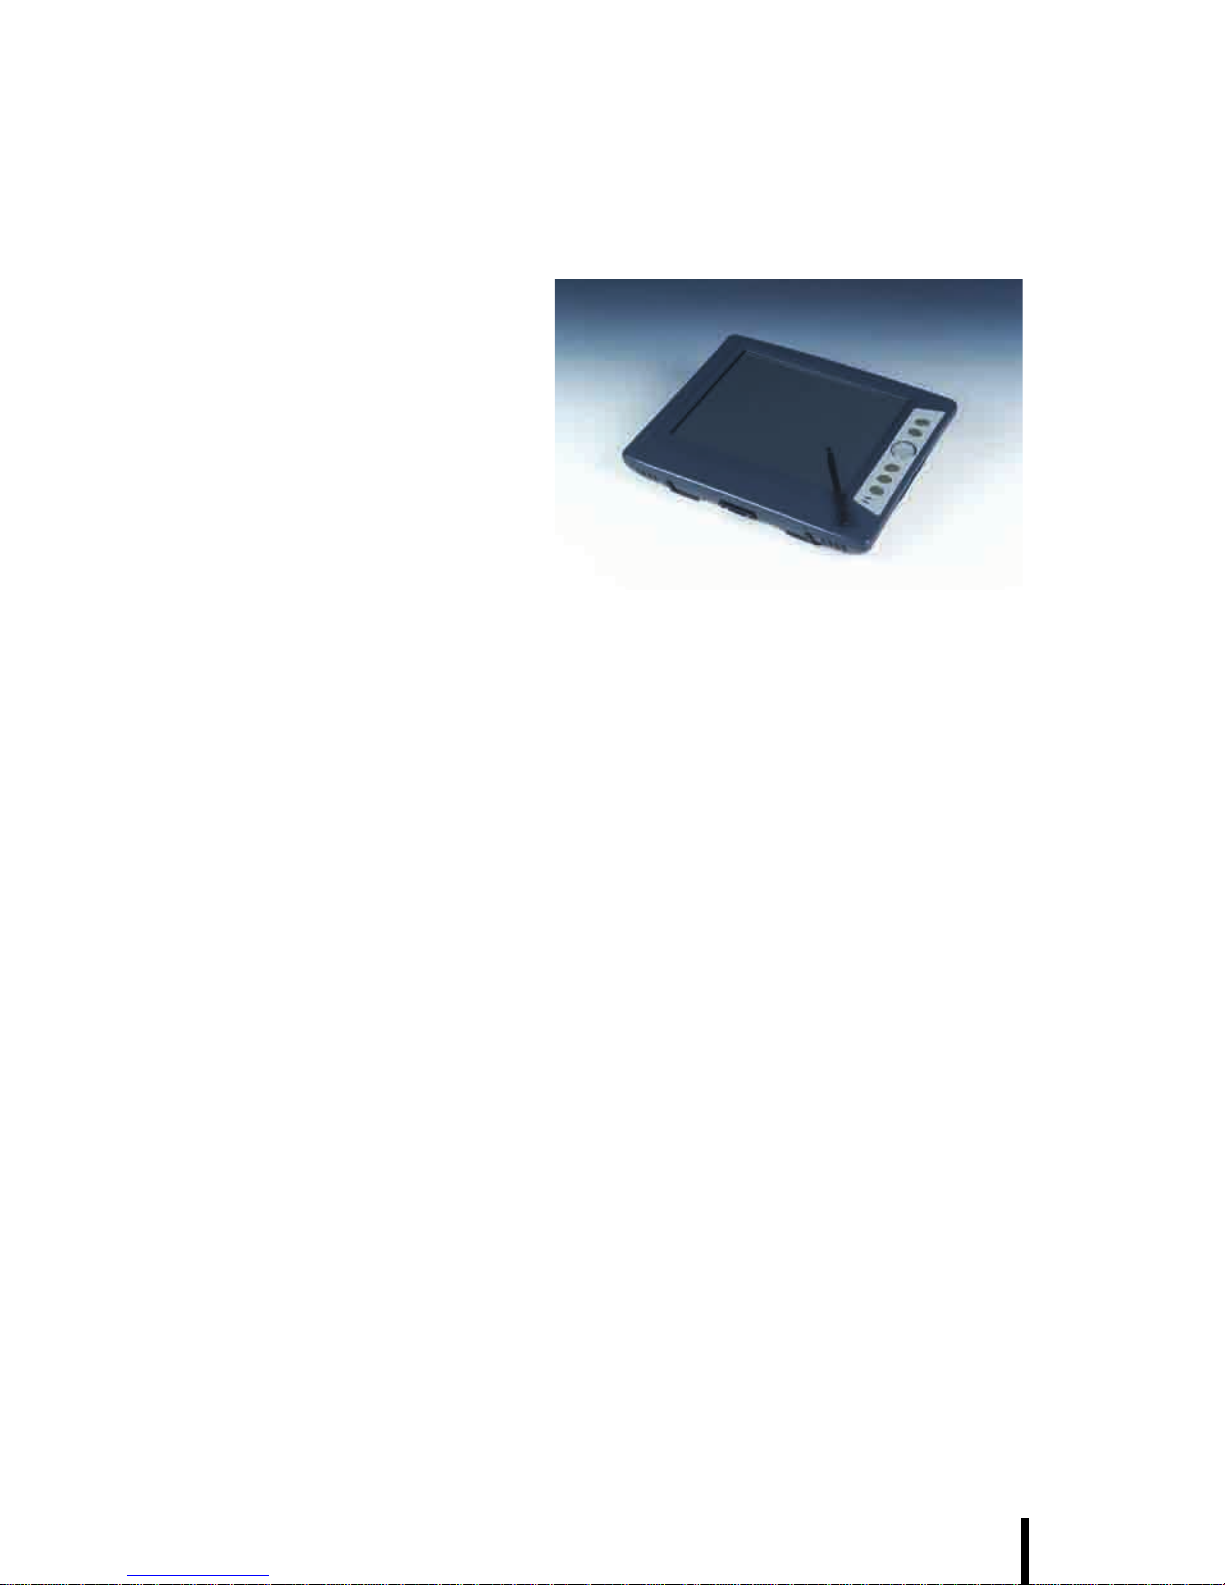
Ridgeline SR.
• Do not attempt to service the Ridgeline SR yourself. Always follow
installation instructions closely.
• Be sure that nothing rests on the AC adapter's power cable
and that the cable is not located where it can be tripped over or
stepped on.
• Do not cover the AC adapter with papers or other items that
will reduce cooling; also, do not use the AC adapter while it is
inside a carrying case.
• Use only the AC adapter, power cord, and batteries that are
approved for use with this Ridgeline SR. Use of another type of
battery or AC adapter may cause risk of fire or explosion.
• If you use an extension cable with the AC adapter, ensure that
the total ampere rating of the products plugged in to the exten-
sion cable does not exceed the ampere rating of the extension
cable.
• When you move the Ridgeline SR between environments with very
different temperature and/or humidity ranges, condensation
may form on or within the Ridgeline SR. To avoid damaging the
Ridgeline SR, allow sufficient time for the moisture to evaporate
before using the Ridgeline SR.
• When you disconnect a cable, pull on its connector or on its
strain relief loop, not on the cable itself. As you pull out the
connector, keep it evenly aligned to avoid bending any con-
nector pins. Also, before you connect a cable make sure both
connectors are correctly oriented and aligned.
RTC Battery/Battery Safety
• There is a risk of explosion if the battery is replaced by an
incorrect type.
• Dispose of used batteries according to the manufacturer's
instructions.
• Do not dispose of batteries in a fire. They may explode. Check
with local authorities for disposal instructions.
CAUTION! The battery used in this device may present a risk
of fire or chemical burn if mistreated. Do no disassemble, heat
above 60 degree C, or incinerate. Replace battery with ACA-
digital P/N: 46-12423-040 only. Use of another battery may
present a risk of fire or explosion.

iv
Battery Charge Notice
It is important to consider the environment temperature whenever you
are charging the Lithium-Ion battery pack. The process is most efficient
at normal room temperature or slightly cooler. It is essential that you
charge batteries within the stated range of 0°C to 50°C. Charging bat-
teries outside of the specified range could damage the batteries and
shorten their charging life cycle.
Storage and Safety Notice
Although charged Lithium-Ion batteries may be left unused for several
months, their capacity may be depleted due to build up of internal
resistance. If this happens they will require recharging prior to use.
Lithium-Ion batteries may be stored at temperatures between-20°C to
50°C, however they may be depleted more rapidly at the high end of
this range. It is recommended to store batteries within normal room
temperature ranges.

v
Table of Contents
Preface
About This Manual .................................................................... i
Regulatory Compliance Statements ........................................ i
FCC Statement................................................................... i
FCC Radiation Exposure Statement .................................... i
Federal Communications Commission Notice...................... ii
Canada-Industry Canada (IC) ........................................... ii
Europe-European Union Notice......................................... ii
Safety .........................................................................................iii
RTC Battery/Battery Safety............................................... iii
Battery Charge Notice...................................................... iv
Storage and Safety Notice................................................ iv
Chapter 1
Introducing the Ridgeline SR 1
Features .....................................................................................2
Package Contents ....................................................................3
A Tour of the Ridgeline SR ......................................................4
Front View ......................................................................... 4
Left and Right View ........................................................... 6
Top View............................................................................ 8
Back View.......................................................................... 9
About the Cradle.............................................................. 10
Chapter 2
Getting Started 11
Installing the Battery........................................................ 11
Charging the Battery........................................................ 13
Charging the Battery Using the AC Adapter....................... 13
Charging the Battery with the Docking Station ................... 14
Checking the Battery Status............................................. 15
Turning the Ridgeline SR on for the First Time................ 15
Powering On.................................................................. 15
Setting up Windows XP................................................... 16
Calibrating the Ridgeline SR Screen ................................. 19
Setting the Time and Date .....................................................20
Adjusting the Volume and Brightness .................................21

Table of Contents
vi
Chapter 3
Using the Hardware 22
Using the Stand ......................................................................22
Navigation and Function Buttons .........................................23
Setting Function Button Assignments.............................. 24
Entering Alphanumeric Characters ......................................25
Entering Characters with the Keypad.............................. 25
Using the Stylus .....................................................................26
Inserting an SD Memory Card ...............................................27
Removing a Storage Card............................................... 27
Connecting Devices to the Ridgeline SR...............................28
Opening the Port Covers................................................. 28
Connecting USB.............................................................. 28
Connecting a Serial Device............................................. 29
Connecting an External Monitor...................................... 29
Connecting LAN .............................................................. 30
Connecting Headphones and a Microphone................... 30
Connecting to the Cradle................................................. 31
Connecting Power .......................................................... 31
Connecting USB............................................................. 31
Chapter 4
Getting Connected 32
Bluetooth Connection...................................................... 32
WiFi Connection............................................................. 35
Chapter 5
Advance Settings 38
Checking the Battery Status ..................................................38
Extending Battery Life ...........................................................39
Changing the Automatic Power Settings......................... 39
Appendix A
System Specifications 41
Appendix B
Maintenance 43
Maintaining the Battery Pack........................................... 43
Maintaining your LCD Display......................................... 43
Cleaning the Ridgeline SR............................................... 43
CF Recovery Procedure.................................................. 44
Recovering from a System Crash.................................... 46

1
Chapter 1
Introducing the Ridgeline SR
Thank you for purchasing
the Ridgeline SR Tablet. The
durable Ridgeline SR is made for
heavy duty use in industrial
applications. The high per-
formance processor incorpo-
rates an additionally graphic
controller to provide speed
and efficiency in the field,
while using minimal power to
extend battery life.
The Ridgeline SR I/O ports provide ample connectivity, with two USB ports,
an RS-232 serial port, a VGA port, microphone and headphone jacks,
SD slot, and an RJ-45 jack for LAN. The Ridgeline SR supports 802.11a/b/g
WLAN.
The Ridgeline SR uses the Windows XP operating system. Five program-
mable function buttons and a navigation pad make it easy to interact
with the operating system, and a software keyboard enables users to
enter and edit text.
To reduce TCO and enhance industrial applications, the Ridgeline SR is
sealed to meet IP53 standards and has undergone multiple 3-foot drop
tests to prevent downtime.

Chapter 1 — Introducing the Ridgeline SR
2
Features
Powerful system
• Microsoft Windows XP
Embedded/Windows XP Pro
Embedded
• AMD Geode™ LX800
500 MHz
• AMD Geode™ CS5536
companion chip
System memory
• 1 DDR400 SODIMM 512MB
Display
•SVGA Model
10.4-inch TFT LCD
(800 x 600)
•XGA Model
10.4-inch TFT LCD
(1024 x 768) (optional)
• 4-wire resistive touch panel
Communication
• Built-in Wireless 802.11a/b/g
module (mini-PCI interface)
with internal antenna
• Bluetooth class 2, v2.0+EDR
built-in with internal antenna
Storage
• 2GB CF card
• 1.8-inch HDD 30GB
(optional)
Audio
• Built-in microphone
• Built-in speaker
• External microphone
connector
• External headset connector
Expansion slot
•SD
Battery life
• Normal usage: 3 hours
• Charging time: 2 hours
User-friendly interface
• User configurable function
buttons
• Navigation keys

Chapter 1 — Introducing the Ridgeline SR
3
Package Contents
After opening the box, ensure the following accessories for the Ridgeline SR
are present:
Terminal Cradle
AC adapter and power cord Stylus Battery

Chapter 1 — Introducing the Ridgeline SR
4
A Tour of the Ridgeline SR
The following sections describe the main components and features of
the Ridgeline SR.
Front View
Navigation padDisplay
Function
buttons
Status
LEDs
Internal
microphone

Chapter 1 — Introducing the Ridgeline SR
5
Component Description
Display Displays the applications and data stored
on your device. It is touch-sensitive and
responds to the stylus or finger.
Navigation key Press this key to navigate in the Ridgeline
SR interface.
Function buttons Interface for controlling the Ridgeline SR.
See Navigation and Function Buttons on
page 23. for more information.
Status LEDs Indicates the battery charging power
status.
Wireless LAN LED (top)
•Off: WLAN Disabled/ No HDD Access
•Solid green: WLAN Activated / Trans-
mission in progress
•Blinking orange: accessing HDD
Power LED (bottom)
•Off: power is off.
•Solid green: battery is fully charged or
good (30%~100%) in power on mode.
In power off mode, battery is charging
when AC is connected.
•Blinking green: AC power is con-
nected and battery is charging.
•Solid orange: power is on, battery is
low (30%).
•Blinking orange: power is on, battery
charge is very low (10%). The Ridgeline
SR will auto-suspend at 3% battery
charge.
Cradle connector Connects to the cradle to expand the I/O
ports.
Note: The cradle connector is protected
by a rubber cover.
Microphone Enables you to record voice audio.

Chapter 1 — Introducing the Ridgeline SR
6
Left and Right View
RJ-45 LAN
port
DC-in jack
USB ports
RS-232 port
VGA port
Headphone
Microphone
Docking/cradle
connector

Chapter 1 — Introducing the Ridgeline SR
7
Component Description
RJ-45 connector Connect this jack to the LAN.
USB ports Connect USB type A connectors to these
ports.
DC-in jack Connect the AC adapter to this jack to
supply power to the pad and charge the
Ridgeline SR battery.
RS232 port Connect a serial connector to this port for
serial communications.
VGA Connect an external monitor to this port.
Headphone jack Connects to audio line-out devices
(earphones or headphones) for use in
noisy environments.
Microphone jack Enables you to record voice audio with an
external microphone.
Docking/Cradle
connector Connects the Ridgeline SR to cradle,
enabling you to charge the battery and
connect USB devices.

Chapter 1 — Introducing the Ridgeline SR
8
Top View
Component Description
Power Switch Slide this switch to turn the Ridgeline SR
on and off.
SD Card slot Accommodates Secure Digital memory
cards. See Inserting an SD Memory Card
on page 27.
Stylus Enables you to interact with the operating
system.
Remove the stylus from the holder and
use it the same way you would use a pen.
SD card slot
Stylus
Power switch

Chapter 1 — Introducing the Ridgeline SR
9
Back View
Component Description
Speakers Enables you to hear audio from the
Stand Adjust this stand to provide the best
viewing angle.
Battery compartment Houses the removable and rechargeable
battery pack. See Installing the Battery on
page 11.
Speakers
Battery
compartment
Stand

Chapter 1 — Introducing the Ridgeline SR
10
About the Cradle
Component Description
USB type A ports
(host) Connect a USB type A connector to these
ports.
DC-in jack Connect the AC adapter to this jack to
supply power to the cradle and charge the
Ridgeline SR battery.
Cradle connector Insert the Ridgeline SR to this connector to
charge the battery and connect USB
devices.
DC-in
USB Type A Cradle connector

11
Chapter 2
Getting Started
This chapter explains how to install and charge the battery, how to
check battery status, how to turn on the Ridgeline SR, and how to calibrate
the screen.
Installing the Battery
This section explains how to install the battery.
WARNING!There is a risk of fire and burns if the battery pack
is handled improperly. DO NOT disassemble, crush, puncture,
short external contacts, or dispose the battery pack in fire or
water. DO NOT attempt to open or service the battery pack.
Dispose of used batteries according to local recycling guide-
lines in your area.
CAUTION! The battery used in this device may present a risk
of fire or chemical burn if mistreated. Do no disassemble, heat
above 60°C, or incinerate. Replace battery with ACA-digital P/
N: 46-12423-040 only. Use of another battery may present a
risk of fire or explosion.

Chapter 1 — Introducing the Ridgeline SR
9
Back View
Component Description
Speakers Enables you to hear audio.
Stand Adjust this stand to provide the best
viewing angle.
Battery compartment Houses the removable and rechargeable
battery pack. See Installing the Battery on
page 11.
Speakers
Battery
compartment
Stand

Chapter 2 — Getting Started
13
5. Replace the battery compartment cover.
Charging the Battery
Before using the Ridgeline SR for the first time, you need to charge it for
about 2 hours. Charge the Ridgeline SR using the AC adapter or the dock-
ing station.
Charging the Battery Using the AC Adapter
1. Plug the AC adapter cable into the power jack on the Ridgeline SR
(A).
2. Plug the power cable connector into the AC adapter (B)
3. Plug the AC adapter into an electrical outlet (C).
Contacts
A
BC
Table of contents
Other Glacier Tablet manuals