GME 7520002 User manual

XRS-BT1
XRS™CONNECT BLUETOOTH® INTERFACE MODULE & WIRELESS PTT
INSTRUCTION MANUAL
THIS PRODUCT CONTAINS
BUTTON/COIN CELL BATTERIES
WARNINGWARNING

XRS-BT1
2
CONTENTS
INTRODUCTION.......................................................................................4
FEATURES...............................................................................................4
INSTALLATION ........................................................................................5
WIRELESS PTT RANGE...............................................................................5
WIRELESS PTT MOUNTING ........................................................................5
INSTALLING THE REMOTE MICROPHONE ..................................................6
INSTALLING THE BLUETOOTH INTERFACE MODULE .................................7
FRONT AND BACK VIEWS ..........................................................................7
INTERFACE MODULE..................................................................................8
XRS-PTT STEERING WHEEL CLAMP MOUNT.............................................8
XRS-PTT DASH MOUNT............................................................................11
BATTERY CHANGE....................................................................................12
INSTALLATION TROUBLESHOOTING.........................................................16
PAIRING ...............................................................................................16
HOW TO UTILISE WIRELESS PTT BUTTON...............................................16
PAIRING BLUETOOTH AUDIO ...................................................................17
XRS™ CONNECT APP ............................................................................17
UPGRADING INTERFACE MODULE USING XRS CONNECT APP ...............17
XRS™ CONNECT APP ...............................................................................19
PAIRING WITH XRS CONNECT APP ..........................................................19

XRS-BT1 3
IMPORTANT NOTICE
Before proceeding, ensure that both your XRS Radio and XRS BT1 are updated
to the latest version. For detailed instructions on how to upgrade, please refer
to the section:
UPGRADING INTERFACE MODULE USING XRS CONNECT APP - Page 16.
Failure to update may result in suboptimal performance or compatibility issues.
GENERAL OPERATION...........................................................................20
RADIO MENU OPTIONS ............................................................................20
RADIO MENU TABLE (WITH INTERFACE MODULE CONNECTED).............21
AUDIO SOURCE OPTIONS TABLE..............................................................24
MICROPHONE GAIN..................................................................................24
SPECIFICATIONS....................................................................................25
ELECTRICAL SPECIFICATIONS ..................................................................25
MECHANICAL SPECIFICATIONS ................................................................26
COMPLIANCE ...........................................................................................26
WARRANTY ..........................................................................................27
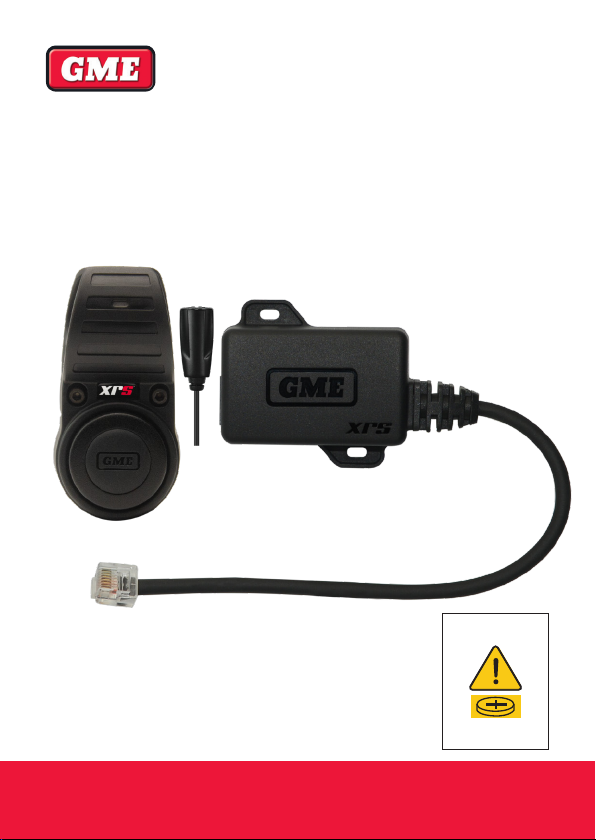
WARNING
THIS PRODUCT CONTAINS A
BUTTON BATTERY.
If swallowed, a lithium button battery can cause
severe or fatal injuries within 2 hours.
Keep batteries out of reach of children.
If you think batteries may have been swallowed
or placed inside any part of the body, seek
immediate medical attention.
Consumer goods with accompanying instructions
If the consumer goods are accompanied by
instructions, the instructions must include a warning
about the battery that is clearly visible, prominent and
legible and includes the substance of all the matters
covered by subsection (7).

XRS-BT1
4
INTRODUCTION
The XRS-BT1 is an interface module providing full Bluetooth® audio connectivity
and wireless PTT (Push-to-Talk) functionality to the full range of XRS™Connect
UHF CB Radios.
Bluetooth® audio connectivity allows the XRS-BT1 to wirelessly connect to an
extensive range of third-party audio accessories plus compatible vehicle audio
systems, providing users with new and improved ways to stay connected.
An external remote microphone is also included for mounting in your vehicle
allowing eective hands-free communications while driving.
The adjustable steering wheel clamp provides a simple mounting solution for the
IP67 wireless PTT button and also provides access to the battery without the need
to remove the clamp from the steering wheel.
FEATURES
KEY FEATURES
• Bluetooth® Wireless Technology – Audio and Data
• Connect to Compatible Bluetooth® Devices Including Vehicle Audio
• Wireless Push-to-Talk
• Adjustable Steering Wheel Clamp
• IP67 Ingress Protection (XRS-PTT)
• Wired Push-To-Talk Input
IN THE BOX
• Bluetooth® Interface Module + two mounting screws
• Wireless PTT and Steering Wheel Clamp (XRS-PTT)
• Pillar Mount Microphone (MC014)
• PTT Dash Mount Kit
• 2mm Silicone Sleeve

XRS-BT1 5
INSTALLATION
WIRELESS PTT RANGE
The Wireless PTT Button has a line-of-sight range of around 5 – 7 meters
depending on the installation. Range may be reduced slightly if the Interface
Module or the Wireless PTT Button is mounted close to metal surfaces. This
should not have any noticeable eect on most installations, however, if mounting
the remote unit in a bus, motor home or other similar sized vehicle please be
aware of the range performance when planning your installation.
WIRELESS PTT MOUNTING
STEERING WHEEL MOUNT
The steering wheel mount clamps onto the steering wheel in a position where the
XRS-PTT can be easily reached without distraction while driving. Place the XRS-PTT
into the top clamp, then screw the clamp mount cover. Place the top clamp on the
steering wheel at the preferred location and t the bottom clamp. Secure with the
two screws provided.Refer to Page 8 for details.
WARNING: To avoid personal injury, DO NOT install the remote control on any
surface associated with your vehicle’s airbag.
WIRELESS PTT AND STEERING WHEEL MOUNT

XRS-BT1
6
PANEL/DASH MOUNT
The Wireless PTT Button can also be mounted onto a at surface using the
supplied dash mount kit. Mount the Wireless PTT Button in a location that is
easy to reach without distraction while driving. NOTE - installing onto a metallic
surface will reduce the signal range. Refer to Page 11 for details.
WARNING: To avoid personal injury, DO NOT install the remote control on any
surface associated with your vehicle’s airbag.
INSTALLING THE REMOTE MICROPHONE
The external remote microphone should be installed in a location close to your
driving position that will allow it to easily pick up your voice while driving.
Suggested areas are the driver’s side door pillar, sun visor or roof mounted centre
console. Once installed, run the cable to your interface module and plug it into the
3.5mm microphone socket.
Note: Installing the external remote microphone is optional. The radio can be
congured to use the original smart microphone (MC66x) with the Wireless
PTT Button for hands-free communications if preferred. See ‘RADIO MENU
OPTIONS’.
External remote microphone mounting suggestions

XRS-BT1 7
INSTALLING THE BLUETOOTH INTERFACE MODULE
MAIN WIRING AND CONNECTION
UHF antenna
Optional extension speaker
12V DC
Connector plug
Red+
Fuse
-Black
Coax cable
Microphone
Interface Module
External Microphone
Input
NOTE: The XRS-BT1 must
be connected directly to the
XRS™Connect radio as per the
above illustration.
FRONT AND BACK VIEWS
FRONT
3.5mm External Microphone Input
BACK
2.5mm Fixed PTT Input

XRS-BT1
8
INTERFACE MODULE
The user can choose to fasten the Interface Module with the provided Pan Head
Phillips Drive 3Gx8mm screws or with a maximum 4.5mm width zip ties.
XRS-PTT STEERING WHEEL CLAMP MOUNT
1. Use a 2.5mm Hex key to loosen the two bolts on Steering Wheel Clamp
Mount without removing it.
1.1 IF the steering wheel has small wheel cross section diameter OR has soft
grips then an additional 2.0mm spacer may be required.

XRS-BT1 9
2. Slide XRS-PTT onto steering wheel and adjust for preferred location/angle.

XRS-BT1
10
3. Use 2.5mm hex key to hand tighten (do not over torque or use a power
driver) two bolts to clamp down the mount. The mount is designed to t a
variety of steering wheel diameters as shown below:
NOTE: The XRS-PTT Steering Wheel Clamp is suitable for circular or elliptical
shape steering wheel cross-section shapes.
Maximum Diameter
Minimum Diameter

XRS-BT1 11
XRS-PTT DASH MOUNT
1. Remove adhesive lm from Hook Fastener Patch (one with the hole) onto the
bottom of the PTT. Ensure slots are unobstructed.
2. Remove adhesive lm from Loop Fastener Patch (one without the hole) onto
a at and clean surface. Ensure slots are unobstructed.

XRS-BT1
12
BATTERY CHANGE
3. Remove Clamp Mount Cap.
4. Remove PTT Button.

XRS-BT1 13
6. Use a 10c coin OR a Flat head screw drive (max size 1.2x6.5mm). Do not use
other tools as it might damage the slots.
For Flat Head screwdriver
(max 1.2 x 6.5mm) For 10 cent coin ONLY
7. Remove PCB. Ensure you are in a dust-free, water-free, and static free
environment to ensure no damage to exposed PCB.

XRS-BT1
14
8. Remove and Replace 3V CR2032 coin cell battery.
9. Place PCB with new coin cell into main housing. Use the orientation notch to
align pcb in correct position.

XRS-BT1 15
Note: These steps are important as it will ensure the unit is IP67 rated/waterproof
and that the switch has the correct tactile feel and engagement.
10. Ensure the RED O-Ring is positioned at onto the battery Lid.
11. Ensure lid is closed correctly and is tightened to the correct torque. The
O-Ring should not be visible when correctly tightened.

XRS-BT1
16
INSTALLATION TROUBLESHOOTING
• The XRS-PTT Tactile button is not engaging after installing a new battery:
o Refer to STEP 9 and onwards.
o If the PCB is not aligned properly then there will interference with the
button and the PCB.
o If the lid is not tightened properly then the button will not
engagement properly with the switch.
• Cannot open or close XRS-PTT battery lid:
o Refer to STEP 6.
o The coin cell battery is only accessible with a tool; a 10 cent coin or a
(max) 1.2x6.5mm Flat head screw driver.
• XRS-PTT Button is rattling in the steering wheel clamp:
o Ensure clamp cap is tighten.
PAIRING
HOW TO UTILISE WIRELESS PTT BUTTON
1. Turn the Bluetooth On for the MC66x.
2. Press on the MENU button from the MC66x.
3. Select the BLUETOOTH setting option from the MC66x menu
4. Select the VISIBLE DEVICES option and press and hold the XRS_PTT
button until you see XRS_PTT appear.
5. Click on the XRS_PTT and click on ‘Connect’.
6. Then go to the PAIRED DEVICES and the XRS_PTT should be visible.
a. In the same screen, next to the ‘XRS_PTT’, there should be an
asterisk (*) next to the name.

XRS-BT1 17
PAIRING BLUETOOTH AUDIO
1. Turn the Bluetooth On for the MC66x and the headset.
2. Press on the MENU button from the MC66x.
3. Select the BLUETOOTH setting option from the MC66x menu.
4. Check the VISIBLE DEVICES option to see the Bluetooth device name.
5. Click on the required Bluetooth device name and click on CONNECT.
6. Then go to the PAIRED DEVICES and the Bluetooth device name
should be visible.
a. In the same screen, next to the Bluetooth device name, there
should be an asterisk (*) next to the name as illustrated in the
below Figure 4 marked in red circle.
b. A Headset symbol should appear on the top right-hand side
of the MC66x main screen as illustrated in the below Figure 4
marked in red circle.
XRS™CONNECT APP
UPGRADING INTERFACE MODULE USING XRS CONNECT APP
For IOS users:
1. Ensure you have the latest update of the XRS Connect App which
could be found on the App Store.
2. Connect the Radio to the XRS Connect App following the pairing
procedures of the XRS Connect App.
3. Above the connected radio name, the following will appear: “XRS-BT1
rmware update available. Transfer now?”
4. Click on the “Start transfer” button, next to the above message.
5. A loading bar will appear with “Transferring” button.
6. After the transfer is complete, the radio should Automatically reboot
and re connect to the XRS Connect App.

XRS-BT1
18
UPGRADING INTERFACE MODULE USING XRS CONNECT APP
For IOS users:
1. Ensure you have the latest update of the XRS Connect App which could be found on the App
Store.
2. Connect the Radio to the XRS Connect App following the pairing procedures of the XRS
Connect App.
3. Above the connected radio name, the following will appear: “XRS-BT1 firmware update
available. Transfer now?”
4. Click on the “Start transfer” button, next to the above message.
5. A loading bar will appear with “Transferring” button.
6. After the transfer is complete, the radio should Automatically reboot and re connect to the
XRS Connect App.
For Android users:
1. Ensure you have the latest update of the XRS Connect App which could be found on the Play
Store.
2. Connect the Radio to the XRS Connect App following the pairing procedures of the XRS
Connect App.
3. Above the connected radio name, the following will appear: “A Firmware update is available
for your BT-1 module. This process will take several minutes to complete. Upgrade now?” it
will also display the current firmware version and the available firmware version.
4. Click on the “Proceed” button as shown below.
5. A loading bar will appear with “Start Transferring” button.
XRS™CONNECT APP
For Android users:
1. Ensure you have the latest update of the XRS Connect App which
could be found on the Play Store.
2. Connect the Radio to the XRS Connect App following the pairing
procedures of the XRS Connect App.
3. Above the connected radio name, the following will appear: “A
Firmware update is available for your BT-1 module. This process will
take several minutes to complete. Upgrade now?” it will also display
the current rmware version and the available rmware version.
4. Click on the “Proceed” button as shown below.
5. A loading bar will appear with “Start Transferring” button.
6. After the transfer is complete, the radio should Automatically reboot
and reconnect to the XRS Connect App.

XRS-BT1 19
To check the version of your device:
1. Press on the MENU key.
2. Go to Radio Settings option. Using the or keys.
3. Go to Versions.
4. Scroll using or keys to look for BT1 F/W where the new
update number would be displayed.
6. After the transfer is complete, the radio should Automatically reboot and re connect to the
XRS Connect App.
To check the version of your device:
1. Press on the MENU key.
2. Go to Radio Settings option. Using the V or ^ keys.
3. Go to Versions.
4. Scroll using V or ^ keys to look for BT1 F/W where the new update number would be
displayed.
XRS™CONNECT APP
The GME XRS™Connect app is the easy way to customise, update and maintain
your XRS™Connect radio. To download the free XRS™Connect app for iOS or
Android go to the App Store or Google Play and search for ‘XRS™Connect’.
PAIRING WITH XRS CONNECT APP
To pair your Smart Device with your XRS™Connect radio, open the XRS™Connect
app, select ‘Radios’ from the menu. Locate your radio in the list and press. If a
previously paired radio is found it will automatically connect. Your Smart Device
will now pair with your radio and the icon on your radio will change to to
show that the Bluetooth pairing is successful.

XRS-BT1
20
Once connected, select the ‘Read from Radio’ button to read your radio’s settings
into the app. After you have congured your preferences in the app, select ‘Write
to Radio’ to update your radio with your new settings.
NOTE: The Bluetooth® connection between your smart device and your XRS™
Connect radio must be made through the XRS™Connect app. You will not be able
to pair your smart device to your XRS Connect radio using the normal Bluetooth
settings option on your smart device.
GENERAL OPERATION
RADIO MENU OPTIONS
The Menu provides access to all the settings, adjustments and functions listed
in the table below. All menu items are controlled using the MENU, , and
BACK keys.
To access the menu, press the MENU key.
To scroll through the list of menu items press the or keys.
To select an item, press the MENU key.
To step back through the menu, or to exit the current screen, HOLD the BACK key.
A context menu is included at the bottom of each screen. The options oered will
change depending on the selected topic.
SEL:OPTION = Briey press the MENU key to select the option.
HLD:OPTION = Press and hold the MENU key to select the option.
Table of contents