GOAL ZERO YETI200X User manual


Table of Contents
CHARGE ME NOW
Before using or storing, plug your Goal Zero Yeti into the wall until it is fully charged.
Keep your Goal Zero Yeti plugged in when not in use. For more tips and tricks on
keeping your battery healthy, see the BATTERY 101 section.
Getting Started
ii. Get to Know Your Gear 2
iii. How it Works
Charging Your Goal Zero Yeti 4
i. Charging from Solar
ii. Charging from the Wall
Using Your Goal Zero Yeti 6
ii. How to Use
iii. Best-Use Strategy
iv. Cold Weather Usage
v. LED Display
Storage and Downtime Maintenance 8
Technical Specifications 9
Frequently Asked Questions 10
Troubleshooting 12
Warranty 13
Français 16
Čeština 30
Español 44
日本語 58
1

Get To Know Your Gear
Input for Charging
from Goal Zero Solar
Panels, or AC
12VOutput
6mm Output USB Input/
Outputs
Interactive LED Screen
Front of Yeti 200X
Back of Yeti 200X
AC Output
How it Works
AC Plug
4-5 Hours
Solar
(Sold separately)
6 Hours
(Based off max input)
12VLED
35 Hours
Phone
20+x
Laptop
3-4x
+ MORE
CHARGE IT
3W
WHAT IT
POWERS
120W
IN/OUT
3
2

Charging from the Wall
Using the included AC Wall Charger, plug your Goal Zero Yeti into any wall outlet. Youwill know the
Goal Zero Yeti is charging when a lightning bolt icon flashes blue in the display. The Goal Zero Yeti is
fully charged when the battery display indicator reads 100. The Goal Zero Yeti should recharge from
the wall in about 5 hours.
1. The AC wall adapter comes in two pieces. Connect the two pieces by plugging the cable into
the box.
CHARGE ME NOW: Before using or storing, plug your Goal Zero Yeti into the wall until it is
fully charged. Keep your Goal Zero Yeti plugged in when not in use. For more tips and tricks
on keeping your battery healthy, see the BATTERY 101 section.
When charging your Goal Zero Yeti you will notice a lightning bolt icon that flashes blue in the display.
This indicates that it is charging. Once your Goal Zero Yeti is fully charged, the battery display
indicator will read 100.
Charging from Solar
The Goal Zero Yeti’s charging port is located on the back of the Yeti and has a blue ring around it.
This 8mm port is designed to work with Goal Zero solar panels and is capable of taking in 120W of
solar.
1. Place your solar panel where it will get as much direct sunlight as possible.
2. Insert the blue-ringed plug from the panel into the input port on the back of the Yeti. Youwill
know the Yeti is charging when the lightning bolt icon is flashing blue on the display. The Yeti is
fully charged when the battery display indicator reads 100.
3. Some Goal Zero panels are chainable to provide more power to your Yeti and reduce
solar charge times. The input port is capable of taking in 120W of solar.
Charging Your Goal Zero Yeti
IMPORTANT NOTE: When solar recharging your Goal Zero Yeti Lithium, take note of the
voltages of the solar panels and do not exceed 22V. Individual solar panels, or solar panels
chained in series in excess of 22V cannot be used with the Goal Zero Yeti Lithium and can
cause serious damage to the unit. For help on chaining solar panels, call our Customer
Solutions Center at 888-794-6250.
5
4
IMPORTANTNOTE: The Goal ZeroYeti Lithium can be charged from your car’s 12V port using a Goal
Zero 12V Car Charging Cable.

How to use your Goal Zero Yeti:
1. Press the power button located above each port you will be using. **When not using certain
ports, make sure to turn them off to conserve power.
2. You’ll know the port is turned on when the LED light on the button is illuminated.
3. Plug in your gear for power anywhere life takes you.
4. If possible, keep your Goal ZeroYeti plugged into a power source when not in use.
5. You can charge your Goal ZeroYeti, and run your gear at the same time.
Best-Use Strategy:
Whenrecharging gearwithyourYeti,takenoteof the LED Battery Display.If youplugin devices thathavea high
powerrequirement, the charge level of yourYetican drop very quickly and you maynot get exactly 187Whof
power. On the flipside, if you’re charging devices that drawpower more slowly (a tablet),you willget closerto
187Whfrom yourYeti.Also, especially whenusing theAC poweroutput, the Goal ZeroYetiwill be convertingthe
energy from the DC powerof
thebatteryto the AC powerneededby your device. Althoughyour Goal ZeroYeti has a highly efficient inverter,
there is stillsomeenergylostin the conversionand you will not get the full rated capacity of the battery.If
you’re experiencing shorterruntimes, you maywantto checkthe device’s power requirements, see
Troubleshootingfor help.
Cold Weather Usage:
Cold temperatures (below freezing) can impact the Goal Zero Yeti’s battery capacity. If you’ll be out
living off-grid in sub-zero conditions, we recommend keeping your Goal Zero Yeti in an insulated
cooler, connected to a power source (solar panels), and charging your gear. The natural heat
generated by the Goal Zero Yeti contained in an insulated cooler will keep battery capacity at its
highest.
Using your Goal Zero Yeti LED Display + Buttons
The built-in LED display indicates battery level. Battery level displays as a number from 0 to 100.
When charging your Goal Zero Yeti you will notice a lightning bolt icon that flashes blue in the display.
This indicates the current charge status. Once your Goal Zero Yeti is fully charged, the battery level
display will read 100. Note that when you first plug in a power source, whether it’s a solar panel or a
wall charger, the Yeti may take a minute to detect and adjust its charge circuitry
before it starts drawing power from the
source.
7
6

Battery:
Cell Chemistry Li-ion NMC
Pack Capacity Up to 187Wh (14.4V, up to 13Ah)
Single Cell Equivalent Capacity Up to 52000mAh @ 3.6V
Lifecycles 500 Cycles to 80% capacity
Shelf-life Charge every 3-6 months
Management System MPPTcharge controller, low battery protection
Ports:
USB port (output) 5V, up to 2.4A (12W max), regulated
USB-C port (output) 5-12V, up to 3.0A (18W max), regulated
USB-C port (input/output) 5-20V, up to 3.0A (60W max), regulated
6mm port (output, 6mm) 12V, up to 10A (120W max)
12V car port (output) 12V, up to 10A (120W max)
120V AC Inverter (output, modified sine wave) 120VAC 60Hz, 1A (120W, 200W surge)
230V AC Inverter (output, modified sine wave ) 230VAC 50Hz, .5A (120W, 200W surge)
Charging Port (input, 8mm, blue, circle) 13-22V, up to 7A (100W max)
General:
Chainable No
Weight 5 lbs (2.27 kg)
Dimensions 7.9 x 5.1 x 5.1 in (20.0 x 13.0 x 13.0 cm)
Operating usage temp. 32-104 F (0-40 C)
Certs
Warranty 12 months
Technical Specifications
Having your Goal Zero Yeti connected to a power source, like a solar panel or wall plug, between adventures
or while in storage keeps its battery healthy and topped off. This prolongs battery life and will ensure your
Goal Zero Yeti is charged and ready to go all day, every day.
If you can’t keep your Goal Zero Yeti plugged into a power source during storage, fully-charge your
Goal Zero Yeti every 3 months and store it in a cool, dry place. Failure to maintain your Goal Zero
Yeti by following these steps can result in battery damage which will void the product warranty.
Storage and Downtime Maintenance
9
8

(200/100=2). If your gear falls within the 200Wh capacity of the Goal Zero Yeti,you’ll want to
check the restrictions on each of the output ports.
Another factor in the math is how much power is being converted going from the Goal Zero Yeti
battery to the device you are powering/charging. In some situations, like when running a 12V
device, such as the LAL 350, directly off the 12V port, there will be no conversion and so no
additional losses. In using the USB ports to charge a phone, you add a layer of conversion (12V
battery in the Goal Zero Yeti is being converted to a 5V USB output), which introduces around 10%
of losses.
When using the inverter, there are two layers of conversion (12V to high voltage, DC to AC). The
least efficient way of using the battery in the Goal Zero Yeti is to use an AC-DC adapter off the AC
ports, as is the case if you use a phone wall charger to charge your phone, as it adds yet another
layer of conversion in the wall adapter.
So when you’re deciding on what to power from your new GOAL ZERO recharger, do some research into
your device’s watt consumption. For more quick tips and learning tools, check out
www.GoalZero.com/learn.html
What type of battery is in my Goal Zero Yeti?
Your Goal Zero Yeti uses custom designed Lithium Ion. Here are some basic facts about Lithium-ion
batteries:
1. Lithium-ion batteries can store and release a lot of energy in a short period of time. The batteries in
your Goal ZeroYeti are in a protective enclosure with a sophisticated battery management and
protection system controlling its terminals to the outside world.
2. It is critical that your battery does not get wet as moisture and watercan get into the battery cells
behind the protection circuitry and bypass that protection.
How do I know if my device will work with the Goal Zero Yeti?
First, you’ll need to determine the amount of power your device requires. This may require some
research on your end, a good internet search or examining the user guide for your device should
suffice.
Second, you will need to check the capacity for the individual output ports. For example, the Goal
Zero Yeti’s AC port is powered by an inverter that allows for 120W of power. This means if your device
is pulling more than 120W for an extended period of time, the Goal Zero Yeti’s inverter will shut off.
Another number to watch for is the surge rating of your device as compared to that of the port. The
Goal Zero Yeti inverter has an advanced surge management system that will maximize its compatibility
with various devices, but there will still be items that will surge at a higher rate, and for a longer time,
than the Goal Zero Yeti can manage, in which case the port will turn itself off.
Finally, once you know your device is compatible, you’ll want to determine how long you’ll be able to
power your gear from the Goal Zero Yeti.Here’s a quick and dirty lesson in power.
All Goal Zero power packs and solar generators have a number in their name, ex. Guide10 Plus Power
Pack, Goal Zero Yeti 200X. These numbers refer to the Watt Hours (Wh), or the amount of energy that can
be stored in each Power Station, and how you’ll know if your gear is compatible. For example, a 200 Wh
Power Station should run a 100W light for 2 hours
Frequently Asked Questions
11
10

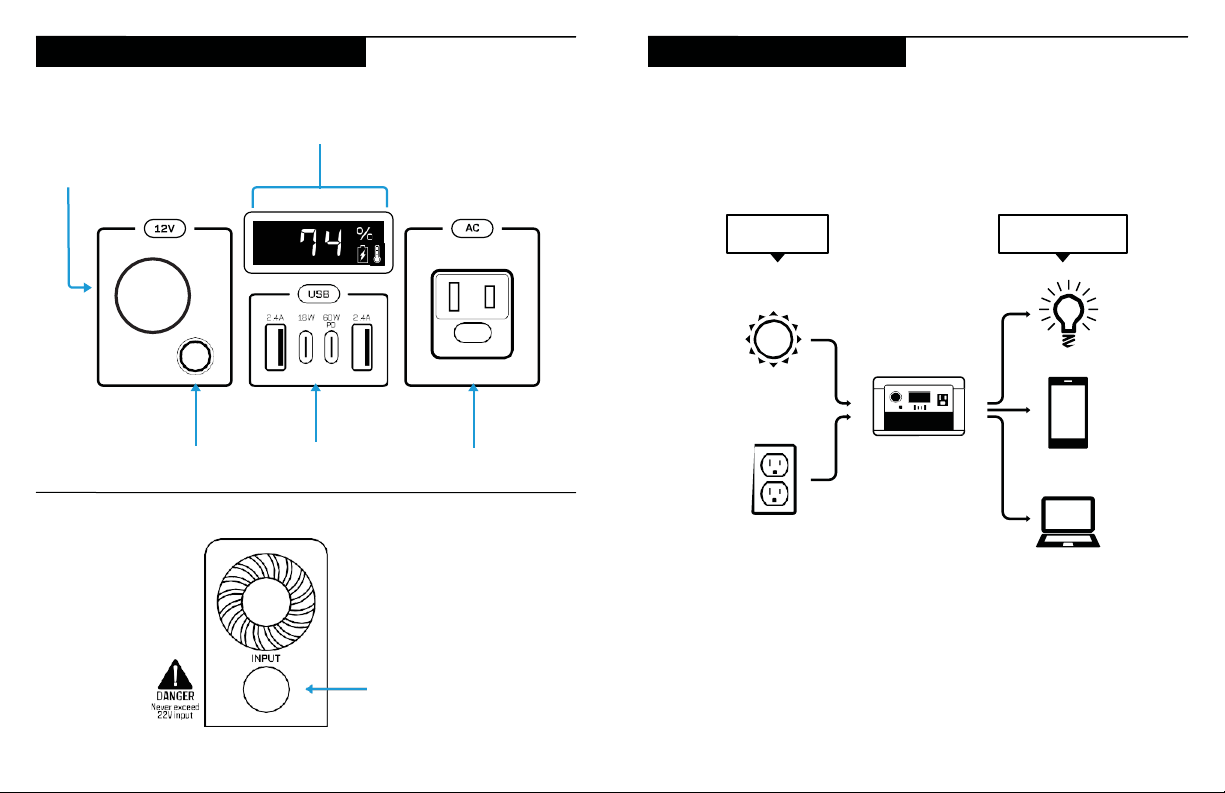
If your devices are not recharging from your Goal Zero Yeti, follow these steps:
1. Ensure the Output Port has been turned on. The LED light on the power button should be lit up.
a. If any of the lights have turned red, this indicates a trip. Push the button again to reset it. The light
will turn white when it is successfully reset.
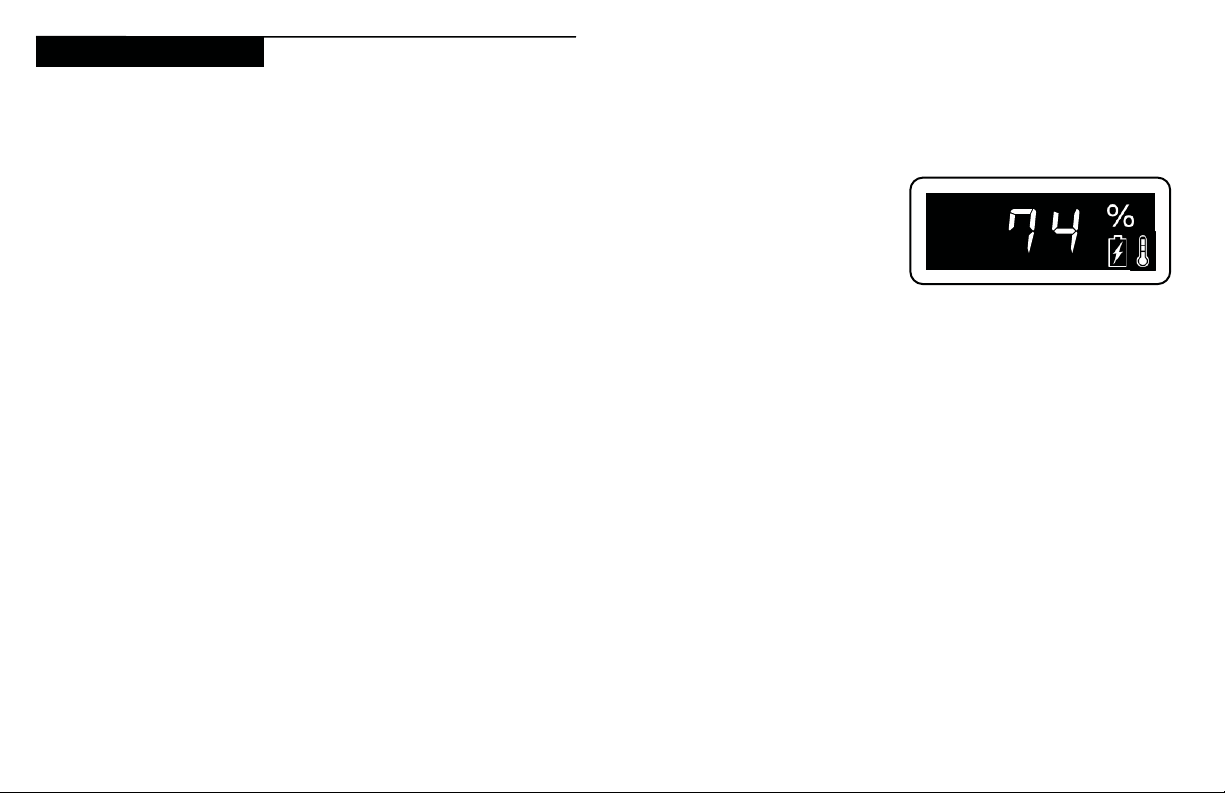
2. Check the Battery Display. If it is at 20% or below, charge your Goal Zero Yeti.
3. Check the LED Display for warning icons:
OVERLOAD: Powerdraw exceeds port’s maximum allowance. Indicated by red light in the
port’s button.
4. Verify your device is suitable for use with the Goal Zero Yeti:
a. All of the Goal ZeroYeti output ports have their own max power capacity. Check the Goal Zero
Yeti’sTech Specs to ensure your device is compatible.
5. If you are still experiencing trouble with your Goal Zero Yeti, please call our Customer Solutions
Center at 1-888-794-6250 or by email at support@goalzero.com
Troubleshooting
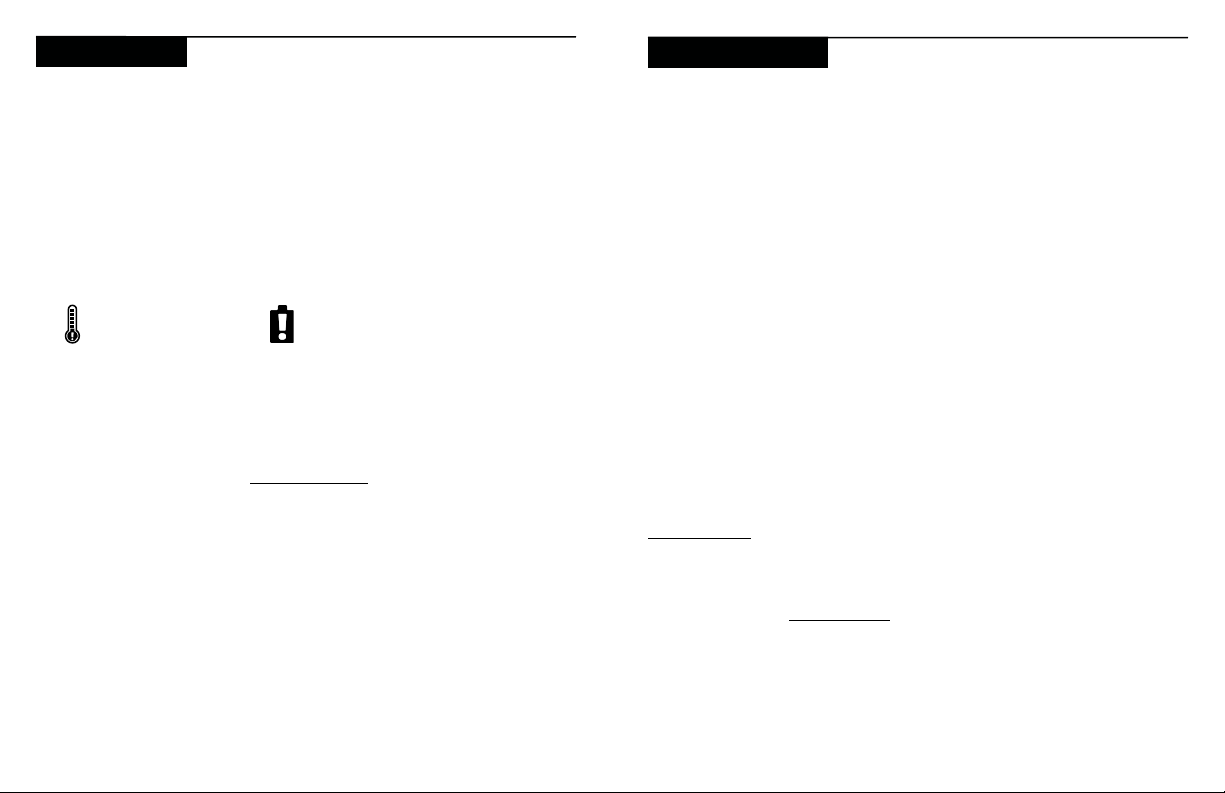
Temperature warning.
Allow unit to cool.
Battery requires attention.
Contact customer support. 1-
888-794-6250
LIMITED WARRANTY
GOAL ZERO LLC warrants to the original consumer purchaser that this GOAL ZERO product will be free from defects in
workmanship and material under normal consumer use during the applicable warranty period identified in Paragraph 2,
below, subject to the exclusions set forth in Paragraph 5, below. This warranty statement sets forth GOAL ZERO’s total
and exclusive warranty obligation. We will not assume, nor authorize any person to assume for us, any other liability in
connection with the sales of our products.
WARRANTY PERIOD
The warranty period for GOAL ZERO battery cells (whether purchased on a stand-alone basis or as part of another
product) is 180 days. The warranty period for all other GOAL ZERO products and components is one (1) year. In each
case, the warranty period is measured starting on the date of purchase by the original consumer purchaser. The sales
receipt from the first consumer purchase, or other reasonable documentary proof, is required in order to establish the
start date of the warranty period. If you completed the online GOAL ZERO Product Registration Form within 30 days
after purchasing your product, that registration can also establish the start date of the warranty period (but warranty
coverage is not conditioned upon such registration).
REMEDY
GOAL ZERO will repair or replace (at GOAL ZERO’s option and expense) any GOAL ZERO product that fails to operate
during the applicable warranty period due to a defect in workmanship or material.
LIMITED TO ORIGINAL CONSUMER BUYER
The warranty on GOAL ZERO’s products is limited to the original consumer purchaser and is not transferable
to any subsequent owner.
EXCLUSIONS
GOAL ZERO’s warranty does not apply to (i) any product that is misused, abused, modified, damaged by accident, or
used for anything other than normal consumer use as authorized in GOAL ZERO’s then- current product literature, or
(ii) any product purchased through an online auction house. GOAL ZERO’s warranty does not apply to any battery cell
or product containing a battery cell unless the battery cell is fully charged by you within seven (7) days after you
purchase the product and at least once every 6 months thereafter.
HOW TO RECEIVE SERVICE
To obtain warranty service, you must contact our customer service team via telephone at (888) 794-6250, or via email at
support@goalzero.com. If our customer service team determines that further assistance is required, they will give you a
Return Material Authorization (“RMA”) number and will provide you with prepaid return shipping label that you can use
to mail back your non-functioning item(s). You must properly package the product, clearly marking the RMA number on
the package and including proof of your purchase date with the product. We will process your return and send your
repaired or replacement product to you at our expense for product being shipped to locations in North America. For
product purchased or being shipped outside of North America, please contact the local distributor from whom you
purchased the product or email support@goalzero.com to obtain further distributor information.
Warranty & Contact
13
12

IMPLIED WARRANTIES
THE LIMITED WARRANTYSTATEDHEREIN IS IN LIEU OF ALL OTHER EXPRESS WARRANTIES. IN NO EVENT SHALL ANY
IMPLIED WARRANTIES, INCLUDING BUT NOT LIMITED TO ANYWARRANTIES OF MERCHANTABILITY, FITNESS FOR A
PARTICULARPURPOSE OR NON-INFRINGEMENT, EXTEND BEYOND THE APPLICABLE WARRANTYPERIOD IDENTIFIED IN
PARAGRAPH 2, ABOVE. Some states
do not allow limitations on how long an implied warranty lasts, so the above limitation may not apply to you. This
warranty givesyou specific legal rights, andyou may also have other rightswhich vary from state to state.
EXCLUSIVE REMEDY; LIMITATION OF LIABILITY
The foregoing provisions state GOAL ZERO’s entire liability, and your exclusive remedy, for any breach of warranty,
express or implied. IN NO EVENTWILL GOAL ZERO BE LIABLE FOR ANYCONSEQUENTIAL OR INCIDENTAL DAMAGES
ARISING FROM ANYUSE OR MALFUNCTION OF ANYGOAL ZERO PRODUCT, OR FROM ANY BREACH OF WARRANTY,
INCLUDING DAMAGE TO OTHER DEVICES. IN NO EVENT WILL GOAL ZERO’s LIABILITY FOR ANYCLAIM, WHETHER IN
CONTRACT, WARRANTY, TORT (INCLUDING NEGLIGENCE AND STRICTLIABILITY) OR UNDER ANY OTHER THEORY OF
LIABILITY,
EXCEED THE AMOUNT PAID BY YOU FOR THE GOAL ZERO PRODUCT. Some states do not allow the exclusion or
limitation of incidental or consequential damages, so the above limitation or exclusion may not apply to you.
FREE EXTENDED WARRANTY
Get an ADDITIONAL YEAR of protection for your Goal Zero Yeti Lithium
Portable Power Station by simply registering your product at:
GOALZERO.com/extendedwarranty
This gives you TWO TOTAL years of worry-free product coverage.
It’s free and easy peace of mind for you and your new power companion.
15
14

Interactifs
et Écran LED
120W
IN/OUT
Apprendre àConnaitre Votre Équipement
Entrée pour charger àpartir
des Panneaux Solaires de
Goal Zero ou du CA
Sortie 12V
Sortie 6mm Sorties 12V USB Sortie CA
Comment cela Fonctionne-t-il ?
Prise Secteur (CA)
4-5 Heures
Panneau Solaire
(Vendu séparément)
6 Heures
(Basé sur l'entrée max.)
12VLED
35Heures
Téléphone
20+x
Ordinateur
Portable
3-4x
ENCORE +
RECHARGEZ CE QUE ÇA
ALIMENTE
3W
Devant le Yeti 200X
L’arrière du Yeti 200X
17
16

Recharger Votre Goal Zero Yeti 2. Insérez le connecteur en anneau bleu du panneau dans le port d’entrée situé à l’arrière
du Yeti. Vous saurez que le Yeti est en charge lorsque l’icône représentant un éclair clignote
en bleu sur l’écran. Le Yeti est complètement chargé lorsque l’indicateur de la batterie
affiche 100.
3. Certains panneaux solaires Goal Zero peuvent être branchés en série pour fournir plus
d’énergie à votre Yeti et ainsi réduire les temps de charge solaire. Le port d’entrée peut
supporter jusqu’à 120 W de puissance solaire.
Recharger àpartir d’une Prise Murale
En utilisant le chargeur mural CA inclus, branchez votre Goal Zero Yeti dans n’importe quelle prise
murale. Vous saurez que le Goal Zero Yeti est en charge lorsque l’icône représentant un éclair
clignote en bleu sur l’écran. Le Goal Zero Yeti est complètement chargé lorsque l’indicateur de la
batterie affiche 100. Le Goal Zero Yeti devrait se recharger àpartir d’une prise murale en 5 heures
environ.
1. .L’adaptateur mural CA est livré en deux parties. Connectez les deux parties en branchant
le câble dans le boîtier.
19
18
CHARGEZ-MOI MAINTENANT : avant de l’utiliser ou de le stocker, branchez votre Goal
Zero Yeti sur une prise murale jusqu’à ce qu’il soit complètement chargé. Veuillez garder
votre Goal Zero Yeti branché lorsqu’il n’est pas utilisé. Pour plus de conseils et d’astuces
pour maintenir le bon fonctionnement de votre batterie, consultez la section PRINCIPES
DE BASE SUR LES BATTERIES.
Lorsque vous rechargez votre Goal Zero Yeti, vous remarquerez une icône représentant un éclair qui
clignote en bleu à l’écran. Cela indique l’état actuel de charge. Une fois que votre Goal Zero Yeti est
complètement chargé, l’indicateur d’affichage de la batterie indiquera 100.
Charger àpartir de l’Énergie Solaire
Le port de chargement du Goal Zero Yeti est situé sur la face arrière du Yeti et comporte un anneau
bleu autour de celui-ci.Ce port de 8mm est conçu pour fonctionner avec des panneaux solaires
Goal Zero et est capable de recevoir 120 Wd’énergie solaire.
1. Placez votre panneau solaire où il obtiendra le plus de lumière directe du soleil que
possible.
NOTE IMPORTANTE : Lors de la recharge grâce à l’énergie solaire de votre Goal ZeroYeti
Lithium, gardez un œil sur les tensions des panneaux solaires et veillez àne pas dépasser 22
V. Les panneaux solaires individuels, ou panneaux solaires enchaînés en série au-dessus de 22
Vne peuvent pas être utilisés avec votre Goal Zero Yeti Lithium et peuvent causer des
dommages sérieux à l’appareil.
Pour obtenir de l’aide sur le chaînage des panneaux solaires, appelez notre Centre de
Solutions Clientèle au +1-888-794-6250.
NOTE IMPORTANTE : Le Goal Zero Yeti Lithium peut être chargé à partir du port 12 V de votre voiture à
l’aide d’un câble de charge pour voiture Goal Zero 12 V.

Utiliser Votre Goal Zero Yeti
Utiliser votre Goal Zero Yeti:
1. Appuyez sur l’interrupteur d’alimentation situé au-dessus de chaque port que vous allez utiliser.
**Si vous n’utilisez pas certains ports, veillez àles éteindre pour économiser l’énergie.
2. Voussaurez quand le port est allumé lorsque la DEL du bouton sera illuminée.
3. Branchez votre équipement pour qu’il fonctionne partout où l’aventure vous mène.
4. Si possible, gardez votre Goal ZeroYeti branché sur une prise d’alimentation lorsqu’il n’est pas
utilisé.
5. Vous pouvez recharger votre Goal Zero Yeti et utiliser votre équipement en même temps.
Stratégie d’Utilisation Optimale:
Lorsquevous rechargez votre équipement avecvotreYeti,gardez toujours un œil sur l’écran LED de la batterie.
Si vous branchez des appareils nécessitant une puissance élevée, le niveau de chargede votreYetipeutchuter
trèsrapidement et vous pourriez ne pas obtenir exactement 187 Wh de puissance.À l’inverse, si vous chargez
des appareils consommant moins d’énergie (une tablette), votreYeti délivrera alors proche de 187 Wh. De
plus,lorsque vous utilisez la sortied’alimentation CA, la batterieGoalZeroYeticonvertiral’énergie du courant
CC de sa batterie en courant alternatif nécessaire au bon fonctionnement de votre appareil. Bien que votre
GoalZeroYeti dispose d’unonduleur trèsefficace, il y a toujoursun peu d’énergie perdue lorsde la conversion
etvous n’obtiendrez pas la pleine capacité nominale de la batterie.Si vous obtenez des durées d’utilisation bien
plus courtes, vous devriez peut-êtrevérifier les exigences d’alimentation de l’appareil en question, voir la
section Dépannage pour obtenir de l’aide.
Utilisation par Temps Froid:
Cold temperatures (below freezing) can impact the Goal Zero Yeti’s battery capacity. If you’ll be out
living off-grid in sub-zero conditions, we recommend keeping your Goal Zero Yeti in an insulated
cooler, connected to a power source (solar panels), and charging your gear. The natural heat
generated by the Goal Zero Yeti contained in an insulated cooler will keep battery capacity at its
highest.
Affichage LED + Boutons:
L’écran LED intégré indique le niveau de la batterie. Le niveau de la batterie s’affiche sous forme d’un
nombre compris entre 0 et 100. Lorsque vous rechargez votre Goal Zero Yeti, vous remarquerez une
icône représentant un éclair qui clignote en bleu à l’écran.
Cela indique l’état actuel de charge. Une fois que votre Goal Zero Yeti est complètement chargé,
l’indicateur de la batterie indiquera 100. Notez que lorsque vous branchez une source
d’alimentation, qu’il s’agisse d’un panneau solaire ou d’un chargeur mural, le Yeti
peut prendre une minute pour détecter
et ajuster ses circuits de charge avant de
commencer à se charger depuis cette
source.
21
20

Batterie :
Type de batterie Li-ion NMC
Capacité du bloc Jusqu’à 187Wh (~14,4V, jusqu’à 13Ah)
Capacitééquivalente de la pile unique Jusqu’à 52000mAh à3.6V
Durée de vie Àrecharger tous les 3 à6 mois
Système de gestion Contrôleur de charge MPPT, protection de la batterie lorsqu'elle est
faible
Ports:
Port USB (sortie) 5V, jusqu'à 2,4A (12Wmax), régulé
Port USB-C (sortie) 5-12V, jusqu'à 3,0A (18W max), régulé
Port USB-C PD (entrée/sortie) 5-20V,jusqu'à 3,0A (60W max), régulé
Port 6 mm (sortie, 6 mm) 12V jusqu'à 10A (120Wmax), régulé
12VPort de sortie dans Voiture 12V, jusqu'à 10A (120Wmax)
Onduleur120VCA (sortie, onde sinusoïdale) 120VCA 60Hz, 2,5A (120W,200W tension max.)
Onduleur 230VCA (sortie, onde sinusoïdale) 230VCA 50Hz, ,5A (120W, 200W tension max.)
Port de Chargement (entrée, 8mm, bleu, cercle) 13-22V,jusqu'à 7A (100Wmax)
Général :
Pouvantêtre mis en série Non
Poids 6,5 livres (2,9 kg)
Dimensions 7,9 x 5,1 x 5,1 pouces (20,0 x 13,0 x 13,0 cm)
Température de fonctionnement à l’usage 0 à 40 °C (32 à 104 °F)
Certifications
Garantie 12 mois
Spécifications Techniques
En ayant votre Goal Zero Yeti connectée à une source d'alimentation, comme un panneau solaire ou prise murale,
entre deux aventures ou pendant son stockage garde la batterie en bon état et rechargée. Cela augmente la durée de
vie de la batterie et garantit que votre Goal Zero Yeti soit rechargée et prête à l'emploi tout au long de la journée, tous
les jours.
Si vous ne pouvez pas garder votre Goal Zero Yeti branchée sur une source d'alimentation pendant son
stockage, rechargez complètement votre Goal Zero Yeti tous les 3 Mois et stockez-la dans un endroit
frais et sec. Si vous ne suivez pas ces étapes pour maintenir votre Goal Zero Yeti en bon état, cela pourra
entraîner des dommages àla batterie qui annuleront la garantie du produit.
Stockage et Temps d’Arrêt pour la Maintenance
23
22

Foire aux Questions solaires de Goal Zero possèdent un numéro dans leur nom, p.ex. Guide10 Plus Power Pack, Goal
Zero Yeti 200X. Ces chiffres se réfèrent aux Watts par Heure (Wh), ou à la quantité d’énergie qui peut
être stockée dans chaque chargeur, et comment vous saurez si votre équipement est compatible
avec chaque chargeur. Par exemple, un chargeur
de 200 Wh devrait faire fonctionner une lampe de 100 W pendant 2 heures (200/100
= 2). Si votre équipement tombait dans la capacité de 400 Wh du Goal Zero Yeti, vous voudrez
vérifier les restrictions sur chacun des ports de sortie.
Un autre facteur dans ces calculs électriques est la quantité de puissance en cours de
conversion allant de la batterie du Goal Zero Yeti vers l’appareil que vous utilisez/
chargez. Dans certaines situations, comme lors de l’utilisation d’un périphérique 12 V, tel que le LAL
350, directement alimenté depuis le port 12 V, il n’y aura pas de conversion et donc aucune perte
supplémentaire. En utilisant les ports USB pour charger un téléphone, vous ajoutez une couche de
conversion (la batterie de 12 V du Goal Zero Yeti est convertie en sortie USB de 5 V), ce qui introduit
environ 10 %de perte.
Lors de l’utilisation de l’onduleur, il existe deux couches de conversion (de 12 Vàhaute tension, et
de CC àCA). La façon la moins efficace d’utiliser la batterie du Goal Zero Yeti est d’utiliser un
adaptateur CA-CC en sortie des ports CA, comme lorsque vous utilisez un bloc chargeur pour
recharger votre téléphone, car cela ajoute une couche de conversion en plus des deux déjà en
place.
Donc, lorsque vous décidez quel appareil alimenter depuis votre nouveau chargeur GOAL ZERO, faites
quelques recherches sur la consommation en watt de votre appareil. Pour plus de conseils et des
outils d’apprentissage, veuillez visiter
www.GoalZero.com/learn.html
25
24
Quel type de batterie se trouve dans mon Goal Zero Yeti ?
Votre Goal Zero Yeti utilise une batterie au lithium-ion personnalisée. Voici quelques données
factuelles fondamentales sur les batteries au lithium-ion :
1. Les batteries au lithium-ion peuvent stocker et libérer beaucoup d’énergie en peu de
temps. Les batteries de votre Goal Zero Yeti sont dans un boîtier de protection avec un système
sophistiqué de gestion et de protection des batteries qui contrôle ses terminaux connectés
avec l’extérieur.
2. Il est primordial que votre batterie ne soit jamais mouillée car l’humidité et l’eau peuvent
entrer dans les cellules de la batterie derrière les circuits de protection et contourner cette
protection.
How do I know if my device will work with the Goal Zero Yeti?
Tout d’abord, vous devrez déterminer la quantité d’énergie nécessaire au fonctionnement de votre
appareil. Cela peut nécessiter des recherches de votre coté, une bonne recherche sur Internet ou
l’examen du guide d’utilisation de votre appareil devrait suffire.
Puis, vous devrez vérifier la capacité de chaque port de sortie individuel. Par exemple, le port CA du
Goal Zero Yeti est alimenté par un onduleur qui permet de faire passer 120 Wde courant. Cela
signifie que si votre appareil tire plus de 120 W pendant une période prolongée, l’onduleur du Goal
Zero Yeti s’éteindra. Un autre nombre àsurveiller est la
tension de votre appareil par rapport àcelle du port pour éviter une surtension. L’onduleur du Goal
Zero Yeti dispose d’un système avancé de gestion des surtensions qui maximisera sa compatibilité avec
divers dispositifs, mais il y aura toujours des appareils dont la tension augmentera à un rythme plus
élevé, et pendant une période plus longue, que le Goal Zero Yeti ne pourra plus gérer, et dans ce cas,
le port s’éteindra.
Finalement si l’appareil est reconnu comme étant compatible, vous devrez déterminer combien
de temps vous pourrez alimenter cet appareil àpartir du Goal Zero Yeti. Voici une leçon rapide et
grossière sur l’énergie. Tous les blocs d’alimentation et générateurs

Dépannage
Si vos appareils ne se rechargent pas depuis votre Goal Zero Yeti, procédez comme suit
1. Assurez-vous que le port de sortie soit allumé. La DEL du bouton d’alimentation devrait
être allumée.
a. Si l’un des voyants est rouge, cela indique un court-circuit. Appuyez de nouveau sur le bouton
pour le réinitialiser. La LED devient blanche lorsqu’elle est correctement réinitialisée.
2. Vérifiez l’écran d’affichage de la batterie. S’il reste 20 % ou moins d’énergie, pensez àrecharger
votre Goal Zero Yeti.
3. Vérifiez l’écran LED pour les icônes d’avertissement :
SURCHARGE (OVERLOAD) :la consommation d’énergie dépasse l’allocation
maximale du port. Cela est indiqué par le voyant rouge sur le bouton du port.
4. Vérifiez que votre appareil soit compatible avec le Goal Zero Yeti :
a. Tous les ports de sortie du Goal Zero Yeti ont leur propre capacité de puissance maximale.
Vérifiez les caractéristiques techniques du Goal Zero Yeti pour vous assurer que l’appareil est
bien compatible.
5. Si vous avez encore des problèmes avec votre Goal Zero Yeti, veuillez appeler notre Centre de
Solutions Clientèle au +1-888-794-6250 ou contactez-nous par courrier électronique à
support@goalzero.com
GARANTIE LIMITÉE
GOAL ZERO LLC garantit à l'acheteur initial que ce produit de GOAL ZERO sera exempt de défauts de fabrication et
dans le matériel original dans des conditions d'utilisation normale du consommateur pendant la période de
garantie applicable identifiée au paragraphe 2 ci-dessous, sous réserve des
exclusions énoncées au paragraphe 5 ci-dessous. Cette garantie énonce l'obligation de garantie totale et exclusive de
GOAL ZERO. Nous n'assumons pas, ni n'autorisons aucune personne àassumer pour nous, toute autre responsabilité
dans le cadre de la vente de nos produits.
PÉRIODE DE GARANTIE
La période de garantie des éléments de la batterie GOAL ZERO (achetés individuellement ou en tant que partie d'un
autre produit) est de 180 jours. La période de garantie pour tous les autres produits et composants de GOAL ZERO est
d'un (1) an. Dans tous les cas, la période de garantie est mesurée à compter de la date d'achat par l'acheteur initial. Le
reçu de vente du premier achat du consommateur, ou autre document raisonnable prouvant cet achat, est nécessaire
pour établir la date de commencement de la période de garantie. Si vous avez rempli le Formulaire d'Enregistrement
du Produit GOAL ZERO en
ligne dans les 30 jours suivant l'achat de votre produit, cet enregistrement peut également établir la date de
commencement de la période de garantie (mais la garantie ne dépend pas d'un tel enregistrement).
RECOURS
GOAL ZERO réparera ou remplacera (au choix et à la charge de GOAL ZERO) tout produit GOAL ZERO qui ne fonctionnera
pas pendant la période de garantie applicable en raison d'un défaut de fabrication ou de matériel.
LIMITÉE À L'ACHETEUR INITIAL
La garantie sur les produits de GOAL ZERO est limitée à l'acheteur initial et n'est pas transférable à tout propriétaire
subséquent.
EXCLUSIONS
La garantie de GOAL ZERO ne s'applique pas (i) aux produits qui ont été mal utilisés, maltraités, modifiés, endommagés
par accident ou utilisés à des fins autres que l'usage normal qu'aurait dû en faire le consommateur, tel qu'autorisé par la
documentation actuelle de GOAL ZERO ou (ii) Acheté sur un site d'enchères en ligne. La garantie de GOAL ZERO ne
s'applique àaucun élément de la batterie ou produit contenant un élément de la batterie, àmoins que cet élément de
la batterie ne soit entièrement chargé par vous dans les sept (7) jours suivant l'achat du produit et au moins une fois
tous les 6 mois par la suite.
COMMENT OBTENIR CE SERVICE
Pour obtenir le service de garantie, vous devez contacter notre équipe de service àla clientèle par téléphone au
(888) 794-6250, ou par courriel à support@goalzero.com. Si notre équipe de service àla clientèle détermine
qu'une assistance supplémentaire est requise, elle vous donnera un numéro
d'autorisation de retour de matériel (Return Material Authorization ou « RMA » en anglais) et vous fournira un
bordereau d'expédition retour prépayé que vous pouvez utiliser pour renvoyer votre/vos article(s). Vous devez
correctement emballer le produit, en marquant clairement le numéro RMA sur l'emballage et en incluant une preuve de
votre date d'achat du produit. Nous traiterons votre déclaration et vous enverrons votre produit réparé ou de
remplacement ànos frais pour les produits expédiés vers des emplacements en Amérique du Nord. Pour les produits
achetés ou expédiés en dehors de l'Amérique du Nord, veuillez contacter le distributeur local auprès duquel vous avez
acheté le produit ou envoyez un courriel àsupport@goalzero.com pour obtenir plus informations sur votre distributeur
local.
Garantie & Contact
Alerte sur la température.
Laisser refroidir l'appareil.
27
26
La batterie doit toujours être surveillée.
Contactez le service clientèle.
1-888-794-6250

GARANTIES IMPLICITES
LA GARANTIE LIMITÉE DÉCLARÉE DANS CE DOCUMENT REMPLACE TOUTE AUTRE GARANTIE EXPRIMÉE. EN AUCUN
CAS, LES GARANTIES IMPLICITES, Y COMPRIS, MAIS SANS S'Y LIMITER, TOUTE GARANTIE DE QUALITÉ MARCHANDE,
D'ADÉQUATION À UN USAGE PARTICULIER OU DE NON-CONTREFAÇON,NE PEUVENTS’ÉTENDRE AU-DELÀ DE LA
PÉRIODE DE GARANTIE
APPLICABLEDÉCRITE AU PARAGRAPHE 2 CI-DESSUS. Certains États n'autorisent pas les limitations sur la durée d'une
garantie implicite, de sorte que la limitation ci-dessus peut ne pas s'appliquer àvous. Cette garantie vous donne des
droits légaux spécifiques, et vous pouvez également avoir d'autres droits qui varient d'un État à l'autre.
RECOURS EXCLUSIF ; LIMITATION DE RESPONSABILITÉ
Les dispositions qui précèdent énoncent la responsabilité entière de GOAL ZERO et votre recours exclusif pour toute
violation de la garantie, explicite ou implicite. EN AUCUN CAS,GOAL ZERO NE SERA TENU RESPONSABLE DE TOUT
DOMMAGE INDIRECT OU ACCESSOIRE DÉCOULANTDE TOUTE UTILISATIONOU DÉFAUT DE TOUTPRODUIT GOAL ZERO OU
DE TOUTE VIOLATION DE GARANTIE, Y COMPRIS LES DOMMAGES À D'AUTRES DISPOSITIFS. EN AUCUN CAS LA
RESPONSABILITÉ
DE GOAL ZERO POUR TOUTE RÉCLAMATION, QUE CE SOITPAR CONTRAT, GARANTIE, DÉLIT(Y COMPRIS LA NÉGLIGENCE
ET LA RESPONSABILITÉ STRICTE) OU SOUS UNE AUTRE THÉORIE DE RESPONSABILITÉ, N’EXCÈDERA LE MONTANT PAYÉ PAR
VOUS POUR LE PRODUIT DE GOAL ZERO.
Certains États n'autorisent pas l'exclusion ou la limitation des dommages indirects ou accessoires, de sorte que la
limitation ou l'exclusion ci-dessus peut ne pas s'appliquer àvous.
EXTENSION GRATUITEDE LA GARANTIE
Obtenez une ANNÉE SUPPLÉMENTAIRE de protection pour votre Alimentation Portative
Goal Zero Yeti Lithium simplement en enregistrant votre produit àl'adresse suivante :
GOALZERO.com/extendedwarranty
Cela vous donne DEUXANS EN TOUTde couverture du produit sans avoir àvous
soucier de rien. C'est une tranquillité d'esprit gratuite et facile pourvous et votre
nouveaucompagnond'énergie.
29
28

120W
IN/OUT
Seznámení s přístrojem
Přední strana Yeti 200X
Interaktivní LED obrazovka
Vstup pro nabíjení
solárním panelem
Goal Zeronebo AC
napájením
Vstup pro nabíjení
solárním panelem
Goal Zeronebo
ACnapájením
12Vvýstupy USB výstupy AC výstupy
Schéma fungování
AC konektor
4-5 hodin
Slunce
(K dispozici zvlášť)
6 hodin
(základ max. vstup)
12VLED
35hodin
Telefon
20+x
Notebook
3-4x
+DALŠÍ
ČÍM SE NABÍJÍ
CO NAPÁJÍ
3W
Zadní strana Yeti 200X
31
30

Nabíjení vašeho Goal Zero Yeti
IHNED NABIJTE: Zapojte svůj přístroj Goal Zero Yeti do stěnové zásuvky a před
uskladnění nebo použitím ho zcela nabijte.Nechejte svůj přístroj Goal Zero zapojený,
pokud ho nebudete používat. Další tipy a triky na údržbu baterie jsou uvedeny v kapitole
BATERIE 101.
33
32
Při nabíjení vašeho přístroje uvidíte symbol blesku, který bude modře blikat na ukazateli. Na tom
je zobrazen stav nabití baterie.Jakmile budete mít svůj přístroj Goal Zero Yeti zcela nabitý, bude na
ukazateli zobrazeno číslo 100.
Nabíjení slunečním zářením
Nabíjecí přípojka přístroje Goal Zero Yeti se nachází na zadní straně přístroje Yeti a je opatřena
modrým kroužkem. Tato 8mm přípojka je navržena tak, aby fungovala se solárním panelem Goal Zero, a
snese až 120 Wsolárního proudu.
1. Umístěte svůj solární modul na místo, které umožňuje co největší příjem slunečního
záření.
2. Zastrčte modrý kruhový konektor ovládacího pole do přípojky vstupu na zadní straně
přístroje Yeti. Přístroj Yeti se bude nabíjet, až bude na displeji blikat symbol blesku. Přístroj Yeti
bude zcela nabitý, až se na ukazateli zobrazí číslo 100.
3. Můžete propojit několik solárních modulů Goal Zero navzájem, aby se zkrátila doba
nabíjení slunečním zářením.Přípojka vstupu je schopna pojmout až 120 Wsolární energie.
DŮLEŽITÉ UPOZORNĚNÍ:Pokud budete svůj přístroj Goal Zero Yeti Lithium nabíjet slunečním
zářením, dávejte pozor na to, aby napětí solárních modulů nepřekročilo 22 V. Jednotlivé nebo
sériově zapojené solární panely s napětím přesahujícím 22 V pro přístroj Goal Zero Yeti
nepoužívejte, jelikož by mohly přístroj vážně poškodit. V případě potřeby asistence při
propojování solárních modulů kontaktujte naše zákaznické centrum na 888-794-6250.
Nabíjení ze zásuvky:
Připojte přístroj Goal Zero Yeti pomocí dodané AC nabíječky do libovolné zásuvky. Přístroj bude
nabíjet, až na ukazateli bude blikat modrý symbol blesku.Přístroj bude na 100 %nabitý,až bude na
ukazateli baterie zobrazeno číslo 100.Přístroj Goal Zero Yeti by se měl plně nabít z běžné zásuvky za
přibližně 5 hodin.
1. Nástěnný AC adaptér je dodáván ve dvou dílech.Spojte oba díly tím, že zastrčíte kabel do boxu.
DŮLEŽITÉ UPOZORNĚNÍ:Přístroj Goal Zero Yeti Lithium lze nabíjet přes 12V přípojky vašeho vozidla
pomocí nabíjecího kabelu Goal Zero 12V proautomobily.

Použití Goal Zero Yeti
Použití vašeho přístroje Goal Zero Yeti:
1. Stiskněte tlačítko Powernad každou přípojkou, kterou použijete.**Pokud určité přípojky
nebudete používat, zajistěte, aby byly vypnuté a nespotřebovávaly žádný proud.
2. Uvidíte, že přípojka je zapnutá, pokud se rozsvítí bílá LED kontrolka na tlačítku.
3. Svůj přístroj můžete nabíjet kdekoli.
4. Svůj přístroj Goal Zero Yeti uschovejte pokud možno v zavěšené poloze a připojený k
síťovému napájení,pokud ho nebudete používat.
5. Svůj přístroj Goal Zero Yeti můžete nabíjet a zároveň jím napájet své zařízení.
Strategie pro optimální použití:
Při nabíjení vašeho zařízení přístrojem Goal ZeroYetisledujte LCD displej baterie. Pokud připojíte zařízení, která
vyžadují hodně proudu, může úroveň nabití přístroje Goal Zero Yetivelmi rychle klesat a možná nedosáhnete příp.
přesně hladiny 187 W proudu. Pokud budete nabíjet zařízení, která spotřebovávají proud pomaleji (tablet), dosáhnete
výše uvedené hodnoty spíše.Pokud použijete AC výstup, bude přístroj GoalZeroYeti navíc přeměňovat energii z DC
proudu baterie na AC proud, které potřebuje vaše zařízení. Ačkoli má přístroj GoalZeroYetimaximálně efektivní
měnič, při přeměně se i tak trochu energie ztratí, a vy tak nedosáhnete plné kapacity baterie.Pokud by byly doby
nabíjení kratší, měli byste možná zkontrolovat spotřebu proudu zařízení(viz Řešení poruch).
Použití při chladném počasí:
Nízké teploty (pod bodem mrazu) mohou negativně ovlivnit kapacitu baterie přístroje Goal Zero Yeti.
Pokud jste venku bez připojení k síťovému napájení a venku je pod bodem mrazu, doporučujeme
uschovat Goal Zero Yeti v izolovaném chladicím boxu, ke kterému připojíte zdroj napájení (solární
moduly) pro nabíjení vašeho zařízení.Vlastní teplo, které vydává přístroj Goal Zero Yeti a které je poté
nashromážděno v izolovaném chladicím boxu, udržuje maximální kapacitu baterie.
LED displej + tlačítka:
Zabudovaný LED displej zobrazuje stav nabití baterie. Stav nabití baterie se zobrazuje jako číslo 0 až
100. Při nabíjení vašeho zařízení se zobrazí symbol blesku, který bude na ukazateli modře blikat. To
zobrazuje aktuální stav nabití baterie. Při úplném nabití baterie bude zobrazeno číslo 100. Dávejte
pozor, pokud přístroj připojujete ke zdroji napájení poprvé, bez ohledu na to, zda se jedná o solární
modul nebo stěnovou zásuvku, může to trvat jednu minutu, než váš přístroj Yeti zjistí zahájení
nabíjení a upraví nastavení před zahájením nabíjení ze zdroje.
35
34

Pokud je přístroj Goal Zero Yeti připojen ke zdroji napájení jako např. solárnímu modulu nebo nabíječce, když jste
právě na cestách nebo je přístroj uskladněn, bude baterie i nadále v dobrém stavu a s plným výkonem.Takový
postup prodlužuje životnost baterie a zaručuje, že přístrojGoal Zero Yeti bude každý den nabitý a připraven k použití.
Pokud svůj přístroj Goal Zero Yeti nemůžete nechat při uskladnění připojený
ke zdroji elektrické energie, plně ho nabijte každé 3 měsíce a uskladněte ho na chladném, suchém místě.
Pokud u svého přístroje Goal Zero Yeti po těchto krocích neprovedete údržbu, může dojít k poškození
baterie, kvůli které pozbyde platnosti záruka na produkt.
Uskladnění a údržba při nepoužívání
Baterie:
Chemické složení článku Li-Ion NMC
Kapacitabaterie Max. 187 Wh (~14,4V, max. 13 Ah)
Příslušná kapacita jednotlivých článků Max. 52000MAh @ 3,6 V
Trvanlivost Nabíjení každých 3-6 měsíců
Správa baterie MPPT regulátor nabíjení, ochrana při slabé baterii
PŘÍPOJKY:
USB přípojka (výstup) 5 V, max. 2,4 A (12 W max.), regulovaná
USB-C přípojka (výstup)5-12V, max. 3,0 A (18 W max.), regulovaná
USB-PD přípojka (vstup/výstup) 5-20 V, max. 3,0 A (60 W max.), regulovaná
6mm přípojka (výstup, 6 mm): 12 V, max. 10 A (120 W max.)
12Vpřípojka pro automobily (výstup)12 V, max. 10 A (120 W max.)
120VAC měnič (výstup,modifikovaná sinusová vlna)120 VAC, 60 Hz, 1 A (120 W, 200 Wpřepětí)
230V AC měnič (výstup,modifikovaná sinusová vlna)230 VAC, 50 Hz, ,5 A (120 W, 200 Wpřepětí)
Nabíjecí přípojka (vstup, 8 mm, modrá,kulatá)13 -22 V, max. 7 A (100 W max.)
Obecné údaje
Možnost propojení ne
Hmotnost 2.27 kg
Rozměry 20,0 x 13,0 x 13,0 cm
Provozní teplota 32-104 °F (0-40 °C)
Certifikáty
Záruka 12 měsíců
Technické specifikace
37
36
Table of contents
Languages:
Other GOAL ZERO Power Supply manuals

GOAL ZERO
GOAL ZERO YETI PRO 4000 User manual

GOAL ZERO
GOAL ZERO YETU 500X LITHIUM User manual

GOAL ZERO
GOAL ZERO Lighthouse mini User manual

GOAL ZERO
GOAL ZERO Yeti 1000 User manual

GOAL ZERO
GOAL ZERO YETI 1000X User manual

GOAL ZERO
GOAL ZERO Yeti 6000X User manual

GOAL ZERO
GOAL ZERO Yeti 1400 User manual

GOAL ZERO
GOAL ZERO Yeti 400 Lithium User manual

GOAL ZERO
GOAL ZERO YETI 300 User manual

GOAL ZERO
GOAL ZERO Yeti 3000X User manual