ferrum OOR User manual

user’s manual
OOR by Ferrum

OOR by Ferrum
user’s manual
user’s manual
OOR by Ferrum

INTRODUCTION
1
user’s manual
Owner's Manual Ver. 1.0
© 2021
OOR by Ferrum
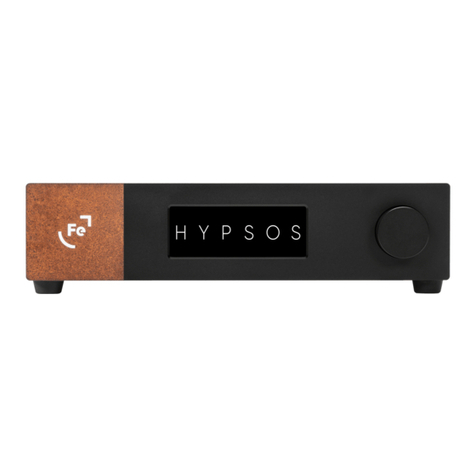
OOR, the only headphone amplifier with a soul.
After the initial success of our firstborn HYPSOS, we at Ferrum set out to follow through on our ideas of creating
category-defining audio products. We tasked our most talented and promising engineer to focus on analogue
audio in it’s purest form and to create a headphone amplifier. He started from the ground up and presented us
the early drawings of OOR, a headphone amplifier with part of his soul forged right into it. Our R&D team put their
decades of experience in designing and manufacturing audio electronics into OOR. It marries stunning
understated looks with a sophisticated, truly balanced preamplifier, our own discrete power amplifier technology
and special power regulating designs. The result simply must be heard to be believed. OOR will drive any
headphones eortlessly to the max of their potential while preserving the essence of the music. Ultra-low
distortion, zero listening fatigue, huge dynamics and unrivalled detail result in ultimate enjoyment. OOR makes it
seem like the most natural thing on earth. The trademarks of a true star. And to make things even better,
combining OOR with Ferrum’s HYPSOS really exceeds the sum of the parts.

CONTENTS
Important Safety Info
Box Content
Device Features
OOR Overview
Getting Started
Front Panel Overwiev
Back Panel Overwiev
1.
2.
3.
4.
4.1.
4.2.
6.
.
6.1.
6.3.
7.
3
4
4
5
5
6
8
8
9
10
Connecting The OOR
5. 7
8
8
Using OOR For The First Time
6.2.
9
Bypass Function
Using OOR With Amplifiers Or Active Speakers
Technical Spec
Warranty
8.
9.
10
11
Contact Ferrum
10. Warninig
Information On Disposal
11.
2
user’s manual
OOR by Ferrum

1. IMPORTANT SAFETY INFO
3
user’s manual
WARNING: To reduce the risk of fire, electric shock or enclosure discoloration, be sure that the apparatus
shall not be exposed to dripping or splashing and that no objects filled with liquids, such as vases, shall be
placed near or on the apparatus.
Read and follow all the instructions before connecting or operating the component. Keep this manual so you
can refer to these safety instructions. Heed all warnings and safety information in these instructions.
Do not allow any objects to get into the enclosure. If the unit is exposed to moisture, or a foreign object gets
into the enclosure, immediately disconnect the power cord.
Take the unit to a qualified service person for inspection and necessary repairs.
Unplug this product from the power supply before cleaning. Do not use liquid cleaners or aerosol cleaners. Use
a damp cloth for cleaning.
When a cart is used, use caution when moving the cart/apparatus combination to avoid injury from tip-over.
Do not place the unit on a bed, sofa, rug, carpet, or similar surface that could block the heatsink airflow.
If the component is placed in a bookcase or cabinet, there must be ventilation of the cabinet to allow proper
cooling.
Keep the OOR away from radiators, kettles, heat registers, stoves, or any other appliance that produces heat.
Connect the OOR only to a power source that meets its requirements (voltage and amps). We recommend
using Ferrum power supplies.
The safest and only method of isolating the device from the power supply is to disconnect the DC plug.
Ensure that the DC plug remains accessible at all times.
Unplug the OOR during lightning storms or when unused for long periods of time.
Do not route the DC cord where it will be crushed, pinched, bent at severe angles, exposed to heat, or
damaged in any way. Pay particular attention to the DC cord at the plug and where it exits the back of the
unit.
Immediately unplug and stop using the OOR and have it inspected and/or serviced by a qualified service
agency if:
- the power cord or plugs have been damaged,
- objects have fallen or liquid has been spilled into the unit,
- the unit has been exposed to rain,
- the unit shows signs of improper operation,
- the unit has been dropped or damaged in any way,
- when the product exhibits a distinct change in performance.
This indicates a need for service.
OOR by Ferrum

2. BOX CONTENT
- OOR headphone amplifier
- AC/DC power adapter
- power cord
- quick guide
3. DEVICE FEATURES
4
user’s manual
When replacement parts are required after the warranty period, be sure the service technician has used
replacement parts specified by the manufacturer or have the same specification as the original part.
Unauthorized substitutions may result in fire, electric shock, or other hazards. Upon completion of any service
or repairs to this product, ask the service technician to perform safety checks to determine that the product is
in proper operating condition.
In households with small children, an adult should provide supervision until the child is capable of following all
the rules essential for the safe operation of the unit.
Truly balanced - the signal path stays truly balanced using the XLR inputs and becomes truly balanced using
the RCA inputs.
Ease of use - only three knobs to control all settings.
Discrete design - modified Class A/B topology used in discrete power stage.
Superior control - perfected steering of output transistors making them to instantly deliver full capacity and
two-pole compensation scheme. Together with the high current design we get superior control and ultra fast
operation over the total bandwidth.
Enhanced transparency - the whole design is focussed on a balanced and very transparent sound signature,
making listening fatigue something of the past.
Made for HYPSOS - while OOR performs very good right out of the box, it is made to excel above and beyond
when used together with HYPSOS. Using the proprietary Ferrum Power Link connection HYPSOS will perform to
its absolute maximum, unleashing unheard musicality from the combination with OOR.
OOR by Ferrum

4. OOR OVERVIEW
5
user’s manual
OOR by Ferrum
A.
B.
C.
4.1. Front Panel Overview
A D E
B F
C
Ferrum logo - brightness adjustable
6.3 mm jack, TRS headphones output
4-pin XLR headphones output
D.
E. Rotary gain selector - allows you to match a gain level to your headphones:
- for single ended headphones (6.3 mm jack) you can choose (from left to right): -10 dB, 0 dB, +10 dB
- for balanced output (4-pin XLR) you can choose (from left to right): -4 dB, +6 dB, +16 dB
Rotary input selector and on/o switch
F. Volume knob
Figure 1.

A
user’s man
4.2. Back Panel Overview
ual
XLR input
RCA input
XLR output
RCA output
Bypass rotary switch - allows you to bypass OOR’s internal volume potentiometer. This option is useful
when you control volume at the source
Note: For more information please look at paragraph “6.2. Bypass Function”.
WARNING! Use with caution! Enabling bypass might cause hearing damage or destroy your headphones.
D.
C.
B.
E.
6
A.
Logo brightness potentiometer
Ferrum Power Link DC input
The 2.5/5.5 mm DC input can be used with other PSUs
H.
G.
F.
C
B D FH
E G
user’s manual
OOR by Ferrum
Figure 2.

5. CONNECTING THE OOR
7
user’s manual
Note: Please connect all cables before switching on the OOR.
OOR by Ferrum
XLR TRS
OR
OR
OR
OR
FEMALE
XLR
RCA
AMP
MALE XLR RCA
PSU
SOURCE
Figure 3.

8
user’s manual
OOR by Ferrum
Make sure the signal cables (optionally you can also connect an amplifier, active speakers, etc.) are
connected to the OOR before turning it on.
Set the Gain knob to the first position (-dB) and the Volume knob to about 25%.
Turn on the OOR using the input selector - select either the RCA or XLR input.
Now while listening to music, gently raise the volume using the Volume knob. If the volume is unsatisfactorily
low at about 75% o, move the Volume knob back to 25% and the Gain knob to the second position (0).
Repeat the procedure - gently raise the volume to about 75%.
If the volume is still noticeably low, move the Volume knob back to 25% and the Gain knob to the 3rd position
(+dB). The idea is to set the optimum volume level with the Gain knob in such a way that you get the widest
possible range from the Volume knob. Our recommendation is to find a Gain knob setting such that the
optimum volume level is as close to 50% of the Volume knob as possible.
6. GETTING STARTED
6.1. Using OOR For The First Time
The bypass function is disabled at the factory. To activate it you have to switch the rotary switch from
position 0 to position 1 - the most convenient way to do it is with a flat screwdriver.
The bypass function disables the built-in potentiometer in OOR. As a result, the signal given at the input of
OOR will be transmitted to the headphones or RCA or XLR outputs with all its power. This is useful when it is
more convenient for the user to control the volume from the sound source.
Please use the Bypass function with caution! A sudden jump in headphone volume may damage your
hearing and the headphones or speakers!
It is best to reduce the input signal at the source to a minimum before the Bypass function is activated.
Note: Ferrum refuses every liability for damage to equipment due to using Bypass function.
6.2. Bypass Function
The potentiometer built into the OOR aects the volume of not only the headphones, but also the RCA and
XLR outputs. We recommend disconnecting headphones from the OOR if they are not used for a longer
period of time, and especially if you want to control volume on RCA or XLR outputs (when an amplifier or
active speakers are connected). This practice can prevent excessive wear or damage to your headphones.
6.3. Using OOR With Amplifiers Or Active Speakers

9
user’s manual
Gain (dB): Balanced -4 dB, +6 dB, +16 dB / single ended -10 dB, 0 dB, +10 dB
Operation: Fully balanced, proprietary discrete power amp technology
Inputs: XLR, RCA, 2.5 mm DC connector centre positive, proprietary 4-pin DC connector
Headphones Outputs: Balanced 4-pin XLR, 6.35 mm jack
Rear Outputs: XLR, RCA
Frequency Response: 20 Hz – 100 kHz 0.1 dB
Output Power Single Ended: 0.4 W into 300 Ω, 2 W into 60 Ω
Output Power Balanced: 1.6 W into 300 Ω, 8 W into 60 Ω
THD: <0,0003% / -110 dB 0.1 W into 50 Ω on balanced output
Input Impedance: 94 kΩ
Output Impedance Single Ended: 22 Ω on pre-amp
Output Impedance Balanced: 44 Ω on pre-amp
Output headphones Impedance: <0.3 Ω
Power Consumption: Idle <15 W
Power Adapter: 100-240 V AC to 22-30 V DC
Dimensions (W x D x H) (in/cm): 8.6 inch x 8.1 inch x 2.0 inch / 21.7 cm x 20.6 cm x 5 cm
Weight (kg/lbs): 1.8 kg / 3.97 LBS
7. TECHNICAL SPEC
Each individual OOR undergoes comprehensive quality control and a complete test before shipping.
This headphone amplifier is warranted by Ferrum to the owner against defects in workmanship and materials
used in manufacture for a period of three years from the date of purchase.
If you suspect that your product is faulty, please contact the place of purchase or you contact Ferrum support.
Prior to shipping for warranty services the customer or dealer must obtain an RMA number from Ferrum for
warranty services. Units sent without an RMA number will not be accepted.
Proof of purchase in the form of a bill of sale or received invoice, which is evidence that this product is within the
warranty period, must be presented to obtain warranty service. This warranty is void and inapplicable if the
factory applied Serial Number has been altered or defaced from this product. Faults due to customer misuse,
unauthorized modifications or accidents are not covered by this warranty.
In case of need to send the OOR for service please pack the product very carefully, preferable in the original
packing, to be sure no damage can be done during shipment.
Ferrum is not responsible for accessories, items left in the packaging and the box in which the device has arrived
for service. Ferrum reserves the right to use a replacement box if necessary.
8. WARRANTY
OOR by Ferrum

In case of questions, problems or suggestions regarding its form or contents, please contact us via our support
system available on our website: www.ferrum.audio/support
10
user’s manual
9. CONTACT FERRUM
Excessive sound pressure from speakers and headphones can cause hearing loss. In order to use this product
safely, avoid prolonged listening at excessive sound pressure levels.
This equipment has been tested and found to comply with the limits for a Class A digital device, pursuant to Part
15 of the FCC Rules. These limits are designed to provide reasonable protection against harmful interference
when the equipment is operated in a commercial environment.
This equipment can radiate radio frequency energy and, if not installed and used in accordance with the
instruction manual, may cause harmful interference to radio communications.
You are cautioned that any changes or modifications not expressly approved in this manual could void your
authority to operate this equipment.
All interface cables used to connect peripherals must be shielded in order to comply with the limits for a digital
device pursuant to Subpart B of Part 15 of FCC Rules.
This device complies with Part 15 of the FCC Rules. Operation is subject to the following two conditions:
(1) this device may not cause harmful interference, and (2) this device must accept any interference received,
including interference that may cause undesired operation.
This product with the CE marking complies with the EMC Directive issued by the Commission of the European
Community. Compliance with this directive implies conformity to the following European standards:
• EN55103-1: Electromagnetic Interference (Emission)
• EN55103-2: Electromagnetic Susceptibility (Immunity)
This product is intended for use in the following Electromagnetic Environments: E1 (residential), E2 (commercial
and light industrial), E4 (controlled EMC environment, ex. TV studio).
10. WARNING
OOR by Ferrum

11
user’s manual
OOR by Ferrum
12. INFORMATION ON DISPOSAL FOR USERS OF
WASTE ELECTRICAL & ELECTRONIC EQUIPMMENT
(PRIVATE HOUSEHOLDS).
The Wheelie Bin symbol on the products and/or accompanying documents
means that used electrical and electronic products should not be mixed with
general household waste. Disposing of this product correctly will help save
valuable resources and prevent any potential negative eects on human
health and the environment.
To properly dispose harmful substances and recycle the product, the user is
obliged to return it at the point of collection of electrical and electronic
equipment waste. For more information please contact your local authorities,
waste disposal units or retailer.
Table of contents
Other ferrum Power Supply manuals
Popular Power Supply manuals by other brands
EPS
EPS NEXUS manual

Ericsson GE
Ericsson GE MASTR II 19A149979P1 Maintenance manual
Siemens
Siemens SIMATIC NET PS598-1 Compact operating instructions

Thermal Dynamics
Thermal Dynamics CE CutMaster 50 instruction manual

Keithley
Keithley 242 instruction manual
Phoenix Contact
Phoenix Contact QUINT4-PS/1AC/24DC/1.3/PT datasheet

