CSA-1371CTLD 说明书 / INSTRUCTION MANUAL
2
Manual Instruction
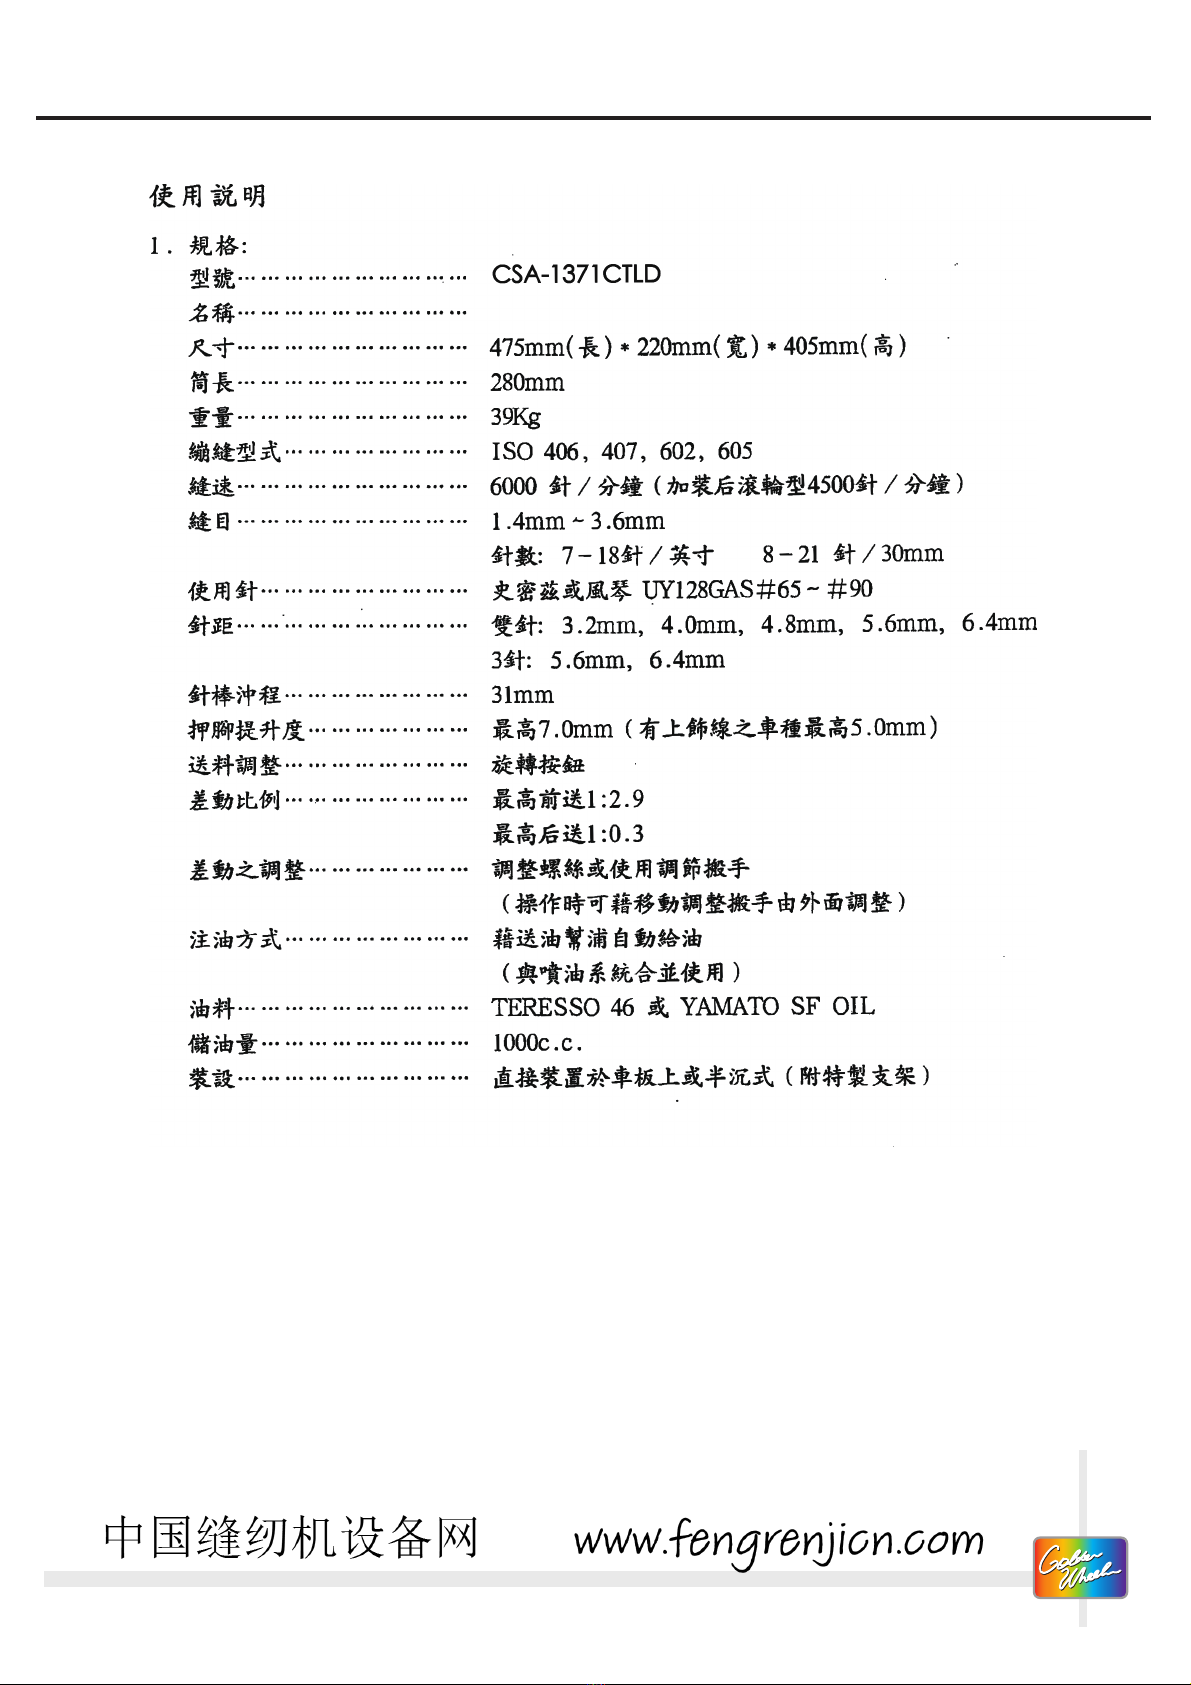
1.Specification:
Model..............................
Name...............................
Size..................................
Cylinder length................
Weight.............................
Interlock sewing type......
Sewing speed...................
Stitch length....................
Needle type......................
Needle gauge...................
Needle bar stroke.............
Foot lift............................
Feed adjustment..............
Differential ratio..............
Differential adjustment....
Oiling way.......................
Oil type............................
Oil reserves......................
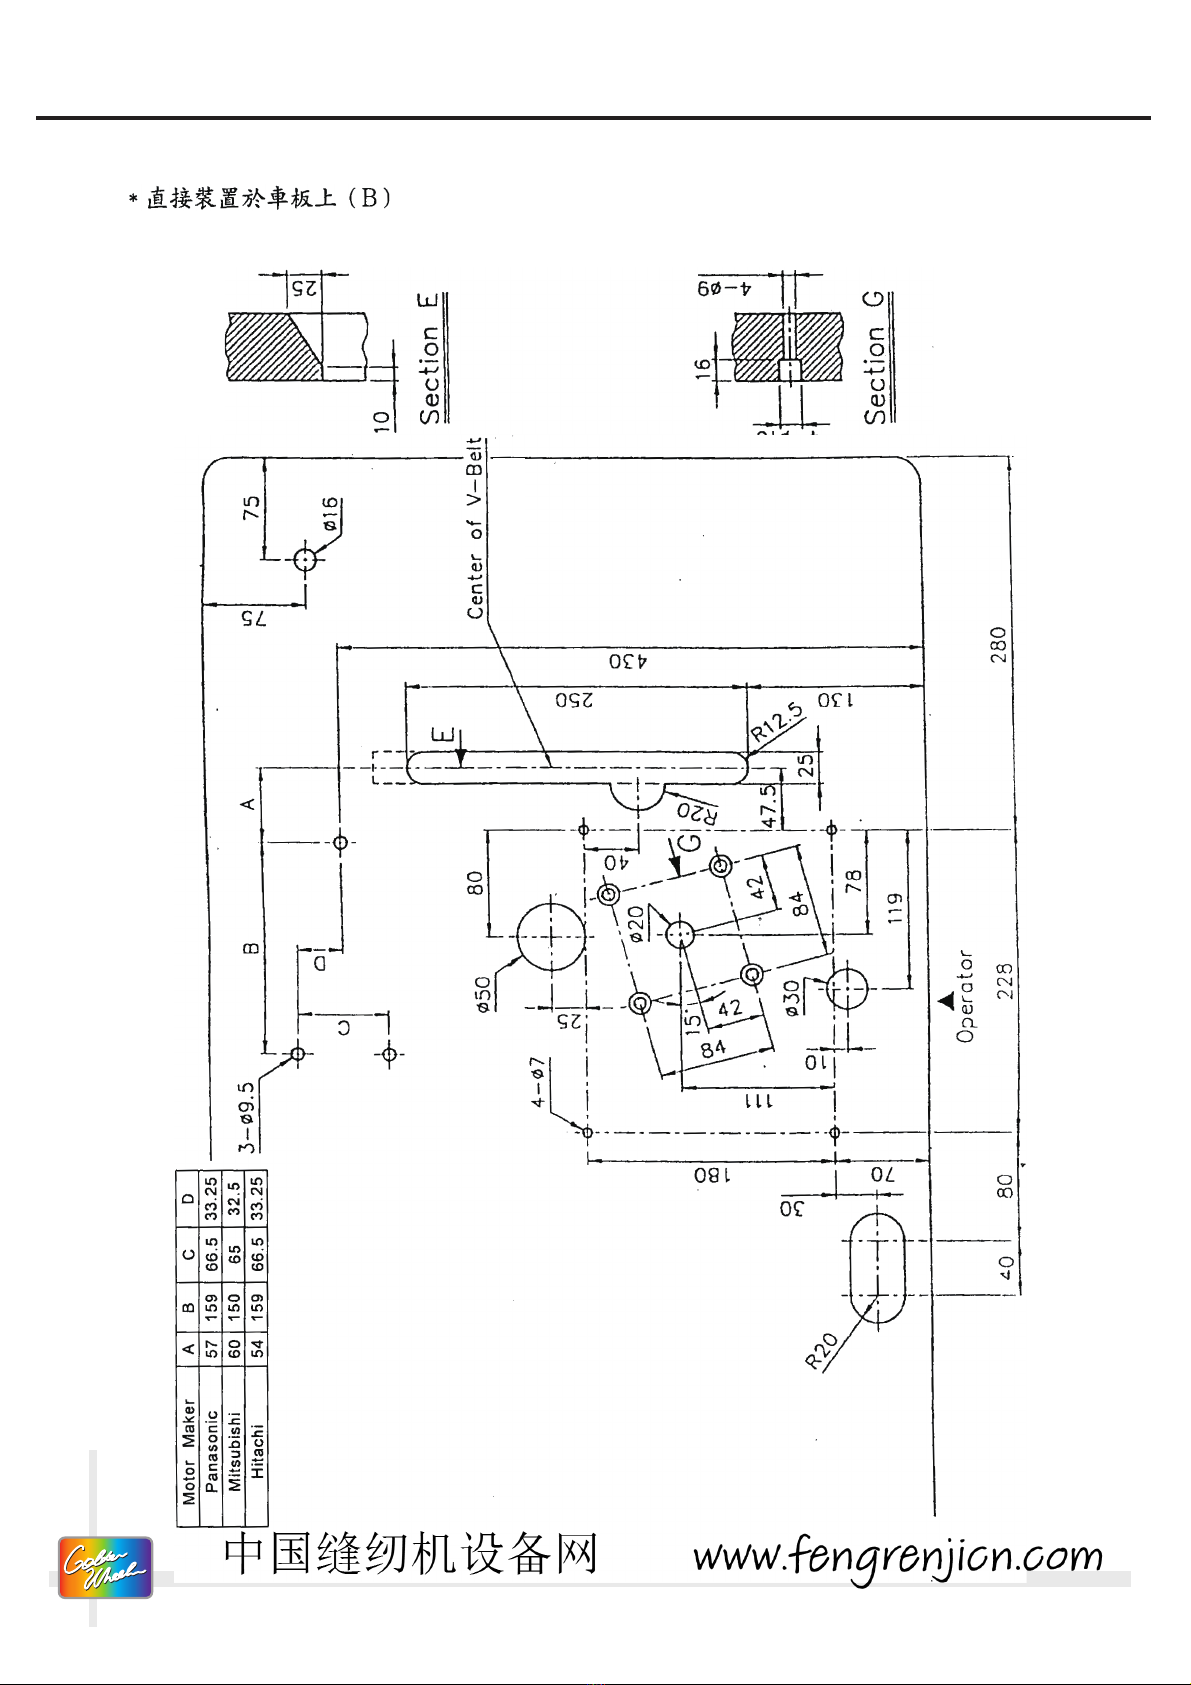
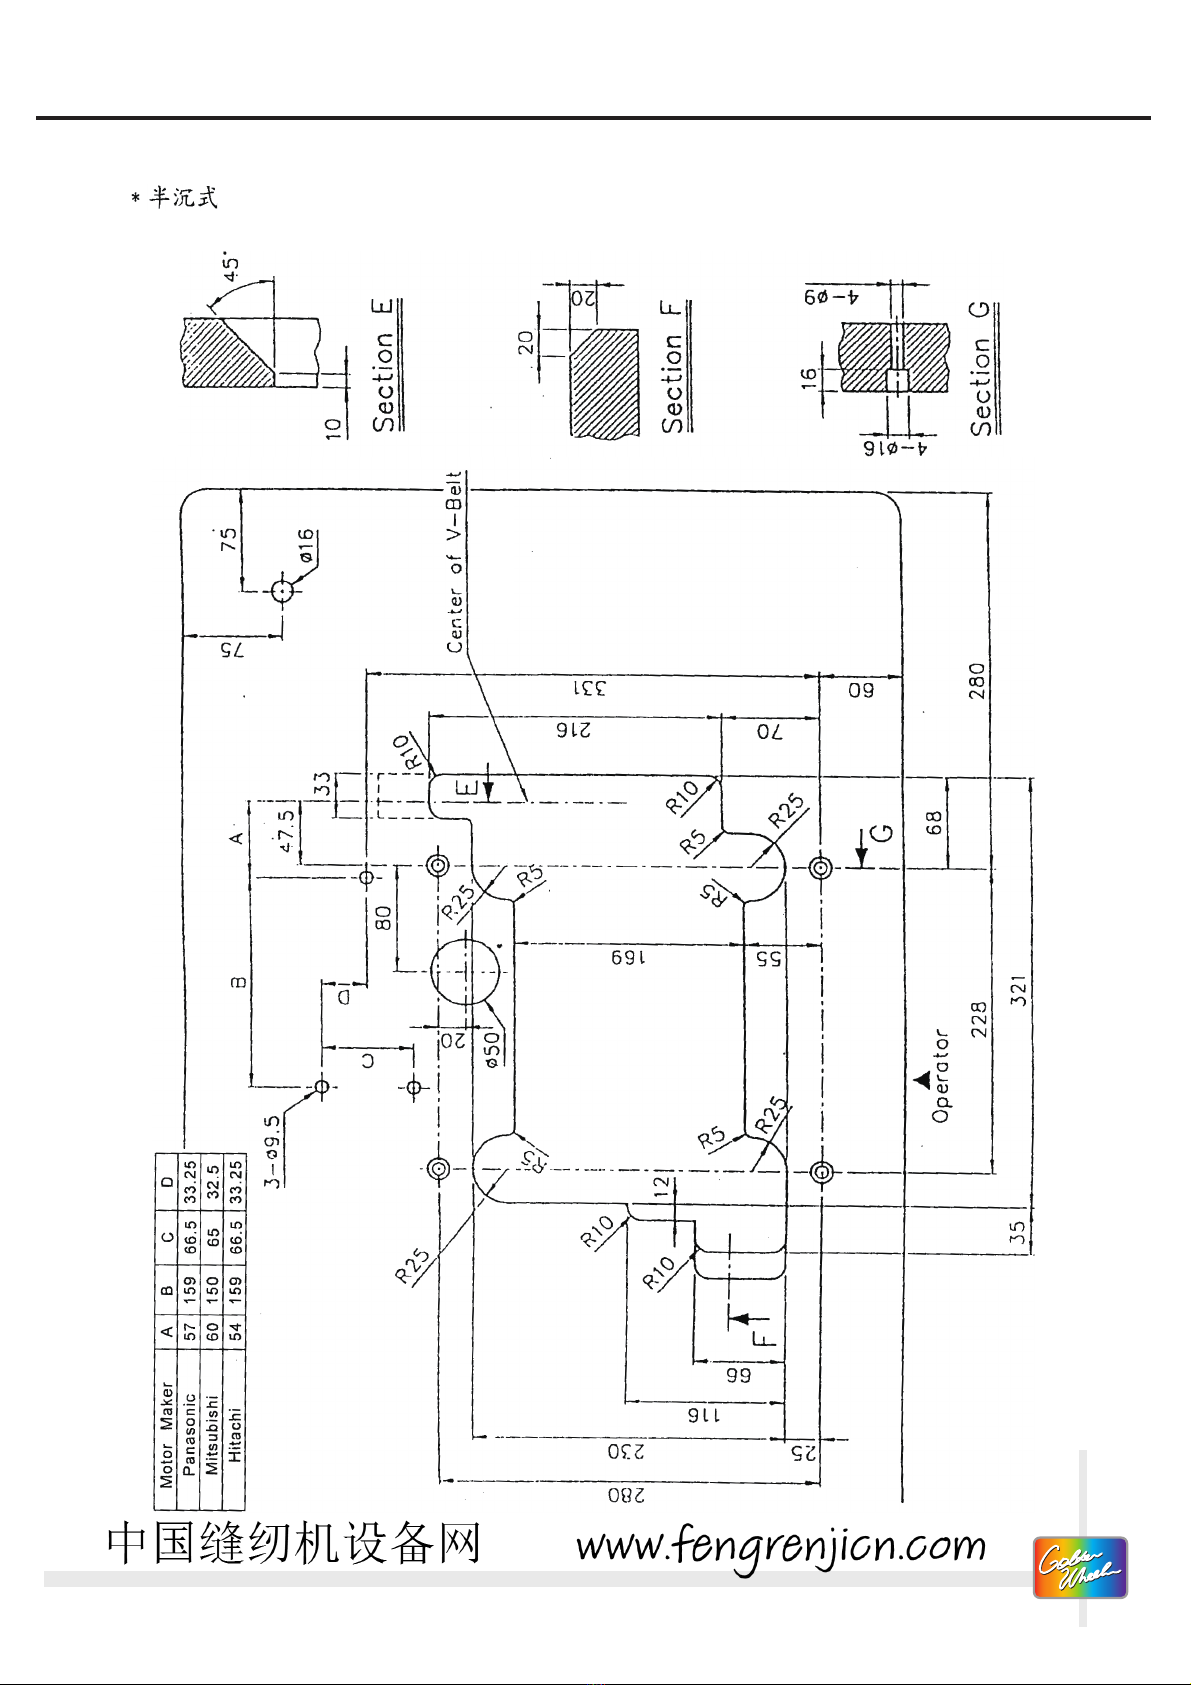
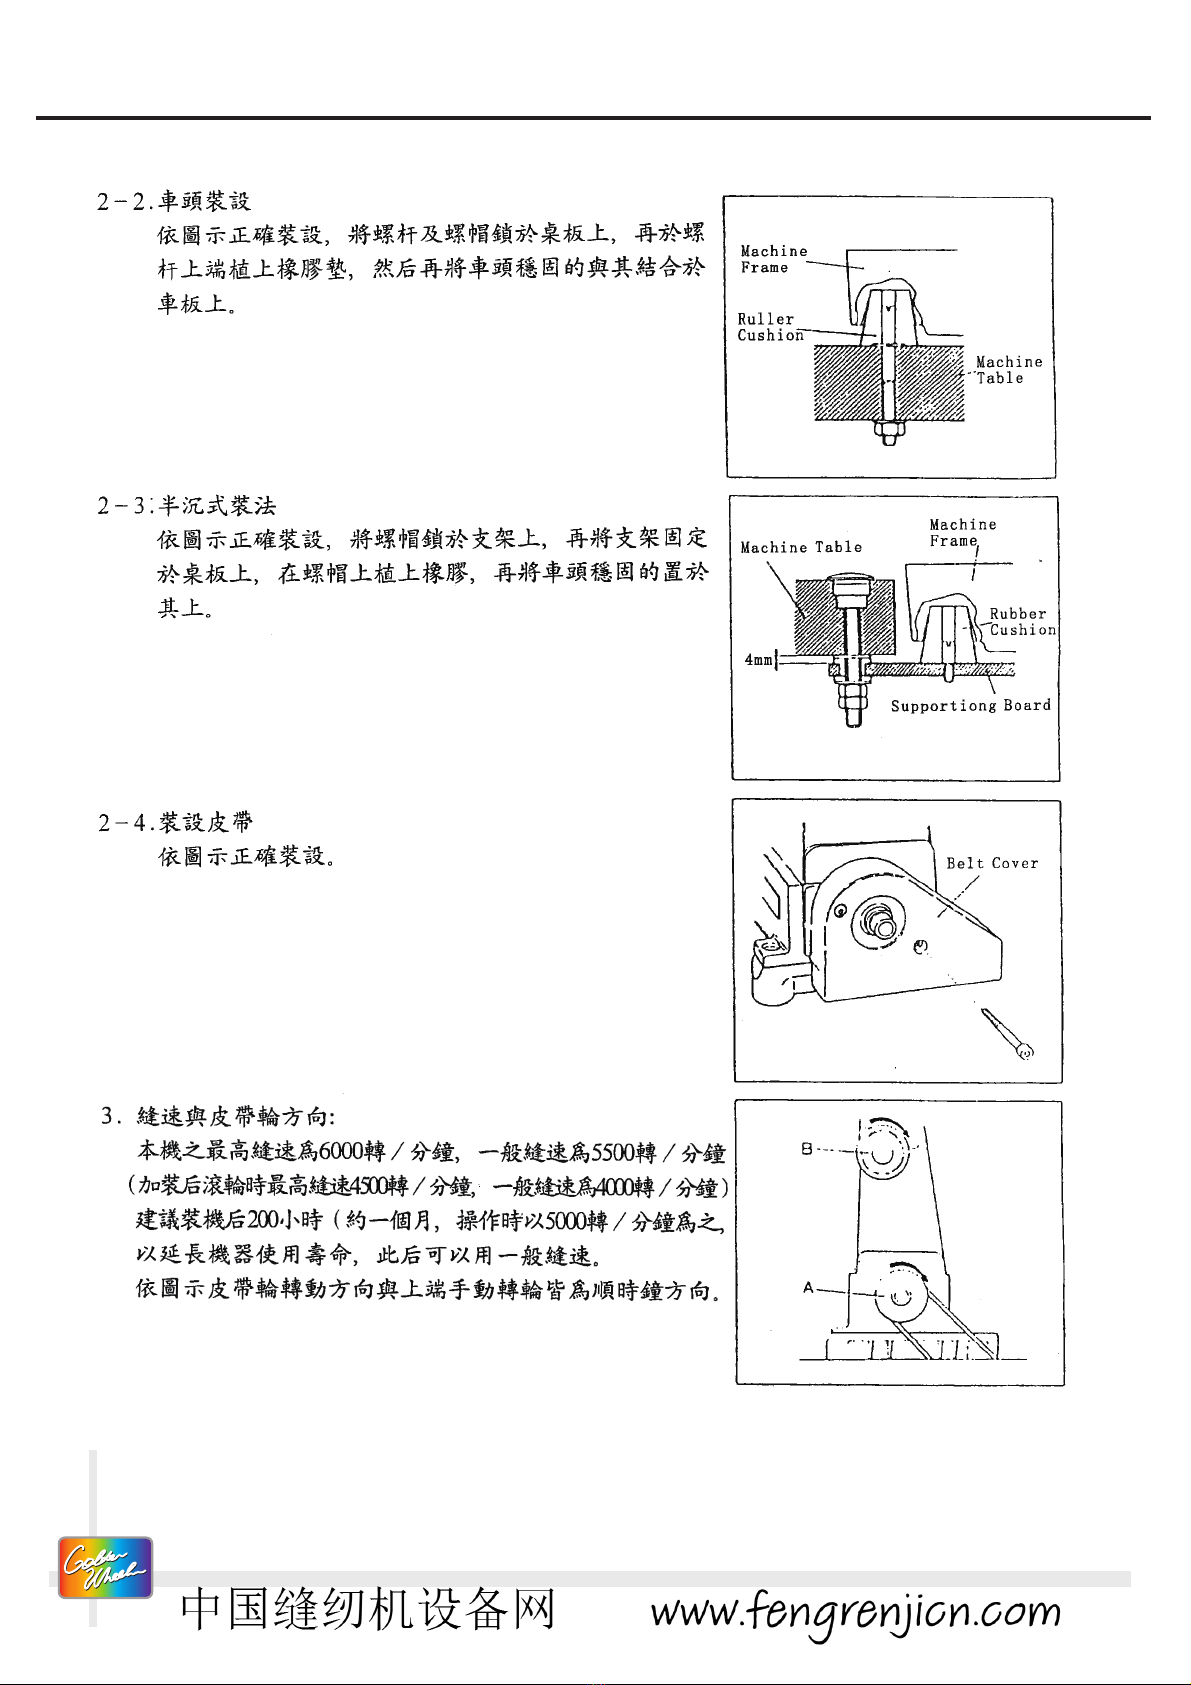
Installation.......................
CSA-1371CTLD
Direct Drive,High Speed,Cylinder-Bed,Interlock Machine
475mm(length)*220mm(width)*405mm(height)
280mm
39Kg
ISO 406,407,602,605
6000 needle/minute( back puller type 4500needle/minute)
1.4mm~3.6mm
eedle quantity:7-18needle/inch 8-21needle/30mm
SCHMETZ or ORGANUY128GAS#65~#90
Double needle:3.2mm,4.0mm,4.8mm,5.6mm,6.4mm
Three needle:5.6mm,6.4mm
31mm
Highest7.0mm(with upper decoration thread sewing:Highest5.0mm)
Rotate button
MAX:front feed 1:2.9
MAX: back feed 1:0.3
Adjustment screw or use adjustable wrench
(adjustment outside by use adjustable wrench)
Automatic oil by oil feed bar.
(Used in combination with the oil injection system)
TERESSO46 or YAMATO SF OIL
1000c.c.
Mounted directly on the table or semi-submerged table
(attached special stand)