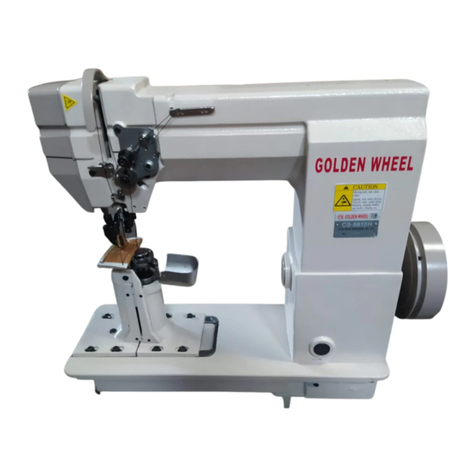
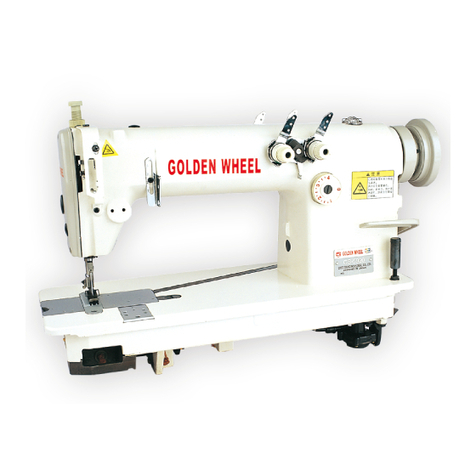
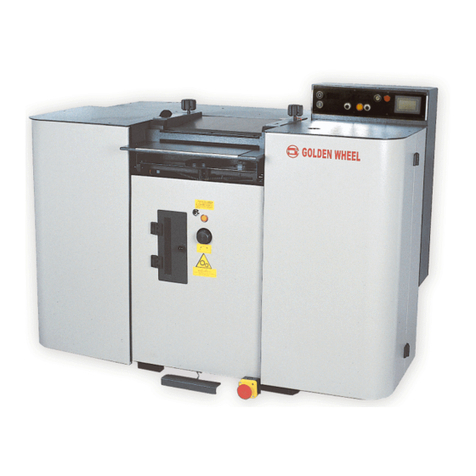
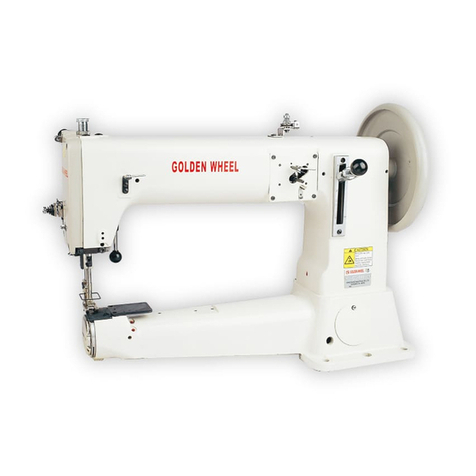
Golden wheel CS-5940 User manual

金翰牌工棠用缝纫械
一-
INSTRUCTION MANUAL
操作手册
后欠 月支
严良 司
CHEE SIANG INDU STRIAL CO., LTD.
2016.02.04


1
1. SETTING UP 安裝
安裝安裝
安裝
1. Inserting the Needle 裝置機針
CAUTION: Switch off the machine! Danger of
injury by unintentional starting of
the machine!
●Set the needle bar at its highest point.
●Loosen screw 1.
●Push needle 2fully into the needle bar (the
long needle groove must face to the front.)
●Tighten screw 1.
注
注注
注意
意意
意:關閉電源!防止無意中啟動機器!
◆ 將針棒提升到最高位置
◆ 鬆開螺絲 1
◆ 將機針 2插入至針棒底部(機針的長勾槽
朝向正前方)
◆ 擰緊螺絲 1
2. Threading the Needle Thread and Regulating its Tension 穿針線與調整線張力
●Thread the needle thread as shown in the
left figure.
●Regulate the needle thread by turning
knurled nut 1.
◆ 如左圖所示穿針線
◆ 旋轉螺帽 1調整針線的張力

2
3. Threading the Looper Thread and Regulating its Tension 穿底線與調整線張力
●Open the looper cover and swing out thread guide plate 1.
●Thread the looper thread as shown in the figure below and pull it under guide plate 2.
●Regulate the looper thread by turning knurled nut 4.
◆ 打開勾針護蓋及過線導引板 1
◆ 如上圖所示穿底線並繞過導線板 2的下方
◆ 旋轉螺帽 4調整底線的張力

3
2. CARE AND MAINTENANCE 維護與保養
維護與保養維護與保養
維護與保養
1. Machine Oil Level 油位高度
Caution: Check oil level before each use.
●The oil level must be between the markings
in the inspection glass.
●If required, refill oil through hole 1.
Caution: Only use oil with a mean viscosity of
22.0mm²/s at 40°C and a density of
0.865 g/cm³at 15°C!
注
注注
注意
意意
意:每次使用前需檢查油位的高度
◆ 油位的高度須介於兩個刻度線之間
◆ 必要時,由加油孔 1補充潤滑油
注意:需使用潤滑油黏度約 22.0mm²/s(在
40°C時)且密度約 0.865 g/cm³(在 15
°C時)
2. Lubricating the Top Feed Joints 潤滑上送料連桿
●Lubricate the points marked in the
illustration with a drop of oil once a week
or after the machine has stood still for
longer periods.
Caution: Only use oil with a medium viscosity
of 10.0 mm²/s at 40°C and a density of
0.847 g/cm³at 15°C.
◆ 每週一次或長期不使用時在圖示的箭頭
指示部位添加潤滑油
注意:需使用潤滑油黏度約 10.0mm²/s(在
40°C時)且密度約 0.847 g/cm³(在 15
°C時)

4
3. Checking and Adjusting the Air Pressure 檢查與調整空氣壓力
●Before operating the machine, always check
the air pressure on gauge 1.
●Gauge 1must show a pressure of 6 bar.
●If necessary adjust to this reading.
●To do so, pull knob 2upwards and turn it so
that the gauge shows a pressure of 6 bar.
◆ 在操作機器之前,請檢查壓力表 1的空氣
壓力
◆ 壓力表 1的壓力須指示在 6 bar
◆ 必要時,調整壓力至此值
◆ 調整時,將旋鈕 2往上拉,轉到指針指示
壓力在 6 bar 位置,再壓下旋鈕 2

5
3. ADJUSTMENT 機器的調整
機器的調整機器的調整
機器的調整
1. Control and Adjustment Aids 控制與輔助調整設置
Note: By inserting the adjustment pin (ø
5mm) to the marked holes 1, 2, 3
and 4with, the desired needle bar
positions can fixed exactly.
備註:利用調整用平行銷(ø5mm)插入
對應 1, 2, 3及4的記號孔時,
可得到準確的針棒位置
●Turn the balance wheel until the needle bar is approximately in the desired position.
●Insert the adjustment pin into the appropriate hole and apply pressure.
●Turn the balance wheel slightly backwards and forwards, until the pin locks into the rear crank
recess, in this way the main shaft of the machine is locked.
Adjustment hole 1= top dead centre of the needle bar (t.d.c.)
Adjustment hole 2= bottom position of top feed dog
Adjustment hole 3= bottom dead centre of the needle bar (b.d.c.)
Adjustment hole 4= neutral position of main feed dog and differential feed dog
◆旋轉手輪使針棒到達所需的大略位置
◆將調整用平行銷插入對應的記號孔,並施以適當的推力
◆稍微前後轉動手輪使平行銷插入凸輪的溝槽中,以鎖定機器的主軸
調整記號孔 1= 針棒上死點
調整記號孔 2= 上送料齒下死點
調整記號孔 3= 針棒下死點
調整記號孔 4= 主送料齒與差動送料齒的中立位置

6
2. Needle to Needle Hole 機針與針孔位置
Requirement
1. As seen from the direction of feeding, needle 5 should be in the centre of the needle hole.
2. The distance between needle 5 and the front edge of the needle hole should be approximately
0.8mm.
調整需求
調整需求調整需求
調整需求:
::
:
1. 從送料方向觀察,機針 5必須對準針孔的中心
2. 機針 5與針孔前緣的距離需約為 0.5mm
●Loosen screw 1and 2.
●Adjust needle bar frame 3according to requirement 1) and tighten screw 1.
●Loosen screw 4and turn needle bar frame 3according to requirement 2).
●Tighten screws 2and 4.
◆ 鬆開螺絲 1與2
◆ 根據調整需求 1) 調整針柱座 3的左右位置,然後擰緊螺絲 1
◆ 鬆開螺絲 4
44
4,根據調整需求 2) 調整針柱座 3的前後位置
◆ 擰緊螺絲 2與4

7
3. Preliminary Adjustment of Needle Height 機針高度的初步調整
Requirement 調整需求
調整需求調整需求
調整需求
CS-5940
With the needle bar at t.d.c. (adjustment hole 1), the distance X between the needle plate
and the needle tip should be 11 mm.
當針棒在上死點時(調整記號孔 1),針尖端與針板面的距離須等於 11 mm
CS-5941
With the needle bar at t.d.c. (adjustment hole 1), the distance X between the needle plate
and the needle tip should be 14 mm.
當針棒在上死點時(調整記號孔 1),針尖端與針板面的距離須等於 14 mm
●Bring needle bar 1to t.d.c.
●Adjust needle bar 1(screws 2) according to the requirement.
◆將針棒 1提升到上死點
◆根據調整需求(鬆開螺絲 2)設定針棒 1的高度

8
4. Neutral Position of Main Feed Dog 主送料齒的中立位置
Requirement 調整需求
調整需求調整需求
調整需求
When the stitch length is set at “0”, there should be no feeding motion of the main feed dog 7.
當縫目長度設定在「0」的位置時,主送料齒無前後運動
●Unscrew set screw 1and nut 2(stitch length limitation disengaged).
●Bring stitch length adjustment lever 3to “0” mark.
●Loosen screw 4to such an extent that crank 5can be rotated on the shaft with some resistance.
●While turning the balance wheel continuously, adjust crank 5, so that crank 6does not move.
●Tighten screw 4.
Note: Screw 1and nut 2remains loosened for further adjustments.
(Stitch length limitation is still disengaged).
◆鬆開螺絲 1與螺帽 2(解除縫目長度限制)
◆將縫目長度調整桿推到「0」的刻度位置
◆鬆開螺絲 4至一有限的程度使擺動臂 5可在軸上旋轉並具有阻力
◆連續轉動手輪,並調整擺動臂 5,使擺動臂 6不轉動
◆擰緊螺絲 4
注意:螺絲 1與螺帽 2仍然保持鬆開狀態,以便做後續的調整
(縫目長度限制仍然保持在解除狀態)

9
5. Neutral Position of Differential Feed Dog 差動料齒的中立位置
Requirement 調整需求
調整需求調整需求
調整需求
With the stitch length set at “0” and the adjustment gauge 1fitted, there should be no movement
of the differential feed dog 5.
當縫目長度設定在「0」的位置且調整治具 1裝入時,差動送料齒 5無前後運動
●Set stitch length at “0”.
●Fit adjustment gauge 1.
●Loosen screw 2to such an extent that crank 3can be moved on the shaft with some resistance.
●While turning the balance wheel continuously, adjust crank 3, so that crank 4does not move.
●Tighten screw 2.
Note: Adjustment gauge 1 remains fitted for further adjustments.
◆ 將縫目長度設定在「0」的刻度位置
◆ 裝入調整治具 1
◆ 鬆開螺絲 2至一有限的程度使擺動臂 3可在軸上旋轉並具有阻力
◆ 連續轉動手輪,並調整擺動臂 3,使擺動臂 4不轉動
◆ 擰緊螺絲 2
注意:調整治具 1仍然保持裝入狀態,以便做後續的調整

10
6. Feeding Motion of Main Feed Dog and Differential Feed Dog 送料齒的前後運動
Requirement 調整需求
調整需求調整需求
調整需求
When the stitch length is set at “4” and the needle bar is positioned at neutral position of feed dog
(adjustment hole 4) and the adjustment gauge 8is fitted, the main feed dog and the differential
feed dog should not move when roller 5is operated.
當縫目長度設定在「4」的位置,針棒設定在送料齒的中立位置(調整記號孔 4),且調整治
具8在裝入狀態,當推動滾輪 5時,主送料齒與差動送料齒無前後運動
●Slightly loosen screws 1and 2(4 screws).
●Bring needle bar to adjustment hole 4and adjust stitch length to “4”.
●While moving roller 5 up and down continuously, turn eccentrics 6and 7so that the cutout is
visible and the cranks 3and 4do not move.
●Tighten screws 1 and 2.
◆稍微鬆開螺絲 1與2(共 4個螺絲)
◆將針棒移到調整記號孔 4的位置,以及將縫目長度設定在「4」的位置
◆上下推動滾輪 5,同時調整偏心輪 6與7的位置,使擺臂 3與4無運動。(此狀態時,偏
心輪 6與7的開槽在可見位置)
◆擰緊螺絲 1與2

11
7. Lifting Motion of Main Feed Dog and Differential Feed Dog 送料齒的上下運動
Requirement 調整需求
調整需求調整需求
調整需求
When the needle bar is at t.d.c. (adjustment hole 1), the cutouts of eccentrics 3and 4should point
straight downward.
當針棒在上死點時(調整記號孔 1),調整偏心輪 3與4的開槽須朝向正下方
●Loosen screws 1and 2(4 screws).
●Bring needle bar to t.d.c.
●Turn eccentrics 3and 4according to the requirement and tighten accessible screws 1and 2.
●By turning the balance wheel, provide access to the remaining screws 1and 2and tighten them.
◆鬆開螺絲 1與2(共 4個螺絲)
◆將針棒移到上死點(調整記號孔 1)的位置
◆轉動偏心輪 3與4到符合上述調整需求
調整需求調整需求
調整需求的位置,擰緊可觸及的螺絲 1與2
◆轉動手輪,再擰緊其餘的螺絲 1與2

12
8. Lifting Motion of Main Feed Dog 主送料齒的上升運動
Requirement 調整需求
調整需求調整需求
調整需求
When the needle bar is at t.d.c. (adjustment hole 1), the cutout of eccentric 2should point straight
downward.
當針棒在上死點時(調整記號孔 1),調整偏心輪 2的開槽須朝向正下方
●Loosen both screws 1.
●Bring needle bar to t.d.c.
●Turn eccentric 2according to the requirement and tighten accessible screw 1.
●By turning the balance wheel, provide access to the other screw 1and tighten it.
◆鬆開螺絲 1(共 2個螺絲)
◆將針棒移到上死點的位置
◆轉動偏心輪 2到符合上述調整需求
調整需求調整需求
調整需求的位置,擰緊可觸及的螺絲 1
◆轉動手輪,再擰緊另一個螺絲 1

13
9. Lifting Motion of Differential Feed Dog 差動送料齒的上升運動
Requirement 調整需求
調整需求調整需求
調整需求
With the needle bar positioned 5.5 mm before t.d.c., the cutout of eccentric 2should point straight
downward.
當針棒在上死點前的 5.5mm 高度時,調整偏心輪 2的開槽須朝向正下方
●Loosen both screws 1.
●Bring needle bar to 5.5 mm before t.d.c.
●Turn eccentric 2according to the requirement and tighten accessible 1.
●By turning the balance wheel, provide access to the other screw 1and tighten it.
◆鬆開螺絲 1(共 2個螺絲)
◆將針棒移到上死點前的 5.5mm 高度位置
◆轉動偏心輪 2到符合上述調整需求
調整需求調整需求
調整需求的位置,擰緊可觸及的螺絲 1
◆轉動手輪,再擰緊另一個螺絲 1

14
10. Position of Main and Differential Feed Dog 送料齒的位置
Requirements 調整需求
調整需求調整需求
調整需求
Whit the needle bar at t.d.c. (adjustment hole 1) and the stitch length set at longest
1. The main feed dog should be 1.4mm parallel and the differential feed dog 1.9mm parallel above
the needle plate.
2. Both feed dogs should be in the centre of the needle plate cutout and
3. The two feed dogs should be spaced 4 mm apart.
當針棒在上死點(調整記號孔 1)且針
距設定在最長時
1. 主送料齒須高出針板面 1.4mm 並
與針板面平行,差動送料齒須高出
針板面 0.9mm 並與針板面平行
2. 主送料齒與差動送料齒的前後位
置皆須位於針板開槽的中央
3. 主送料齒與差動送料齒的前後端距
離須為 4 mm
●Bring needle bar to t.d.c. and set the stitch length set at longest.
●Loosen screws 1, 2, 3and 4.
●Adjust feed dog carriers 5and 6according to requirement 1.
●Slightly tighten screws 1and 2.
●Turn eccentric bushes 7and 8according to requirements 2and 3.
●In this position tighten screws 3and 4.
●In compliance with requirement 1 tighten screws 1and 2.
◆ 將針棒移到上死點的位置並將針距設定到最大
◆ 鬆開螺絲 1, 2, 3及4
◆ 調整送料齒台 5與6到符合上述調整需求
調整需求調整需求
調整需求 1.的位置
◆ 稍微擰緊螺絲 1與2
◆ 轉動偏心軸套 7與8到符合上述調整需求
調整需求調整需求
調整需求 2.與3.的位置
◆ 在此位置擰緊螺絲 3與4
◆ 在符合上述調整需求
調整需求調整需求
調整需求 1.的狀態下擰緊螺絲 1與2

15
11. Position of Main and Differential Feed Dog on CS-5941 送料齒的位置
Requirements 調整需求
調整需求調整需求
調整需求
With the stitch length set at longest and the feed dogs in their highest position
1. The main feed dog should be 1.7mm and the differential feed dog 2.0mm parallel above the
needle plate.
2. Both feed dogs should be in the centre of the needle plate cutout and be approximately 4 mm
apart.
當針距設定在最長且送料齒在最高位
置時
1. 主送料齒須高出針板面 1.7mm 並
與針板面平行,差動送料齒須高出
針板面 2.0mm 並與針板面平行
2. 主送料齒與差動送料齒的前後位
置皆須位於針板開槽的中央,且其
前後端距離須為 4 mm
●Set the stitch length at the longest and bring the main feed dog up to its highest position.
●According to requirement 1and 2, adjust carrier 1of the main feed dog by turning crank 2and 3
(loosen screws 4and 5) as well as the eccentric clamp bush 6.
●Bring differential feed dog carrier 7into its highest position.
●According to requirement 1and 2, adjust differential feed dog by turning crank 8and 9(screws
10 and 11) as well as the eccentric clamp bush 12.
◆ 將針距設定到最大並將主送料齒移到最高位置
◆ 根據調整需求
調整需求調整需求
調整需求 1.與2.轉動擺動臂 2與3(鬆開螺絲 4與5)以及偏心軸套 6來調整主送料
齒台 1位置
◆ 將差動送料齒台 7移到最高位置
◆ 根據調整需求
調整需求調整需求
調整需求 1.與2.轉動擺動臂 8與9(鬆開螺絲 10 與11)以及偏心軸套 12 來調整差動
送料齒位置

16
12. Neutral Position of Top Feed Dog 上送料齒的中立位置
Requirement 調整需求
調整需求調整需求
調整需求
When the stitch length is set at “0” and with the adjustment gauge 4 fitted, there should be no
feeding motion of the top feed dog.
當縫目長度設定在「0」的位置且調整治具 4裝入時,上送料齒無前後運動
Note: The stitch length limitation must be deactivated.
●Set stitch length at “0”.
●While continuously turning the balance wheel, turn crank 1(screw 2) so that lever 3does not
move.
注意:縫目長度限制須在解除
◆ 將縫目長度設定到「0」的刻度位置
◆連續轉動手輪,並調整擺動臂 1(螺絲 2),使擺動臂 3不轉動

17
13. Feeding Motion of Top Feed Dog 上送料齒的進給運動
Requirement 調整需求
調整需求調整需求
調整需求
With the stitch length set at “4”, the needle bar is positioned at neutral position of feed dog.
(adjustment hole 4), lever 4should not move when lever 2is operated.
當縫目長度設定在「4」的位置,針棒設定在送料齒的中立位置(調整記號孔 4),當推動滾
輪擺臂 2時,擺動臂 4無前後運動
●Loosen both screws 1.
●While continuously moving lever 2up and down, adjust eccentric 3, so that the slot is pointing
towards the operator and lever 4does not move.
●Tighten screws 1.
◆ 鬆開 2個螺絲 1
◆ 持續撥動擺動臂 2作上下搖動,並調整偏心輪 3,使其凹槽朝向操作者側,並且使擺動臂
4不移動
◆ 擰緊 2個螺絲 1

18
14. Top Feed Stroke 上送料齒的行程
Requirement 調整需求
調整需求調整需求
調整需求
With the stitch length set at “4” and adjustment gauge 12 fitted, at t.d.c. the top feed dog 2should
be 3.2mm from the needle plate.
當縫目長度設定在「4」的位置且調整治具 12 裝入時,在上送料齒的上死點位置時需離針
板面 3.2 mm
●Allow the presser foot 1to touch the needle plate.
●Set the stitch length “4”.
●By turning the balance wheel bring the top feed dog 2to t.d.c.
●Adjust the eccentric pin 3(screw 4) so that its eccentric part is pointing towards the needle.
●Move pin 5(nut 6) to the bottom of the elongated hole of lever 7.
●To pre-set the distance of the top feed dog 2from the needle plate adjust lever 8(screw 9).
●Adjust eccentric pin 10 (screw 11) in accordance with the requirement.
◆ 將壓腳 1降下接觸針板
◆ 將縫目長度設定到「4」的刻度位置
◆ 轉動手輪使上送料齒 2到達上死點的位置
◆ 調整偏心輪 3(鬆開螺絲 4)使其最大偏心量朝向機針的方向
◆ 將銷軸 5(鬆開螺帽 6)移到擺臂 7的長型孔的底部位置
◆ 調整擺動臂 8(鬆開螺絲 9)預先設定上送料齒 2距離針板面的高度
◆ 調整偏心軸 10(鬆開螺絲 11)以符合調整需求
調整需求調整需求
調整需求
This manual suits for next models
3
Other Golden wheel Sewing Machine manuals

Golden wheel
Golden wheel CS-471 User manual

Golden wheel
Golden wheel CS-5900 User manual

Golden wheel
Golden wheel CSA-1371CTLD User manual

Golden wheel
Golden wheel CS-8810 Assembly instructions

Golden wheel
Golden wheel CS-2160N User manual

Golden wheel
Golden wheel CS-9010 User manual

Golden wheel
Golden wheel CS-S868 User manual