manuals.online logo
Brands
  1. Home
  2. •
  3. Brands
  4. •
  5. Golight
  6. •
  7. Spotlight
  8. •
  9. Golight 2049 Manual

Golight 2049 Manual

Congratulations
You are now the owner of one of the finest
remote control searchlights available today.
Thank you for letting Golight® assist you in your
lighting application needs. We're proud
of our products and the technology that
we've developed to ensure our customers
the most durable,versatile and powerful
searchlights in the lighting industry.
Please read these instructions before using
your new Golight®.
Three Year Limited Warranty
Golight, Inc. warrants the Golight®against any deemed defects
that are due to workmanship for parts or faulty materials, except
lamps, for three years from the date of the original purchase.
This warranty to the RadioRay®does not cover damage resulting
from unreasonable use or misuse, unreasonable maintenance or
loss,or labor costs.
Mounting the light upside down will void the warranty.
Warranty cards must be filled out and sent in within 30 days of
purchase to Golight, Inc. •RT 3 Box 37B •Culbertson, NE 69024,
for warranty protection. Register online at www.golight.com.
If the Golight®does fail to operate under warranted
specifications, send the light and remote controls postage paid,
plus $9.95 for shipping and handling to: Golight, Inc. •Service
Department •RT 3 Box 37B •Culbertson, NE 69024. No C.O.D.'s
accepted. Only the above manufacturer is authorized to perform
warranty repair or replace product.
Any consequential damages to person or property are excluded
from this warranty. Some states do not allow the exclusion and
limitation of incidental or consequential damages, therefore the
above limitations or exclusions may not apply to you. This
warranty gives you specific legal rights and you may also have
other rights.
Golight, Inc.
RT 3 Box 37B • Culbertson, NE 69024
800.557.0098 • 308.278.3131
info@golight.com • www.golight.com
✱
This light is for off road and utility use only. It is not designed for
road use as a driving light.
✱
The Golight®Model 2049/2067 complies with Part.15 of the FCC
Rules. Operation is subject to the following two conditions: (1) This
light and remote may not cause harmful interference, and (2) this light
and remote must accept any interference received, including
interference that may cause undesired operation.
✱
FCC RULE Part.15.21 - Changes or modifications made by the
user not expressly approved by Golight, Inc. for compliance could void
the user’s authority to operate the equipment.
For safe and efficient operation of your Golight®, observe these
guidelines:
Using your Golight®in icing conditions could damage the gear
motors. (Optional dome available - see accessory sheet.)
Always keep the wireless remote in the raincoat provided. The
remote must be kept clean and dry to avoid damage to the internal
circuitry.
Your Golight®is a radio transmitter and receiver operating at 433MHz.
Whenever the light is on,the internally mounted antenna sends out
and receives radio frequency (RF) energy.
•Modern electronic equipment, i.e. Personal medical devices such
as pacemakers,hearing aids, etc., are shielded from RF energy.
However,RF energy may affect some electronic equipment.
•Vehicle electronic systems may be affected by RF energy. Check
with your vehicle manufacturer representative to be sure that
your Golight®will not affect the electronic system of your vehicle.
U.S. Patent 5,673,989
MODEL 2049/2067
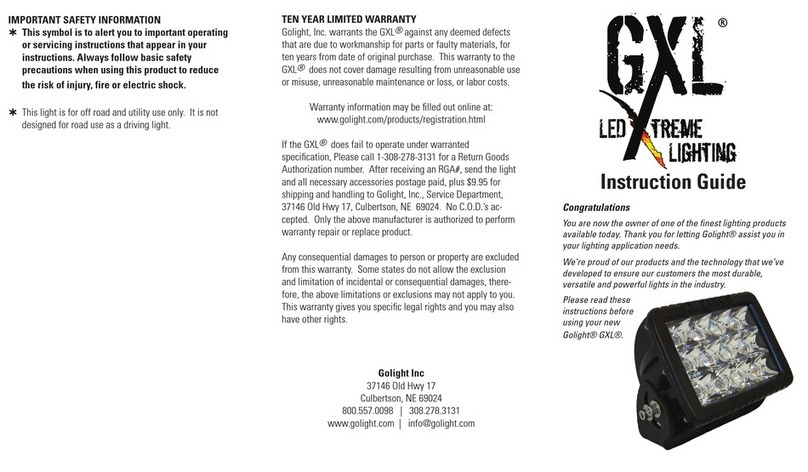
IMPORTANT SAFETY INFORMATION
✱ This symbol is to alert you to important operating or servicing
instructions that appear in your instructions. Always follow basic
safety precautions when using this product to reduce the risk of
injury, fire or electric shock.
www.magnalight.com
1-800-369-6671
903-498-3363
[email protected]
NOTE: The small drain hole in the edge of the gasket should normally
face opposite the forward direction of the vehicle—opposite the
arrow molded in the front of the base. Use silicone sealant to fill
opening around power cord.
IMPORTANT: Allow 3" of cord to remain under the light to ensure full
370°rotation.
Install the dash-mount control and connect the wiring harness.
Connect the positive-negative wires to a positive-negative
connection, preferably on the backside of the fuse box. The 12 Volt DC
power wires should be joined to the leads under the lamp with
appropriate automotive wire attachments. It is critical that polarity be
observed. The (+) lead of the unit is marked with a red tag. The power
should be fused at 15 Amps and be on an ignition switched circuit if
possible.
PROGRAMMABLE REMOTE INSTRUCTIONS
The Golight®is controlled with a programmable remote with 6561
different channels. This feature allows you the freedom to change the
channel selection, and the receiver relearns the new selection.
PROGRAMMING THE TRANSMITTER.
This light has been pre-programmed at the factory, and it is not
necessary to re-program the transmitter, unless you experience
outside interference.
1. IMPORTANT: Disconnect power by removing fuse or
disconnecting vehicle battery.
2. Remove battery cover from remote control.
3. Set the 7 dip switches to a selection of your choice. There are 3
positions on each; positive,negative and neutral. Use a small
screwdriver and select a position for each dip switch. *Please note
that the orientation of the +/–switch positions may vary among
different models of wireless remote controls.
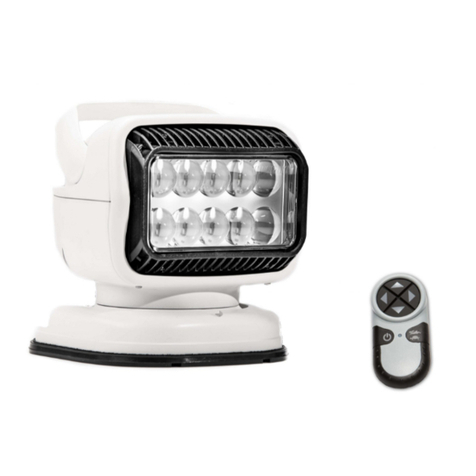
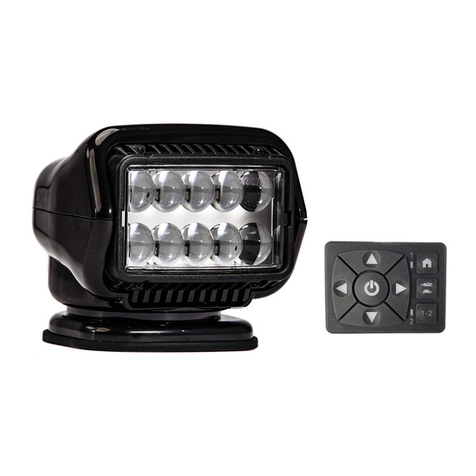
The Golight®Model 2049/2067 is designed to be permanently
attached to a vehicle. The Combination Searchlight with Directional
Flexibility is controlled by a wireless remote and/or a dash-mount
remote,which gives the operator a full 370°horizontal rotation and a
135°vertical tilt with fingertip control. The Golight®provides superior
light penetration with Cr5 PentaBeam™technology.
The Golight®Model 2049/2067 Includes:
•Golight®Searchlight
•Wireless Remote Control in Raincoat
(must be kept clean and dry)
•Dash-Mount Remote with 20' Wiring Harness
•2 Duracell MN21 Batteries
•Permanent Mounting Gasket
•All Necessary Hardware for Mounting
MOUNTING INSTRUCTIONS
Determine the location for the light on your vehicle or boat. The small
arrow on the base indicates the normal forward direction of the light.
The light will rotate to the left of this arrow approximately 190°and to
the right approximately 190°. The beam will angle down about 45°
and angles up to 90°, a full vertical. The location should take into
consideration this beam movement to ensure optimum usability.
Once the position and orientation are decided upon—use the black
rubber gasket as a footprint to mark the mounting of base to vehicle.
Drill 7/64 inch holes for #7 screws to mount the light. Also drill 1/2
inch opening in the center to accommodate the wiring harness.
NOTE: When connecting the plug from the light to the harness,
please note the additional ground wires that are not included in the
plug. These grounds need to be connected.
Once the plug and grounds have been connected,the plugs and all
exposed wires need to be shielded with the enclosed aluminum tape,
this will help prevent any interference to your light. The grounding
strap at the dash remote also needs to be attached to a solid ground.
To connect the light to the wiring harness, put the gasket on the base
of the light and attach the light to the surface.
4. Insert both MN21 Duracell batteries with the +/–in the same
direction. Be sure batteries have adequate charge.
5. Replace battery cover.
a. Depress the on/off button and hold it down. Red LED will light.
b. While holding the on/off button down,reinstall the power
(replace fuse or connect vehicle battery).
c. Keep your finger on the on/off button for 5-6 seconds,and then
release. The light should now be programmed.
OPERATION OF GOLIGHT®MODEL 2049/2067
1. Using the programmable wireless remote control,turn on the light
by depressing the on/off button.
2. With the 4-way arrows on the remote control,rotate your light to
the desired location. Depending upon conditions,the wireless
remote may be used up to 100 feet from the Golight®.
3. The speed of the light rotation can be controlled by depressing
the +/–button one time and by depressing it again to restore the
original speed.
4. The dash-mount remote can be used to control the rotation and
the on/off switch.
5. The spotlight should not be turned on when the snap on lens
cover (rockguard) is attached.
BULB REPLACEMENT
The Golight®utilizes a Philips®H-9 bulb, which may be purchased
through Golight, Inc. —308.278.3131 or 800.557.0098.
www.magnalight.com
1-800-369-6671
903-498-3363
[email protected]

This manual suits for next models

1

Other Golight Spotlight manuals

Golight Stryker ST Series Manual

Golight

Golight Stryker ST Series Manual

Golight GT Series User manual

Golight

Golight GT Series User manual

Golight GoBee 2121 User manual

Golight

Golight GoBee 2121 User manual

Golight Profiler II Manual

Golight

Golight Profiler II Manual

Golight GXL Perfomance Manual

Golight

Golight GXL Perfomance Manual

Popular Spotlight manuals by other brands

Mr. Beams MB380 user manual

Mr. Beams

Mr. Beams MB380 user manual

ADB Europe 256 instruction manual

ADB

ADB Europe 256 instruction manual

Ryobi CML180 Owner's operating manual

Ryobi

Ryobi CML180 Owner's operating manual

Heitronic 24125 Installation and operating instructions

Heitronic

Heitronic 24125 Installation and operating instructions

Stairville BEL1 IP user manual

Stairville

Stairville BEL1 IP user manual

Lighting Technologies CT SYBAR HG35 manual

Lighting Technologies

Lighting Technologies CT SYBAR HG35 manual

NANLITE P-100 user manual

NANLITE

NANLITE P-100 user manual

Stanley FL5W10 instruction manual

Stanley

Stanley FL5W10 instruction manual

Philips Selecon Acclaim Operation manual

Philips

Philips Selecon Acclaim Operation manual

ADB EUROPE 105 instruction manual

ADB

ADB EUROPE 105 instruction manual

Beyond Lighting BY-P27 user manual

Beyond Lighting

Beyond Lighting BY-P27 user manual

Lumascape LS471LED installation instructions

Lumascape

Lumascape LS471LED installation instructions

mawa wi4-str2-1 Mounting manual

mawa

mawa wi4-str2-1 Mounting manual

Expert E201411 quick guide

Expert

Expert E201411 quick guide

PLG MICRO SPOT user manual

PLG

PLG MICRO SPOT user manual

Strong International SUPER TROUPER II instruction manual

Strong International

Strong International SUPER TROUPER II instruction manual

Larson Electronics GL-30514-S-E Instruction guide

Larson Electronics

Larson Electronics GL-30514-S-E Instruction guide

STI solar 5650 instruction manual

STI solar

STI solar 5650 instruction manual

manuals.online logo
manuals.online logoBrands
  • About & Mission
  • Contact us
  • Privacy Policy
  • Terms and Conditions

Copyright 2025 Manuals.Online. All Rights Reserved.