GOOD HOUSEKEEPING CARE & USAGE INSTRUCTIONS
2 3
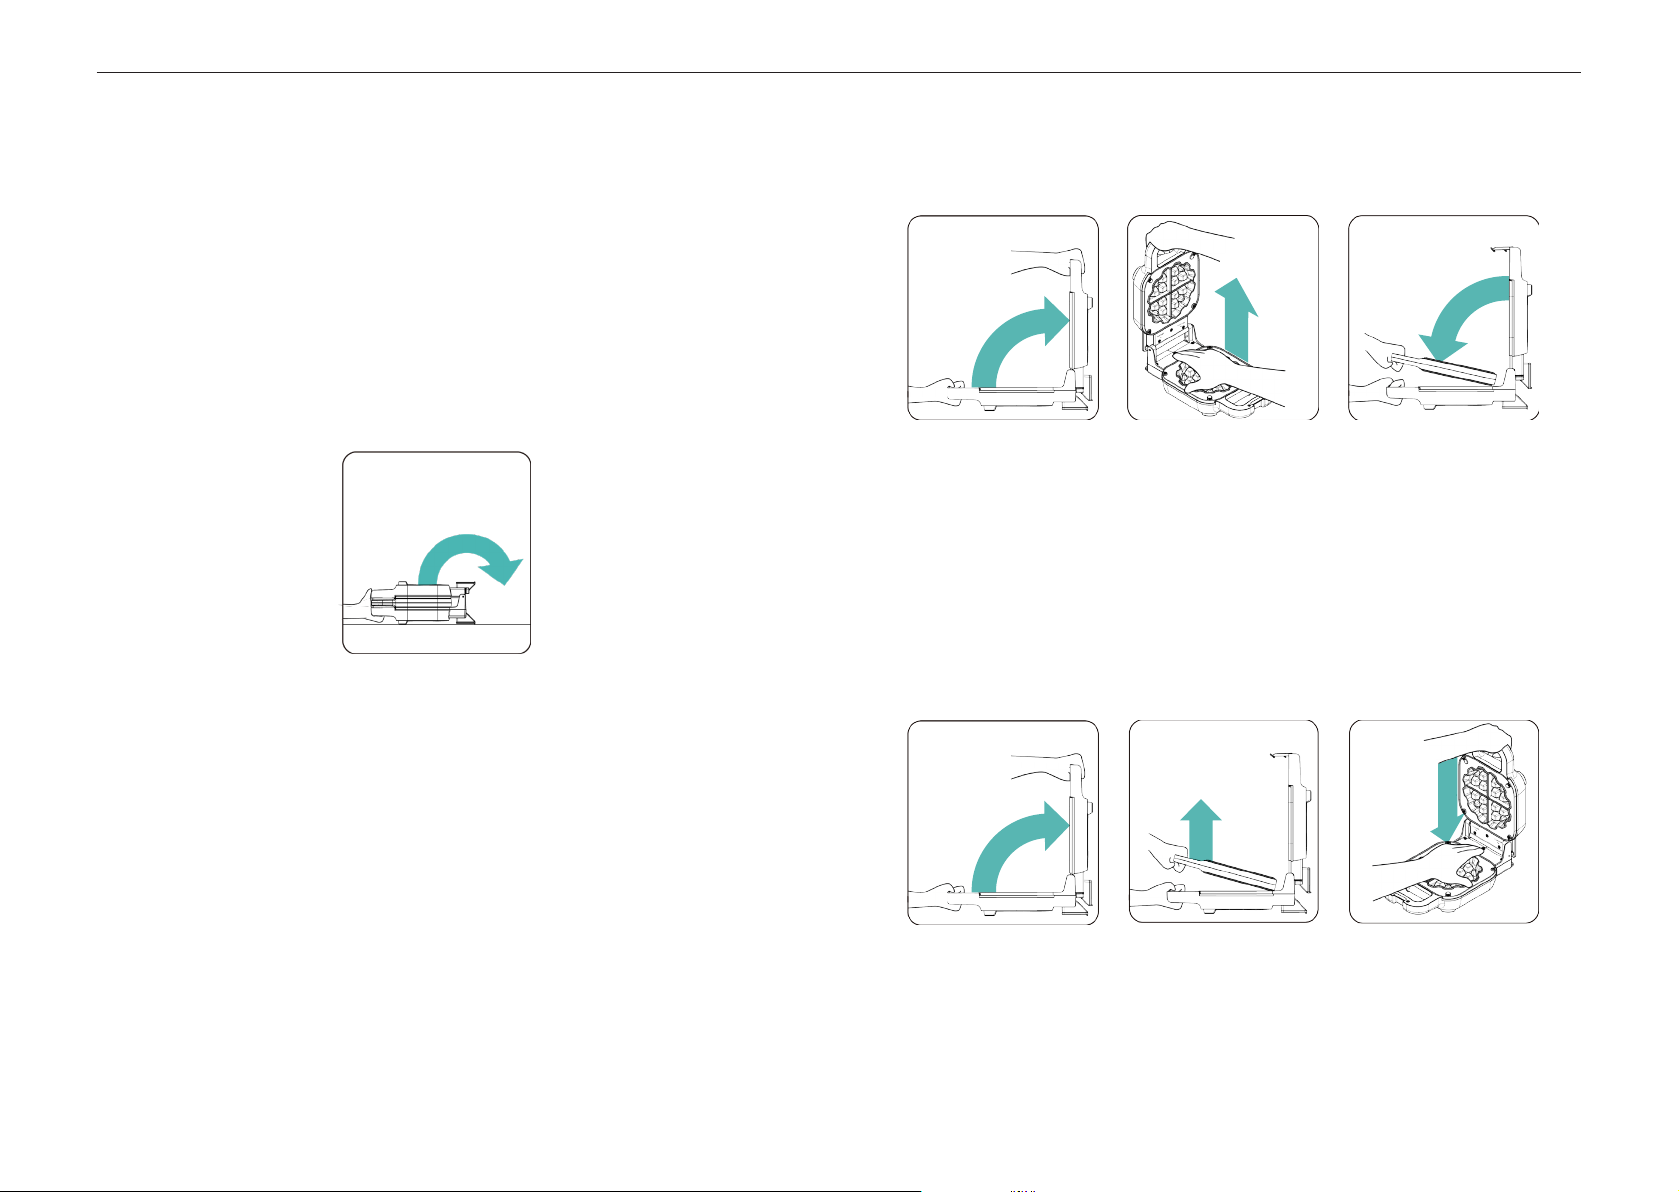
BELGIAN & STUFFED
WAFFLE MAKER
IMPORTANTSAFEGUARDS
BEFOREUSINGYOURSTUFFEDWAFFLEMAKERREADALLINSTRUCTIONSCAREFULLY
LIKEANYELECTRICALAPPLIANCETHEWAFFLEMAKERMUSTBEHANDLEDWITHCAREATALLTIMES
TOENSUREYOURSAFETYTHEFOLLOWINGPRECAUTIONSSHOULDBEFOLLOWED
For questions or concerns, contact us at product@foodfight.hk • 866.231.6384
• DO NOT immerse the product in water or
other liquids or rinse under the tap.
• Please check that the voltage marked on
the product matches the local power supply
voltage, before connecting the product to the
power supply.
• DO NOT use this product if the plug, power
cord or product is damaged.
• This product is not intended for people
(including children) who are physically
impaired, have sensory or mental disabilities,
or lack relevant experience and knowledge,
unless someone responsible for their safety
supervises or directs their use of the product.
• Keep the product and its cables out of the
reach of children.
• Keep the power cord away from hot surfaces.
• Always place and use this product on a dry,
stable and level surface.
• This product cannot be operated with an
external timer or a separate remote control
system.
• DO NOT use this product for any purpose
other than as described in this user manual.
• The product must be allowed to cool
before cleaning.
• DO NOT let the Power Cord hang over edge
of table or counter or touch hot surfaces.
• DO NOT immerse the Waffle Maker in water.
To protect against electrical shock, do not
immerse the power cord, plug or appliance in
any liquid.
• For indoor use only. Not intended for
outdoor use.
• If this appliance begins to malfunction during
use, immediately unplug the power cord.
• DO NOT use or attempt to repair a
malfunctioning appliance.
• WARNINGTHISELECTRICALAPPLIANCE
CONTAINSAHEATINGFUNCTION
ALLSURFACESCANDEVELOPHIGH
TEMPERATURESSINCETEMPERATURESARE
DIFFERENTLYPERCEIVEDBYDIFFERENT
PEOPLETHISEQUIPMENTSHOULDBEUSED
WITHCAUTION
• The appliance should only be touched using
the intended handles and gripping surfaces.
Surfaces other than intended gripping
surfaces need sufficient time to the cool
down before being touched.
• This appliance is rated 800 watts and should
be the only appliance operating on the
circuit. The power cord must be plugged into
an outlet that is properly installed.
• WARNINGASHORTPOWERSUPPLYCORD
ISPROVIDEDTOREDUCETHEHAZARDS
RESULTINGFROMENTANGLEMENTOR
TRIPPINGOVERALONGERCORDIFITIS
NECESSARYTOUSEANEXTENSIONCORD
ITSHOULDBEPOSITIONEDSUCHTHATIT
DOESNOTDRAPEOVERTHECOUNTEROR
TABLETOPWHEREITCANBEPULLEDONBY
CHILDRENORTRIPPEDOVERTHEMARKED
RATINGOFTHEEXTENSIONCORDMUSTBE
EQUALTOORGREATERTHANTHERATINGOF
THISAPPLIANCETHEELECTRICALRATINGIS
LISTEDONTHEBOTTOMOFTHISUNIT
• DO NOT place anything inedible inside
the appliance or place the appliance in any
container or small, confined space while the
appliance is hot or in operation.
• Always operate the appliance on a
horizontal surface that is level, stable and
noncombustible.
• DO NOT leave this appliance unattended
while in operation.
• DO NOT place your appliance on a cooktop,
even if the cooktop is cool, because you
could accidentally turn the cooktop on,
causing a fire, damaging the appliance, your
cooktop and your home.
• DO NOT attempt to dislodge food or open
the appliance while in operation.
• DO NOT use sharp utensils (knives or forks)
to extract food from the appliance. These
implements can damage the appliance’s
protective nonstick coating.
• Always unplug the appliance aer use and
then allow the appliance to cool for 30
minutes before handling, cleaning or storing.
BEFORE FIRST USE
FORHOUSEHOLDUSEONLY
• Carefully unpack Waffle Maker. Remove all
packaging materials. Refer to Care & Cleaning
Guide on page 8 in this booklet.
• Place appliance on flat, level surface, close to a
120V wall outlet.
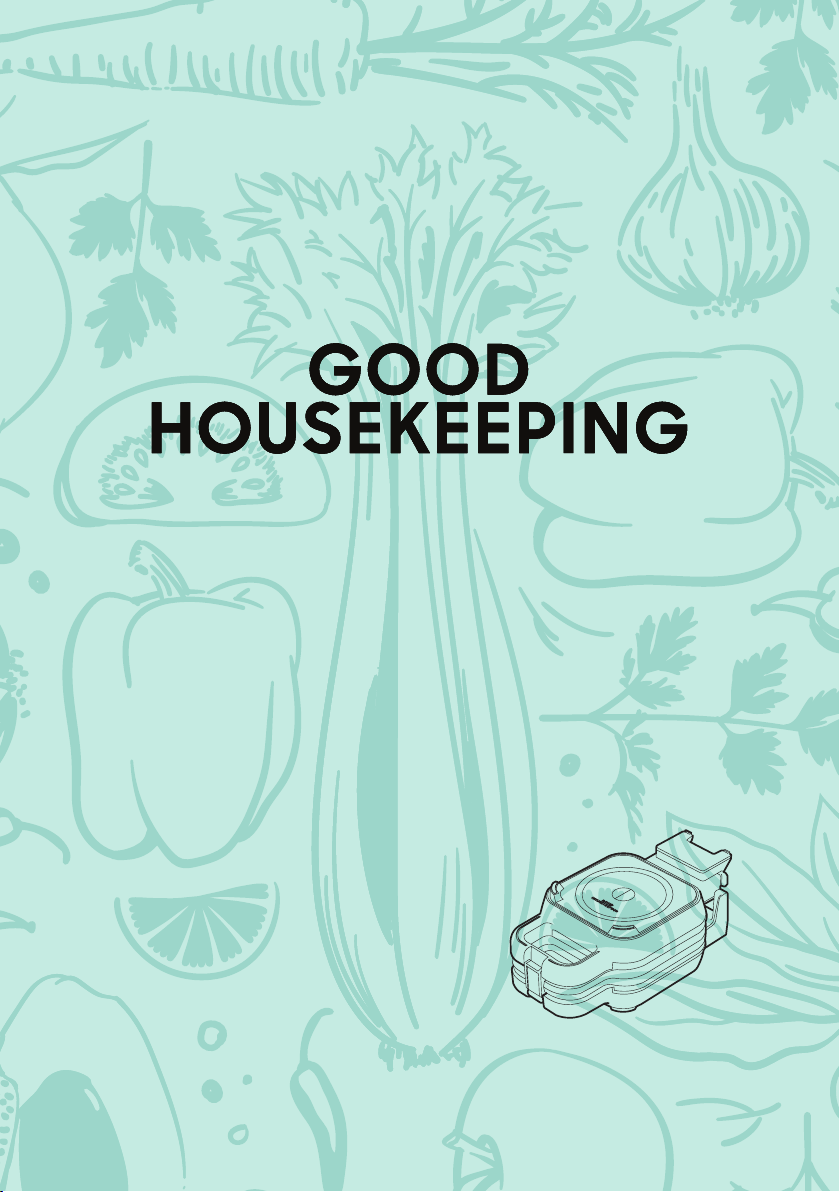
• Open Waffle Maker and wipe the Upper Plate,
Lower Plate and Waffle Ring with damp cloth so
that they are clean.
• Wipe outside of Waffle Maker with damp so
cloth. Never immerse Waffle Maker, Power
Cord or Plug in water or any other liquid.
• Close appliance.
• Plug into the wall outlet and preheat for 3
minutes or until green Ready Light turns on.
You may notice some smoke coming from your
Waffle Maker during this initial phase; this is
normal. Season the Upper and Lower Plates
with vegetable oil, using a heat-proof bristle
brush, and wipe off excess with a paper towel.
There is no need to season plates again.
SAVETHESEINSTRUCTIONS
WARNING!SHOCKHAZARDTHISAPPLIANCEHASAPOLARIZEDPLUGONEBLADEISWIDERTHANTHEOTHER
To reduce the risk of electric shock, this plug is intended to fit into a polarized outlet only one way.
If the plug does not fit fully into the outlet, reverse the plug. If it still does not fit, contact a qualified
electrician. Do not attempt to modify the plug in any way.
To avoid an electrical circuit overload, do not use another high-wattage appliance on the same circuit with your
Waffle Maker. The length of the cord used on this appliance was selected to reduce the hazards of becoming
tangled in or tripping over a longer cord. If a longer cord is necessary, an approved extension cord may be
used. The electrical rating of the extension cord must be equal to or greater than the rating of the appliance.
Care must be taken to arrange the extension cord so that it will not drape over the countertop or tabletop
where it can be pulled on by children or accidentally tripped over.
SET INCLUDES
Waffle Maker
Waffle Ring