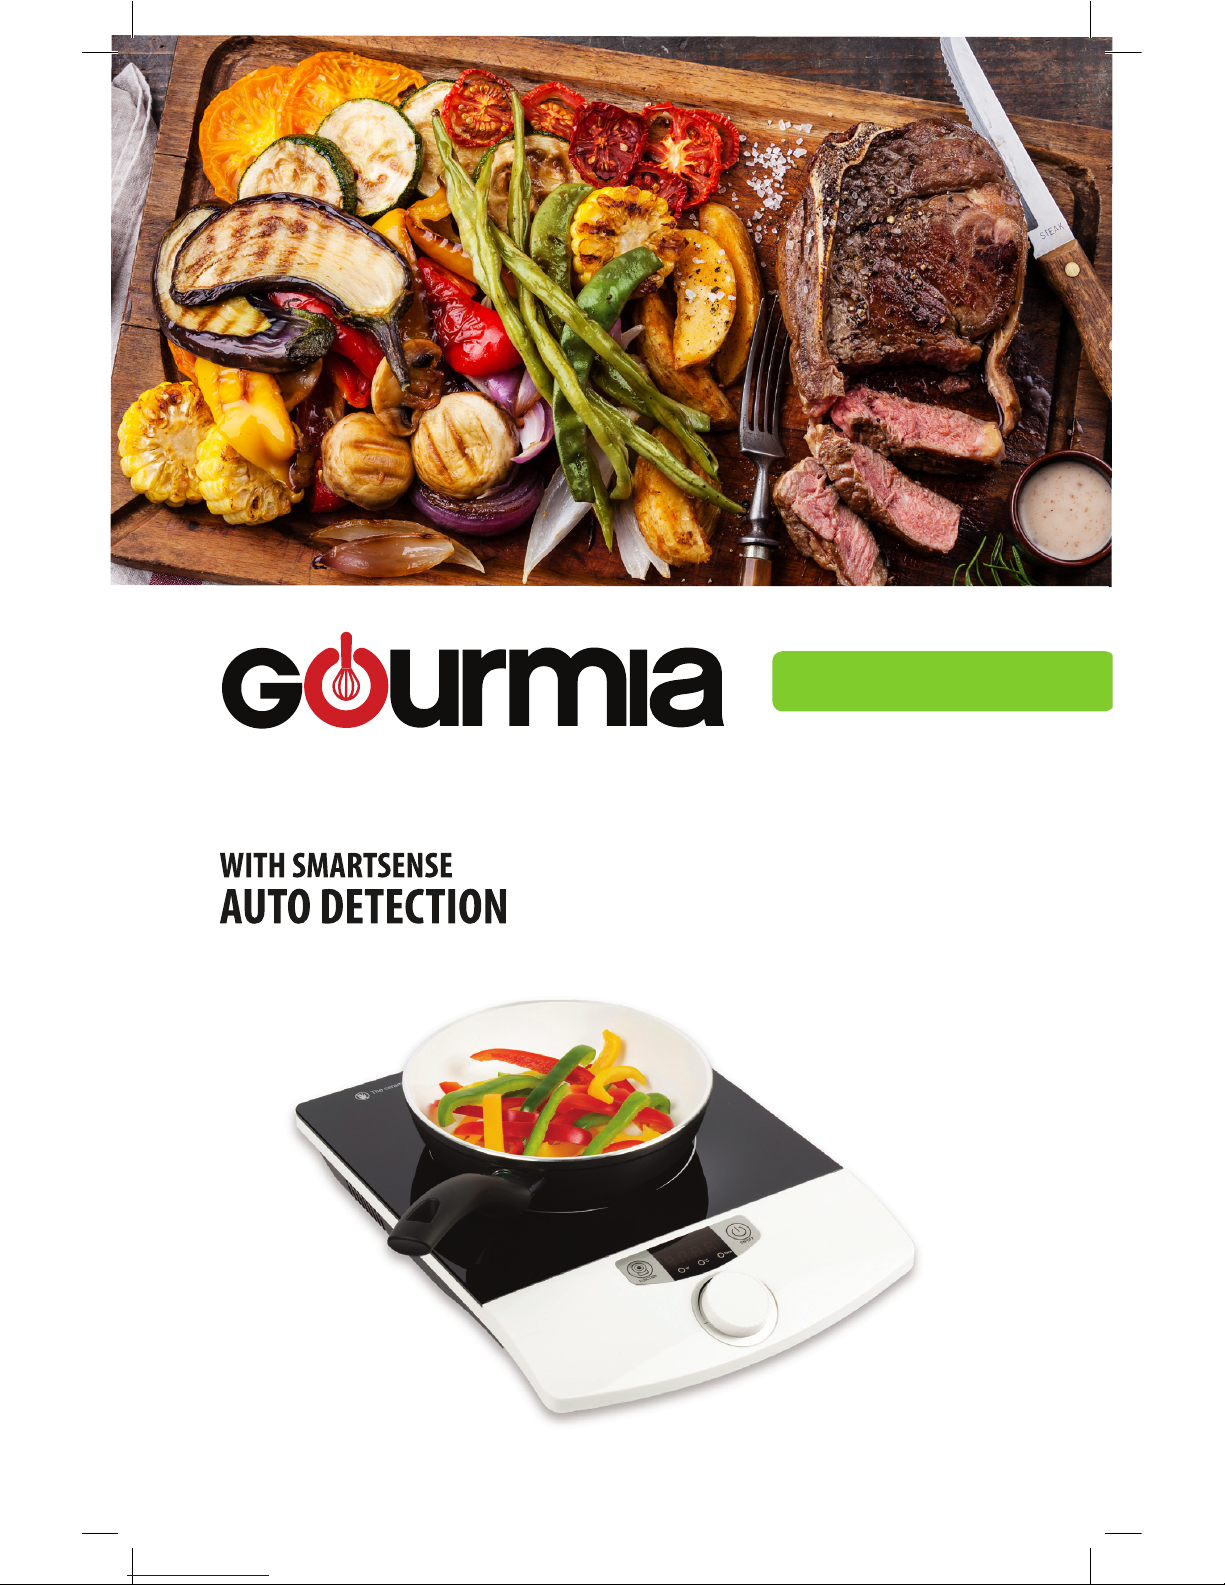
Gourmia GIC100 User manual

1
INDUCTION COOKER
WITH SMARTSENSE
AUTO DETECTION
MODEL#GIC100

3
2
© 2017 Gourmia
www.Gourmia.com
The Steelstone Group
Brooklyn, NY
All rights reserved. No portion of this manual may be reproduced by any means
whats over without written permission from The Steelstone Group, except for
the inclusion of quotations in a media review.
Although every precaution has been taken in the preparation of this manual,
The Steelstone Group assumes no responsibility for errors or omissions. Nor is
any liability assumed for damages resulting from the use of the information
contained herein. Although every eort has been made to ensure that the
information contained in this manual is complete and accurate, The Steelstone
Groupisnotengagedinrenderingprofessionaladviceorservicestotheindividual
consumer;further,TheSteelstone Groupshallnotbeheldresponsibleforanyloss
or damage allegedly arising from any information or suggestion in this manual.
Printed in China
INDUCTION TECHNOLOGY ACTIVATES THE DEVICE
UPON CONTACT WITH MOST METAL COOKWARE
Cutting edge induction cooking is the safe and smart solution to
messy grates and burners. With the BlackTop III Induction Cooker,
the sleek glass like surface utilizes magnetic attraction between
its base and compatible metal cookware. A powerful and fo-
cused heat source transmits accurate heat for all forms of cookery,
with the sensible addition of our classical center mount control
dial for temperature accuracy. Boiling and grilling can be alter-
nated via simple access of the device's touch safe control panel.
The modern finish of gen3 crystalline composite combines
with powered impact resistance for results that are as good as
they appear.
Thank you for your purchase! We hope you will enjoy all the
innovative products brought to you by our family at Gourmia.

5
4
SAFETY FIRST / P. 6
USING THE INDUCTION COOKER / P. 10
INTRODUCTION / P. 8
Step By Step Instructions / P. 11
Introduction / P. 8
Troubleshooting / P. 9
CARING FOR THE INDUCTION COOKER / P. 12
WARRANTY & SERVICE / P. 14
Warranty & Service / P. 15
TABLE OF CONTENTS
Induction Cooker
WITH SMARTSENSE AUTO DETECTION
Step By Step Instructions / P. 13

7
6
Disclaimer:
Manual inductions should always be read and implemented prior to product use.
Manufacturer / importer advisory board are not reliable for inadequate use due to
instruction manual negligence or failure to follow direction.
This product is intended for indoor household use only!
Keep this device out of the reach of children or other unqualied persons, since the
misuse of contents and packaging materials may result in haxard death.
READ ALL SAFETY & USAGE INSTRUCTIONS BEFORE USING
• Turn the device o and disconnect from socket in the event of any cracks on the
cook top panel.
• Top avoid damage or malfunction, never place the unit in the proximity of heat, gas,
or ammables.
• This plug is geared to t into an individual outlet. The rated elecctrical current is not
less than 16A.
• Place the unit on a leveled surface, the distance between it and its background sur-
roundings may not be less than 10cm.
• Do not immerse the appliance or its electrical cord in water or liquid.
• Do not allow water to enter the unit.
• Unplug the power cord prior to cleaning.
• Do not cover the air vent with anythign during cooking.
• Open lids before heating canned food.
• If the device fails to power on after the self-inspection, please contaact our customer
service immediately.
• Do not cook with any empty pot.
• Always clean the unit to avoid any dirt entering the fan.
• To avoid burns, never touch the plate while the unit is working.
• If you are using a cardiac pacemaker, please consult yoru doctro if its safe to operate
this unit.
• Do no operate the unit on gas stove.
• Never place paper, cloth or other articles under the bottom of the pan.
• Do not plcae the unit on cloth or carpet, since it can block the air vent.
• Avoid any impact on the plate of the unit. In case any cracks, turn o teh unit and
unplug immediately. Proceed with contacting customer service.
• Do not touch the conrol panel with any sharp objects.
• Do not place any metal objects other than the pot on the unit while operating.
KEEP THESE INSTRUCTIONS FOR FUTURE REFERENCE!
IMPORTANT SAFEGUARDS
SAFETY FIRST
SAFETY FIRST
SAFETY FIRST

9
8
INDUCTION COOKER
PRODUCT SPECS TROUBLESHOOTING
Note: Power mode is designed for cooking soup, boiling water. It is not recommend-
ed to stir and deep fry the food.
Note: Temperature mode is designed for stirring and deep frying and keeping soup
warm. It is not recommended to cook soup or boil water.
Cookware Selection
Compatible for use with: steel, cast iron, enameled iron, stainless steel, at-bottom
pans/pots with bottom diameter of 4 3/4" to 10 1/4".
Note: Aside from the mentioned recommended pots, do not try to use other pots
instead. Aluminum pots will not work.
Note: Some stainless steel pots contain aluminum in their base and will not work
with induction cooking.
For all other pots:
• Pan/pot must be suitable for induction cooker use.
• Pan/pot should be tried out if it's purchased separately to check for damage/malfuc-
tion.
• Pan/pot should be at and come with the cover and air vent.
INTRODUCTION TO THE INDUCTION COOKER
Problem: Check point Solution:
Appliance fails to respond
after connecting to a power
source pressing power key.
Is the electricity o?
Is the fuse or circuit breaker
tripped?
Is the plug connected rmly?
Use after electricity re-
sumes.
Check the root causes care-
fully. If the problem cannot
be xed, please contact
customer service for as-
sistance.
Heating is interrupted by
'beep' sound during normal
use.
Incompatible cookware, or
cookware removed?
Is the cookware not placed
directly at the center of the
heating zone?
Is the cookware being heated
but continuously stopping?
Replace compatible
cookware for the induction
cooker.
Place the cookware at the
center of the dened heat-
ing zone.
Place the cookware inside
the heating zone.
Heating stops or won't start. Is the cookware empty or the
temperature too high?
Is the air intake/exhaust vent
clogged or has dirt accumu-
lated?
Is the cooker working over 2
hours without any external
instruction?
Please check whether the
appliance is being misused.
Remove the the contents
clogging the air intake/
exhaust vent. Operate the
appliance again after cool-
ing down.
Reset cooking modes or use
timer fuction.
Error codes occur. EO Inner circuit error
E1 No pan or the pan isn't
suitable
E2 Device is overheated
E3 Input voltage is too high
E4 Input voltage is too low
E5 Top sensor open circuit/
short circuit
E6 IGBT sensor open circuit/
short circuit
E7 Top plate overheated
When showing error signal
E1, E2 and E7, please check
whether the cookware is
not suitable, or switch the
appliance on again after it
has naturally cooled down.
When showing E0, E3-E6m,
please contact customer
service for assistance.

11
10
USING THE INDUCTION COOKER
USING THE
INDUCTION COOKER
1) After inserting the plug into the socket, a "Beep" will emit and the indicator above
the [On/O] key will start to ash [88:88] once indicating the appliance is connected
to a power source (standby mode).
2) Place suitable cookware on the center of the cooking panel.
3) Start the operation and switch to standby mode by pressing the ON/OFF key.
4) Stop the oparation and switch to standby mode by pressing the ON/OFF key.
FUNCTION KEY
1) Power:
Press the function key once to illuminate the power indicator. Display will show P06,
representing that the unit is working at power 6. The unit can be adjusted by turning
the knob to the desired power level, from 1-8. Rotate toward the + sign for higher,
and - sign for lower levels.
2) Temp:
Press the function key twice to illuminate the temp indicator. The display will show
460°F, representing that the unit is operating at a temperature level of 460°F. The
temperature can be adjusted by turning the knob to the desired temperature level,
from 140°F to 460°F. Rotate toward the + sign for higher, and - sign for lower levels.
3) Timer:
Press the function key three times to illuminate the timer indicator. The display will
show 00:00. Adjust the dial to set cooking time. Timer can be adjusted from 0 to 180
minutes. Rotate toward the + sign for higher, and 0 sign for lower levels.

13
12
CARING FOR THE INDUCTION COOKER
CARIING FOR THE INDUCTION COOKER
• Remove the power plug prior to cleaning the unit. Do not clean it until the surface
cools down.
• Glass plate, panel and the shell: use a soft cloth for slight stains.
• For grease, blot by using a clean, damp cloth with mild detergent.
• For any dust and dirt accumulation on the gas vent, please clean it by brush or cot-
ton stick regularly.
• Do not wash the unit using running water.
• Be sure to have a good contact between plug and socket before using.
• Do not pull the power cord to unplug.
• To extend the appliance's lifespan, press the "ON/OFF" button prior to removing the
power cord.
• Plug out the power cord after the fan has stopped, as this fan is still in operation
even after use to cool down the cooking panel.
CARING FOR THE INDUCTION COOKER

15
14
WARRANTY & SERVICE
This product is guaranteed under a 1 year limited warranty period,
applicable to the original purchaser and not transferable to a third
party user.
Repair or replacement of defective parts are at the seller’s discretion. In
the event that repair isn’t possible, the seller will replace the product/
part. If product repair/ replacement won’t suce, the seller has the
option of refunding the cash value of the product or component
returned.
Product defects not covered under the warranty provisions include
normal wear and damage incurred from use or accidental negligence,
misuse of instruction specications, or repair by unauthorized
parties. The manufacturing company is not liable for any
incidental or consequential damages incurred by such circumstances
For Customer Service or Questions, Please call: 03332205031
www.gourmia.com
WARRANTY & SERVICE
WARRANTY & SERVICE

16
www.gourmia.com
Table of contents
Popular Cooktop manuals by other brands

KitchenAid
KitchenAid KICU500 Series Use & care guide

Miele
Miele SmartLine CS 7612 FL Operating and installation instructions

Moffat
Moffat Blue Seal Evolution Series E514B-LS Technical data sheet

Bartscher
Bartscher IKTS 35 instruction manual

Fisher & Paykel
Fisher & Paykel DCS CDV2365N installation instructions

ROSIERES
ROSIERES RIS3BC user manual