GOVO GOSURROUND 610 User manual

GOBUDS 600 True Wireless Earbuds
Get ready for MORE, for a LIFE of WOW with your all new GOSURROUND 610.
We strongly recommend you go through this manual completely before
beginning to use the product as it contains important technical information to
ensure you have a seamless audio experience. It can also be referred to in times
of difficulty.
PACKAGE CONTENTS
SPECIFICATIONS
Input
Output Power
Subwoofer (Dimension in mm)
Soundbar (Dimension in mm)
110-240V AC 50/60Hz
100W
W150 x D280 x H340
L800 x D58 x H68
Bluetooth Version V5.3
Soundbar Drivers 2 x 2.25”
Subwoofer Driver 1 x 5.25”
1 x Soundbar
1 x Subwoofer
1 x AUX Cable
1 x User Manual
1 x Remote Control
1 x Warranty Card
GOSURROUND 610 2.1 Soundbar
Speaker System

REMOTE BATTERY INSTALLATION
1
2
3
4
Open the battery case.
Insert 2 batteries with the polarity reversed.
Close the battery case.
Keep within 5 meter range, 30 degree angle while aiming to the unit.
PRODUCT USE
1
2
3
4
Plug the power cable of the soundbar to the external socket, the unit is in
standby mode.
Please plug the RCA cable of the woofer to the SUB output jack in the
soundbar and plug the AC power cord to power on the product.
AUX: Use 3.5mm AUX in cable to connect external audio sources (DVD,
Mobile, TV). Press on panel or INPUT key in the remote control to select
AUX IN mode.
HDMI: Use your HDMI cable to connect the soundbar with your HDMI (ARC)
device. Press on panel or INPUT key in the remote control to select
HDMI mode.
USB: Insert your USB disk into the USB socket in the soundbar, it will switch to
USB mode automaticllly . You can also press on the panel or INPUT key in
the remote control to switch USB mode.
BT: Press on panel or INPUT key in remote control to enter BT mode.
Turn on the Bluetooth on your device, find ‘GOSURROUND 610’ in the
Bluetooth list and start the pairing.
ERP low power consumption mode: If there is no signal input for 30 minutes,
Soundbar will automatically enter the Standby mode.
5
6
7

1
2
3
4
5
6
“ ” Key: Standby mode for power ON/0FF.
“MUTE” Key: MUTE ON/0FF.
“PAIR” Key: Bluetooth disconnect/connect, long press to
disconnect Bluetooth, long press again to reconnect to
Bluetooth.
“INPUT” Key: The input mode switch, BT, HDMI (ARC), USB,
AUX-IN input mode cycle switch. (Attention: When connected to
a mobile device via Bluetooth, the volume of the Soundbar will
match the volume of the device automatically)
Volume + Key: Increase the volume level in all modes (BT, HDMI,
USB, AUX IN).
Volume – Key: Decrease the volume level in all modes (BT, HDMI,
USB, AUX IN).
DESCRIPTION OF THE REMOTE CONTROL
MUTE
PAIR INPUT
MUSIC
NEWS
3D
MOVIE
TREB+
TREB-
BASS+
BASS-
VOL+
VOL-
RESET
1
3
5
8
6
1 0
1 4
1 5
2
4
7
9
1 1
1 6
1 2
1 7
1 3
1 0
1 1
1 2
1 3
“MUSIC” Key: Music Equalizer Mode, which is the default. The LED
display shows E1.
“MOVIE” Key: Movie Equalizer Mode. The LED Display shows E2.
“NEWS” Key: News Equalizer Mode. The LED Display shows E3.
“3D” Key: 3D Equalizer Mode. The LED Display shows E4.
TREB + : Increase the treble level.
TREB - : Decrease the treble level.
BASS + : Increase the bass level.
BASS - : Decrease the bass level.
1 4
1 5
1 6
1 7
Key:
- Bluetooth mode: Short press for next song
- USB mode: Short press for next song & Long press for fast forward
Key:
- Bluetooth mode: Short press for previous song
- USB mode: Short press for previous song & Long press for backward
RESET Key: Short Press
- Bluetooth mode: pause/play
- AUX - IN mode: MUTE/ UNMUTE
After resetting the default Volume is (“U 15”), Bass (“SU 8”)
& Treble (“HI 8”)
8
7
9
RESET Key: Long Press for RESET
9

SAFETY INSTRUCTIONS
1
2
3
4
5
Read these instructions before using the product.
Read all warnings carefully.
Follow all instructions carefully.
Do not use this apparatus near water.
Clean only with dry cloth.
Do not block any ventilation openings. .
Do not install the speaker system near any heat sources such as
radiators, heat registers, stoves or other apparatus (including
amplifiers) that produce heat.
Protect the power cord from being walked on or pinched particularly
at plug points and the point where they exit from the unit.
Only use attachments/accessories specified by the manufacturer.
Use only with the cart, stand, tripod, bracket or table specified by the
manufacturer or sold with the unit. When cart is used, be cautious
while moving the cart unit combination to avoid injury from tip-over.
6
7
8
9
1 0
WALL MOUNTING
Measure 24.41 inches (620mm) and drill 2 parallel holes (1/4 inch each)
in the wall.
Firmly apply a dowel into each hole in the wall (dowel only required for
solid wall).
Attach the soundbar to the screws on the wall and press and push the
soundbar to the right 1/8 inch each to lock.
SOUNDBAR (BACK)
1
2
2
HDMI (ARC)
1
2
3
AC IN AC110~240V
50/60Hz
HDMI(ARC)
SUB OUTPUT
AUX IN
AUX IN
SUB OUTPUT
BUTTON CONTROL
1 4
2
3 5
2
3
4
5
“+” Key: Short press for next track & long press it to adjust volume up in all
modes.
“ “ Key: Bluetooth mode, Short press to pause/play, long press to
disconnect/connect.
“ “ Key: USB mode, Short press to pause/play.
“-” Key: Short press for previous track & long press to adjust the volume
down in all modes.
USB input.
“ “ Key: Short press to power ON & Short press to change Input
cyclically from BT, HDMI (ARC), USB, to AUX IN & long press to power OFF.
1

Life’s too short for “ok”. Too short to have stuff in our lives that’s “ok, I guess”.
“But-I’m-almost home!” battery life. “But-it-only-fell-off-the-table” build
quality. “Has-someone-stolen-the-bass?” sound quality.
We say NO to “ok”. In 2021, we set out to make stuff that’s better in little
ways that make a big difference.
Stuff for people who expect more. Who want the songs to keep playing until
they’re home. Who are on a mission to stay up all night. Who want to know
they’ll feel great and look awesome, every day.
For people who want every day to be a ‘wow’ day.
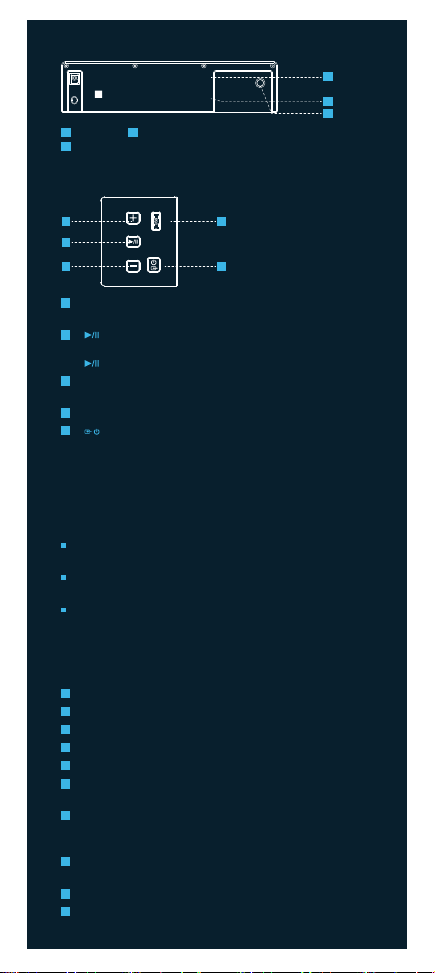
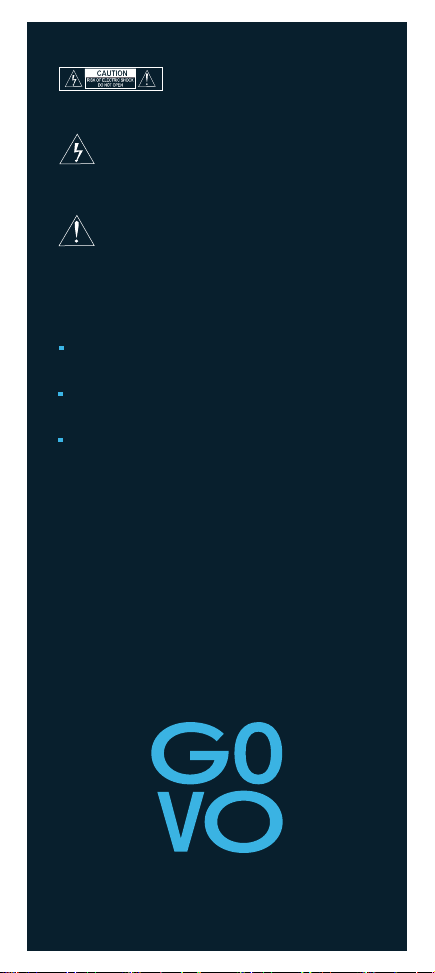
Explanation of the symbols on the device
Warning: To reduce the risk of electric shock, do
not remove cover (or back). No user-serviceable
parts inside. Refer servicing to qualified service
personnel.
The lightning flash with arrowhead symbol, within an
equilateral triangle, is intended to alert the user to the
presence of uninsulated “dangerous voltage” within the
product’s enclosure that may be of sufficient magnitude to
constitute a risk of electric shock to persons.
The exclamation point within an equilateral triangle is
intended to alert the user to the presence of important
operating and maintenance (servicing) instructions in the
literature accompanying the appliance.
AC POWER
Make sure the power supply is correct and never handle the power
cord or its plug with wet hands when plugging into, or unplugging from
an outlet.
IMPORTANT NOTES
Ensure that the main power switch is in the “OFF” position before
connecting to AC power cord to the power supply to avoid damage to
the unit.
A damaged power cord can easily cause an electric shock or fire
hazard, never use a power cord after it has been damaged.
Table of contents
Other GOVO Speakers System manuals