These instructions and the images herein are proprietary. Any unauthorized reproduction is prohibited.
F45VW-T4
Awning Bracket or Eurovan – Fits Fiamma and ARB Awnings
Page 1 o 2
GoWesty Camper Products • 1119 Los Olivos Ave, Los Osos, CA 93402 • 888-469-3789 • www.gowesty.com
MOUNTING BRACKET INSTALLATION
MOUNTING BRACKET INSTALLATIONMOUNTING BRACKET INSTALLATION
MOUNTING BRACKET INSTALLATION
Fitting the
Fitting the Fitting the
Fitting the Front Bracket
Front BracketFront Bracket
Front Bracket
to the Body
to the Bodyto the Body
to the Body
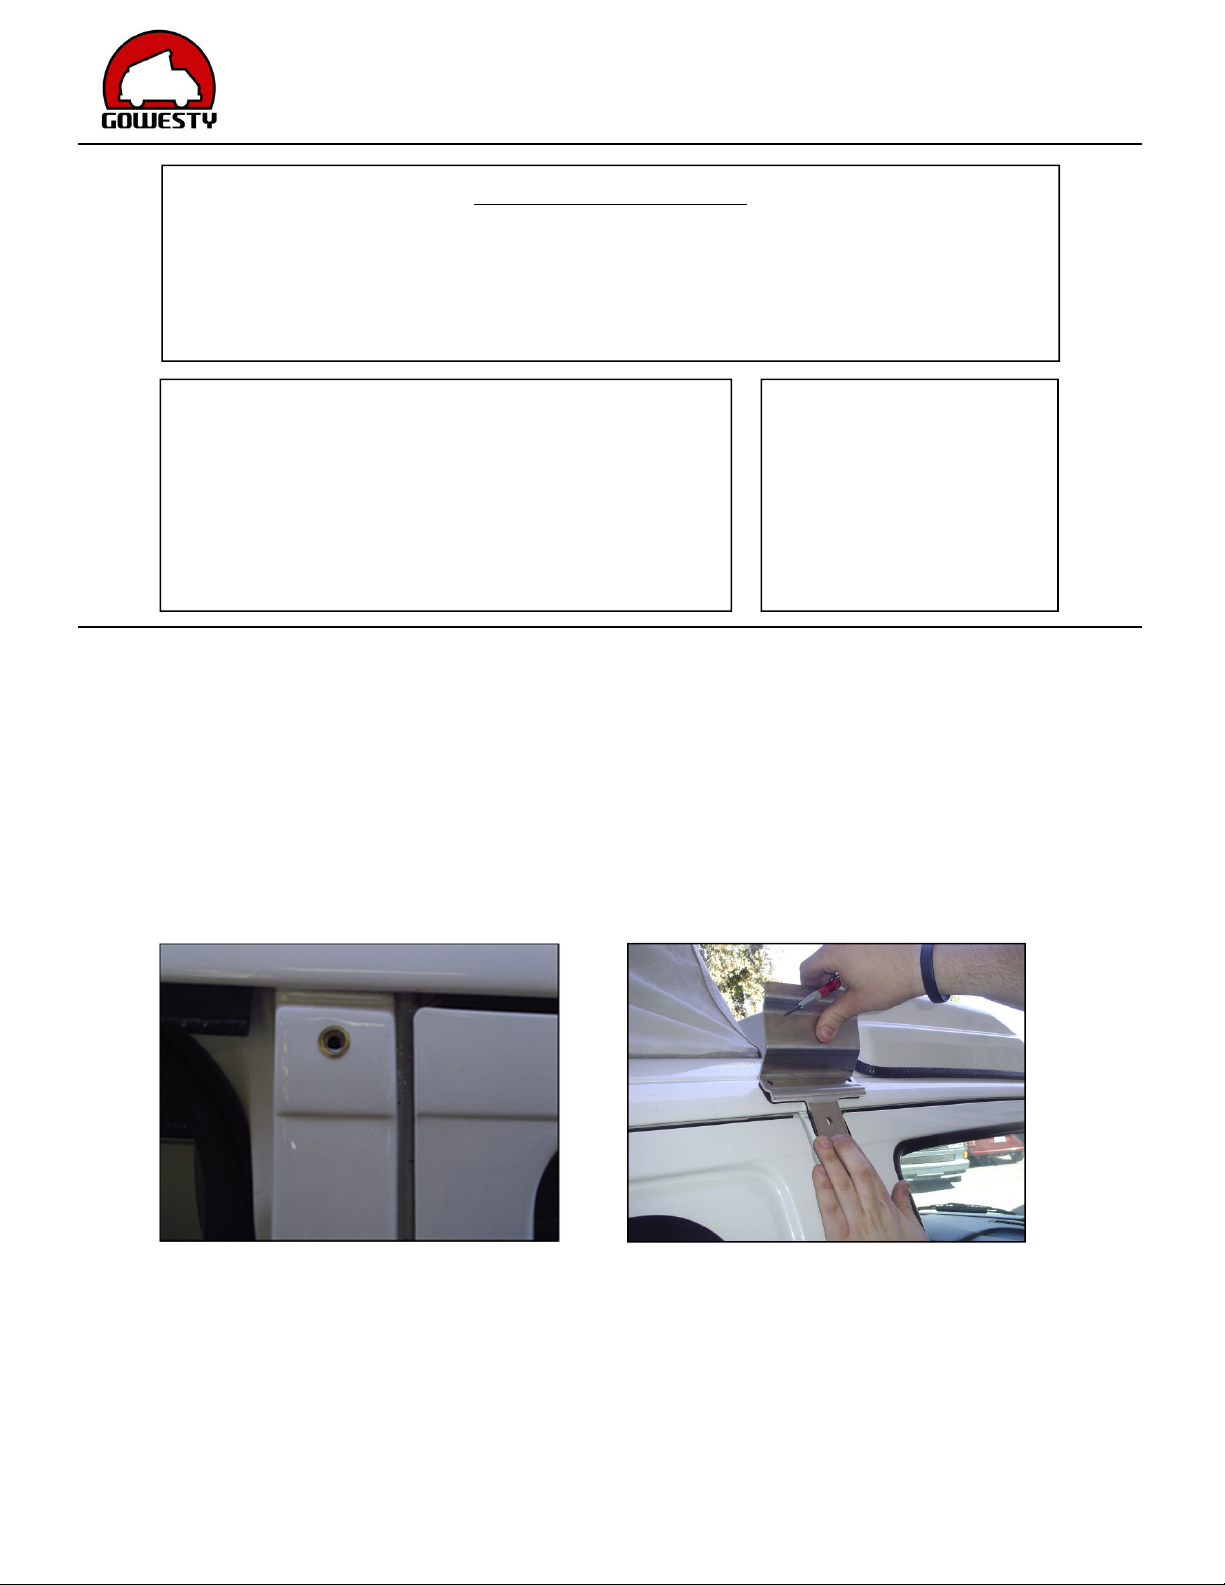
1) Hold the bracket up and mark the large, bottom hole or drilling. Hole should be centered 1¼” above lip on
ront pillar. Drill a 25/64” hole.
2) Attach rivet nut using rivet nut tool. Application o a silicone sealant in the bolt hole and around each
threading piece is recommended.
3) Bolt on gasket and bracket.
4) Drill pilot holes through bracket. Remove bracket and drill holes out to 25/64”.
5) Apply silicone sealant and attach rivet nuts with rivet nut tool. Bolt on gasket and bracket to test the it using
the 6mm x 20mm bolts (you will have to remove the brackets i installing an ARB awning).
Fitting the Rear
Fitting the Rear Fitting the Rear
Fitting the Rear Bracket to the Body
Bracket to the BodyBracket to the Body
Bracket to the Body
6) Follow steps 2-5 with the rear bracket. The lower hole should be positioned as high as possible without being
a ected by the bodyline (positioning the bracket too low could inter ere with the slider door).
7) From center o ront bracket to center o rear bracket is measured as ollows:
a. EVC Winnebago: 96” (10’ Fiamma awning), 83” (8’ Fiamma and ARB a
EVC Winnebago: 96” (10’ Fiamma awning), 83” (8’ Fiamma and ARB aEVC Winnebago: 96” (10’ Fiamma awning), 83” (8’ Fiamma and ARB a
EVC Winnebago: 96” (10’ Fiamma awning), 83” (8’ Fiamma and ARB awning)
wning)wning)
wning)
b. Eurovan MV/Hard Top: 83” (all a
Eurovan MV/Hard Top: 83” (all aEurovan MV/Hard Top: 83” (all a
Eurovan MV/Hard Top: 83” (all awnings)
wnings)wnings)
wnings)
Release rom Liability
Release rom LiabilityRelease rom Liability
Release rom Liability
Please use your best judgment when installing your awning. These instructions are to be
used as a guideline, but remember the old adage: “Measure twice, drill once!” GoWesty
GoWesty GoWesty
GoWesty
will not be liable or any damage to your vehicle during the installation o this
will not be liable or any damage to your vehicle during the installation o this will not be liable or any damage to your vehicle during the installation o this
will not be liable or any damage to your vehicle during the installation o this kit.
kit.kit.
kit. I
you are uncertain o your ability to sa ely per orm the procedures in these instructions,
please have your awning pro essionally installed.
Tools Needed:
Tools Needed:Tools Needed:
Tools Needed:
(dependent
(dependent(dependent
(dependent
on awning used)
on awning used)on awning used)
on awning used)
• Electric drill
• 15/64” & 25/64” bits
• 8mm &10mm wrenches
or ratchet and sockets
• Phillips screwdriver
Contents o Kit:
Contents o Kit:Contents o Kit:
Contents o Kit:
(6) 6mm rivet nuts (20) 6mm lat washers
(6) 6mm x 20mm hex bolts (1) Rivet nut tool
(4) 6mm x 16mm hex bolts (2) 5mm lock nuts
(4) 6mm x 25mm hex bolts (8) 6mm Nylock nuts
(2) 5mm machine screws (2) 5mm lat washers
(2) Rubber gaskets (2) Mounting brackets


