PROBLEMA SOLUCIÓN
P: El material a pulverizar no llega a la pistola
pulverizadora si el gatillo está apretado.
1. Compruebe la disolución de la pintura, y si fuese demasiado espesa, vuelva a diluir.
2. Compruebe que los tubos y la manguera de aire estén correctamente colocados. El suministro de aire de la
mochila pulverizadora no llega al recipiente de la mochila pulverizadora.
3. Compruebe que la tapa del recipiente de la mochila pulverizadora esté sellado.
4. Compruebe si el punta por donde sale el fluido de la pistola pulverizadora está bloqueado y si la aguja para el
fluido está libre para moverse. Compruebe el manual de la pistola pulverizadora sobre cómo limpiarla.
5. El nivel de material a pulverizar en el recipiente está demasiado bajo y necesita llenarse más.
6. Asegúrese de que las correas estén bien sujetas a la mochila pulverizadora y que ésta se encuentre colocada
correctamente en la espalda.
P: Se sale la pintura por el tubo de aire. Compruebe que la válvula esté correctamente colocada en la mochila pulverizadora (5) (Fig.1).
P: La pintura gotea alrededor del tubo de pintura/el
punto de conexión.
Compruebe que se encuentre presente la junta tórica y que esté correctamente colocada en la llave de pintura.
(7) (Fig.1)
6
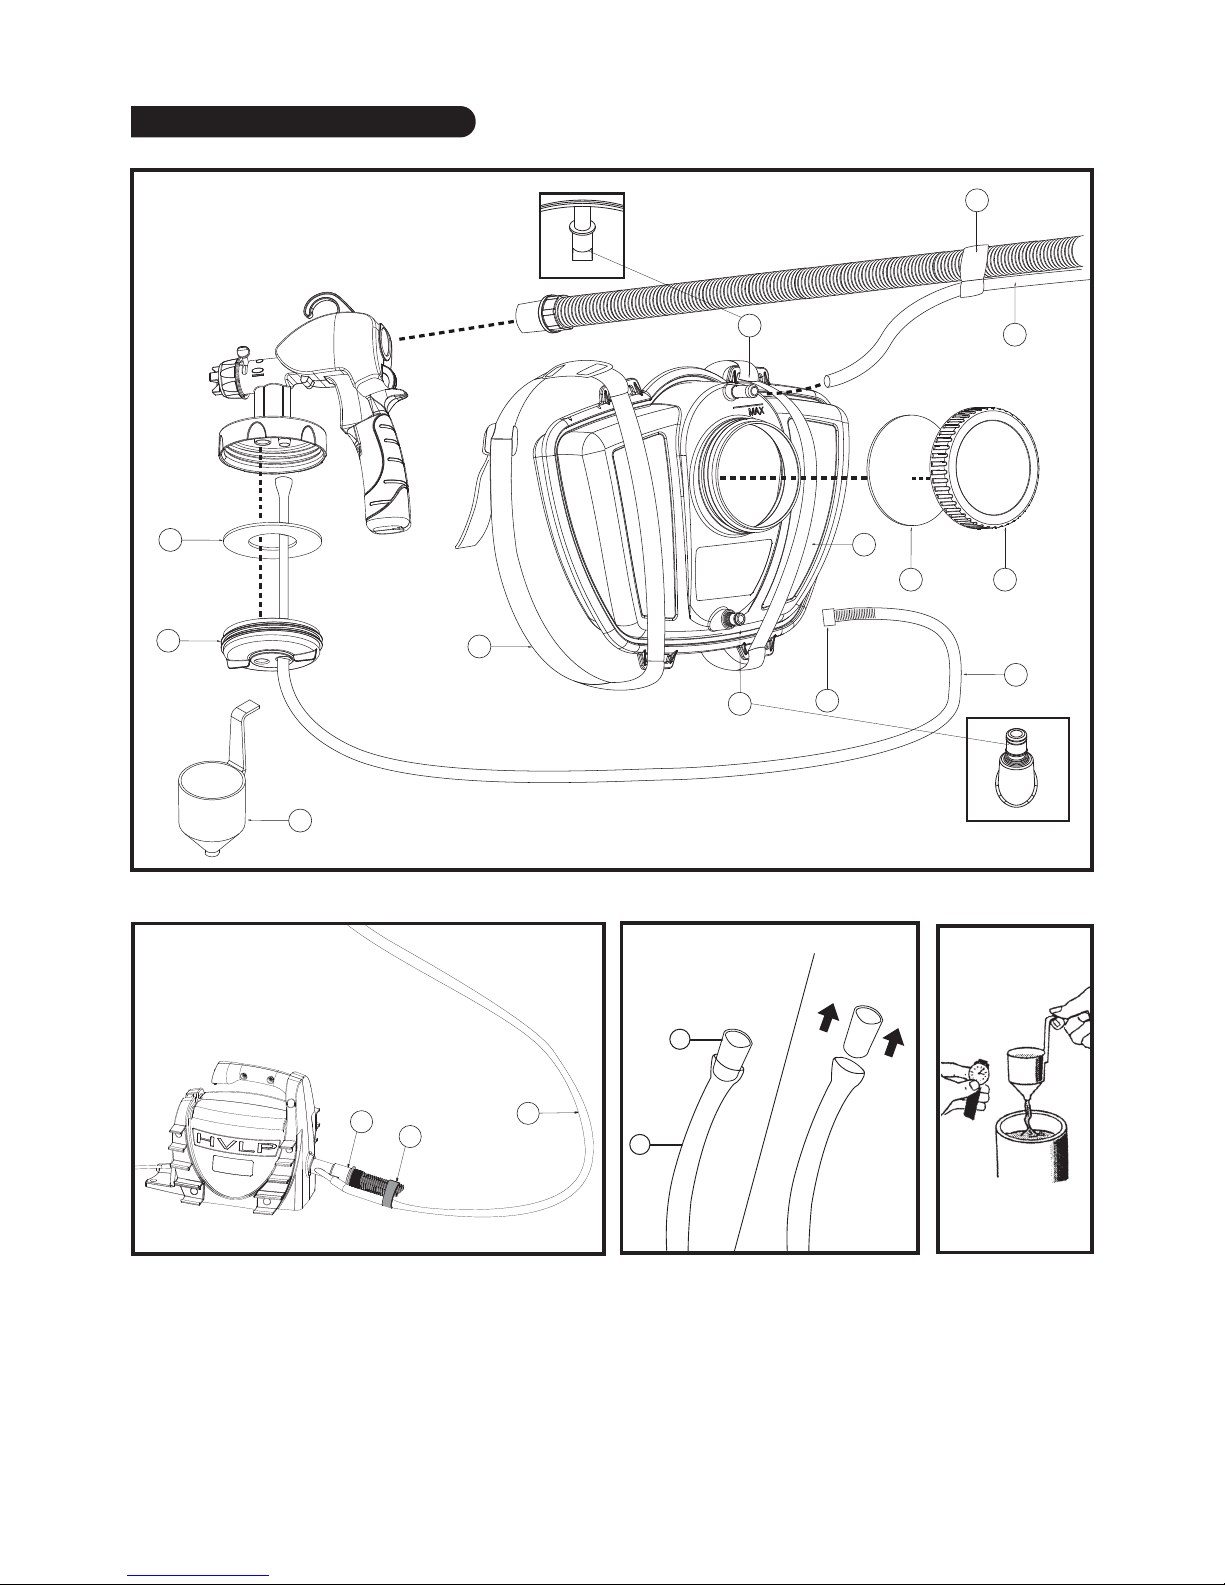
Montaje del pulverizador
1. Saque la mochila pulverizadora de la caja. Compruebe que la junta tórica (7) se encuentre en su lugar (consulte la Fig. 1) y acople la pistola pulverizadora y el tubo
utilizando la abrazadera de conexión rápida. (Fig. 1-E).
2. Compruebe la mochila pulverizadora (antes de llenarla de pintura) para asegurarse de que encaje cómodamente. Ajuste las correas según sea necesario para que
la mochila pulverizadora descanse en la parte alta de la espalda.
3. Escurra cualquier pintura vieja o grumosa para evitar bloqueos. En un recipiente adecuado, diluya la pintura o el material a pulverizar hasta la viscosidad correcta,
utilizando la guía de disolución de este manual o una copa de viscosidad.
4. Remueva a conciencia la pintura o el material a pulverizar durante aproximadamente 1 minuto. Este proceso resulta fundamental para el buen funcionamiento del
pulverizador. Le recomendamos que utilice un mezclador de pintura con taladro y que se asegure de que la pintura se
encuentre a temperatura ambiente.
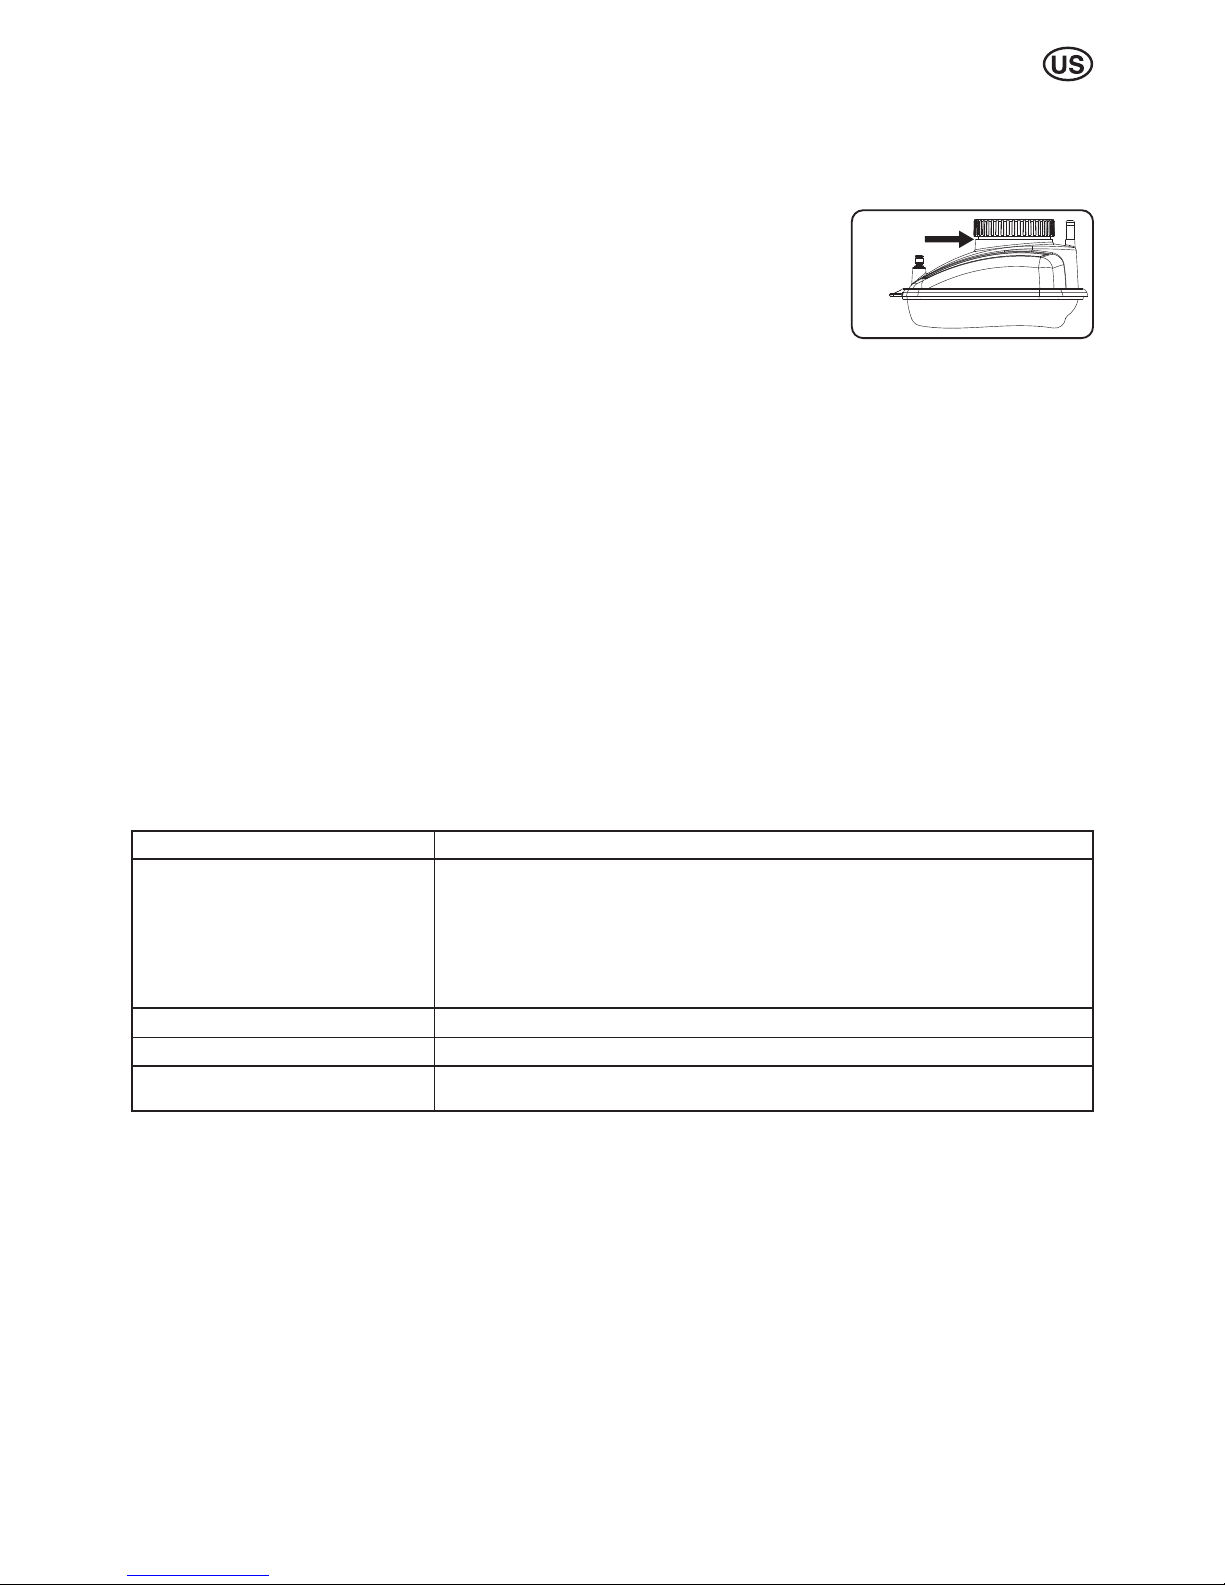
5. Vierta el material a pulverizar ya removido en la mochila pulverizadora, No rellenar el depósito dorsal más alta del límite
indicado (Fig.5).
6. Compruebe que el sello (8) de la tapa de la válvula se encuentre en su sitio y enrosque bien la tapa para evitar cualquier
fuga.
7. Flexibilizar el final del tubo con agua caliente para facilitar su inserción en el depósito dorsal (consulte la Fig. 1-6).
8. Tome la manguera negra e introdúzcala con firmeza en la pistola pulverizadora. (Consulte la Fig.1)
9. Colóquese la mochila pulverizadora en la espalda y ajuste las correas (AVISO: la mochila pulverizadora pesa aproximadamente unos 15lbs una vez lleno.
10. Asegúrese de que la mochila pulverizadora esté bien colocada en su espalda y las correas ajustadas. La mochila pulverizadora debería descansar sobre la parte
superior de su espalda para una altura de pulverización adecuada.
11. Encienda la unidad de la estación pulverizadora con el control de flujo abierto y el gatillo apretado, sujete la pistola pulverizadora más baja que la mochila
pulverizadora hasta que el líquido llegue a la pistola pulverizadora.
12. Se recomienda el uso de máscara, guantes, gafas y batas adecuadas durante el uso del equipo de pulverización.
Instrucciones de limpieza
La mochila pulverizadora debe limpiarse en profundidad inmediatamente tras su uso. Si la pintura se seca en el interior de la mochila pulverizadora, su limpieza será mucho
más difícil e incluso podría volver la mochila pulverizadora no operativa. Le recordamos que esto no está cubierto por la garantía.
1. Apague la unidad y extraiga el enchufe de la toma eléctrica.
2. Desconecte la manguera de aire negra de la pistola. Desconecte el tubo de aire transparente de la parte superior de la mochila pulverizadora tirando suavemente
de él, dejando el tubo de pintura acoplado.
3. Lleve la mochila pulverizadora a la pila/zona de lavado protegida para su limpieza. Se recomienda el uso de agua tibia jabonosa, nunca agua hirviendo.
4. Quite la tapa de la mochila pulverizadora (1) desenroscando con cuidado y lentamente para liberar la presión de aire del interior de la mochila
pulverizadora.
5. Vierta cualquier pintura restante en un recipiente para poder utilizarla en el futuro. Limpie con un paño la mochila pulverizadora para elimina toda la
pintura/material a pulverizar que sea posible.
6. Vierta cierta cantidad de agua tibia jabonosa en el recipiente de la mochila pulverizadora.
7. Vuelva a enroscar la tapa. Agite suavemente la mochila pulverizadora; repita el proceso hasta que la mochila esté limpia.
8. Extraiga la pequeña válvula del interior de la mochila pulverizadora (5) para quitar los restos de pintura. Seque y vuelva a colocar la válvula dentro de la mochila
pulverizadora.
9. Añada una cantidad final de agua tibia en la mochila pulverizadora, vuelva a acoplar la manguera de aire, encienda la unidad y con el control de flujo de aire de la pistola
pulverizadora, apriete el gatillo; debería pulverizar a través de la pistola hasta el tubo de pintura, proceso que costaría entre 25 y 60 segundos. El pulverizador deberá
estar limpio y sin restos de pintura. De lo contrario, repita el proceso hasta que el pulverizador se vea claro.
10. Suelte la manguera de conexión rápida de la mochila pulverizadora pulsando el botón hacia adentro y aparte el tubo.
11. Seque la mochila pulverizadora con una toalla y vuelva a montarlo para guardarlo para el siguiente trabajo de pulverización.
12. Siga las instrucciones de limpieza para su pistola específica.
Consejos:
• Asegúrese de que las correas estén bien sujetas a la mochila pulverizadora y que ésta se encuentre colocada correctamente en la espalda.
• Es importante que la pintura o el material a pulverizar se encuentre a temperatura ambiente. Si hiciese demasiado frío, se dificultará la pulverización y producirá
obstrucciones.
• Las temperaturas bajas pueden hacer que la pintura sea más densa, y por tanto recomendamos su pulverización a una temperatura ambiente de al menos 59°F.
¡Atención!
• No desconecte el tubo de la pintura cuando no haya salido la presión del envase o cuando la mochila pulverizadora esté llena de pintura.
• Recuerde que la pintura puede salirse accidentalmente de la pistola pulverizadora cuando al unidad de la turbina se apaga a causa de la presión contenida en la
mochila pulverizadora.
• Recuerde que la mochila pulverizadora puede pesar hasta 15lbs cuando esté lleno, por tanto tenga cuidado al manejar esta unidad.
Para preguntas y atención al cliente llamada gratuita: 888-944 HVLP
Do not fill pass
this level
Fig.5