manuals.online logo
Brands
  1. Home
  2. •
  3. Brands
  4. •
  5. Graco
  6. •
  7. Water Pump
  8. •
  9. Graco Husky 715 Operation manual

Graco Husky 715 Operation manual

308573
Rev. S
First choice when
quality counts.
t
04050
LISTED
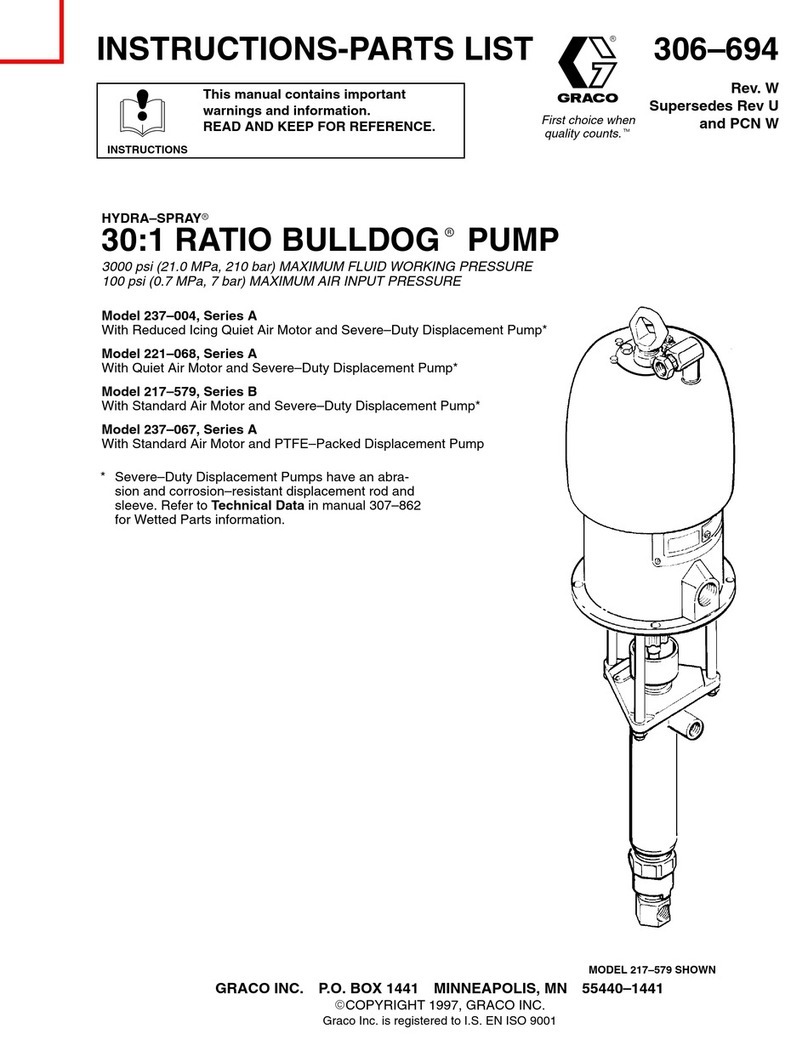
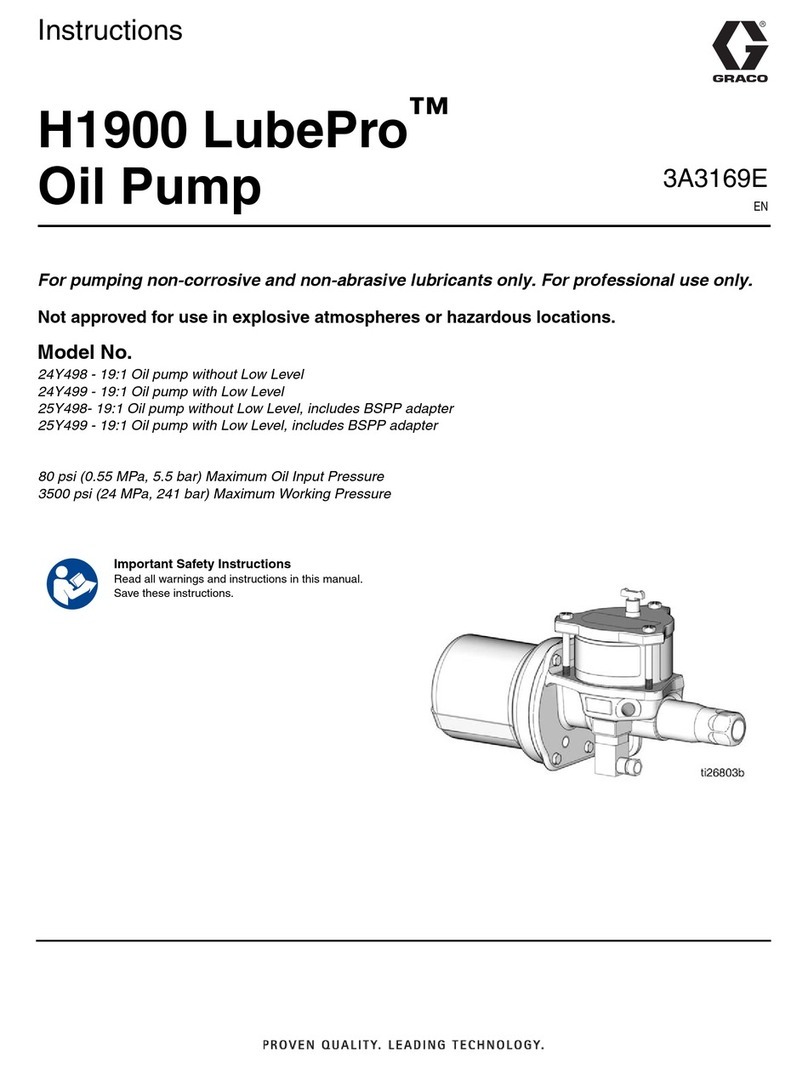
Model No. 237311 and 238226 shown
INSTRUCTIONS–PARTS LIST
INSTRUCTIONS
This manual contains important
warnings and information.
READ AND KEEP FOR REFERENCE.
ALUMINUM
Huskyt 715 Air-Operated
Diaphragm Pumps
50 psi (345 kPa, 3.4 bar) Maximum Fluid Working Pressure
50 psi (345 kPa, 3.4 bar) Maximum Air Input Pressure
Model No. 237311, Series D
Buna-N diaphragms and balls
Model No. 238226, Series D
Buna-N diaphragms and balls
Restricted air inlet to maximize pumping efficiency for
evacuation systems
Model No. 232106, Series D
Buna-N diaphragms and balls
Same as Model No. 238226, except air inlet and fluid
inlet and outlet ports face in the same direction to
facilitate wall mounting
GRACO INC. P.O. BOX 1441 MINNEAPOLIS, MN 55440–1441
ECOPYRIGHT 1995, GRACO INC.
Graco Inc. is registered to I.S. EN ISO 9001
2 308573
Table of Contents
Symbols 2. . . . . . . . . . . . . . . . . . . . . . . . . . . . . . . . . . . . . .
Safety Warnings 2. . . . . . . . . . . . . . . . . . . . . . . . . . . . . . .
Installation 4. . . . . . . . . . . . . . . . . . . . . . . . . . . . . . . . . . . . .
Operation 10. . . . . . . . . . . . . . . . . . . . . . . . . . . . . . . . . . . .
Maintenance 12. . . . . . . . . . . . . . . . . . . . . . . . . . . . . . . . . .
Troubleshooting 14. . . . . . . . . . . . . . . . . . . . . . . . . . . . . . .
Service 16. . . . . . . . . . . . . . . . . . . . . . . . . . . . . . . . . . . . . .
Parts 27. . . . . . . . . . . . . . . . . . . . . . . . . . . . . . . . . . . . . . . .
Dimensions 30. . . . . . . . . . . . . . . . . . . . . . . . . . . . . . . . . . .
Mounting Hole Layouts 30. . . . . . . . . . . . . . . . . . . . . . . . .
Technical Data 30. . . . . . . . . . . . . . . . . . . . . . . . . . . . . . . .
Performance Charts
Pump Rate Decrease at Different Suction Lifts 31. . .
Model 237311 Performance Curves 32. . . . . . . . . . . .
Model 238226 and 232106 Performance Curves 34.
Graco Standard Warranty 36. . . . . . . . . . . . . . . . . . . . . .
Graco Phone Number 36. . . . . . . . . . . . . . . . . . . . . . . . . .
Symbols
Warning Symbol
WARNING
This symbol alerts you to the possibility of serious
injury or death if you do not follow the instructions.
Caution Symbol
CAUTION
This symbol alerts you to the possibility of damage to
or destruction of equipment if you do not follow the
instructions.
WARNING
INSTRUCTIONS
EQUIPMENT MISUSE HAZARD
Equipment misuse can cause the equipment to rupture or malfunction and result in serious injury.
DThis equipment is for professional use only.
DRead all instruction manuals, tags, and labels before operating the equipment.
DUse the equipment only for its intended purpose. If you are not sure, call your Graco distributor.
DDo not alter or modify this equipment. Use only genuine Graco parts and accessories.
DCheck equipment daily. Repair or replace worn or damaged parts immediately.
DDo not exceed the maximum working pressure of the lowest rated component in your system. This
equipment has a 50 psi (345 kPa, 3.4 bar) maximum working pressure at 50 psi (345 kPa,
3.4 bar) maximum incoming air pressure.
DUse fluids and solvents which are compatible with the equipment wetted parts. Refer to the Tech-
nical Data section of all equipment manuals. Read the fluid and solvent manufacturer’s warnings.
DDo not use 1,1,1–trichloroethane, methylene chloride, other halogenated hydrocarbon solvents or
fluids containing such solvents in aluminum pumps. Such use could result in a serious chemical
reaction, with the possibility of explosion.
DDo not use hoses to pull equipment.
DRoute hoses away from traffic areas, sharp edges, moving parts, and hot surfaces. Do not expose
Graco hoses to temperatures above 82_C (180_F) or below –40_C (–40_F).
DDo not lift pressurized equipment.
DWear hearing protection when operating this equipment.
DComply with all applicable local, state, and national fire, electrical, and safety regulations.
 
WARNING
TOXIC FLUID HAZARD
Hazardous fluid or toxic fumes can cause serious injury or death if splashed in the eyes or on the skin,
inhaled, or swallowed.
Know the specific hazards of the fluid you are using.
Store hazardous fluid in an approved container. Dispose of hazardous fluid according to all local,
state and national guidelines.
Always wear protective eyewear, gloves, clothing and respirator as recommended by the fluid and
solvent manufacturer.
Pipe and dispose of the exhaust air safely, away from people, animals, and food handling areas. If
the diaphragm fails, the fluid is exhausted along with the air. See Air Exhaust Ventilation on
page 9.
FIRE AND EXPLOSION HAZARD
Improper grounding, poor ventilation, open flames or sparks can cause a hazardous condition and
result in a fire or explosion and serious injury.
Ground and bond the equipment. Refer to Grounding on page 4.
If there is any static sparking or you feel an electric shock while using this equipment, stop pump-
ing immediately. Do not use the equipment until you identify and correct the problem.
Provide fresh air ventilation to avoid the buildup of flammable fumes from solvents or the fluid
being pumped.
Pipe and dispose of the exhaust air safely, away from all sources of ignition. If the diaphragm fails,
the fluid is exhausted along with the air. See Air Exhaust Ventilation on page 9.
Keep the work area free of debris, including solvent, rags, and gasoline.
Electrically disconnect all equipment in the work area.
Extinguish all open flames or pilot lights in the work area.
Do not smoke in the work area.
Do not turn on or off any light switch in the work area while operating or if fumes are present.
Do not operate a gasoline engine in the work area.
4 308573
Installation
Grounding
WARNING
FIRE AND EXPLOSION HAZARD
This pump must be grounded. Before
operating the pump, ground the system
as explained below. Also read the sec-
tion FIRE OR EXPLOSION HAZARD on
page 3.
Check your system electrical continuity after the initial
installation, and then set up a regular schedule for
checking continuity to be sure proper grounding is
maintained.
To reduce the risk of static sparking, ground the pump
and all other equipment used or located in the pumping
area. Check your local electrical code for detailed
grounding and bonding instructions for your area and
type of equipment.
Ground and bond all of this equipment:

Pump
: attach a ground wire (Y) to the grounding
strip (111) with the screw (121), lockwasher (122)
and nut (123), as shown in Fig. 1, and per code.
Connect the clamp end of the ground wire to a true
earth ground. Order Part No. 222011 Ground Wire
and Clamp.
04051C
Fig. 1
Y
111
121
122
123

Air and fluid hoses
: use only electrically conductive
hoses.

Air compressor
: follow the manufacturer’s
recommendations.

Suction device nozzle:
must be bonded to metal
container from which it is suctioning by firm
metal-to-metal contact to a properly grounded
suction hose and pump.

Piping, valves and fittings:
use only electrically
conductive materials. Bond and ground per code.

Solvent pails used when flushing
: follow your local
code. Use only metal pails, which are conductive.
Do not place the pail on a non-conductive surface,
such as paper or cardboard, which interrupts the
grounding continuity.

Waste storage tank:
follow your local code.
 
Installation
Typical Installation Description
Fig. 2 shows a system for the fast evacuation of gear
oil from vehicles. One centrally-mounted Husky 715
pump can have suction line drops to up to four service
bays, when activated singly. Interchangeable, nylon
suction wands are available to fit most differentials.
One control valve at each bay remotely activates the
pump and quickly suctions the gear oil. This system
can also be used to remove waste oil from rolling
waste oil drain carts, using a high capacity wand.
Fig. 3 shows a system for the fast evacuation of waste
oil from rolling waste oil receivers, or for general fluid
transfer applications. In waste oil evacuation systems,
roll the receivers up to a centrally mounted Husky 715
pump. Couple a quick disconnect coupler to a mating
connector on the waste oil receiver. Turn on the pump
and the oil is quickly evacuated from the receiver and
sent to a waste oil storage tank.
General Information
The Typical Installations in Figs. 2 and 3 are only
guides for selecting and installing system
components. Contact your Graco distributor for
assistance in planning a system to suit your needs.
Always use Genuine Graco Parts and Accessories.
Installation and use must be in accordance with the
Flammable and Combustible Liquids Code (NFPA
30) and Automotive and Marine Service Station
Code (NFPA 30A) and must comply with all local,
state and federal codes.
Use a compatible, liquid thread sealant on all male
threads. Tighten all connections firmly to avoid air
or fluid leaks.
Reference numbers and letters in parentheses refer
to the callouts in the Figures and the parts lists on
pages 27 to 29.
WARNING
TOXIC FLUID HAZARD
Hazardous fluid or toxic fumes can
cause serious injury or death if splashed
in the eyes or on the skin, inhaled, or
swallowed.
Read TOXIC FLUID HAZARD on page 3.
Use fluids and solvents which are compatible
with the equipment wetted parts. Refer to the
Technical Data section of all equipment manu-
als. Read the fluid and solvent manufacturer’s
warnings.
Tightening Screws Before First Use
After unpacking the pump and before using it for the
first time, check and retorque the external fasteners.
See the Service section for torque specifications.
After the first day of operation, check and retorque the
fasteners again. The recommended frequency for
retorquing fasteners varies with pump usage; a general
guideline is to retorque fasteners every two months.
Mountings
Be sure the mounting surface can support the
weight of the pump, hoses, and accessories, as
well as the stress caused during operation.
The Husky 715 Pump can be used in a variety of
installations. See Figs. 2 and 3 for examples.
Secure the pump with screws and nuts.
6 308573
Installation
04926
Fig. 2
KEY
A Pump air regulator
B Air line quick coupler (required)
C Fluid drain valve (required)
D Control valve
E Suction wand
F Suction hose
G Fluid quick coupler
H Husky 715 pump
J Electrically conductive, bonded
air supply line
K Electrically conductive, bonded
fluid line to pump
L Electrically conductive, bonded
waste oil line to storage tank
Y Ground wire (required; See page 4
for installation instructions. Pump
must be properly grounded and entire
system electrically bonded.)
H
Example of a Gear Oil Receiver Evacuation System
A
C
D
G
J
L
Y
F
B
E
Bay 1 Bay 2 Bay 3
J
J
J
JJ
J
KK
K
Fig. 3
Example of a Waste Oil Evacuation System, or
General Fluid Transfer Application
Using Pump Model No. 232106, which has air inlet
and fluid inlet and outlet ports facing forward
KEY
A Pump air regulator
B Air line quick coupler (required)
C Fluid drain valve (required)
D Wall-mount bracket (Part No. 221167)
F Electrically conductive
suction hose
G Fluid quick coupler
H Husky 715 pump
J Electrically conductive, bonded air
supply line
L Electrically conductive, bonded waste
oil line to storage tank
M Waste oil receiver
Y Ground wire (required; See page 4
for installation instructions. Pump
must be properly grounded and entire
system electrically bonded.)
H
A
C
L
Y
F
B
J
J
J
M
G
04927B
D
 
Installation
Air Line
WARNING
An air line quick coupler (B) is required in your
system to relieve air trapped between this valve
and the pump. See Fig. 2. Trapped air can cause
the pump to cycle unexpectedly, which could result
in serious injury, including splashing in the eyes or
on the skin, injury from moving parts, or contamina-
tion from hazardous fluids.
CAUTION
Before connecting the permanent air line to the
regulator (A), blow out all lines with air to remove
contaminants that can clog or damage the regulator,
hose, or pump air valve.
CAUTION
The pump exhaust air may contain contaminants.
Ventilate to a remote area if the contaminants could
affect your fluid supply. See Air Exhaust Ventilation
on page 9.
1. Install the air line accessories as shown in Fig. 2.
Mount these accessories on the wall or on a
bracket. Be sure the air line supplying the
accessories is electrically conductive and bonded.
2. Use the air regulator (A) to control the pump fluid
outlet pressure. The fluid pressure will be the
same as the setting on the regulator gauge.
3. Install an electrically conductive, flexible air hose
(J) between the regulator (A) and the 1/4 npt(f)
pump air inlet. Use a minimum 1/4” (6.3 mm) ID air
hose. Screw an air line quick disconnect coupler
(B) onto the end of the air hose (J), and screw the
mating fitting into the pump air inlet snugly. Do not
connect the coupler (B) to the fitting yet.
Fluid Supply Line
Use electrically conductive fluid hoses (J or F). Be
sure the lines are bonded all the way from the fluid
supply to the grounded pump.
The pump fluid inlet is 3/4 npt(f). See Fig. 4. Screw
the fluid fitting into the pump inlet snugly. Do not
overtighten.
For the Gear Oil Evacuation System, install a
control valve (D) and an appropriate wand (E). See
Fig. 2.
For the Waste Oil Receiver Evacuation System,
connect an appropriate suction hose (F) and fluid
quick coupler (G) between the pump fluid inlet and
the waste oil receiver (M). See Fig. 3.
If the inlet pressure to the pump is more than 25%
of the outlet working pressure, the ball check valves
will not close fast enough, resulting in inefficient
pump operation.
At inlet fluid pressures greater than 15 psi
(100 kPa, 1.0 bar), diaphragm life will be shortened.
See the Technical Data on page 30 for maximum
suction lift and flow rate loss at various lift
distances.
Fluid Outlet Line
WARNING
A fluid drain valve (C) is required in your system to
relieve pressure in the hose if it is plugged. See
Figs. 2 and 3. The drain valve reduces the risk of
serious injury, including splashing in the eyes or on
the skin, or contamination from hazardous fluids
when relieving pressure. Install the valve close to
the pump fluid outlet.
Use electrically conductive fluid hoses (L). Be sure
the lines are bonded all the way from the grounded
pump to the waste storage tank.
The pump fluid outlet is 3/4 npt(f). See Fig. 4.
Screw the fluid fitting into the pump outlet snugly.
Do not overtighten.
Install a fluid drain valve (C) near the fluid outlet.
See the WARNING above.
Also read Fluid Pressure Relief Valve, on
page 8.
 
Installation
Changing the Orientation of the Fluid Inlet
and Outlet Ports
You can change the direction of the fluid inlet and
outlet manifolds (102), if desired. Models 237311 and
238226 are shipped with the fluid inlet manifold
pointing toward the air inlet and the fluid outlet
manifold pointing away from the air inlet. See Fig. 4.
Model 232106 is shipped with all ports (air inlet, fluid
inlet, fluid outlet) facing in the same direction, as
shown in Fig. 3 on page 6.
1. Remove the bolts (105) holding the manifold (102)
to the covers (101). Save the attaching hardware.
2. Turn the manifold to the desired position, and
reinstall the hardware. Torque the bolts (105) to 3
to 6 ft-lb (4 to 8 N.m).
04055
Fig. 4
1
3
4
21/4 npt(f) Air Inlet
Torque to 3 to 6 ft-lb (4 to 8 N.m).
3/4 npt(f) Fluid Inlet
3/4 npt(f) Fluid Outlet
(on opposite side)
1
2
3
4
102
102
105
101
Fluid Pressure Relief Valve
CAUTION
Some systems may require installation of a pressure
relief valve at the pump outlet to prevent overpres-
surization and rupture of the pump or hose. See
Fig. 5.
Thermal expansion of fluid in the outlet line can
cause overpressurization. This can occur when using
long fluid lines exposed to sunlight or ambient heat,
or when pumping from a cool to a warm area (for
example, from an underground tank).
Overpressurization can also occur if the Husky pump
is being used to feed fluid to a piston pump, and the
intake valve of the piston pump does not close,
causing fluid to back up in the outlet line.
Pressure Relief Kit 238428 is available for use on
aluminum Husky 715 pumps and may be purchased
separately.
04333
Fig. 5
KEY
N 3/4 npt(f) Fluid Inlet Manifold
P 3/4 npt(f) Fluid Outlet Manifold
R Pressure Relief Valve
Part No. 110134 (Aluminum)
Part No. 112119 (Stainless Steel)
5
7
6Connect fluid inlet line here.
Install valve between fluid inlet and outlet ports.
Rotate fluid inlet manifold 180 (see Fig. 4).
R
N
P
8 Connect fluid outlet line here.
5
6
7
8
308573 9
Installation
Air Exhaust Ventilation
WARNING
FIRE AND EXPLOSION HAZARD
Be sure to read FIRE OR EXPLOSION
HAZARD and TOXIC FLUID HAZARD
on page 3, before operating this pump.
Be sure the system is properly ventilated
for your type of installation. You must
vent the exhaust to a safe place, away from peo-
ple, animals, food handling areas, and all sources
of ignition when pumping flammable or hazardous
fluids.
Diaphragm failure will cause the fluid being
pumped to exhaust with the air. Place an appropri-
ate container at the end of the air exhaust line to
catch the fluid. See Fig. 6.
The air exhaust port is 3/8 npt(f). Do not restrict the air
exhaust port. Excessive exhaust restriction can cause
erratic pump operation.
To exhaust to a remote location:
1. Remove the muffler (W) from the pump air exhaust
port.
2. Install an electrically conductive air exhaust hose
(X) and connect the muffler to the other end of the
hose. The minimum size for the air exhaust hose
is 3/8 in. (10 mm) ID. If a hose longer than 15 ft
(4.57 m) is required, use a larger diameter hose.
Avoid sharp bends or kinks in the hose.
3. Place a container (Z) at the end of the air exhaust
line to catch fluid in case a diaphragm ruptures.
See Fig. 6.

Fig. 6
VENTING EXHAUST AIR
See Fig. 2 for accessories
KEY
W Muffler
X Electrically Conductive Air Exhaust Hose
Z Container for Remote Air Exhaust
W
X
Z
10 308573
Operation
Pressure Relief Procedure
WARNING
PRESSURIZED EQUIPMENT HAZARD
The equipment stays pressurized until pressure is
manually relieved. To reduce the risk of serious
injury from pressurized fluid, accidental spray from
the gun or splashing fluid, follow this procedure
whenever you
Are instructed to relieve pressure
Stop pumping
Check, clean or service any system equipment
Install or clean fluid nozzles
1. Close the air regulator by turning counterclockwise
as far as possible.
2. Disconnect the air line quick coupler to relieve air
pressure.
3. Open the dispensing valve, if used.
4. Open the fluid drain valve to relieve all fluid
pressure, having a container ready to catch the
drainage.
Flush the Pump Before First Use
The pump was tested in air, to eliminate possible
contamination of the fluid you are pumping by test
fluids. Prior to use, flush the pump thoroughly with a
compatible solvent. Follow the steps under Starting
and Adjusting the Pump.
Starting and Adjusting the Pump
All Systems
WARNING
TOXIC FLUID HAZARD
Hazardous fluid or toxic fumes can
cause serious injury or death if splashed
in the eyes or on the skin, inhaled, or
swallowed. Do not lift a pump under
pressure. If dropped, the fluid section may rupture.
Always follow the Pressure Relief Procedure at
left before lifting the pump.
1. Be sure the pump is properly grounded and
bonded. Read FIRE OR EXPLOSION HAZARD
on page 3.
2. Check all fittings to be sure they are tight. Use a
compatible liquid thread sealant on all male
threads. Tighten the fluid inlet and outlet fittings
snugly. Do not overtighten the fittings into the
pump.
3. For the first startup: At the suction line,
disconnect the short hose leading to the pump.
Place the hose in a two quart container of oil.
Start the pump following Steps 1, 3 and 4 in either
of the following startup procedures. When the
container is empty, shut off the air to the pump
and reconnect the hose to the suction line. This
procedure wets the pump internal parts to ensure
maximum suction.
308573 11
Operation
Waste Receiver Evacuation Systems, or General
Fluid Transfer Applications (See Fig. 3)
1. Connect the suction hose (F) to the waste oil
receiver (M) with a fluid quick coupler (G).
2. Be sure the drain valve (C) is closed.
3. Connect the air hose (J) to the pump with an air
line quick coupler (B).
4. Open the air regulator (A) until the pump starts to
cycle.
NOTE: If the pump does not start, turn the reset shaft
(21) on the air valve (A). See Fig. 8 on page 16.
5. Adjust the air regulator. Do not use higher air
pressure than needed for the pump to provide
good suction. Increasing the pump cycle rate does
not necessarily improve suction.
Gear Oil Evacuation Systems (See Fig. 2)
1. Attach an appropriate wand (E) to the suction hose
(F).
2. Be sure the drain valve (C) is closed.
3. Connect the air hose (J) to the pump with an air
line quick coupler (B).
4. Open and set the air regulator (A) to about 50 psi
(345 kPa, 3.4 bar).
5. Place the suction wand (E) in the differential or
fluid to be pumped.
6. Pull the control valve (D) handle down to start the
pump.
NOTE: If the pump does not start, turn the reset shaft
(21) on the air valve (A). See Fig. 8 on page 16.
7. Adjust the air regulator. Do not use higher air
pressure than needed for the pump to provide
good suction. Increasing the pump cycle rate does
not necessarily improve suction.
8. Push the control valve (D) handle up when
finished. Place the wand in the holder on the
control valve.
NOTE: Be sure the control valve handle is closed
when the evacuation is completed. Failure to close it
may prevent other service bays on the line from
developing full suction.
Pump Shutdown
WARNING
To reduce the risk of serious injury whenever you
are instructed to relieve pressure, always follow the
Pressure Relief Procedure on page 10.
At the end of the work shift, relieve the pressure.
12 308573
Maintenance
Lubrication
The air valve is designed to operate unlubricated,
however if lubrication is desired, every 500 hours of
operation (or monthly) remove the hose from the pump
air inlet and add two drops of machine oil to the air
inlet.
CAUTION
Do not over-lubricate the pump. Oil is exhausted
through the muffler, which could contaminate your
fluid supply or other equipment. Excessive lubrication
can also cause the pump to malfunction.
Flushing and Storage
WARNING
To reduce the risk of serious injury whenever you
are instructed to relieve pressure, always follow the
Pressure Relief Procedure on page 10.
Flush the pump often enough to prevent the fluid you
are pumping from drying or freezing in the pump and
damaging it. Flush with a fluid that is compatible with
the fluid you are pumping and with the wetted parts in
your system. Check with your fluid manufacturer or
supplier for recommended flushing fluids and flushing
frequency.
Always flush the pump and relieve the pressure
before storing it for any length of time.
Grounding Continuity Check
Check your system electrical continuity regularly to be
sure proper grounding is maintained.
Tightening Threaded Connections
Before each use, check all hoses for wear or damage,
and replace as necessary. Check to be sure all
threaded connections are tight and leak free. Check
and retorque all threaded connections at least every
two months.
The recommended frequency for retorquing fasteners
varies with pump usage; a general guideline is to
retorque fasteners every two months.
Tightening the Clamps
When tightening the clamps (109), apply thread
lubricant to the bolts and
be sure
to torque the nuts
(110) to 50 to 60 in-lb (5.6 to 6.8 N.m). See Fig. 7.
04056
Fig. 7
Apply thread lube to bolts and
torque nuts to 75 to 85 in-lb (8.5 to
9.6 N.m).

110
109
Preventive Maintenance Schedule
Establish a preventive maintenance schedule, based
on the pump’s service history. This is especially
important for prevention of spills or leakage due to
diaphragm failure.
308573 13
Notes
14 308573
Troubleshooting
WARNING
To reduce the risk of serious injury whenever you
are instructed to relieve pressure, always follow the
Pressure Relief Procedure on page 10.
1. Relieve the pressure.
2. Check all possible problems and causes before
disassembling the pump.
PROBLEM CAUSE SOLUTION
Pump will not cycle, or cycles once
and stops.
Air valve is stuck or dirty. Turn reset shaft (21}).
Disassemble and clean air valve.
See pages 19, 20.
Use filtered air.
Worn or broken detent link (22}). Replace detent link (22}) and ball
(8}). See pages 19, 20.
Broken or damaged springs (3}, 6})
and/or valve cup (5}) and plate
(13).
Replace. See pages 19, 20.
Bent or broken pilot pins (26). Replace. See pages 16, 18. When
reinstalling the air valve, be sure to
follow the instructions on page 18,
to avoid damaging the pins.
Pump cycles at stall or fails to hold
pressure at stall.
Leaky check valves or o-rings (113). Replace. See page 22.
Worn check balls (301*) or guide
(201*).
Replace. See page 22.
Check ball (301*) wedged in guide
(201*).
Repair or replace.
See page 22.
Excessive air leakage from exhaust
port.
Worn air valve cup (5}) or plate
(13).
Replace. See pages 19, 20.
Worn shaft seals (30F). Replace. See page 23.
Pump operates erratically. Clogged suction line. Inspect; clear.
Loose manifolds (102). Tighten manifold screws (105).
Refer to page 22.
Sticky or leaking check valve balls
(301*).
Clean or replace. See page 22.
Diaphragm (401{) ruptured. Replace. See page 23.
308573 15
Troubleshooting
PROBLEM CAUSE SOLUTION
Air bubbles in fluid. Suction line is loose. Tighten.
Diaphragm (401{) ruptured. Replace. See page 23.
Loose manifolds (102) or damaged
o-rings (113*).
Tighten manifold screws (105);
replace o-rings (113*).
See page 22.
Loose fluid side diaphragm plates
(116***).
Tighten screw (114***). See page
23.
Fluid in exhaust air. Diaphragm (401{) ruptured. Replace. See page 23.
Loose fluid side diaphragm plates
(116***).
Tighten screw (114***). See page
23.
Pump exhausts air at stall. Worn air valve cup (5}) or plate
(13).
Replace. See pages 19, 20.
Worn shaft seals (30F). Replace. See page 23.
Pump exhausts air from clamps. Loose clamps (109). Tighten clamp nuts (110).
See page 12.
Pump exhausts air near air valve. Air valve screws (10) are loose. Tighten screws. See page 16.
Air valve o-ring (19}) is damaged. Inspect; replace. See pages 19, 20.
Pump leaks fluid from check valves. Worn or damaged o-rings (113*). Inspect; replace. See page 22.
Loose manifolds (102). Tighten manifold screws (105).
Refer to page 22.
16 308573
Service
Tools Required
DTorque wrench
DSet of socket wrenches
D1/8” EZY-OUT bearing extractor
DO-ring pick
Replacing the Air Valve
NOTE: Air Valve Kit 239952 is available. Parts
included in the kit are marked with a symbol, for
example (2}). A tube of general purpose grease (25})
is supplied in the kit. Install the kit as follows.
WARNING
To reduce the risk of serious injury whenever you
are instructed to relieve pressure, always follow the
Pressure Relief Procedure on page 10.
1. Relieve the pressure.
2. Unscrew the six mounting screws (10) and remove
the air valve (A) from the pump. See Fig. 8.
04345
Fig. 8
1
2
GREASE APPLICATION
19}
Torque oppositely and evenly to 20 to 25 in-lb (2.3 to 2.8
N.m).
Apply grease (25}).
1
2
2
2
2
}14
10
A
21}
}16
}21
03412A
308573 17
Service
3. Refer to Fig. 9. Use an o-ring pick to remove the
bearings (9 and 24).
4. Remove the two screws (23) holding the valve
plate (13) to the pump. Use an o-ring pick to
remove the valve plate and seal (12). Clean and
inspect the parts. Replace any worn ones.
5. If the pilot pins (26) are accessible from the inside
of the pump housing (1), pull them out. If not
accessible, disassemble the fluid section as
explained on page 23.
NOTE: Inspect the pilot pin o-rings (28) and bearings
(27) in place. Removal will destroy the bearings and is
not required unless they are damaged. To service the
bearings, first perform steps 2 to 5 on page 23.
6. Use a 1/8 in. EZY-OUT to remove the bearings
(27) from the housing (1). See Fig. 17 on page 23
for an illustration of how to use an EZY-OUT.
Remove the o-rings (28). Clean and inspect the
parts. Replace any worn ones.
NOTE: If the pilot pin o-rings (28) and bearings (27)
were not removed, go to step 8.
7. Grease the o-rings (28) and install them in the
bearings (27). Press the bearings and o-rings in
place so the bearings are flush with the surface of
the housing (1). See Fig. 9.
8. Grease the pilot pins (26) and install them from the
inside of the housing (1).
9. Install the seal (12) in the pump housing (1). Install
the valve plate (13) and secure with the two
screws (23). (The heads of the screws overlap the
top and bottom edges of the plate to hold it in
place.) Torque the screws to 5 to 7 in-lb (0.6 to 0.8
N.m).
10. Apply grease (25) to the bearings (9 and 24).
Install the bearing (9) in the pump housing (1).
Install the other bearing (24).
11. Make certain the o-ring (19) is in place on the air
valve (A). See Fig. 8.
12. Apply grease (25) where shown in Fig. 8.
Fig. 9

2627
28
Press-fit flush with surface of housing (1).


12
1
23
13
Torque to 5 to 7 in-lb (0.6 to 0.8 N.m).
9
24
Apply grease (25).






18 308573
Service
CAUTION
If you are replacing the diaphragms, you must rein-
stall the air valve before installing the diaphragms, as
the diaphragms will force the pilot pins into the air
valve area.
The pilot pins (26) must give clearance for the actua-
tor link (16), to prevent damage to the pins. Follow
steps 13 to 15 carefully.
13. Check if either of the two pilot pins (26) are
protruding out into the air valve cavity. Push them
back in as far as possible.
14. If one of the pins is still protruding, make sure the
air valve is shifted
away from
that pin’s side of the
cavity. To shift the valve, push down on the detent
link (22) and slide it to the other side with your
fingers (see Fig. 11).
15. Align the air valve assembly (A) so the reset shaft
(21) is at the top and the valve is angled away
from a protruding pilot pin (26), then slip it into
position. See Fig. 10.
Do not force the air valve
down onto the pin.
If the pin is interfering with
the actuator link (16), make sure the valve is
shifted away from the pin (see step 14), then
reposition the valve.
16. Install the six screws (10) and torque oppositely
and evenly to 20 to 25 in-lb (2.3 to 2.8 N.m). See
Fig. 8.

26
21
A
Fig. 10
Top end of the air valve.

NOTE: This example shows how to shift the air valve when a pilot pin (26) is protruding as shown in Fig. 10. If the
pin on the other side of the air valve is protruding, the valve should be shifted in the reverse of this example.
Fig. 11
 
22
16
21
22
16
21

Push down and slide to the other side.

Top end of the air valve.
 


 
Service
Tools Required
DTorque wrench
DPhillips screwdriver
DO-ring pick
DRubber mallet
Repairing the Air Valve
Disassembly
WARNING
To reduce the risk of serious injury whenever you
are instructed to relieve pressure, always follow the
Pressure Relief Procedure on page 10.
1. Relieve the pressure.
2. Remove the air valve (A) from the pump. See
page 16.
3. Remove the screw (15}) and shift saddle (14}).
See Fig. 12.
4. Disassemble the link assembly, consisting of the
actuator link (16}), spacer (17}), detent link (22}),
spring (3}), stop (4}), and valve cup (5}).
5. Remove the detent ball (8}) and spring (6}). The
detent collar (7}) is a press-fit and should not need
removal; if it does require replacement, you should
also replace the cover (2}).
6. Remove the reset shaft (21}), o-ring (20}) and
washer (18}).
7. Clean all parts and inspect for wear or damage.
Replace as needed. See Reassembly, page 20.
Fig. 12
NOTE: ALL PARTS SHOWN ARE INCLUDED
IN AIR VALVE KIT 239952.
01431A
}2
7}
}4
}18
}16
}20
}21
}22
}17
}14
}15
}3
5}
8}
6}19}
20 308573
Service
Reassembly
1.
If the detent collar (7

) was removed,
install a new
collar in a new cover (2). Using a rubber mallet,
carefully press fit the detent collar (7) into the
cover (2). See Fig. 13.
2. Grease the detent spring (6) and place it in the
collar (7). Grease the ball (8) and set it on the
spring.
3. Grease the o-ring (20) and install it in the hole (H)
in the cover (2). See Fig. 13. Slide the washer
(18) onto the blunt end of the reset shaft (21).
Insert the shaft through the cover (2) until it
seats.

Fig. 13


18
2
6
8
7
21
Apply grease (25).
Press fit.
20





H
4. Grease the spring (3). Place the link stop (4)
inside the spring. See Fig. 14.
5. Grease the detent link (22) and link spacer (17).
Assemble the detent link, link spacer, and actuator
link (16) as shown in Fig. 14. The raised bumps
on the links (16 and 22) must face up.
6. Squeeze the spring (3) and install it and the stop
(4) in the link assembly. The spring tension will
hold all these parts together. Grease the valve cup
(5) and install it in the link assembly as shown.
7. Install the link assembly onto the air valve cover
(2) so the pointed end of the reset shaft (21) fits
through the holes in the links and the square part
of the reset shaft engages the square hole in the
detent link (22). Make certain the bumps on the
detent link (22) engage the detent ball (8).
Fig. 14
17
3



16
2
48
5
22
Apply grease (25).
Bumps face up.
Reset shaft square must
engage with square hole.






7505A


Other manuals for Husky 715

6

This manual suits for next models

3

Other Graco Water Pump manuals

Graco 12 VDC EGP User manual

Graco

Graco 12 VDC EGP User manual

Graco 15H882 User manual

Graco

Graco 15H882 User manual

Graco Orion 245934 Operation manual

Graco

Graco Orion 245934 Operation manual

Graco Husky 307 F Series Operation manual

Graco

Graco Husky 307 F Series Operation manual

Graco Dyna-Star HP User manual

Graco

Graco Dyna-Star HP User manual

Graco 287834 Instruction Manual

Graco

Graco 287834 Instruction Manual

Graco GH 733 HYDRA-SPRAY Operation manual

Graco

Graco GH 733 HYDRA-SPRAY Operation manual

Graco G3-G-24NC-8LTA00-0D00L000 User manual

Graco

Graco G3-G-24NC-8LTA00-0D00L000 User manual

Graco Fire-Ball 205626 Operation manual

Graco

Graco Fire-Ball 205626 Operation manual

Graco LubePro H1900 User manual

Graco

Graco LubePro H1900 User manual

Graco Dura-Flo 2400 Datasheet

Graco

Graco Dura-Flo 2400 Datasheet

Graco KING D Series Operation manual

Graco

Graco KING D Series Operation manual

Graco Hydra-Clean 1040 Use and care manual
Graco

Graco Hydra-Clean 1040 Use and care manual

Graco 17C487 Operating instructions

Graco

Graco 17C487 Operating instructions

Graco 3A2977K Parts list manual

Graco

Graco 3A2977K Parts list manual

Graco ToughTek F680e User manual

Graco

Graco ToughTek F680e User manual

Graco 17P750 User manual

Graco

Graco 17P750 User manual

Graco ChemSafe 307 Operation manual

Graco

Graco ChemSafe 307 Operation manual

Graco E-Flo DCi User manual

Graco

Graco E-Flo DCi User manual

Graco 222077 User manual

Graco

Graco 222077 User manual

Graco High-Flo Operation manual

Graco

Graco High-Flo Operation manual

Graco Husky 2150e Use and care manual

Graco

Graco Husky 2150e Use and care manual

Graco SaniForce Parts list manual

Graco

Graco SaniForce Parts list manual

Graco Husky 1050 Series Instruction Manual

Graco

Graco Husky 1050 Series Instruction Manual

Popular Water Pump manuals by other brands

Aqua Medic DC Runner Series Operation manual

Aqua Medic

Aqua Medic DC Runner Series Operation manual

AQUATECH ECO 3600 User instructions

AQUATECH

AQUATECH ECO 3600 User instructions

Astral Pool BX Series owner's manual

Astral Pool

Astral Pool BX Series owner's manual

New Era Pump Systems Multi-Phaser NE-1000 Series Quick start instructions

New Era Pump Systems

New Era Pump Systems Multi-Phaser NE-1000 Series Quick start instructions

Tuthill KVA Series Operator's manual

Tuthill

Tuthill KVA Series Operator's manual

Gude HWW 1200 II manual

Gude

Gude HWW 1200 II manual

INOXPA DCS Installation, service and maintenance instructions

INOXPA

INOXPA DCS Installation, service and maintenance instructions

Ulvac DOP-120SX user manual

Ulvac

Ulvac DOP-120SX user manual

Interpump Group QUIKY TURBO 11.50 operating instructions

Interpump Group

Interpump Group QUIKY TURBO 11.50 operating instructions

Grundfos PS.R.05 Installation and operating instructions

Grundfos

Grundfos PS.R.05 Installation and operating instructions

Knauer Azura P 4.2S instructions

Knauer

Knauer Azura P 4.2S instructions

Welch WOB-L 2534 owner's manual

Welch

Welch WOB-L 2534 owner's manual

Pentair MYERS MCU Series owner's manual

Pentair

Pentair MYERS MCU Series owner's manual

Becker KVT 3.100 operating instructions

Becker

Becker KVT 3.100 operating instructions

ProMinent Sigma 1 S1Cb operating instructions

ProMinent

ProMinent Sigma 1 S1Cb operating instructions

Schmalz EVE-TR 4 DC operating instructions

Schmalz

Schmalz EVE-TR 4 DC operating instructions

Fiap Aqua Active Magic operating manual

Fiap

Fiap Aqua Active Magic operating manual

Grundfos SRP Installation and operating instructions

Grundfos

Grundfos SRP Installation and operating instructions

manuals.online logo
manuals.online logoBrands
  • About & Mission
  • Contact us
  • Privacy Policy
  • Terms and Conditions

Copyright 2025 Manuals.Online. All Rights Reserved.