Great Arnoldi Just in Case User manual

Owner’s Guide
Core Unit and Additional Handsets
You MUST read and understand the instructions in this Owner’s
Guide BEFORE using the 911 Emergency Phone. SERIOUS
INJURY and DAMAGE can result from incorrect setup and use.
JUST IN CASETM
911 Emergency Phone

2
JUST IN CASETM 911 Emergency Phone
Table of Contents
COMPONENTS..............................................................................................5
SECTION 1
SAFETYPRECAUTIONS................................................................................6
1.1 Safety Warnings............................................................................................................6
1.2 Battery Strength Test Safety.....................................................................................7
1.3 Signal Strength Test Safety........................................................................................8
1.4 Electric Shock Warnings.............................................................................................9
1.5 Warning Label Locations.........................................................................................10
SECTION 2
INSTALLATION...........................................................................................11
2.1 Installing the Batteries..............................................................................................11
Battery Installation Procedures..........................................................................12
2.2 Locating the Handset(s)...........................................................................................14
Using the Velcro Strips..........................................................................................15
Waterproof................................................................................................................16
2.3 Locating the Base Unit.............................................................................................17
2.4 Connecting the AC Adapter/Power Cord..........................................................18
2.5 Connecting the Telephone Line...........................................................................20
Standard Telephone Connection......................................................................20
Connecting a Second Telephone.......................................................................21
Connecting with DSL............................................................................................22

3
SECTION 3
OPERATION...............................................................................................23
3.1 Operating the Handset...........................................................................................23
3.2 Placing an Emergency Call....................................................................................24
3.3 Failed Emergency Call.............................................................................................24
3.4 Cancelling an Emergency Call..............................................................................25
3.5 Operating the Base Unit.........................................................................................25
3.6 Linking Additional Handsets................................................................................26
SECTION 4
PERIODIC TESTING...................................................................................27
4.1 Battery and Signal Test Procedures....................................................................28
Initiating the Battery and Signal Tests............................................................28
Battery Test...............................................................................................................29
Signal Test.................................................................................................................29
SECTION 5
CARE & MAINTENANCE............................................................................31
5.1 Battery Replacement...............................................................................................31
5.2 General Care...............................................................................................................31
5.3 Cleaning.......................................................................................................................32
5.4 Power Failures............................................................................................................33
JUST IN CASETM 911 Emergency Phone
Table of Contents

4
TROUBLESHOOTING GUIDE.....................................................................34
FREQUENTLY ASKED QUESTIONS............................................................36
FCC INFORMATION....................................................................................40
LIMITEDWARRANTY INFORMATION........................................................41
30-DAY MONEY BACK GUARANTEE.........................................................43
Copyright 2011, The Great Arnoldi, LLC

5
The following components are included with your JUST IN CASETM 911
Emergency Phone Core Unit:
COMPONENTS
Handset Base Unit
Phone Cord
AAA Alkaline
Batteries
AC Adapter / Power Cord
Line Splitter
Velcro Strips
NOTE: If you have purchased an additional Handset, the components
include the Handset, AAA alkaline Batteries, and the Velcro Strips.

6
This section describes the safety precautions that should be followed during
installation, use and care of your JUST IN CASETM 911 Emergency Phone.
You MUST read and understand the Safety Warnings and this Owner’s
Guide before using your JUST IN CASETM 911 Emergency Phone. Failure
to follow these safety precautions and the instructions in this Owner’s
Guide can result in the phone not working properly during an emergency.
SECTION 1
SAFETY PRECAUTIONS
1.1 Safety Warnings
Throughout this Owner’s Guide, WARNING, NOTICE and the SAFETY
ALERT SYMBOL will be used.
This is the safety alert symbol. It is used to alert you to potential
personal injury hazards. Obey all safety messages that follow
this symbol to avoid possible injury or death. This safety alert
symbol precedes safety messages about risk of personal injury.
It may also have one of the following signal words:
WARNING indicates a hazardous situation which, if not
avoided, could result in death or serious injury.
NOTICE is used to address practices not related to
personal injury.

7
1.2 Battery Strength Test Safety
Your JUST IN CASETM 911 Emergency Phone Handset requires the use of
two AAA alkaline batteries for operation. This section describes the safety
precautions you must follow when testing and replacing your batteries to
ensure the SAFE OPERATION of your Handset. (See Section 4, pg. 27 for
Battery Testing Procedures).
• TEST the batteries in your Handset monthly.
• TEST the batteries after using your Handset to place an
emergency call.
• REPLACE the batteries IMMEDIATELY if the battery strength
test fails.
• REPLACE the batteries in your Handset every year.
Failure to test and replace the batteries may result in your Handset
not working properly leading to SERIOUS INJURY or DEATH.
To ensure your Handset works properly during an emergency,
ALWAYS take the following safety precautions:
WARNING

8
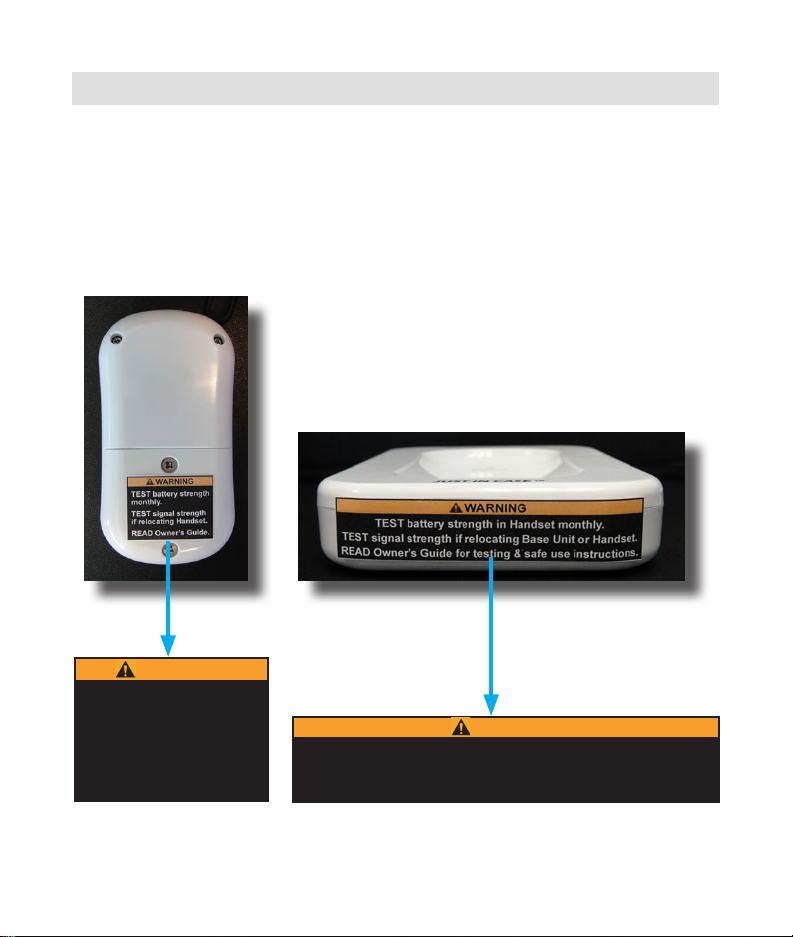
Failure to test the signal strength may result in your Handset
not working properly leading to SERIOUS INJURY or DEATH.
To ensure your Handset works properly during an emergency,
ALWAYS take the following safety precautions:
• TEST the signal strength during installation of your JUST IN
CASETM 911 Emergency Phone Core Unit.
• TEST the signal strength anytime you relocate a Handset or
the Base Unit.
• TEST the signal strength after replacing the batteries.
• TEST the signal strength after you have LINKED an
additional Handset to the Base Unit.
WARNING
1.3 Signal Strength Test Safety
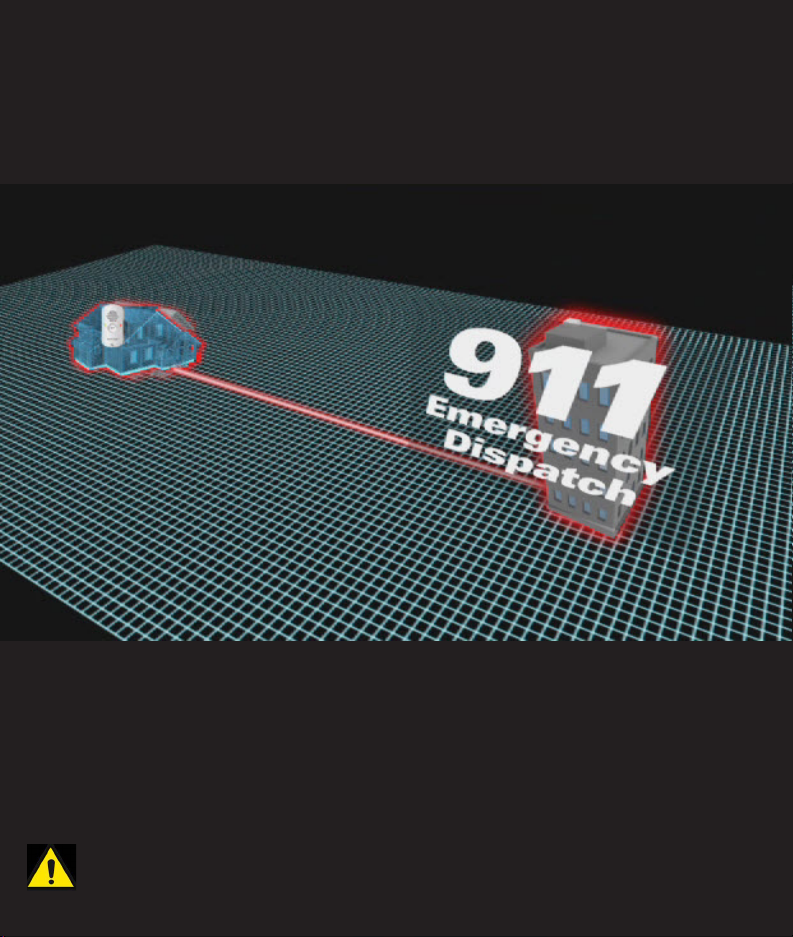
Your JUST IN CASETM 911 Emergency Phone Handset requires the use of your
regular telephone line and service for operation. If your telephone line is
disconnected, is in use, or is otherwise not working, you will not be able to
use your Handset to dial 911.*
Additionally, the Handset MUST be within range of the Base Unit to maintain
proper signal strength. This section describes the safety precautions you
MUST follow when testing the signal strength between the Base Unit and the
Handset to ensure the SAFE OPERATION of your Handset. (See Section 4, pg.
27 for Signal Strength Testing Procedures).
*NOTE: In some communities, you may still have 911 emergency service even
though your telephone line is disconnected. Contact your local telephone
service provider for your home to determine if 911 emergency service is
available, and under what circumstances.

9
• ALWAYS plug the AC Adapter/Power Cord into a properly
grounded 120V AC outlet.
• ALWAYS use ONLY the provided AC Adapter/Power
Cord.
• NEVER use the Base Unit or the AC Adapter/Power Cord
if they are damaged.
• ALWAYS unplug the AC Adapter/Power Cord from the
Base Unit before cleaning the Base Unit.
• NEVER place the Base Unit or AC Adapter/Power Cord
in an area where they will be exposed to water or other
liquids.
• DO NOT disassemble any component of this product.
Electrical shock can cause SERIOUS INJURY or DEATH.
To prevent electrical shock, ALWAYS take the following
safety precautions:
WARNING
1.4 Electrical Shock Warnings
Your JUST IN CASETM 911 Emergency Phone Base Unit requires 120 Volts (V)
AC for operation. Follow all instructions and safety precautions in this guide
when installing and using your phone. Failure to follow the safety precautions
in this Owner’s Guide may result in SERIOUS INJURY or DEATH.

10
1.5 Warning Label Locations
Your JUST IN CASETM 911 Emergency Phone has two warning labels. One is
located on the back of the Handset, the other is located on the front of the
Base Unit. Periodically inspect these labels to ensure that they are clean and
legible. Damaged or missing warning labels must be replaced immediately.
To request replacement labels, please go to www.justincase911.com.
TEST battery strength in Handset monthly.
TEST signal strength if relocating Base Unit or Handset.
READ Owner’s Guide for testing & safe use instructions.
WARNING
TEST battery strength
monthly.
TEST signal strength
if relocating Handset.
READ Owner’s Guide.
WARNING
Back of Handset
Front of Base Unit
Handset
Warning Label
Base Unit
Warning Label

11
• Use ONLY new, high quality AAA alkaline batteries, from a recognized brand.
• ALWAYS follow the battery installation instructions carefully.
• ALWAYS insert the batteries correctly by matching the + and - polarity
markings on the battery with the label inside the battery compartment.
• ALWAYS TEST the batteries for strength once a month.
• ALWAYS REPLACE the batteries once every year.
• ALWAYS TEST the batteries for strength after using the Handset to make an
emergency call.
• ALWAYS keep batteries away from children and if swallowed seek immediate
medical attention.
• ALWAYS remove batteries if Handset is not going to be used for a long period
of time.
• DO NOT mix old batteries with new batteries or dierent types.
• DO NOT use rechargeable batteries and DO NOT place the provided AAA
alkaline batteries in a battery charger.
• NEVER throw batteries into a re, disassemble, or heat them.
• DO NOT remove or damage the battery casing.
IMPORTANT BATTERY SAFETY INFORMATION:
SECTION 2 - INSTALLATION
The initial installation of your JUST IN CASETM 911 Emergency Phone Core Unit
is important in ensuring safe and reliable operation. This section will provide
you with information and instructions about the installation of your Core Unit.
Take the following safety precautions to ensure that your Handset works
properly and to prevent damage to your Handset caused by improper
handling and installation of the batteries:
2.1 Installing the Batteries

12
Battery Installation Procedures:
1. Use a Phillips head screwdriver to carefully loosen the two battery
compartment screws in the battery compartment door on the back
(bottom) of the Handset (Figure 1, pg. 13).
2. Insert two AAA alkaline batteries inside the battery compartment as shown
below (Figure 2, pg. 13).
3. Follow the “+/-” signs on the label inside the battery compartment for
proper battery installation.
4. Insert the negative end of the battery into the compartment rst by
pushing it against the spring. Then lower the positive end into the slot.
NOTICE
DO NOT unscrew or remove the two top small screws on the
back of the Handset (See Figure 1, pg. 13). This may cause
severe damage to the Handset, causing it to not work when you
need to use it during an emergency.
NOTICE DO NOT overtighten the battery compartment screws.
Overtightening the battery compartment screws may cause severe
damage to the Handset.
5. Replace the battery compartment door and carefully tighten the battery
compartment screws.

13
Figure 2. Correct battery placement in the battery compartment.
+ Polarity
Figure 1. Handset screws.
Top Small Screws
*DO NOT REMOVE*
Battery
Compartment Screws

14
2.2 Locating the Handset(s)
Your JUST IN CASETM 911 Emergency Phone Core Unit includes Velcro strips
which can be used to attach your Handset(s) to easily accessible locations
where you will be most likely to need it during an emergency. Examples of
locations where you may want to place your Handset(s) are in the bathroom,
in the kitchen, near the stairway and near your bedside.
Your Core Unit includes one Handset but you can LINK up to four additional
Handsets to one Base Unit, allowing you to have a Handset in dierent parts
of your home.

15
1. Peel o the protective backing on the
Velcro strip with the plastic hooks.
2. Attach the Velcro strip to the wall,
refrigerator, outside of the bathtub or
other desired location.
NOTE: Adhesive on the back of Velcro
strips may damage some surfaces.
Choose surface carefully.
3. Peel o the protective backing on the
Velcro strip with the fuzzy loops.
4. Attach the Velcro strip to the back of
your Handset. The Velcro strip should
be placed on the top portion of the
back of the Handset, above the battery
compartment door (See Figure 3).
DO NOT place the Velcro strip on the
battery compartment door.
5. Press the two Velcro strips together to
attach your Handset to the desired
location.
6. When you need to use the Handset or
conduct a battery and signal test, simply
pull the Handset so that the two Velcro
strips separate.
Using the Velcro Strips to attach the Handset:
Figure 3. Velcro placement.
Place Velcro
Strip Here

16
Waterproof:
Your JUST IN CASETM 911 Emergency Phone Handset is designed to be water and
humidity proof. This means that you can place your Handset in your bathroom
next to, or on the outside of, the bathtub.
During a non-emergency, if you accidently drop your Handset into a bathtub or
sink full of water, take the following steps to prevent damage:
1. Remove the Handset from the water as quickly as possible.
2. Shake the Handset to remove any excess water.
3. Remove the battery compartment cover and the batteries.
4. Dry all visible water with a dry, soft and clean cloth.
5. Let the Handset remain open so that it can dry quickly.
6. After the battery compartment is completely dry, install new batteries.
7. Conduct a battery and signal strength test.
NOTICE
Although your Handset is designed to be waterproof, take the following
precautions to prevent damage to your Handset:
• NEVER place your Handset in a location where it will be
submerged in water (such as inside your bathtub).
• NEVER place your Handset in a location where it will be exposed
to chlorine, chemicals, or salt water (such as pools, hot tubs,
whirlpools, oceans, lakes, or rivers).
• NEVER place your Handset in a location where it will be exposed
to extreme cold or extreme heat and humidity (such as steam
rooms, saunas and hot tubs).
• NEVER disassemble or open the Handset, except to install the
batteries.
• NEVER place your Handset in a location where it will be exposed
to soaps or hair care products.
• NEVER leave your Handset outside.

17
For best results and maximum signal range, locate the Base Unit:
• In a central location in your home near a telephone phone jack and an
electrical power outlet.
• AWAY from household appliances which could present electrical
interference. These include microwave ovens, televisions, electric mixers
or blenders, hair dryers, WiFi routers or other cordless phones.
• On a sturdy level surface, such as a counter top or desktop.
2.3 Locating the Base Unit
NOTICE
To prevent damaging your Base Unit, take the following
precautions:
• DO NOT locate near any sources of water, such as bathroom
or kitchen sinks.
• DO NOT locate near any sources of heat such as the stove,
toaster oven, or the oven.
• DO NOT locate the Base Unit outside.
• DO NOT place any items on top of or inside the Base Unit.
• NEVER disassemble or open the Base Unit.
If your Base Unit is exposed to water or another liquid, DO NOT continue
to use it. Unplug the AC Adapter/Power Cord from the Base Unit and
the outlet and go to the website, www.justincase911.com to order a
replacement Base Unit.

18
2.4 Connecting the AC Adapter/Power Cord
DO NOT plug the AC Adapter/Power Cord into an outlet which is
controlled by a switch. The switch could accidently be turned o,
causing the Base Unit to not work.
1. Connect the AC Adapter/Power Cord into the power jack on the back of
the Base Unit (See Figure 4, pg. 19).
2. Connect the AC Adapter/Power Cord into a standard 120V AC electrical
wall outlet.
3. When you have successfully connected your Base Unit to a power source,
the green POWER LED light on the Base Unit will illuminate. (See Figure
5, pg. 19)
WARNING
Electrical shock can cause SERIOUS INJURY or
DEATH. To prevent electrical shock, ALWAYS take the
following safety precautions:
• ALWAYS plug the AC Adapter/Power Cord into a
properly grounded 120V AC outlet.
• ALWAYS use ONLY the provided AC Adapter/Power
Cord.
• NEVER use the Base Unit or the AC Adapter/Power
Cord if they are damaged.
• NEVER use the Base Unit or the AC Adapter/Power
Cord if they are wet.
ELECTRICAL SHOCK HAZARD

19
Figure 4. AC Adapter/Power Cord and Telephone line connections.
Back of Base Unit
Telephone
Line Jack Power Jack
Green Power
LED Light
Figure 5. Green Power LED Light.

20
Standard Telephone Connection:
1. Connect one end of the supplied telephone cord into your telephone
jack in the wall (See Figure 4, pg. 19).
2. Plug the other end of the telephone cord into the telephone line jack on
the back of the Base Unit (See Figure 4, pg. 19).
NOTE:You should feel and hear a‘click’when the telephone jacks are rmly
seated into the jack in the wall and the Base Unit.
You do not need a special phone line to use your JUST IN CASETM 911
Emergency Phone. This phone will work with your existing telephone line
and phone service. It works the same way as a regular cordless phone.
The ability of the JUST IN CASETM 911 Emergency Phone to work is dependent
on the availability of 911 emergency service. It will NOT work if you do
not have 911 emergency service available in your community. You MUST
conrm that 911 emergency service is available in your community with your
telephone service provider.
This phone is designed for residential use only. It will NOT work with phone
systems where a“dial out” number is required to get an outside phone line to
make a phone call (such as in some businesses and hotels).
2.5 Connecting the Telephone Line
Table of contents
Popular Emergency Phone manuals by other brands

Viking
Viking E-1600A-TP-EWP Technical practice

everon
everon VEGA Guide

Linear
Linear PERS-4200 Series quick guide

Trigon
Trigon Miniguard HF-2 Series Installation and operational instructions

RATH MICROTECH
RATH MICROTECH SMARTPHONE IV Simplified Programming Instructions

Honeywell
Honeywell ECC-50/100 instruction manual