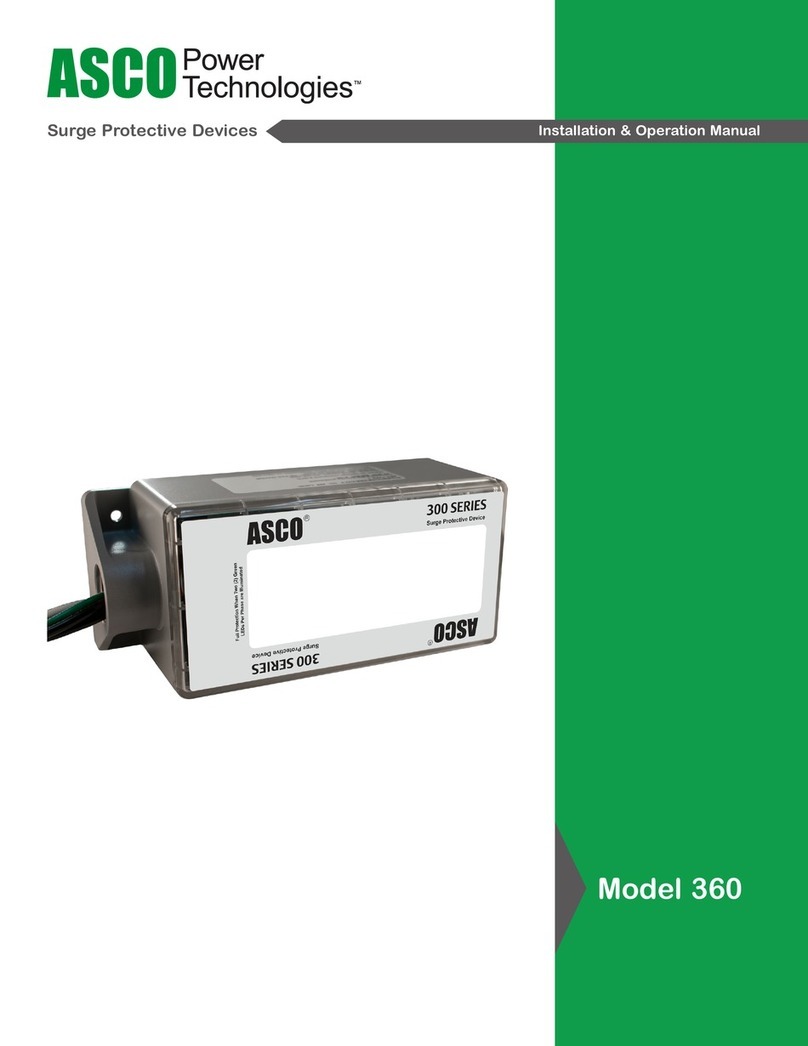
Grifco GLCPS User manual

Installaon and users
manual for the Grifco Light
Curtain Protector System
(including GLCPS-B)
www.grifco.com.au
www.grifco.co.nz
114A4796 250914
Chamberlain Australia Pty Ltd
PO Box 1446, Lane Cove
NSW 1595, Australia
Phone toll free 1800 474 326
Chamberlain New Zealand Ltd
PO Box 100-221
North Shore 0745, New Zealand
Phone toll free 0800 653 667
Light Curtain Protector System
GLCPS Designed for eDrive +2.0 or GLMe2—Software V2.00 and above

2
Carton Inventory 2
Safety instrucons 3
Introducon 4
Idenfying your Light Curtain System 4
Planning 4-5
Compability 4
Applicaon Overview 5
Installaon 6-8
Mounng 6-7
Connecon 8
Operaon 9
Maintenance 10
Troubleshoong 10
Specicaons 10
Warranty 11-12
TABLE OF CONTENTS
CARTON INVENTORY
GLCPS Light Curtain Protector System in housing
2 x Housed Light Curtain rails
1 x Connecng cable
1 x Synchronisaon cable (10m)
1 x Interface module
6 x Mounng Brackets and fasteners
GLCPS-B Light Curtain Protector System without housing
2 x Un-housed Light Curtain Rails
1 x Connecng cable (with 3 pos term block)
1 x Synchronisaon cable (10m)
1 x Interface module
6 x Mounng brackets and fasteners
1 x Installaon manual

3
THESE ARE IMPORTANT SAFETY INSTRUCTIONS. FOLLOW ALL INSTRUCTIONS SINCE INCORRECT
INSTALLATION CAN LEAD TO SEVERE INJURY OR DEATH
An electrician must disconnect electric power to the commercial
door opener and control before making repairs or removing
covers
Installaon and wiring must be in compliance with your local
building and electrical codes. Connect the power supply cord
only to properly earthed mains.
Moisture and water can destroy the electronic components.
Make sure under all circumstances that water moisture or storage
moisture cannot penetrate the electronics. The same applies for
openings and cable entries.
Acvate opener only when the door is in full view, free of ob-
strucons and opener is properly adjusted. No one should enter
or leave the building while the door is in moon.
Aer the installaon a nal test of the full funcon of the sys-
tem and the full funcon of the safety devices must be done.
Make sure that people who install, maintain or operate the door
follow these instrucons. Keep these instrucons in a safe place
so that you can refer to them quickly when you need to.
The GLCPS has been designed and tested to oer safe service provided it is installed, operated, maintained and tested in strict
accordance with the instrucons and warnings contained in this manual
WARNING
WARNING
CAUTION
Mechanical
Electrical
When you see this Signal Word on the following pages, it will alert you
to the possibility of damage to your commercial door and/or the com-
mercial door opener if you do not comply with the cauonary state-
ments that accompany it.
When you see these Safety Symbols and Signal Words on the following
pages, they will alert you to the possibility of serious injury or death if
you do not comply with the warnings that accompany them. The hazard
may come from something mechanical or from electric shock.
When operang a biased-o switch, make sure that other per-
sons are kept away.
This appliance is not intended for use by persons (including chil-
dren) with reduced physical, sensory or mental capabilies, or
lack of experience and knowledge, unless they have been given
supervision or instrucon concerning use of the appliance by a
person responsible for their safety. Children should be supervised
to ensure that they do not play with the appliance.
WARNING: Important safety instructions. It is important for the
safety of persons to follow all instructions. SAVE these instructions.
SAFETY SYMBOL AND SIGNAL WORD REVIEW
Although the GLCPS does not emit dangerous amounts of infrared
light, long exposure to intense infrared light source can result in
damage to the eyes
4
Congratulaons on your purchase of the Grifco® Light Curtain Protector System (GLCPS). The GLCPS provides industry leading
safety to your industrial door applicaon. With an acvely monitored mesh of infrared beams through the height of the sys-
tem, the GLCPS provides complete personal and property protecon against entrapment in the closing direcon
INTRODUCTION
IDENTIFYING YOUR LIGHT CURTAIN SYSTEM
Suitable for any compable (refer to Planning Secon) new
or retrot installaon.
The GLCPS is supplied completed with a robust aluminium
housing to allow bracket mounng in a stando posion
adjacent to the door plane.
Suitable for any compable (refer to Planning Secon) new
installaon where the sensors can be mounted in a secure,
protected zone. The GLCPS-B is typically only used by door
manufacturers, where the door guide is designed to house
the light curtain rail.
Compability
The GLCPS (-B) is only compable with eDrive +2.0 or GLMe2 models featuring soware version 2.0 or higher as shown below.
- Call 1800 GRIFCO or your local dealer if you require an upgrade MCB for either eDrive +2.0 or GLMe2 -
PLANNING
P/N: E-MCB5XXX
VER: 2.00 (or above)
S/N: _ _ _ _ _ _
GLCPS Light Curtain Protector System in housing: GLCPS-B Light Curtain Protector System without housing:

5
PLANNING
The GLCPS is provided with plug in cabling to allow for a door size of approximately 20m2. On larger doors, you may need to allow
for a plug in extension cable accessory (P/N: GLC-3E).
To ensure the GLCPS cabling will suit your door size, refer to the chart below
Call 1800 GRIFCO or your dealer to obtain any GLC-3E extension cables
Applicaon Overview
Maximum
Door Height Maximum Door Width
(m) Standard GLCPS Add 3m ext cable 1 x GLC-3E Add 2 x 3m ext cable 2 x GLC-3E
2m 9m 10m
2.5m 8m 10m
3m 7m 10m
3.5m 6m 9m 10m
4m 5m 8m 10m
5m 3.5m 6m 9m
6m 1.2m 4m 8m
8m 3.5m
Maximum 10m range
TX
Door roll
Extension/Synchronisaon Cable
(secured in conduit or duct behind door roll)
Connecon
Cable
eDrive +2.0
Or
GLMe2
RX
IMPORTANT NOTE:
Do not install or leave other
IR devices in the vicinity of
the light curtain detecon
plane. These other device
may conict and cause un-
acceptable results.

6
Mounng
Where possible, it is always preferred to mount the RX side of the light curtain away from direct sunlight.
Avoid incorrect orientaon, as shown below:
The GLCPS-B is oered to allow door manufacturers to closely couple the light curtain rail to the door guide to provide a dis-
crete and eecve mounng locaon.
To mount the GLCPS-B, use countersunk headed fasteners to secure in 3 places per side along the length of the light curtain
rail. The image below shows how the system can be mounted through either direcon. The boom edge must be set 50mm
from the oor level.
Fasteners should be either M4 or 6 gauge self tapping screws.
Noce! Mechanical damage risk to the GLCPS
- Do not drill addional holes into the light curtain
- Do not over ghten the mounng screws
- Mount the edges on a at surface
INSTALLATION
The opcal axis of the emier (TX) and the receiver edge (RX)
need to be aligned towards each other to ensure the light curtain
funcons reliably
Reecve surfaces near to or parallel to the safeguarded area
can cause reecons and interfere with the GLCPS funcons.
Keep a reasonable distance between the sensor edges and any
reecve surface

7
Mounng
To mount the GLCPS, ulise the six provided mounng brackets to secure as shown below. Follow the steps as suggested.
Install steps:
Use each rail to mark the approximate mounng
height for each bracket on both sides of the
door opening.
Mount all the brackets in accordance with the
marked locaons. The brackets can x in any
locaon vercally along the rail (spacing gener-
ally as pictured below right), so the importance
of posioning should be placed on vercal align-
ment of the brackets. If needed, use a spirit level
to ensure true vercal.
With all brackets fastened to the wall, take the
M5 hexagon head fasteners and slide 3 into
each rail at the cable end (Fig 1).
Whilst holding the rail in the vicinity of the brack-
ets, with nyloc nuts in hand, posion the M5 fas-
tener through each bracket (working from the
top down) and secure the nyloc nuts nger ght
(ref Fig 1.).
Posion the rail vercally as it relates to the
door plane, and ghten the nyloc nuts. Ensuring
the rail locaon does not breach the dimensions
shown (Fig 2).
INSTALLATION
Mount brackets to
the wall rst
Fig.1
The light curtain rails are to be secured
with three equally spaced mounng
brackets (per side) as shown.
(wall fasteners not included)
Fig.2
Max. 70mm
from guide
face to outer
face of GLCPS
50mm from oor to
boom edge of rail
Note: Posioning the GLCPS rails too close to the door
plane may result in nuisance reversals if the door cur-
tain is able to ex inward (e.g. wind load condion).
Check for this at the conclusion of the installaon by
lightly pushing on the door curtain from the outside
during closing travel. If a reversal occurs, consider
moving the rails further away from the door plane.

8
Connecon
The GLCPS is connected to the eDrive +2.0 or the GLMe2 board as shown below. Ensure power is isolated before proceeding.
WARNING
An electrician must disconnect electric power to the commercial door opener
and control before removing or opening covers
Connecon Cable plugs into Interface Module as shown
To complete connecon, plug the extension/synchronisaon cable to each light curtain rail (ref pg-5 Applicaon Overview)
The GLCPS Interface Module connects within
the enclosure containing the eDrive +2.0 or
GLMe2 Main Control Board as shown.
The Connecon Cable can be fed from the
inside of the enclosure and out via a suitable
conduit or cable duct via the plug end.
Note: Cable duct (as shown below) is recom-
mended for ease of installaon.
Connect to the RX
side of the GLCPS
Interface Module terminal
wire colour reference
Connecon cable to 3
posion terminal wire
colour reference
Connect the Interface Module
to the eDrive2 or GLMe2 as
shown.
(connecon will be made to +VDC– and
IR1 terminals)
Red +
Black -
(empty)
Yellow Or White
INSTALLATION

9
With the installaon complete, the system must be tested to ensure an obstrucon will be detected when moving through the
protecon zone. Refer below.
Receiver — RX
Green LED Red LED Sensor status
ON OFF Light Curtain Free
OFF ON Light Curtain interrupted
BLINK SLOW OFF Start up (slow blink)
OFF BLINK FAST Internal malfuncon
Emier — TX
Green LED Sensor status
ON Power Status
OFF No power or not within the limits
The GLCPS will operate as a safety reversal sensor when correctly installed. Obstrucng the plane of the light curtain will cause
the door operator to stop and open, or simply prevent closing if the door is already open.
Refer to your eDrive +2.0 or GLMe2 manual for further conguraon and set up informaon.
When correctly connected and installed, apply power to the control system.
Both sides should show a Green LED if there is no obstrucon.
Note: on the housed GLCPS, you will see the LED through the IR lter strip. If suitable, cup your hand around the top end of
the rail and look down through the assembly to see the Green LED
If necessary (for troubleshoong) the IR lter can be removed by sliding out of the extrusion.
OPERATION
TESTING

10
Although the GLCPS does not need regular maintenance, a periodic funconal check is strongly recommended. Make sure the
opcal elements are clear of dirt and dust. If necessary, clean the front surface with a so towel. Make sure the edges are se-
curely fastened. Check the mounng posion, cable roung and connecon of the sensor.
If disposal is required, it should be done using the most up to date recycling technology according to local regulaons and laws.
There are no harmful materials used in the design and manufacture of the sensor. Traces of such dangerous materials may be
found in the electronic components but not in quanes that are harmful
MAINTENANCE
TROUBLESHOOTING
Emier TX Receiver RX Acon
LED o LED o Check electrical connecons
LED o LED red Check the Synchronisaon Cable
LED on LED always red Make sure the detecon plane is clear of obstrucons
LED on LED always green (even when
obstructed)
Make sure the Light Curtain rails are not mounted closely to any shiny or
reecve surfaces
Check electrical connecons
LED on LED switching between red and
green without obstrucon
Check alignment and ensure no misalignment due to vibraon during door
operaon
Make sure cables and Light Curtain rails are not mounted near any sources
of electromagnec interference
LED blinking LED blinking Check alignment
Check connecon of the Synchronisaon Cable
Check for obstrucons to the Light Curtain
SPECIFICATIONS
Opcal Electrical
Max. operang range 1 … 10m (3 ...33) Supply Voltage USP 10 … 30VDC
Number of elements 4 … 50 Current Consumpon at
24VDC 100mA
Max. ambient light 100,000 Lux Output PNP/NPN (push-pull) or FSS
Aperture angle at 3m (10) Tx: ≤ ± 10° and Rx: ≤ ± 20° Output load 100mA, 100nF
Mechanical Typ. Res. me with 32
elements 90ms
Cross Secon 12 mm x 16 mm (0.47 in x 0.63
in) Max. door speed 2.5m/s (8.2 /s)
Max. protecon height 2,500 mm (98.5 in) Status LED RX Object detected Red
No object detected Green
Housing material Natural anodized aluminium Status LED TX Power OK Green
Enclosure rang IP67 Connecons Cable and Electrical Connecon
Temperature range -40°c … +60°c (-40°F … +140°F) Synchronous cable
Length 10 m (33 )
Diameter Ø 3.5 mm (Ø 0.14 in)

11
© 2014 The Chamberlain Group, Inc
CHAMBERLAIN LIMITED WARRANTY - Grifco Products
Chamberlain Australia Pty Limited / Chamberlain New Zealand Limited (Chamberlain) is commied to manufacturing and
supplying high quality goods. As part of this commitment, we seek to provide reliable service and support for our goods and
are pleased to provide you, the original purchaser, with this Chamberlain Limited Warranty.
We also provide the following statement as required by the Australian Consumer Law: In Australia, in addion to your rights
under this Chamberlain Limited Warranty, our goods come with guarantees that cannot be excluded under the Australian
Consumer Law. You are entled to a replacement or refund for a major failure and for compensaon for any other reasona-
bly foreseeable loss or damage. You are also entled to have the goods repaired or replaced if the goods fail to be of ac-
ceptable quality and the failure does not amount to a major failure.
Chamberlain’s warranty
Chamberlain warrants to the original purchaser of the Grifco product (Unit) that:
1 The Unit (excluding the electric motor) is free from defects in materials and workmanship for a period of 24 months from
the date of purchase.
2 The electric motor is free from defects in materials and workmanship for a period of 12 months from the date of pur-
chase.
During the applicable Chamberlain Warranty period, if you are concerned that the Unit or electric motor may be defecve,
call our service centre on the toll free number below before removing the Unit and a Chamberlain technician will diagnose
the problem. Once the problem has been diagnosed, subject to your rights under the Australian Consumer Law with respect
to major failures, Chamberlain will provide you with:
1 parts for “do-it-yourself” repairs; or
2 shipping instrucons for a factory repair or replacement.
If a factory repair or replacement is required, provided the defecve part or Unit is returned to Chamberlain well-packaged
and in accordance with Chamberlain’s shipping instrucons, Chamberlain will, subject to your rights under the Australian
Consumer Law with respect to major failures:
1 in relaon to the Unit (excluding the electric motor), repair or, at its opon where permissible, replace any defecve part
or Unit (excluding the electric motor) and return it to you at no cost; and
2 in relaon to the electric motor, replace the electric motor and return it to you at no cost.
Where the Unit has been installed by an authorised installer, you must call them for prompt on-site service. Chamberlain
will furnish replacement parts free of charge through the authorised installer. A service fee for on-site service may apply.
Repairs and replacement parts provided under this Chamberlain Limited Warranty are provided free of charge and are war-
ranted for the remaining poron of the original warranty period.
This Chamberlain Limited Warranty provides benets which are in addion to your other rights and remedies as a consumer.
Exclusions
If our service centre determines that a warranty claim has been made in respect of a failure or defect arising under or out of
any exclusion detailed below such that the claim is not covered under this Chamberlain Limited Warranty, we may, subject
to your other rights and remedies as a consumer, charge you a fee to repair, replace and/or return the Unit to you.
This Chamberlain Limited Warranty does not cover any failure of, or defect in, the Unit due to:
1 non-compliance with the instrucons regarding installaon, operaon, maintenance and tesng of the Unit or of any
product with which the Unit is used;
2 any aempt by a person other than an authorised installer to change sengs, repair, dismantle, reinstall or move the
Unit to another locaon once it has been installed;
3 tampering, neglect, abuse, wear and tear, accident, electrical storm, excessive use or condions other than normal com-
mercial use;
4 use of the Unit in conjuncon with controls which have not been supplied, or pre-approved, by Chamberlain;
5 problems with, or relang to, the commercial door or commercial door hardware, including but not limited to the door
springs, door rollers, door alignment, hinges, guides, slats and drums; or
6 problems caused by electrical faults.
If this Chamberlain Limited Warranty does not apply, you may have rights available to you under the Australian Consumer
Law.

12
© 2014 The Chamberlain Group, Inc
CHAMBERLAIN LIMITED WARRANTY - Grifco Products
Liability – Australia only
Except as set out in the Australian Consumer Law (being Schedule 2 of the Compeon and Consumer Act 2010) (as amended,
consolidated or replaced):
1 all other guarantees, warranes and representaons in relaon to the Unit or its supply are excluded to the extent that
Chamberlain can lawfully exclude them; and
2 under no circumstances will Chamberlain be liable for consequenal, incidental or special damages arising in connecon
with the use, or inability to use, the Unit, other than those which were reasonably foreseeable as liable to result from the fail-
ure.
Liability – New Zealand only
Except as set out in the Fair Trading Act 1986 and the Consumer Guarantees Act 1993 (as amended, consolidated or replaced):
1 all other guarantees, warranes and representaons in relaon to the Unit or its supply are excluded to the extent that
Chamberlain can lawfully exclude them; and
2 under no circumstances will Chamberlain be liable for consequenal, incidental or special damages arising in connecon
with the use, or inability to use, the Unit, other than those which were reasonably foreseeable as liable to result from the fail-
ure.
Note
We request that you retain your sales docket or invoice as proof-of-purchase and aach it to this manual to enable you to es-
tablish the date of purchase in the unlikely event of a warranty service being required. Chamberlain reserves the right to
change the design and specicaons of the Unit without prior nocaon. Some features or accessories of the Unit may not be
available in certain markets or areas. Please check with your distributor.
New Zealand
Auckland phone 09 477 2823
Phone toll free 0800 653 667
Fax toll free 0800 653 663
Websites
www.grifco.com.au or www.grifco.co.nz
Chamberlain service centre contact details
Australia
Phone toll free 1800 474 326
Fax toll free 1800 888 121
Unit 1, 75 Epping Road
North Ryde, NSW 2113
Email
customerservice@chamberlainanz.com
Table of contents