Your new coffee grinder is easy to operate and
maintain. Before you place it in service, please have all
personnel familiarize themselves with these
instructions. Keep this manual in a convenient place for
ready reference.
How to Operate
1. Turn the selector knob to the desired grind
setting.
2. Fill the hopper with the desired type and
amount of whole bean coffee. Close the
lid.
3. Place the bag underneath the spout.
4. Press the start button. *810 model - Press
the grinder switch to the ON position.
5. The grinder will automatically stop when
the bag is removed.**
* 810 model - Once coffee is ground, press
the grinder switch to the off position or
grinder will continuously run.
** On models 835 and 875 the stop button
may be pressed after the grinder has
completed grinding.
6. Remove bag from coffee spout once coffee
is ground.
Grinds
Before shipment, this grinder has been tested with
coffee and has been accurately adjusted to deliver
ground coffee to normal auto drip specifications.
The Grinding Burrs are made of an extremely hard and
wear resistant material. From time to time, grind
adjustments (see following instructions) may be
necessary. If the grind runs coarser than expected after
normal adjustment and the grind time has increased,
the burrs may have excess wear and should be
replaced. New burrs should always be installed as a
pair, never one or the other, as they are accurately
ground and lapped in pairs. Old burrs cannot be
resharpened.
Grind Adjustment
Tools required: Phillips screwdriver
Large blade screwdriver
Pliers
1. Remove all coffee from the hopper.
2. Set selector knob to the finest setting
(Espresso or Turkish) depending on the
model.
3. Loosen both knob retainer screws in
selector knob one turn only.
4. While pressing the bag switch, located
behind the spout, press the start button so
that the grinder will run during
adjustment.
*810 model - Press the on or start button
so that the grinder will run during
adjustment.
5. With the grinder still running, turn the
adjusting screw in the center of the selector
knob slowly to the right until a slight
chirping noise is heard. Immediately turn
the adjusting screw to the left until
chirping noise stops. This is the finest grind
obtainable.
6. Tighten both of the knob retainer screws.
Once the finest grind has been set, the
other grind settings will automatically set
correctly.
7. Press the stop or off button.
NOTICE: Always be sure the grinding burrs are not
touching while the machine is running on the
ESPRESSO/TURKISH setting. Otherwise serious damage
to the motor may result.
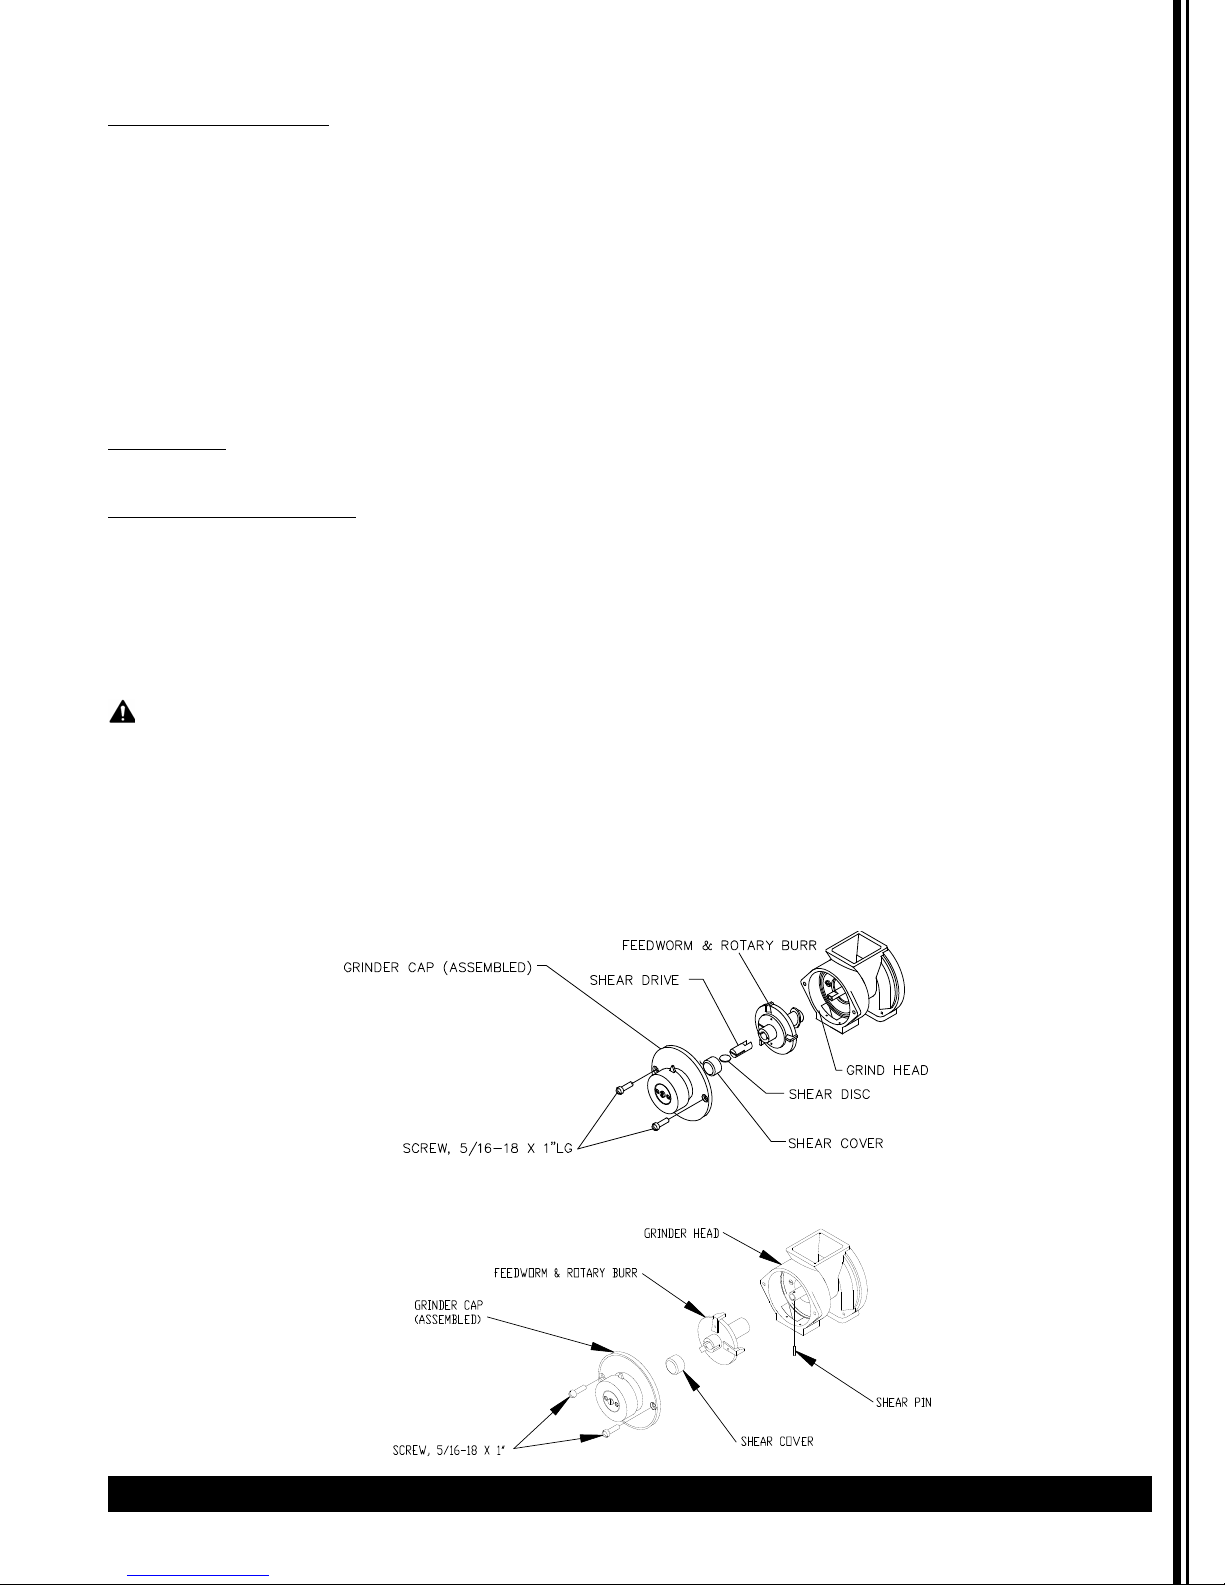
Protection
This grinder is equipped with both a circuit breaker and
a shear disc or shear pin to protect motor and burrs.
Circuit Breaker
This grinder is equipped with a circuit breaker to
protect the motor from overloading. When the circuit
breaker trips, the reset button will pop out
approximately 1/4” which stops the power to the
grinder. The reset button is located on the front panel
of the Model 810, 835 and 875. To reset the circuit
breaker, wait two minutes then push in the reset
button. You will hear a click as it resets. If the grinder
does not operate after resetting the circuit breaker,
there may be an obstruction in the grinding
mechanism that is stalling the motor. Turn the grind
selector knob all the way to the left. Try restarting the
grinder. If the circuit breaker “trips” again, the
obstruction was not able to pass. In this case, the
Grinder Head should be cleaned out as described in the
Shear Disc Replacement section of this manual.
4 Grindmaster®800 Series Coffee Grinders
Operation