manuals.online logo
Brands
  1. Home
  2. •
  3. Brands
  4. •
  5. Grizzly
  6. •
  7. Saw
  8. •
  9. Grizzly Extreme Series User manual

Grizzly Extreme Series User manual

PLANER GUIDE
Safety Rules
1. Wear proper personal protection equipment (safety glasses, hearing protection,
respiratory protection)
2. Keep loose clothing, hair, and jewelry away from the machine
3. Do not bypass any safety devices
4. Keep hands clear of the feed area
5. Ensure the workpiece is appropriate material and size
6. Inspect workpiece thoroughly before using planer
7. Plane only one piece at a time
8. Let the planer come up to speed before starting the cut
9. Let the planer come to a complete stop before leaving the tool
10. If something is broken or breaks, notify one of the woodshop leads at
([email protected]).
Planer Summary
1. Tool Location in Shop
2. Parts of the saw (refer to diagram)
3. Uses for Tool
4. Kickback Prevention
5. Before Use
a. Oil Planer
i. One drop each, four hex sockets
b. Check workpiece for planer suitability
i. Natural wood only
ii. Min thickness: ¼”
iii. Min width: ¾”
iv. Min length: 12”
v. Maximum width: 20”
c. Set start depth
6. During Use
a. Start planer without workpiece
b. Keep hands clear of machine internals
c. Let automatic feed controls workpiece motion
d. Adjust depth as needed (¼ - ½ turn of handle)
e. Use assistant or outfeed roller for large stock
7. Cleanup
8. Defects & Corrections
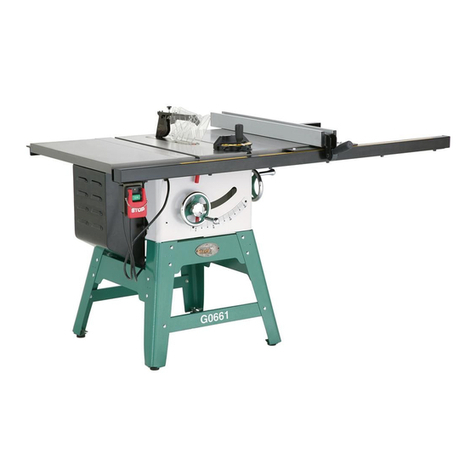
Unless otherwise noted, diagrams in this document are taken from the manual for the Grizzly
Industrial Model G1033 table saw, and are copyright of Grizzly Industrial, Inc.
Machine Parts
1) Table height handwheel: raises and lowers table to
adjust cutting height. One complete handwheel turn is
approximately 1/16”.
2) Feed rate control knob: adjustes feed rate of planer.
The feed rate must only be adjusted when the
machine is running, but not during a cutting operation,
or the gearbox may be damaged.
a) Generally, low feed rates are used for material
removal passes, while high feed rates are
used for finishing passes.
3) Return rollers: used to pass material back over the machine from the outfeed to the
infeed side.
2
Internal Parts
A. Anti-Kickback Fingers: Provide additional safety for the operator by minimizing sudden
movements of the workpiece.
B. Serrated Infeed Roller: Pulls the workpiece toward the cutterhead.
C. Chip Breaker: Breaks off chips created by the cutterhead to prevent tear-out and diverts
the chips to the dust hood.
D. Chip Deflector: Directs chips into the dust hood.
E. Cutterhead: Holds the knives/indexable carbide inserts that remove material from the
workpiece.
F. Pressure Bar: Stabilizes the workpiece as it leaves the cutterhead and assists in
deflecting wood particles toward the dust hood.
G. Outfeed Roller: Pulls the workpiece through the planer.
H. Bed Rollers: Provide upward pressure on the workpiece, enabling the feed rollers to pull
the workpiece along.
I. Planer Table: Provides a smooth and level path for the workpiece as it moves through
the planer.
3
Instructions for Use
Uses for Tool:
1. Good for:
a. Reducing board thickness
b. Solid, natural wood
2. Prohibited:
a. Engineered lumber (Plywood/laminates/particle board/MDF)
b. Wood with nails, staples, rocks, sand, etc. (NO PALLET LUMBER)
c. End grain
d. Significantly warped boards
e. Green (wet, undried) lumber
f. Small parts
g. Metals
h. Ceramics/Glass/Tiles
i. Composites (fiberglass or carbon fiber)
j. Finished or painted material
Kickback Prevention
1. “Kickback” occurs during the operation when the workpiece is ejected from the machine
at a high rate of speed. Kickback is commonly caused by poor workpiece selection,
unsafe feeding techniques, or improper machine setup/maintenance. Kickback injuries
typically occur as follows:
a. Operator/bystanders are struck by the workpiece, resulting in impact injuries (i.e.,
blindness, broken bones, bruises, death)
b. Operator’s hands are pulled into blade,resulting in amputation or severe
lacerations.
2. To prevent kickback:
a. Ensure the workpiece is appropriate before using in planer
b. Feed gently but firmly; do not force the tool
c. Choose correct feed rate for the workpiece
d. Do not attempt to take a deep cut; several shallower passes are preferred
e. Plane parallel to the grain (or slightly offset) only
f. Support long workpieces into and out of the planer
3. Standing offset to the machine will reduce the chances of injury should kickback occur
4
Before Use
1. Wear personal protective equipment.
a. Safety glasses
i. Face shields may be worn for greater comfort, but safety glasses must be
worn underneath.
ii. Do not attempt to view inside the planer during operation, even with
safety glasses
b. Dust masks or respirators are strongly encouraged.
c. Gloves shall not be worn while operating the planer.
d. Hearing protection is recommended.
e. Tie long hair back.
f. Roll loose sleeves above elbow.
g. Remove all jewelry.
2. Inspect the workpiece for suitability
a. Workpiece must be greater than ¼” thick, wider than ¾”, and at least 12” long
i. If uniform thickness is critical, the workpiece should be longer than
required to compensate for snipe (see section on Defects & Corrections)
ii. Planer has a maximum width capacity of 20”
b. Materials must be limited to natural wood
i. No laminates, plywood, MDF, particle board, OSB, etc.
c. Workpiece must be clear of foreign objects such as nails, screws, fasteners, dirt,
rocks, sand, debris, or any other non-wood material.
i. If planing a glued assembly, scrape all surface glue off the workpiece
before feeding to reduce wear on planer knives/cutters
ii. Do not use the planer on painted or finished surfaces. If further
information is needed, contact a Woodshop Lead.
d. Loose knots should be removed before being fed through the planer. If loose
knots can not be removed, an alternate cut method should be found.
e. Green, pressure treated, or any other “wet” workpiece should be avoided.
f. Minor warping is acceptable, but care should be taken with cut orientation and
feeding. Cut must be made in the most stable orientation (concave side down).
g. Significantly warped lumber (cupped, bowed, or twisted) should not be planed.
h. The Grizzly planer is on loan to SPARK, and should be treated with utmost
respect.
5
At The Planer
1. Material Handling
a. Plane only one piece at a time. Do not attempt to run multiple workpieces through
the planer simultaneously.
b. Varying the location of the workpiece left and right on the infeed table will
increase the life of the cutting edges.
c. Support the workpiece on both infeed and outfeed sides, either by hand or with
roller stands.
i. Uneven loading will result in uneven cutting and increased wear on the
machine
d. Where possible, plane equally on both sides of the board to reduce the chances
of twisting, cupping, or warping.
2. The maximum material removal on a single pass is approximately 1/32” (or about half a
turn of the table height handwheel). A number of passes will be required to significantly
reduce the thickness of a workpiece.
a. Wide materials will require a reduced cutting depth
b. Hard woods will require a reduced cutting depth
3. For best surface finish, plane with the grain direction of the wood.
a. Do not plane cross- or end-grain; the workpiece can be destroyed and cause
injury to the user.
4. Machine lubrication
a. There are four hexagon sockets in bolts on top of the planer. A drop of oil should
be placed in each socket before starting the planer.
b. Oiling is only required the first time the planer is started each day.
c. The oiler requires very little pressure to dispense one oil drop; beware of
over-dispensing.
Operation
1. Ensure workpiece is acceptable for planing
2. Place a drop of oil in each of the four hex sockets on the top of the machine
3. Check that both infeed and outfeed space is sufficient for the length of the workpiece
a. Set up feed rollers or assistants as needed
4. Set table height to be slightly greater than the thickness of the workpiece
a. Loosen table locks before adjusting table height
b. The table height handwheel should be turned clockwise to raise the table, and
decrease the material thickness. Turning counterclockwise will lower table.
c. Gap between table and cutter should be larger than workpiece
d. Table locks should be snugged after each adjustment
5. Connect dust collection system to the planer
6. Turn on dust collection system
7. Turn on planer
8. Allow planer to reach operating speeds
a. Set speed, if required, by pulling or pushing speed selection knob
6
b. Speed should only be set while planer is running
9. Stand to one side of planer path, and feed workpiece into planer
a. Ensure the piece is fed squarely into planer, particularly on long pieces
b. The infeed and outfeed rollers will grab and feed the workpiece. Users should not
push or pull on the workpiece once the workpiece is engaged with the automatic
feed system.
10. If the pitch of the planer motor decreases significantly, or the planer “bogs,” immediately
shut off the plane. The planer table should be lowered, the workpiece removed, and the
table reset for a lighter cut before continuing.
a. If the planer does not automatically feed the workpiece, turn the table height
handwheel clockwise by ½ turn and try again. Several iterations may be required.
11. As the workpiece leaves the outfeed side of the machine, it should be supported. Once
clear of the machine, it can be laid on the return rollers on top of the machine to return it
to the infeed side.
12. If further thickness reduction is required, the table should be raised by turning the table
height handwheel clockwise by ¼ - ½ turn.
a. Loosen table locks before adjusting; retighten after adjusting.
b. A larger number of light passes will achieve better results than heavy cuts
c. If possible, passes should be made on alternating sides of the workpiece to
reduce cutting or twisting of the wood.
13. Once the desired thickness of workpiece has been achieved, turn off the planer and the
dust collection system.
After Use
1. Shut down the dust collection system.
2. Return the planer to baseline configuration.
3. Clean up shavings and sawdust from around the tool.
7
Defects & Corrections
1. Chipped Grain
a. Problem:
i. Small chips or lifted portions of the workpiece. Usually a result of cutting
against the grain, planing lumber with knots or excessive amount of cross
grain, or using dull knives/inserts.
ii. Some amount of chipping is normal with highly figured wood.
b. Solution:
i. Decrease the depth of cut.
ii. Reduce the feed rate.
iii. Inspect your lumber and determine if its grain pattern or feed directions is
causing the problem.
iv. If the lumber does not show substantial crossgrain, and reducing feed
rate and depth of cut does not resolve the problem, contact a Woodshop
Lead for assistance.
2. Fuzzy Grain
a. Problem:
i. “Fur” or fuzz on the workpiece after planing
ii. Usually caused by surfacing lumber with too high of a moisture content.
iii. Sometimes fuzzy grain is an unavoidable characteristic of some woods,
such as basswood.
iv. Fuzzy grain can also be caused by dull knives/inserts.
b. Solution:
i. Check the lumber with a moisture meter. If moisture is greater than 20%,
set the lumber aside and allow it to dry.
ii. Otherwise, contact a Woodshop Lead to check the condition of the cutting
blades.
3. Snipe
a. Problem:
i. A thinned or tapered end to the lumber after planing. Occurs when board
ends have more material removed than the rest of the board.
ii. Usually caused when the workpiece is not properly supported as it goes
through the machine.
iii. In many cases, a small amount of snipe is inevitable.
b. Solution:
i. Hold workpiece up slightly as it leaves the outfeed end of the planer.
ii. The best way to deal with snipe is by planing lumber longer than your
intended work length and then cutting off the excess after planing is
completed.
4. Pitch and Glue Build-up
a. Problem:
8
i. Glue and resin buildup on the rollers and cutterhead will cause
overheating by decreasing cutting sharpness while increasing drag in the
feed mechanism.
ii. The result can include scorched lumber, uneven knife/insert marks, and
chatter.
b. Solution:
i. Ensure all glue-ups are thoroughly dry before being planed
1. Ensure as much dry glue as possible is removed before planing to
reduce wear on the cutters
ii. Contact a Woodshop Lead to determine if the rollers and cutterhead
require cleaning.
5. Chip Marks or Indentations
a. Problem:
i. Woodchip patterns embedded or embossed on the surface of the
workpiece after planing.
ii. Chip indentation or chip bruising is the result of wood chips not being
thrown away from the cutterhead and out of the machine. Instead they are
carried around the cutterhead, deposited on the planed surface and
crushed by the outfeed roller. Some of the causes of chip indentation are:
1. Wood chips/sawdust not being properly expelled from the
cutterhead.
2. The type of lumber being planed. Certain species have a tendency
to chip bruise.
3. A high moisture content (over 20%) or surface moisture
4. Excessive depth of cut.
b. Solution:
i. Use a proper dust-collection system
ii. Lumber must be completely dry, preferably kiln-dried (KD). Air-dried (AD)
lumber must be seasoned properly and have no surface moisture.
iii. Reduce depth of cut.
iv. Contact a Woodshop Lead to make sure planer knives/inserts are sharp.
6. Rippled Cut
a. Problem:
i. Regularly spaced indentations across face of workpiece are caused by
excessive outfeed roller pressure or excessive feed rate.
b. Solution:
i. Reduce feed rate.
ii. Contact a Woodshop Lead to check outfeed roller pressure
9
Baseline Configuration Identification
1. Depth set <2”
2. Feed speed set to low (knob furthest out)
a. Feed speed adjustment must be made with planer running
3. Dust collection system attached
10
Planer Competencies
Trained User Competencies
Setup
● Set feed rate
● Set cut offset
● Connect dust collection system
Operation
● Material feed
● Depth adjustment
Changes and Adjustments
● None
Maintenance and Care
● Cleanup of planer and surrounding space
Advanced User Competencies
Setup
● None
Operation
● None
Changes and Adjustments
● None
Maintenance and Care
● Table clean and wax

Other manuals for Extreme Series

6

This manual suits for next models

2

Other Grizzly Saw manuals

Grizzly G8993 User manual

Grizzly

Grizzly G8993 User manual

Grizzly G0513 SERIES User manual

Grizzly

Grizzly G0513 SERIES User manual

Grizzly G1127 User manual

Grizzly

Grizzly G1127 User manual

Grizzly G1023Z User manual

Grizzly

Grizzly G1023Z User manual

Grizzly G9744Z User manual

Grizzly

Grizzly G9744Z User manual

Grizzly G0555 User manual

Grizzly

Grizzly G0555 User manual

Grizzly G0570 User manual

Grizzly

Grizzly G0570 User manual

Grizzly G0501 Quick start guide

Grizzly

Grizzly G0501 Quick start guide

Grizzly G0591 User manual

Grizzly

Grizzly G0591 User manual

Grizzly T10687 User manual

Grizzly

Grizzly T10687 User manual

Grizzly G5959 User manual

Grizzly

Grizzly G5959 User manual

Grizzly G0504 User manual

Grizzly

Grizzly G0504 User manual

Grizzly G0899 User manual

Grizzly

Grizzly G0899 User manual

Grizzly G0621 User manual

Grizzly

Grizzly G0621 User manual

Grizzly G0513 SERIES User manual

Grizzly

Grizzly G0513 SERIES User manual

Grizzly T33300 User manual

Grizzly

Grizzly T33300 User manual

Grizzly G0503 User manual

Grizzly

Grizzly G0503 User manual

Grizzly G0665 User manual

Grizzly

Grizzly G0665 User manual

Grizzly H0629 User manual

Grizzly

Grizzly H0629 User manual

Grizzly G1572 User manual

Grizzly

Grizzly G1572 User manual

Grizzly G0681 User manual

Grizzly

Grizzly G0681 User manual

Grizzly G0531 User manual

Grizzly

Grizzly G0531 User manual

Grizzly G0580 Quick start guide

Grizzly

Grizzly G0580 Quick start guide

Grizzly G0771Z User manual

Grizzly

Grizzly G0771Z User manual

Popular Saw manuals by other brands

Kobalt KXRS 124B-03 manual

Kobalt

Kobalt KXRS 124B-03 manual

Norton GC55 owner's manual

Norton

Norton GC55 owner's manual

Solo 880-12 instruction manual

Solo

Solo 880-12 instruction manual

DeWalt DWS778 Original instructions

DeWalt

DeWalt DWS778 Original instructions

VITO PRO POWER VISCF355 instruction manual

VITO

VITO PRO POWER VISCF355 instruction manual

King Canada KC-2102C Service manual & parts list

King Canada

King Canada KC-2102C Service manual & parts list

VITO VISC21235 instruction manual

VITO

VITO VISC21235 instruction manual

YATO YT-82814 Original instructions

YATO

YATO YT-82814 Original instructions

Skil 4900 Original instructions

Skil

Skil 4900 Original instructions

Ryobi A18WS07P Assembly manual

Ryobi

Ryobi A18WS07P Assembly manual

Rockwell Rockwell 1088294 owner's guide

Rockwell

Rockwell Rockwell 1088294 owner's guide

Stone SAW DEVIL CS1 Operator's manual

Stone

Stone SAW DEVIL CS1 Operator's manual

Makita 4341FCT Parts Breakdown

Makita

Makita 4341FCT Parts Breakdown

LabelMill LM3612 Operation manual

LabelMill

LabelMill LM3612 Operation manual

Jula 240-040 operating instructions

Jula

Jula 240-040 operating instructions

Hitachi C 10FSH Safety instructions and instruction manual

Hitachi

Hitachi C 10FSH Safety instructions and instruction manual

Hitachi CC 14SC Instruction manual and safety instructions

Hitachi

Hitachi CC 14SC Instruction manual and safety instructions

Milwaukee HD28MS Original instructions

Milwaukee

Milwaukee HD28MS Original instructions

manuals.online logo
manuals.online logoBrands
  • About & Mission
  • Contact us
  • Privacy Policy
  • Terms and Conditions

Copyright 2025 Manuals.Online. All Rights Reserved.