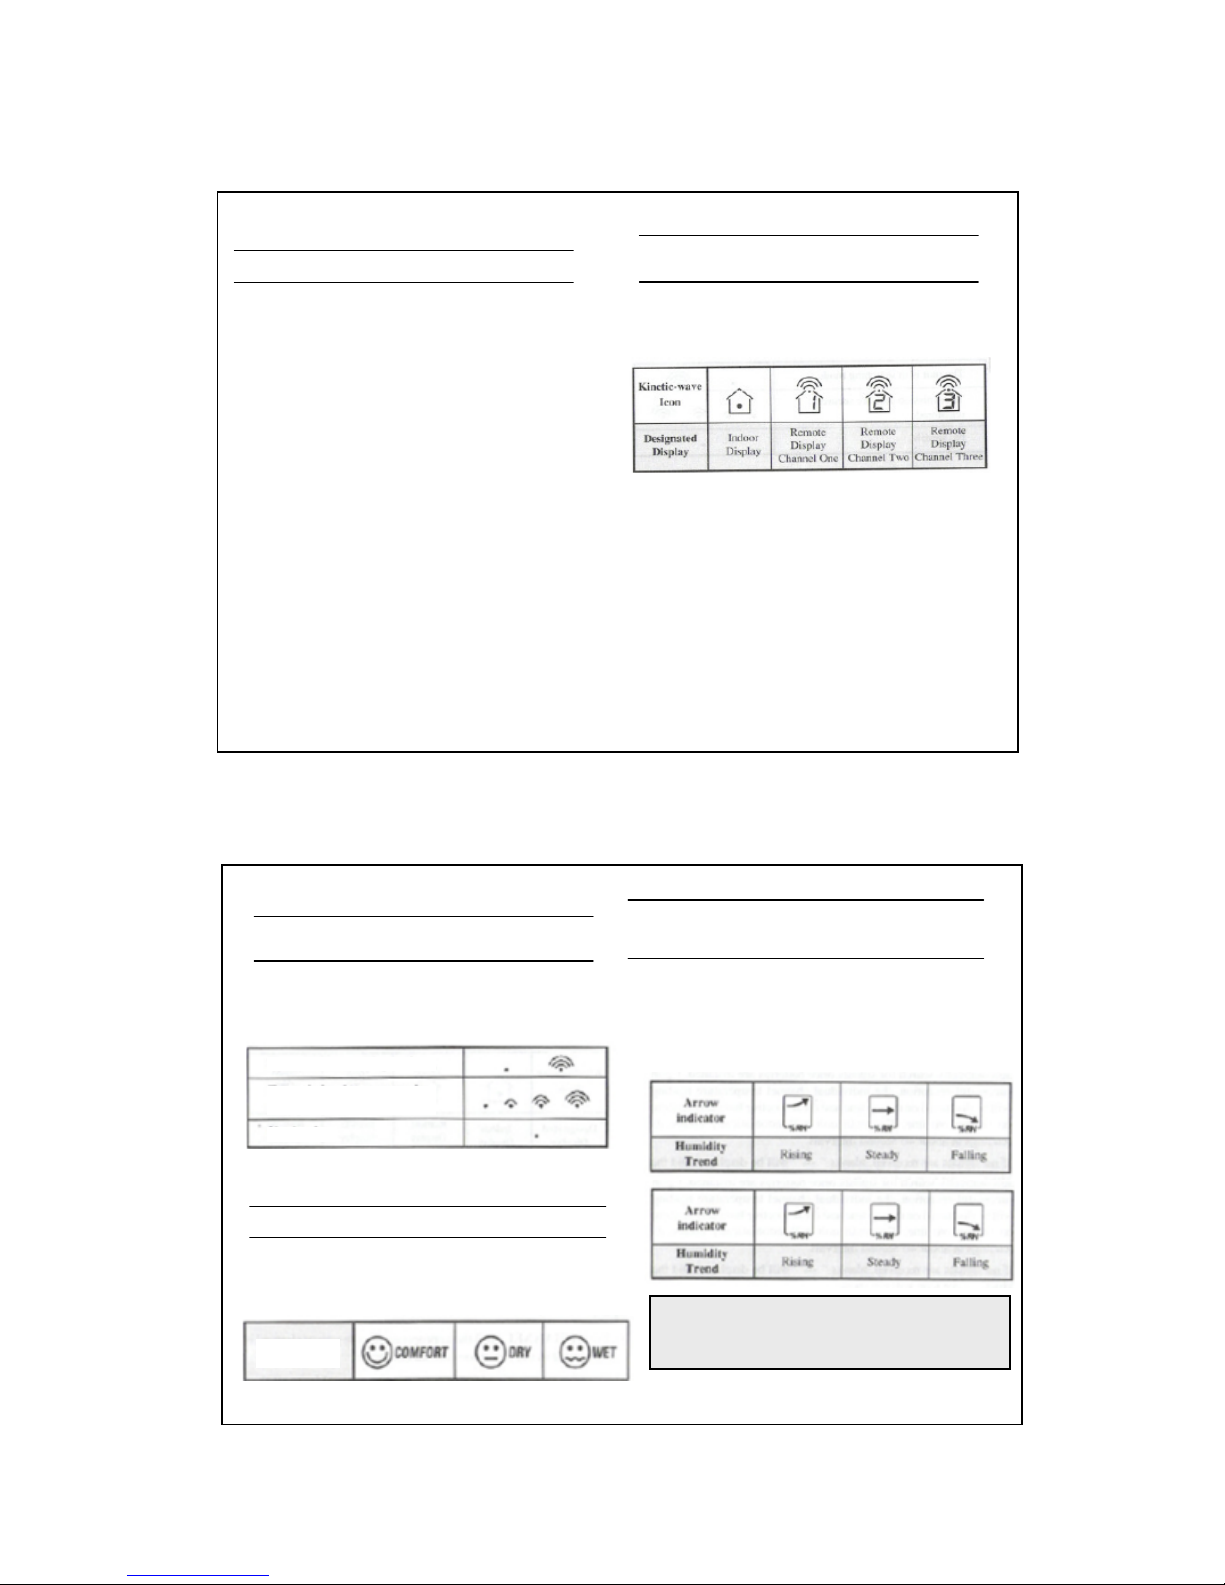
Enters HI temperature display
To display the maximum and minimum display memory:
1.'Select the channel to be checked.
2.'Press MEM/CLEAR once to display the maximum
temperature and again the minimum temperature. The
respective indicators, MAX or MIN will be displayed.
●Press and hold MEM/CLEAR now, the maximum and
minimum temperatures will have the same values as the
current ones until different readings are recorded.
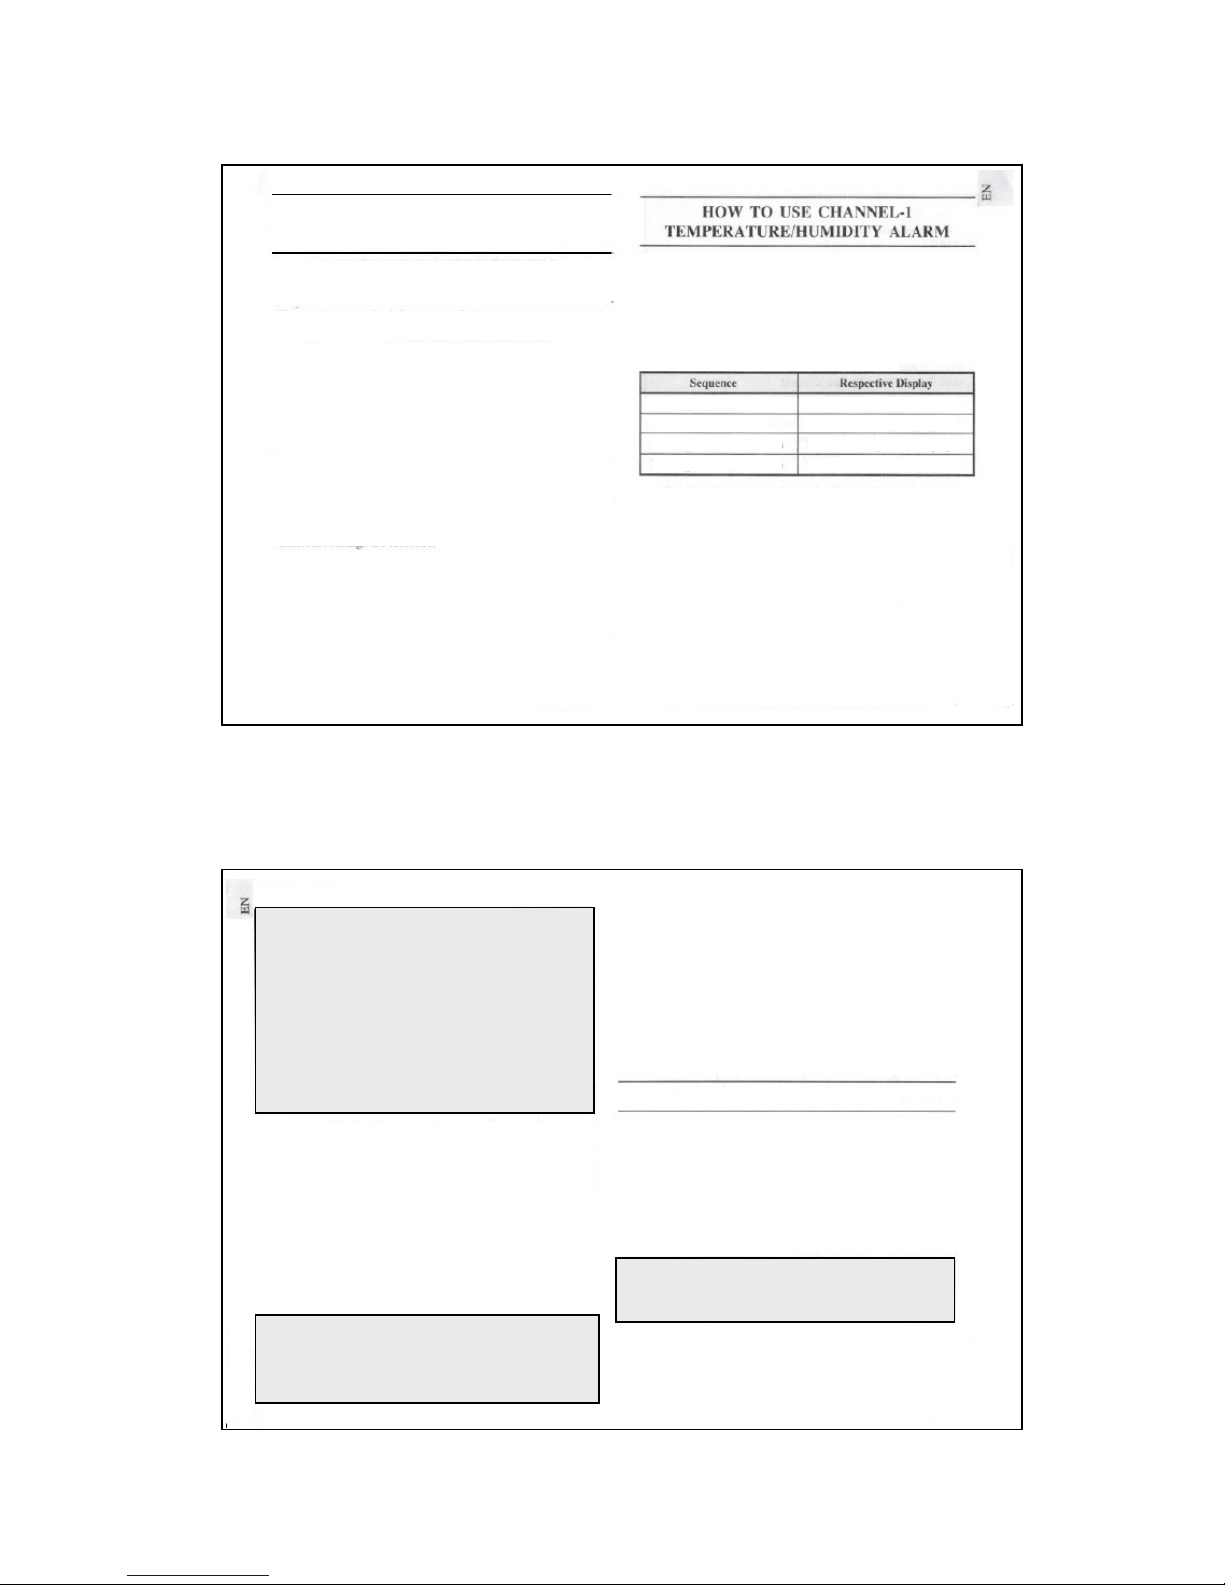
Upper and lower temperature and humidity limits for channel-1 can
be set so that an alarm activates when the limits are exceeded.
The high and low temperature and humidity displays are selected by
sequentially pressing HI/LO.
To set a high or low tem pe ra tu re or hu mi di ty a la rm :
1. Press HI/LO, channel-1 will be displayed.
2. Press UP to set the temperature or humidity limit. Each
press will increase increments by one degree or percentage.
Press and hold the button for a rapid-scrolling sequence by
The high-low displays are as follows:
Pressing HI/LO three times
Pressing HI/LO four times
Enters LO humidity display
Enters HI humidity display
3. The transmission is within range and path is clear of obstacles
and interference. Shorten the distance when necessary.
Note:
The temperature range is from -50
℃
(-58
℉
) to 70
℃
(158
℉
).
If this is the first time you set the limits, the lower limit will start
from -50
℃
(-58
℉
) and the upper limit 70
℃
(158
℉
).
Otherwise, the reading will start from the temperature last
selected.
The humidity range is from 2% to 98%.
If this is the first time you set the limits, the lower limit will start
from 2% and the upper limit 98%. Otherwise, the reading will
start from the humidity last selected.
If in another channel other than channel one is selected, when the
alarm activates the display will switch to channel-1 and the display
will flash. If left untouched, the alarm will activate for a 1-minite.
Press any key to momentarily stop the alarm. The alarm will activate
again if the limit continues exceeds the set limit.
3. Repeat the steps to set the upper humidity setting and the
lower temperature and humidity settings.
4. When finished, press HI/LO to set another limit or wait
16-seconds and the unit will automatically return to the
normal display. The respective HI, LO or both indicators will
light up to signify the status of the alarm.
Note: If a second limit is passed while an alarm is active, the
first alarm will complete its 1-minute cycle and the alarm will
continue to activate for a second minute to indicate that a
second limits has been surpassed.
Note that when the temperature falls below freezing point, the
batteries of outdoor units will freeze, lowering their voltage
supply and the effective range.
1.'Enter the setting mode by pressing HI/LO.
2.'Then, press AL ON/OFF.
The alarm has been disabled and will not sound at the previously set
To disable a sounding alarm:
●Press any button, the alarm sound will stop.
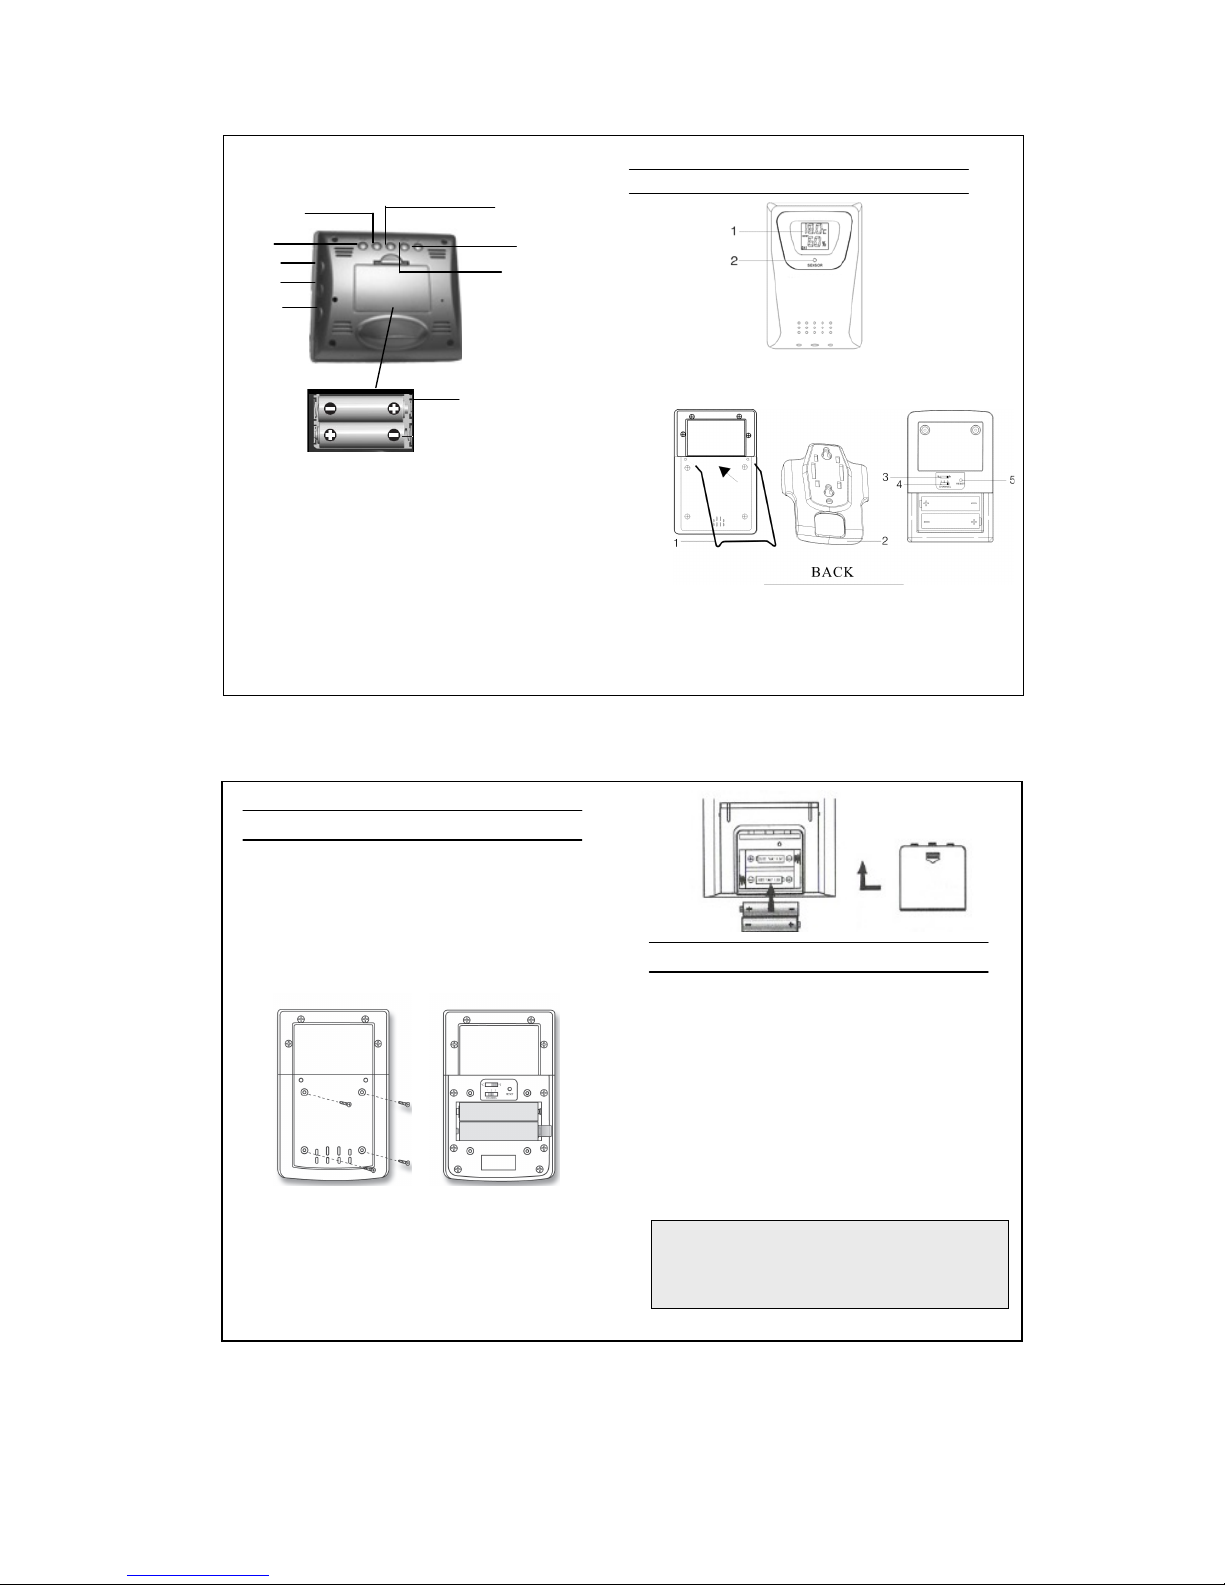
If without obvious reasons the display for a particular channel goes
blank, press SEARCH to enforce an immediate search.
If that fails, CHECK:
1. The batteries of both the remote unit and main unit. Replace as
necessary.
The maximum and minimum recorded temperature and
humidity readings will automatically be stored in the
Enters HI temperature display
Enters LO temperature display