Grozone Control Temp-2 User manual

www.grozonecontrol.com
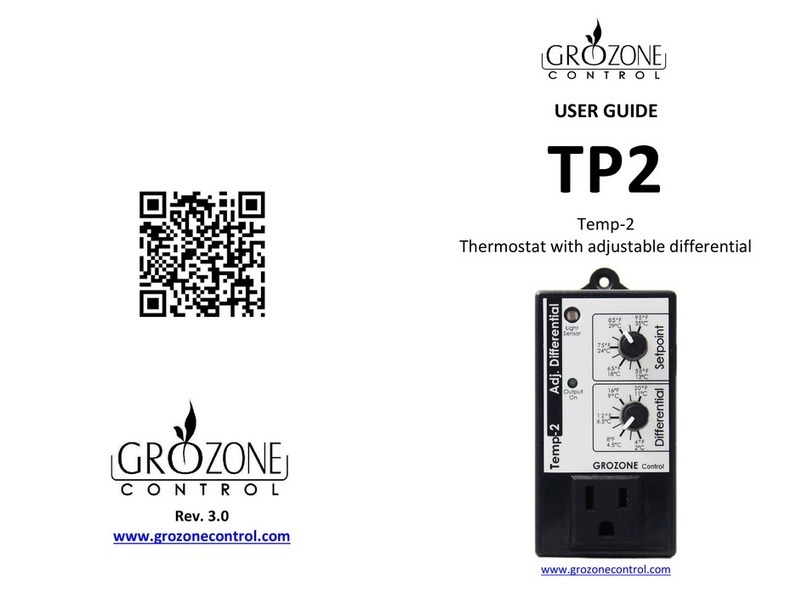
USER GUIDE
TP2
Temp-2
ThermostatÊwithÊadjustableÊdifferenal

TABLE OF CONTENTS
SAFETY NOTICE 3
INSTALLATION & OPERATION 4
OPTIONAL SETTINGS/24-HOUR HEATING 5
OPTIONAL SETTINGS/HEATING DAY ONLY 6
OPTIONAL SETTINGS/24-HOUR COOLING 7
OPTIONAL SETTINGS/COOLING DAY ONLY 8
COMPLETE TROUBLESHOOTING GUIDE 9-10-11
QUICK TROUBLESHOOTING GUIDE 12-13
WARRANTY & CUSTOMER SERVICE 14-15
PRODUCT DETAILS 16

Ê3
SAFETY NOTICE
IMPORTANT SAFETY INSTRUCTIONS
SAVE THESE INSTRUCTIONS
DANGER
TOÊREDUCEÊTHEÊRISKÊOFÊFIREÊORÊELECTRICÊSHOCK,
CAREFULLYÊFOLLOWÊTHESEÊINSTRUCTIONS.
ToÊreduceÊtheÊriskÊofÊelectricÊshock,ÊdisconnectÊpowerÊtoÊtheÊ120VÊ
electricalÊoutletÊbeforeÊinstallingÊorÊremovingÊtheÊunit.ÊWhenÊremovingÊtheÊ
electricalÊwallÊplate,ÊitÊmayÊfallÊacrossÊplugÊpinsÊorÊbecomeÊdisplaced.
ToÊreduceÊtheÊriskÊofÊelectricÊshock,ÊthisÊproductÊhasÊaÊgroundingÊtypeÊplugÊ
thatÊhasÊaÊthirdÊ(grounding)Êpin.ÊThisÊplugÊwillÊonlyÊfitÊintoÊaÊgroundingÊ
typeÊpowerÊoutlet.ÊIfÊtheÊplugÊdoesÊnotÊfitÊintoÊtheÊoutlet,ÊcontactÊaÊ
qualifiedÊelectricianÊtoÊinstallÊtheÊproperÊoutlet.ÊDoÊnotÊchangeÊtheÊplugÊinÊ
anyÊway.
3

Ê4
INSTALLATION & OPERATION
Note: This unit has been set to perform in 24-hour Cooling Mode. For
alternave heang & cooling modes, please refer to the
"Oponal Sengs" secon.
Set Values
PlugÊintoÊ120ÊVACÊoutletÊ(seeÊsecurityÊnoceÊonÊpageÊ1).
PlaceÊtheÊsensorÊatÊdesiredÊlocaon.
ConnectÊtheÊheangÊorÊcoolingÊequipmentÊinÊtheÊfrontÊpanelÊoutletÊ
(MAX 15A).
Setpoint
Installaon is now complete
LightÊsensorÊ(photocell)
Differenal
4

Ê5
A. UnplugÊtheÊunit.
SetÊbothÊvaluesÊtoÊminimum.
OPTIONAL SETTINGS/24-HOUR HEATING
B. Within 5 seconds,ÊplugÊinÊtheÊ
unitÊandÊsetÊtopÊvalueÊtoÊ
maximumÊfollowedÊbyÊboomÊ
valueÊtoÊmaximum.
C. Output On"ÊlightÊindicatorÊ
turnsÊon.
TP2 is now in 24-hour heang mode
Change to 24-hour heang
5

Ê6
B. Within 5 seconds,ÊplugÊinÊtheÊ
unitÊandÊsetÊboomÊvalueÊtoÊ
maximumÊfollowedÊbyÊtopÊ
valueÊtoÊmaximum.
C. "Output On"ÊlightÊindicatorÊ
turnsÊon.
TP2 is now in heang day only mode
OPTIONAL SETTINGS/ HEATING DAY ONLY
Change to heang day only
6
A. UnplugÊtheÊunit.
SetÊbothÊvaluesÊtoÊminimum.

Ê7
B. Within 5 seconds,ÊplugÊinÊtheÊunitÊ
andÊsetÊtopÊvalueÊtoÊminimumÊ
followedÊbyÊboomÊvalueÊtoÊ
minimum.
C. "Output On"ÊlightÊindicatorÊturnsÊ
on.
TP2 is now in 24-hour cooling mode
OPTIONAL SETTINGS/24-HOUR COOLING
Change to 24-hour cooling
7
A. UnplugÊtheÊunit.
SetÊbothÊvaluesÊtoÊmaximum.

Ê8
B. Within 5 seconds,ÊplugÊinÊtheÊ
unitÊandÊsetÊtopÊvalueÊtoÊ
minimumÊfollowedÊbyÊboomÊ
valueÊtoÊminimum.
C. "Output On"ÊlightÊindicatorÊ
turnsÊon.
TP2 is now in cooling day only mode
OPTIONAL SETTINGS/COOLING DAY ONLY
Change to cooling day only
8
A. UnplugÊtheÊunit.
SetÊbothÊvaluesÊtoÊmaximum.

Ê9
COMPLETE TROUBLESHOOTING GUIDE
Thermostat with adjustable differenal
TP2
1Ê–ÊBeforeÊyouÊstart
2Ê–ÊTest
***IMPORTANT: READ AND FOLLOW THESE INSTRUCTIONS BEFORE
STARTING THE TEST.
· THEÊUNITÊMUSTÊBEÊUNPLUGGED.
· DOÊNOTÊPLUGÊAÊLOADÊINTOÊTHEÊOUTLETÊUNTILÊSTEPÊ9.
· LIGHTNINGÊCONDITION:ÊPerformÊthisÊtestÊinÊaÊroomÊwithÊenoughÊlightÊ
forÊtheÊcontrollerÊtoÊdetectÊaÊDAYÊcondion.
· TEMPERATURE:ÊPerformÊthisÊtestÊinÊaÊroomÊwhereÊambientÊtemperatureÊ
isÊbetweenÊ65°FÊandÊ75°FÊ(18°CÊandÊ24°C).
· DefinionsÊ:ÊCWÊ:ÊClockwise.
· CCWÊ:ÊCounterÊclockwise.
· TURNÊBOTHÊKNOBSÊFULLYÊCWÊBEFOREÊGOINGÊTOÊSTEPÊ1.
STEP HANDLING AND TEST DESCRIPTIONS EXPECTED RESULTS
1
· PlugÊtheÊunitÊintoÊtheÊpowerÊoutlet.
WITHIN 5 SECONDS:
· FIRSTÊturnÊLOWERÊknobÊfullyÊcounterÊ
clockwiseÊ(CCW).
· THENÊturnÊUPPERÊknobÊfullyÊcounterÊ
clockwiseÊ(CCW).
· You are now in cooling mode.
Output OnÊlightÊ
indicatorÊwillÊturnÊON.
9

Ê10
COMPLETE TROUBLESHOOTING GUIDE
STEP HANDLING AND TEST DESCRIPTIONS EXPECTED RESULTS
2 · TurnÊUPPERÊknobÊfullyÊCW. Output OnÊlightÊ
indicatorÊwillÊturnÊOFF.
3 · TurnÊUPPERÊknobÊfullyÊCCW. Output OnÊlightÊ
indicatorÊwillÊturnÊON.
4
· CoverÊtheÊlightÊsensorÊcompletelyÊ
withÊtheÊpalmÊofÊyourÊhandÊorÊblackÊ
electricalÊtapeÊ(aÊsingleÊfingerÊwillÊ
NOTÊcoverÊtheÊsensorÊappropriately).
Output OnÊlightÊ
indicatorÊwillÊturnÊOFFÊ
aerÊ6-8Êseconds.
5 · UncoverÊtheÊlightÊsensorÊandÊwaitÊforÊ
6-8Êseconds.
Output OnÊlightÊ
indicatorÊwillÊturnÊONÊ
aerÊ6-8Êseconds.
6
· ROTATEÊTHEÊUPPERÊKNOBÊVERYÊ
SLOWLYÊCWÊUNTILÊTHEÊOUTPUTÊONÊ
INDICATORÊTURNSÊOFF:ÊleaveÊtheÊ
knobÊinÊthisÊposion.
Output OnÊlightÊ
indicatorÊwillÊturnÊOFFÊ
whenÊtheÊknobÊpointerÊ
indicatesÊaÊ
temperatureÊcloseÊtoÊ
theÊambientÊroomÊ
temperature.ÊVerifyÊ
thatÊtheÊaccuracyÊofÊtheÊ
temperatureÊindicaonÊ
isÊcorrespondingÊtoÊtheÊ
ambientÊroomÊ
temperature.
10

Ê11
COMPLETE TROUBLESHOOTING GUIDE
STEP HANDLING AND TEST DESCRIPTIONS EXPECTED RESULTS
7 · TurnÊLOWERÊknobÊ(differenal)ÊtoÊ
4°F.
SlowlyÊrotateÊtheÊupperÊ
knobÊbothÊways;ÊtheÊ
output lightÊindicatorÊ
shouldÊturnÊONÊandÊ
OFFÊwithinÊaÊrangeÊofʱÊ
2°FÊfromÊtheÊambientÊ
temperature.
8 · TurnÊLOWERÊknobÊ(differenal)ÊtoÊ
20°F.
SlowlyÊrotateÊtheÊupperÊ
knobÊbothÊways;ÊtheÊ
output lightÊindicatorÊ
shouldÊturnÊONÊandÊ
OFFÊwithinÊaÊrangeÊofÊ
±10°FÊfromÊtheÊ
ambientÊtemperature.
9 · TurnÊUPPERÊknobÊfullyÊCCW. Output OnÊlightÊ
indicatorÊwillÊturnÊON.
10 · PlugÊaÊloadÊ(lamp,Êpump.)ÊintoÊtheÊ
TP2ÊfrontÊoutlet.
TheÊloadÊwillÊturnÊONÊ
(theÊloadÊON/OFFÊ
switchÊshouldÊbeÊinÊtheÊ
ONÊposion).
11 · TurnÊUPPERÊknobÊfullyÊCW. Output OnÊlightÊ
indicatorÊandÊtheÊloadÊ
willÊturnÊOFF.
11

Ê12
QUICK TROUBLESHOOTING GUIDE
Quick Troubleshoong Chart
Product Model: TP2
PlugÊUNIT
TurnÊupperÊknob
toÊMin
AerÊ10ÊsecÊ
IndicatorÊisÊ
On TurnÊupperÊknob
toÊMax
WithinÊ5Êsec,Ê
turnÊboomÊ
knobÊtoÊMin andÊ
theÊupperÊknobÊ
toÊMin
RotateÊslowlyÊ
upperÊknobÊtoÊ
Max
UnlÊtheÊindica-
torÊturnsÊOff
AerÊ10ÊsecÊ
indicatorÊisÊ
Off
DEFINITIONS
Min :ÊTopÊknobÊatÊ55°FÊorÊbelowÊ&ÊBoomÊknobÊatÊ4°FÊorÊbelow
Max :ÊTopÊKnobÊatÊ95°FÊorÊaboveÊ&ÊBoomÊknobÊatÊ20°FÊorÊabove
Indicator :ÊOutputÊONÊLightÊIndicator
UncoverÊ
photocellÊ&ÊwaitÊ
10Êsec
TurnÊboomÊknobÊtoÊ
4°F
VerifyÊthatÊtheÊtemperatureÊisÊ
correspondingÊtoÊtheÊambientÊ
roomÊtemperature
CoverÊphotocellÊ
withÊhandÊpalmÊ
&ÊwaitÊ10Êsec
Product
Defecve
OutputÊ
On
OutputÊ
Off
OutputÊ
On
OutputÊ
Off
OutputÊ
On
OutputÊ
Off
AerÊ10ÊsecÊ
IndicatorÊisÊ
Off
AerÊ10ÊsecÊ
IndicatorÊisÊ
On
OutputÊ
On
OutputÊ
Off
=ÊSteps
A B
C
D
E F G H
BEFORE YOU START:
· PerformÊtestÊinÊaÊbrightÊroomÊwhereÊtheÊtemperatureÊisÊbetweenÊ
18°CÊ-Ê24°C
· YouÊwillÊneedÊaÊloadÊtoÊplugÊintoÊUNIT*
· TurnÊbothÊknobÊtoÊMax
Product
Defecve
Product
Defecve

Ê13
QUICK TROUBLESHOOTING GUIDE
TurnÊupperÊknobÊ
toÊMax
PlugÊloadÊinto
UNIT
IndicatorÊstaysÊ
OnÊ&ÊOff
TurnÊupperÊknobÊ
slowlyÊinÊbothÊ
direcons
TurnÊupperÊknobÊ
slowlyÊinÊbothÊ
direcons
IndicatorÊturnsÊOnÊ&Ê
Off withinÊaÊrangeÊofʱÊ
2°FÊofÊroomÊ
temperature
*BeforeÊtest,ÊcheckÊifÊloadÊisÊworkingÊproperly.
Product
Correct
TurnÊupperÊknobÊtoÊ
Min
TurnÊboomÊknobÊtoÊ
adjustÊdifferenalÊtoÊ
20°F
IndicatorÊturnsÊOnÊ
&ÊOff withinÊaÊ
rangeÊofʱÊ10°FÊofÊ
roomÊtemperature IndicatorÊstaysÊOnÊ&ÊOff
IndicatorÊ&ÊloadÊareÊOff
IndicatorÊ&ÊloadÊ
areÊOn
IndicatorÊ&ÊloadÊ
areÊOff
IndicatorÊ&ÊloadÊareÊOn
I J K L
M
N
Product
Defecve

Ê14
WARRANTY & CUSTOMER SERVICE
DOÊYOUÊHAVEÊAÊPROBLEMÊWITHÊYOURÊCONTROLLERÊ?ÊPLEASE READ
THESE INSTRUCTIONS CAREFULLY AND SAVE THEM FOR FUTURE
REFERENCE.
1. I think my controller is damaged, or it simply does not work as
indicated in the user guide, what should I do?
· PleaseÊreferÊtoÊtheÊtroubleshoongÊsteps.ÊFollowÊtheseÊinstruconsÊ
carefully,ÊstepÊbyÊstep.ÊTheÊcontrollerÊshouldÊworkÊasÊdescribedÊinÊtheÊ
“ExpectedÊresults”ÊcolumnÊofÊtheÊCompleteÊTroubleshoongÊGuide.
Do you need assistance on execung the Troubleshoong steps?
1. Contact us at 1-855-262-1800
2. Send us an EMAIL at ser[email protected]
3. VISIT our Technical Support Center at
www.grozonecontrol.com/techsupport.html
TechnicalÊSupportÊisÊavailableÊMondayÊthroughÊFriday,ÊfromÊ8:00ÊAMÊtoÊ
8:00ÊPM,ÊEasternÊTime.
14

Ê15
2. I’ve been through the troubleshoong steps. What do I do if I meet a
problem at any of these steps? Is my product covered by the
WARRANTY?
· GrozoneÊcontrollersÊareÊcoveredÊbyÊaÊ3-yearÊwarrantyÊ(*).ÊWeÊwillÊ
replaceÊanyÊDAMAGEDÊPRODUCTÊWITHÊAÊBRANDÊNEWÊPRODUCT.
· CoveredÊorÊnotÊcovered?ÊWeÊdoÊnotÊauthorizeÊtheÊreplacementÊofÊfullyÊ
workingÊproductsÊnorÊalteredÊ(tampered)Êproducts.ÊTheÊ
TroubleshoongÊstepsÊwillÊhelpÊyouÊidenfyÊaÊdamagedÊproduct.ÊDoÊ
notÊhesitateÊtoÊcontactÊusÊorÊcontactÊyourÊretailerÊtoÊmakeÊsureÊtheÊ
controllerÊisÊnotÊfullyÊworkingÊorÊdamagedÊbeforeÊreturningÊitÊtoÊtheÊ
store.
· MyÊproductÊisÊnotÊfullyÊworkingÊorÊdamaged,ÊIÊwantÊaÊreplacementÊ
unit:ÊinÊorderÊtoÊgetÊaÊreplacementÊproduct,Êyou MUST return all
modules and applicable accessories to the retailer.ÊToÊavoidÊbeingÊ
chargedÊforÊtheÊaccessories,ÊbeÊsureÊtoÊincludeÊallÊpieces.ÊThanksÊforÊ
yourÊcooperaon.Ê
· AnyÊGrozoneÊControlÊproductÊthatÊisÊreturnedÊwithÊobviousÊsignsÊofÊ
userÊneglectÊwillÊnotÊbeÊcoveredÊbyÊtheÊwarranty. ÊGrozoneÊControlÊ
exercisesÊtheÊrightÊtoÊmakeÊfinalÊdecisionsÊinÊtheseÊmaers.
(*)TheÊwarrantyÊperiodÊbeginsÊfromÊtheÊdateÊofÊpurchaseÊatÊtheÊretailÊlevel.ÊTheÊ
retailer/consumerÊmustÊkeepÊtheirÊproofÊofÊsale/purchase.ÊOtherwise,ÊGrozoneÊ
ControlÊwillÊconsiderÊtheÊmanufacturingÊdateÊtoÊapplyÊtheÊwarrantyÊcoverage.
IMPORTANT MESSAGE TO RETAILERS
RetailersÊmustÊcallÊGrozoneÊControlÊtoÊgetÊauthorisaonÊtoÊreplaceÊtheÊ
defecveÊproductÊandÊaÊRMAÊnumber.
1-855-262-1800
WARRANTY & CUSTOMER SERVICE
15

Ê16
PRODUCT DETAILS
Operaon and Specificaons
TemperatureÊSetpointÊbetweenÊ55°FÊandÊ95°FÊ/Ê13°CÊtoÊ35°C.
AdjustableÊDifferenalÊfromÊ4°FÊtoÊ20°FÊ/Ê2°CÊtoÊ11°C.
Example:ÊInÊCoolingÊmode,ÊSetpointÊisÊ75°FÊ&ÊDifferenalÊisÊ10°FÊ(±Ê5°F).
TheÊoutputÊwillÊturnÊONÊatÊ80°FÊandÊOFFÊatÊ70°F.
InternalÊOperaonÊinÊFahrenheit.
6-ÊtemperatureÊprobeÊworksÊfromÊ32°FÊtoÊ212°FÊ(0°CÊtoÊ100°C).
ElectricalÊSpecificaons:ÊSeeÊtheÊrangÊlabelÊonÊyourÊproduct.
16

NOTE


GUIDE DE L’USAGER
Temp-2
ThermostatÊavecÊdifférenelÊajustable
www.grozonecontrol.com
TP2

TABLE DES MATIÈRES
NOTICE DE SÉCURITÉ 3
INSTALLATION & OPÉRATION 4
RÉGLAGES OPTIONNELS/CHAUFFAGE 24 HEURES 5
RÉGLAGES OPTIONNELS/CHAUFFAGE JOUR SEULEMENT 6
RÉGLAGES OPTIONNELS/REFROIDISSEMENT 24 HEURES 7
RÉGLAGES OPTIONNELS/REFROIDISSEMENT JOUR
SEULEMENT
8
GUIDE DE DÉPANNAGE COMPLET 9-10-11
GUIDE DE DÉPANNAGE RAPIDE 12-13
SERVICE À LA CLIENTÈLE ET GARANTIE 14-15
FICHE DE PRODUIT 16
This manual suits for next models
1
Table of contents
Languages:
Other Grozone Control Thermostat manuals
Popular Thermostat manuals by other brands

AFG
AFG Arbonia FKS Series Instructions for use and installation instructions

Giacomini
Giacomini K470H Series quick start guide

C-LOGIC
C-LOGIC 400-TC instruction manual

Braeburn
Braeburn Premier 5300 user manual

Venstar
Venstar T2150 Owner's Manual & Installation Instructions

Ferroli
Ferroli ROMEO N RF user manual